
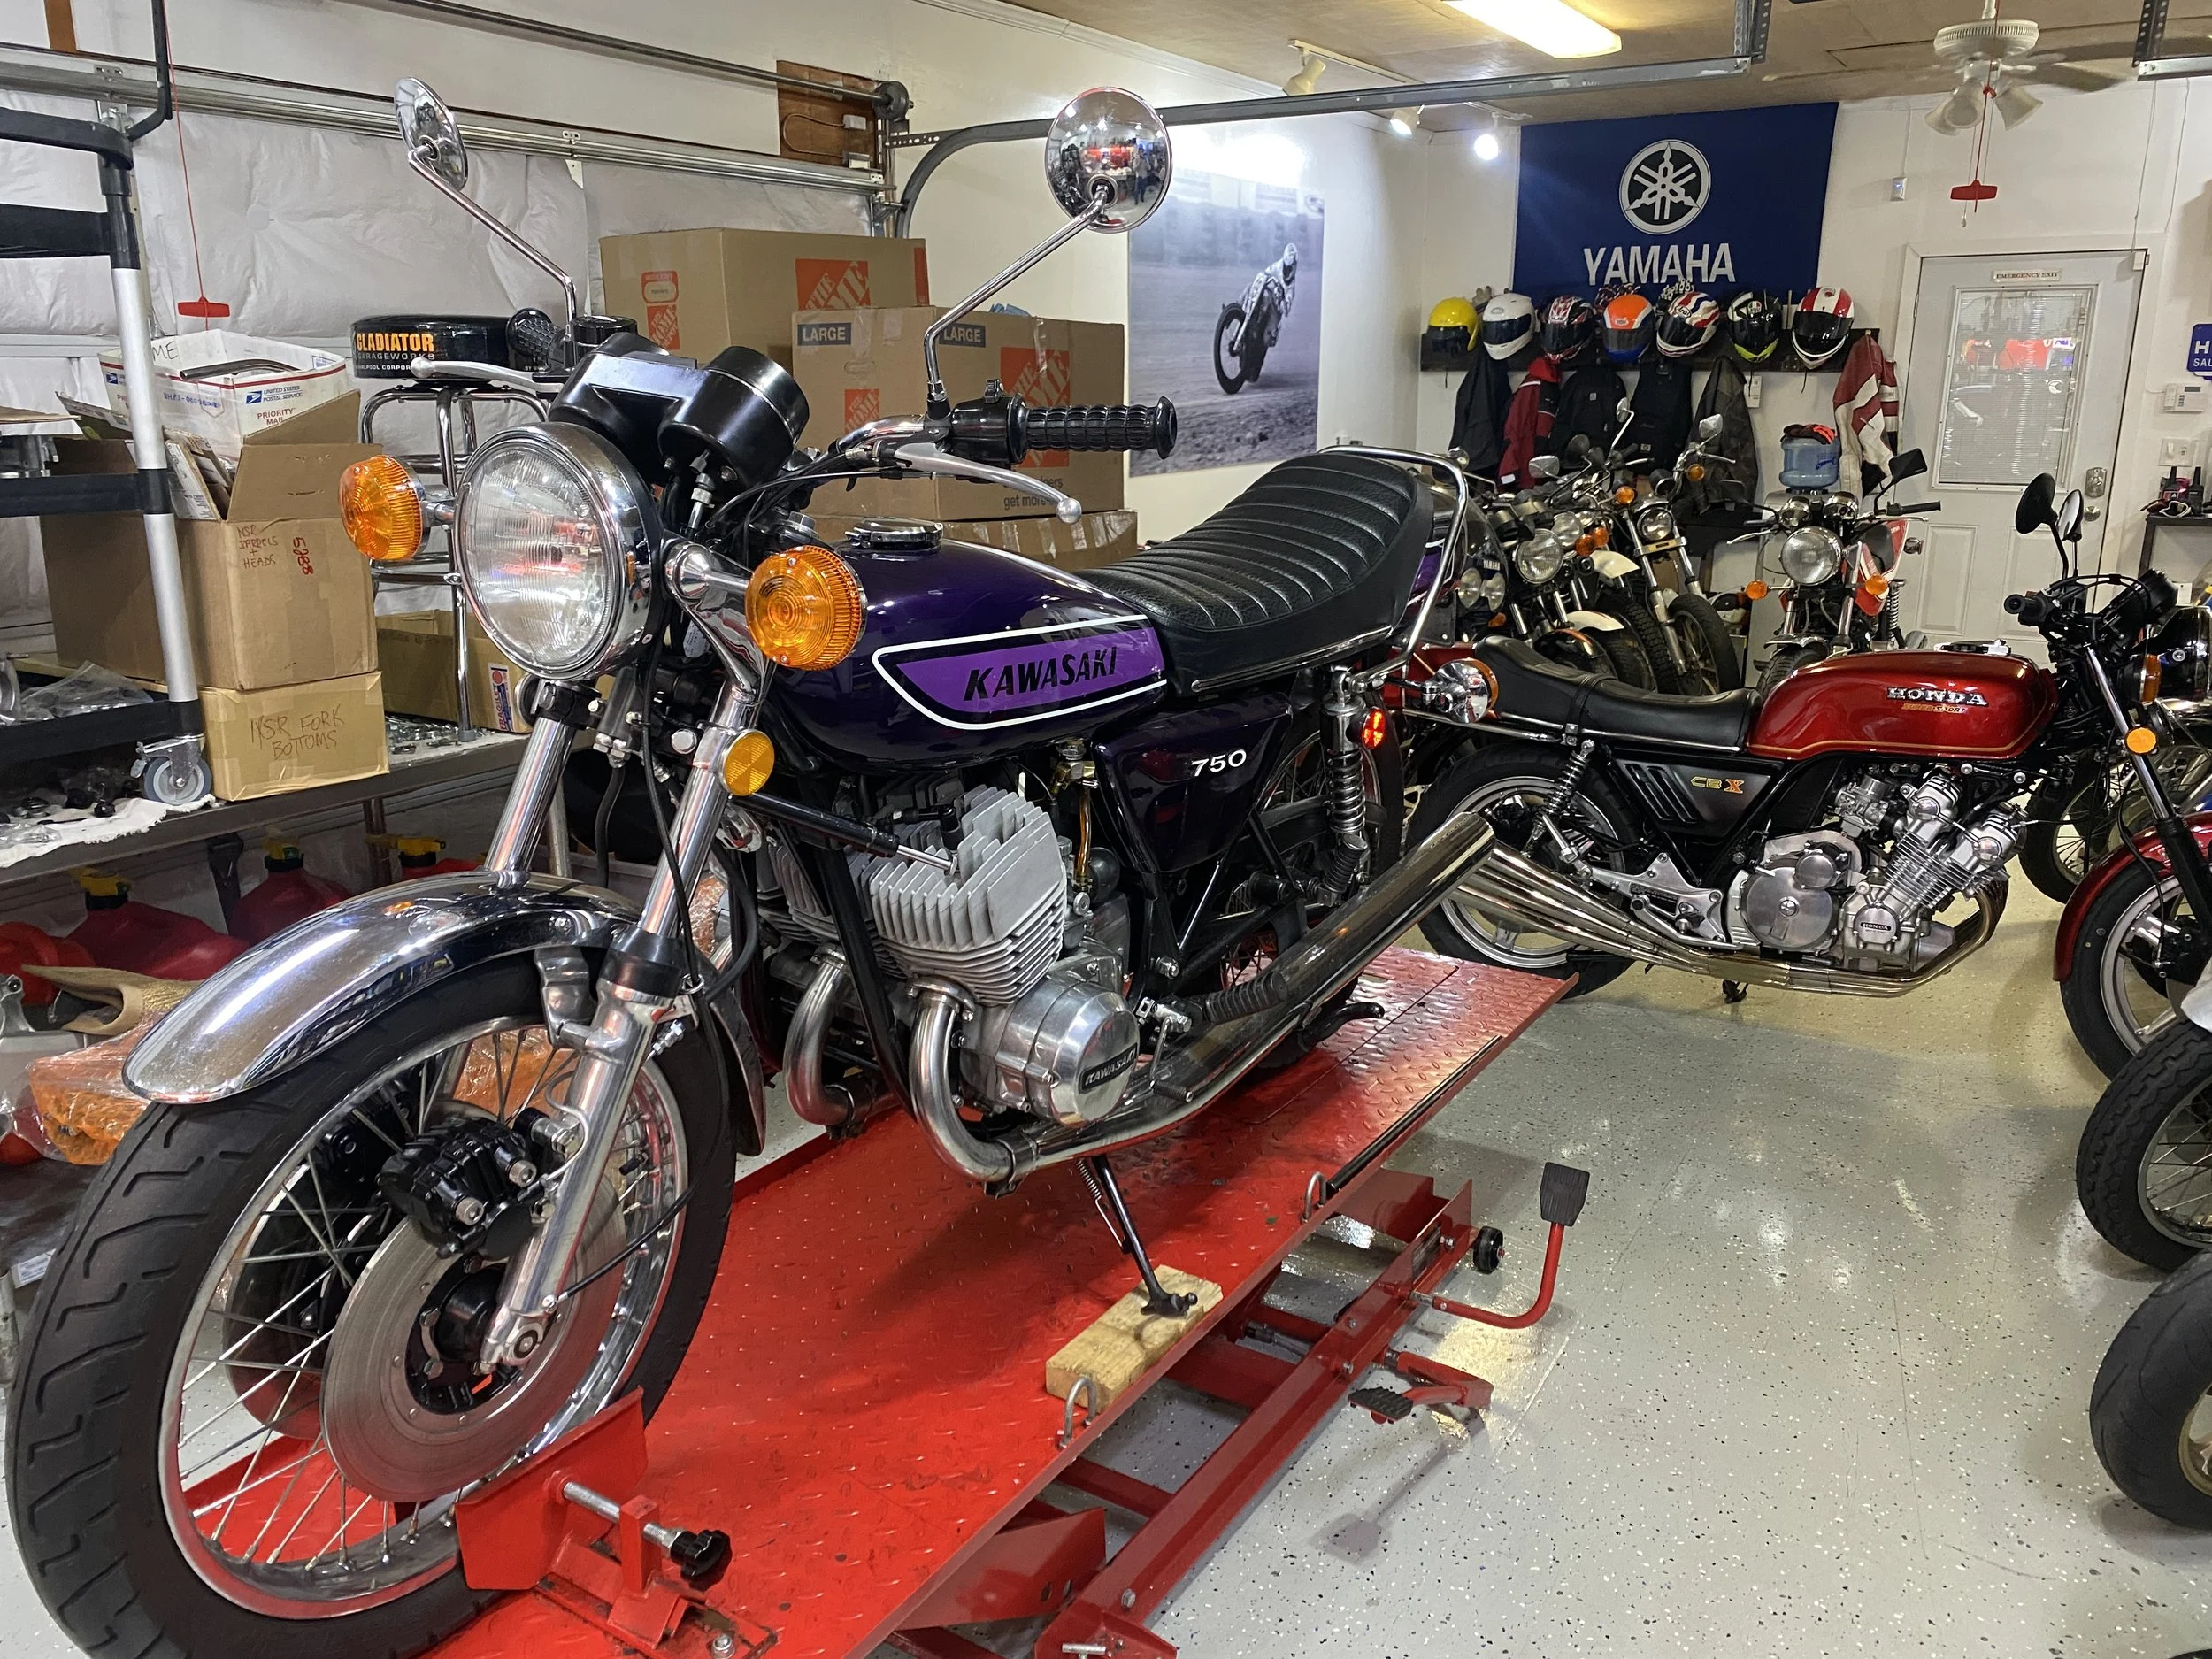
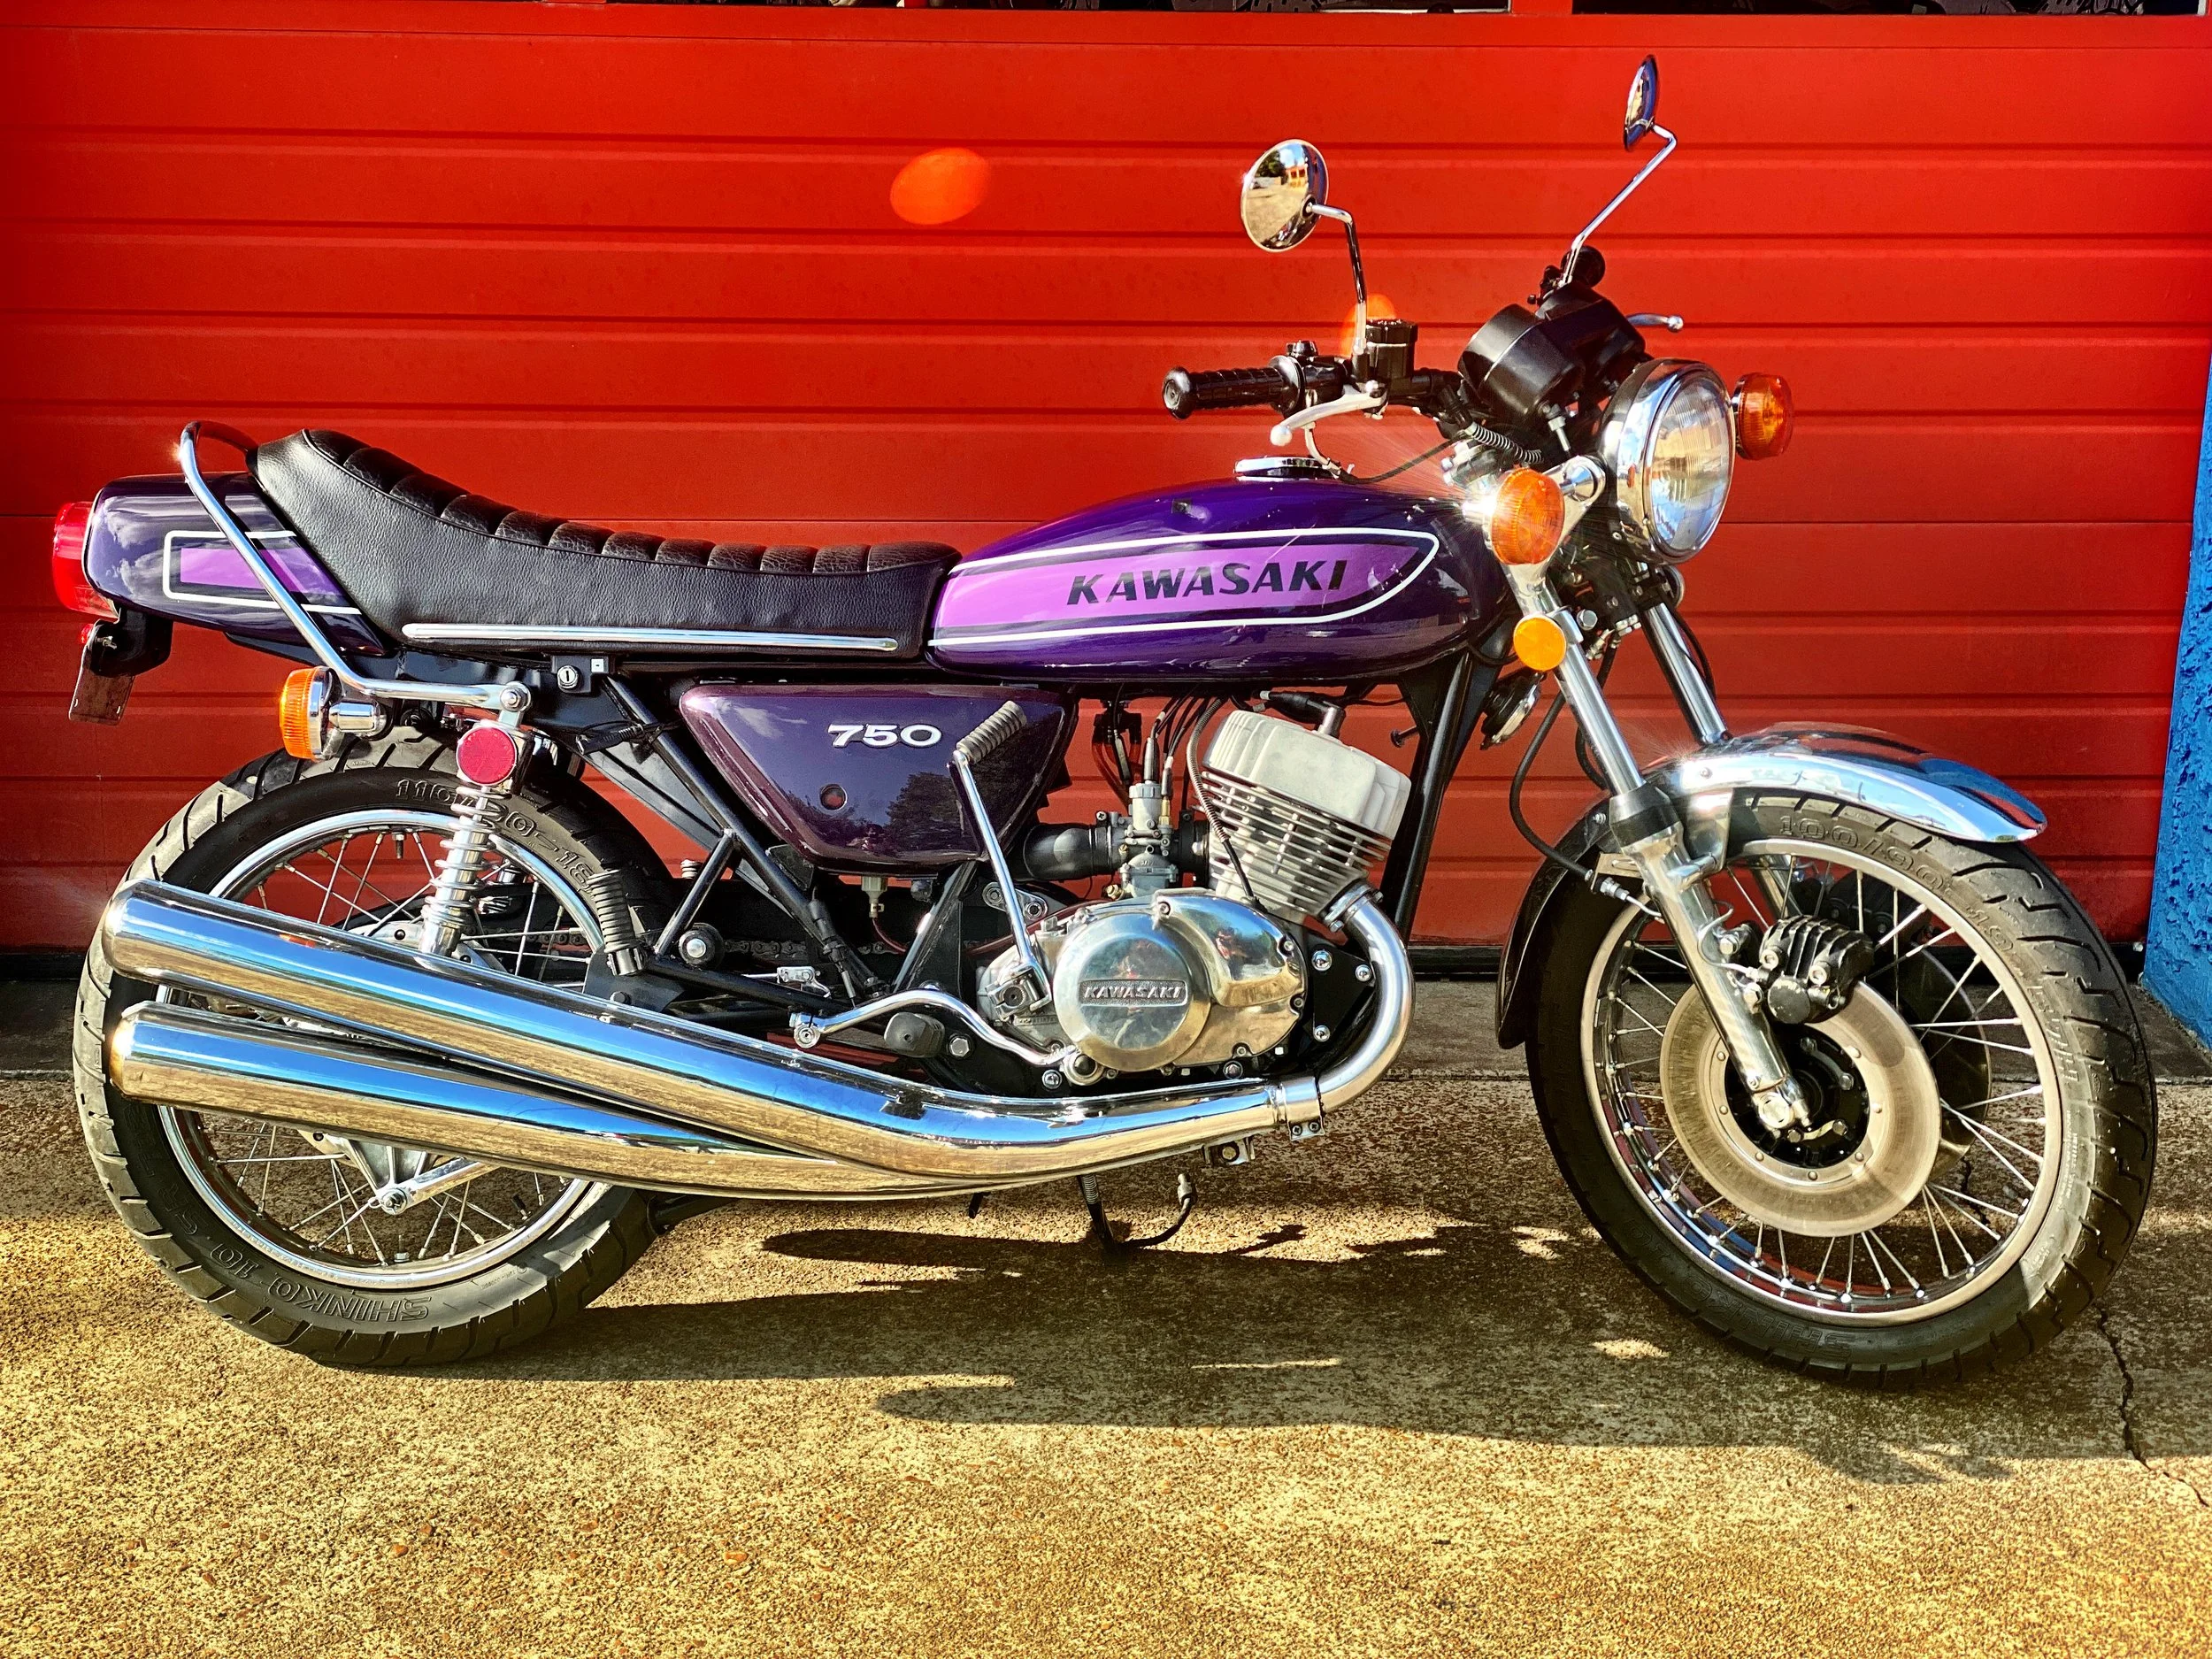
1975 Kawasaki 750 H2C
Bought on E-bay March 7th, arrived April 4th 2019.

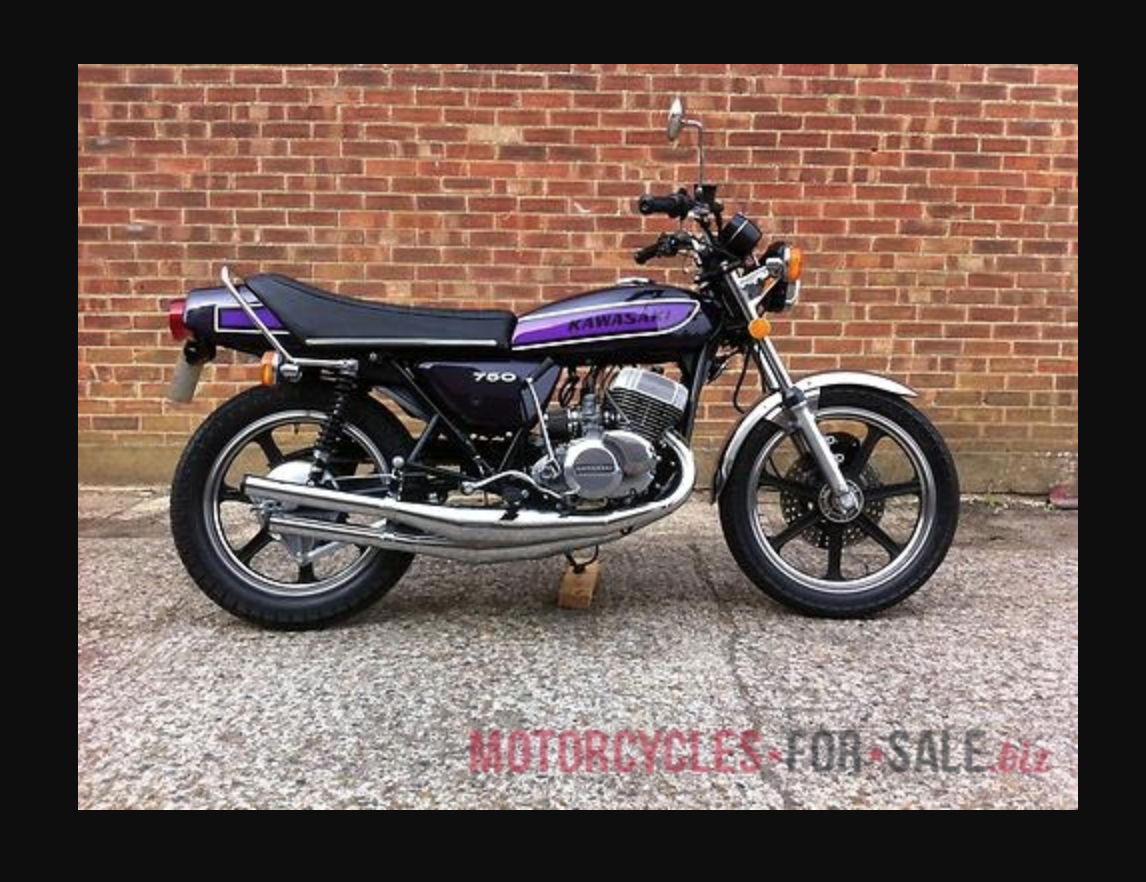
It was this photo on E-bay…
…that made me want this bike…a lot. It was purple, it was powerful and it had enjoyed a “frame up reconditioning” and therefore must be ready to ride. After a brief discussion with some friends over the high price and whether it was really worth it, the responses ranged from was “it’s worth it if you want it” to “not $16,000 of MY money…(for that was the Buy It Now price)…..I put in my highest bid and then turned back around and watched the scene as Robert Plant, John McEnroe and Sheryl Crow carried on a conversation in an RV parked outside the backstage door of the Beacon Theater, New York City in the spring of 2019. If only they had known what I had just done…..I don’t think they would be even mildly interested, but all of that, is another story.
As the night carried on, I was kind of hoping the bike wouldn’t come through…..

Nevertheless I won it…
…and I was very excited. I must have read and re-read the description at least 100 times. (Pictured right) A day or two later I spoke to the seller and he sounded very much like a connoisseur of the Kawasaki triples and outlined how he liked to jet them just so to let them unleash their riotous power and run well.
I was stoked and figured that I was buying from a tuning guru and all would be well….
I was in for a bit of a shock.

It arrived on Apr 4th via a UShip contact and ...it started! A short run was enough to tell me it really wasn't happy tho'

Besides the fact that the rear light was missing one of it's 3 bolts, the rear brake was adjusted so it practically locked the wheel, two stoke oil dripped from the oil pump area, at the time I thought it could have been worse, but decided, those things, a sloppy gear change, puddle of fuel under the carbs, the poor running, (sounded like a bag of hammers) all warranted the need for a closer inspection, so it was off with the tank so I could check out the likely culprits: the carbs.

I didn't get too far before I came upon the first fix. The budget replacement petcock released it's brass connectors from the main body only with a slight tug. Epoxy fixed that issue- for the moment.

In passing, I noticed that the airbox looked a little 'empty'. The description represented this air box as "Reconditioned" This was first evidence of mine and the sellers differences in the understanding of the word- reconditioned. Looking at this assembly he appears to think it means: cleaned, possibly re-sprayed and reassembled with some crucial parts missing such as: 1) an air filter, 2) air cleaner cap 3) wire net assembly. None of these parts were available separately so I had to buy a new unit for $365 from my go-to supplier of parts www.jessbikes.com. Some might argue you need the Silencer to complete the airbox assembly. Add $85 to that tally

Going back to the petcock a minute. A frame up recondition must mean a gas tank must contain copious amounts of rust particles....

...that are thankfully caught by the budget rated in-line fuel filter. Note lack of fuel line clamps- the tank was indeed rusty, more on that in a minute, but in the meantime moved onto the carbs....

Again a conflict of understanding ....if reconditioned means left with old fuel to slowly dissipate leaving dark gooey deposits then these are perfect.

C'mon. Not reconditioned. In any way.

Got them all cleaned up..... added new gaskets....

....and an Ivan's kit. http://www.ivansperformanceproducts.com/h2.htm

Next I turned my attention to the heart of the engine: The oil pump. This is how I found it connected. Note brass fitments directly connected to the pump and H2B lever.

I labelled all the connections and sent it to Jeff Derstine (recommended by the KTOG forum) to replace the seals...

and as preventative measure insert helicoils in the one oil inlet and the four outlets..note this is an H2-B lever on an H2C motor- not sure if that's a big issue or not...regardless I was glad I had sent the pump to Jeff...he found epoxy in the bottom of the two short oil lines ports. He said: "Cleaned it out and now the holes break thru...don't know if it was a factory fix or if somebody else was into this pump before me..The end holes are now M4 x 0.7 instead of the factory M3 x 0.5 Someone made those oversize." He found a welder to fill it, put in helicoils in and made copper threaded plugs to back it up.

I made up some new clear lines...

and reassembled everything exactly as I had found it....and there I learnt my lesson...on an unfamiliar bike: it doesn't pay to trust that the previous owner did everything right.

..with the cleaned up carbs back on, some premix in the tank, got it started and held the pump lever wide open to get the oil pumping through the lines....but after 5 mins or so....as you can see....nothing was leaving the pump.

Troubled, I went to the Mechanical Zone of the KTOG forum and posted the dilemma. It was 'Zambia' who pointed out the the oil lines were connected the wrong way round. The brass fittings should be attached to the carb bowls- and as these have check valves built in, connected as they were, the oil could not get through. A quick swap around had the oil flowing nicely. I shudder to think what might have happened had I not focussed my attention on the pump and reached out to both Jeff and the forum. Catastrophe would have been on the horizon in many shapes and forms. The fuel that was in the tank when it arrived must have been a pre-mix, otherwise my test ride might have gone a lot differently- but in this case all's well ends well...at least in that department.

However a test ride showed the bike was was still having problems. I was so unaccustomed to riding a triple I didn't realize it spent most of it's time running on two cylinders. One was refusing to fire....leaving a lot of unburnt fuel and oil....and it has to go somewhere.

such as all over the pipes and rear wheel. On this same oil anointing test ride the bike suddenly lost all electrics, but I was surprised to find, the engine still ran, just no lights or turn signals or neutral light etc etc.

Safely home I look at the battery I realize it's far from factory issue, about the quarter of the size and has been flying about untethered in it's case to the point that it connected with the metallic battery door....

and fried the neg earth lead....

Toasted. Luckily it's an easy fix. New earth lead, inline fuse and a battery with the correct specifications, (Motobatt MotoBatt MB5.5U) made sure it fit well and considered that dealt with.

My next task was to work out why the neutral light wasn't working. It wasn't as easy as a dead bulb. Turns out there was no wire leading from the neutral switch which sits on top of the gear box. When I dismantled it, it came away in too many parts...so ordered a new one....

I can't remember exactly but I think I had to run a wire from the battery down to the switch....I still have quite a bit of pale green wire of the same gauge.
Tankgate…
The paintwork was beautiful and the color is truly what sold me on the bike….but inside problems lurked….


Of course the next step was to look into the tank. My worst fears were confirmed- full on rust party going on in there......

..in fact the party was raging so hard it busted through the steel walls of the tank in a series of pinholes. None of this was visible in any of the E-bay ad pictures and in fact I didn't even notice it until a friend pointed it out to me after I'd had it for 7 days. I was really disappointed and I got myself in trouble with one of the most reputable painters in the country when I took to the kawi2strokes forum to ask advice on how to fix a rusted tank and still retain the great paint job and I questioned what kind of paint shop would ever paint a tank to such high quality on the outside while the inside rotted internally? Isn't it a given with tanks this old they need to be lined? Within a few hours of my post Kathy the co-owner of LRC (leftrightandcenter.net) was on the phone giving me a piece of her mind- which mostly said you can lead a horse to water but you can't make it drink. The seller did not want to have the tank coated and in fact they had completed the tank three years prior to my purchase. A lot could have happened to it after they let it go.

This tank being mine and not a clients, and knowing I could live with the blemished paintwork, I figured it was worth taking a chance to try and fix the inside while saving the paint job.. so I protected the tank as much as I could...

...and let it sit filled with Evaporust in a few different positions for two days.

End result...rust completely gone.

The next stage, lining the tank, involved much more potentially damaging chemicals...the tank liner....this one from Caswell's...so I added another layer of protection.

Long story short, the project failed. I think it was the acetone (that I used to prepare the tank for the liner) that seeped thru the cling film, duct tape and masking tape.

and so it all went back to LRC Triples to be resprayed, and while there. had that dent above the K fixed...a surprise which the bike arrived with....already there or damaged in shipping?...I'll never know.


And tank related, when I got it back, I upgraded from the petcock with the loose spigots to a Pingel. Lovely piece of kit. Have to watch the mileage though, the bike drinks like a fish (20mpg) and there's no reserve option.

in situ

tank back from LRC in excellent condition....Since that first intial conversation with Kathy @ LRC they have painted my two other (blue) H2's and repainted (and lined!) this one. All jobs are beautiful and the quality and attention to detail is second to none.
Next: The Engine.
I always knew my first encounter with the iconic triple two stroke would be something to remember but thought it might be a little more exhilarating. On the first ride the engine sounded like a bag of hammers, it pinged, it surged, it ran on two, then the third would kick in right after it threw a fuel/oil mixture all over the pipes and rear tire. Yes, the Widowmaker was trying to kill me. I was in no mood for point by point diagnosis. These motors are simple, so I decided rather than troubleshoot I would strip it down, examine each component carefully and replace anything suspicious. This was a good plan because it would allow me to remove the one thing I couldn’t stand about the look of the bike: the paint job on the engine!

A painted motor looks great….in a picture….or from 12 feet away….but in my opinion has no place on a restoration unless that’s how the factory did it. Having said that, only yesterday, I read an interview with an ex-Grand Prix mechanic Nigel Everett who’s building a KR750 replica and said about paint and race bikes….“Kawasaki were a nightmare, they used to build the engine and spray it black-covering all the nuts and bolts and everything.” However this isn’t a race bike.

Maybe this is a common ploy of Ebay sellers, because if you are selling from afar, painting a motor looks trick as the larger picture above illustrates. Look closer however and you can see the details of the hasty job that took place where preparation was cursory and masking was absent. The sight of rubber pipes, sprockets, nuts, bolts and worse, crud, paint sprayed in place is not evidence of a mastermind restorer...

Painted rubber. Not cool. Also didn't like that oil slick down there- where's that coming from?

Crud encased forever.....maybe just fluff from a cloth...but...

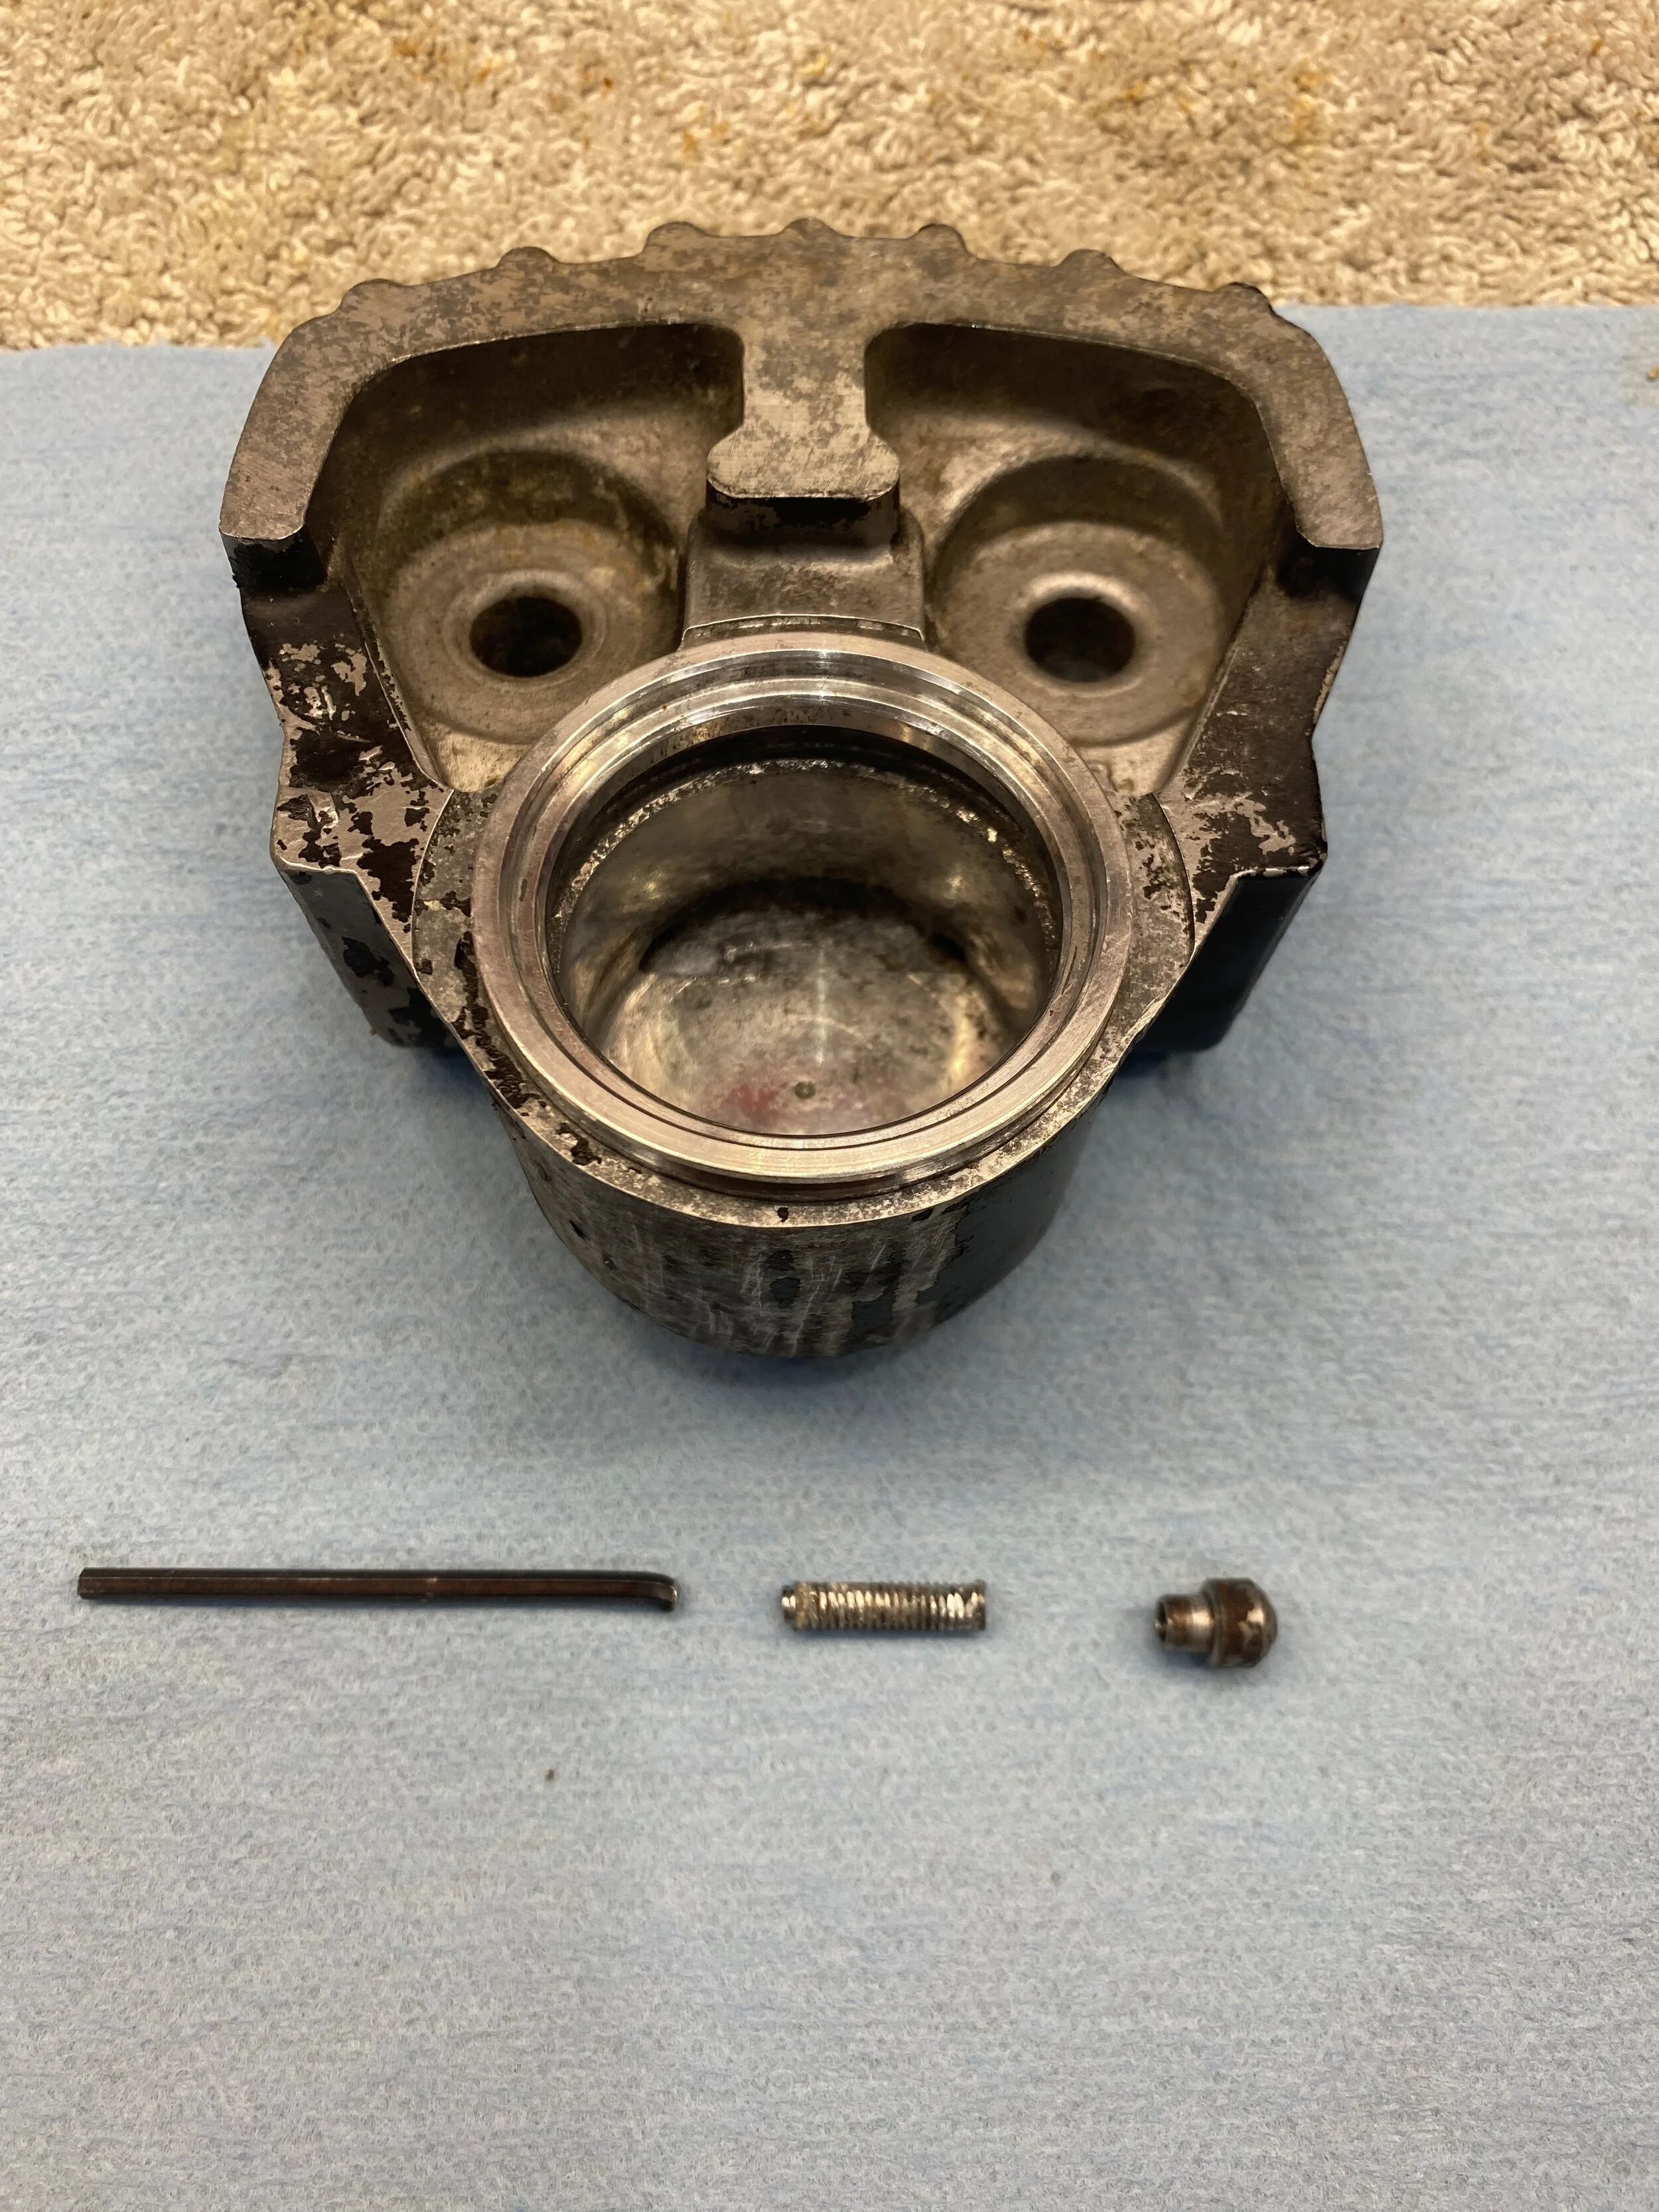
A lot of my disappointment with the bike was down to my personal expectations. I thought that when you restored a motor, first things first, you vapor blast cylinders, heads, crankcases etc so removing all the grease, dirt oil down to a fresh layer of metal allowing you to inspect each piece for flaws such as: cracks like these.

Acoording to Paul at Fast By Gast, these cracks are common and caused by over zealous torquing. Manuals frequently recommend 30 ft/lbs, whereas the drag racers suggest as little as 24.

This is how Fast By Gast fix them...not especially pretty but highly effective and this is on the inside...never seen.

Nothing unusual looking with the pistons. Wossners as described, good to see the hatch marks.

and D100 indicates 72mm which I think is first oversize.

Split the cases. Everything looked pretty good. I've seen some homemade attempts of undercutting- this transmission hasn't had that

As good as it looks, on the test ride it didn't feel great. It will be going to R&D Motorsports for a race undercut and shimming to the cases


some overuse of gasket sealer....

and under-use of an actual gasket on the cover. I initially thought that was just lazy, but later found it's a thing.....some people simply don't use gaskets!

Quite a bit of sludge for a bike that's only done a few miles since rebuild. Further experience in this world hints that this could be left over media from a blasting procedure resulting in a destructive mix of oil and abrasive. This cleaning could have saved this motor.

I thought the crank looked good. It was advertized as rebuilt by Charlie Smith of triplecranks

but I didn't like the look of this so sent it to Charlie for him to guarantee it's integrity

He confirmed it was his work, balanced it a tiny bit more and sent it back good to go....

Cases beautifully blasted and properly cleaned, receive the transmission back from R&D. Looking great bathed in assembly oil....notice undercut dogs

Crank and kickstart in...

and buttoned up....and Mark at R&D also blasted the cases free from that silver paint. They now look factory fresh.

I didn't know any better at the time when I removed the OEM ball bearing pusher and replaced it with a new fancy brass one. It's not bad but not as good as the bearing one.

assembling the clutch. I filed down these bumps on the fingers.

put the motor back in the frame while it was still relatively light....

bolted in the engine using shims that had come with the two H2's....

shimming prevents the mounting tabs from being bent into the engine and helps eliminate high frequency vibration

threw in the hub center and bolted up with these guys. hard to find dimpled washer, lock washer and nut.

all else looked good. Put in a bearing pusher.

new plates in and clutch bolts torqued to....not very much....I'd twisted off a head before already. Note copper pipe in gears allowing me to do this. Got the idea from the RDLC boys. Works and no harm was caused to any gears participating in this photograph

Bolting in the oil lines. Note paint free crankcase- an improvement for sure.

Assembled the top end, ran it for a bit and then witnessed oil weeping from the cylinder head gasket...and so I learned about cracked heads and getting them fixed, and the importance of annealing (even brand new) copper head gaskets, the benefits of using using (2 light coats) of Permatex Copper Spray-A-Gasket and torquing the heads properly. Not a problem ever since.
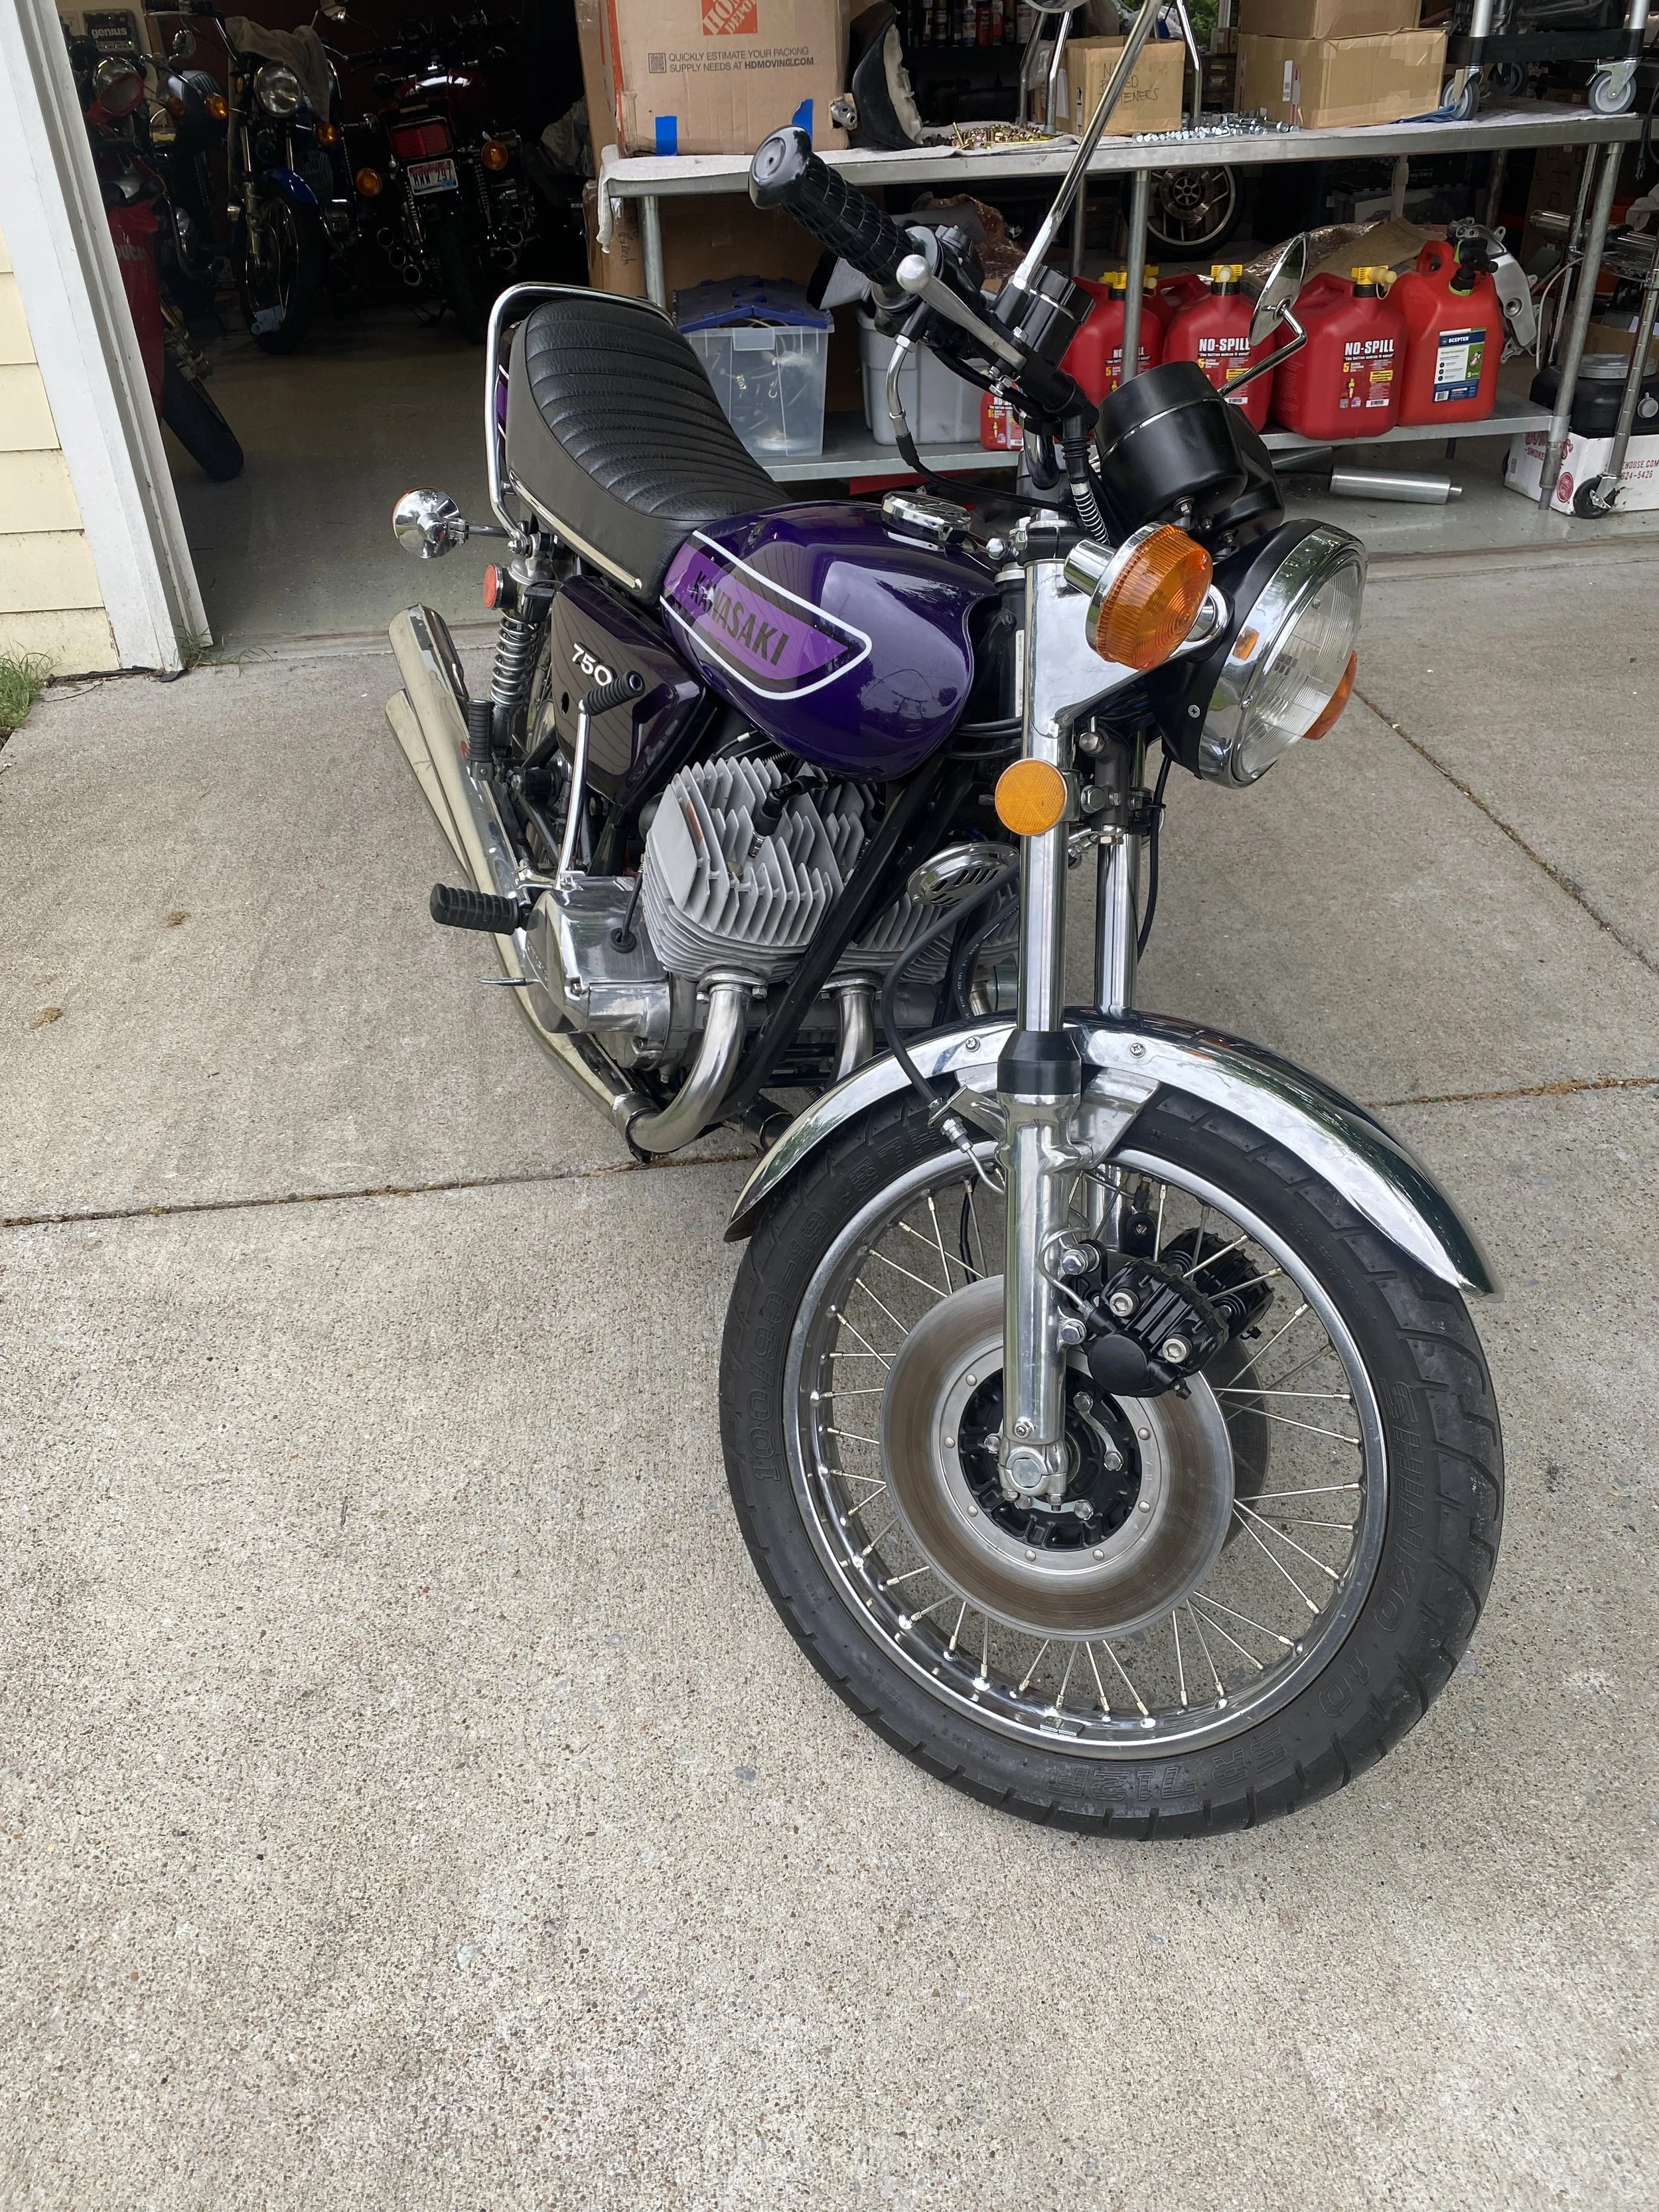
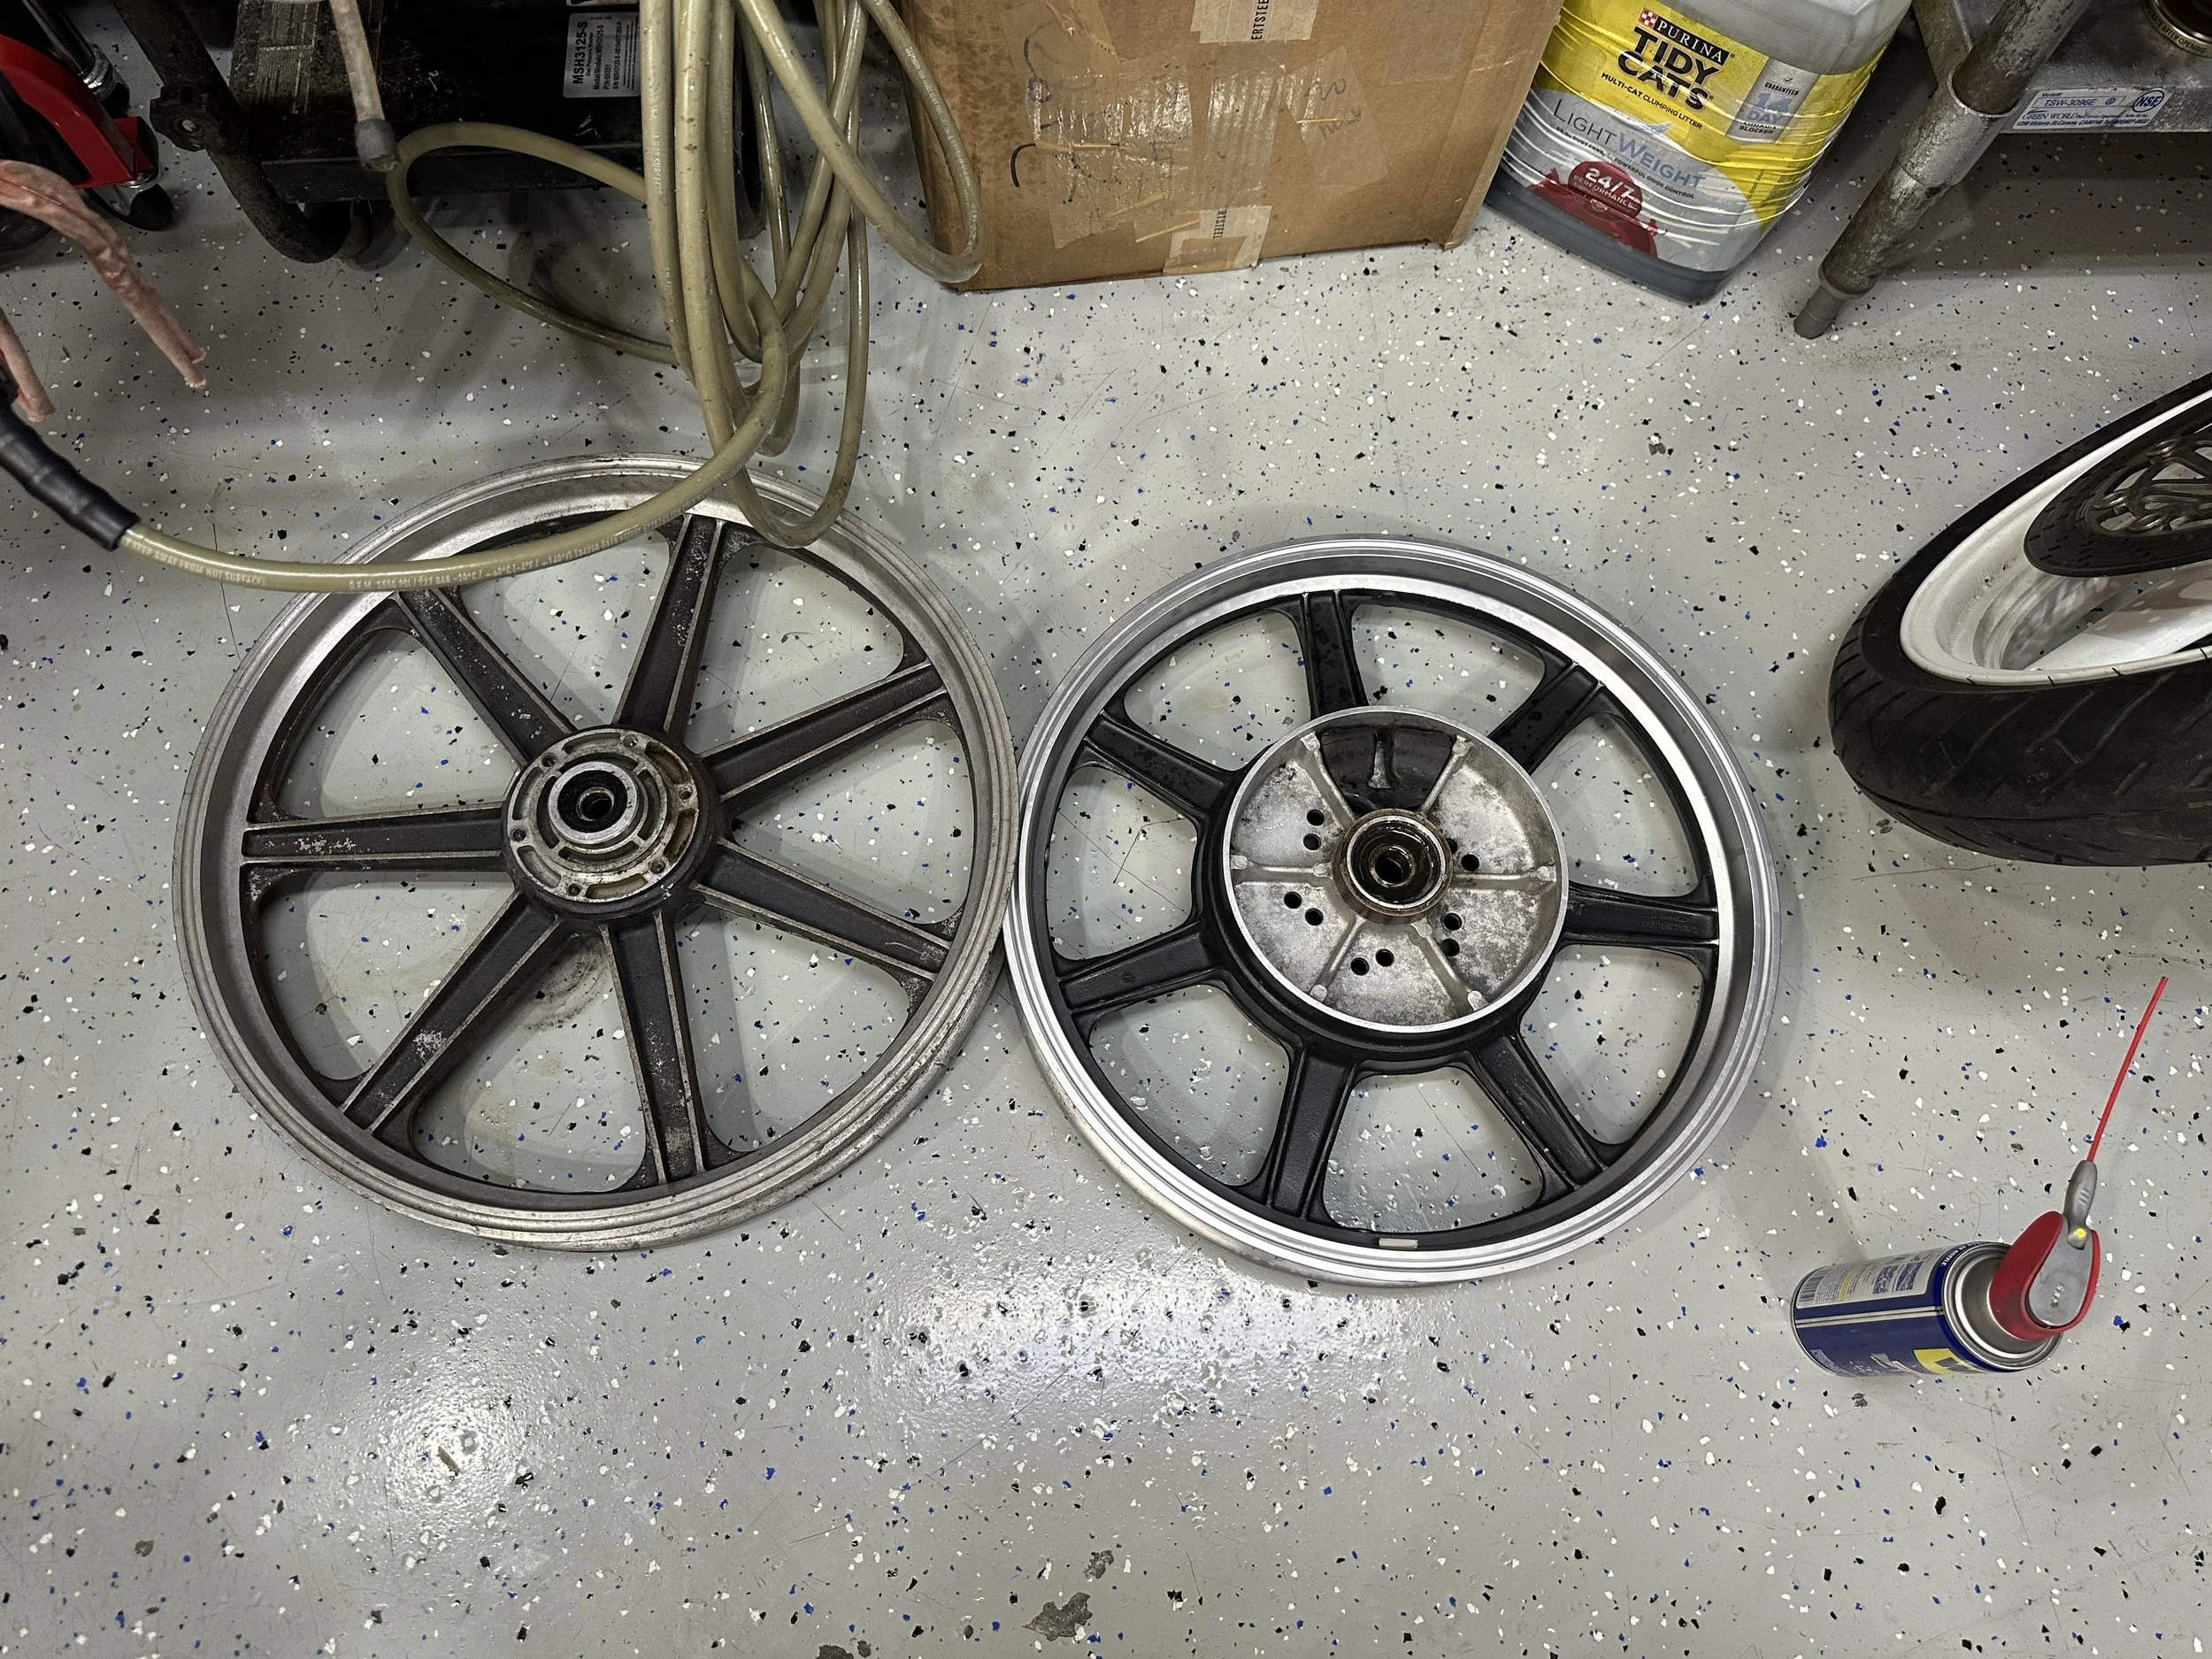
The Wheels…
Don’t assume they’ll be fine. I did until I was working on the rear end installing rear brake shoes…and one day playfully spun the rear wheel to find it not to be so true…
Not disastrous by any means, nor unfixable, but not the condition you want to find a wheel on a high powered vintage motorcycle. So I took them to Ryan at Motoresurrection.
He’s been building wheels for years….

Tire off....and not only rust but some non-factory rim tape.....

....yards of it. Looks like electrical tape, which I thought was particularly negligent and lame, but a few people on the Kawasaki Triples forum have admitted to doing the same when they were dirt bike racing.....but that's different.

More rust than I care to ride around on...

Ryan gave it some wire wheel just to see how deep the rust went....

some of it was just a little too much for me

Takasago....original rims. The front had a little hop.....but Ryan was able to fix and it wasn't afflicted with the rust as much has the back so it was allowed to stay. One DID rim from Z1Parts and stainless steel spokes from Buchanans ended up around $225

I find it hard throwing away things....this is the rear rim which now safely dangles under my desk. Always trying to get our feral rescue to do an MGM impression. His name is Will. Will Feral
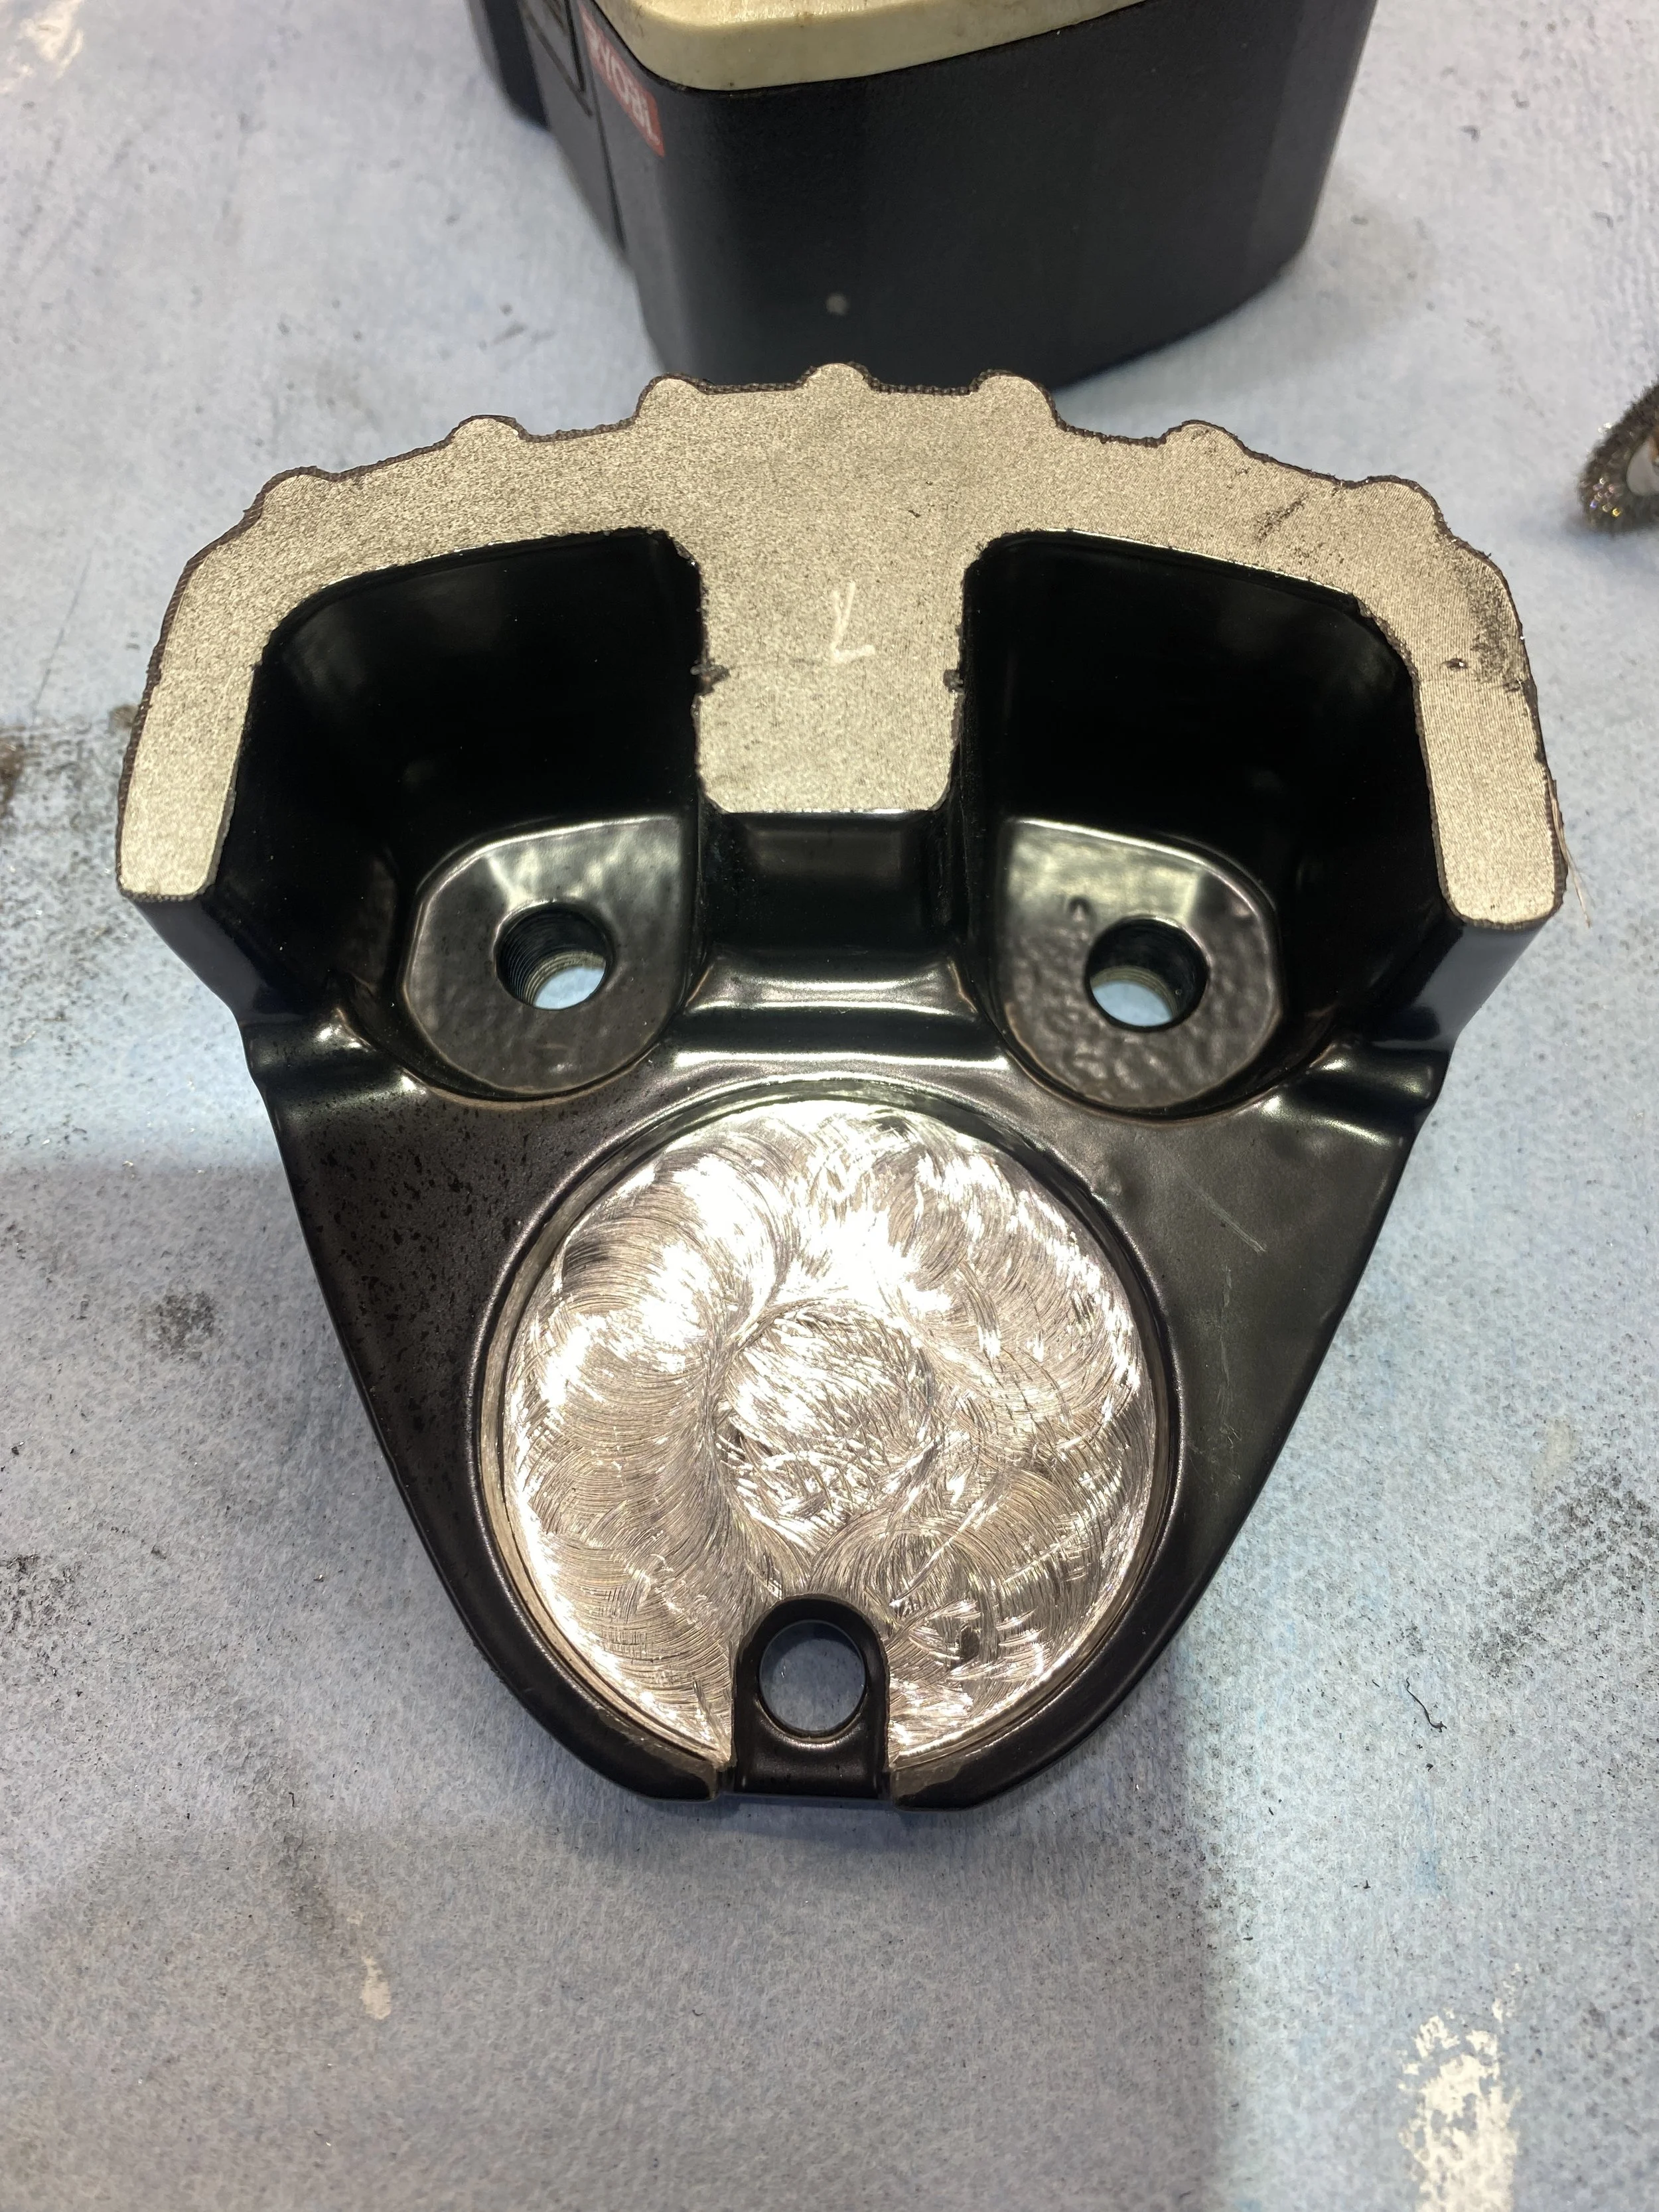
The Brakes….
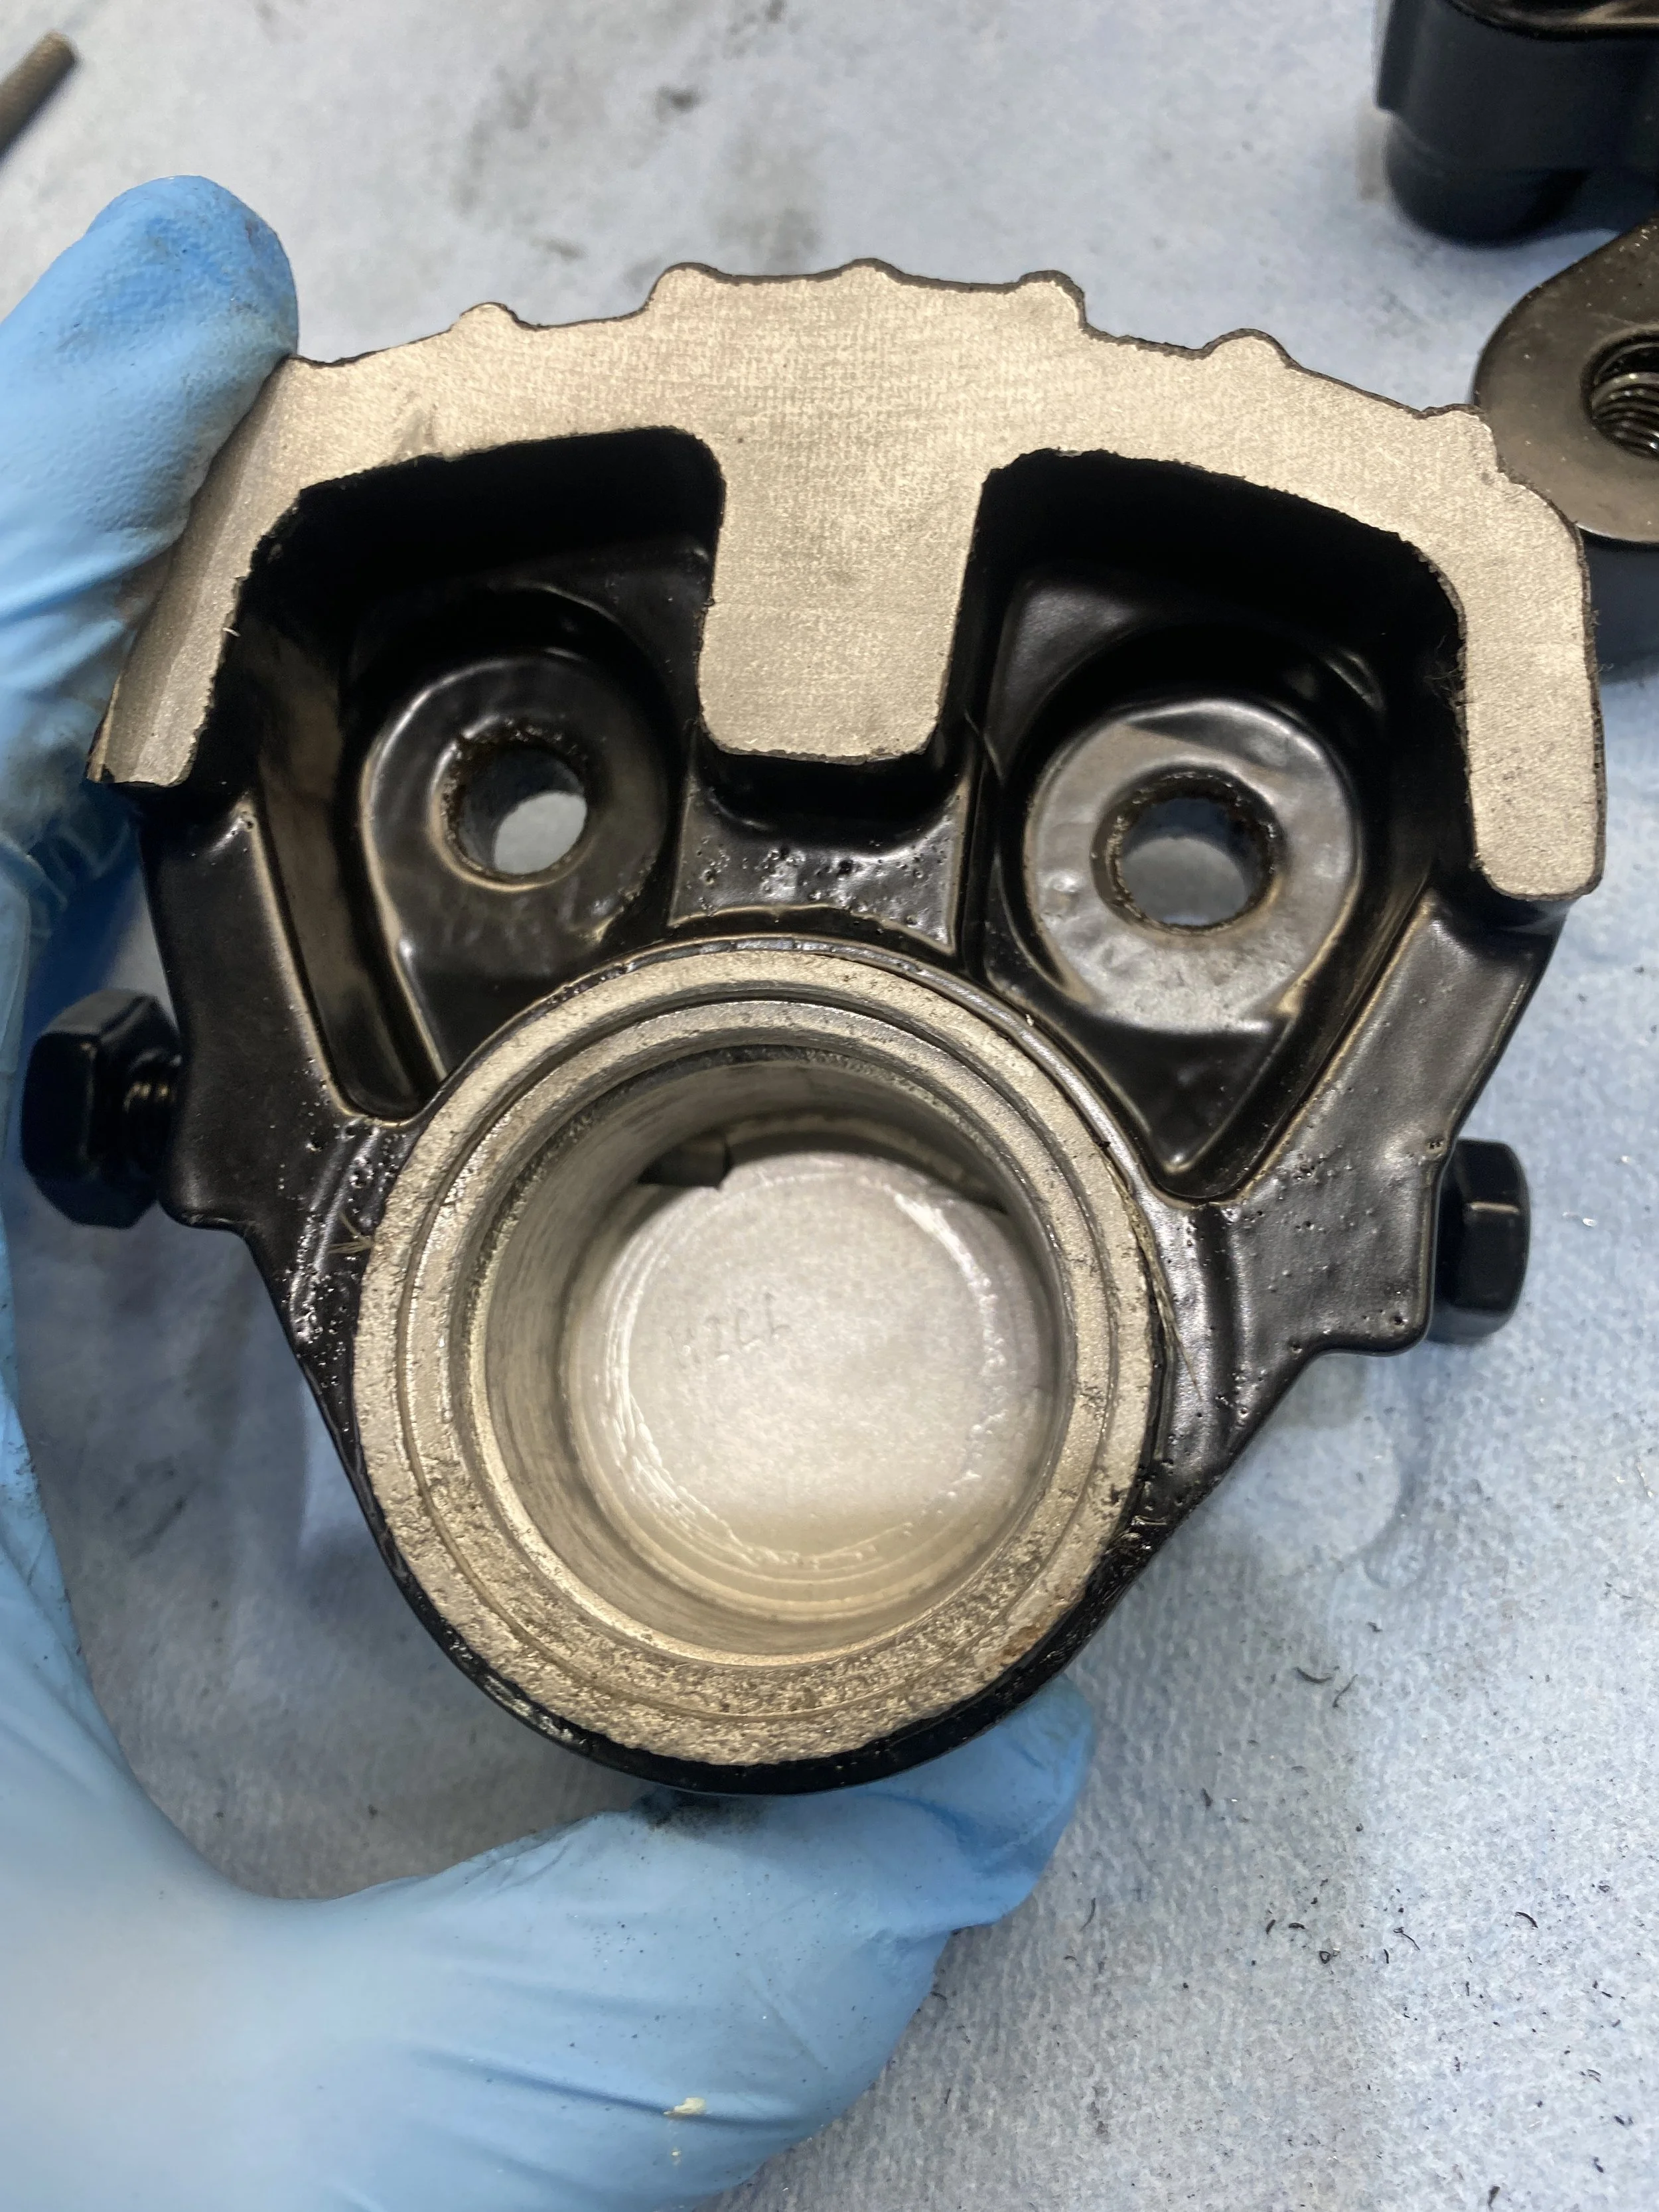
I’ve never read reports of fantastic brake performance from the OEM front calipers, but with no intention to change the look of the bike, replacing existing components with modern pieces was out of the question so I decided to add another front disc. The seller offered to do that for $2,000. I passed on that and elected to take it on myself- but note this is in no way a lesson on how to do it! If you choose to copy what I have done- you do so at your own risk…brakes will save your life…or ruin it if they don’t work…

These are the essentials required for a dual disc set up. 5/8 Master Cylinder $60 Z1 Parts 4 way splitter $90 Brake Lines Right hand bracket- you can use a Z1 but best to bush it up

Standard H2 Inner Diameter is about 10mm. Your Z1 caliper bolts are a bit larger so the Z1 brackets have holes that are....

11mm...not much different but enough to make them feel 'loose'....it's brakes we're talking about so...make it right as you can.


Of course, need an extra disc. I had a spare one. Repainted them both. Masking was painstaking...

but worth it...


But if you don't care convert a left hand caliper to a right hand caliper and don't need to have the period correct calipers...get an almost complete kit here...https://z1parts.net/complete-brake-set-z1-900/ for a little under a grand

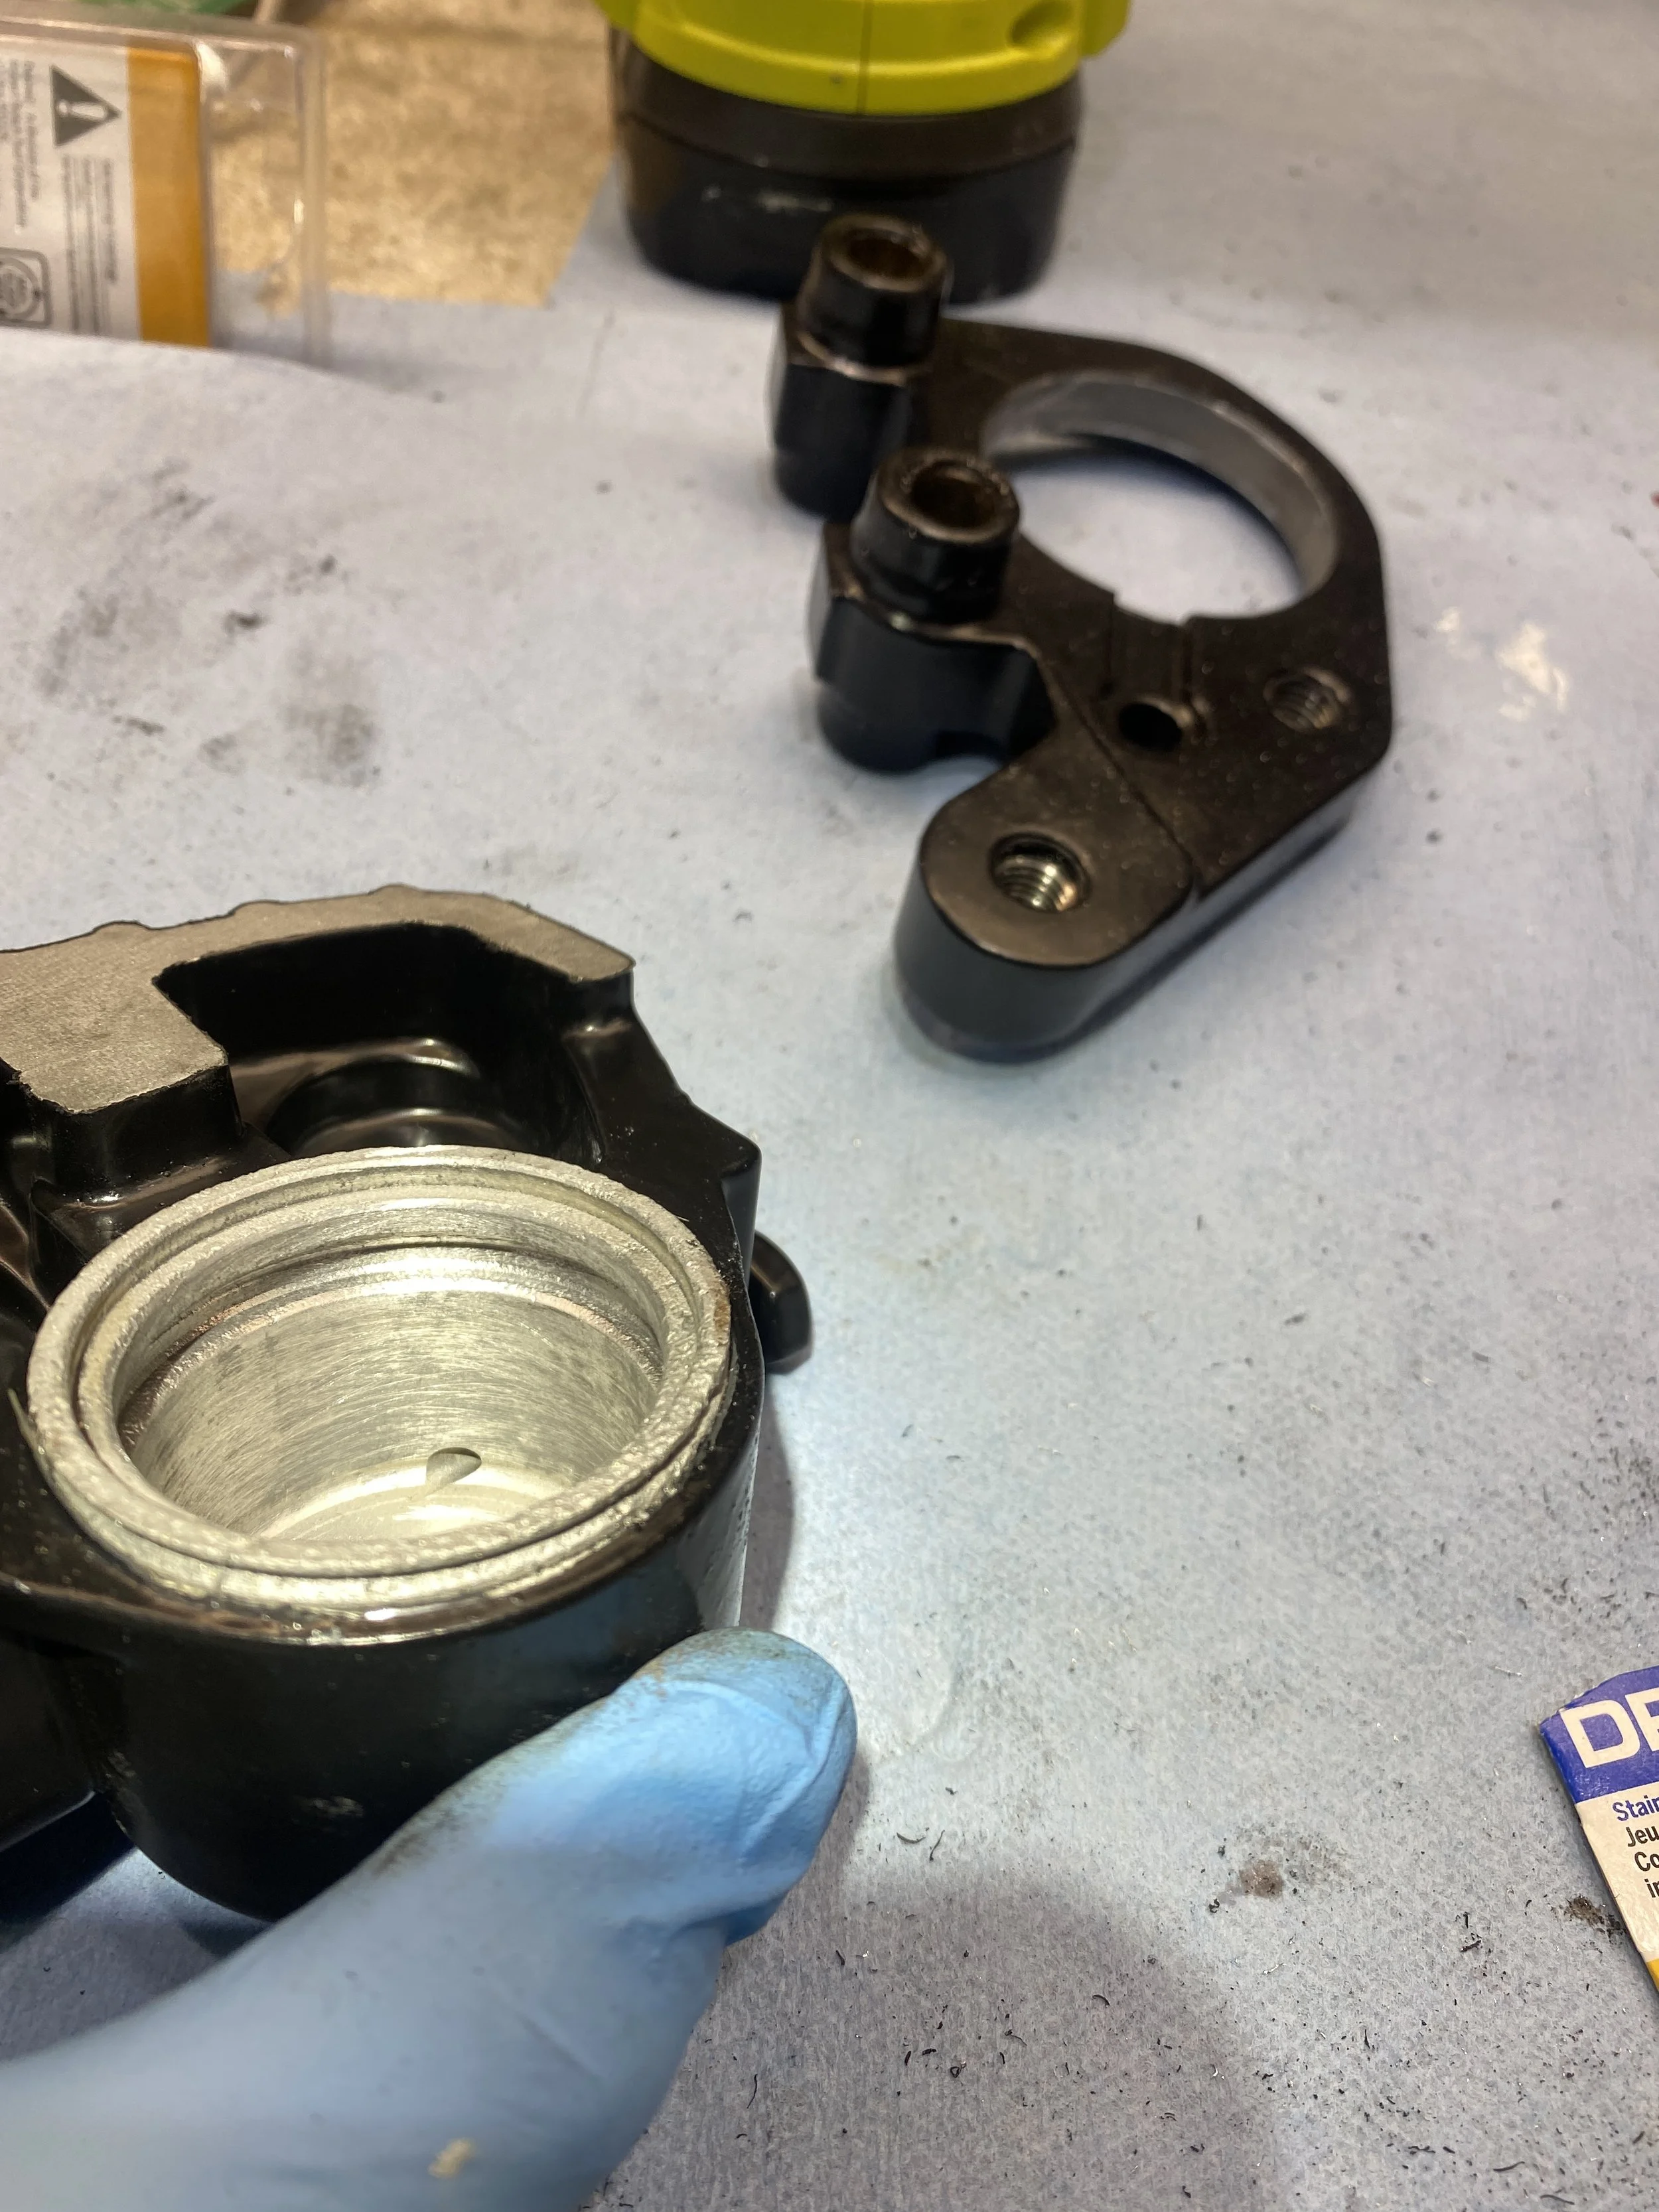
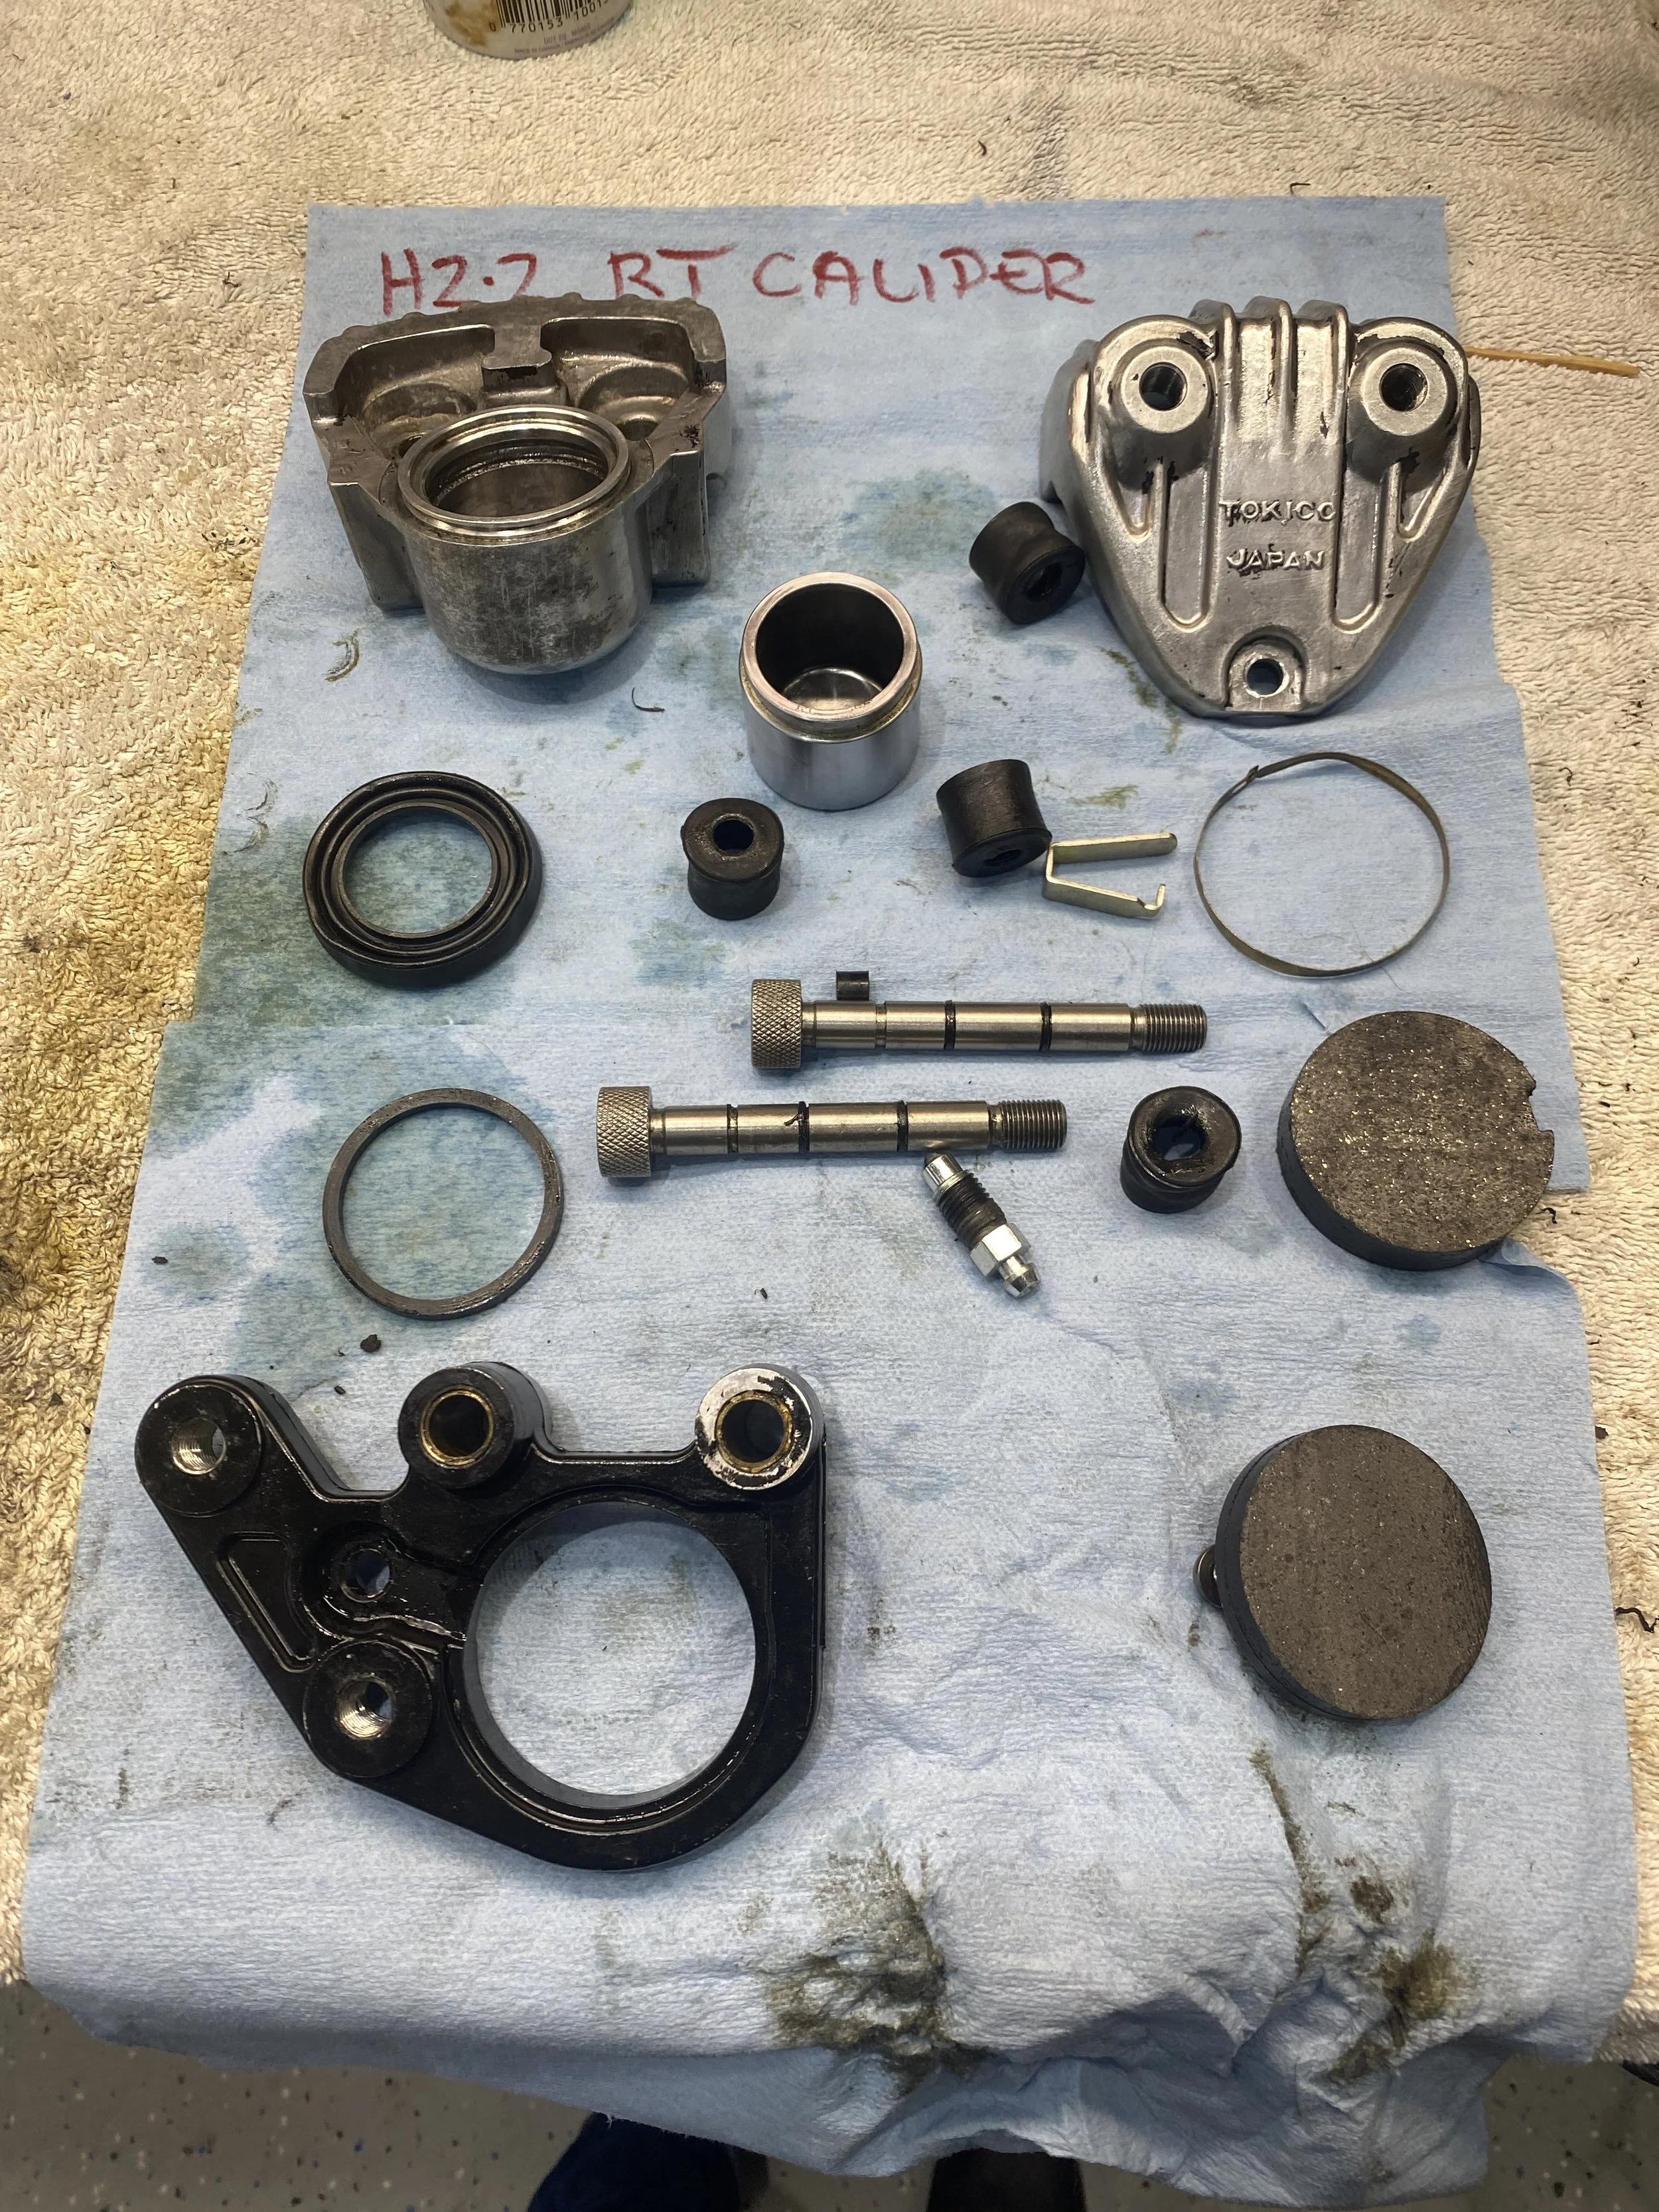
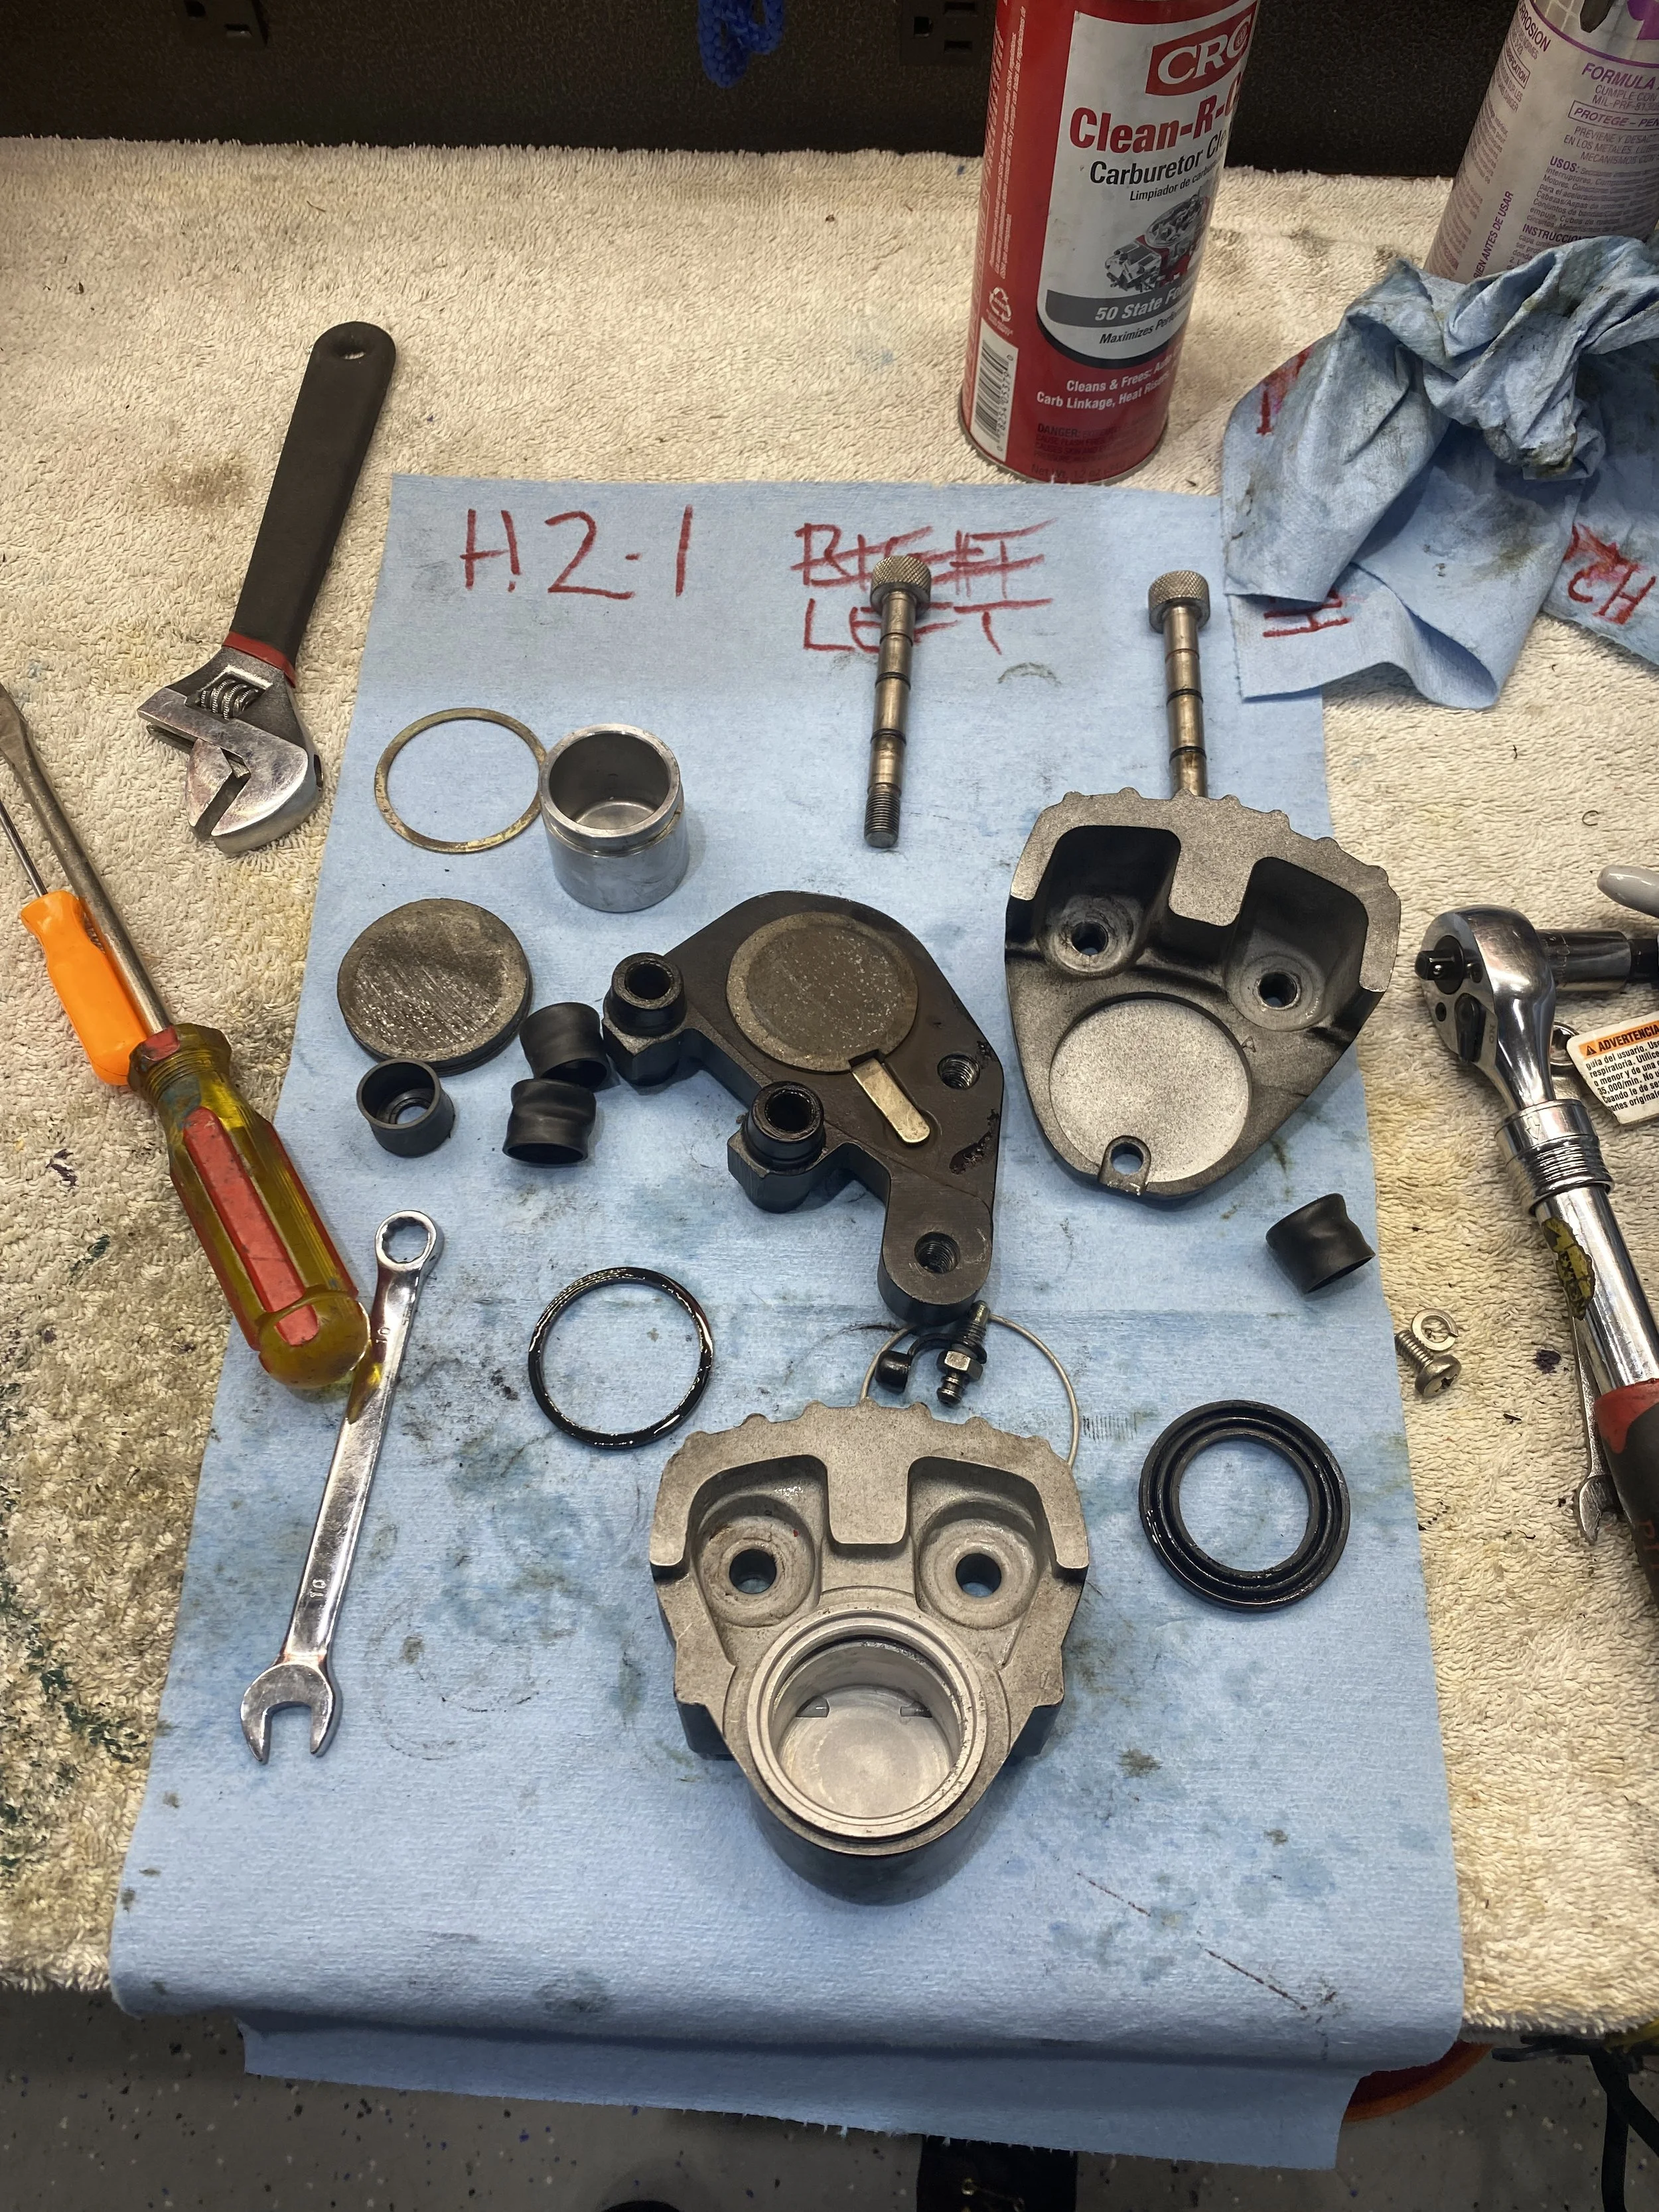
To convert a left to a right hand caliper, (and this is NOT a lesson on how to do it- only a description of what I did) I firstly got hold of a left hander from Danny at triplestuff.net. (dhg1337@gmail.com). To remove the piston, at first I carefully tried compressed air (have heard horror stories of that gone wrong) but no joy, so I had to hook up the caliper to an existing working brake system and pump it out. As you can see someone tried the grease gun method.
First I removed the cone piece that engages with the brake line. My hillbilly arrangement has worked twice. Basically used something the same diameter of the cone (piece of M6 bolt) and an 3mm allen....

and tapped it out with a small hammer..

This is the hole which originally held the bleeder. I then.. 1- Drilled a 3/16 hole 17.15mm deep. (3/16 is as wide as the cone end). 2-Expanded the hole wider using an 8.9mm drill bit (but a 11/32 will also work) down to 13.05mm deep....

.....and tapped it M10x1.25.

The original brake line hole will take a M10x1.25 bleeder which is readily available from Napa Auto Parts. It fits right in.

Many wise words have been written on a greasy workshop towel....not sure if these are any of them but most important is to understand the diagram top right.
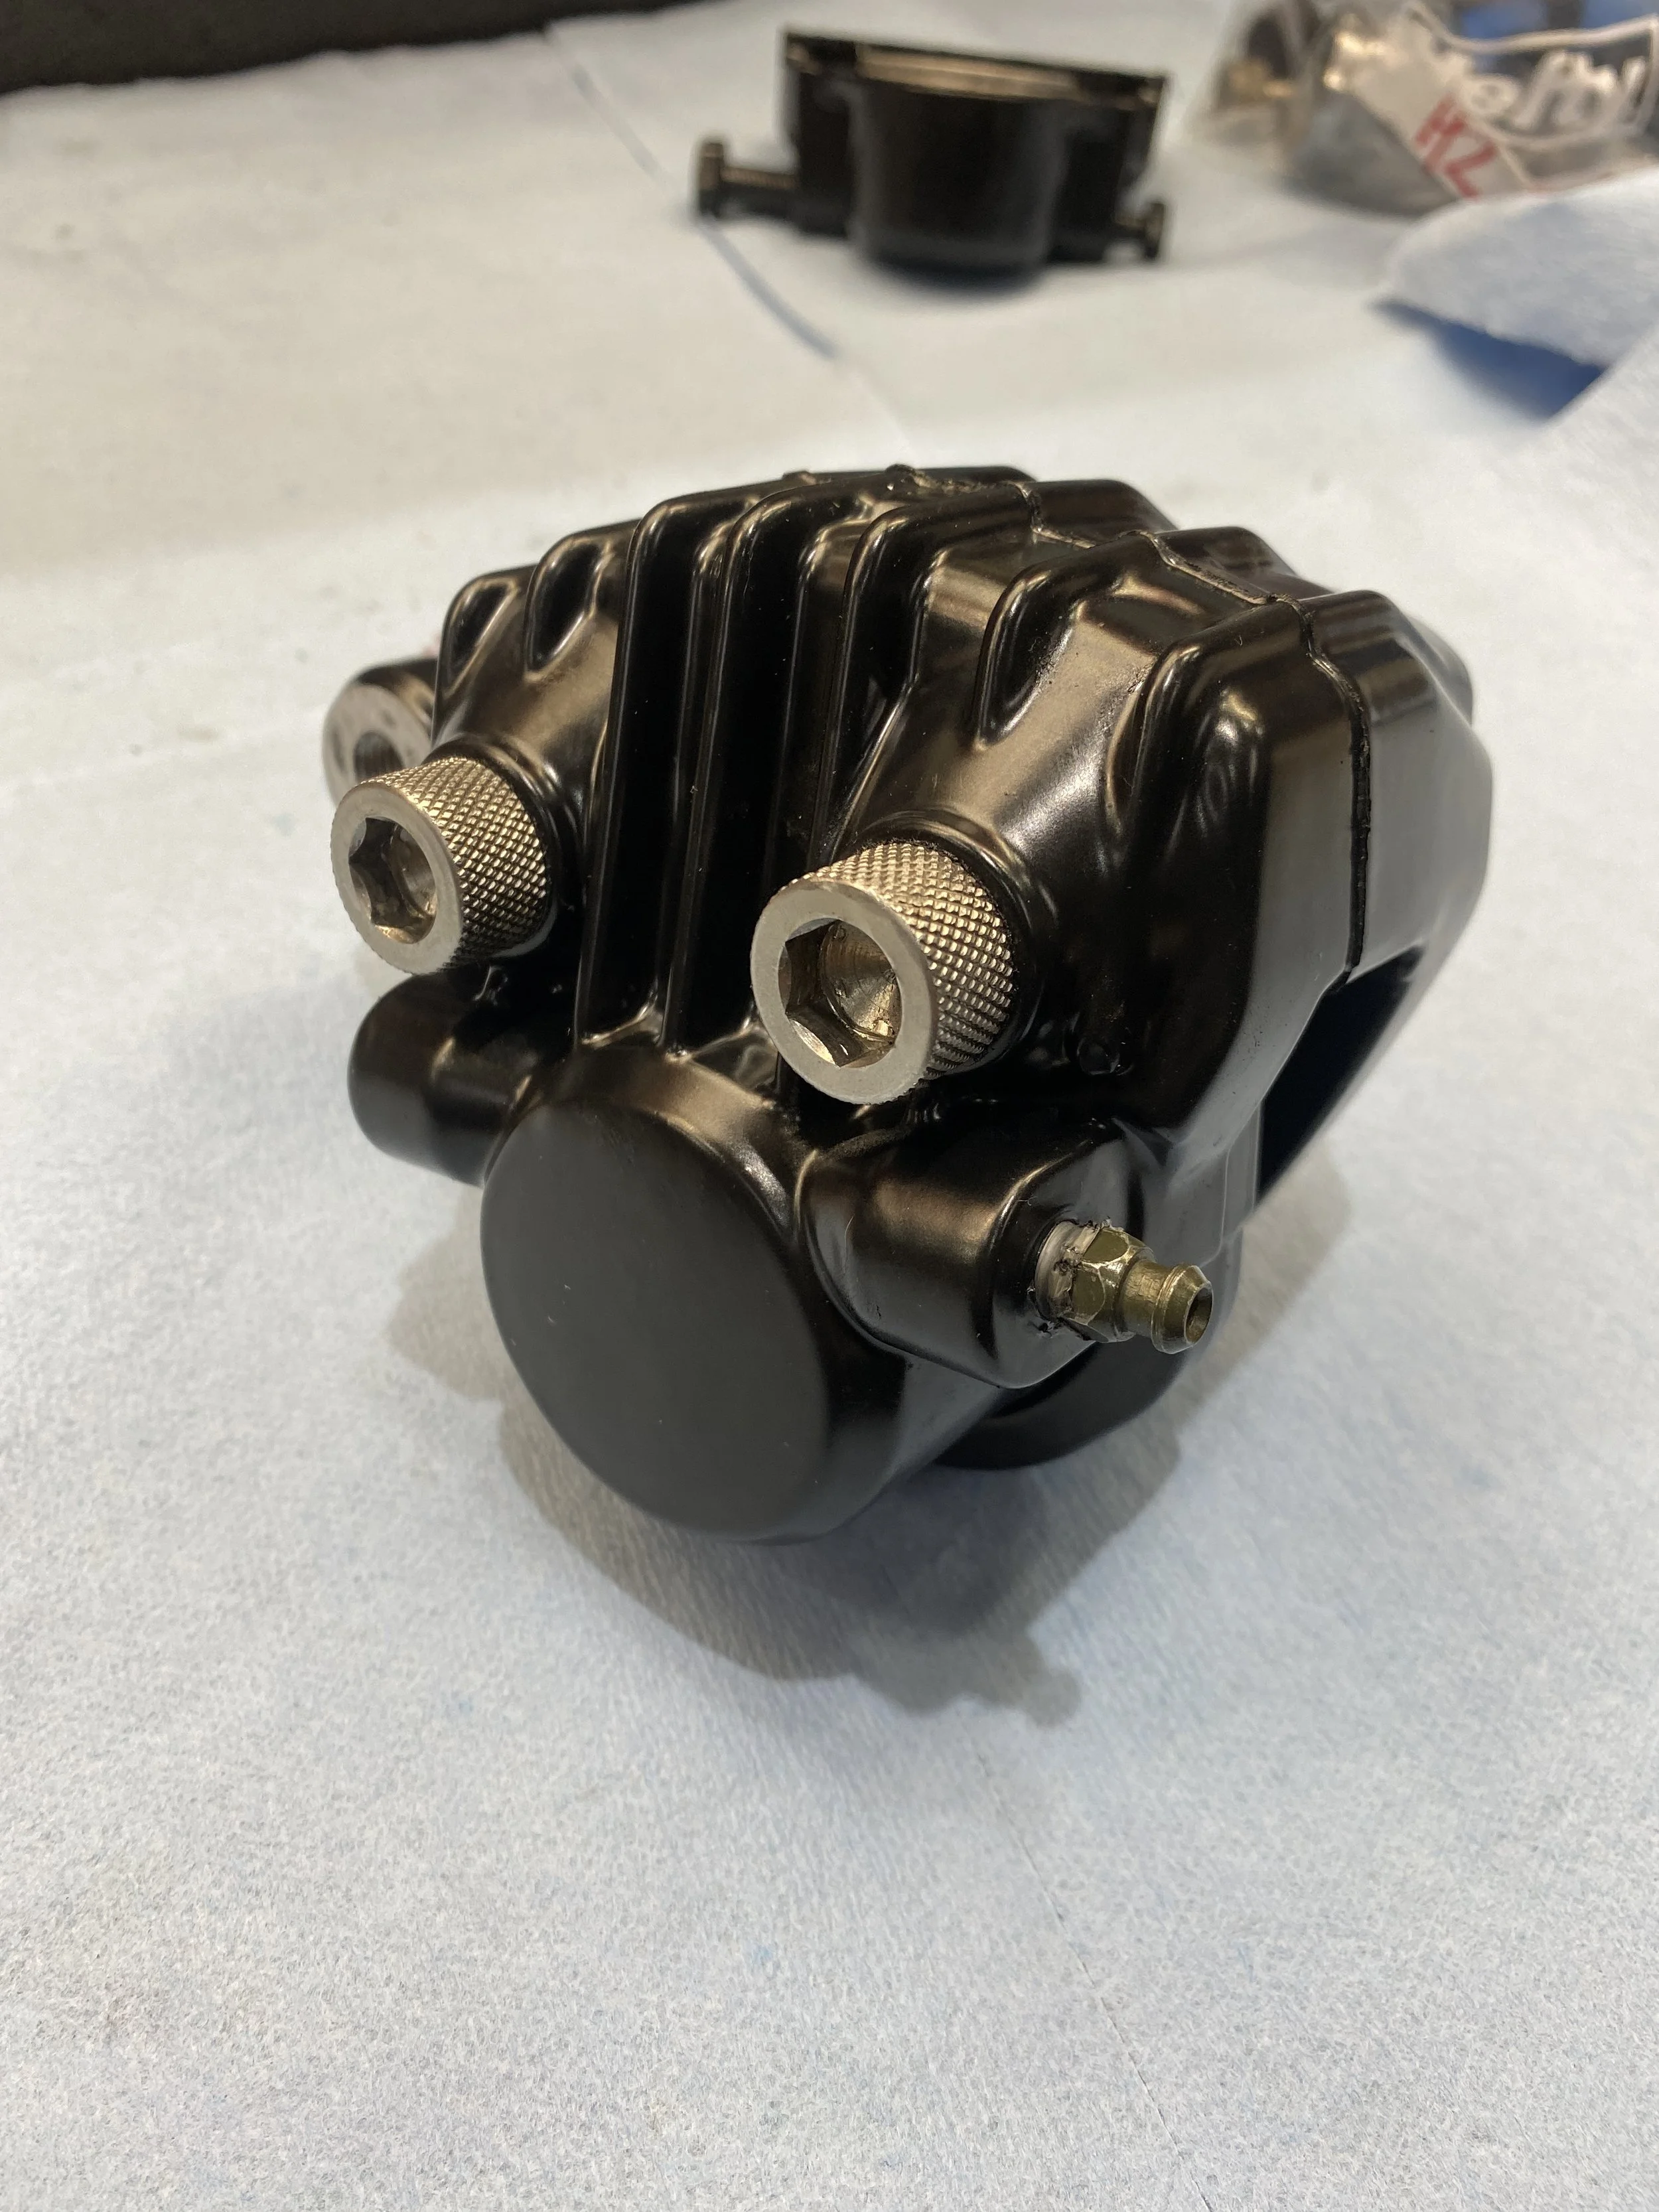
Semi finished article, since there's likelihood of very destructive liquid getting out and stripping all the paint off I don't paint the caliper until I'm sure it works liquid tight. Regardless of how it looks the double disc set up works fantastic.

If you don't know the history of you rear shoes, it's best to replace them. There was a time where the brake linings were separating from the shoes which initiated a sudden and unfortunate rear wheel lock.

Classic wear limit sticker available from Diablo cycle.
Update as from Apr 2022
I decided to rip off all the calipers on the 3 H2’s and send them to the powder coater to get them covered once and for all. No paint I had used in the past, no matter how well I prepped them, managed to stick to the calipers. It didn’t help that I am of course the worst painter so I decided to let a third party take care of it. Superior Powdercoat and Sandblasters of Nashville.
Now you see them….
…now you don’t.
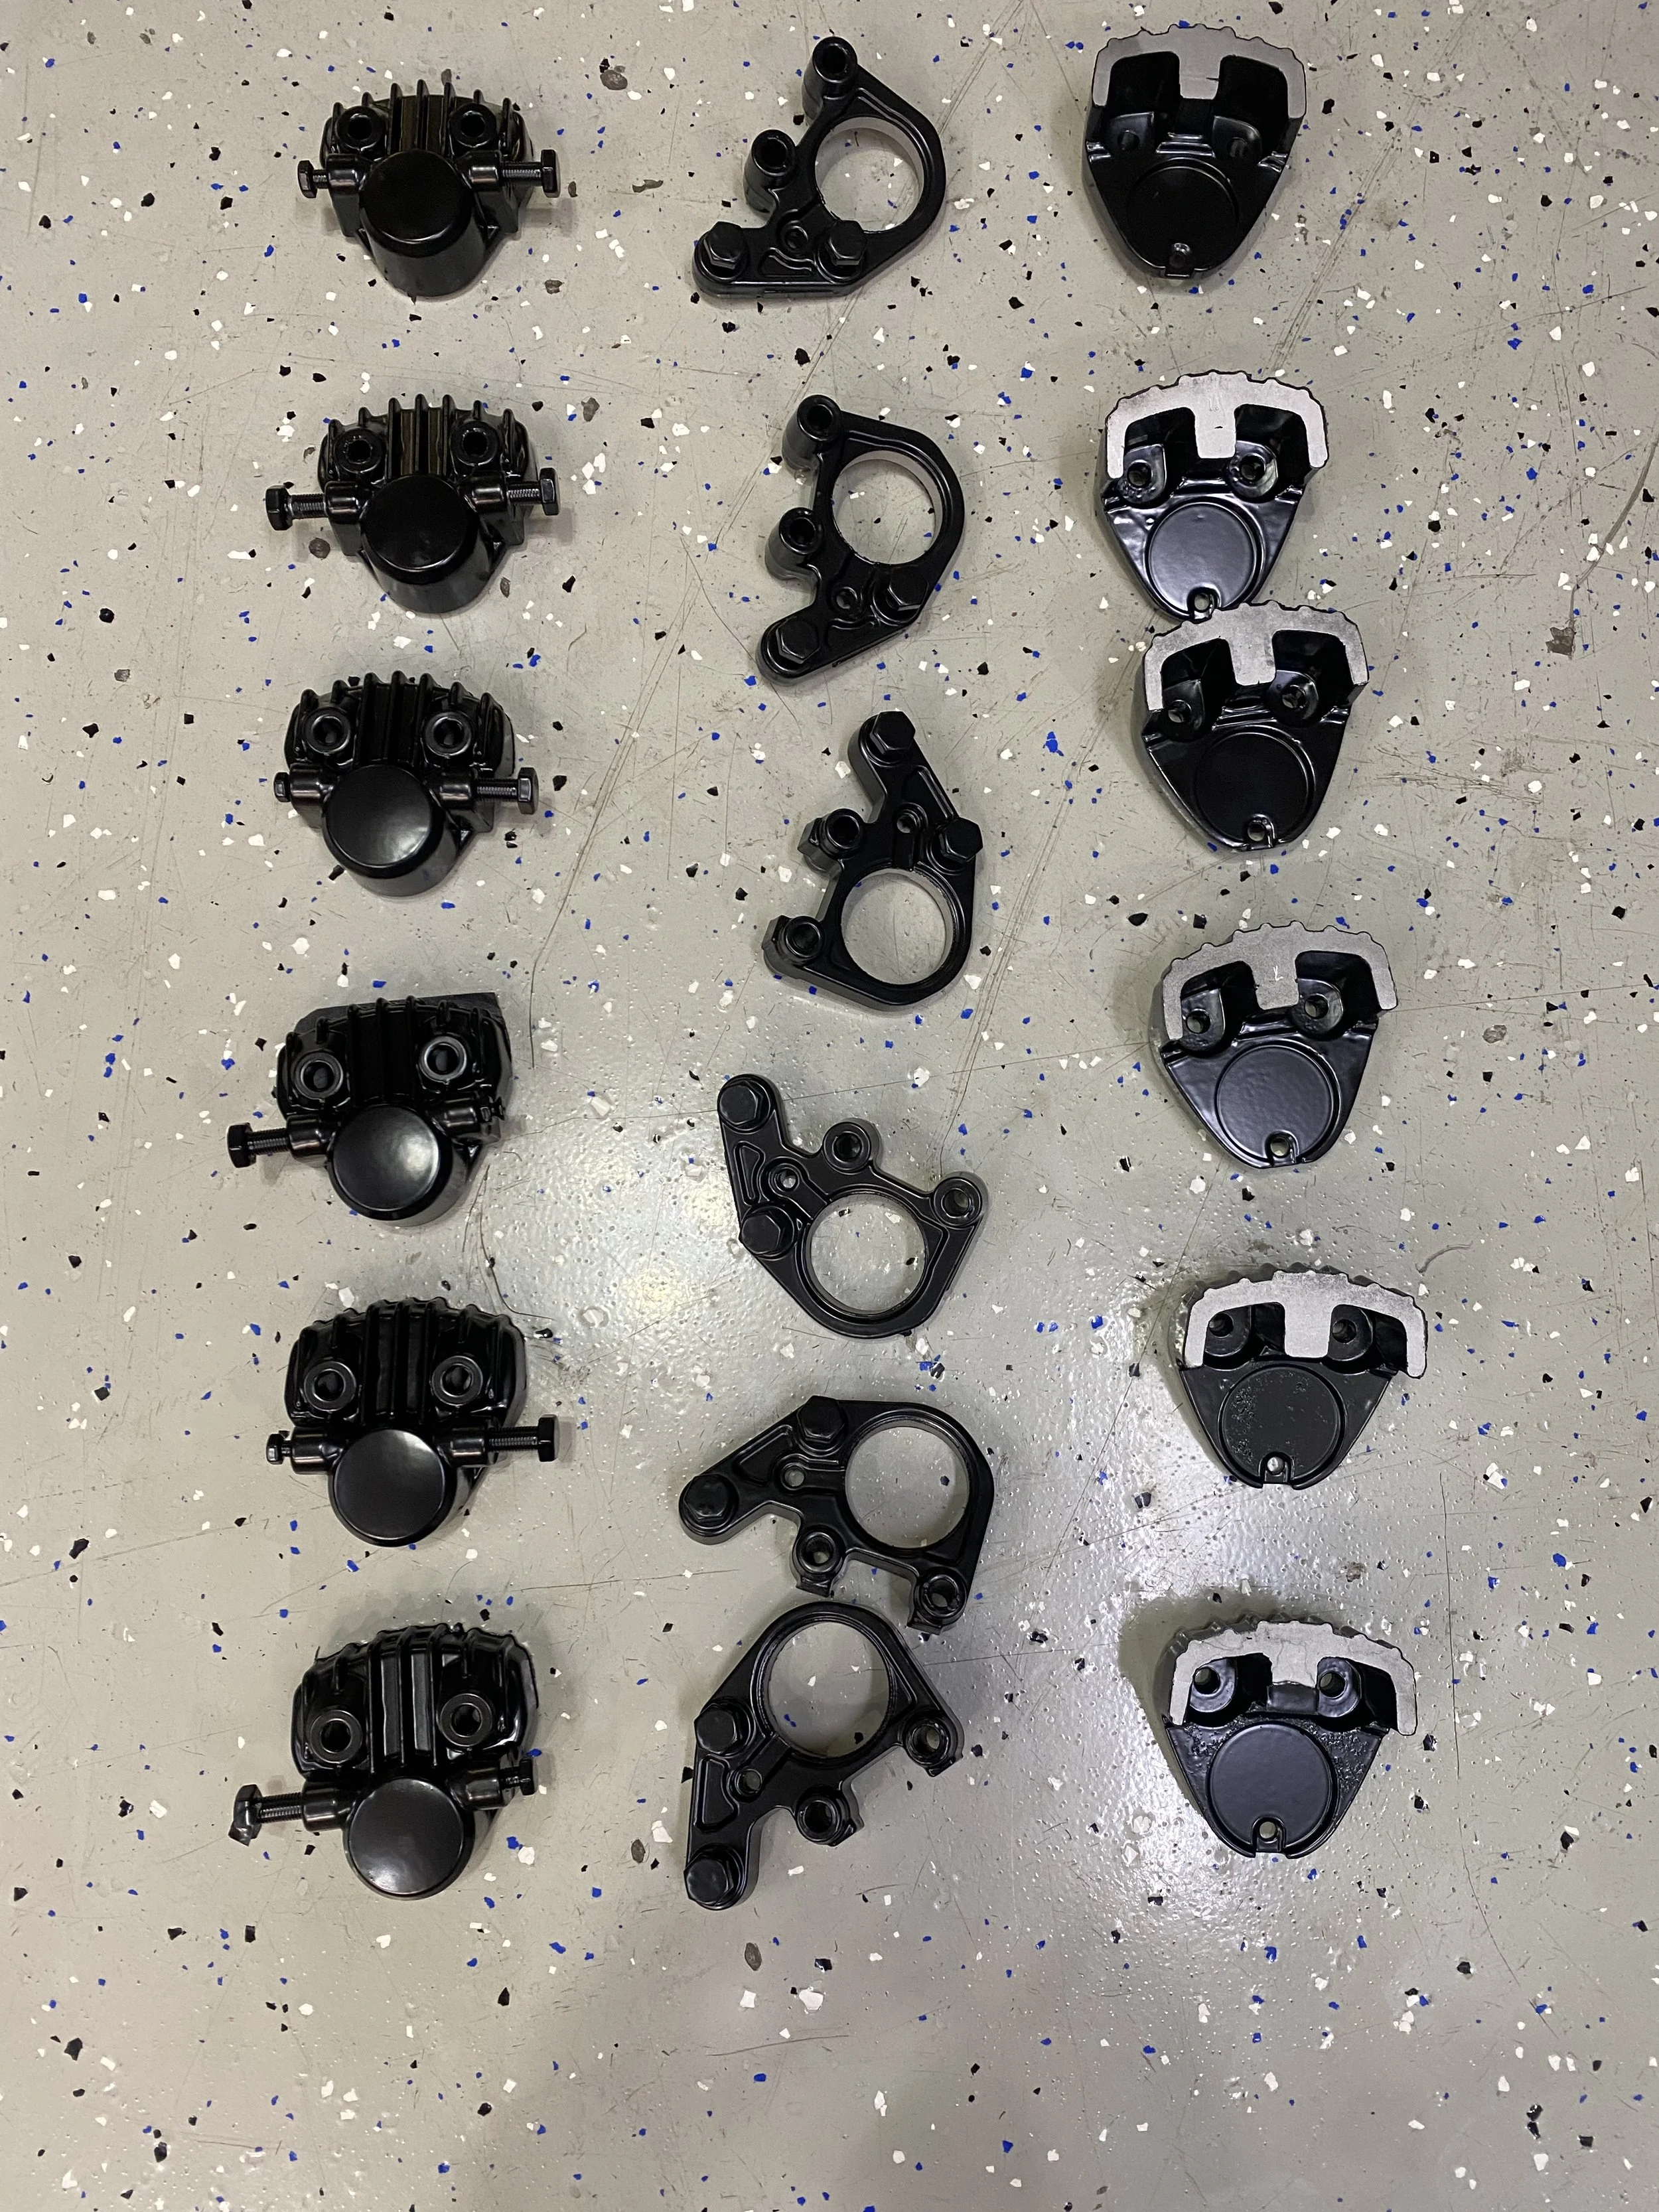
And they're back.

Looking like some kind of Star Wars Droid head, I spent some not insignificant money on bolts to help prep them and protect the threads
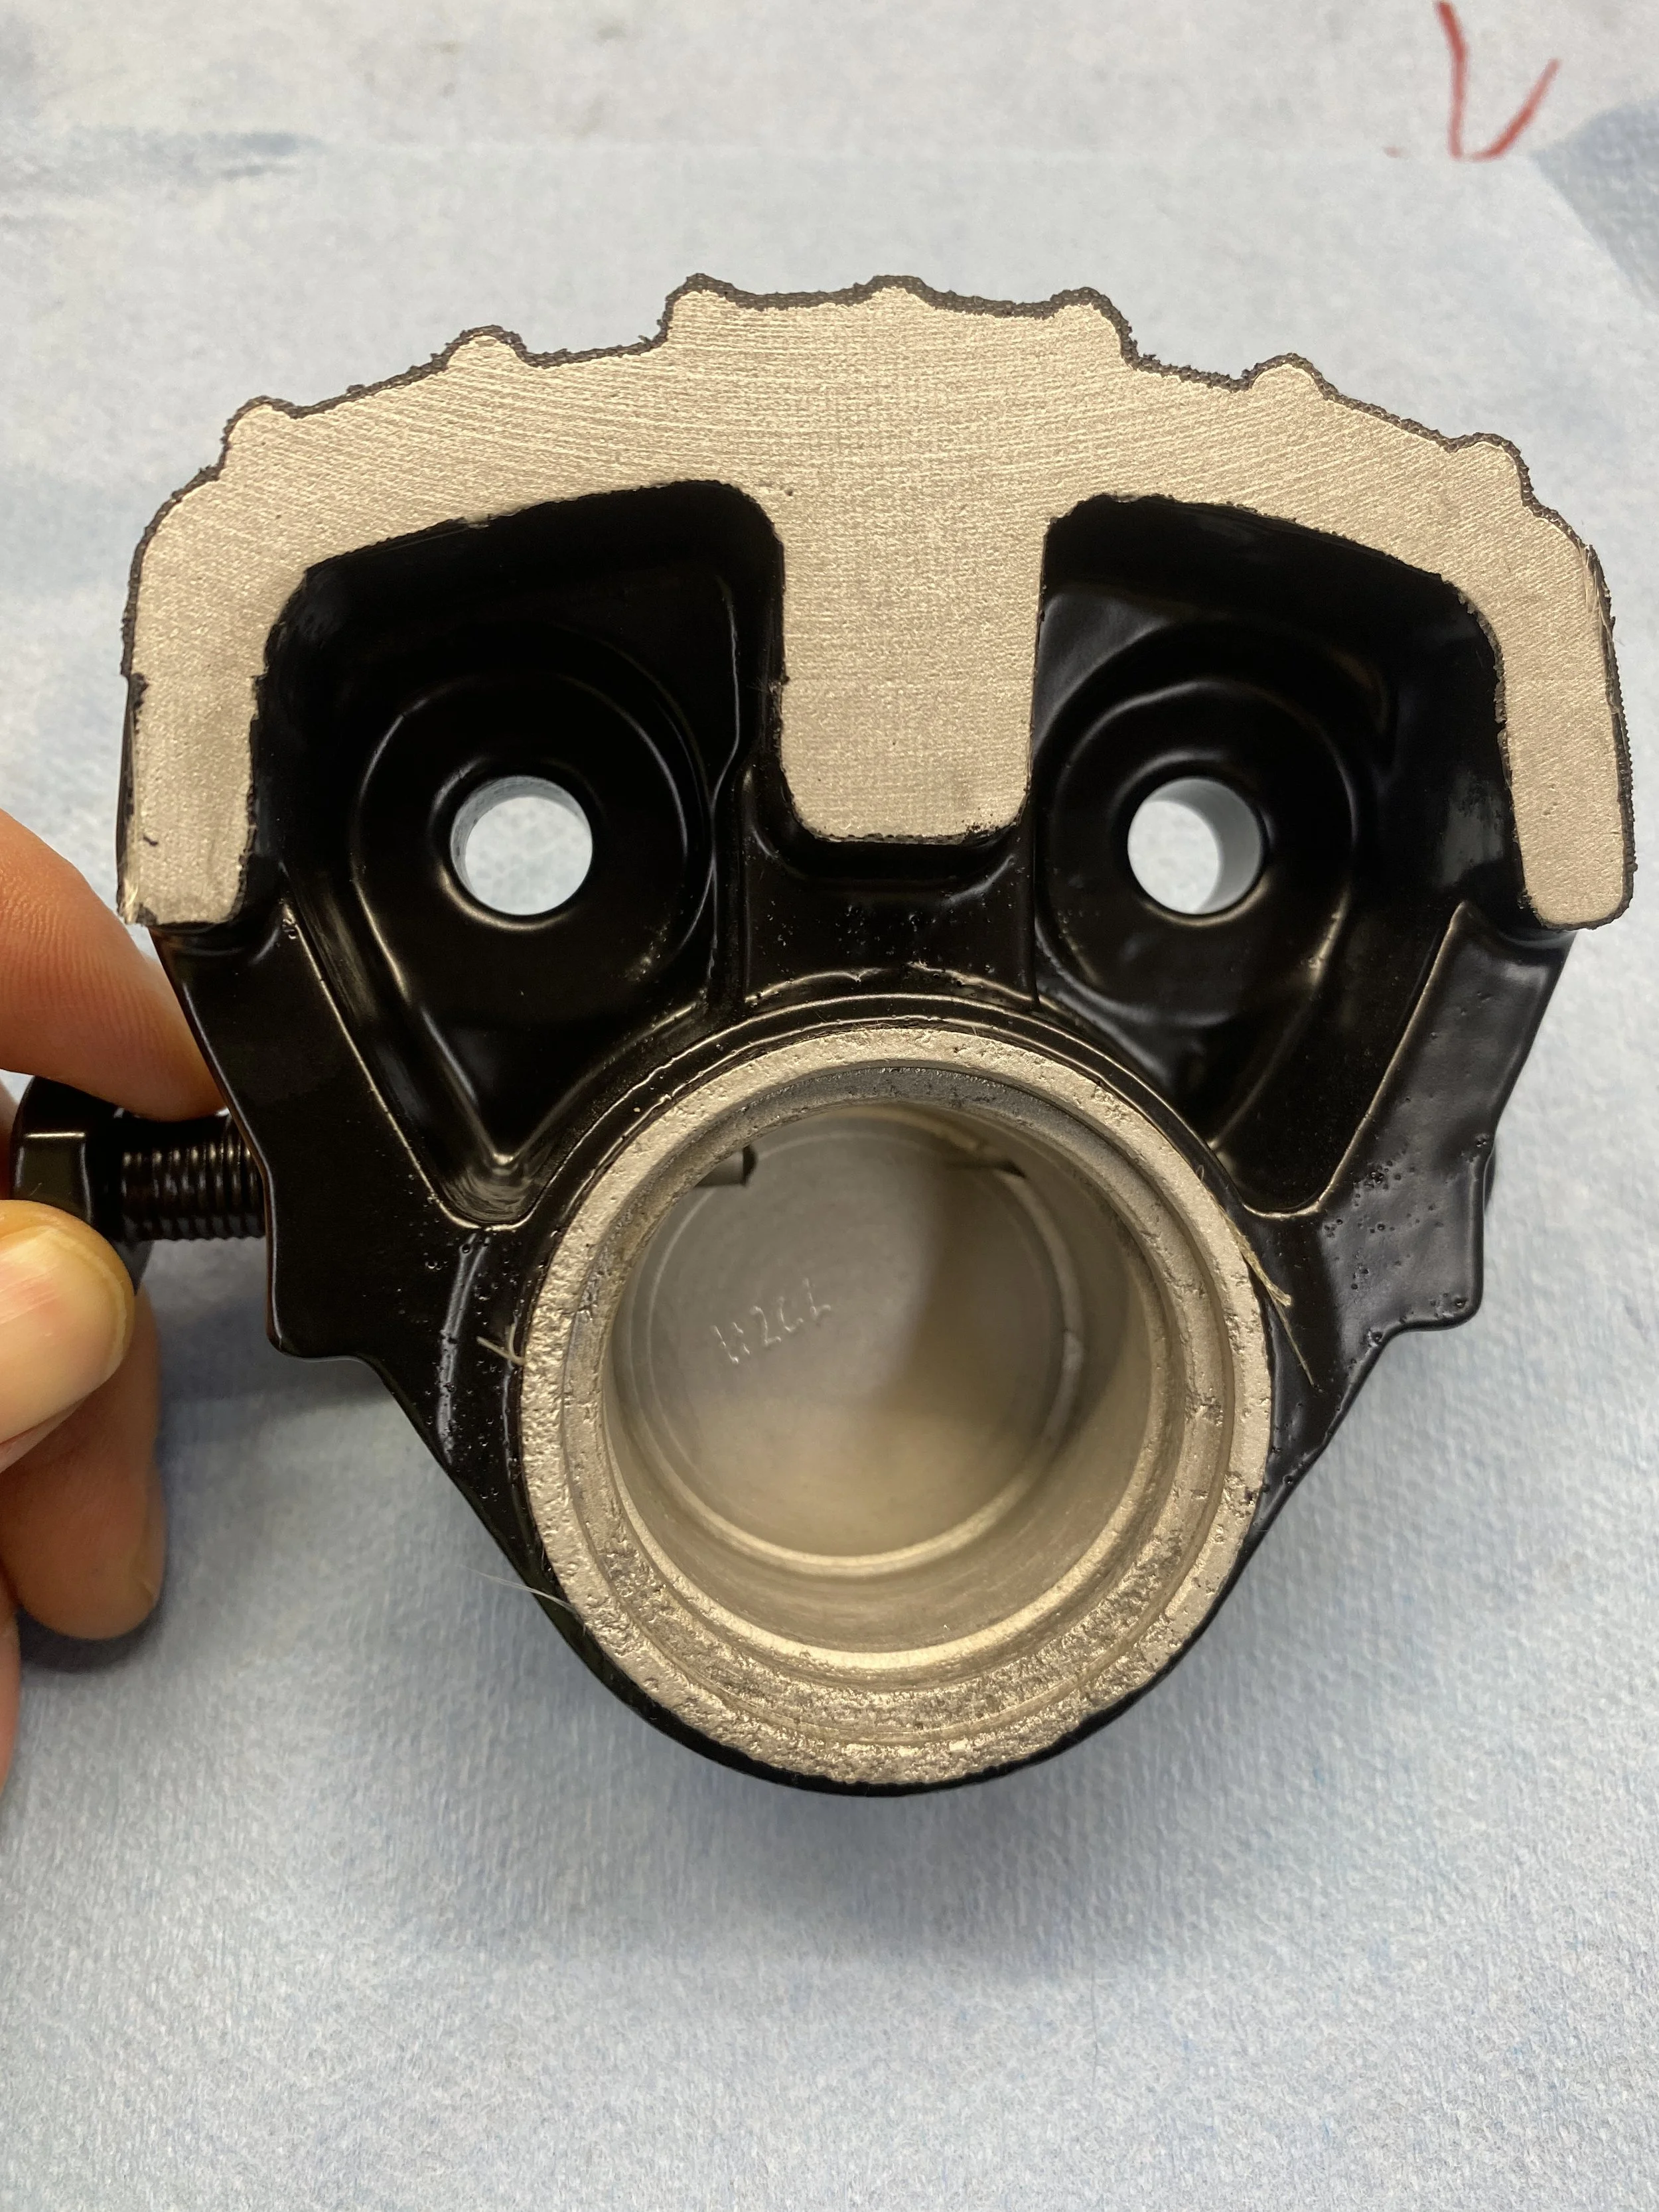
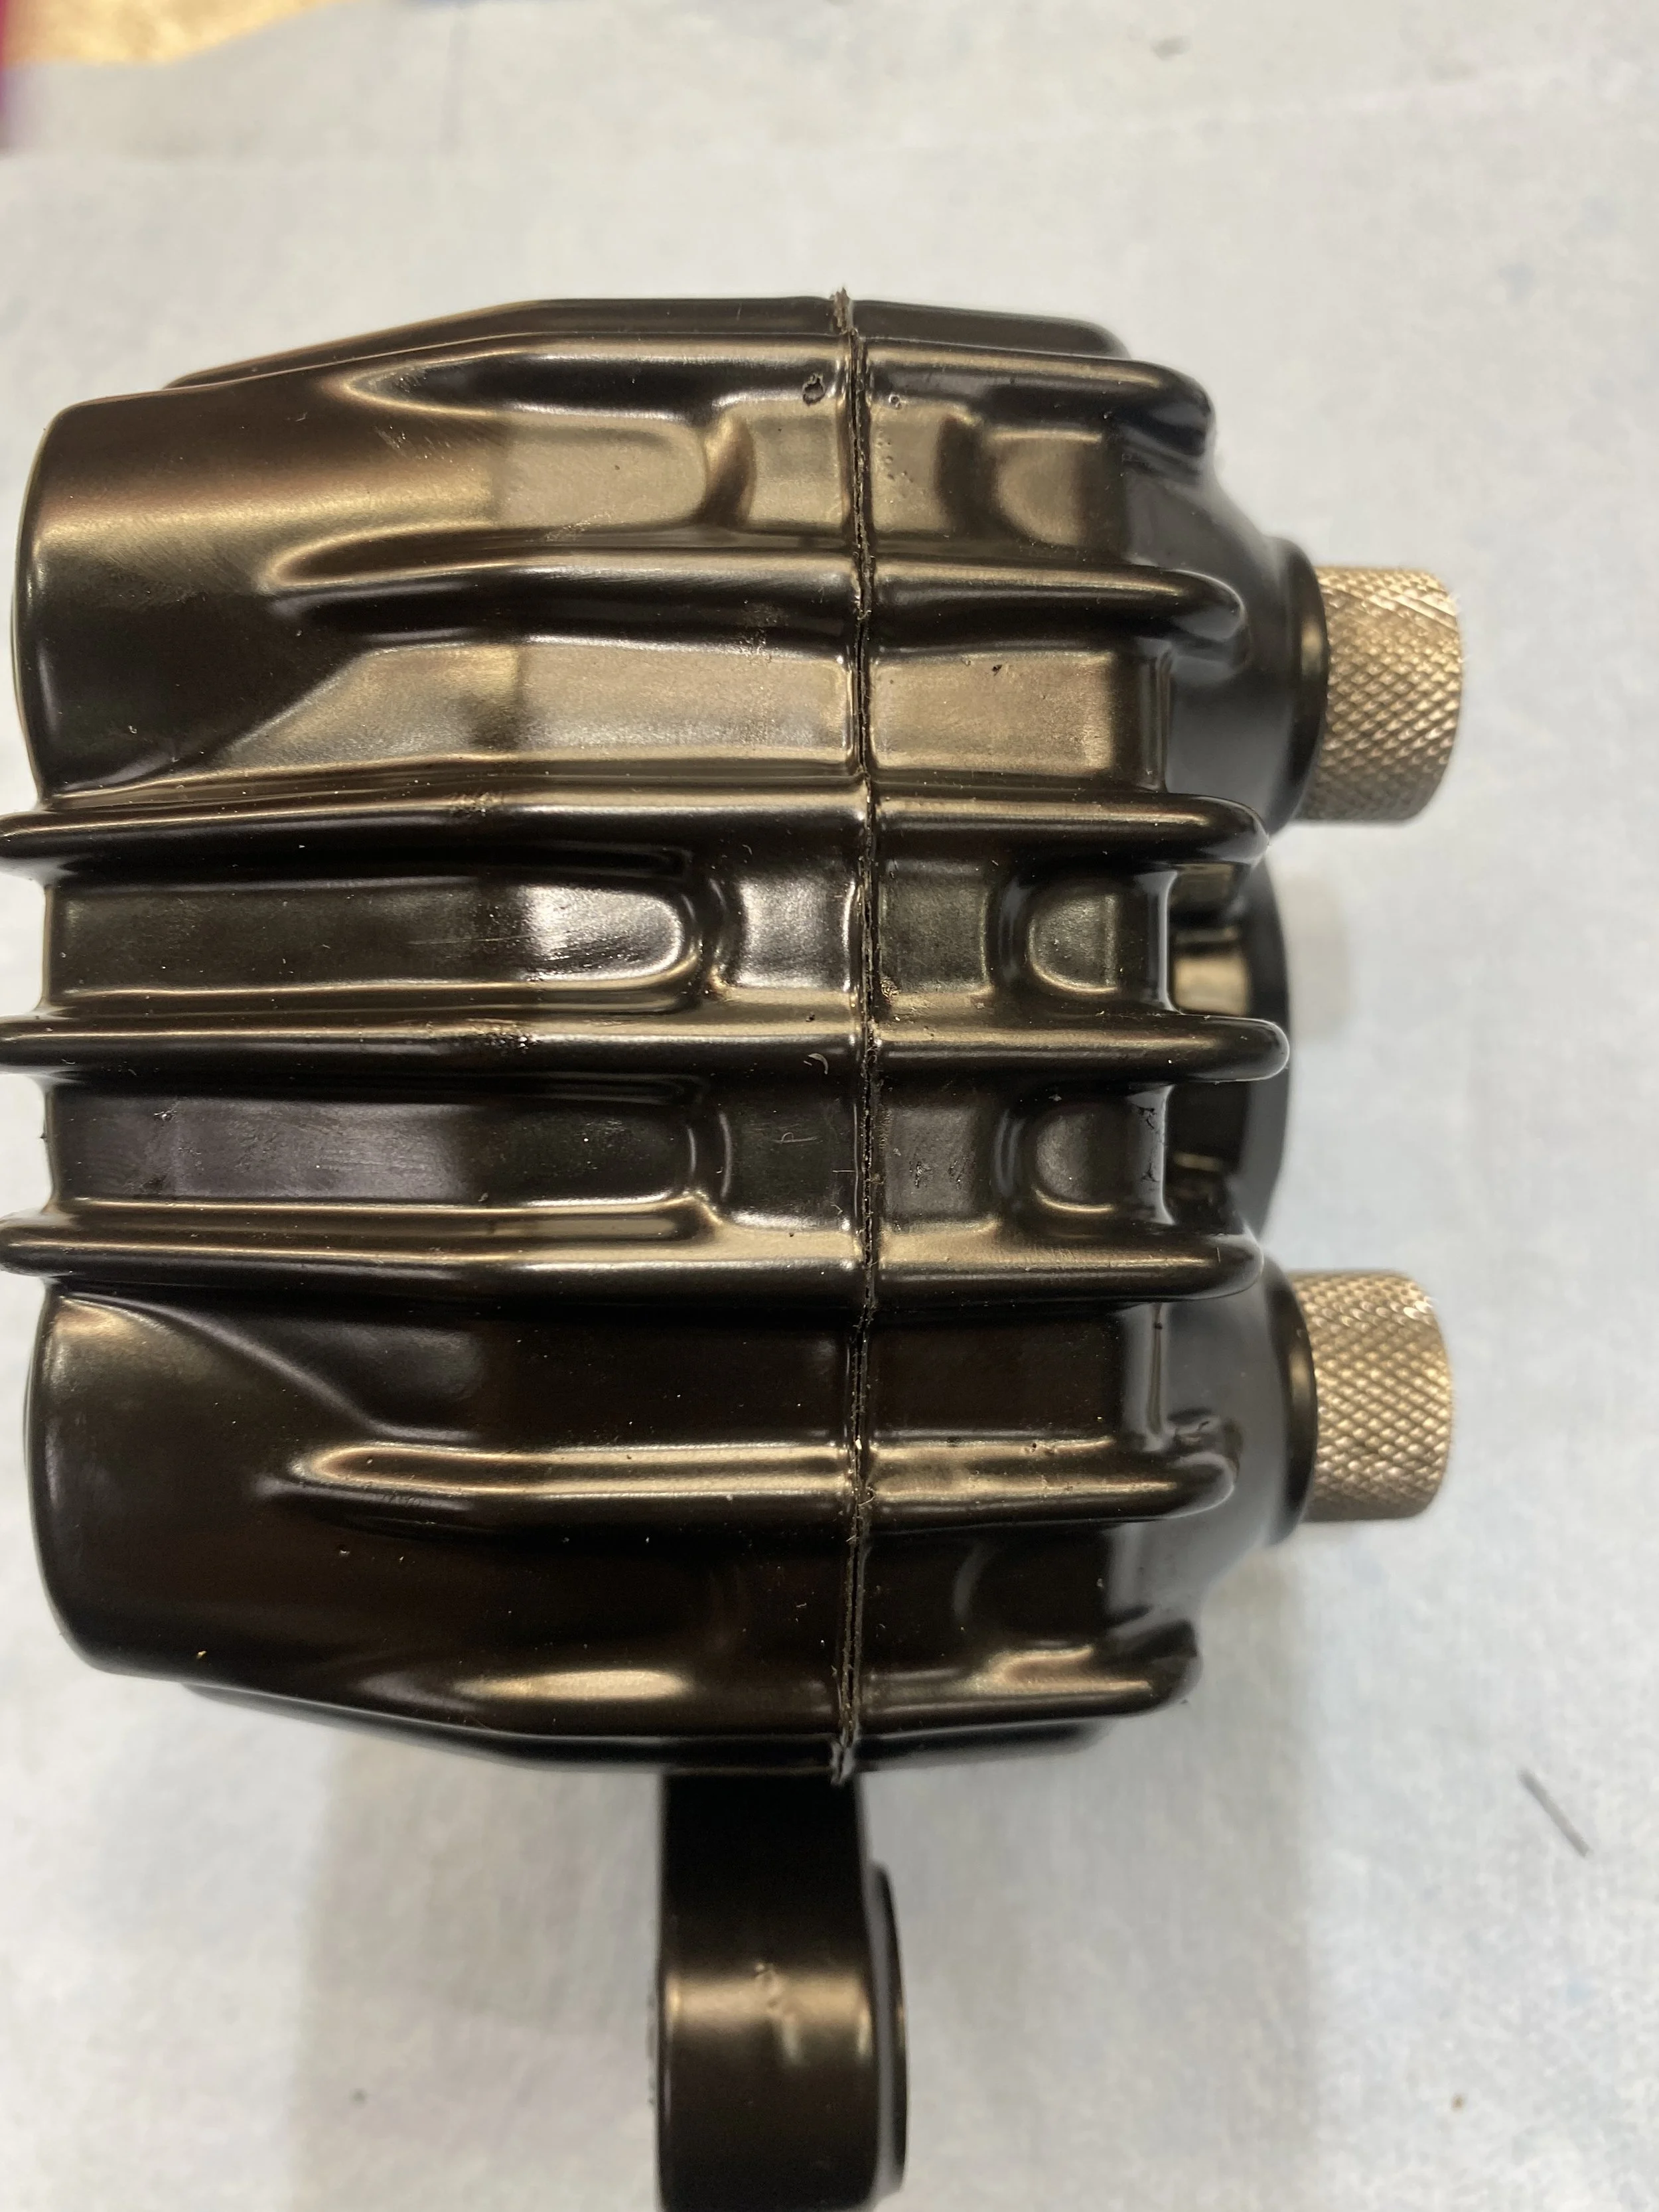
look at the top...that's how thick the coating is. Brett gives everything 2 coats.
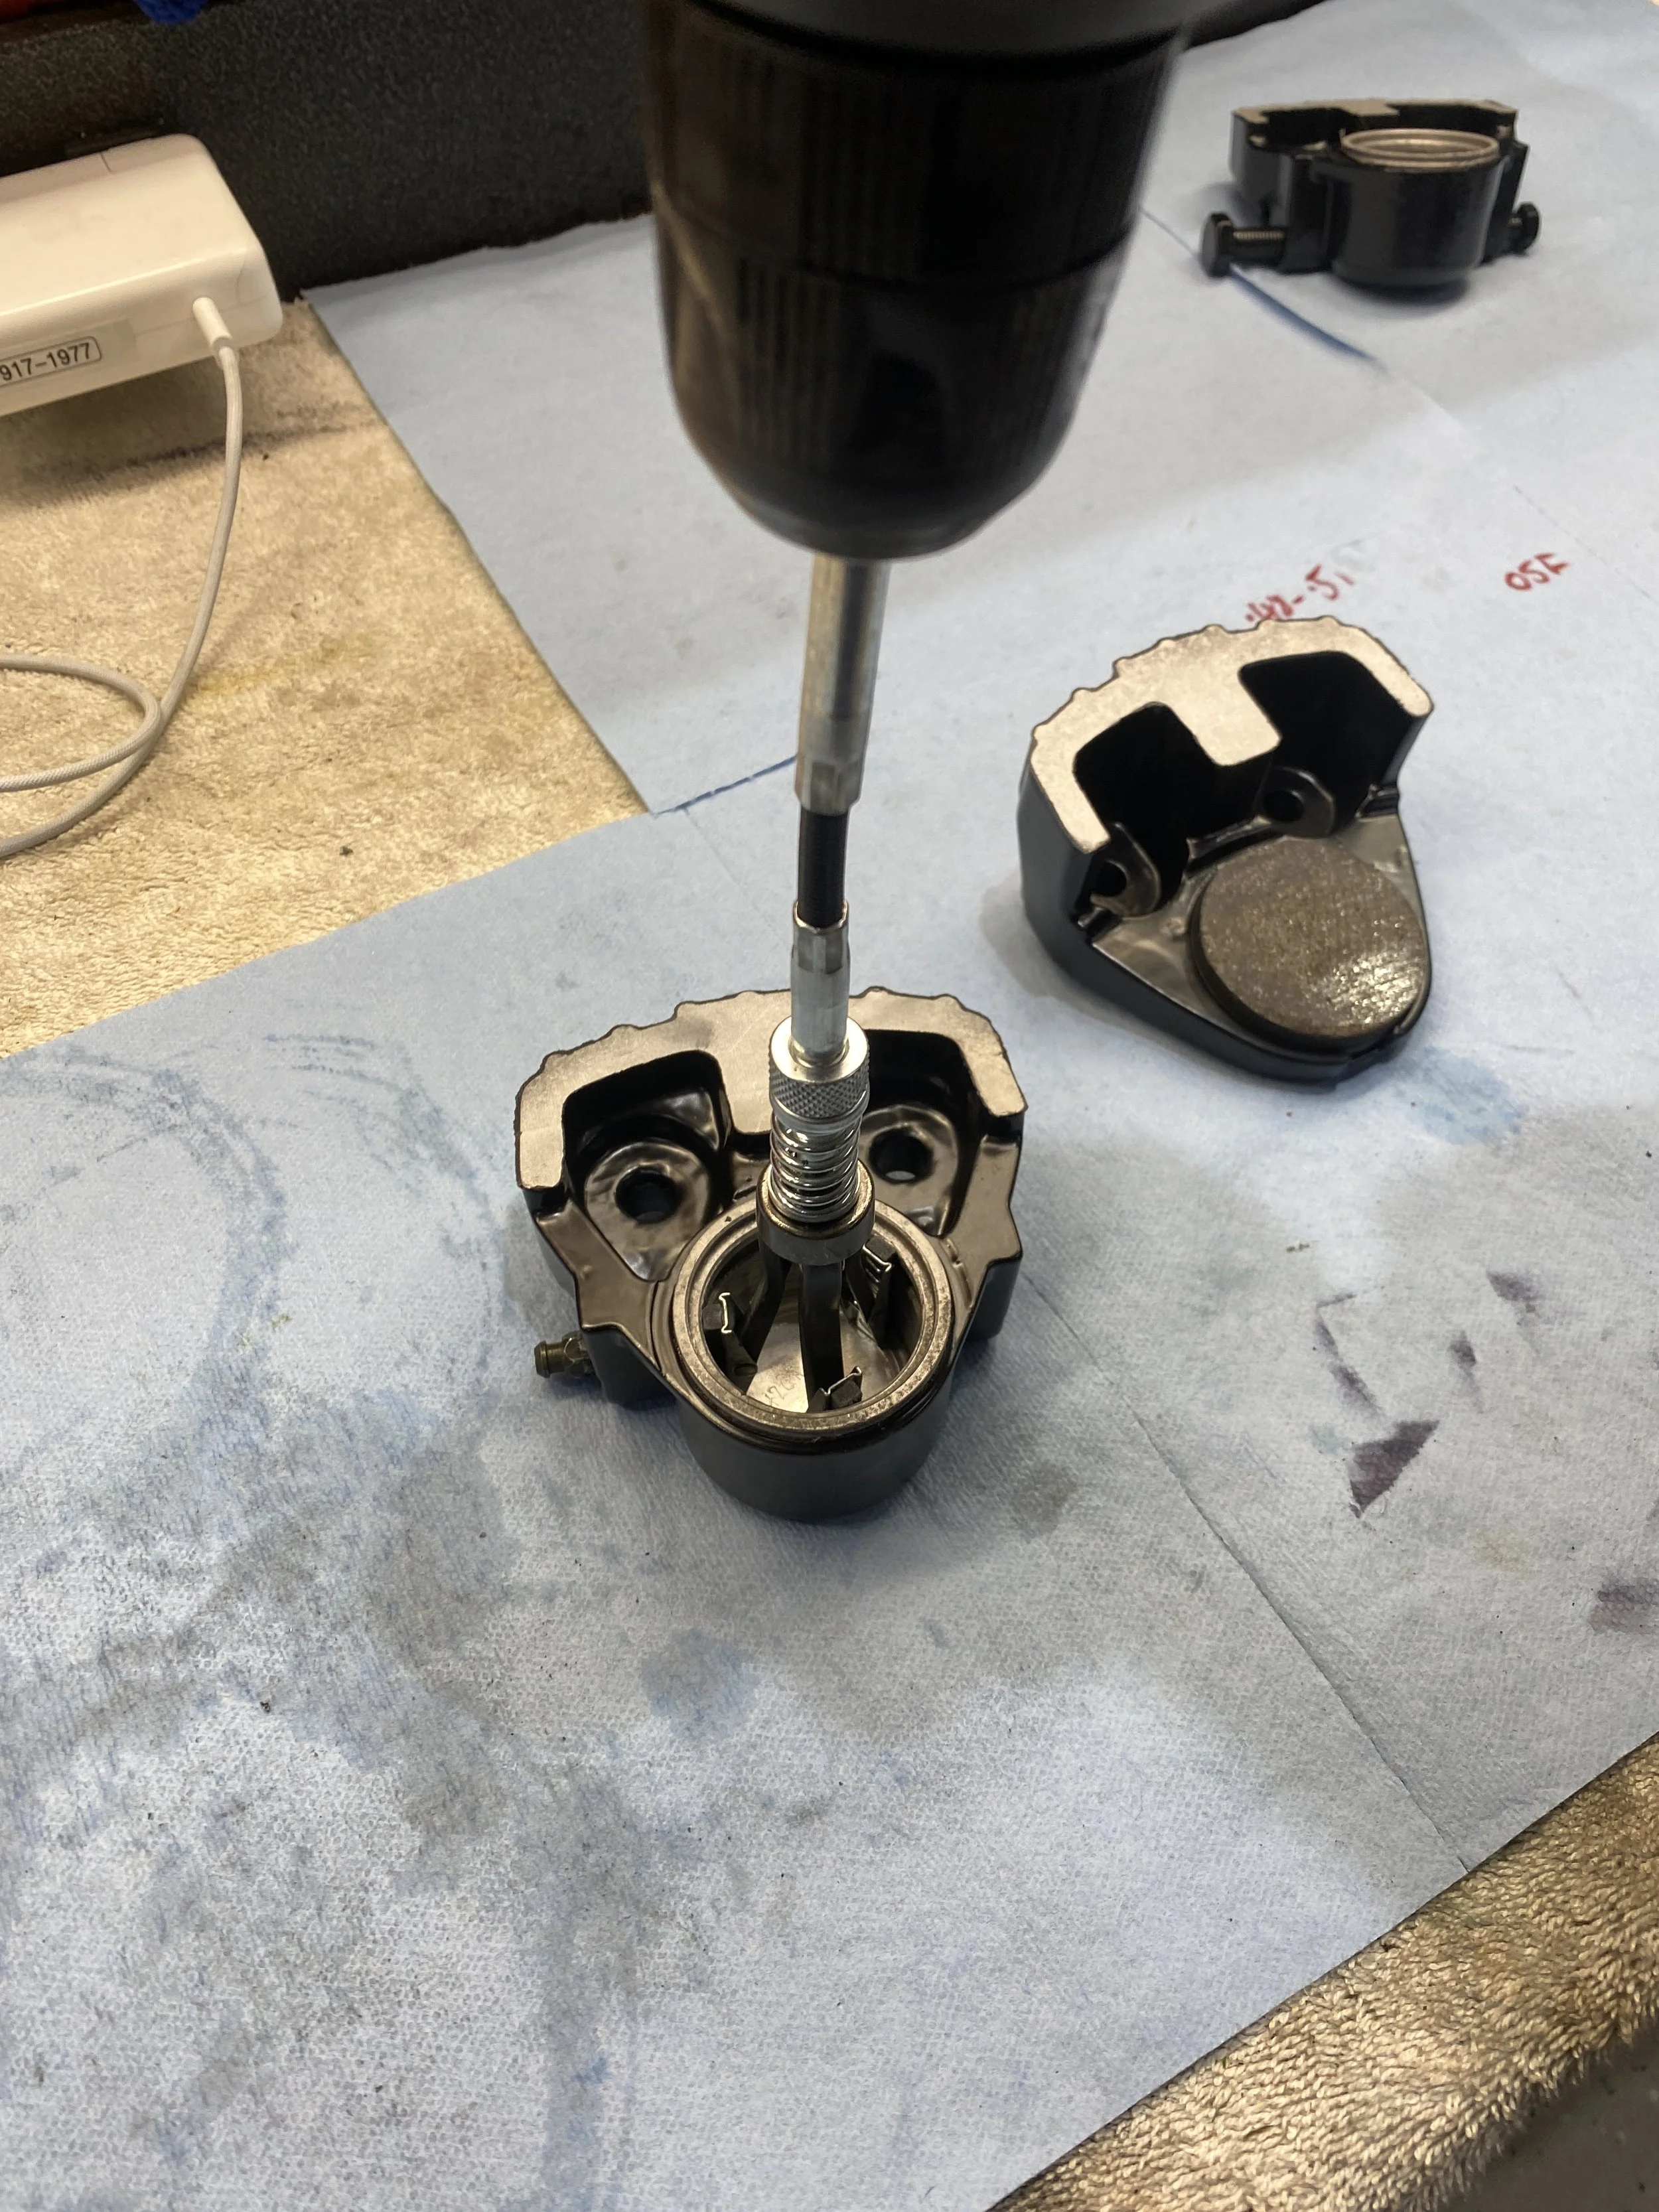
Just a wee light hone while they are apart.
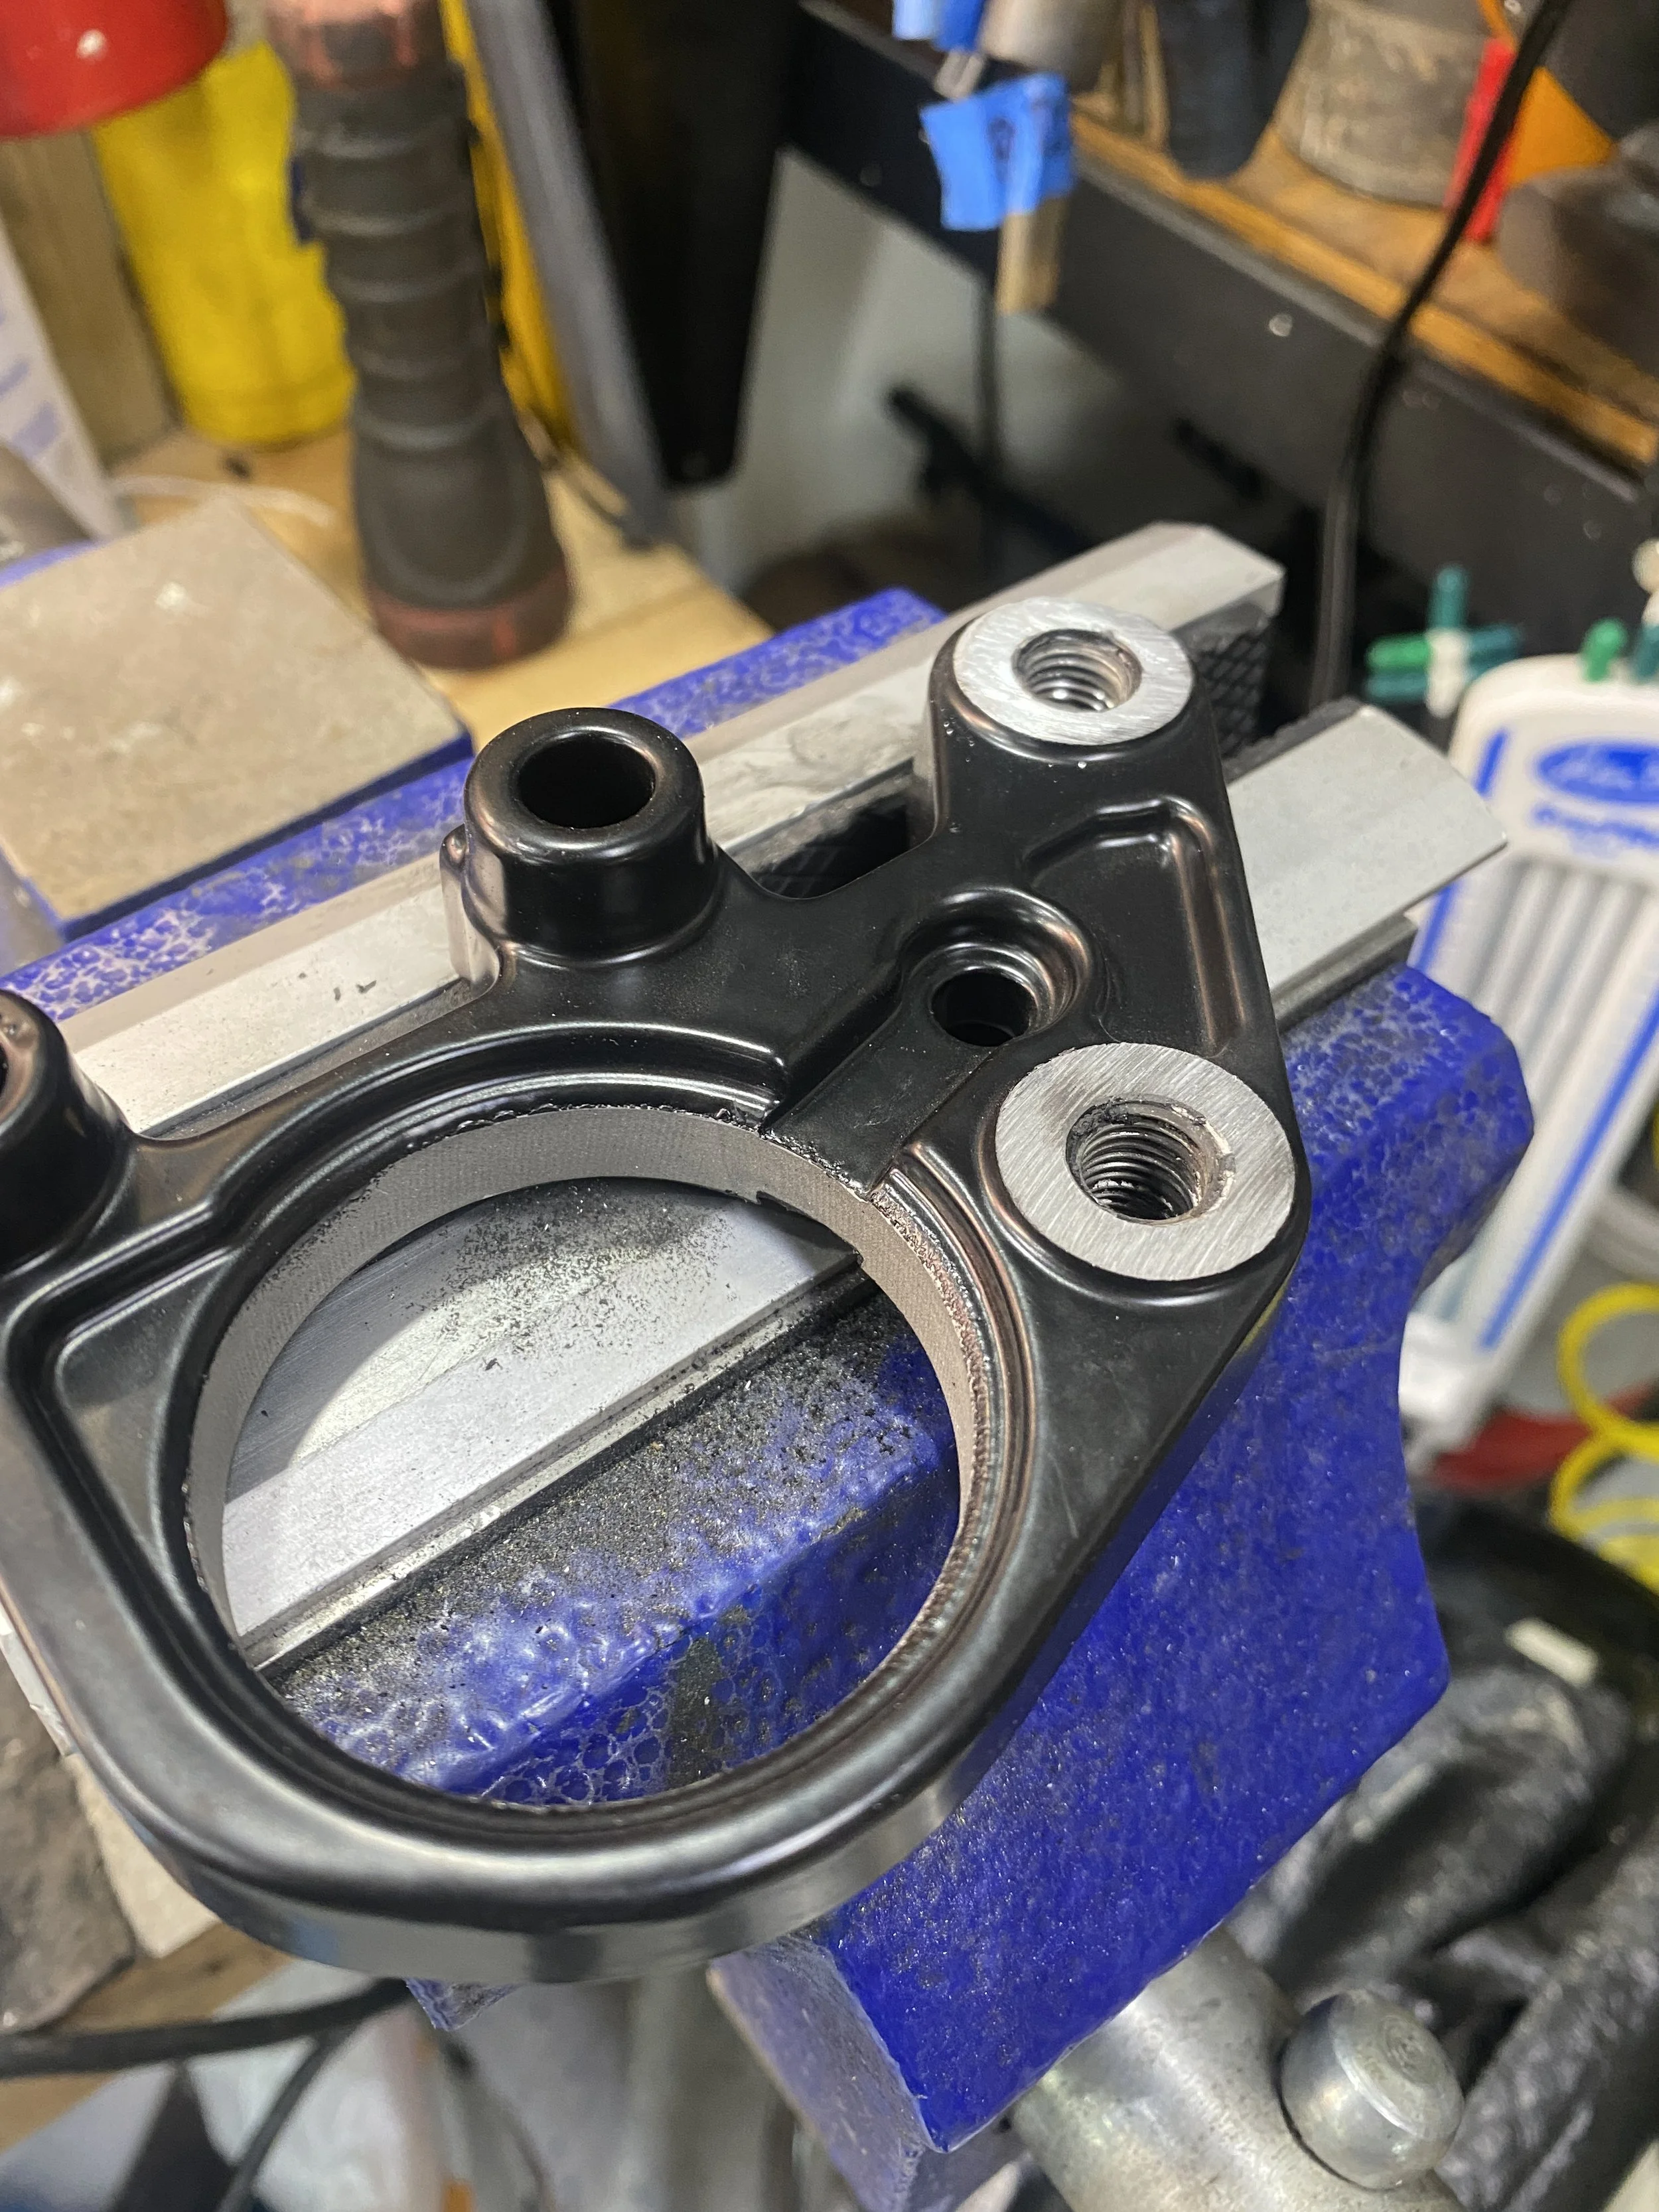
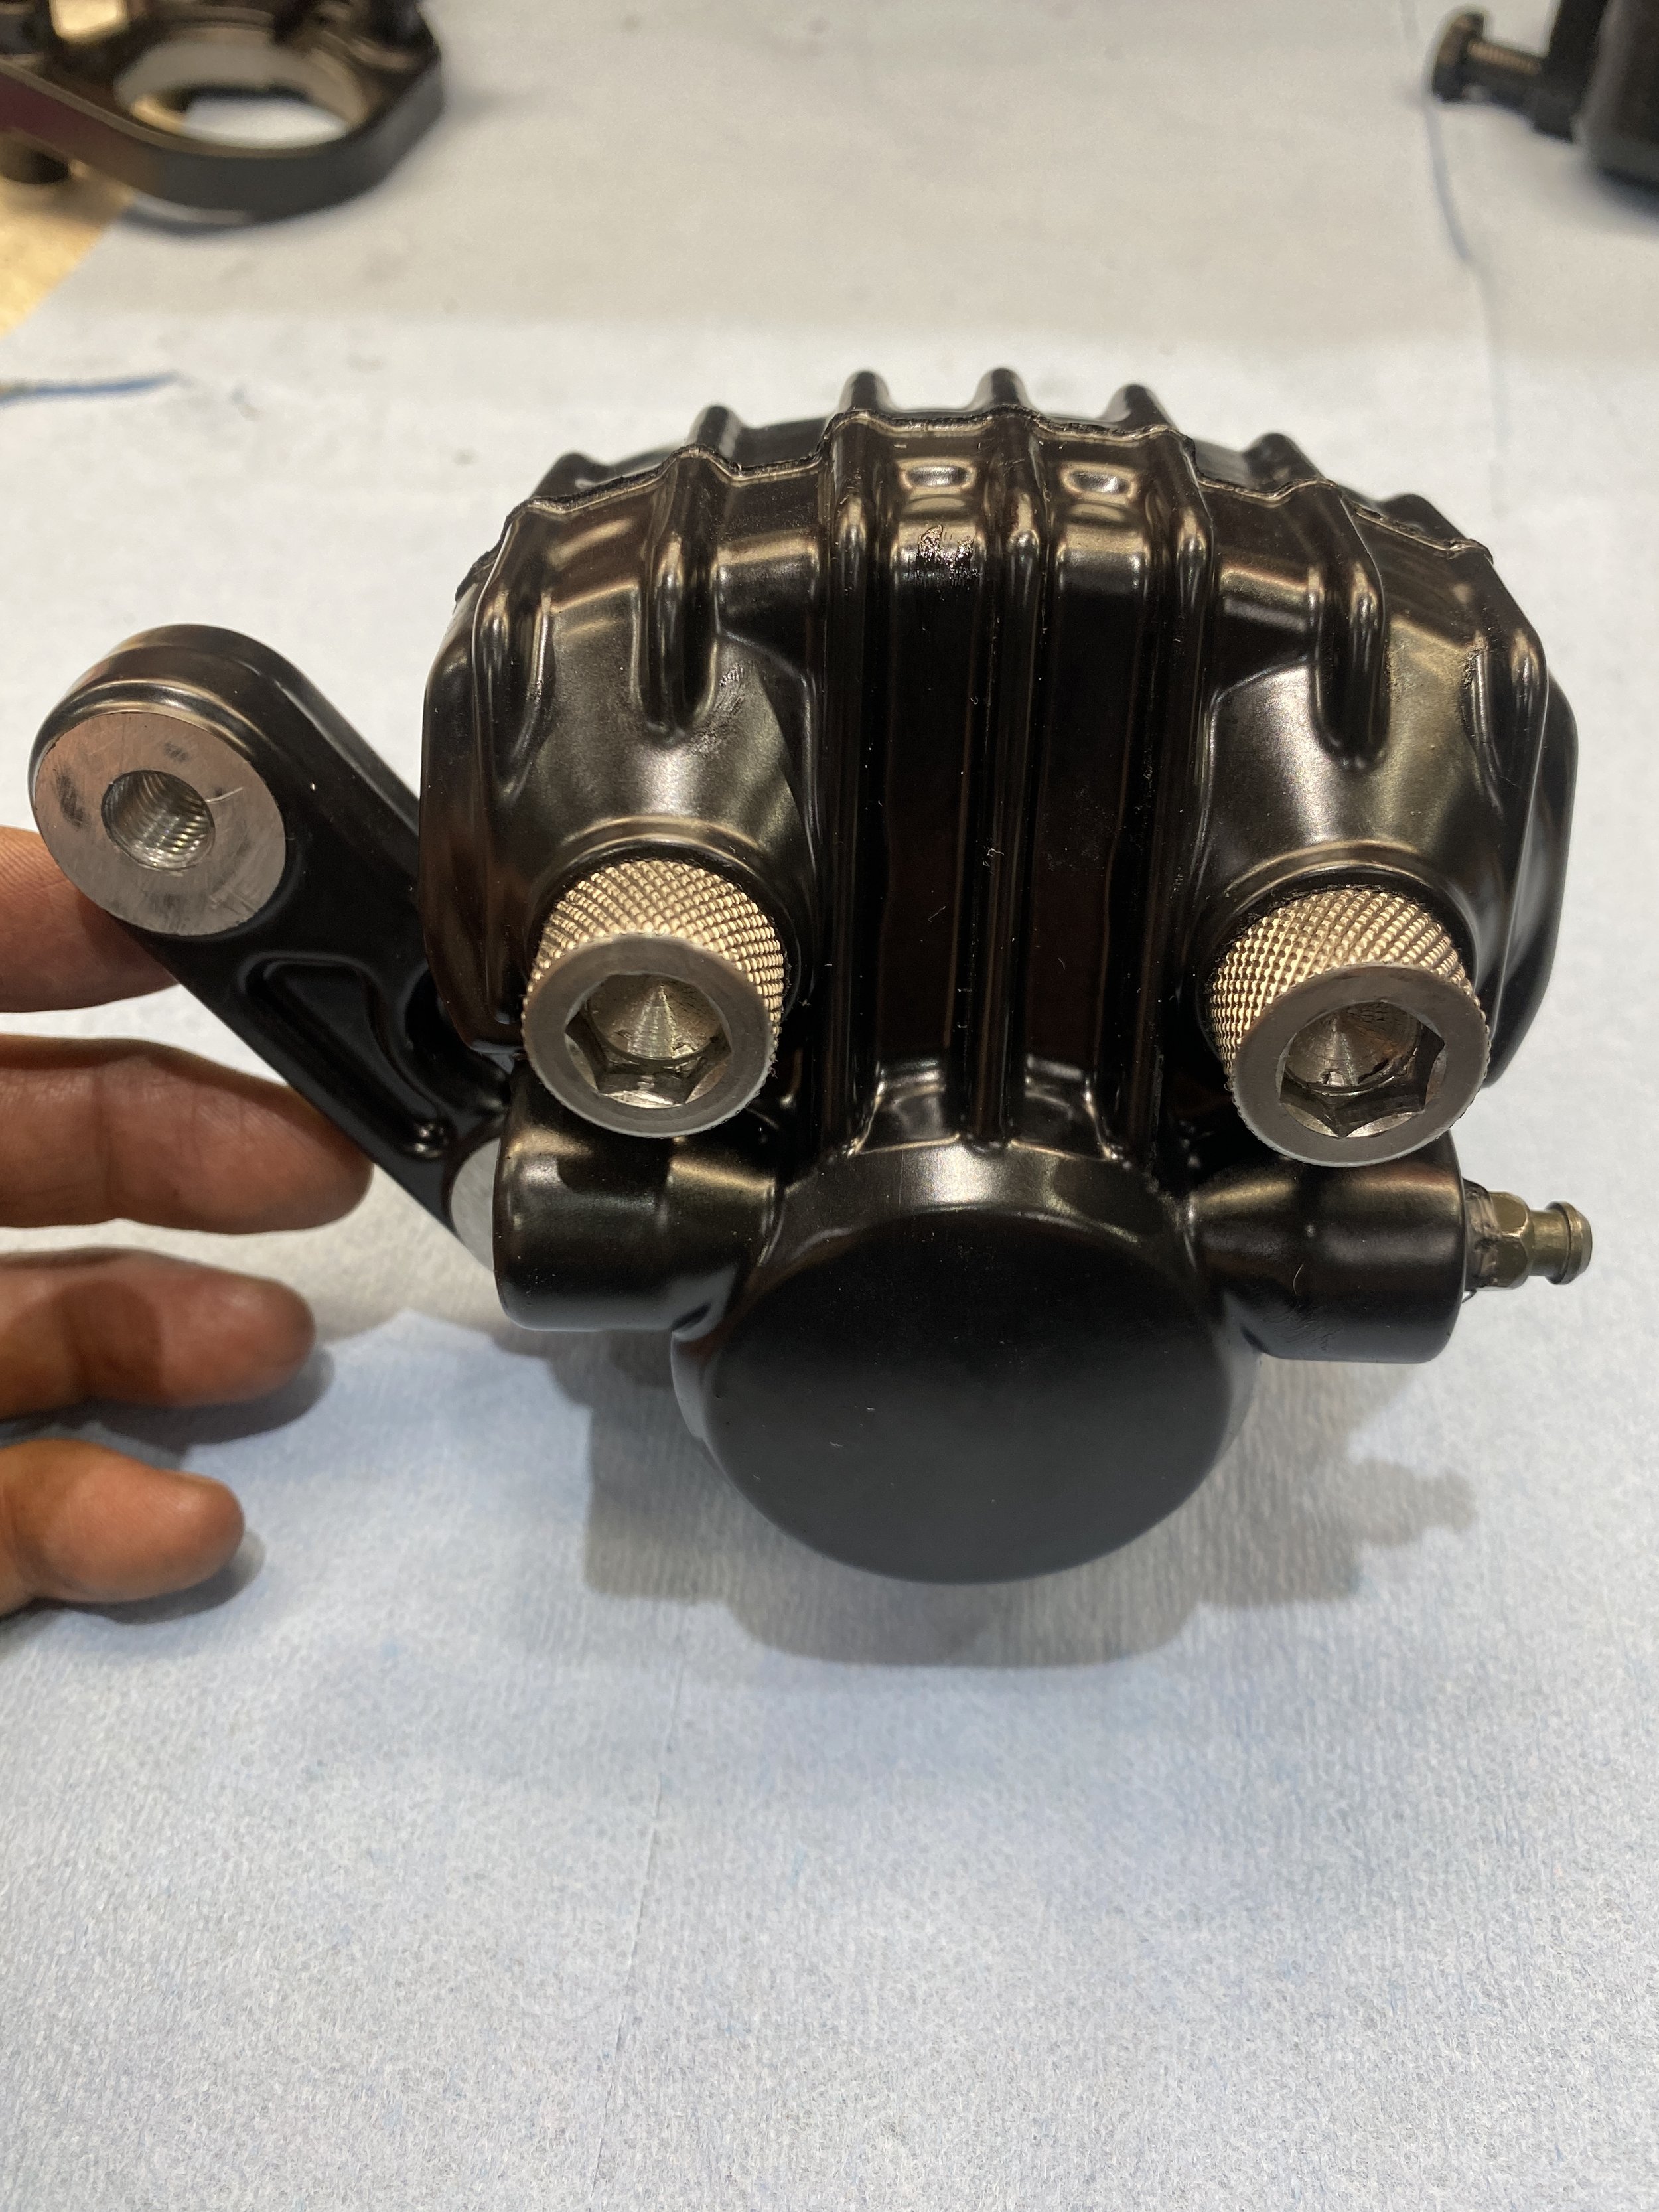
Removed the coating from these places to allow the caliper holder slide into the fork bottoms. The inner ring where the pad sits had been carefully masked by the coaters.
Removed the coating in the pad seat here just to ensure that when I get brand new pads one day, they will fit.
Nice and clean in there.
Honed.
Assembly

I love these stainless steel knurled caliper bolts from https://classicbikefasteners.co.uk/ £28 a set though. Click on the pic and it will take you there.
Not for the purists maybe but it looks pretty sweet.
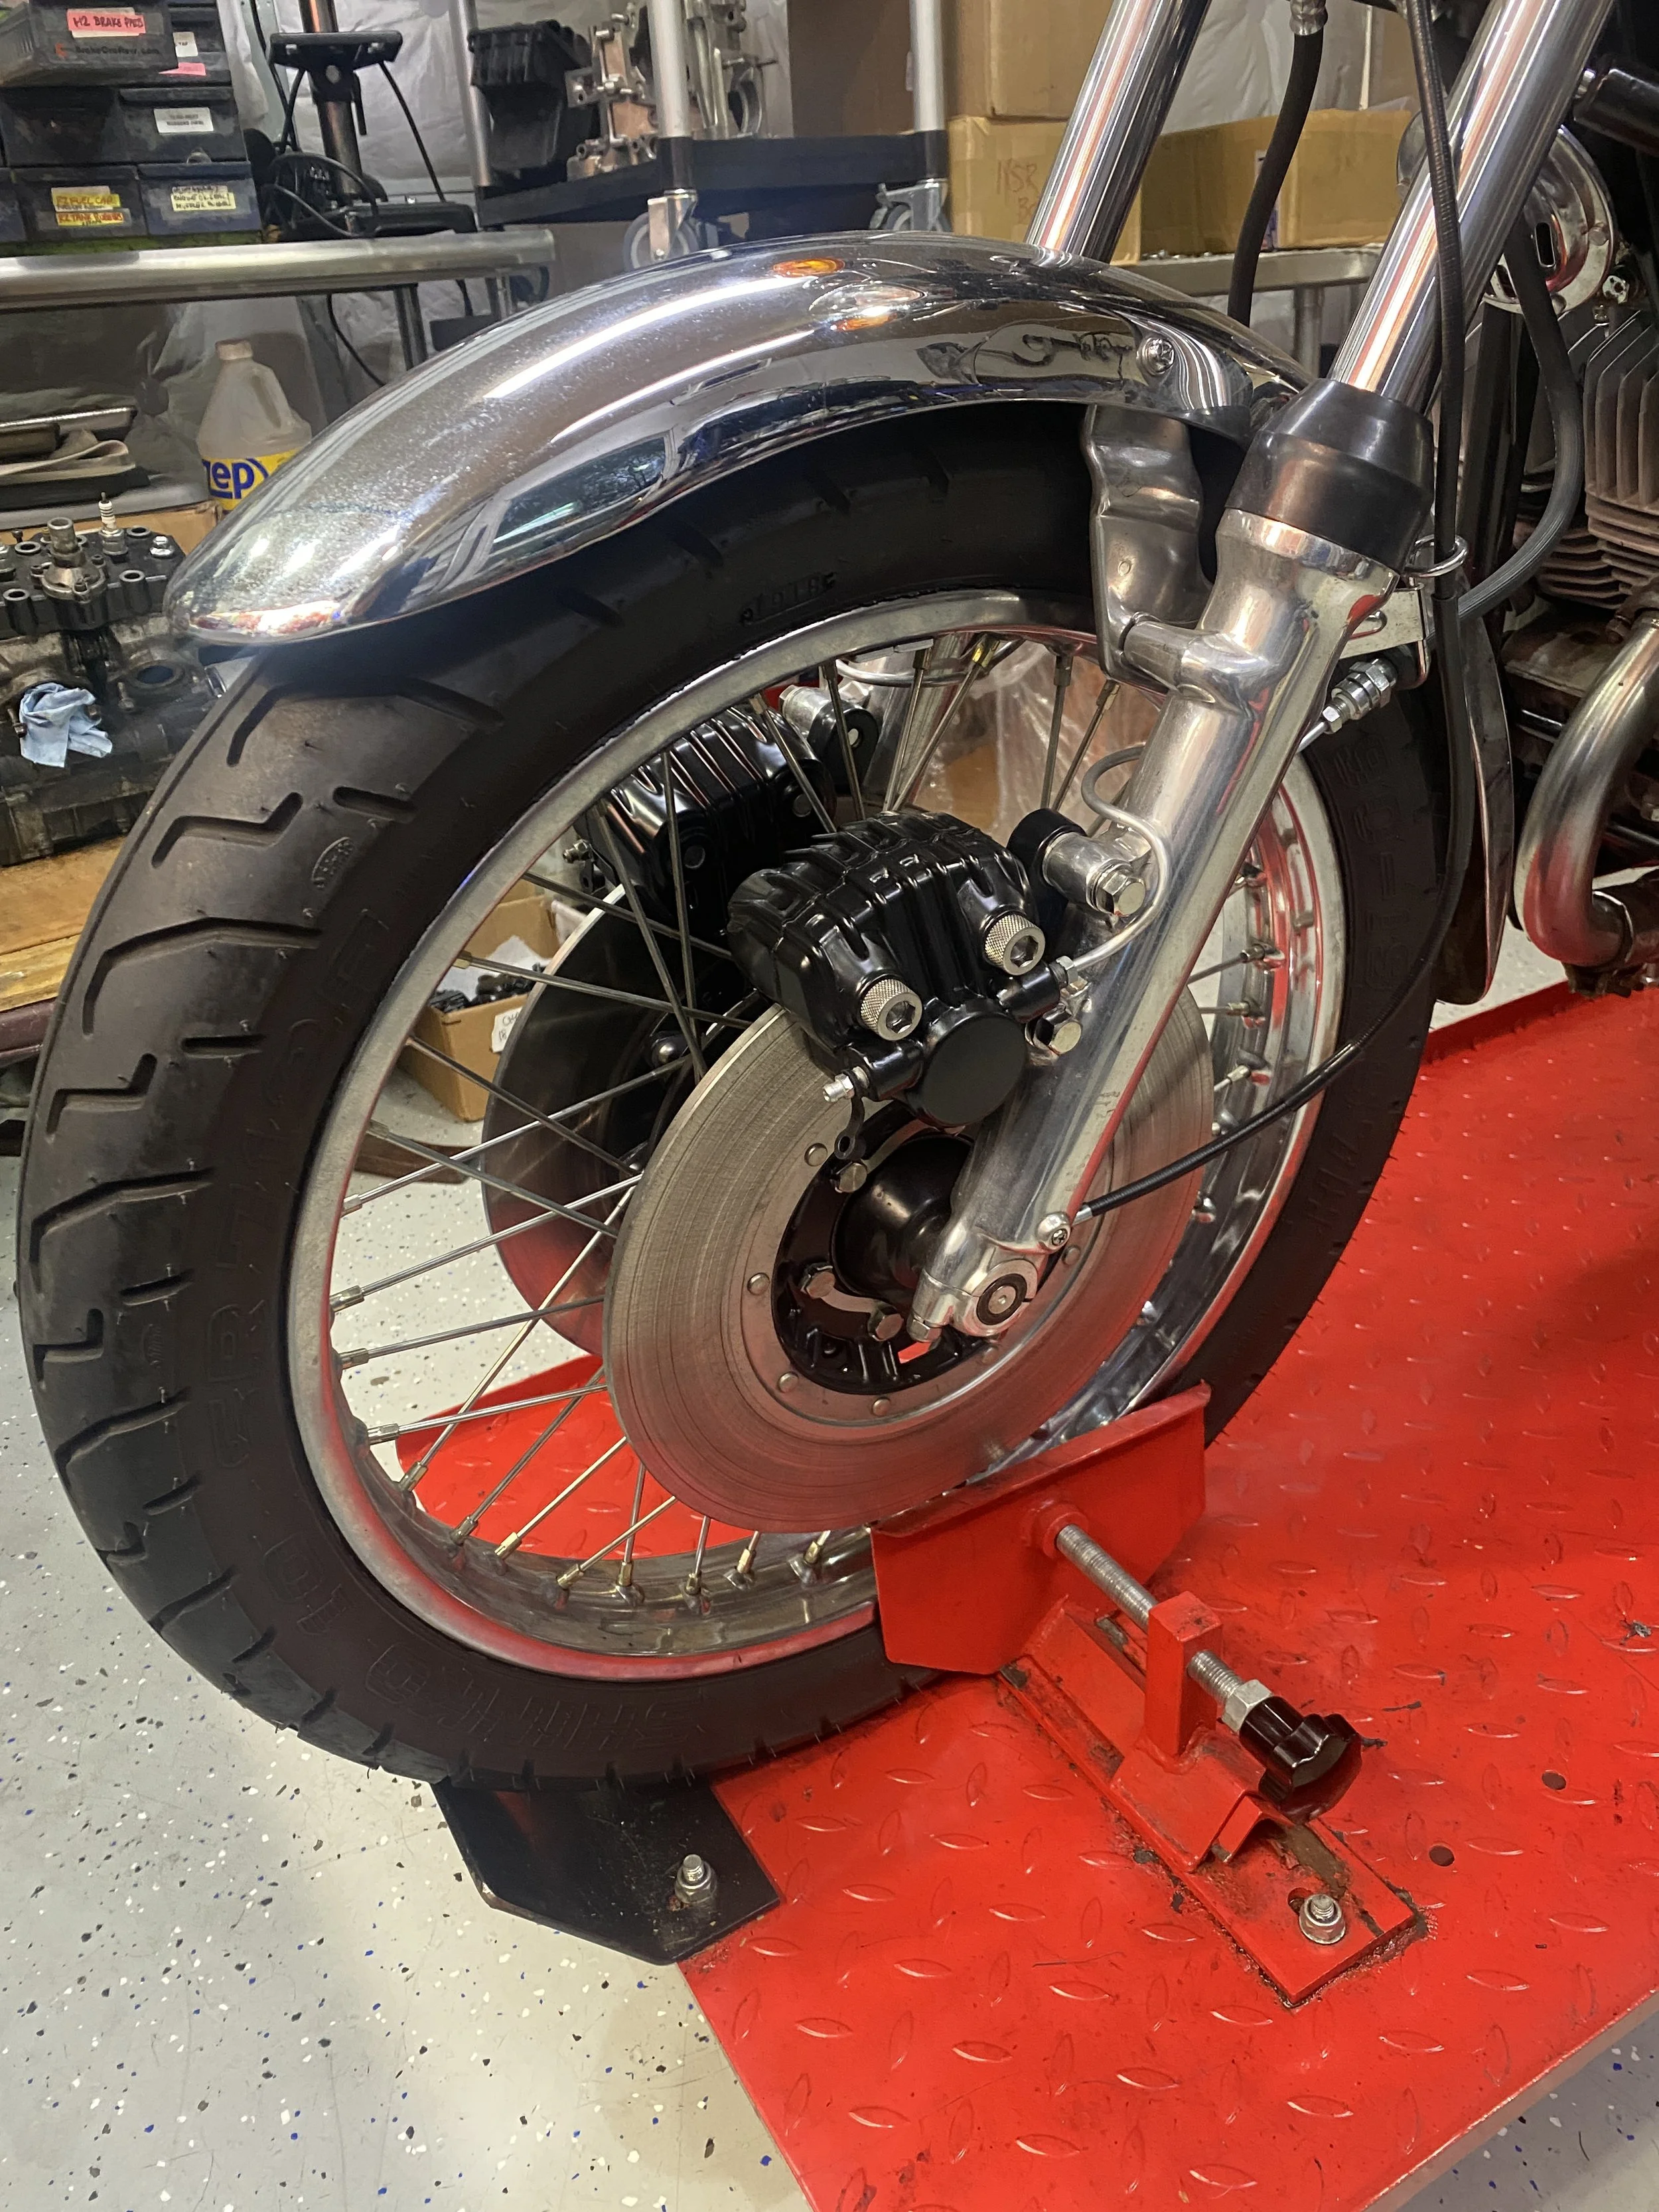
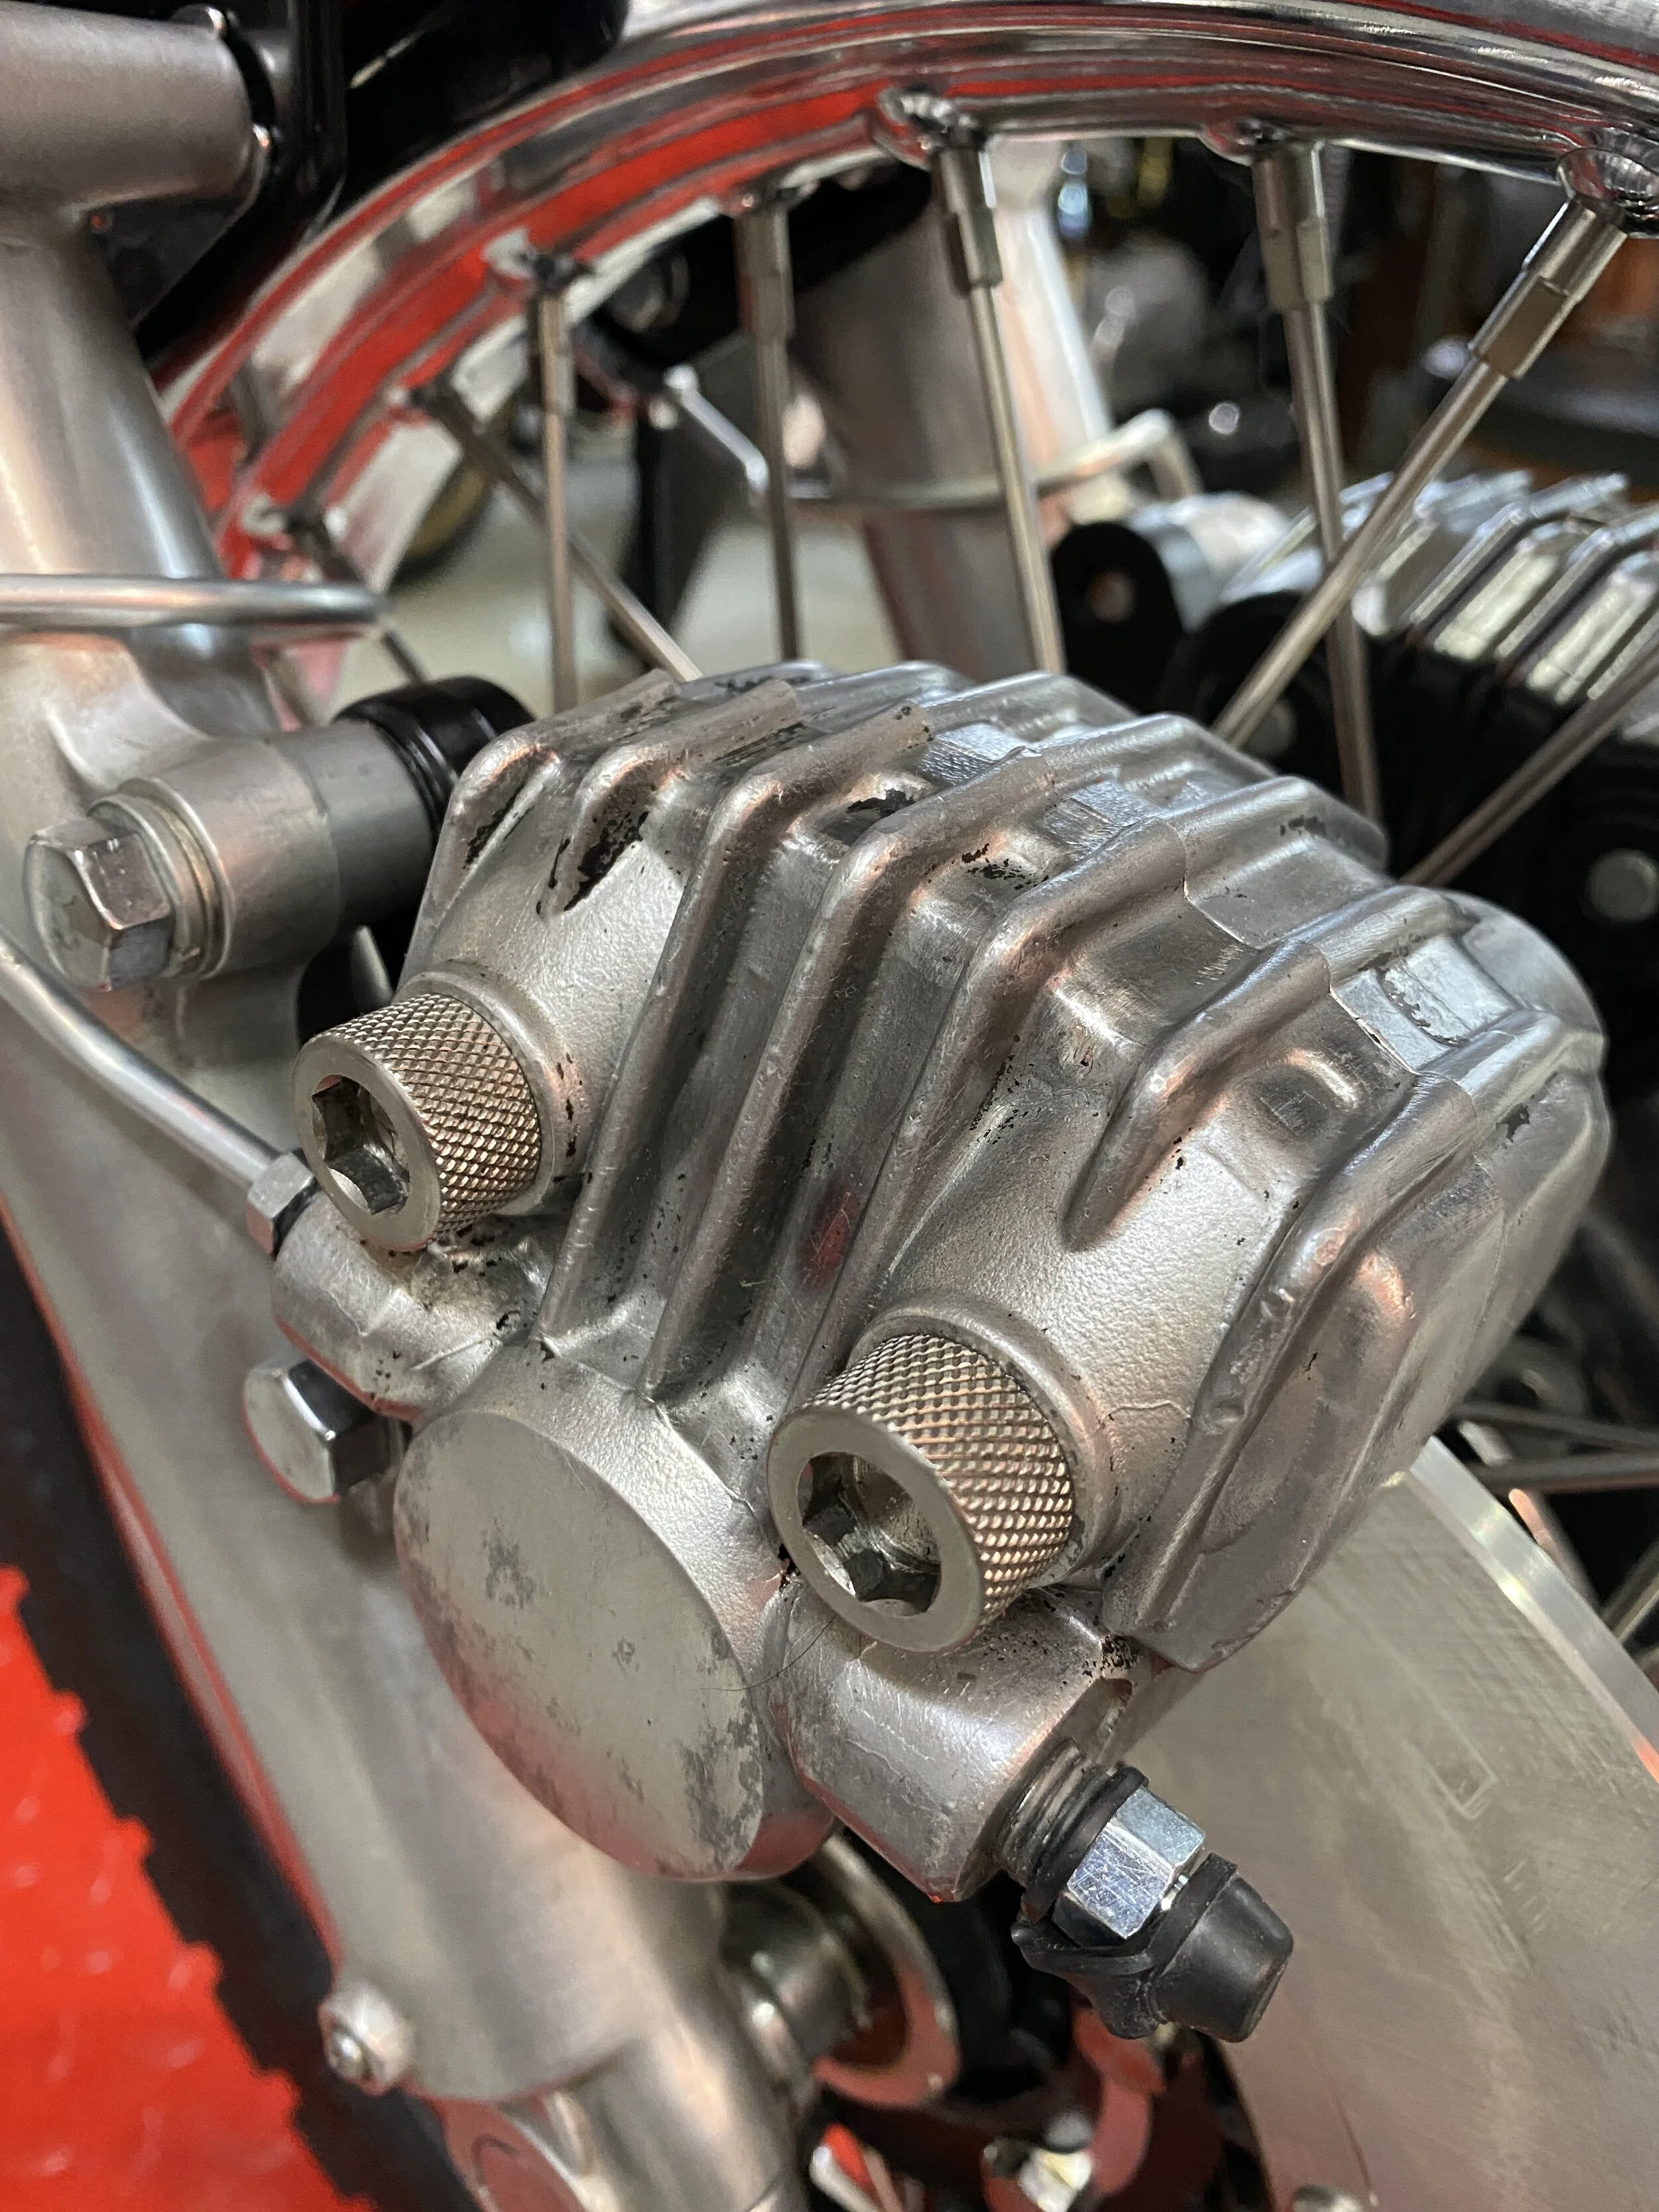
I mean, why have one, when you can have two.....?
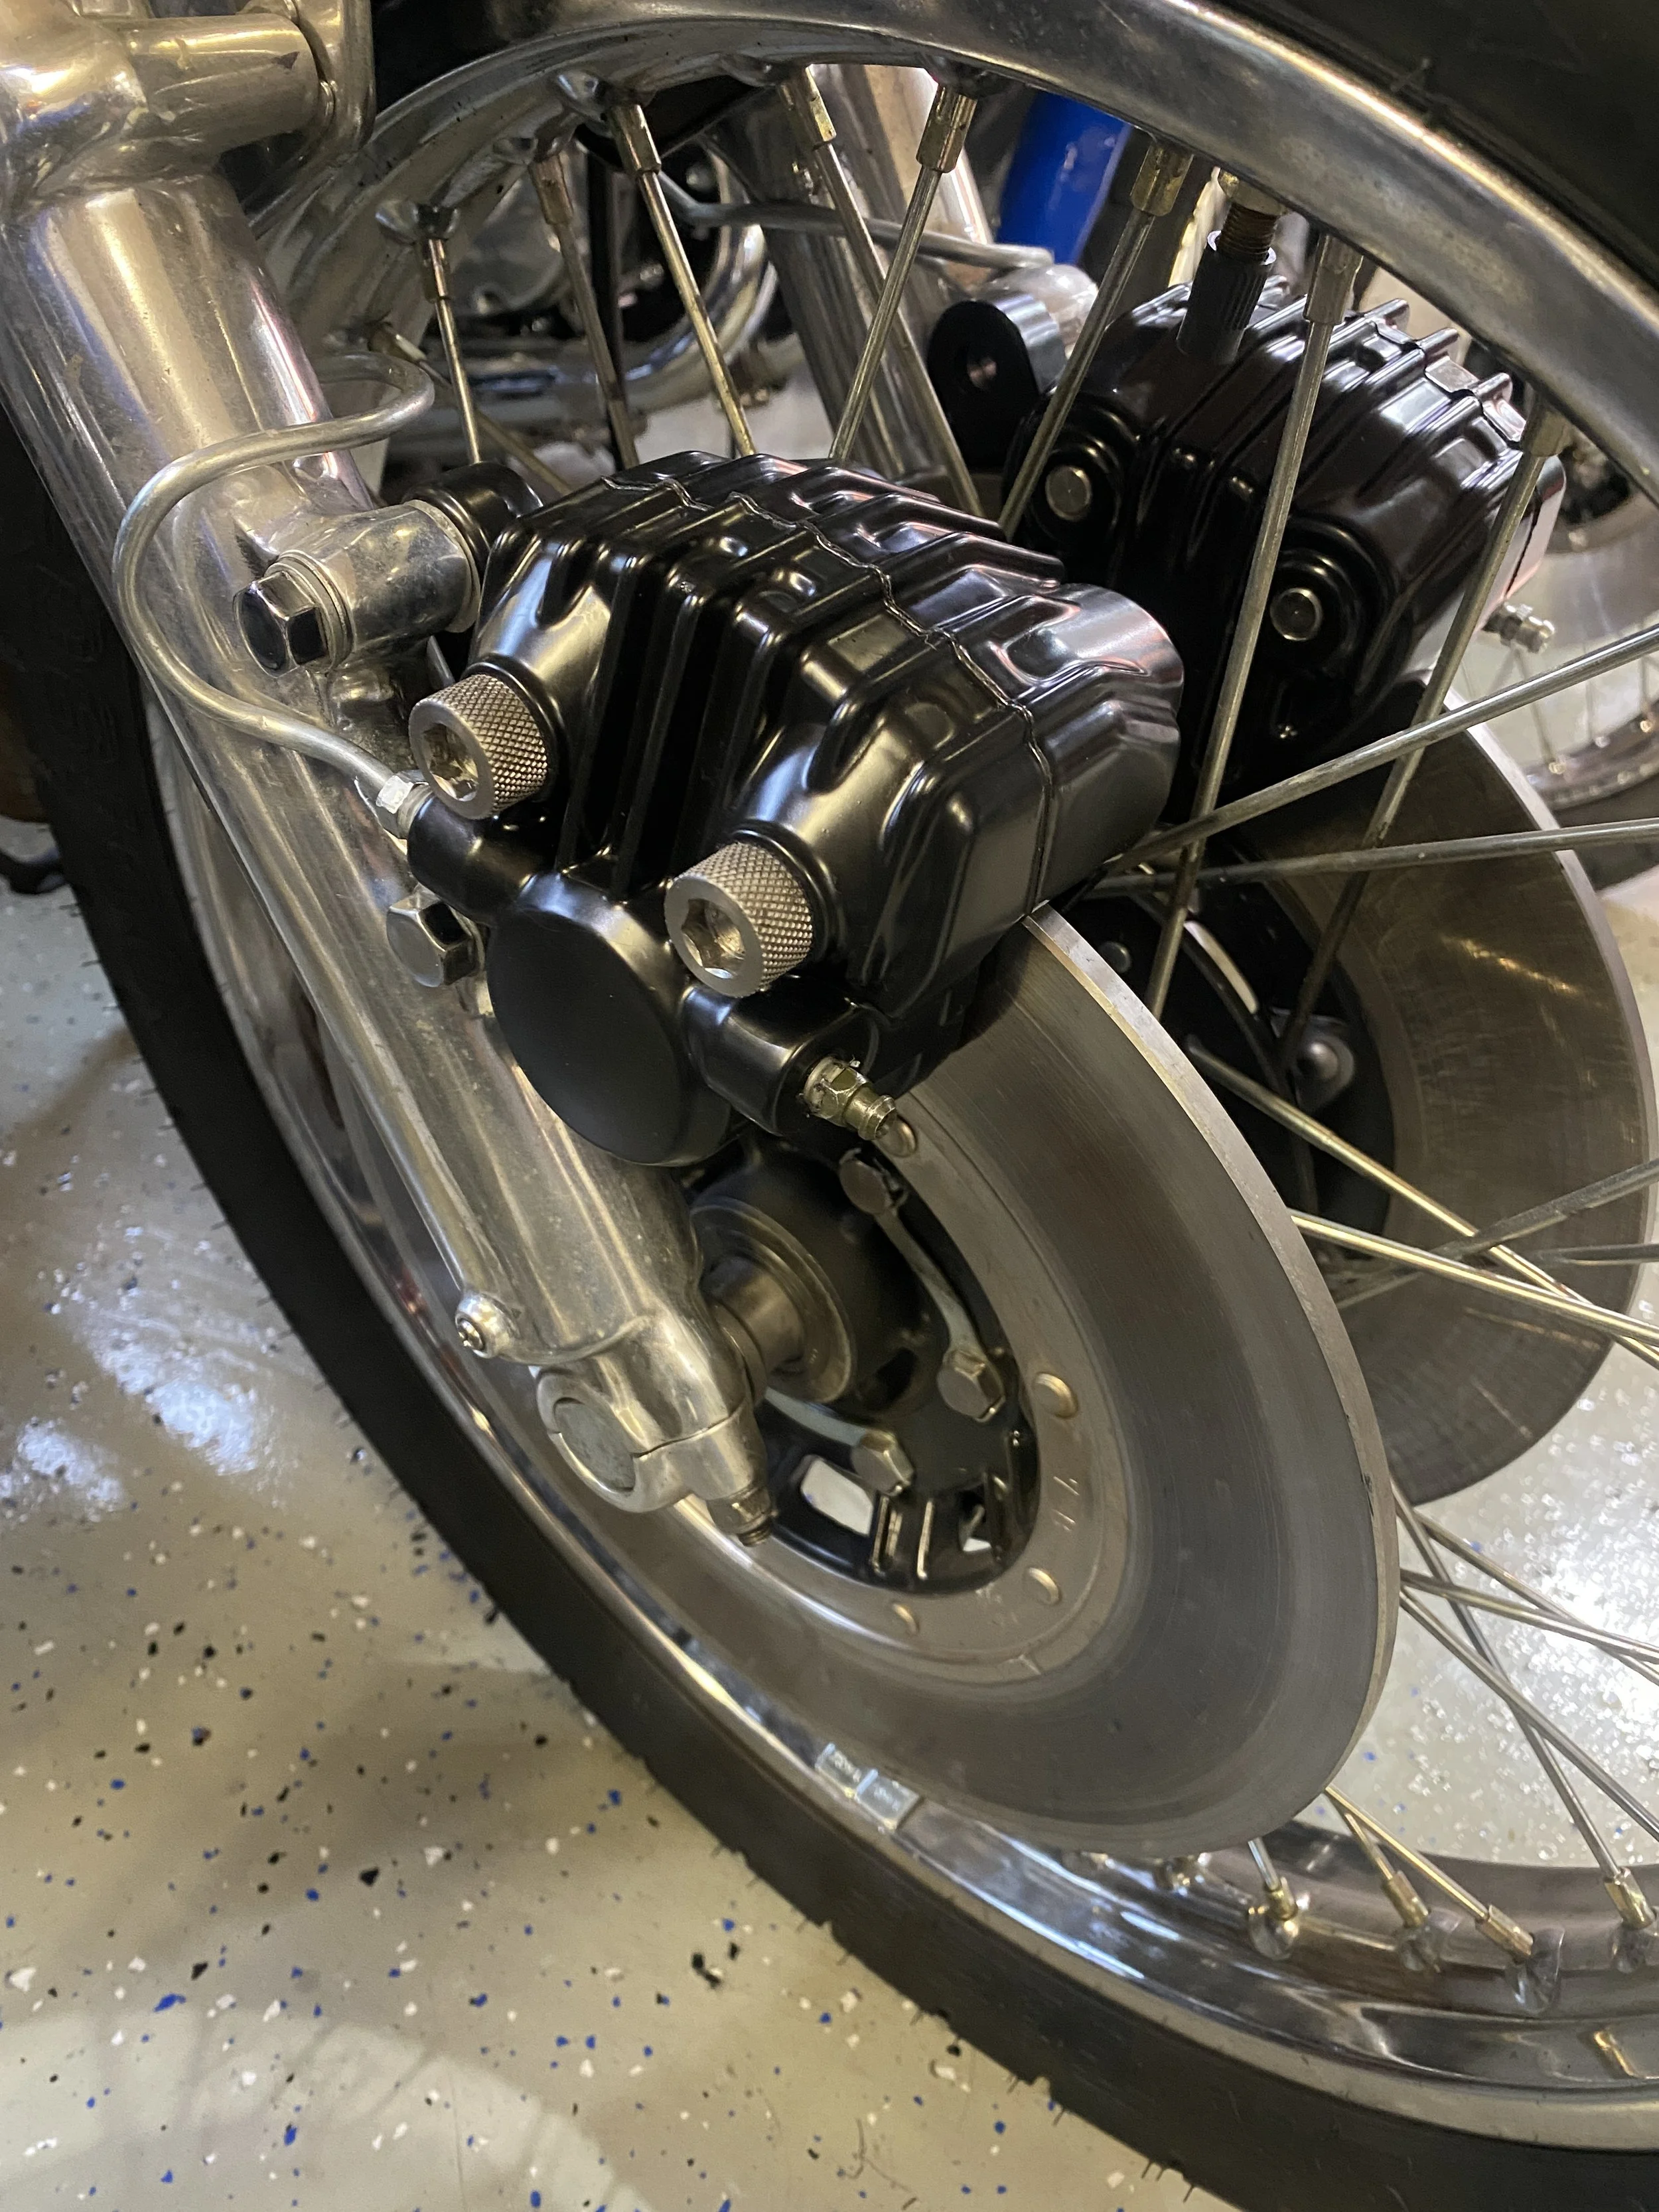
Double the power.

Best look on the front end...
Swingarm….
It’s no secret that the handling of these bikes is not the best, so I’ve sought ways to improve it without altering the outline of the bike. Worn swingarm bearings can make it feel like it has a hinge in the middle The OEM’s are plain steel bearings. You can take one step up to brass or go all the way with a needle bearing kit from Ralf Gille in Germany. I managed to get a couple in 2019 before COVID hit, after which he was prohibited to ship anything to the USA. There’s no longer any reference to the kits on his website. I may have got the last ones…

At this stage, with the transmission sent out to get verified & undercut and having the bike this much in pieces I figured I might as well upgrade the swingarm bearings.

Old ones were a bear to remove, but I made no marks.

Kit comes with four needle bearings, a custom sleeve and some shims.

Got a long threaded rod a selection of washers and nuts from HD....

and proceeded to press them in...

was a relatively simple task. Rear feels planted when winding it open on the exit of those long fast bends. I put it down to this.
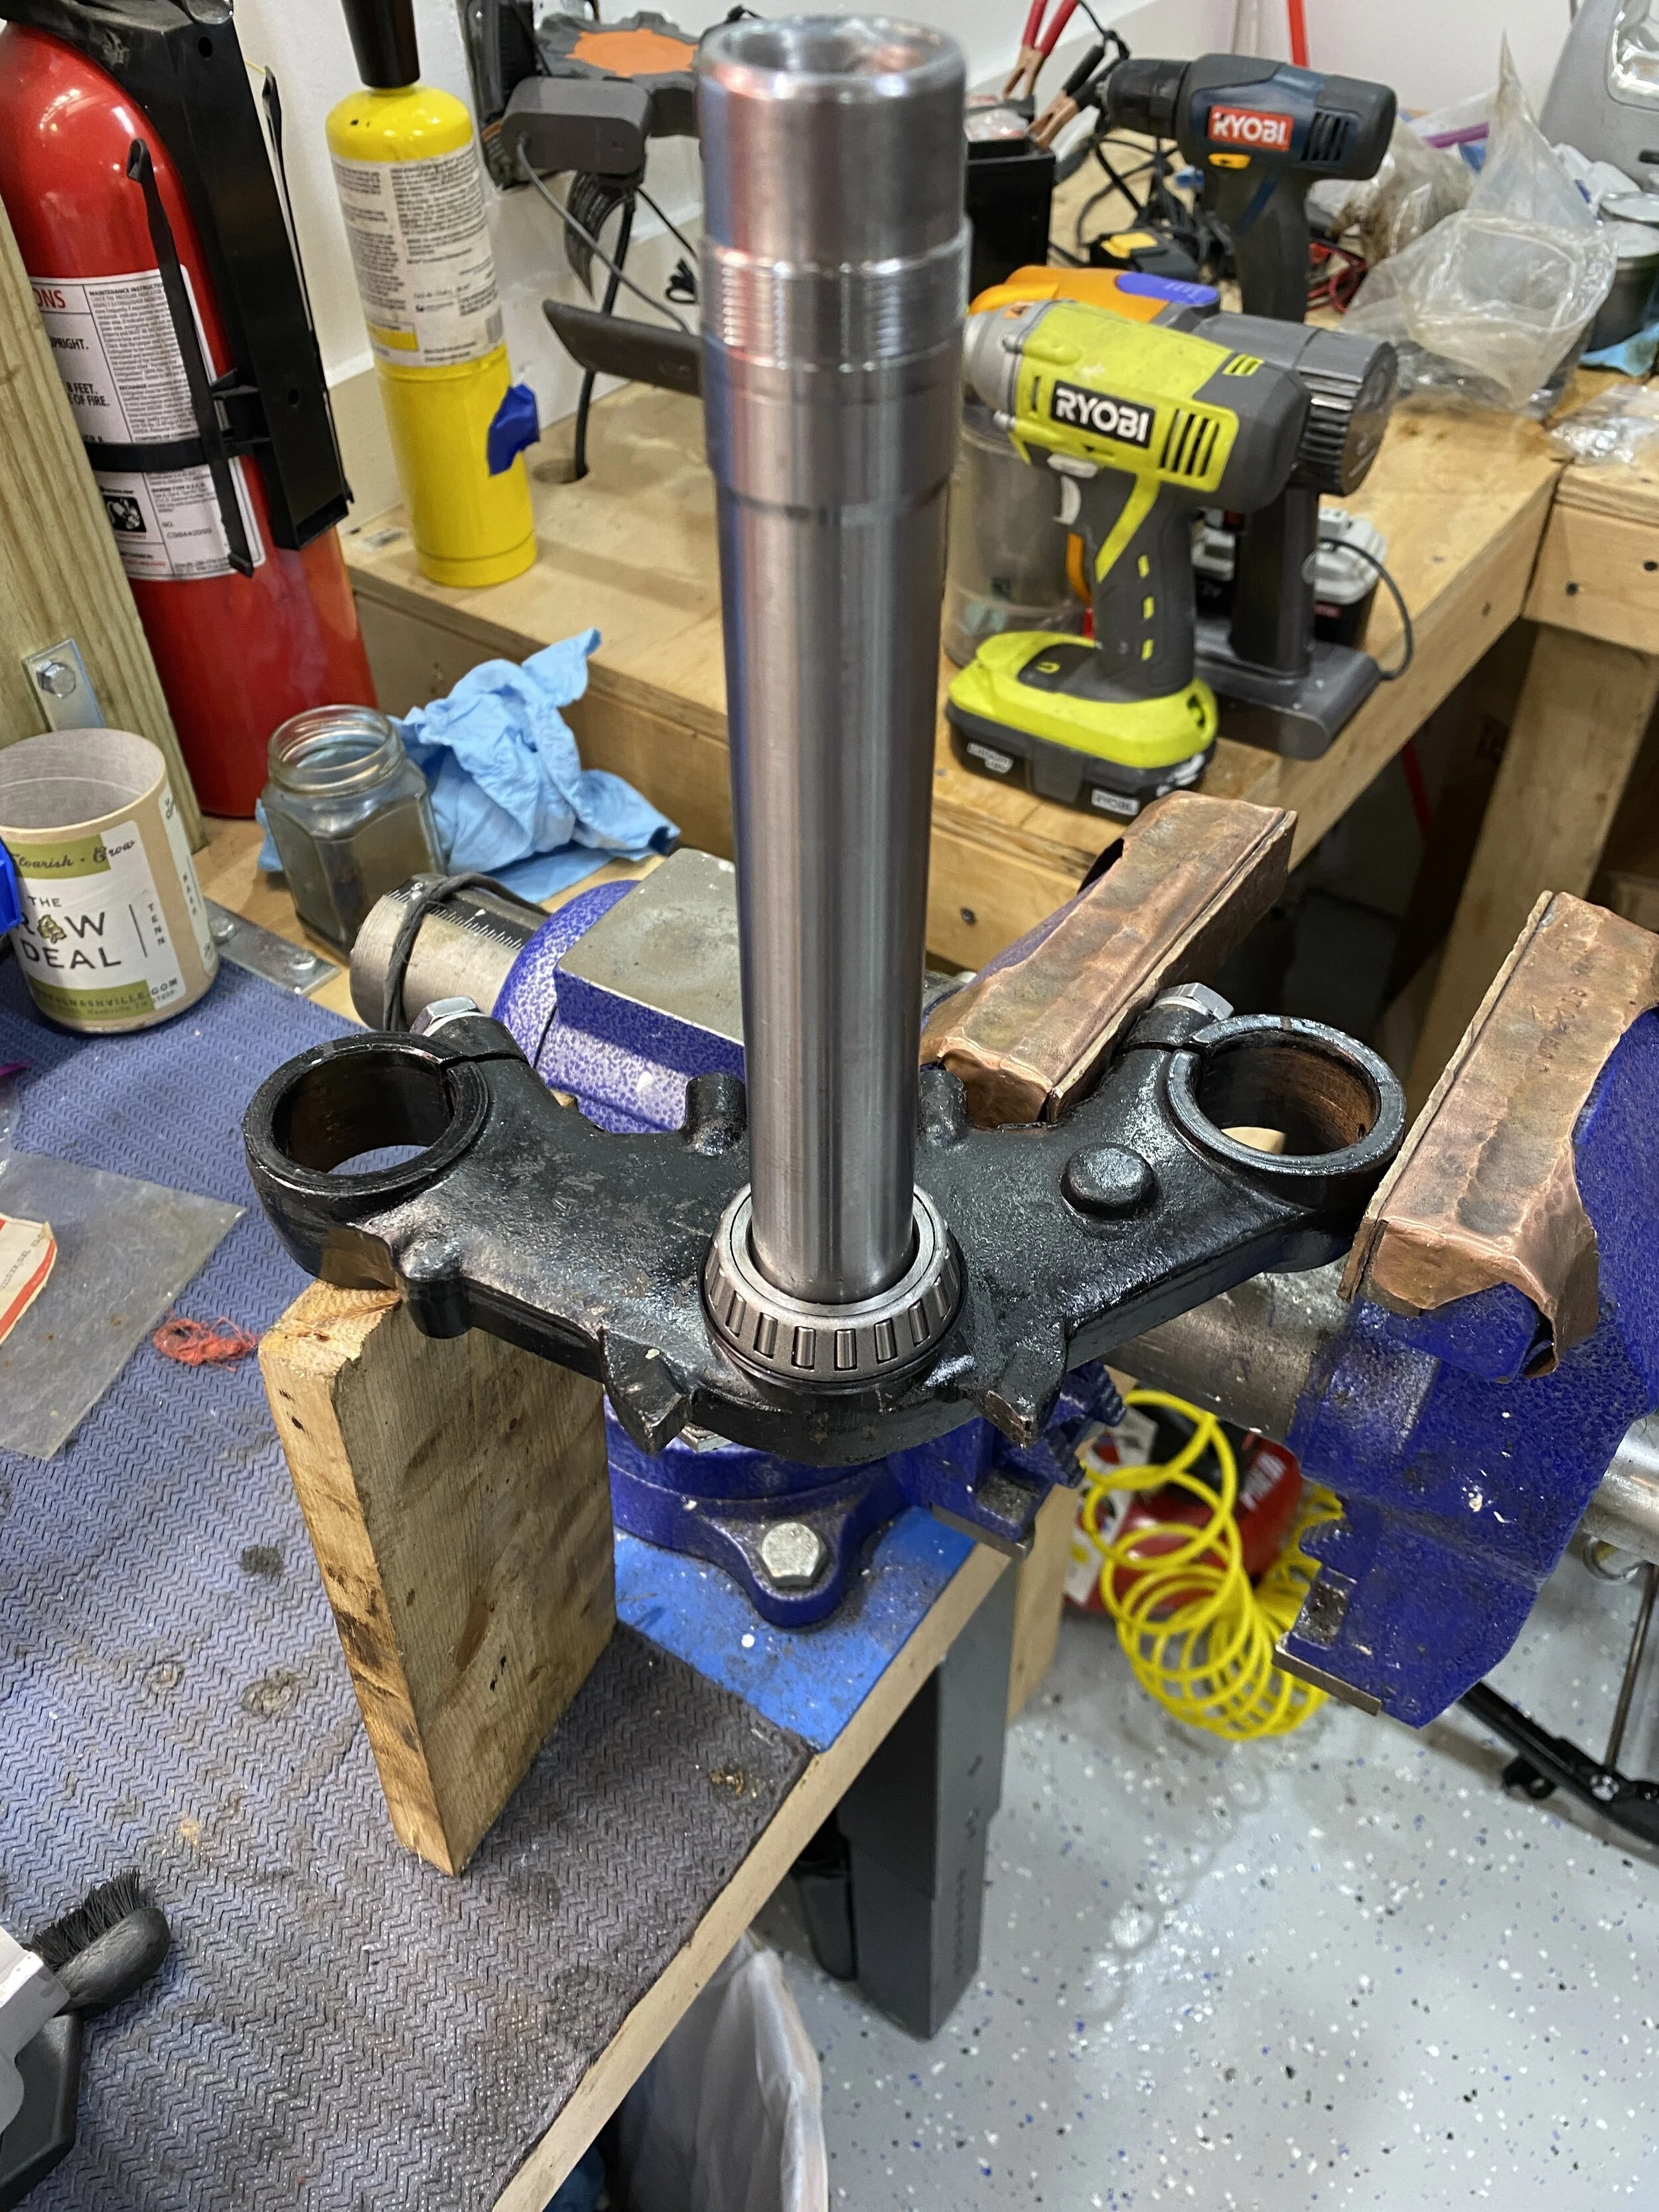
Steering head bearings…..
— when I removed the front wheel to attend to the discs I moved the steering from left to right…it was notchy AF. After doing the swing arm bearings, installing a taper head bearing kit from All Balls was the obvious next stage.

Grease circa 1975? Looks like it, but we'll never know for sure, what's pretty certain is that these never got looked at.

It doesn't look like it here but I can attest that all bearings were in place when I dismantled it-the general feeling though: dry, rusty and notchy.


Old....
New.....
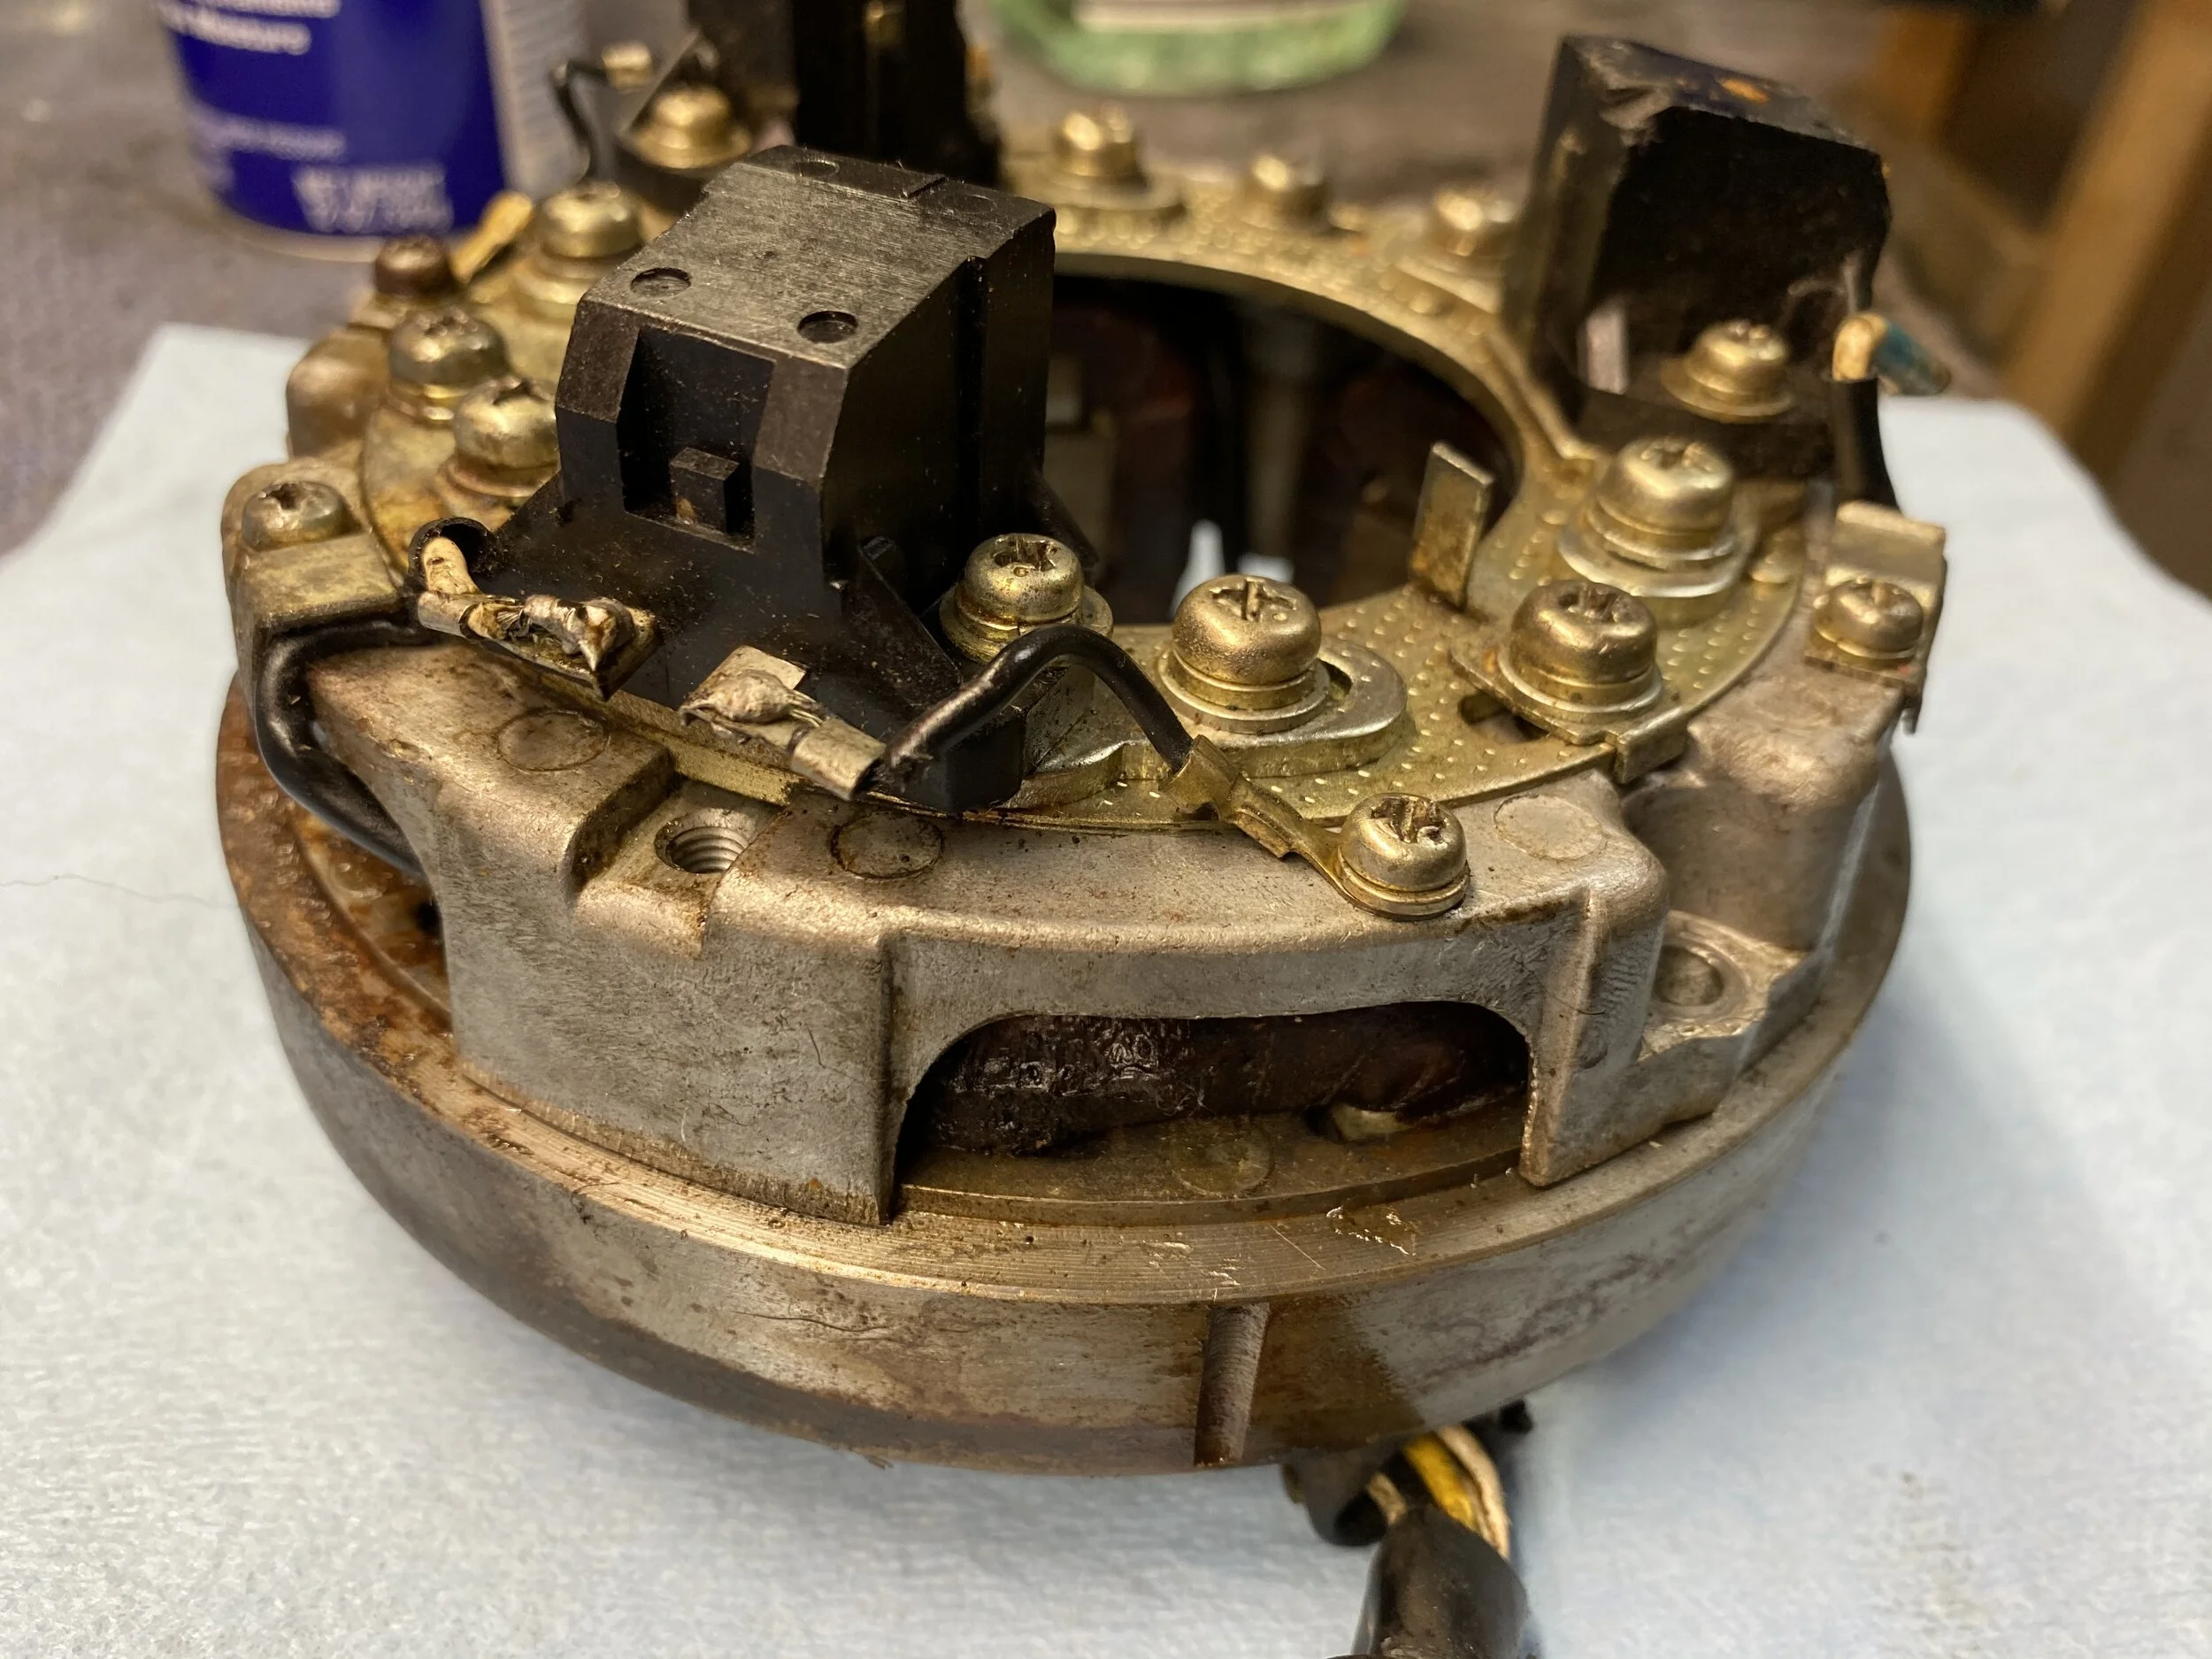
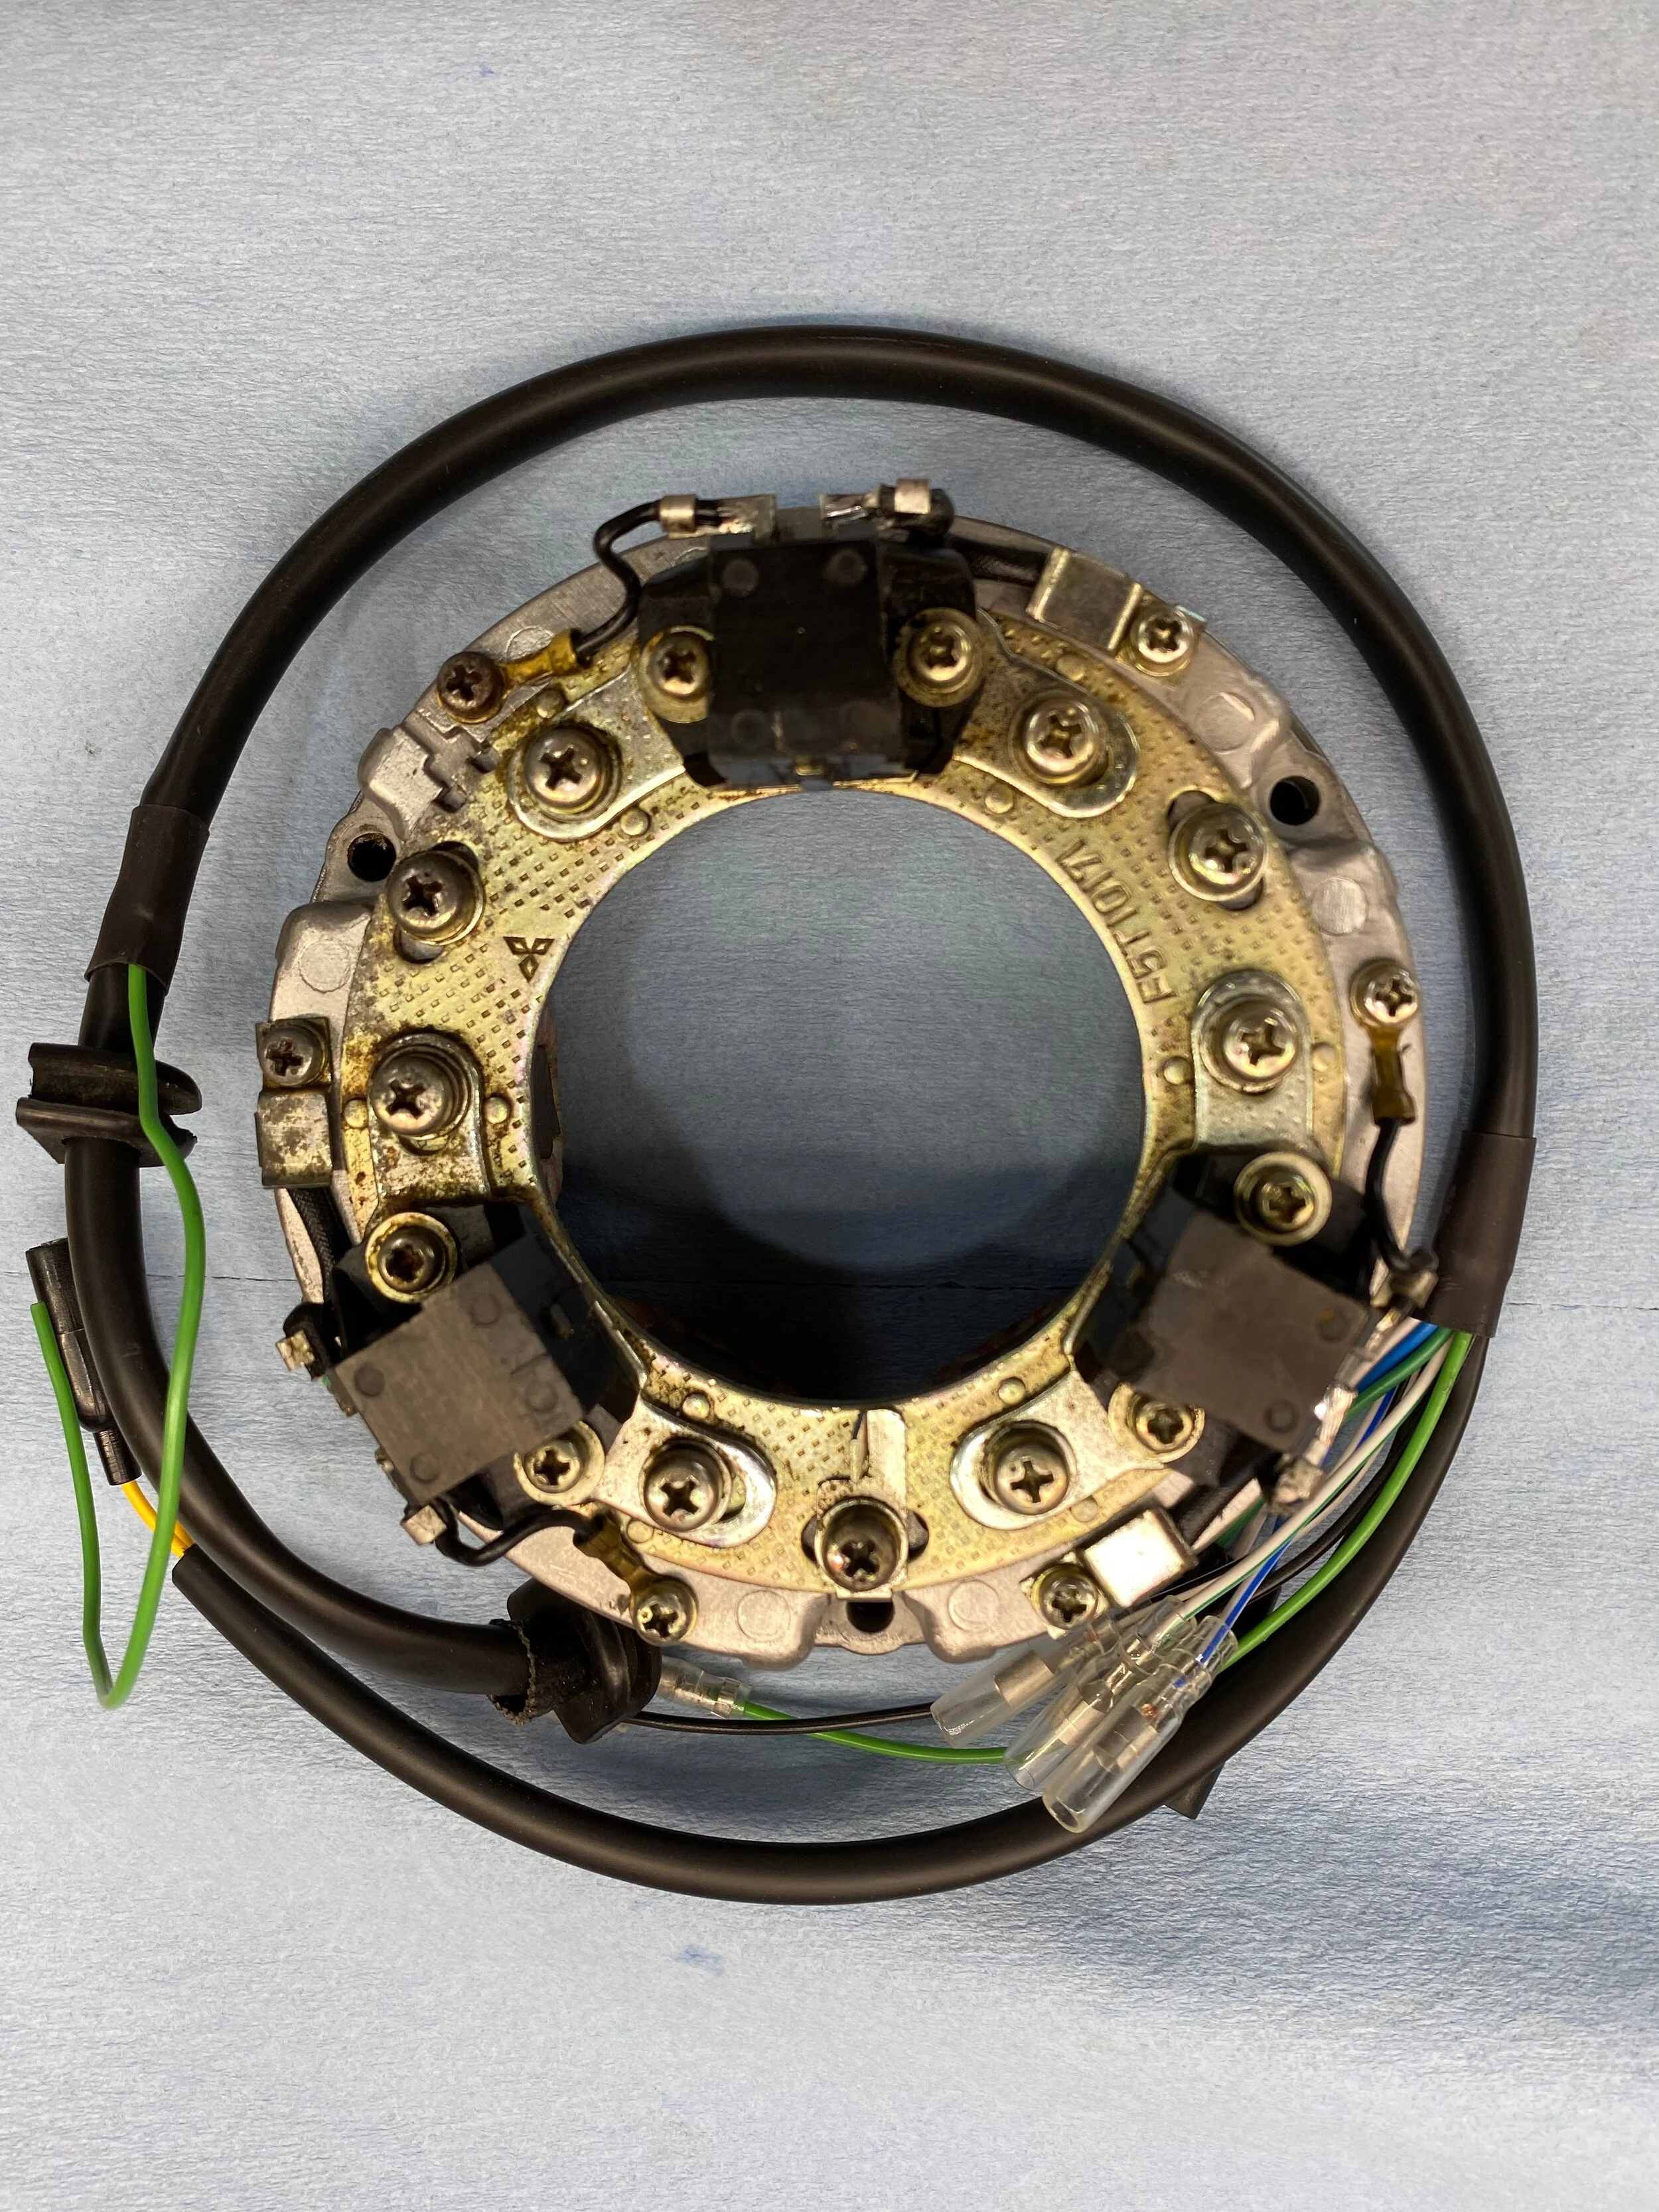
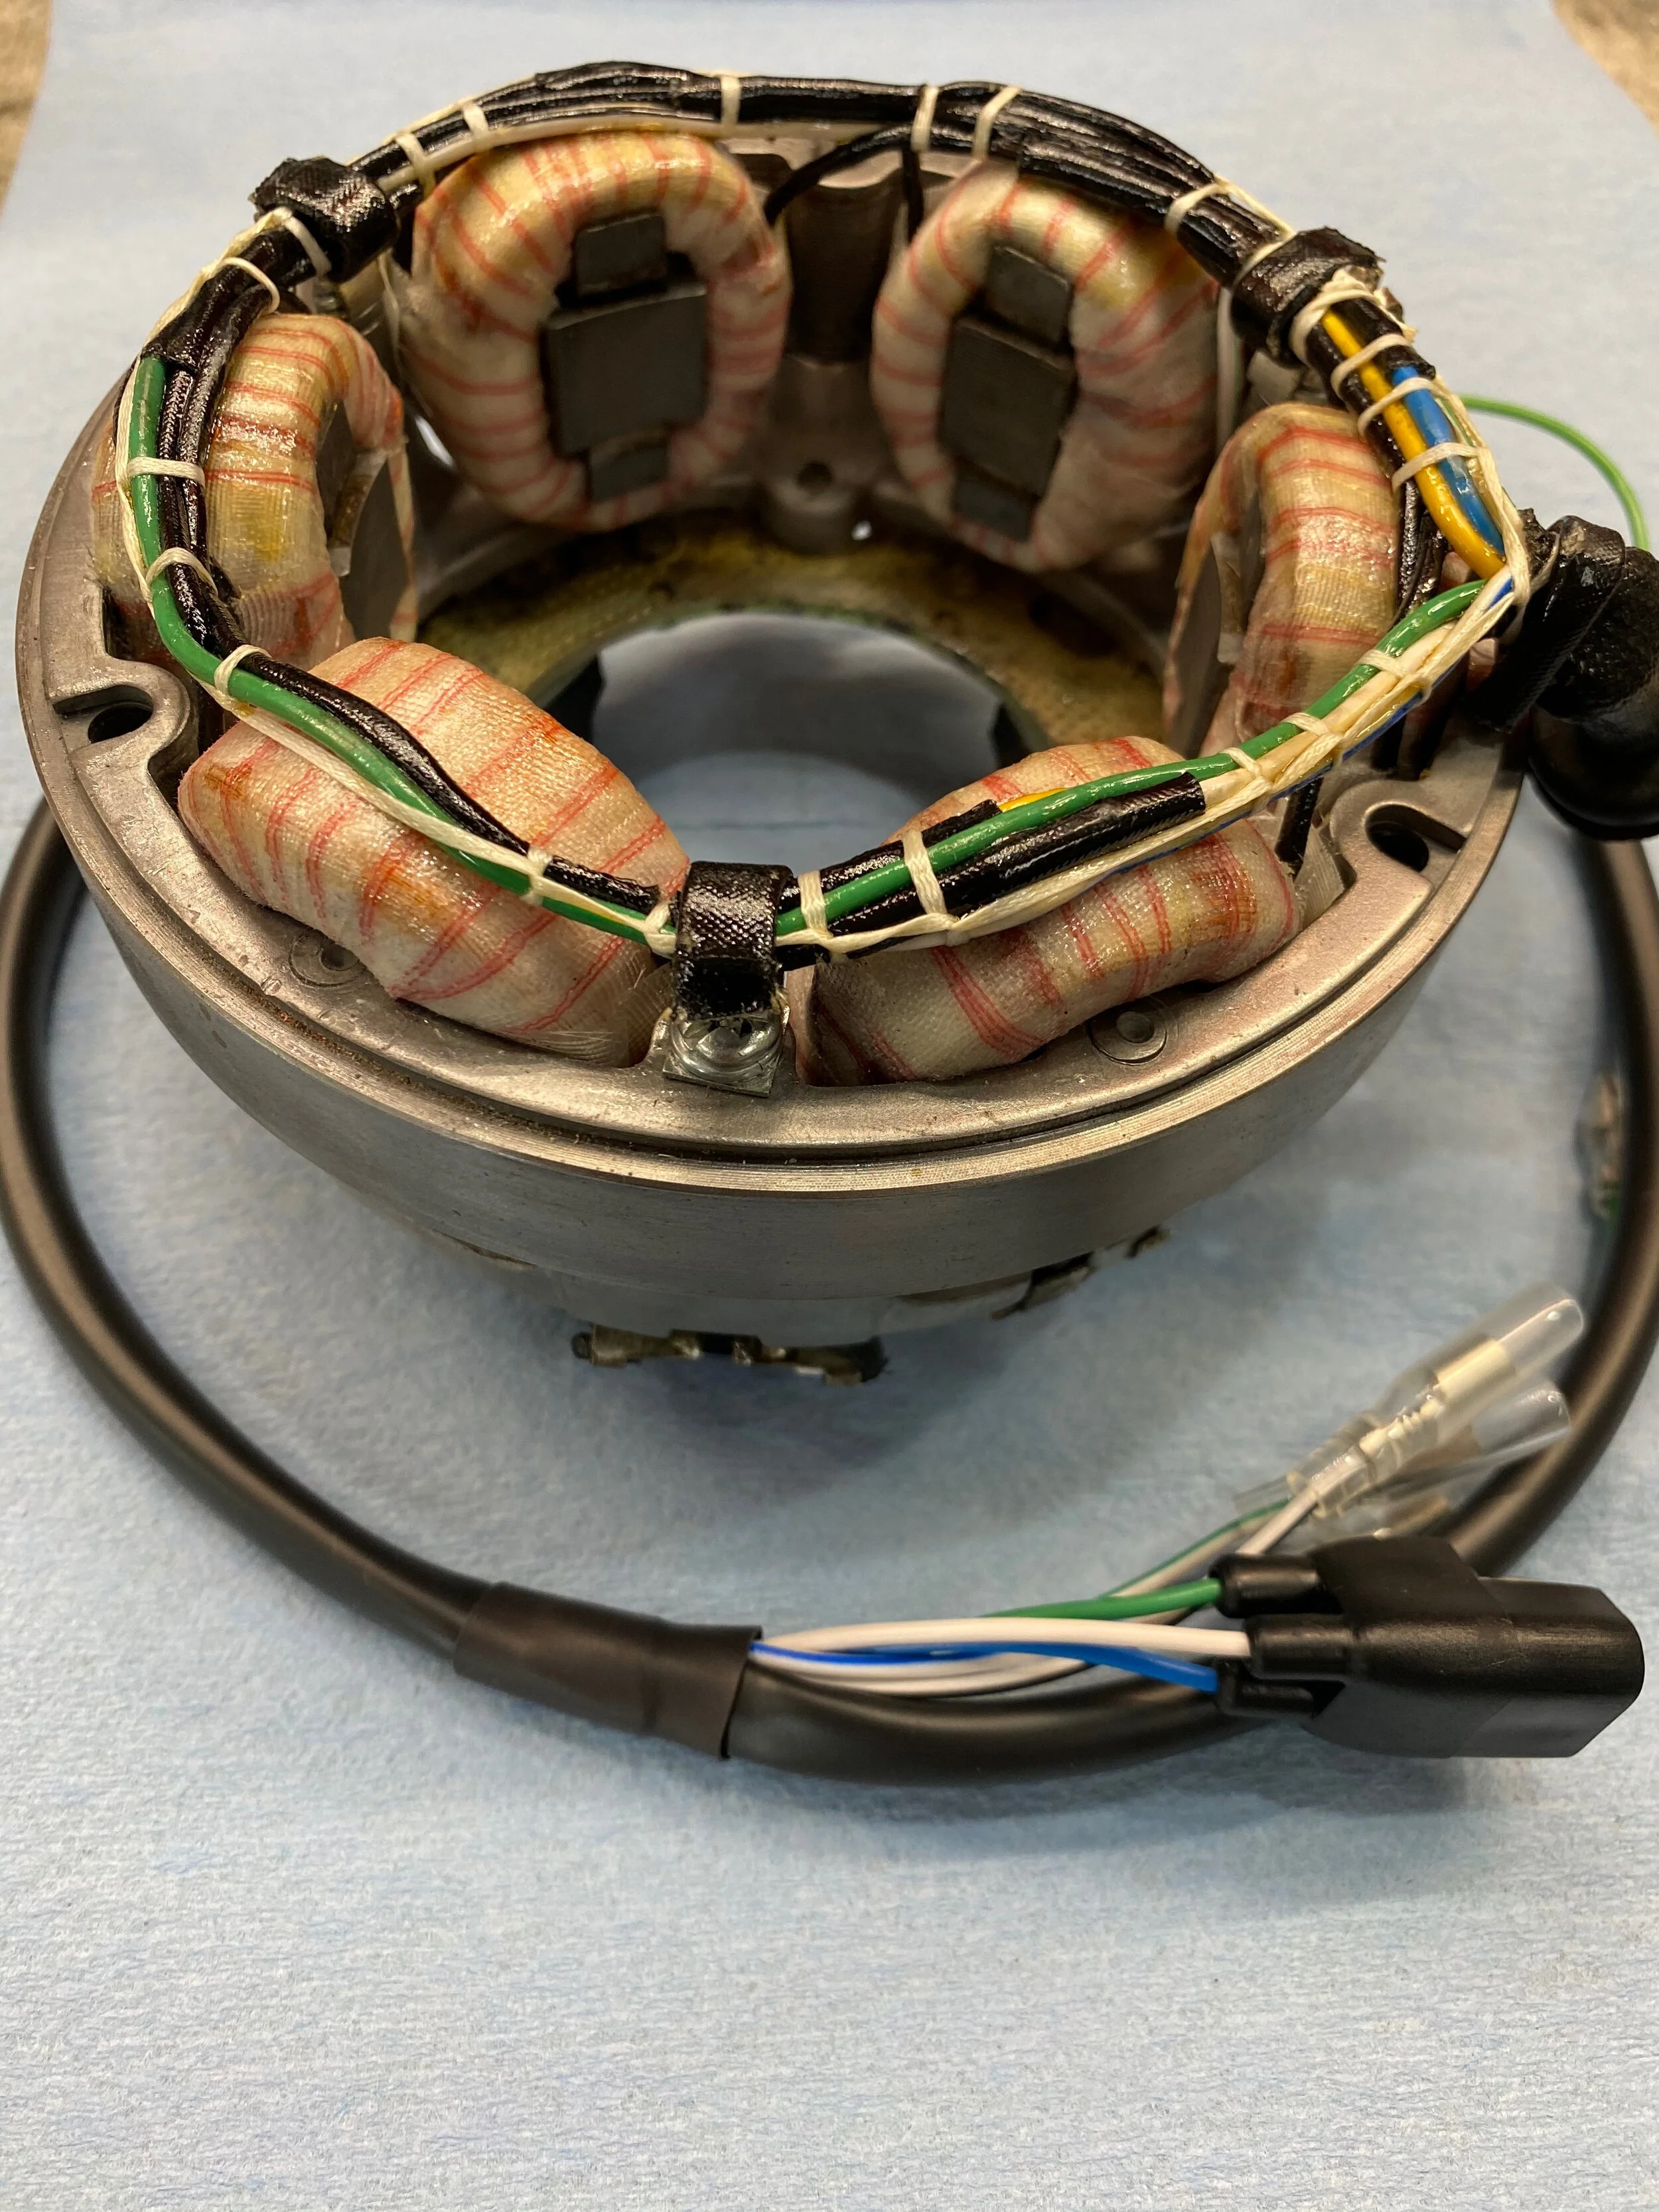
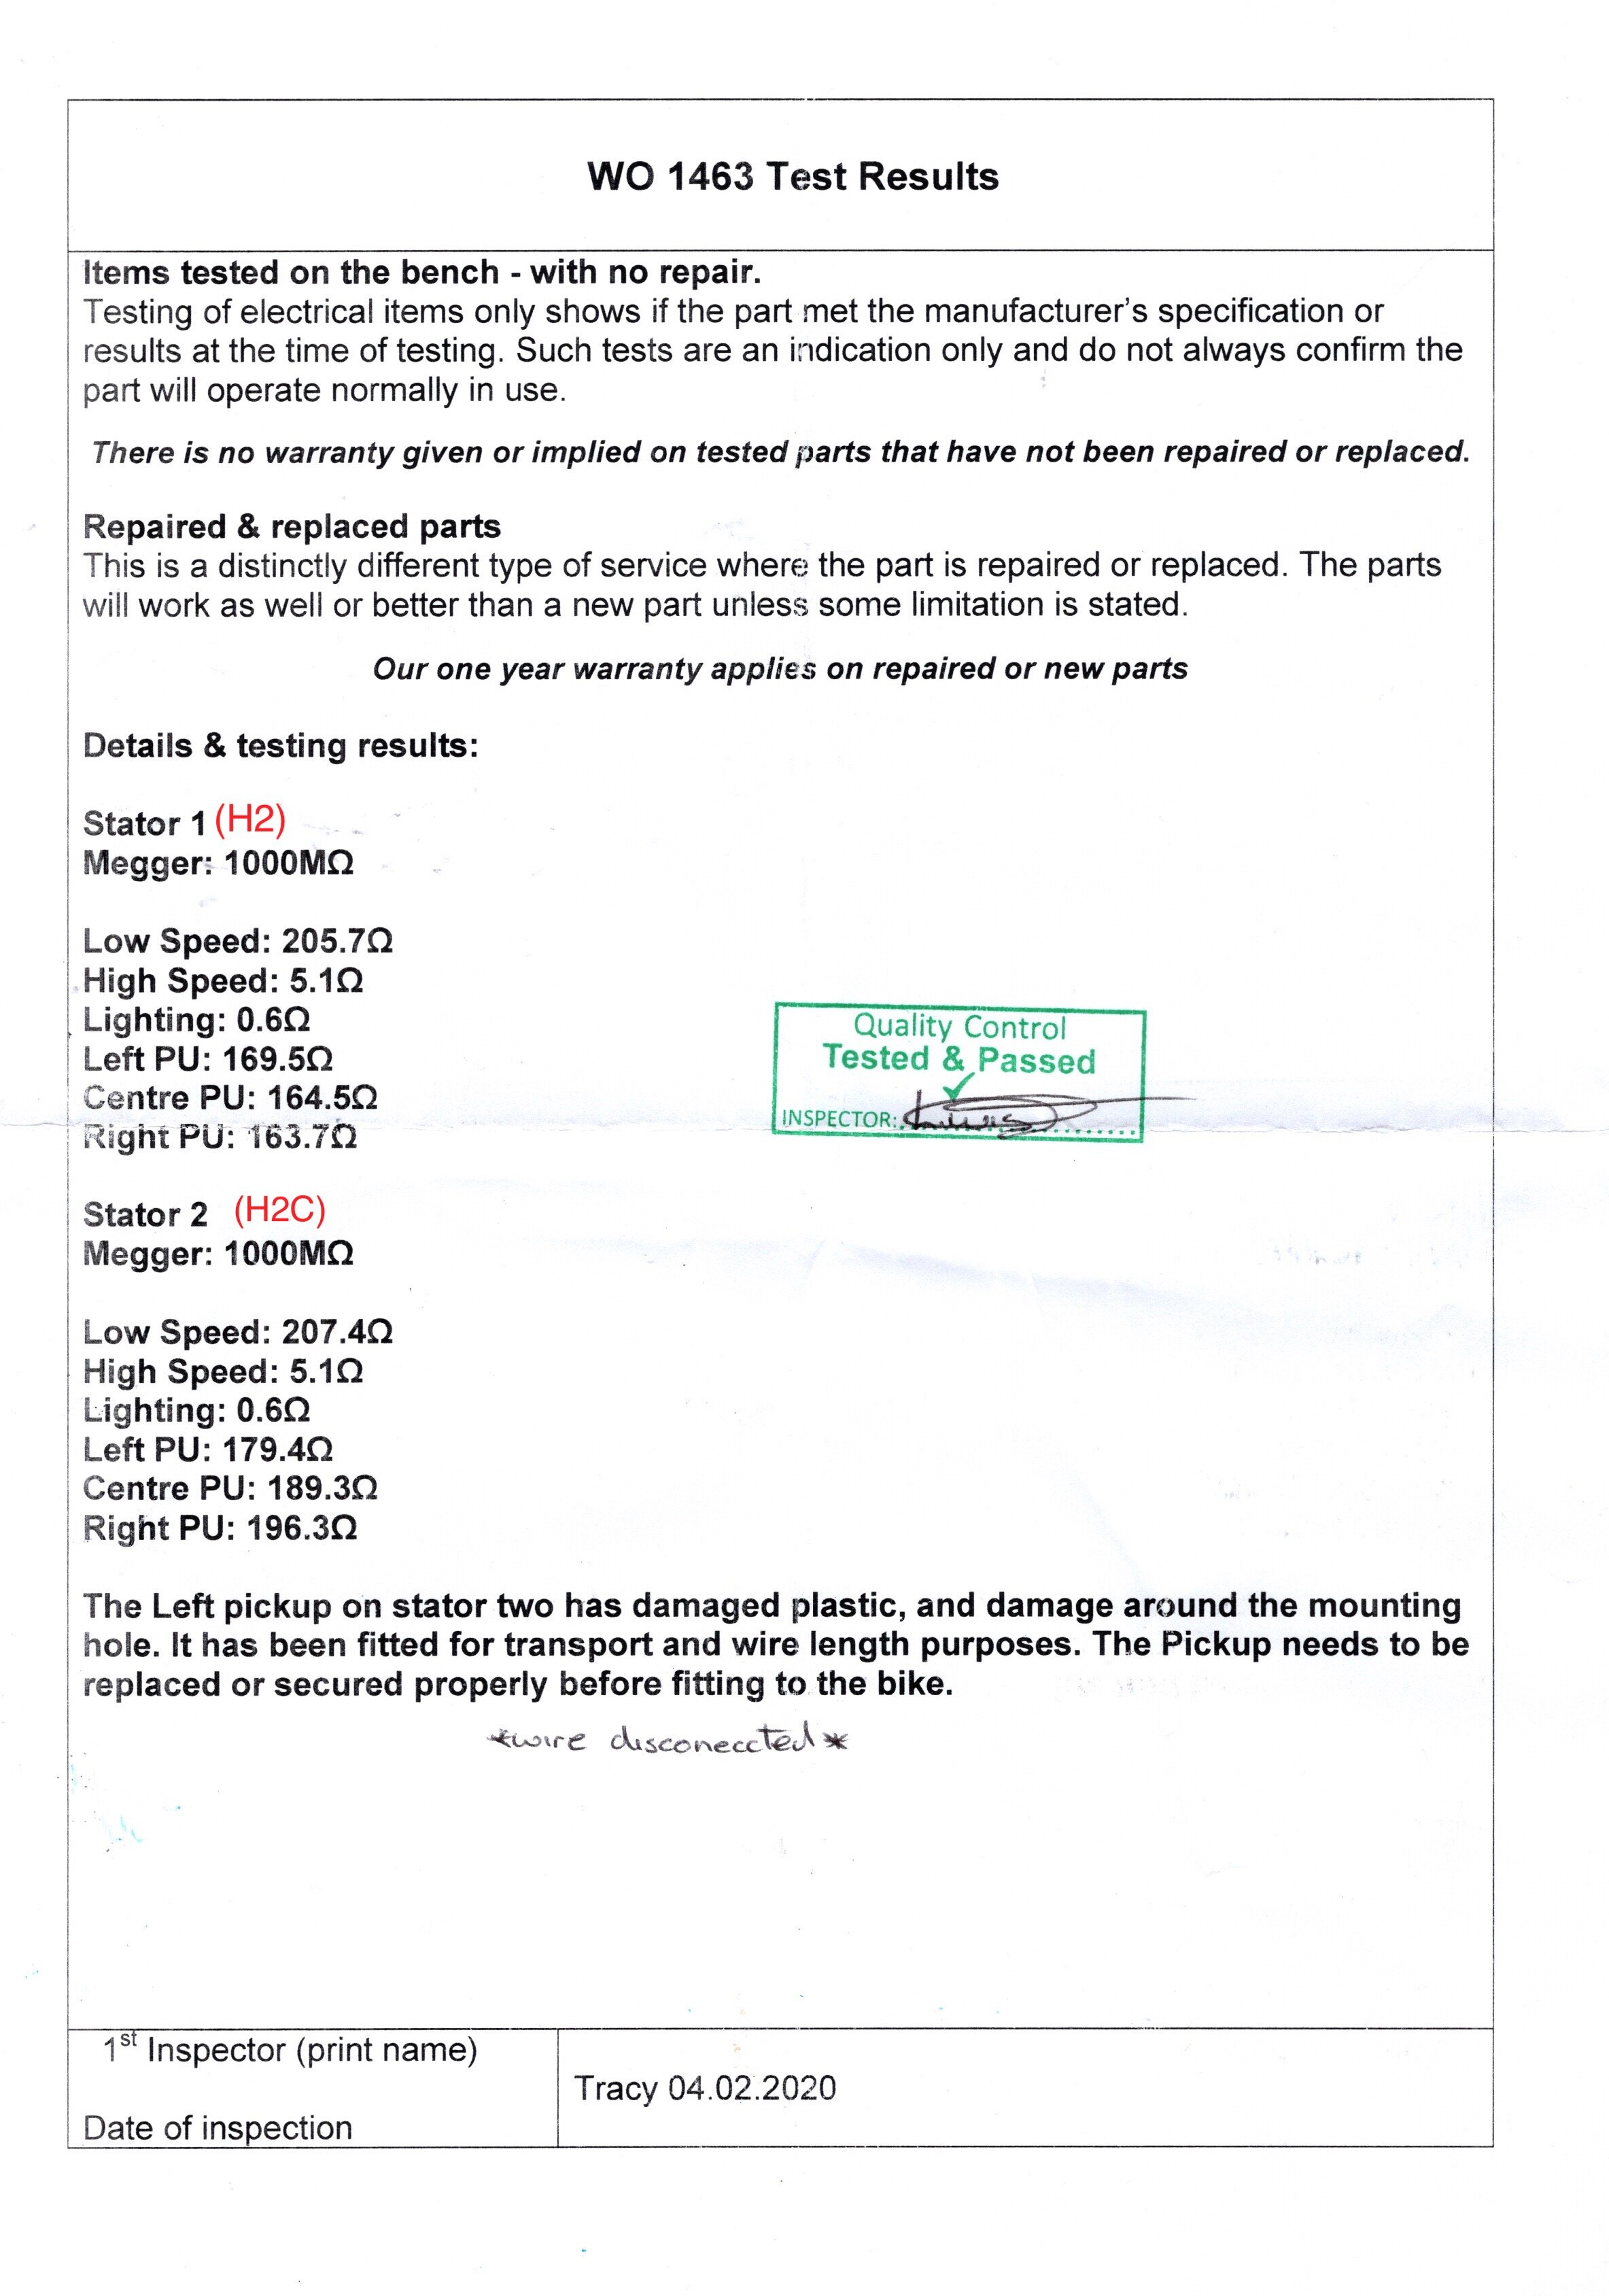
Stator Rewind…….
My overall goal was to eliminate problems by assessing each component vital to a fully functioning motor and then do whatever it takes to get the component up to scratch, or replace it. In terms of the electronics, with new coils being cheap and readily available it made sense to invest in new coils and plugs and get the stator tested.
The only place I could find that dealt with these stators was Rex’s Speed Shop in the UK. I sent them the stator and they came back with this: “The stator has failed both the low and high speed tests. The pick ups are under specification but they are all reading about the same. I have seen pick ups work at this reading but I can’t guarantee they will work. I recommend a full overhaul with new CDI and lighting coils and new loom. “ Turn around was almost exactly two months…. and have had no issues with the pick ups.


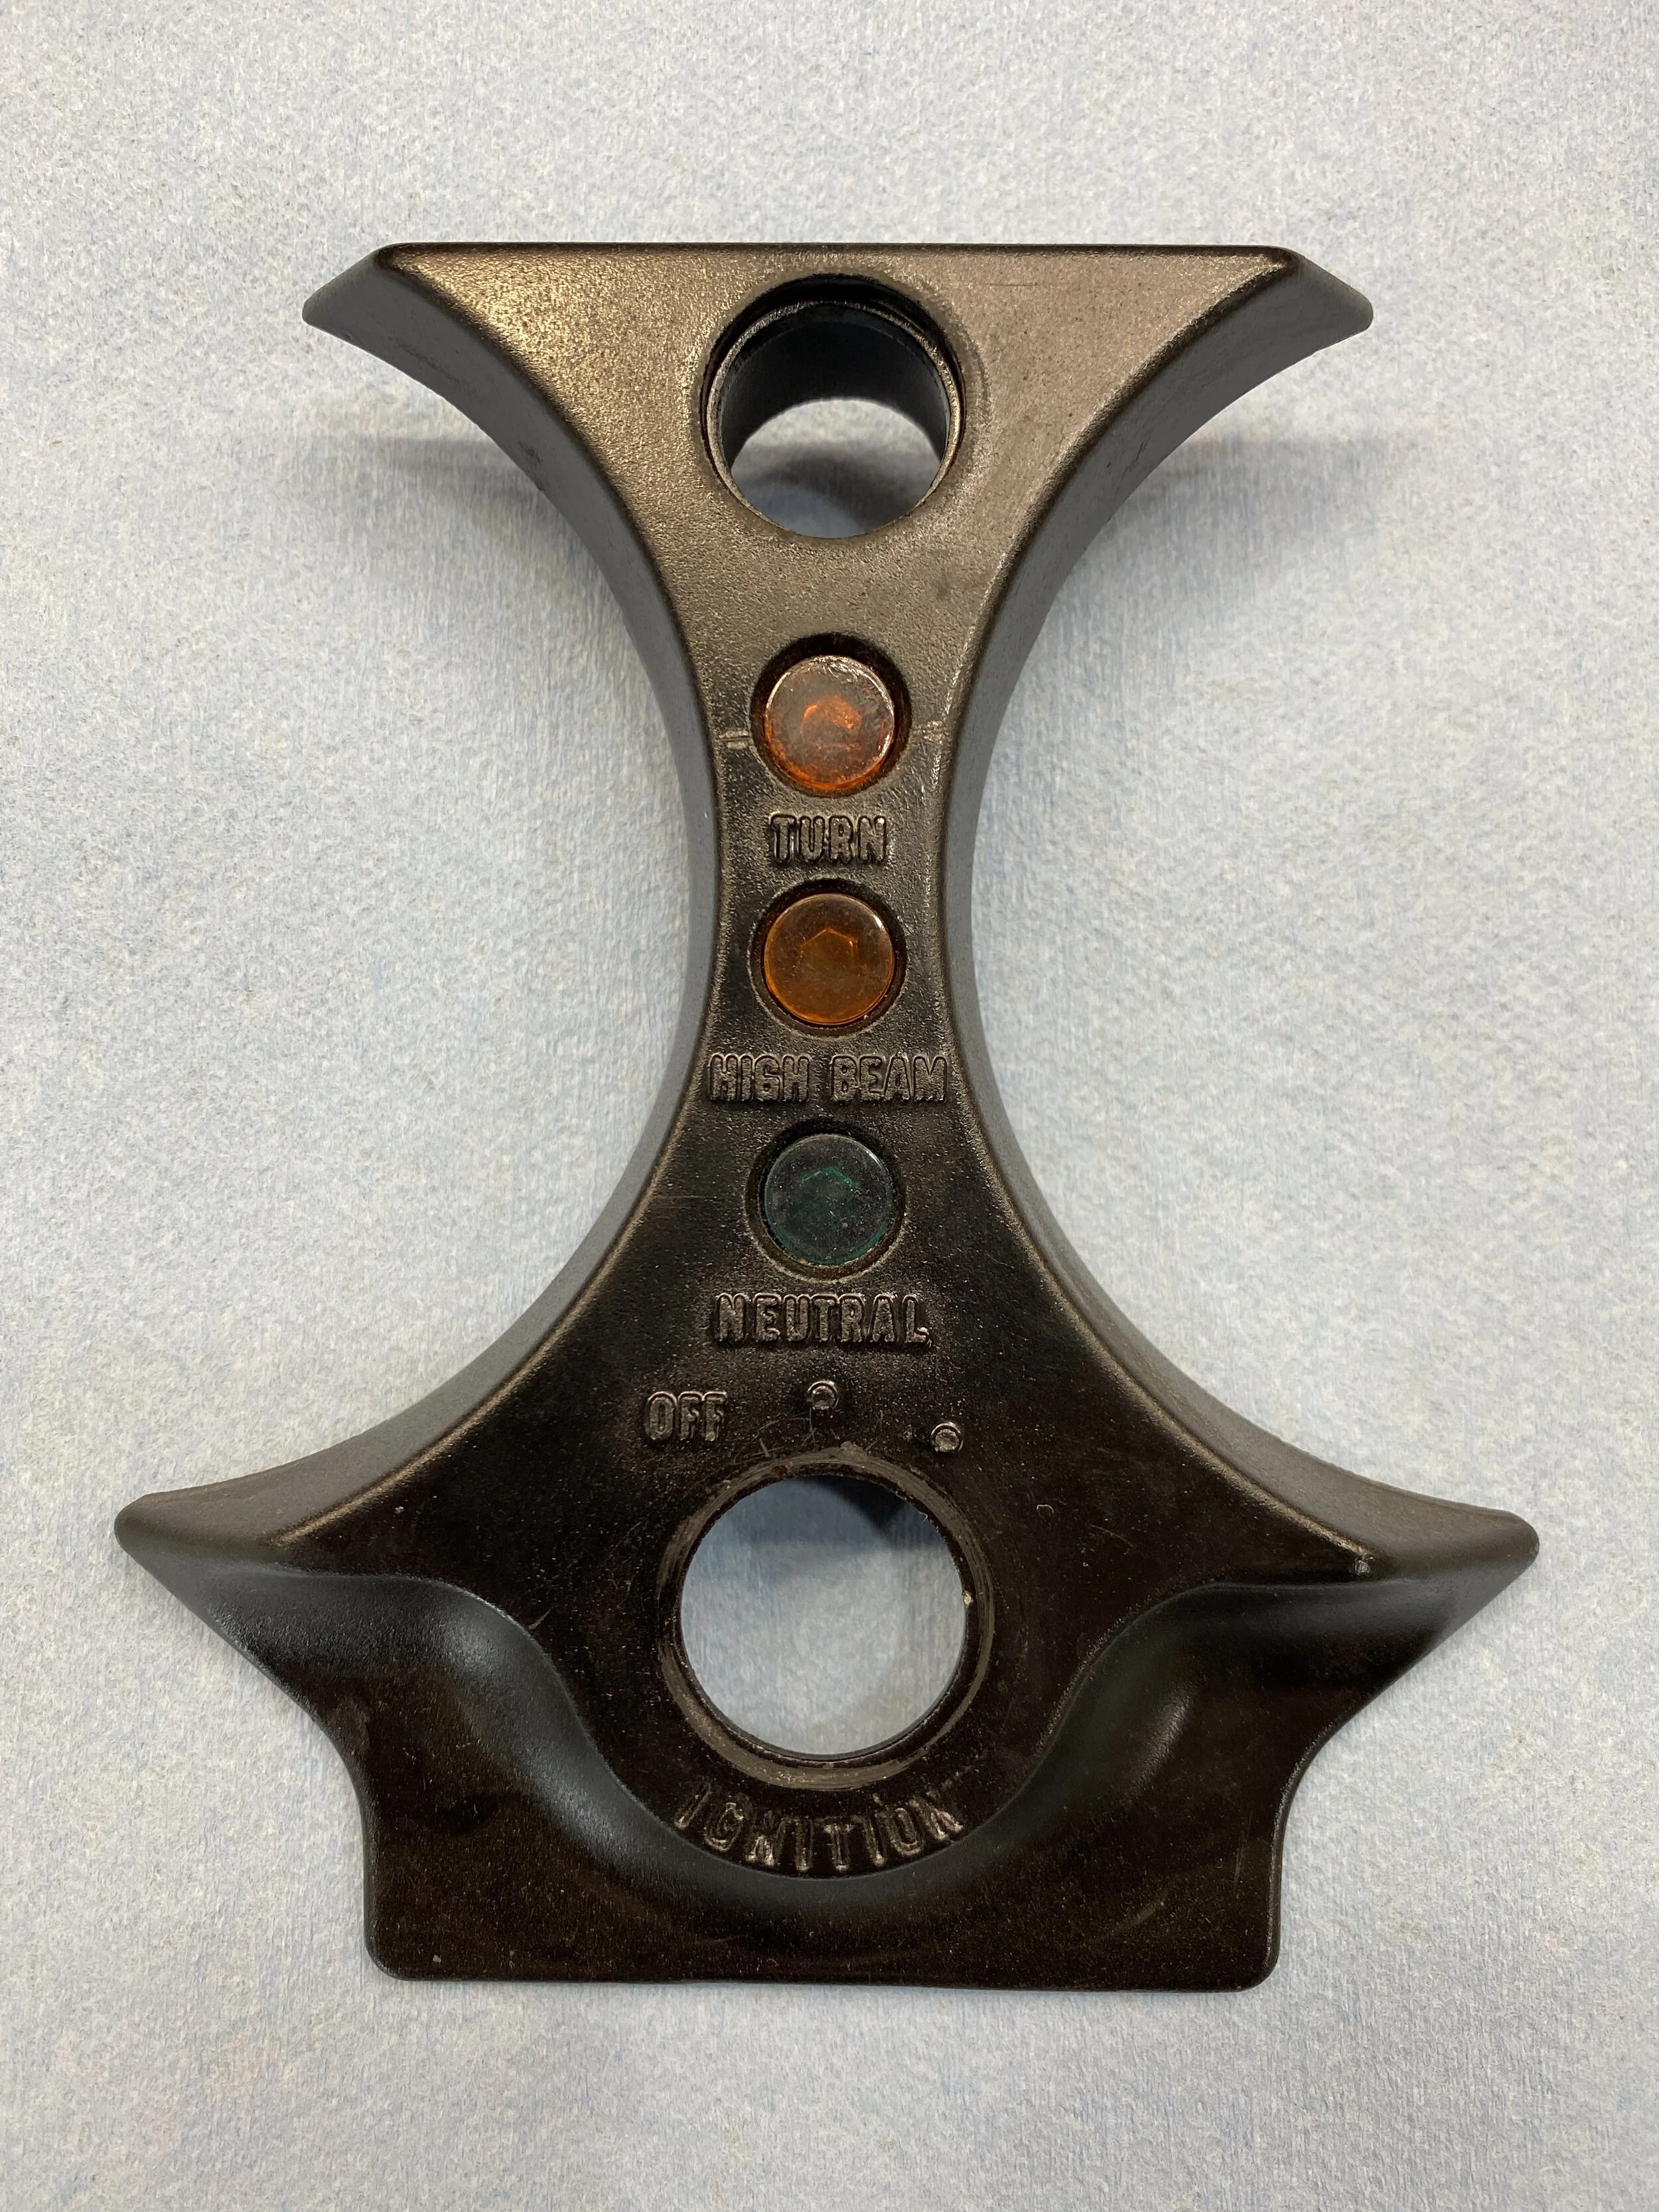
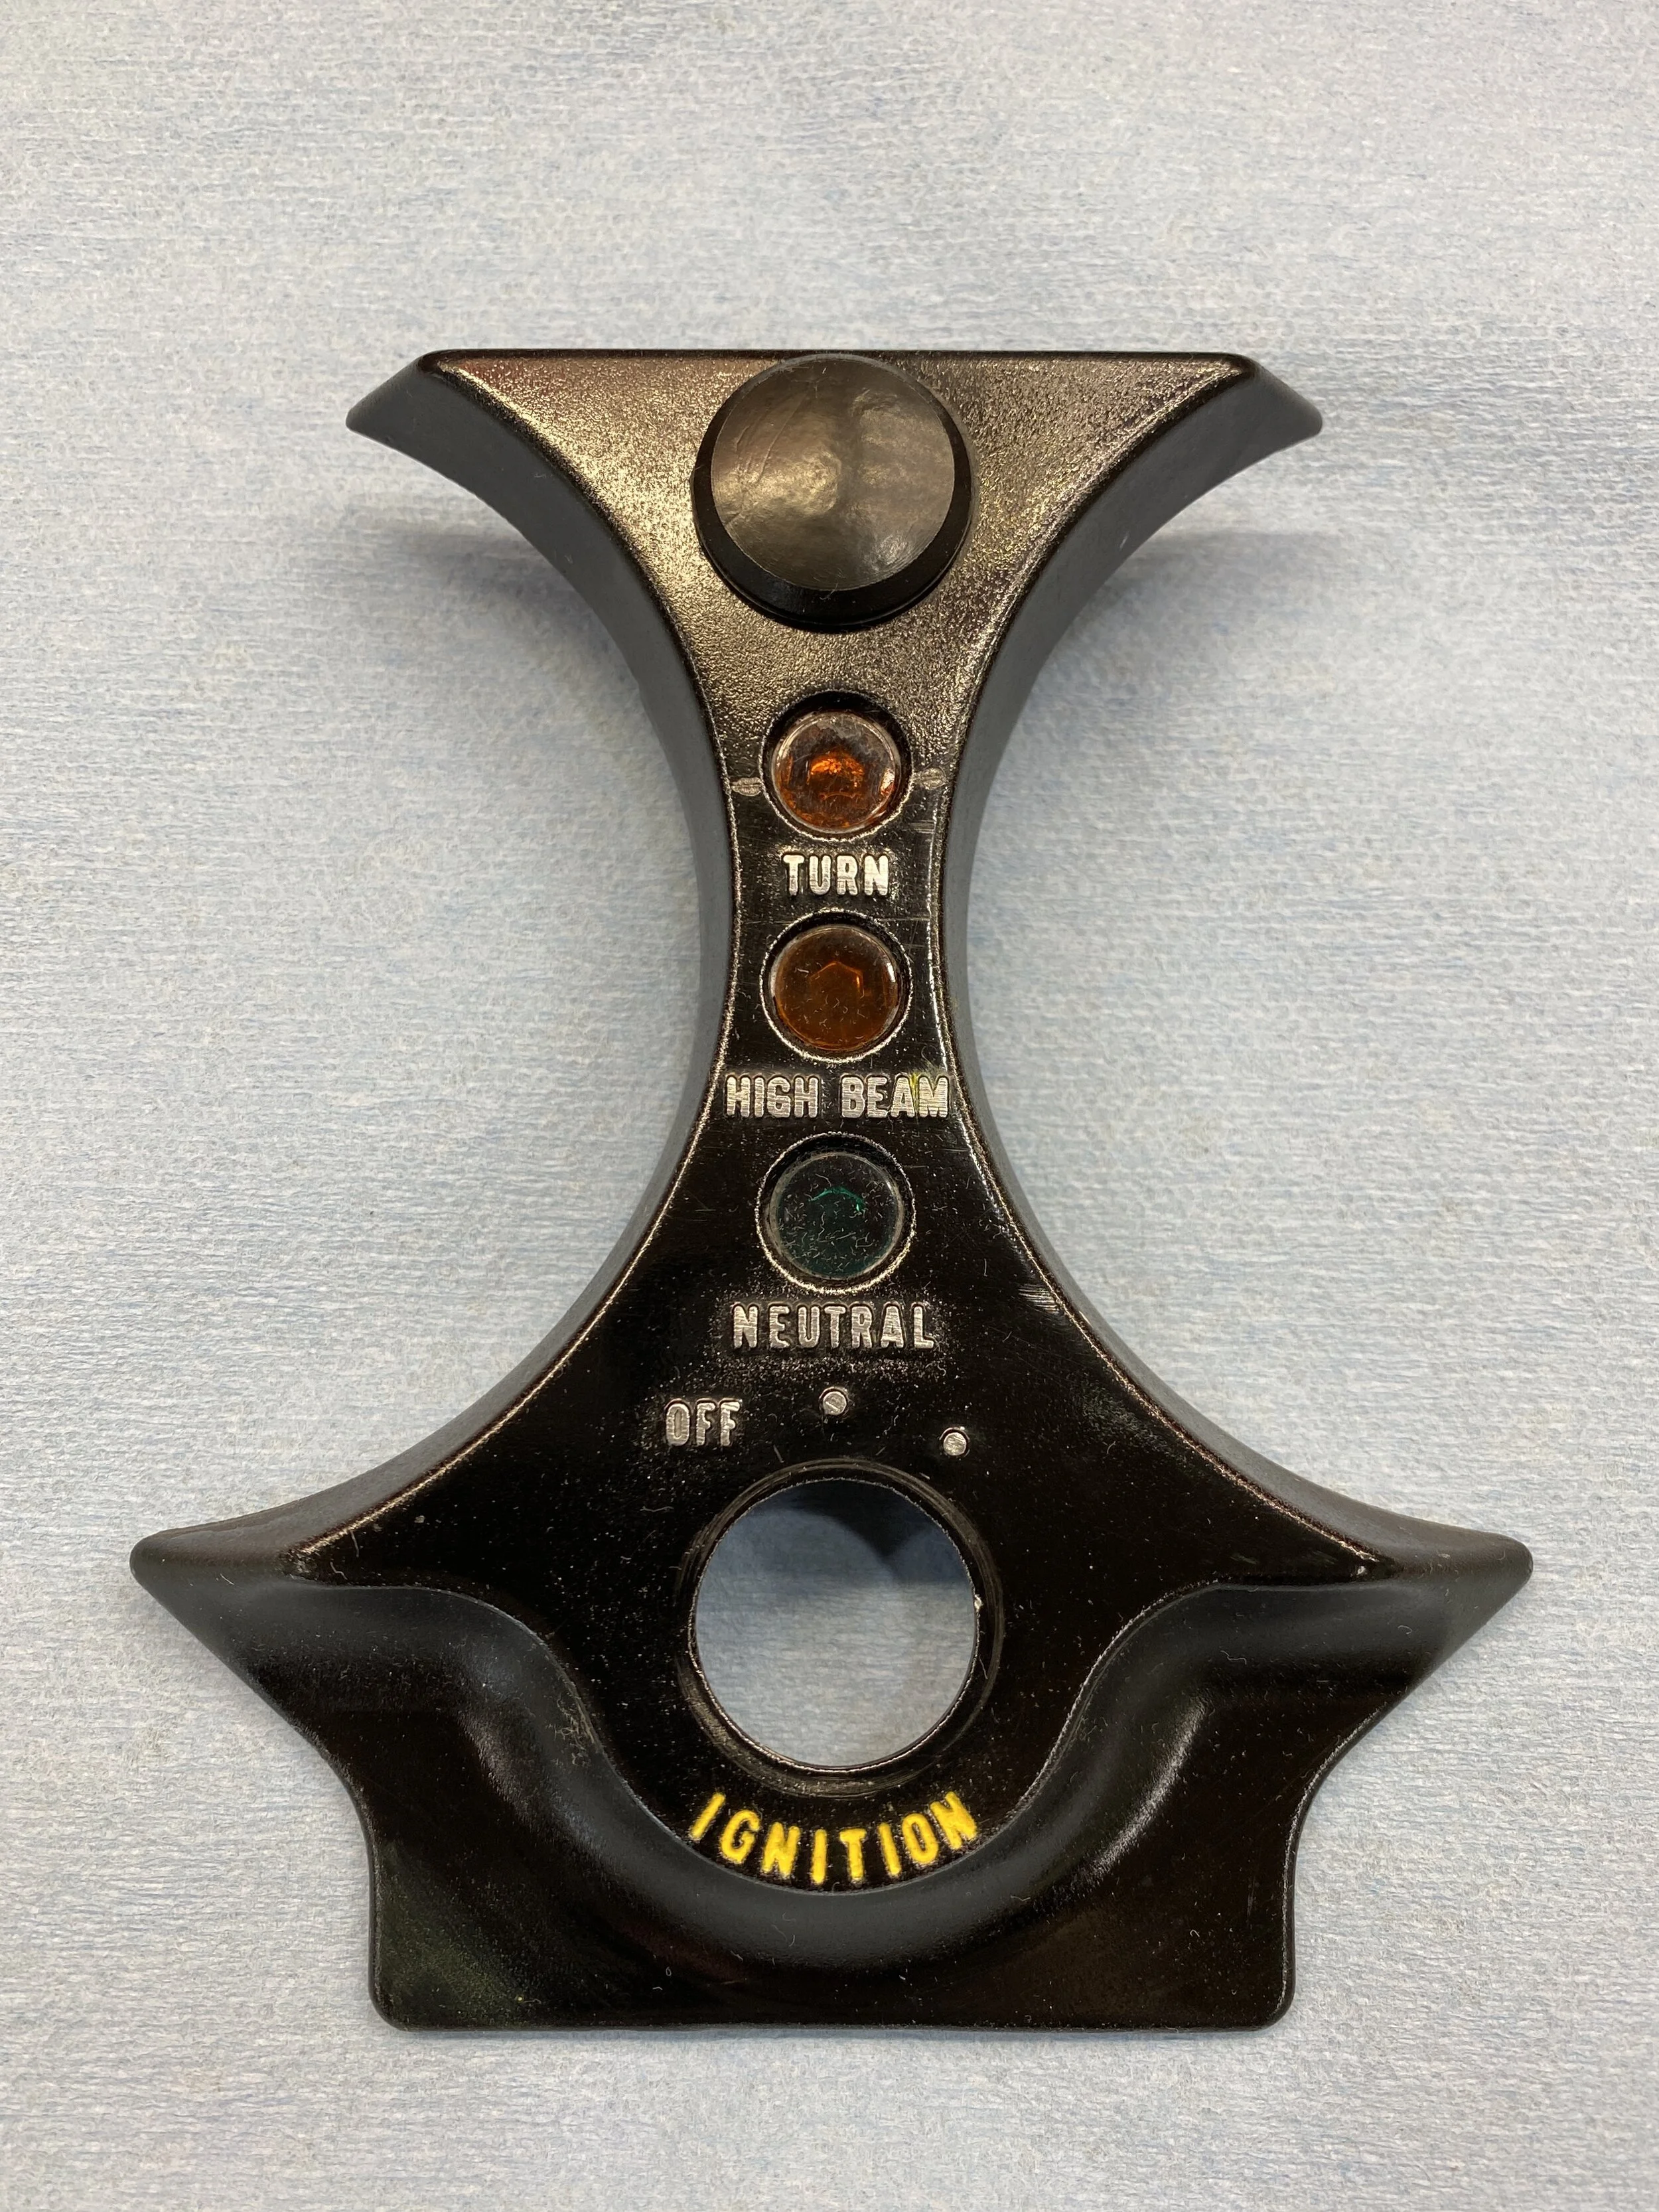
Meters…..
It took me awhile to get to these. Despite new cables both the speedo and rev counter had very wavy needles. I sent them to Don Fulsang in FLA for a full refurb. He determined that the rev counter was in fact from an H1….the difference being the redline on the H2 rev counter should start at 7500 rpm rather than 9500 rpm…new H2 faceplate is the only alteration to bring it up to spec.


In Summary…
It took me a while, and yes, I perhaps did a lot more then needed (e.g. install of swingarm needle bearings, a stator rewind, overkill on Tankgate ) but the bike I have is now solid and is what I dreamt it would be.
Note that, as with my H2 other builds, I could not have done any of it without the endless true first hand knowledge from the great gentlemen on the Kawasaki Triple Owners Club (KTOG) all of whom are exceedingly gracious and generous with their time and have had the patience to read my questions, digest and respond with good advice whenever I needed it. Thank you all.
Back to the bike: There’s no question that it had a lot of good parts thrown at it before it got to me. The Lakeland CDI, new shocks, good seat, reconditioned Charlie Smith crank to name but a few but what was disappointing was quality of workmanship on the machine which lead to the incorrectly connected oil lines, the notchy steering bearings, sloppy gear change (the bolt securing the shifter was screwed in from the threaded end first so was unable to grip the shifter splines), untrue (and internally rusty) wheels, unconnected neutral light, the filthy carbs, the empty airbox, the incorrect battery, the pinholes in the rusty gas tank, basically all the things that hide behind the ‘sold as is’ disclaimer but one should never expect to find on a frame up re-conditioning. It has, however, been a deep learning experience, that showed me exactly how not to present a motorcycle.
I know the question on everyone’s mind is simply- Did you contact the seller? I meant to, but I kept thinking, well it’s just this or just that and I’ll have it fixed in a jiffy and maybe I’ll contact him later and ask for a contribution to the fixes, but as the problems mounted I simply only cared about getting them fixed and that window closed. I did a little research and saw that any negative reviews were met with swift and merciless attacks with the victims suffering further by being portrayed as the wrongdoer. I wanted no part of that dance. Nothing I learned lead me to believe that anything I did would result in a remedy that would leave either of us satisfied, and again the defense would be the all encapsulating sold ‘as is’.
All that being said, I’ve collected seven bikes from the fabulous E-bay and honestly this has been the only purchase that really ran against the grain of what I was expecting, and in the end I turned it around.
Will I do it again?
You know.
Running…


“There’s nae spark Captain!” Apr ‘22
Rolling the H2C onto the lift to refit the calipers reminded me of the blood sweat and almost tears it cost me when it unceremoniously flat cut out on the way back from the supermarket one night last summer. Some thirty kicks later, a push up a long hill a roll down the other side and bump start in second got it going again which doesn’t make it sound electrical, but I think it is.
Fast forward to tonight, I took the plugs out and kicked it over just to make sure that was no oil or fuel in the crankcase and out of curiosity dimmed the garage lights to see if I could see what the spark was like. It went from intermittent to not at all. Bikes been on a tender. It’s got lights and flashers.

Rummaging around in the small H2C box in the corner of the garage revealed this little collection set aside for a project that never happened.
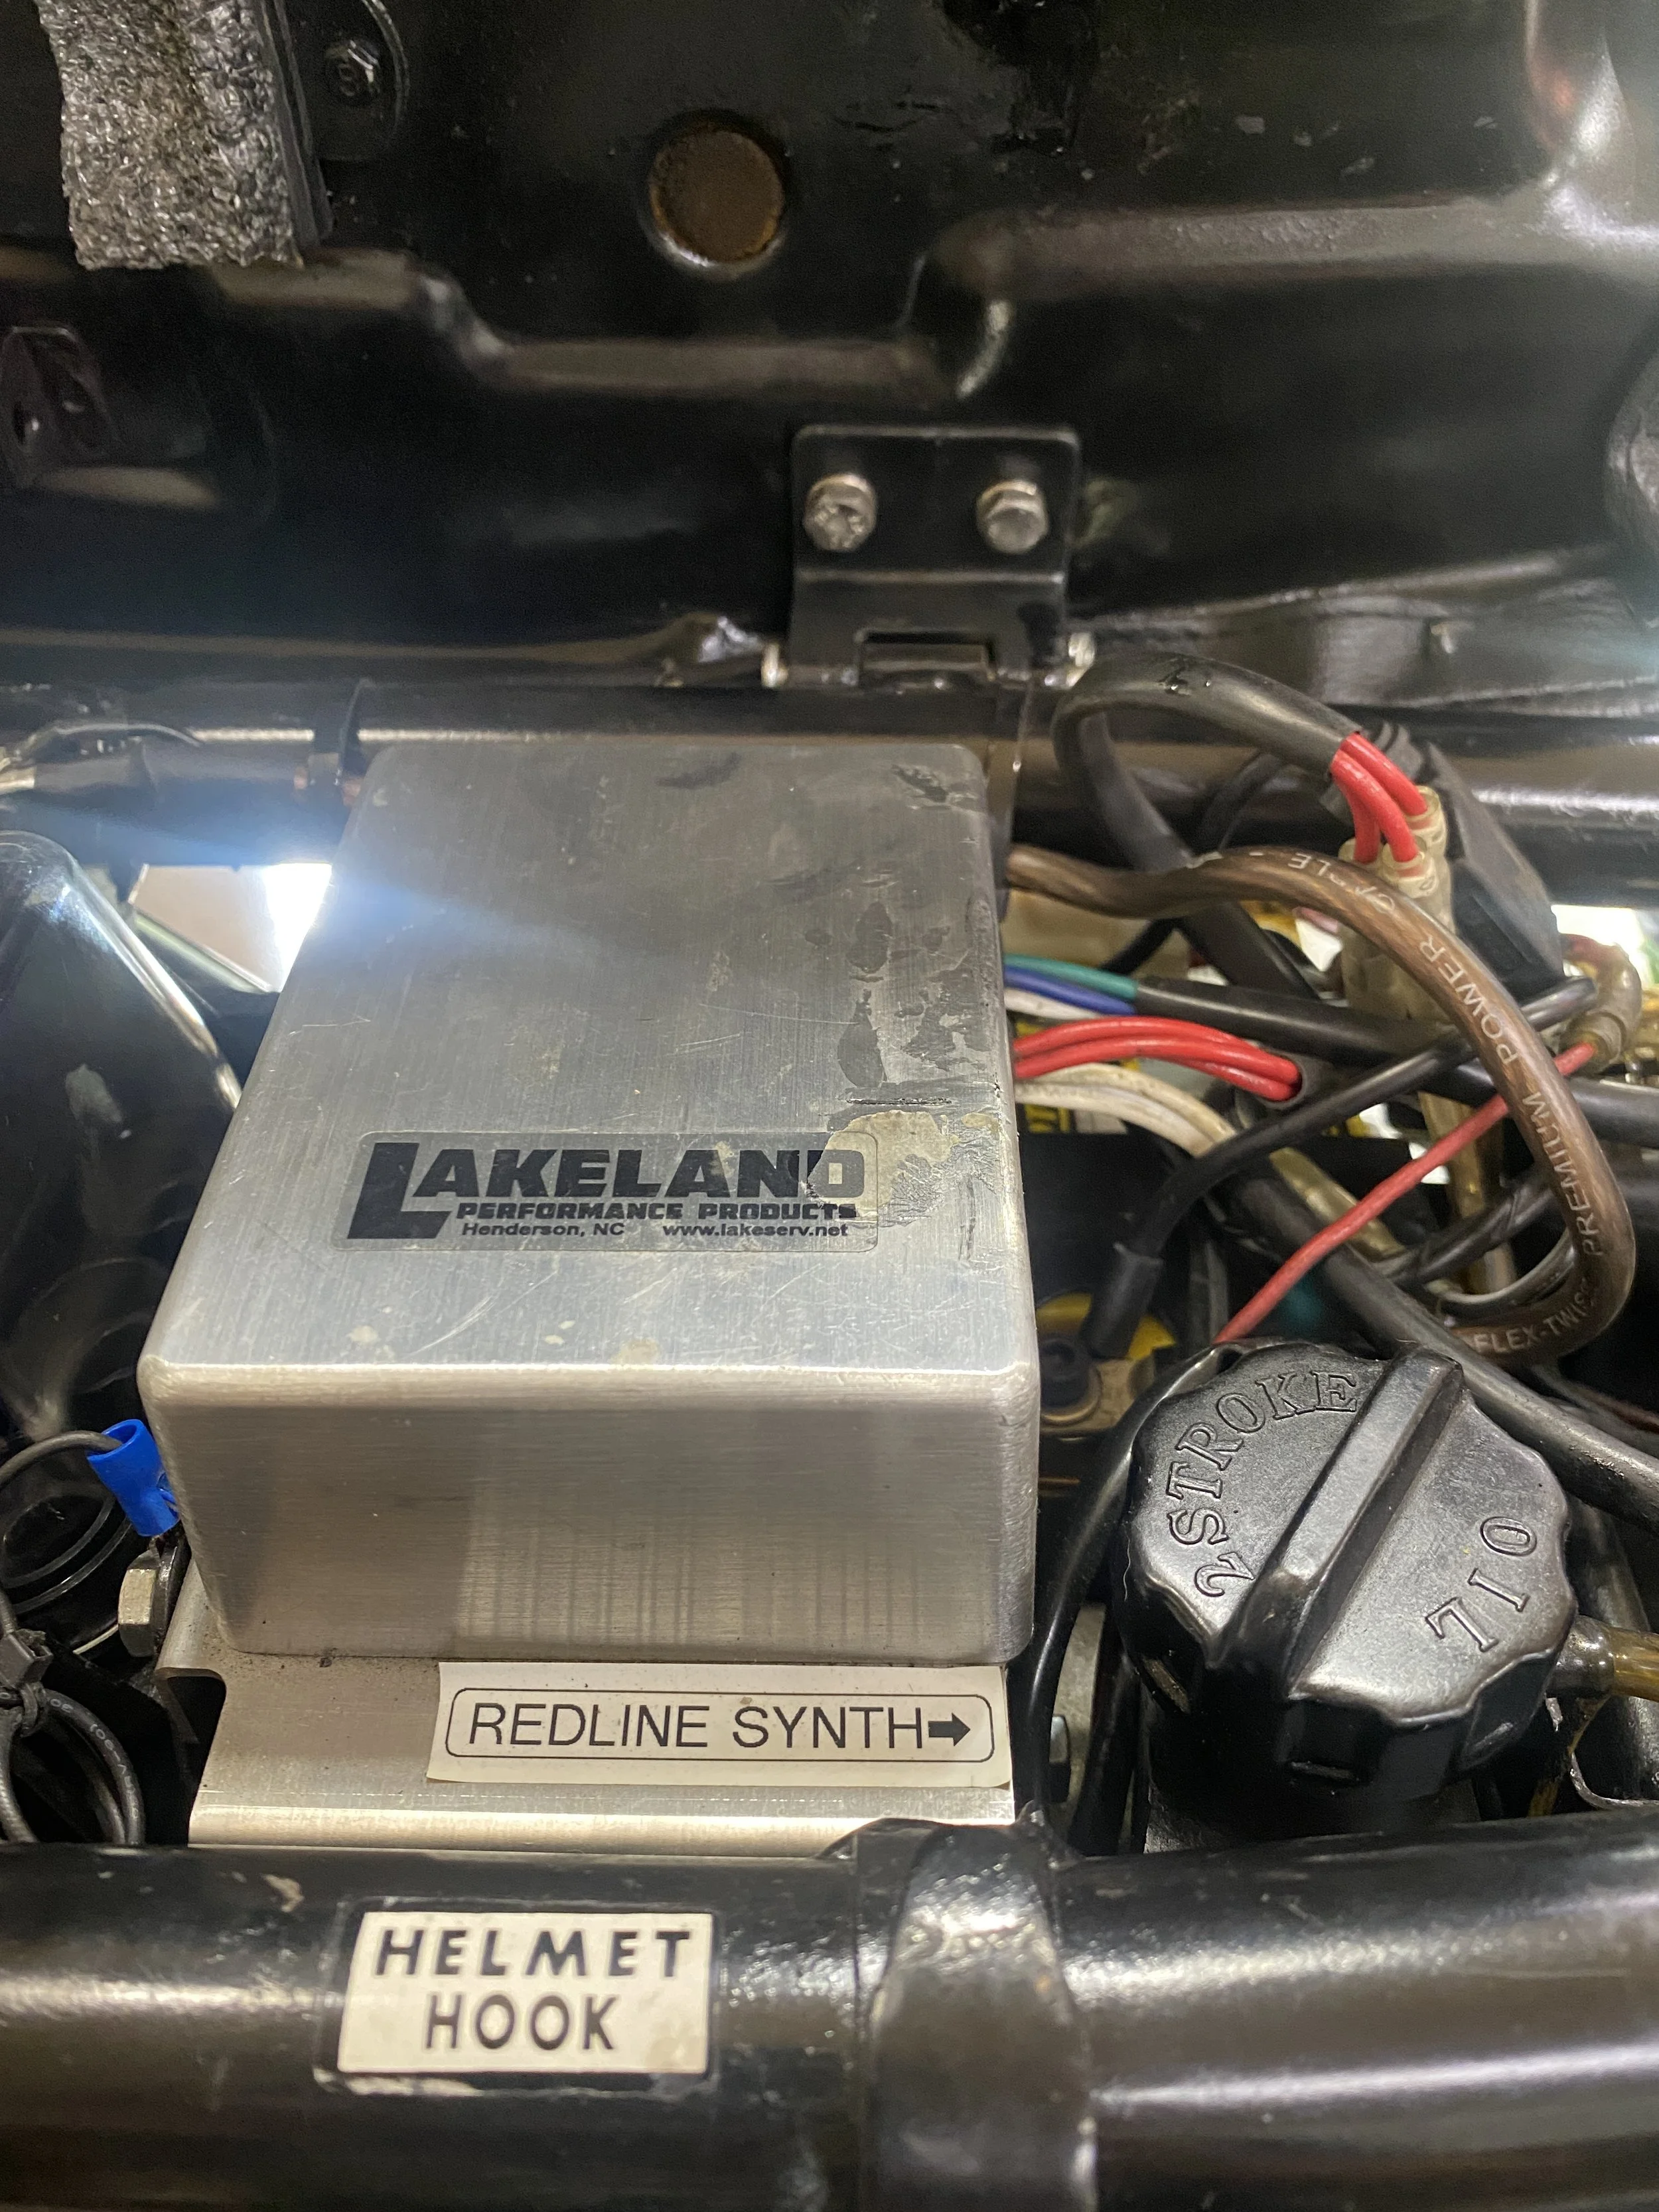
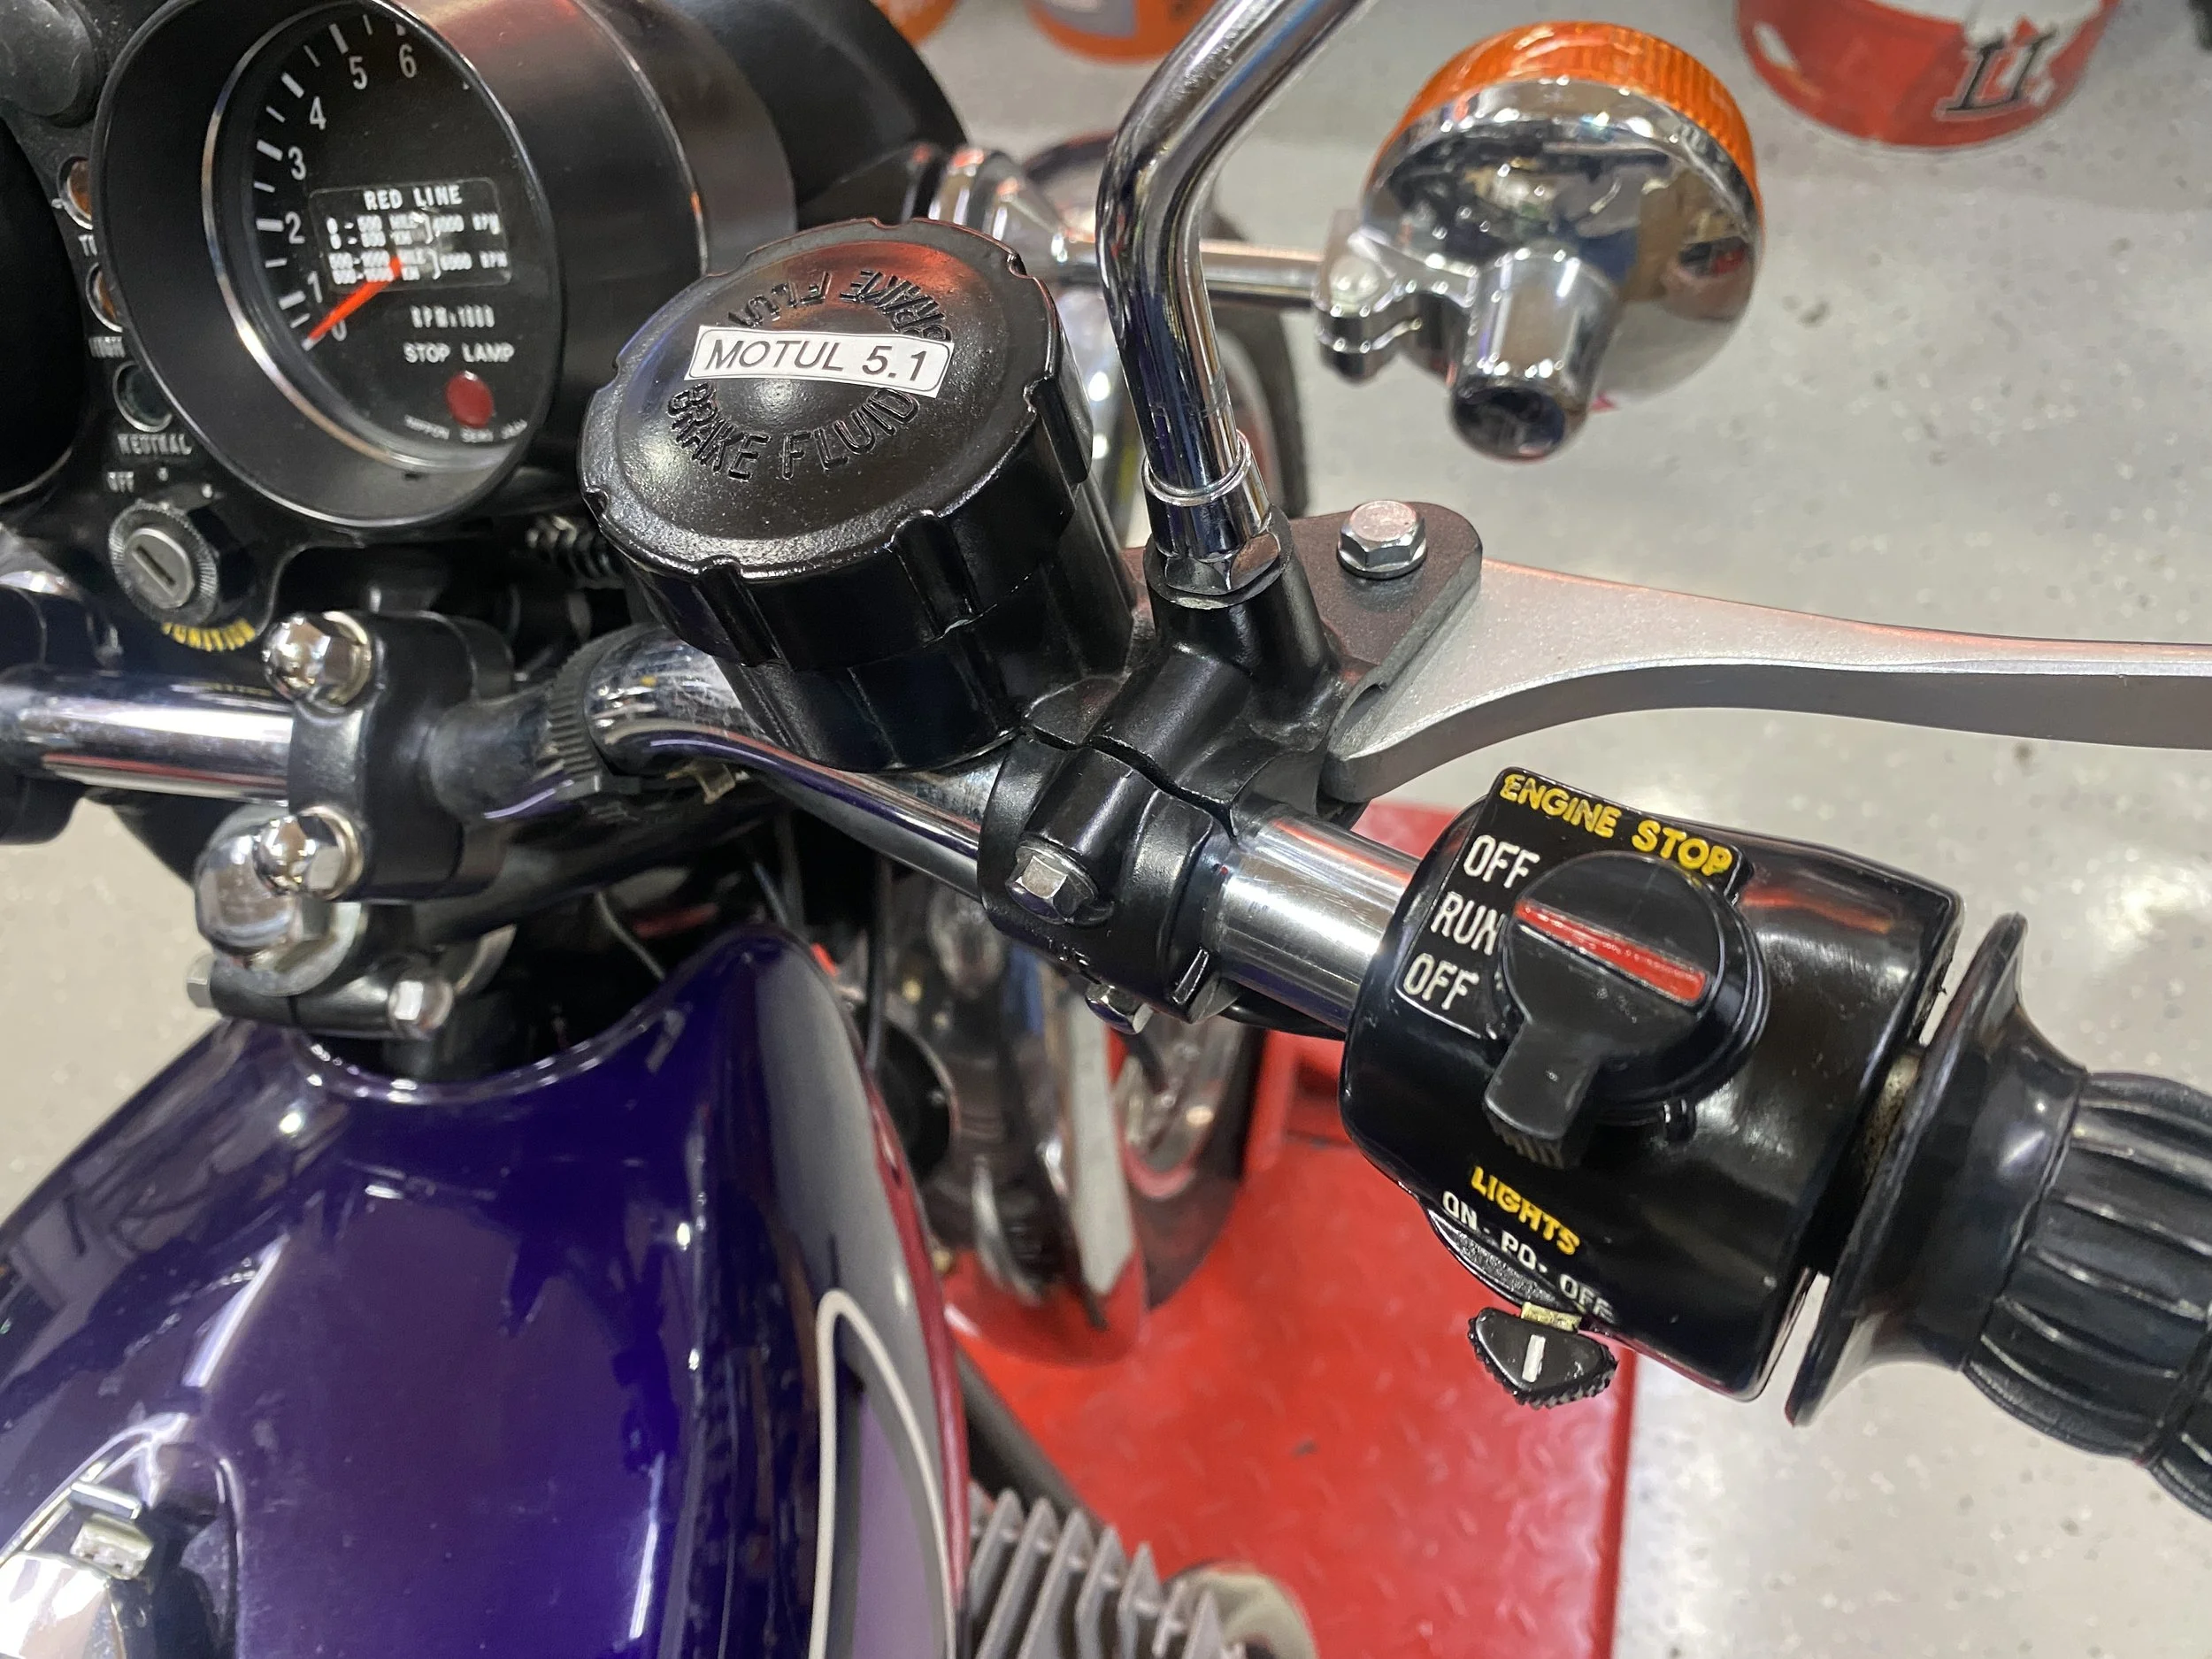
3 original coils and four different spark plugs. In my defence (been saying that a lot lately) I remember now that the New In Box plug was one of 10 I had ordered that were advertised as B9HS’s not BR9HS’s. Seller became MIA when I tried to return them. Bearing in mind this bike has had all its electronics replaced: Rewound stator from Rex New coils from Jess New CDI from Lakeland NOS rectifier New switchgear (killswitch) came with bike. It’s a bit of a mystery and a little annoying considering I did all that work to make it more reliable. Bikes eh?

Dug out an OEM CDI unit. Dusted it off.
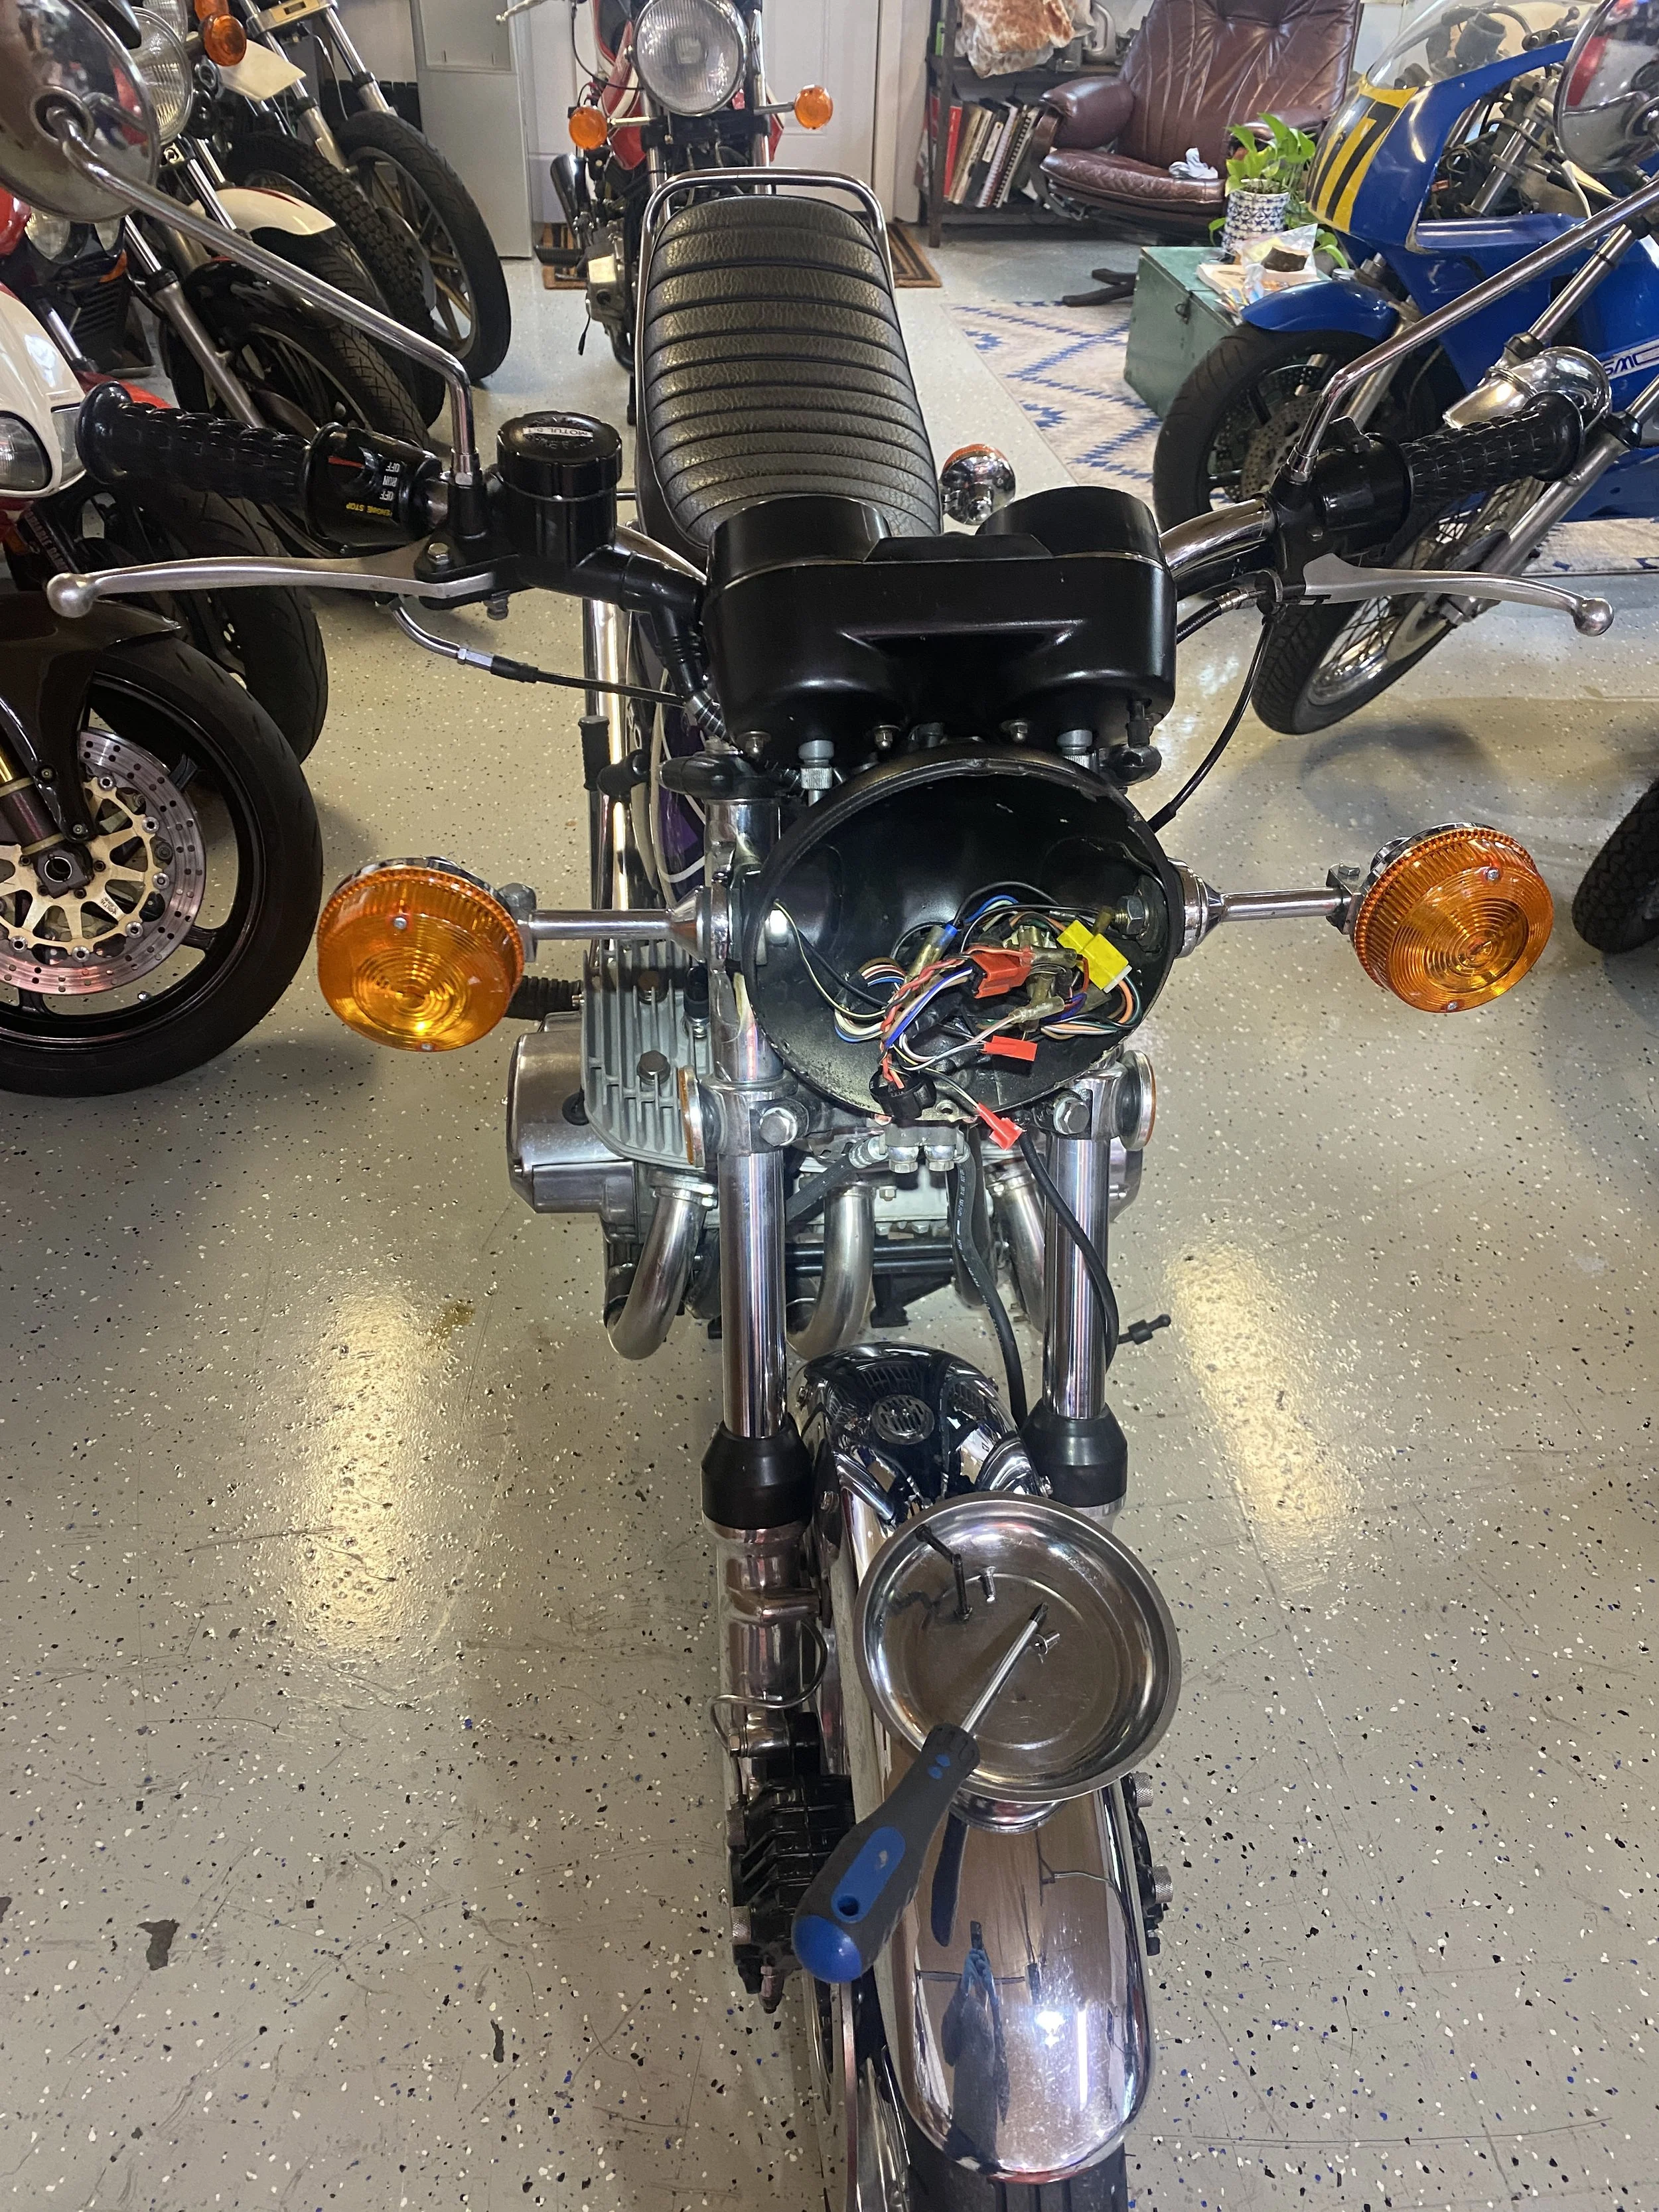
Thought better of doing that swap and instead identified the 2 wires coming from the kill switch and undid the appropriate block connecter in the headlamp. Bingo. All sparks and later, a ring ding ding and blue smoke. Was about to take for a test ride and a friend appeared for dinner. Just as well really, would have been riding without a headlight. Haven’t had the chance to get to the root of the problem. Maybe tomorrow.
The possibly offending item looks......new.
Wires full of insulation and healthy looking connections don't suggest I'm finding anything.
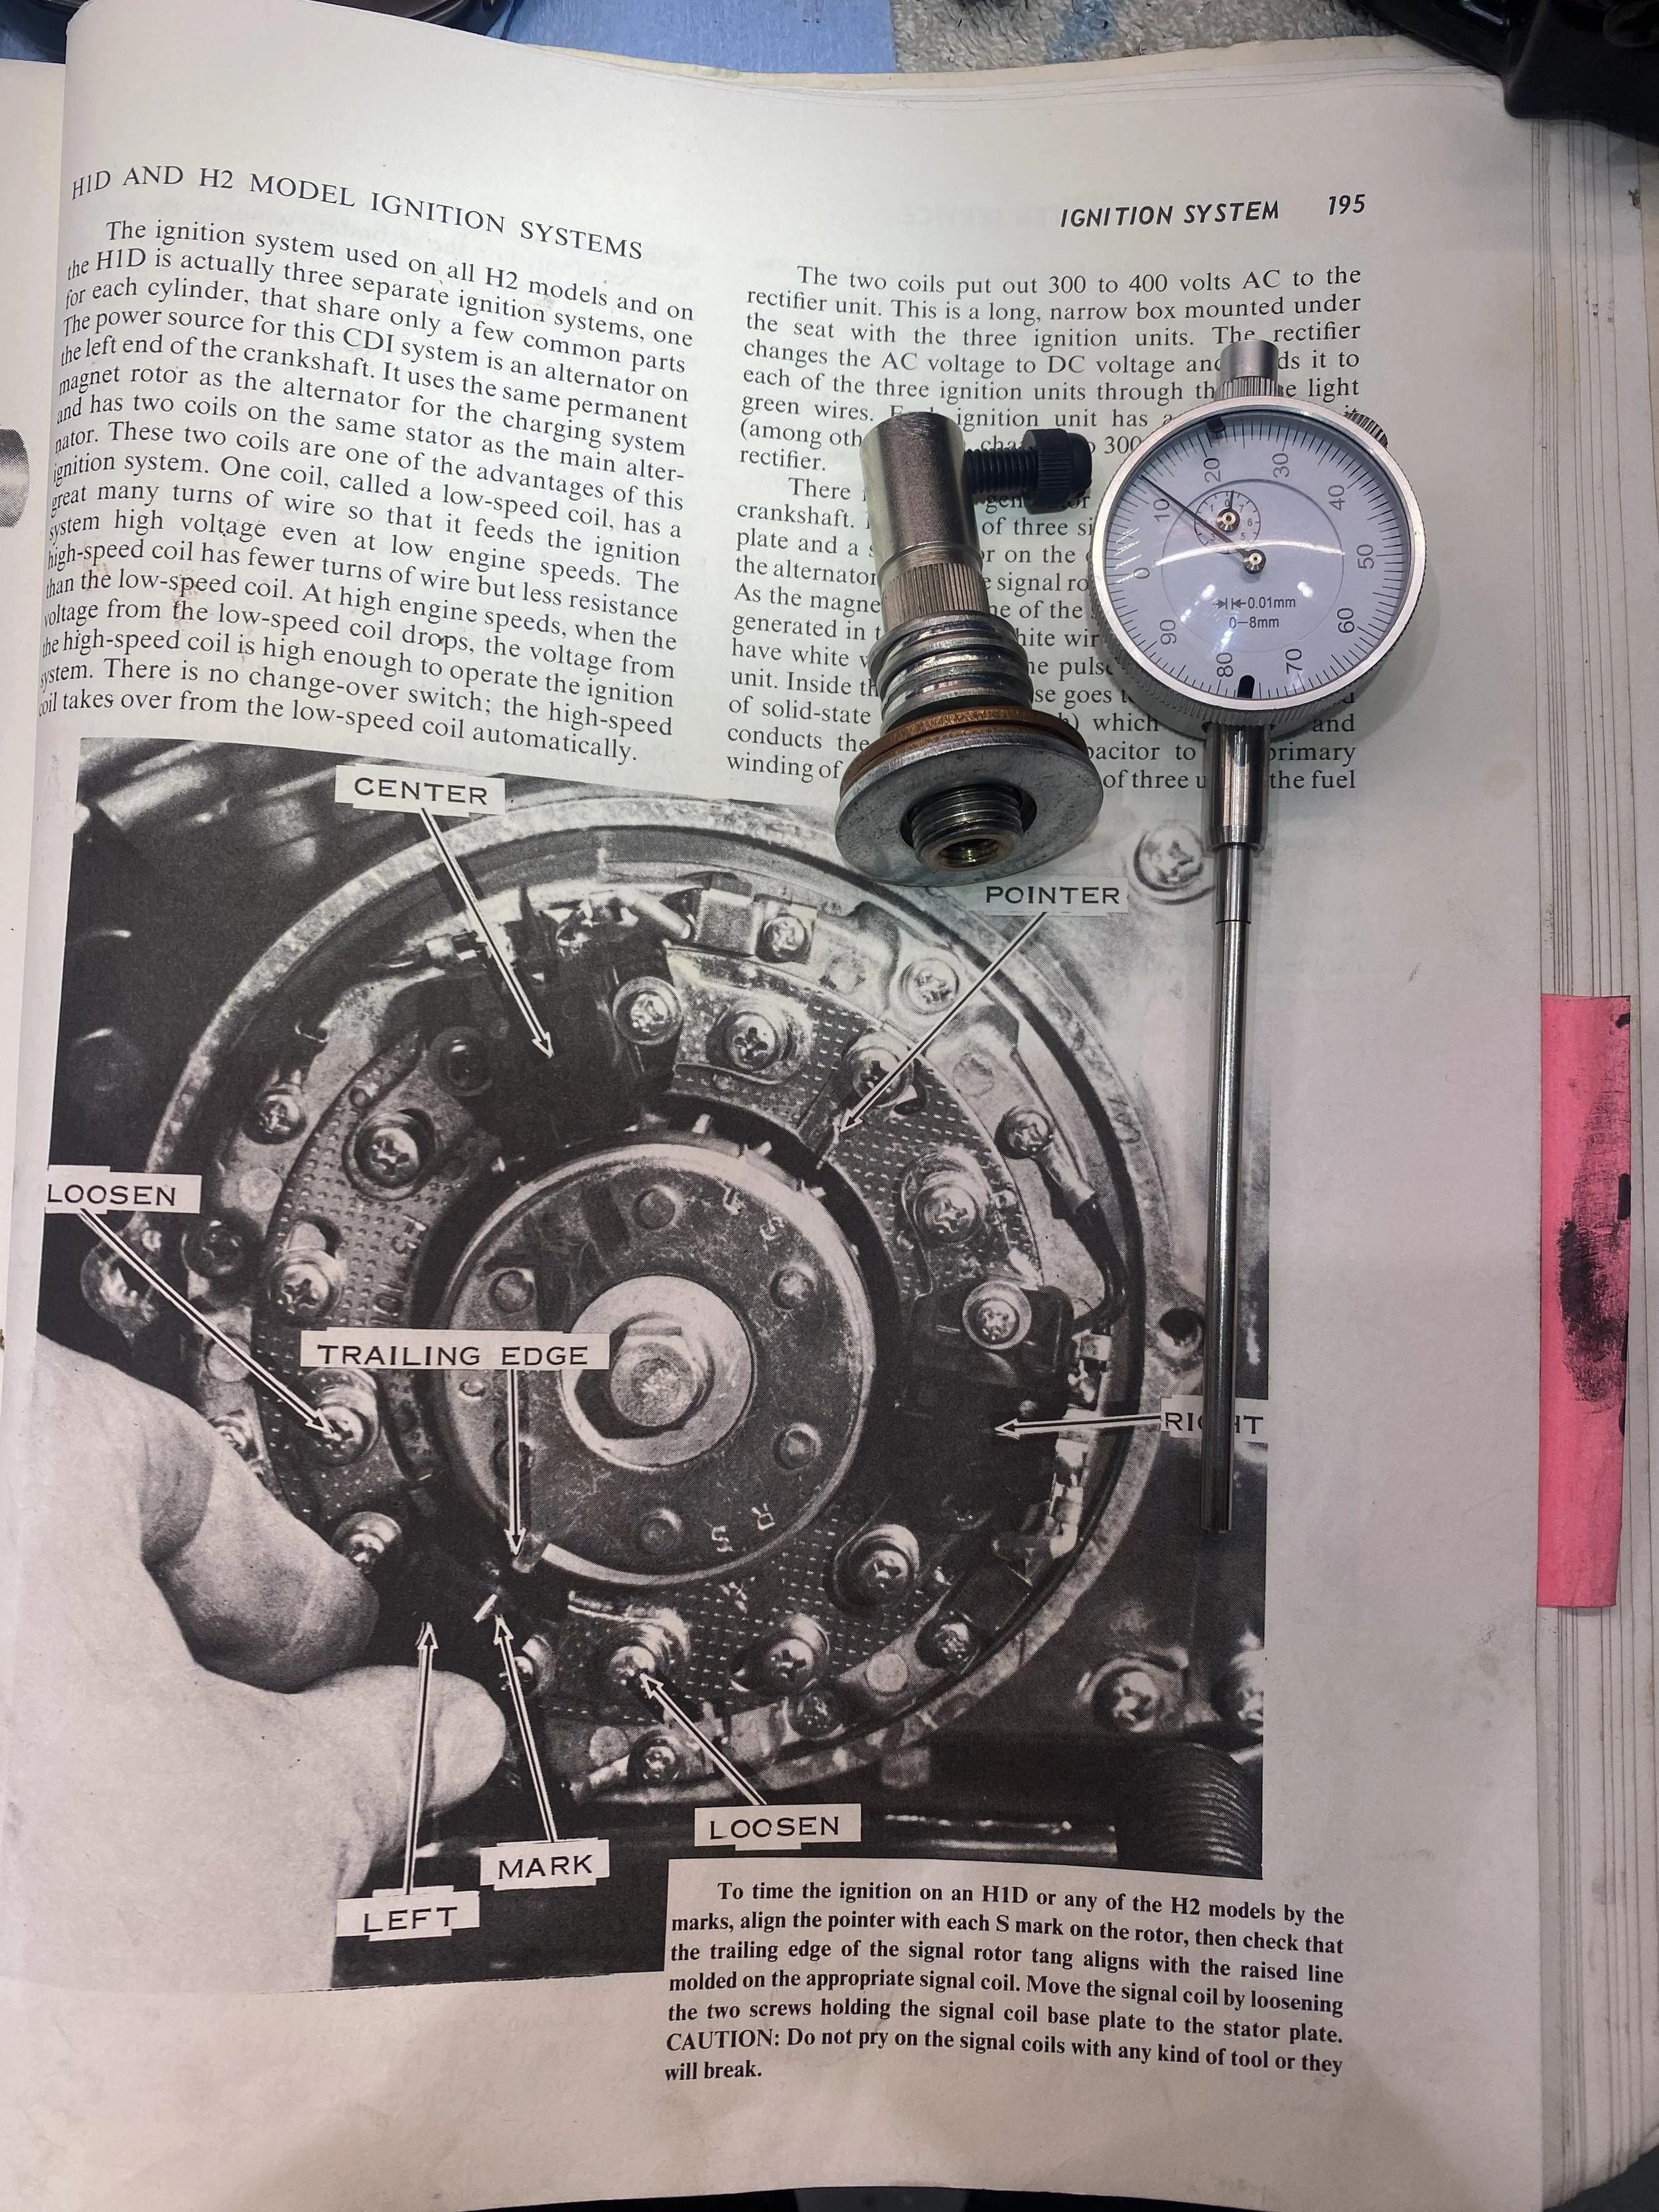
Part of the process of elimination. Check the timing, starting off with a dial gauge to make sure the pointer is in the correct position.
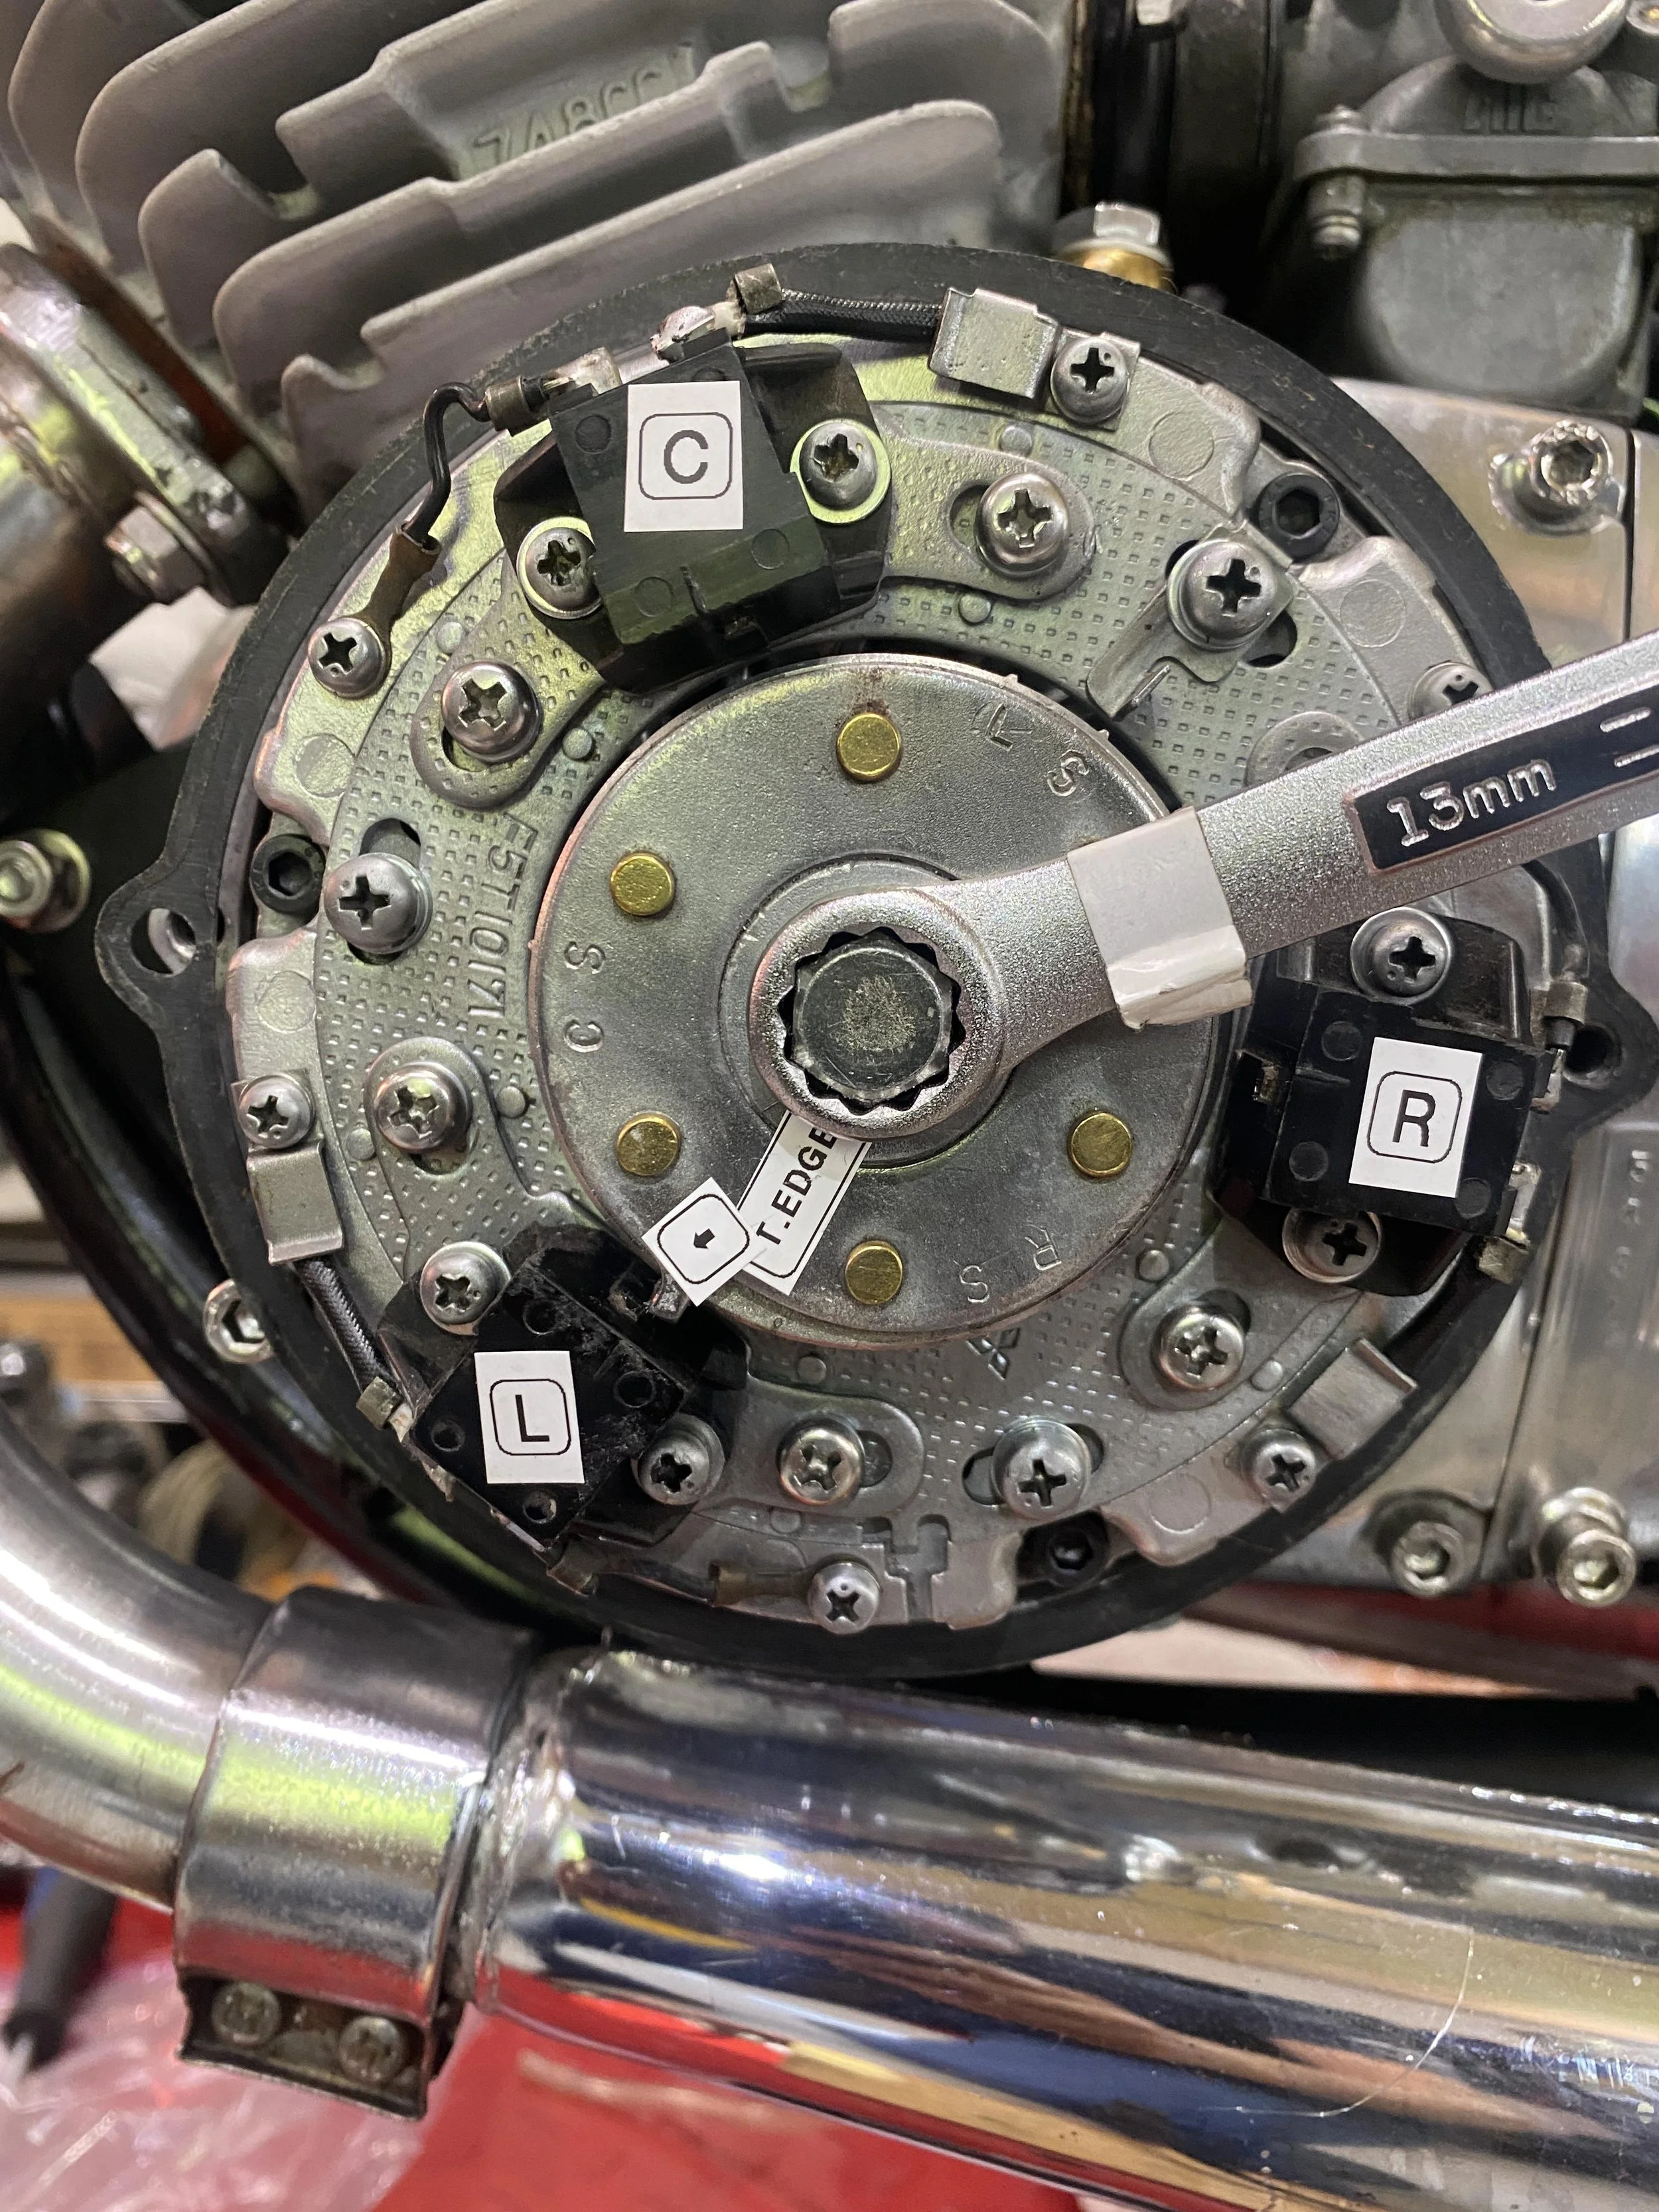
Then make sure the trailing edge of the stator pointer is lining up with the embossed ridge on each of the pick-ups. Then I learned a new tip from someone one the KTOG forum: Decrease the air-gap between the pick ups and the stator from 0.020in to 0.010. Double checked the run out of the stator was consistent and was not about to take out the (irreplaceable) pick-ups.
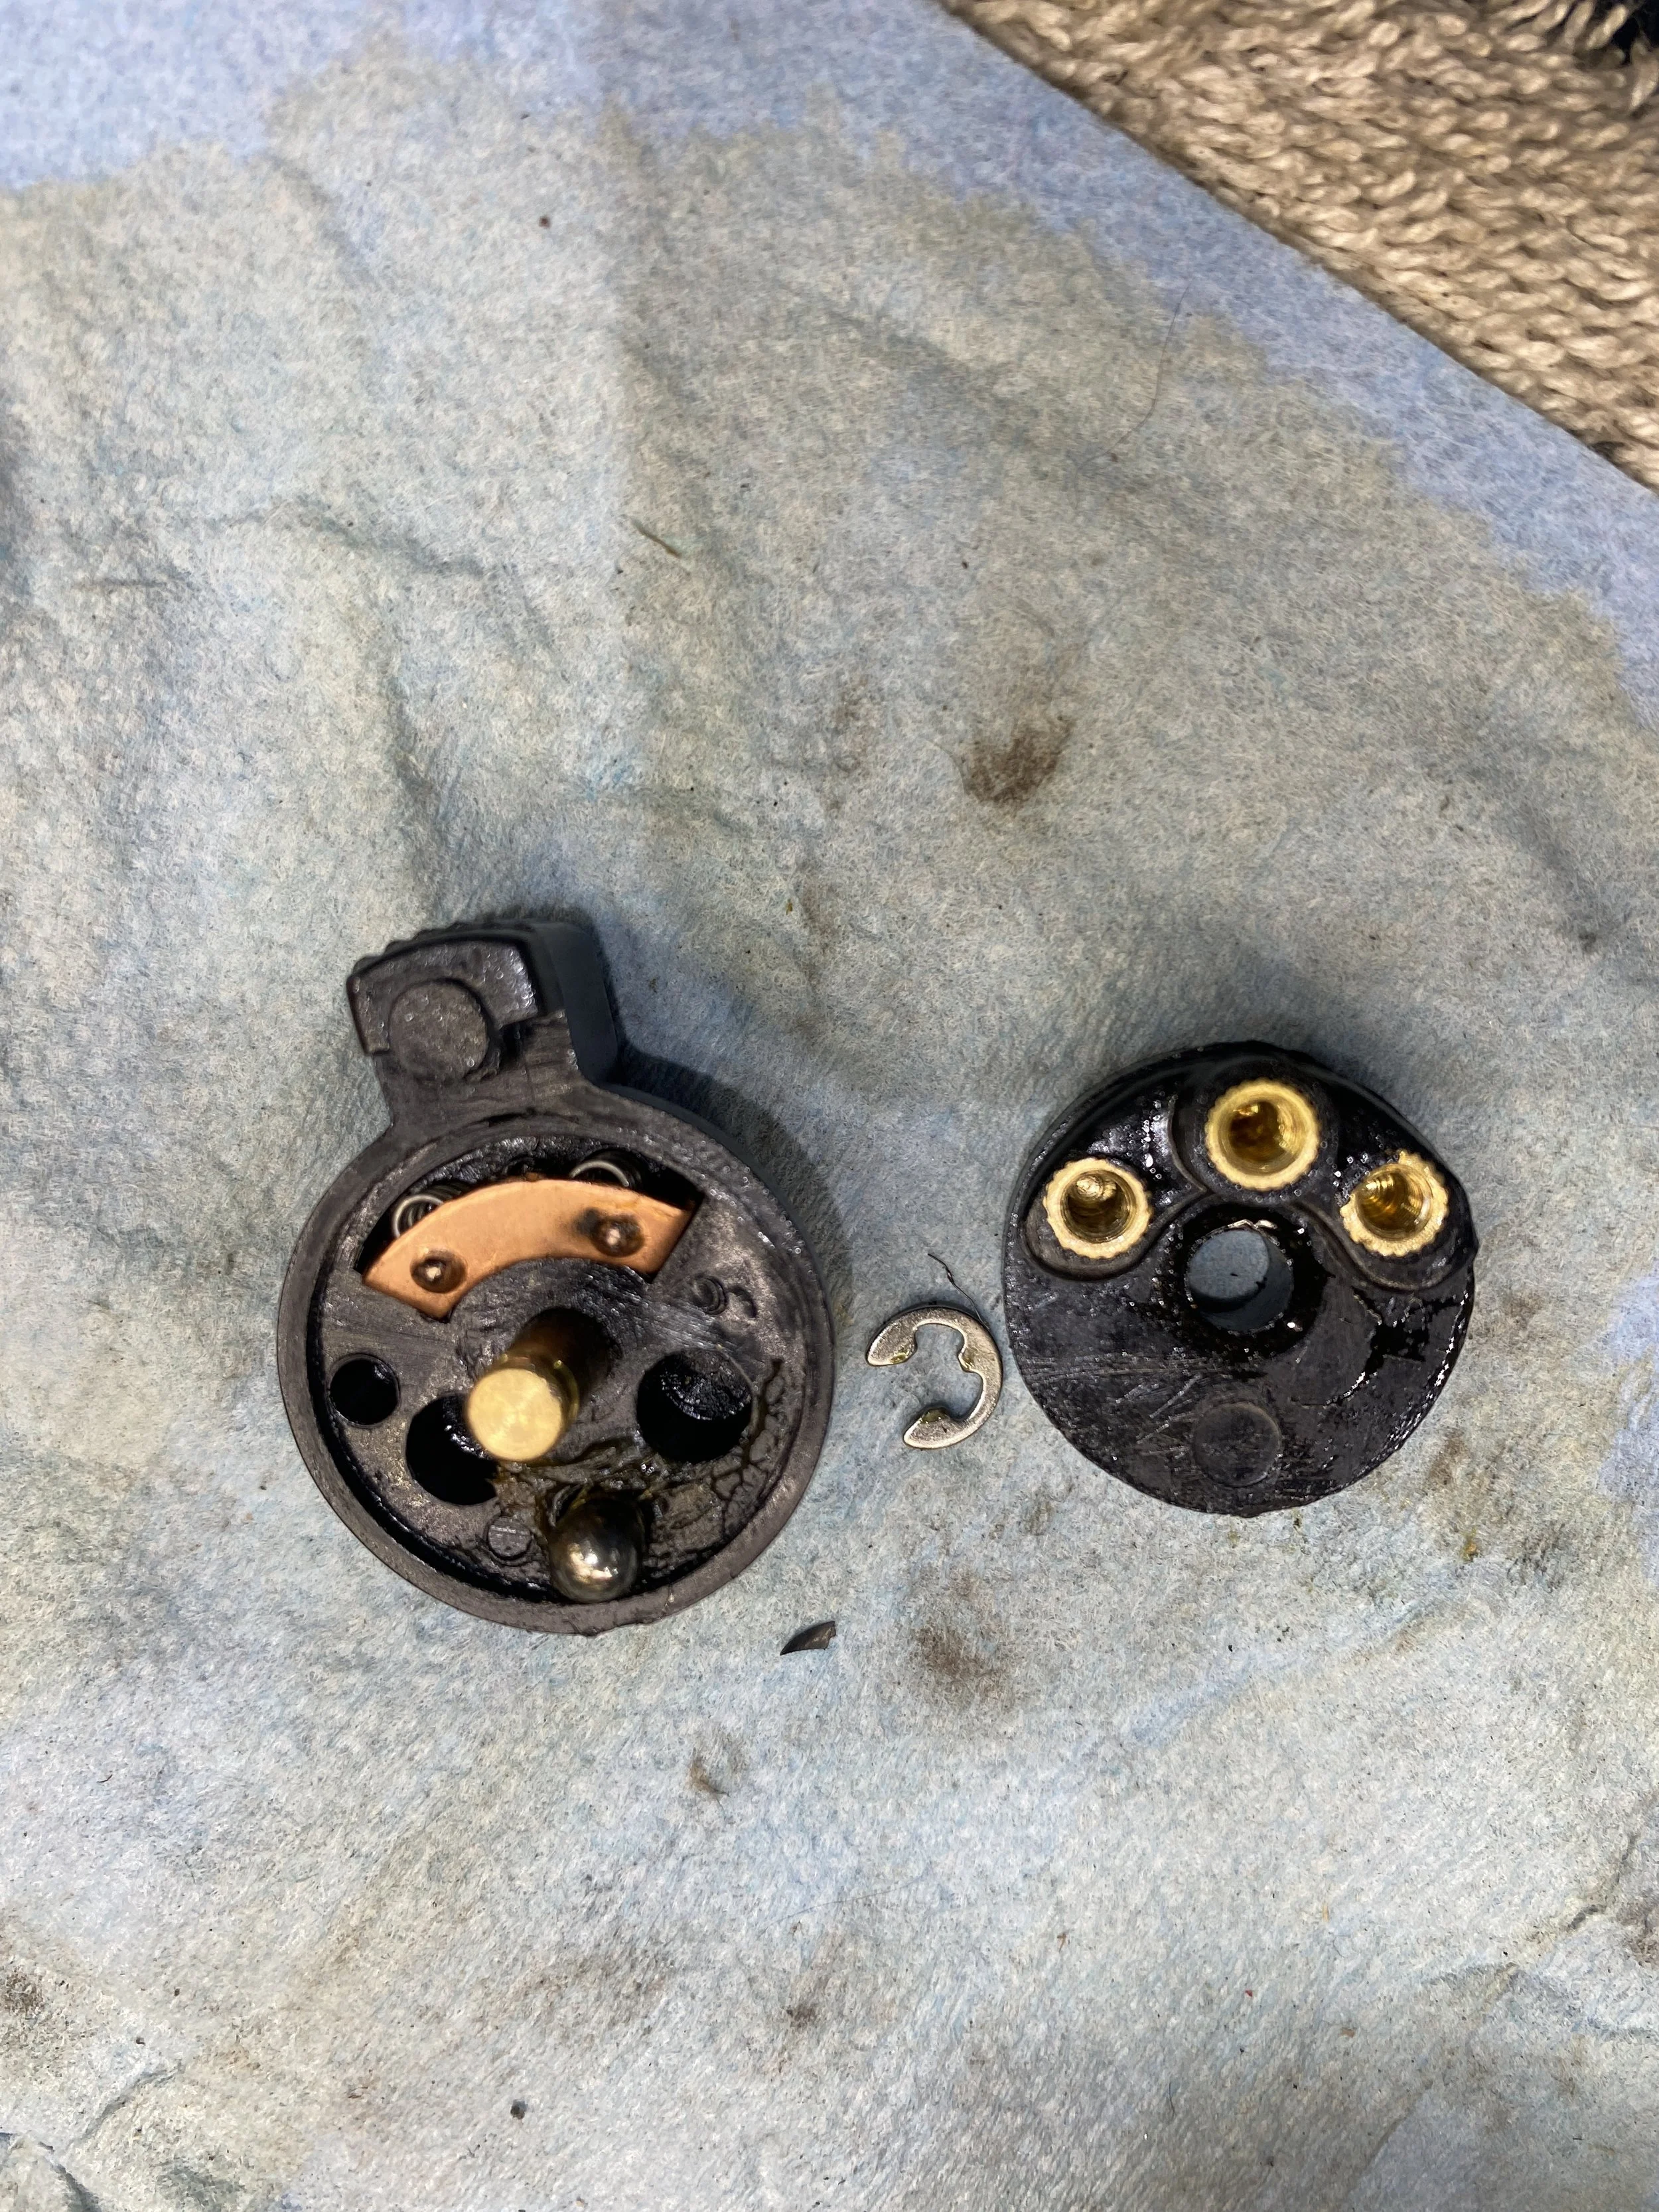
This is how it works. Simple and mechanical, the same thing is being done by a circuit board buried deep in the modern motorcycles.

Continuity test. For a moment I figure I must have the only switch that seems to be wired backwards!! Power flows when it’s off and doesn’t when it’s on- but mate, that’s how it’s supposed to be. Ah.
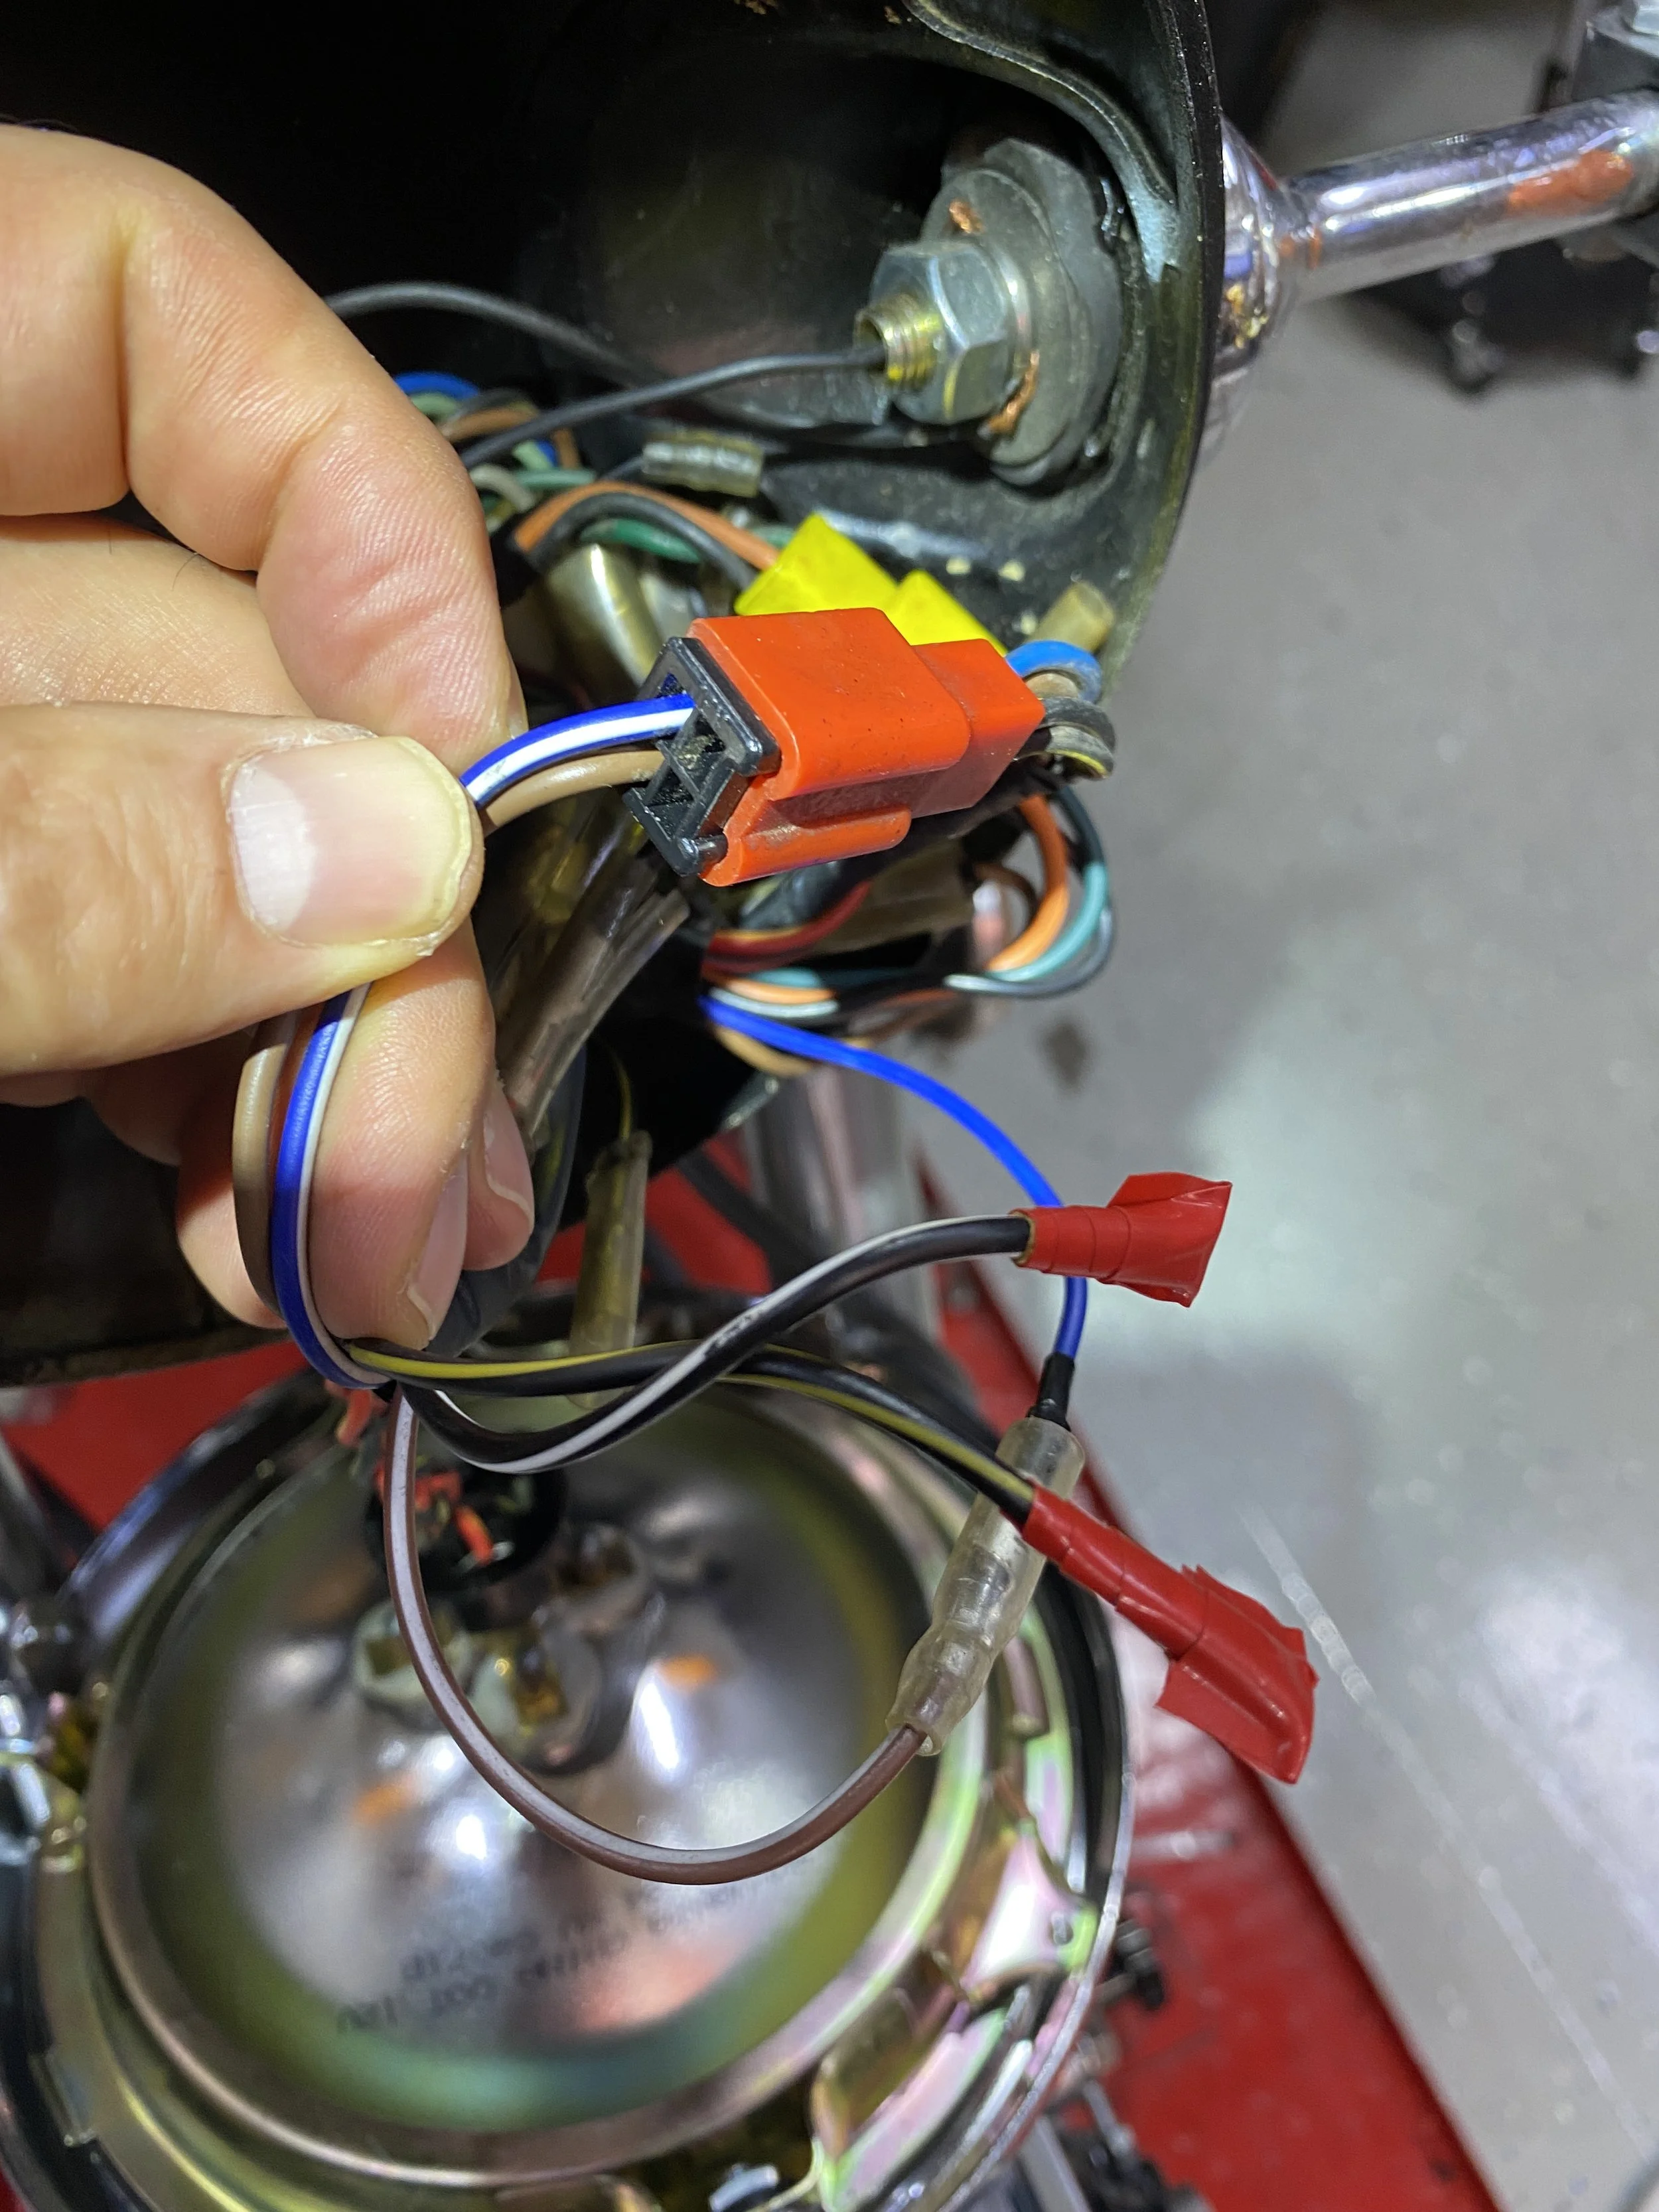
I got the bike running and then connected just the kill switch connections with crocodile clips and it died instantly even though it was in the RUN position. Wanted to do a quick ride in the dark so disengaged the kill switch by simply teasing the kill switch wires out of the block connecter with a thin screwdriver

Just for a laugh I took 12dotToms advice and disconnected the black and white wire under the seat.
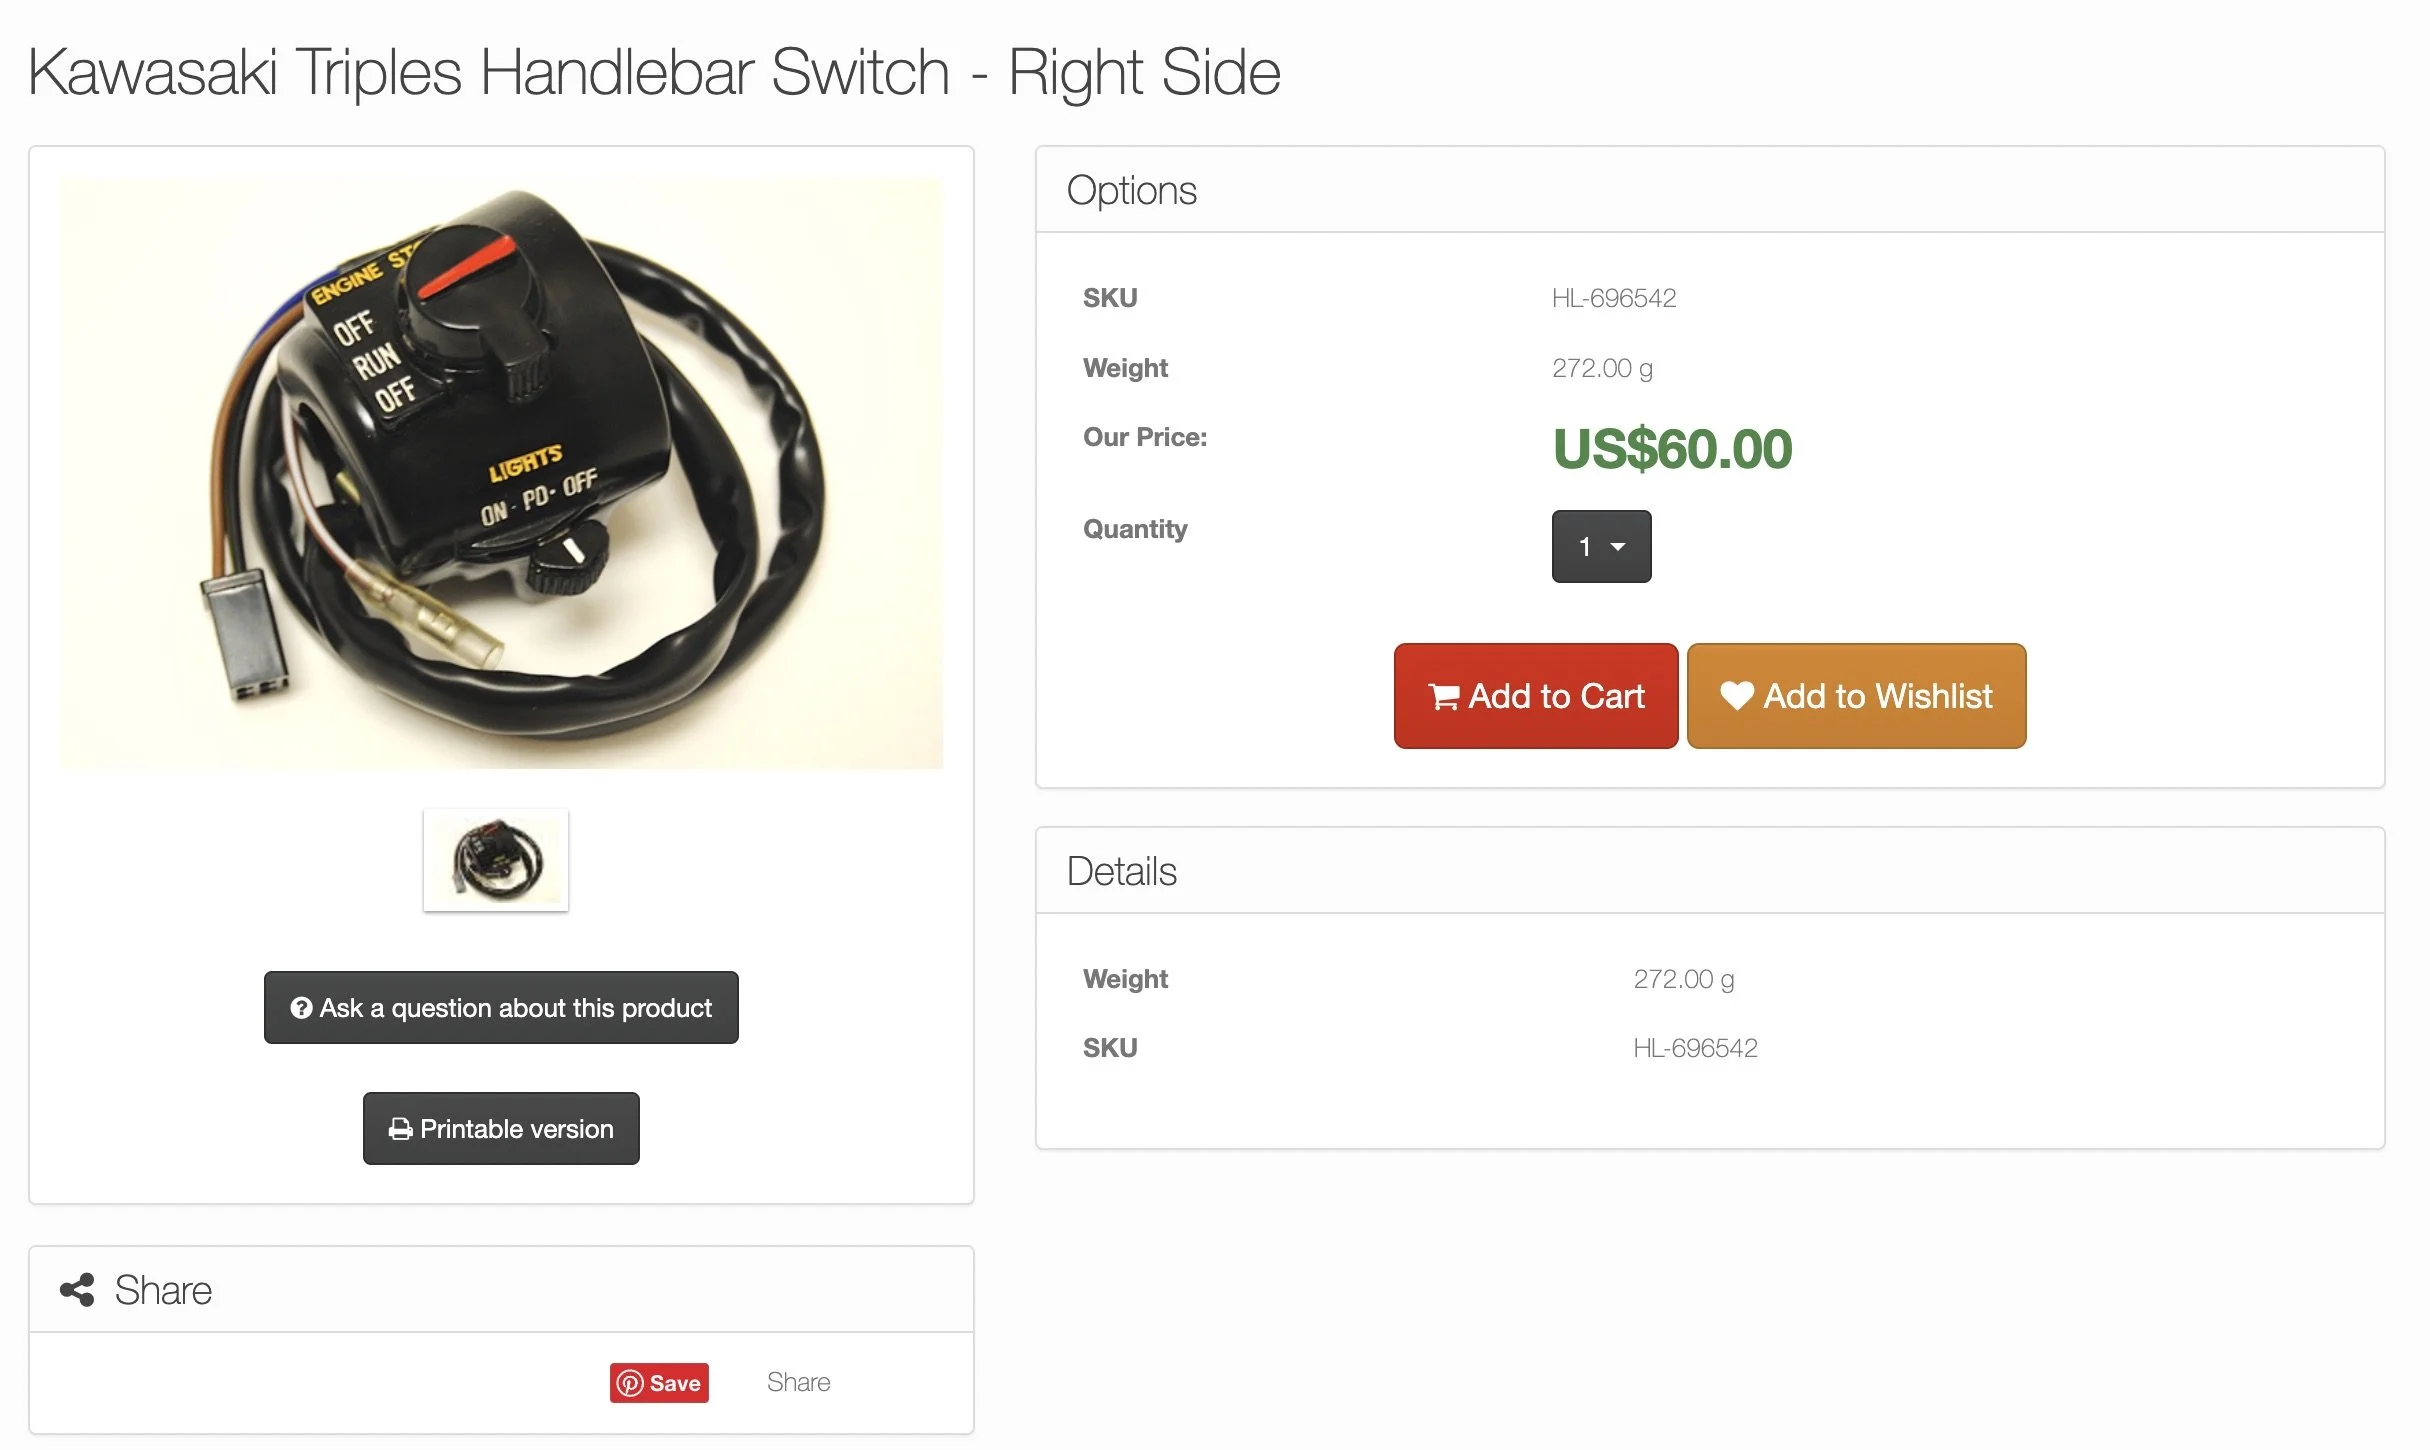
Starts no problem, and continues running when I reconnect the right hand switchgear block connector. When I went to turn it off with the key it kept running. Didn’t realize it by-passes the ignition also. These things are so easy to steal! I guess you have to get around the seat lock on the H2C though. So in summary it seems to be the kill switch because sometimes I was getting continuity in the ‘on’ position, which explains why it was intermittently dying. Unless the lighting switchgear side of it is some how affecting the kill switch, the only thing I haven’t looked into, I don’t think there is any long term remedy, so replacement seems to be the only route, but with what? Whatever’s available is almost certainly just like mine. Aftermarket and cheaply made. My first go to jessbikes.com doesn’t appear to have any right hand switchgear, although I will connect with him to make sure. Diablo has, and I thought surprisingly cheap ($60) and looks just like mine=potentially problematic, and then Z1parts is even cheaper at $39.50. Hmmm. Who knows what they are like.
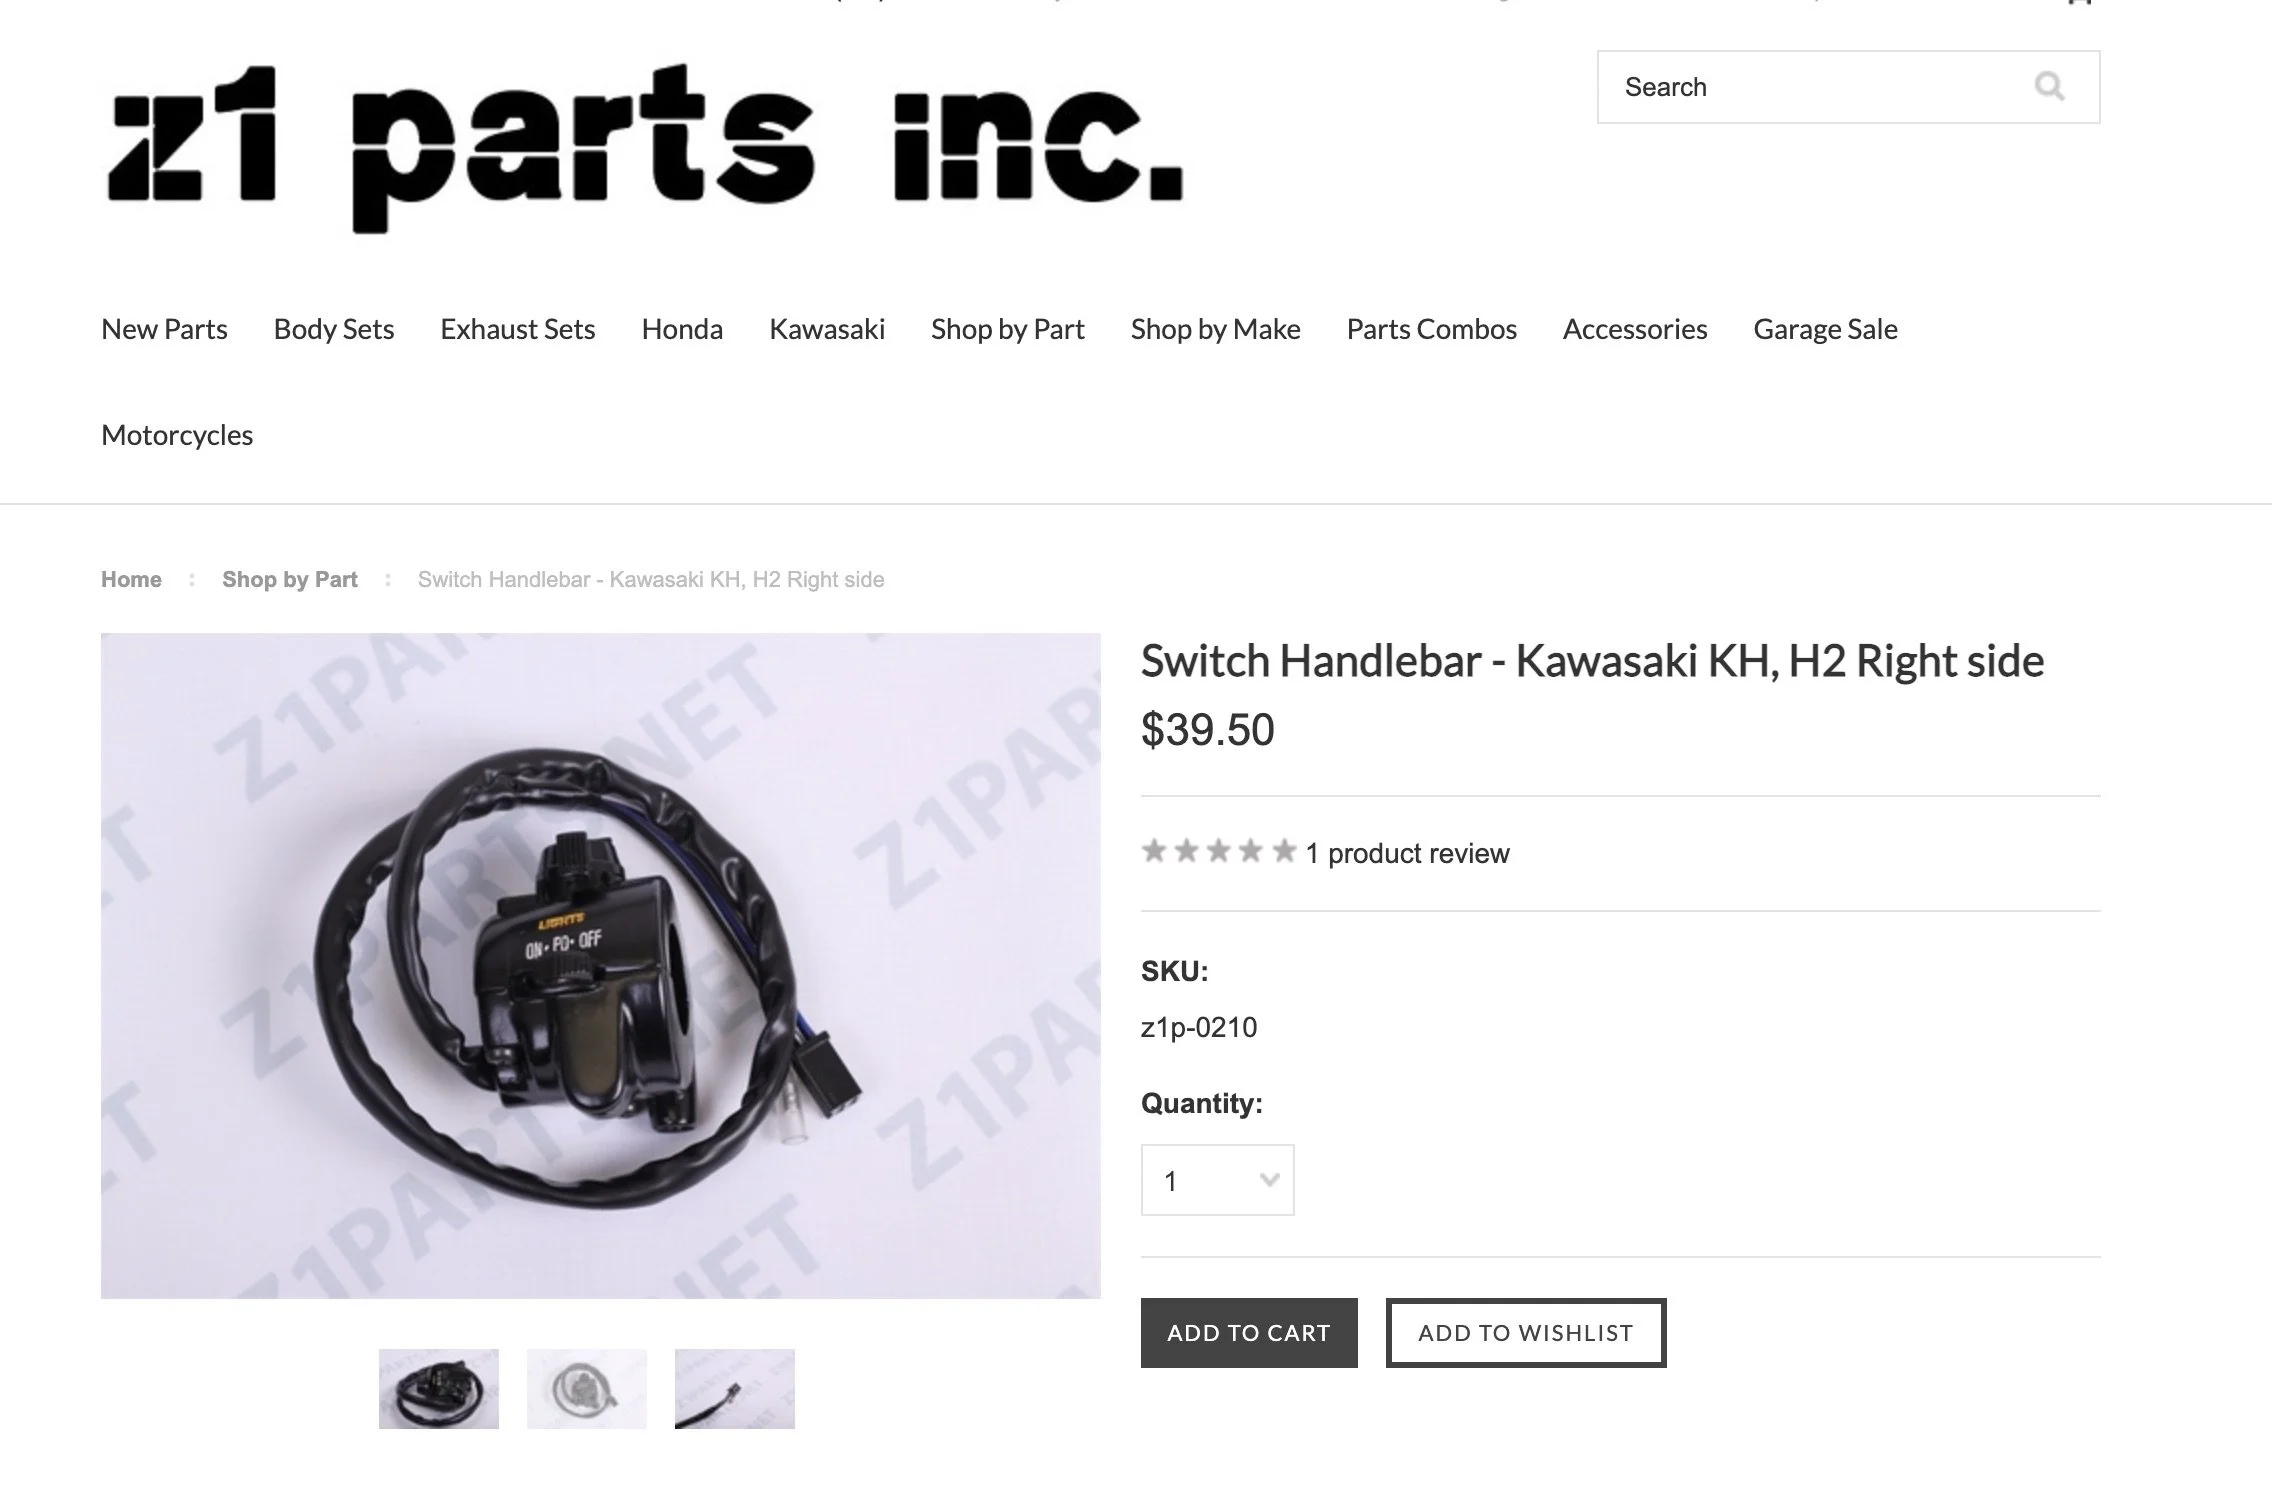
.....and then Z1parts is even cheaper at $39.50. Hmmm. Who knows what they are like.
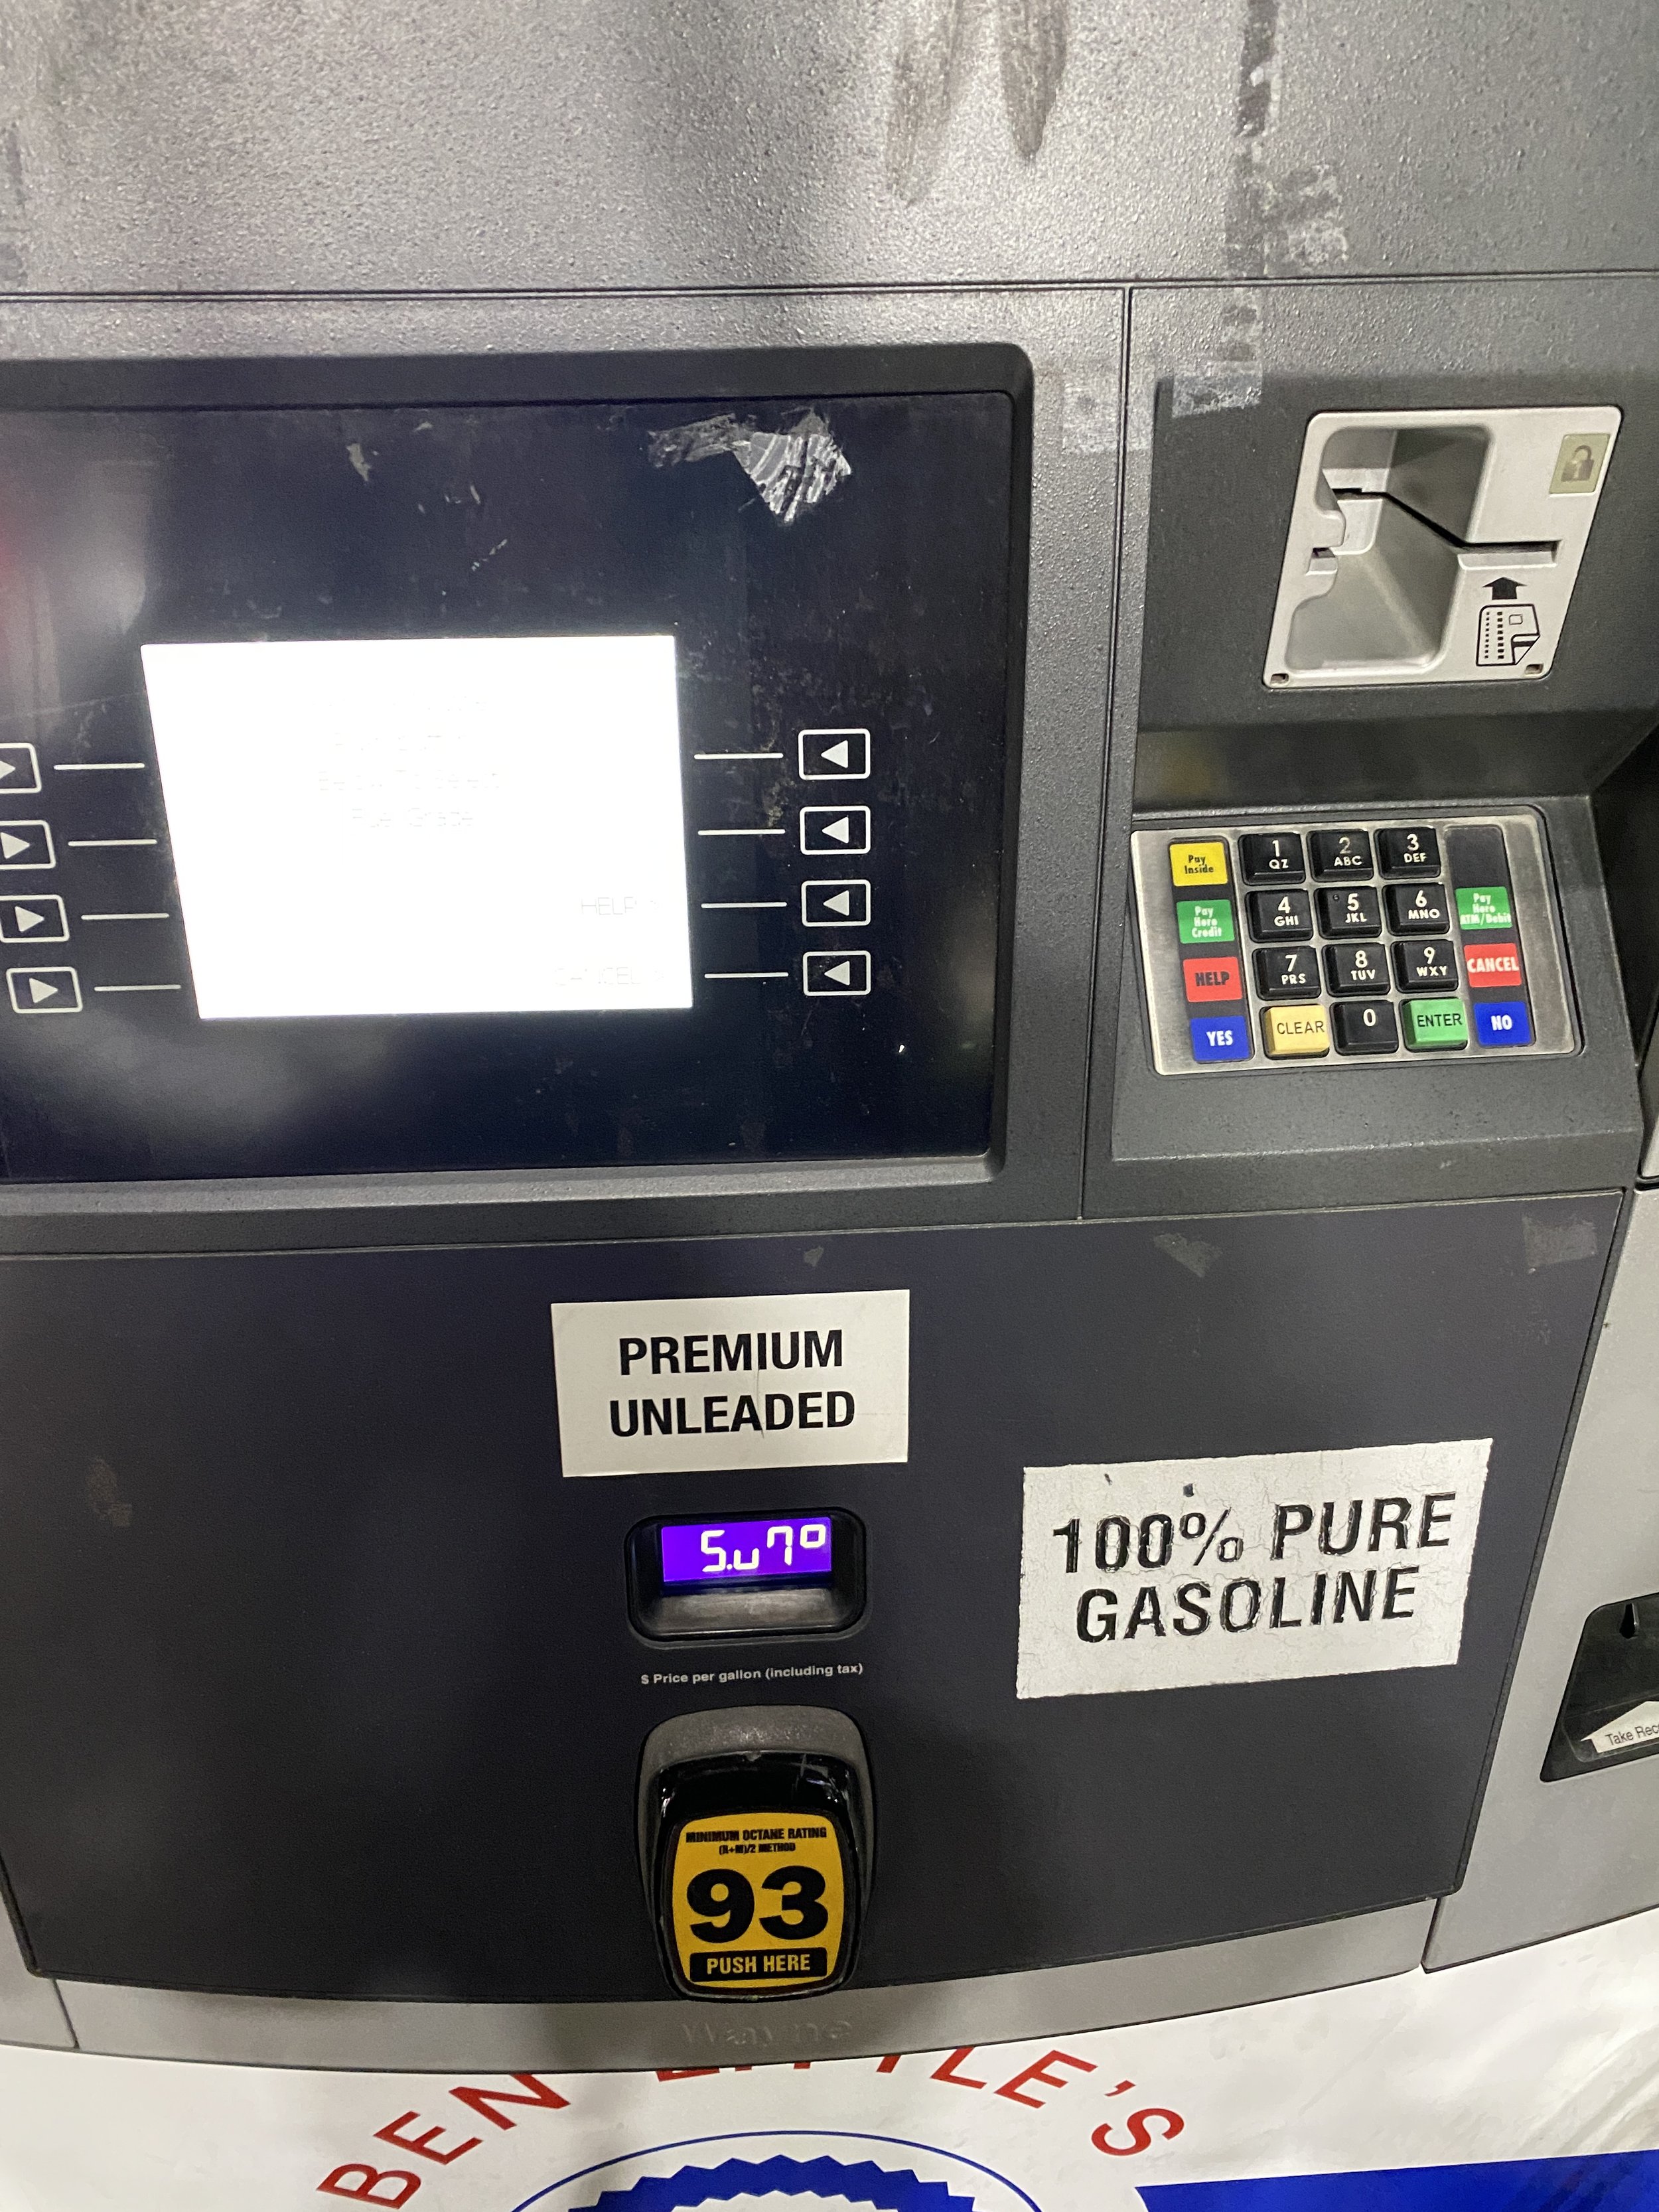
Safe enough to ride I stopped by to fill it up with non-ethanol 93
Barely took a splash, but it was just an excuse to go out....At $5.09 a gallon you have to love your bike...
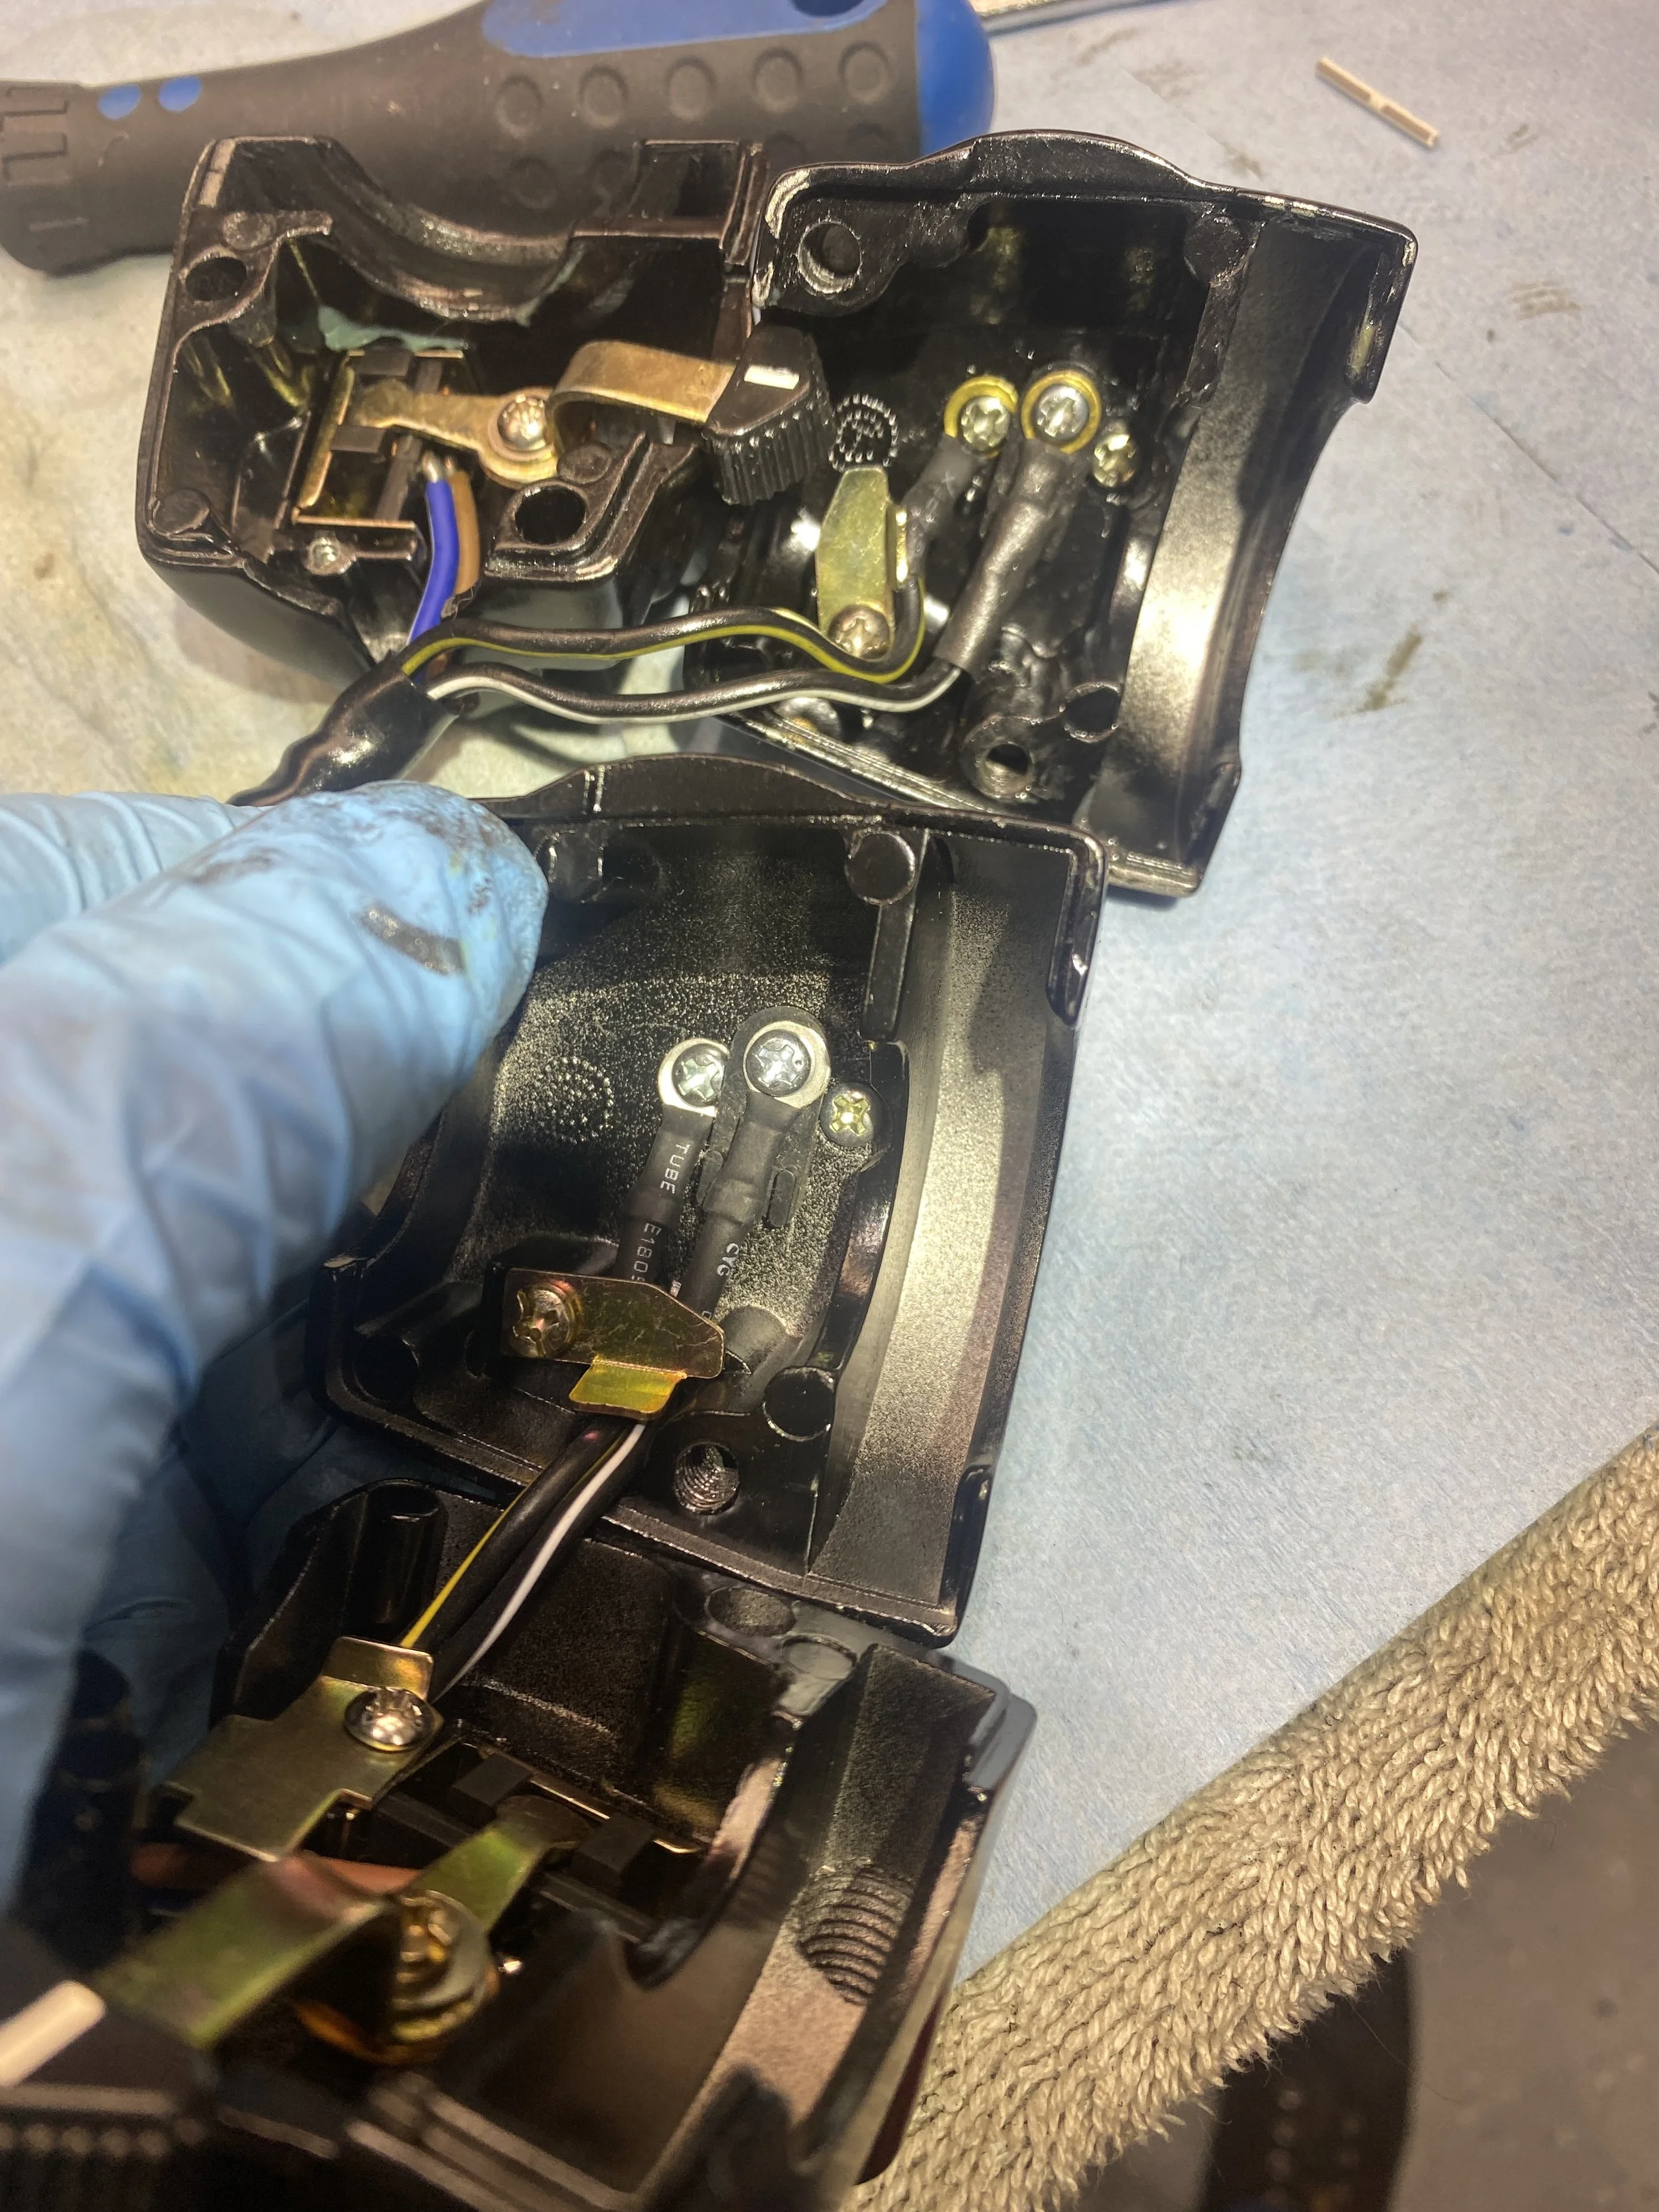
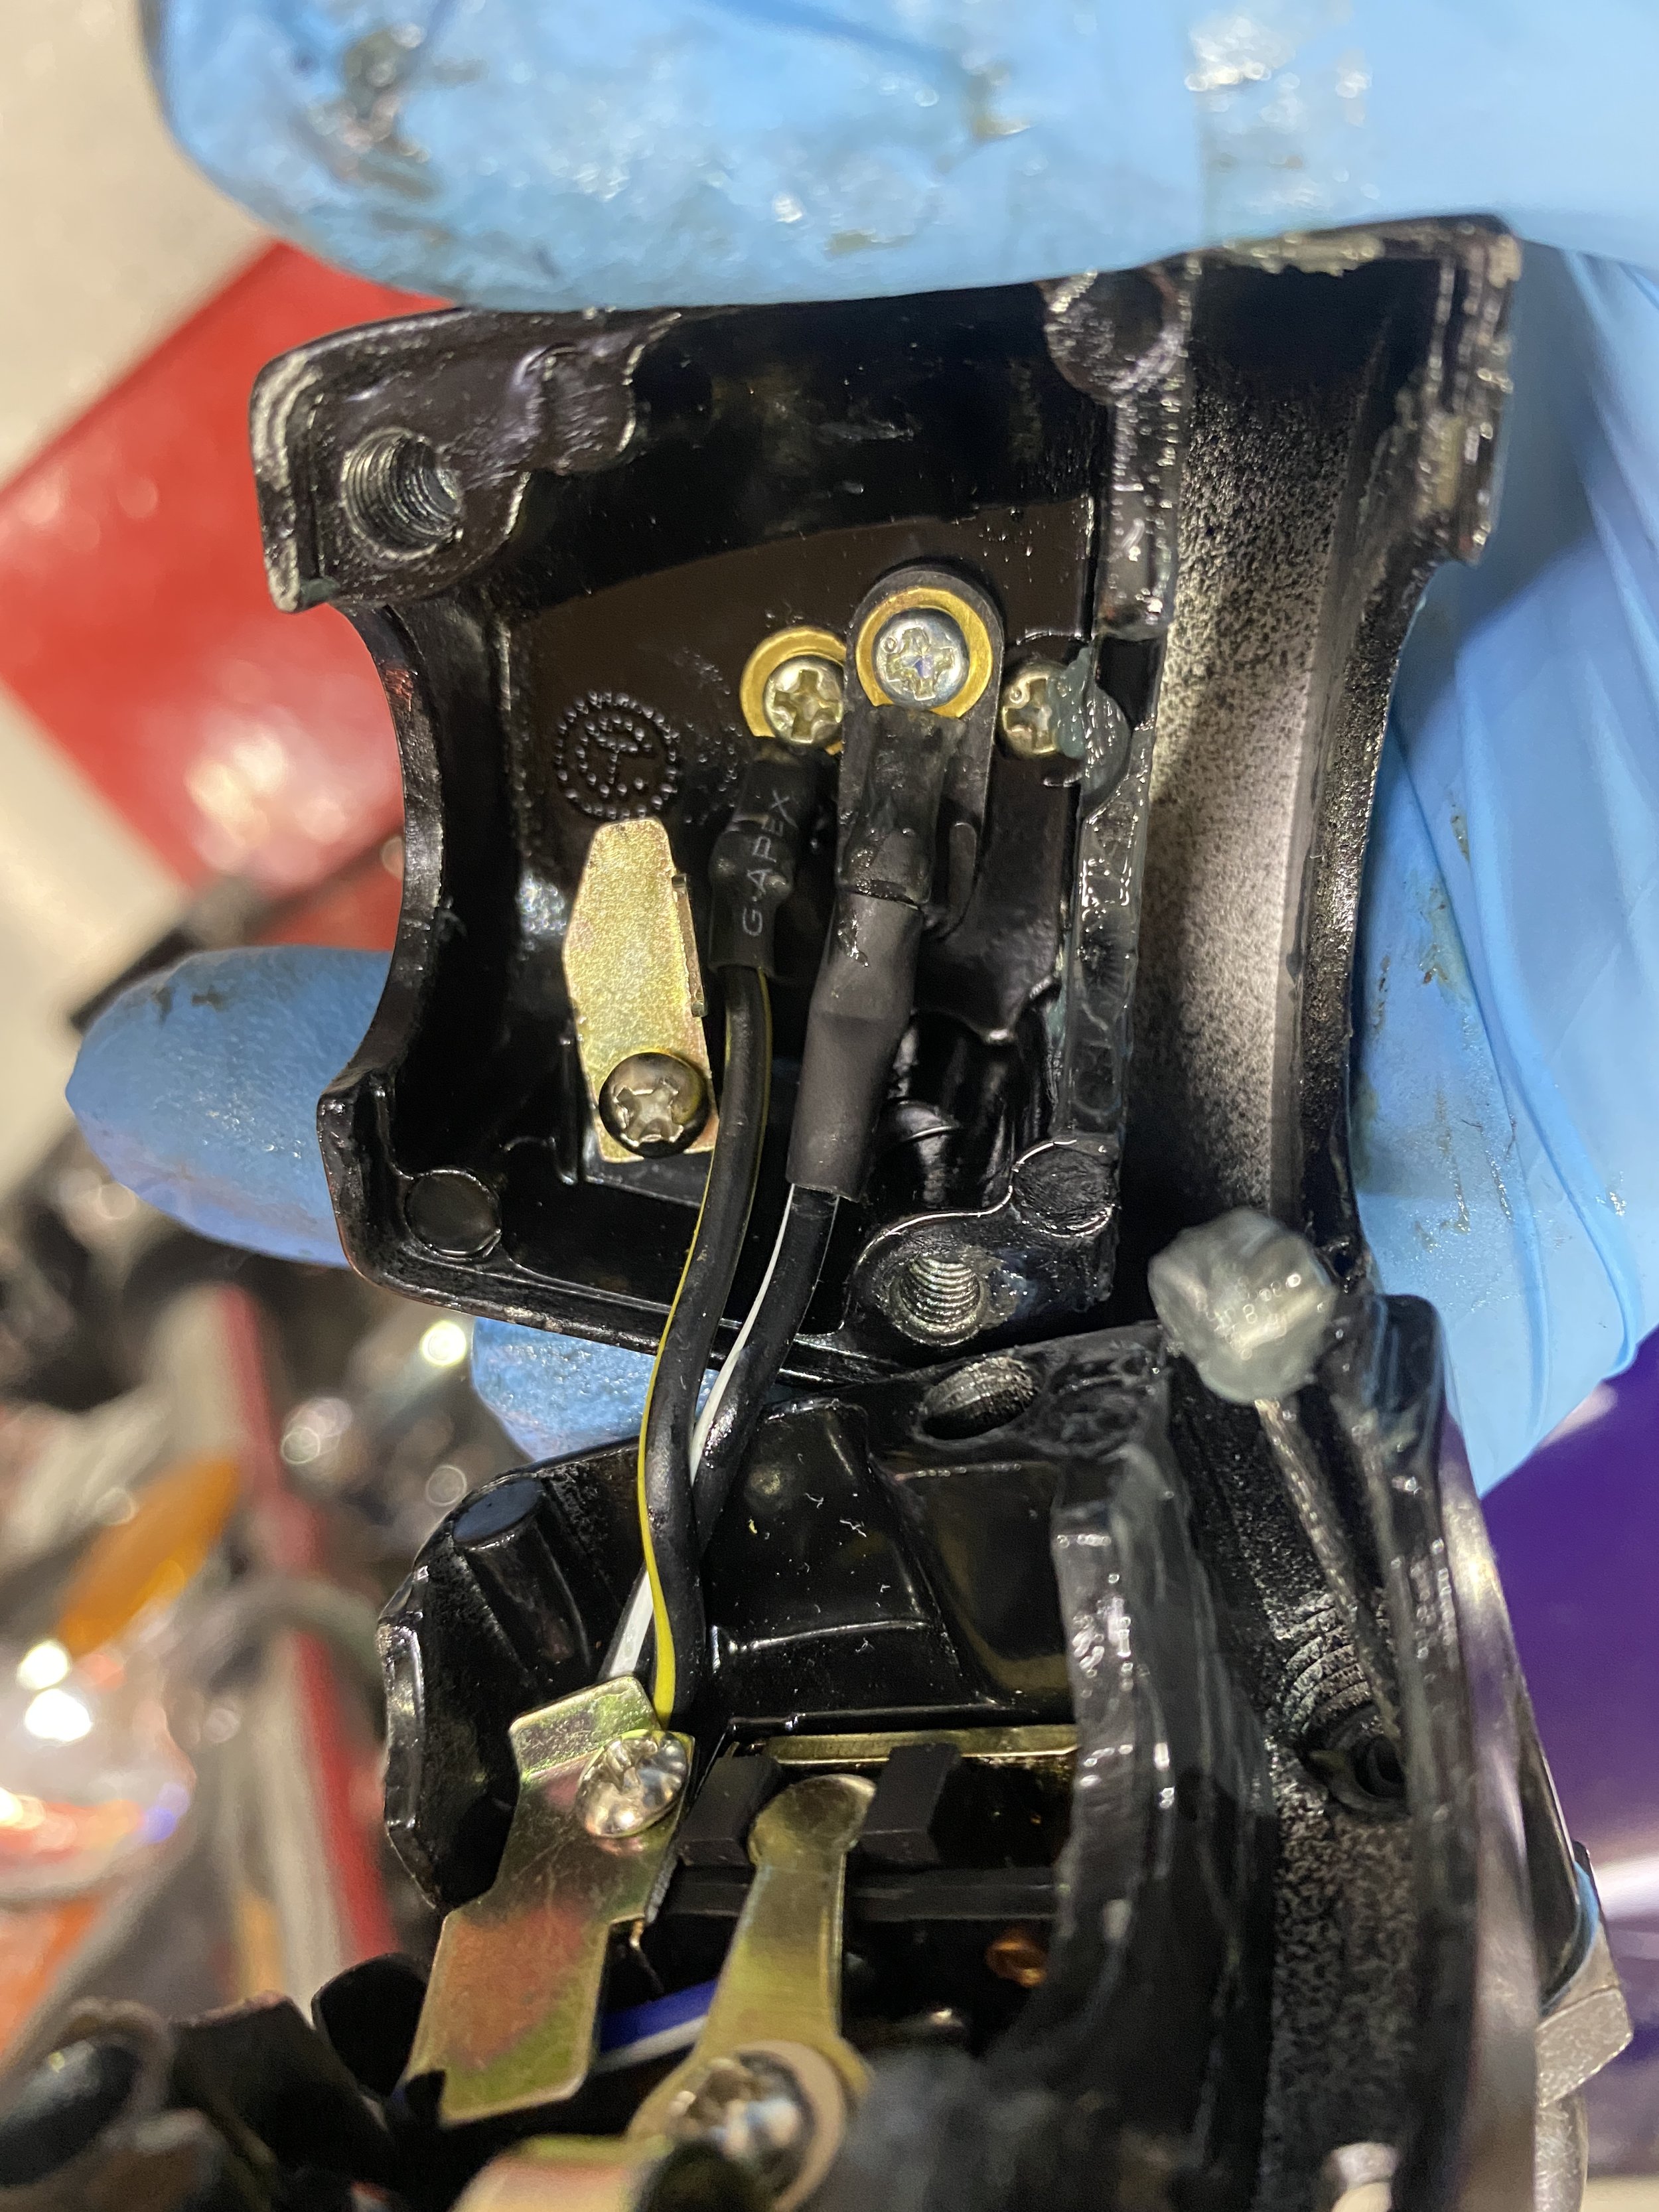
Repro right hander switchgear arrived from Diablo. Looks identical.
Before I accepted a new one was the only answer I double checked the wiring from the switchgear to the block in the headlamp. Unless you want to strip the protective sleeve (which I declined to do), all you can really do is check the connections at both ends. Insulation on everything I could see was continuous and unbroken. Nothing to see there. Move along to the new one.

With the new switchgear in place, the old one consigned to the cold case unsolved problematic parts bin...
This bike is now a three kick starter, sometimes two. Used to always be a starter fluid diva. Performed great on a test ride. Even blew a rear bulb and warned me about it with a flashing red light. And she was right! First time I’ve ever seen that system in operation. As far as Scotty’s desperate cry “There’s nae spark Captain!” That’s no longer the case. Subject closed.
Got Lesters! — Feb 2023
The wheels
What it looks like now...
What it could look like....but I'll be polishing the spoke edges...