
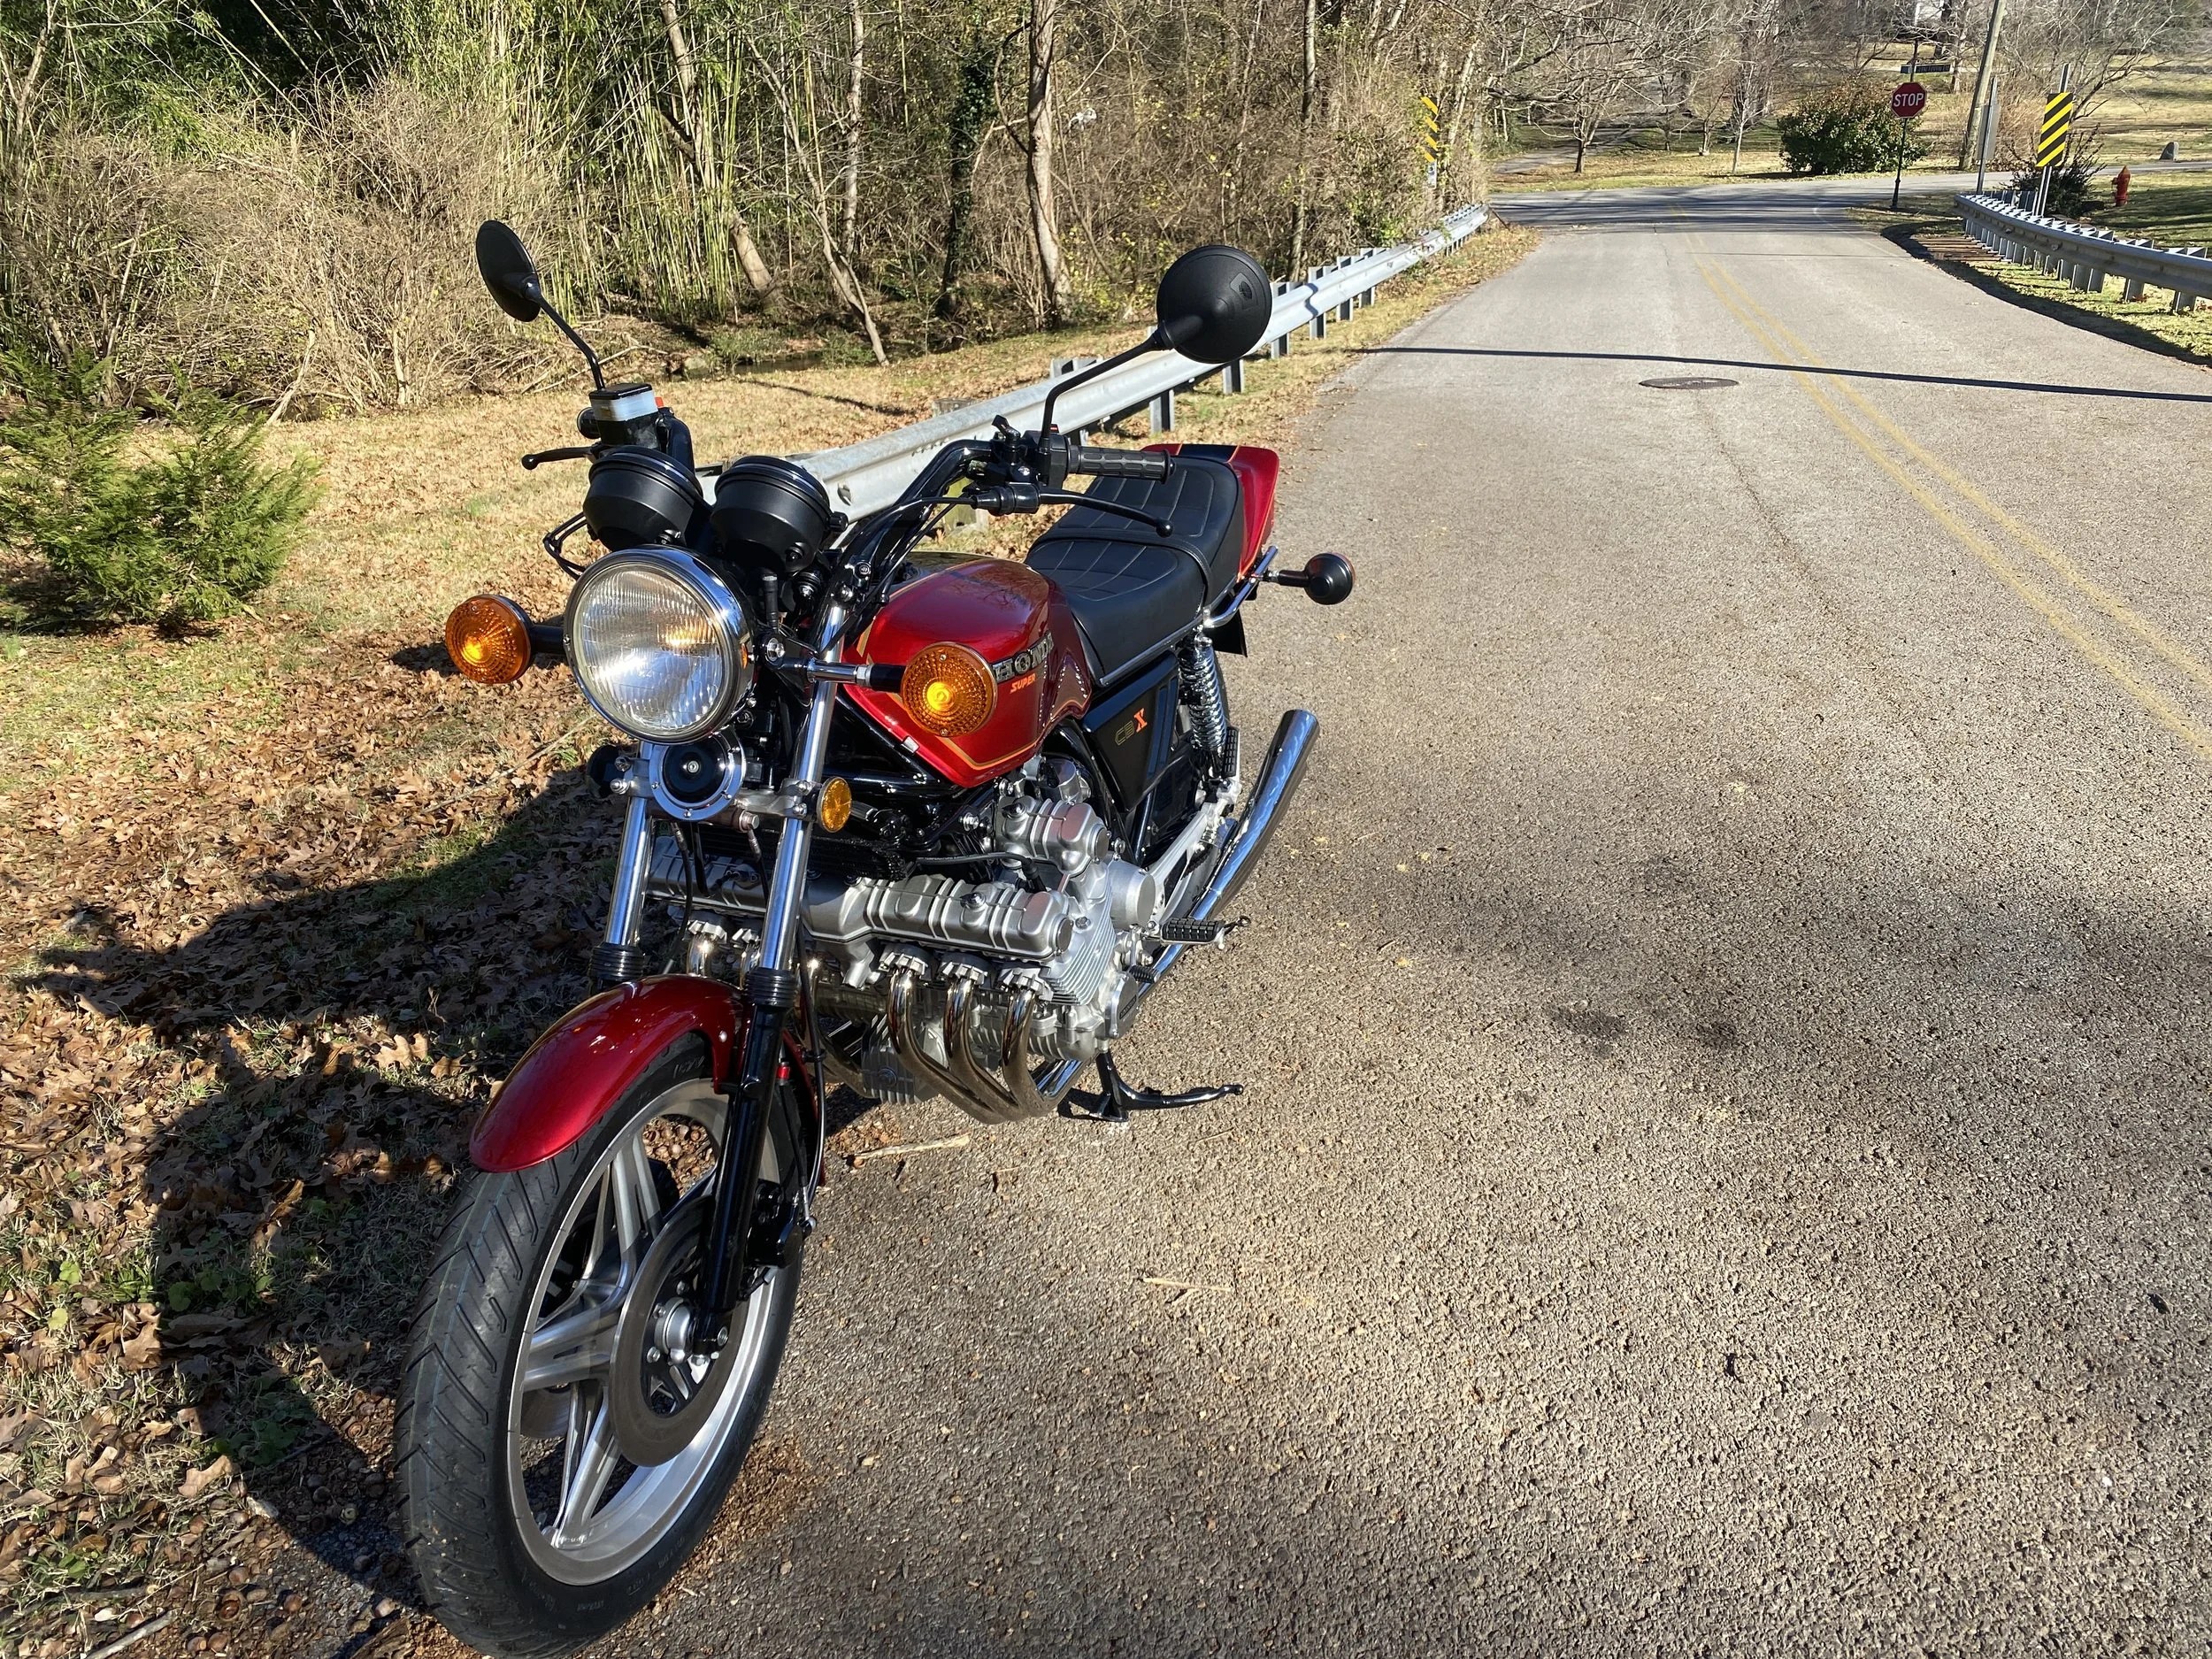
1979 Honda CBX


Bought on 11/21/21. Arrived in Nashville 12/13/21
Motorcycle Confession #7856: In November, heavily resting on the life-is-short-better-enjoy-it theory, I raided my rainy day account and threw some scary big money at this '79 Honda CBX. My first impression was : This without doubt the most beautifully and accurately restored motorcycle I’ve ever had the pleasure to throw a leg over. The PO invested a lot of time and money and even threw himself to the critical wolves of Forums to get the best advice in order to get it almost exactly (not counting the six into six Pipemasters) period correct.
I’m so used to having bikes that are in someway broken, but this one is so pristine that I’m even scared to even look at it…
Here’s the Contents of the Original Ad courtesy of a man we will call Norm, for that is his name, and, as indicated above, for simplicity, we will know him hereon as The PO. (Previous Owner). It must be pointed out that without this particular owners commitment, tenacity and almost heedless regard of cost to get this bike up to Concours standards, this machine would not be half of what it is now.
So….in his own words….
“A little back history to this bike:
I purchased this bike from a gentlemen in Florida back in April 2015, I had it shipped to me in Idaho, where it incurred a little cosmetic shipping damage in transit, the shipper made good for the damaged parts.
I then took the bike to Carl’s Motorcycles in Boise around May 2015. I had Carl’s replace the parts with original NOS parts, I was lucky enough to be able to purchase a 6 into 6 set of pipes from Pipework’s in Australia, so I had those shipped to Carl’s where they were assembled and installed, at the same time the carburetors would require re-jetting, I had the carburetors synced and balanced as well, I also asked them to rebuild the carbs while they had everything apart. The carbs were rebuilt during the original restoration, however, since I had them out and apart I replaced all the float bowls, new jets were also installed, mains, pilots, needles, springs everything new, once that was completed the bike was then started up.
Carl’s then informed me that the alternator was not charging, in doing the research this seems to be an Achilles heel to these bikes, even if I rebuilt it, the bike would still not charge at idle, and would not be reliable, so I reached out to Tim’s CBX where he shipped me a new electronic alternator looks exactly like the original and same finish, and had the original removed and the new electronic one installed, now even at idle the amperage gauge is way in the +.
Since the engine was down, I also replaced all the spark plugs, wires, they also tuned each cylinder with a thermal gun, so each individual cylinder runs at the same temperature as all other 6 one’s.
I picked up the bike from Carl’s the end of October 2015 and has been at my house since. This has been a labor of love since then until actually now she is finished. I would say the bike was 85-90% complete during the original restoration back in 2015, however, for sure all the major stuff was complete and correct. I decided to post it on CBX forums, and eBay at one time, to ask for brutally honest feedback, what I learned was that there were many things either left off, or not done correctly, so I attacked them one at a time, there was quite a laundry list, just finding them let alone as a NOS item was quite time consuming. I have even gone as far as going on the Honda parts site, opening up the fiche schematics, and comparing every nut, bolt, washer, fastener, etc. There is not a nut, bolt, washer, zerk fitting, cotter pin, which is now not Honda NOS original that I have touched.
Everything you see in the photo’s are either original parts, or original parts in (perfect) condition, or only (NOS), there is nothing non original on this bike, other than what I list in the next 3rd paragraph .
I received a ton of feedback from all the critics on the CBX forum and eBay, on parts that needed addressing, it was pretty brutal, but a big thanks to everyone for helping me get to where my bike is today.
I would say 95% of my NOS parts are from Tim’s or USED CBX parts, the go to for CBX bikes. The bike that I received was definitely done correctly from Tim’s CBX, the entire engine inside and outside, transmission, wheels bearing seals, bushing, powder coating, carb rebuild, chain, fork rebuild, headset bearing, blah blah blah, you get the picture.
The original glory red 3 pearl paint on all the parts, was done by a company in Florida who is the point of reference for original paint also expensive.
The gauges I had sent out to Seattle speedometer who is the only one recommend for repainting the dials and recalibrating the speedo, as well as tach.
In fact, while I just replaced both tires, I also had new fork seals and new fluids installed, since the last fork rebuild was 6-7 years ago.
So, here is what is not original and my thinking as to why I did this, (non-original parts), the tires are now 43 years old, so I asked around in the forum and the consensus was to purchase a set of Kenda – Retroactive tires, even if I were to find NOS tires, which there are none, who- ever purchases this bike would only need to throw them away, why would anyone trust riding on 43 year old tires.
I also changed the pipe out as Pipework’s only imports around 6 or so pipes to the US every year what an upgrade, the sound and look is stunning. The pipes alone were around $2400.00 plus shipping from Australia.
I just replaced the front brake lines with braided lines looks like the originals, as over the years the inside rubber starts to deteriorate and causes the little pieces of rubber to block the flow and return holes in the master cylinder, causing the brakes not to function properly, so again even if I were able to find original NOS brake lines it made no sense to install 43-year-old rubber lines already deteriorating.
The alternator as I discussed above, who wants a bike that is unreliable, I also have the original alternator, rectifier, and will include that in the sale, all it needs it its brushes replaced, but again, it is not dependable.
Lastly the fuel line from the petcock has hose clamps on it, the hose is a NOS original, however, the factory hose clamps did not work and the fuel would leak from the petcock to the carburetors. I have the original NOS fuel clamps, but they leak.
This bike is the real deal it has only 82.7 miles on it since the rebuild, I got the bike with 34 miles on it, and it took about 49 miles to work out all the bugs, between Carl’s and myself to resolve all the issues from a full restoration. When I say there is nothing that needs to be addressed or is not correct, it is an understatement, money has never been an issue to me, doing it correctly was the end goal to have an original bike like you would have found in the dealership in 1979, but even better was the goal. It has been a pleasure and a pain in the ass finishing it over these past 5 years.
For those of you that have not been thru this, when someone says fully restored, that is ( code ) for that means until the money runs out, then its aftermarket cheap parts, and shortcuts to finish it. Period correct new or NOS only parts which are insanely expensive, and extremely hard to come by.
I have always wanted this bike, and now that she is all done, I have no intentions of riding it, I have many other bikes so it would be bound as a garage queen, a beautiful one at that. So, I am going to offer it up to another collector who is looking to purchase a perfect or near perfect example to have in his or her collection, or too someone who wants to ride it. I have as many receipts as I could get from the original owner plus from me.
Included is the original tool kit, the service manual, the original owner’s manual, carburetor tools, brand new carburetor synchronizing gauges, original identification card from the original owner in 1979, it is getting hard to read though.
Here is a partial list of parts and services provided, I have not updated this in a year or so, so there are many more items to add, however, this should give you an idea of its authenticity and dedication to preserve it as original as possible.
Before purchasing this bike, I also did my due diligence and reached out to Tim’s who performed all the mechanicals listed above, as well as most of the restoration, and had verified that everything that was originally listed from the Florida owner, had in fact been done, and by whom, and correctly.
Since having the bike back from Carl’s the bike is started every month on the 25th and run for about 3 ½ - 4 minutes to keep everything lubricated, and all the gaskets and seals from drying out. The bike has never been revved over 4,00 rpms as the motor only has 82 miles on her clocks.
1979 Honda CBX - 10001979 Original Honda CBX - 1000 Service Manual All in Plastic Sleeves
1979 Original Owners Identification Card
82.7 Miles Since Restoration
Air Box Polished and Completely Restored
All 3 Front Brake Lines All Brackets - Fasteners - Misc. Glass Beaded to Match Engine Casings
All Controls Painted
Reconditioned All New Front Rear Banjo Crush Washers - Copper
Carbs Completely Rebuilt
All New NOS Floats -NOS Needles -NOS Jets -NOS Springs Carbs Completely Rebuilt - Synced @ 63 Miles
Complete Upper - Lower Engine Rebuild All Internals as Well @ Tim’s CBX
Front - Rear Brake Calipers Powder Coated
Front - Rear Brake Rotors Resurfaced
Front - Rear Wheels Glass Beaded All New Bearings & Seals Installed
Front Caliper Rebuild Kits Both Calipers Including New Pistons
Front Forks Rebuilt
Gas Tank - Rear Fenders - Front Fender Painted @ 63 Miles - Candy Glory Red
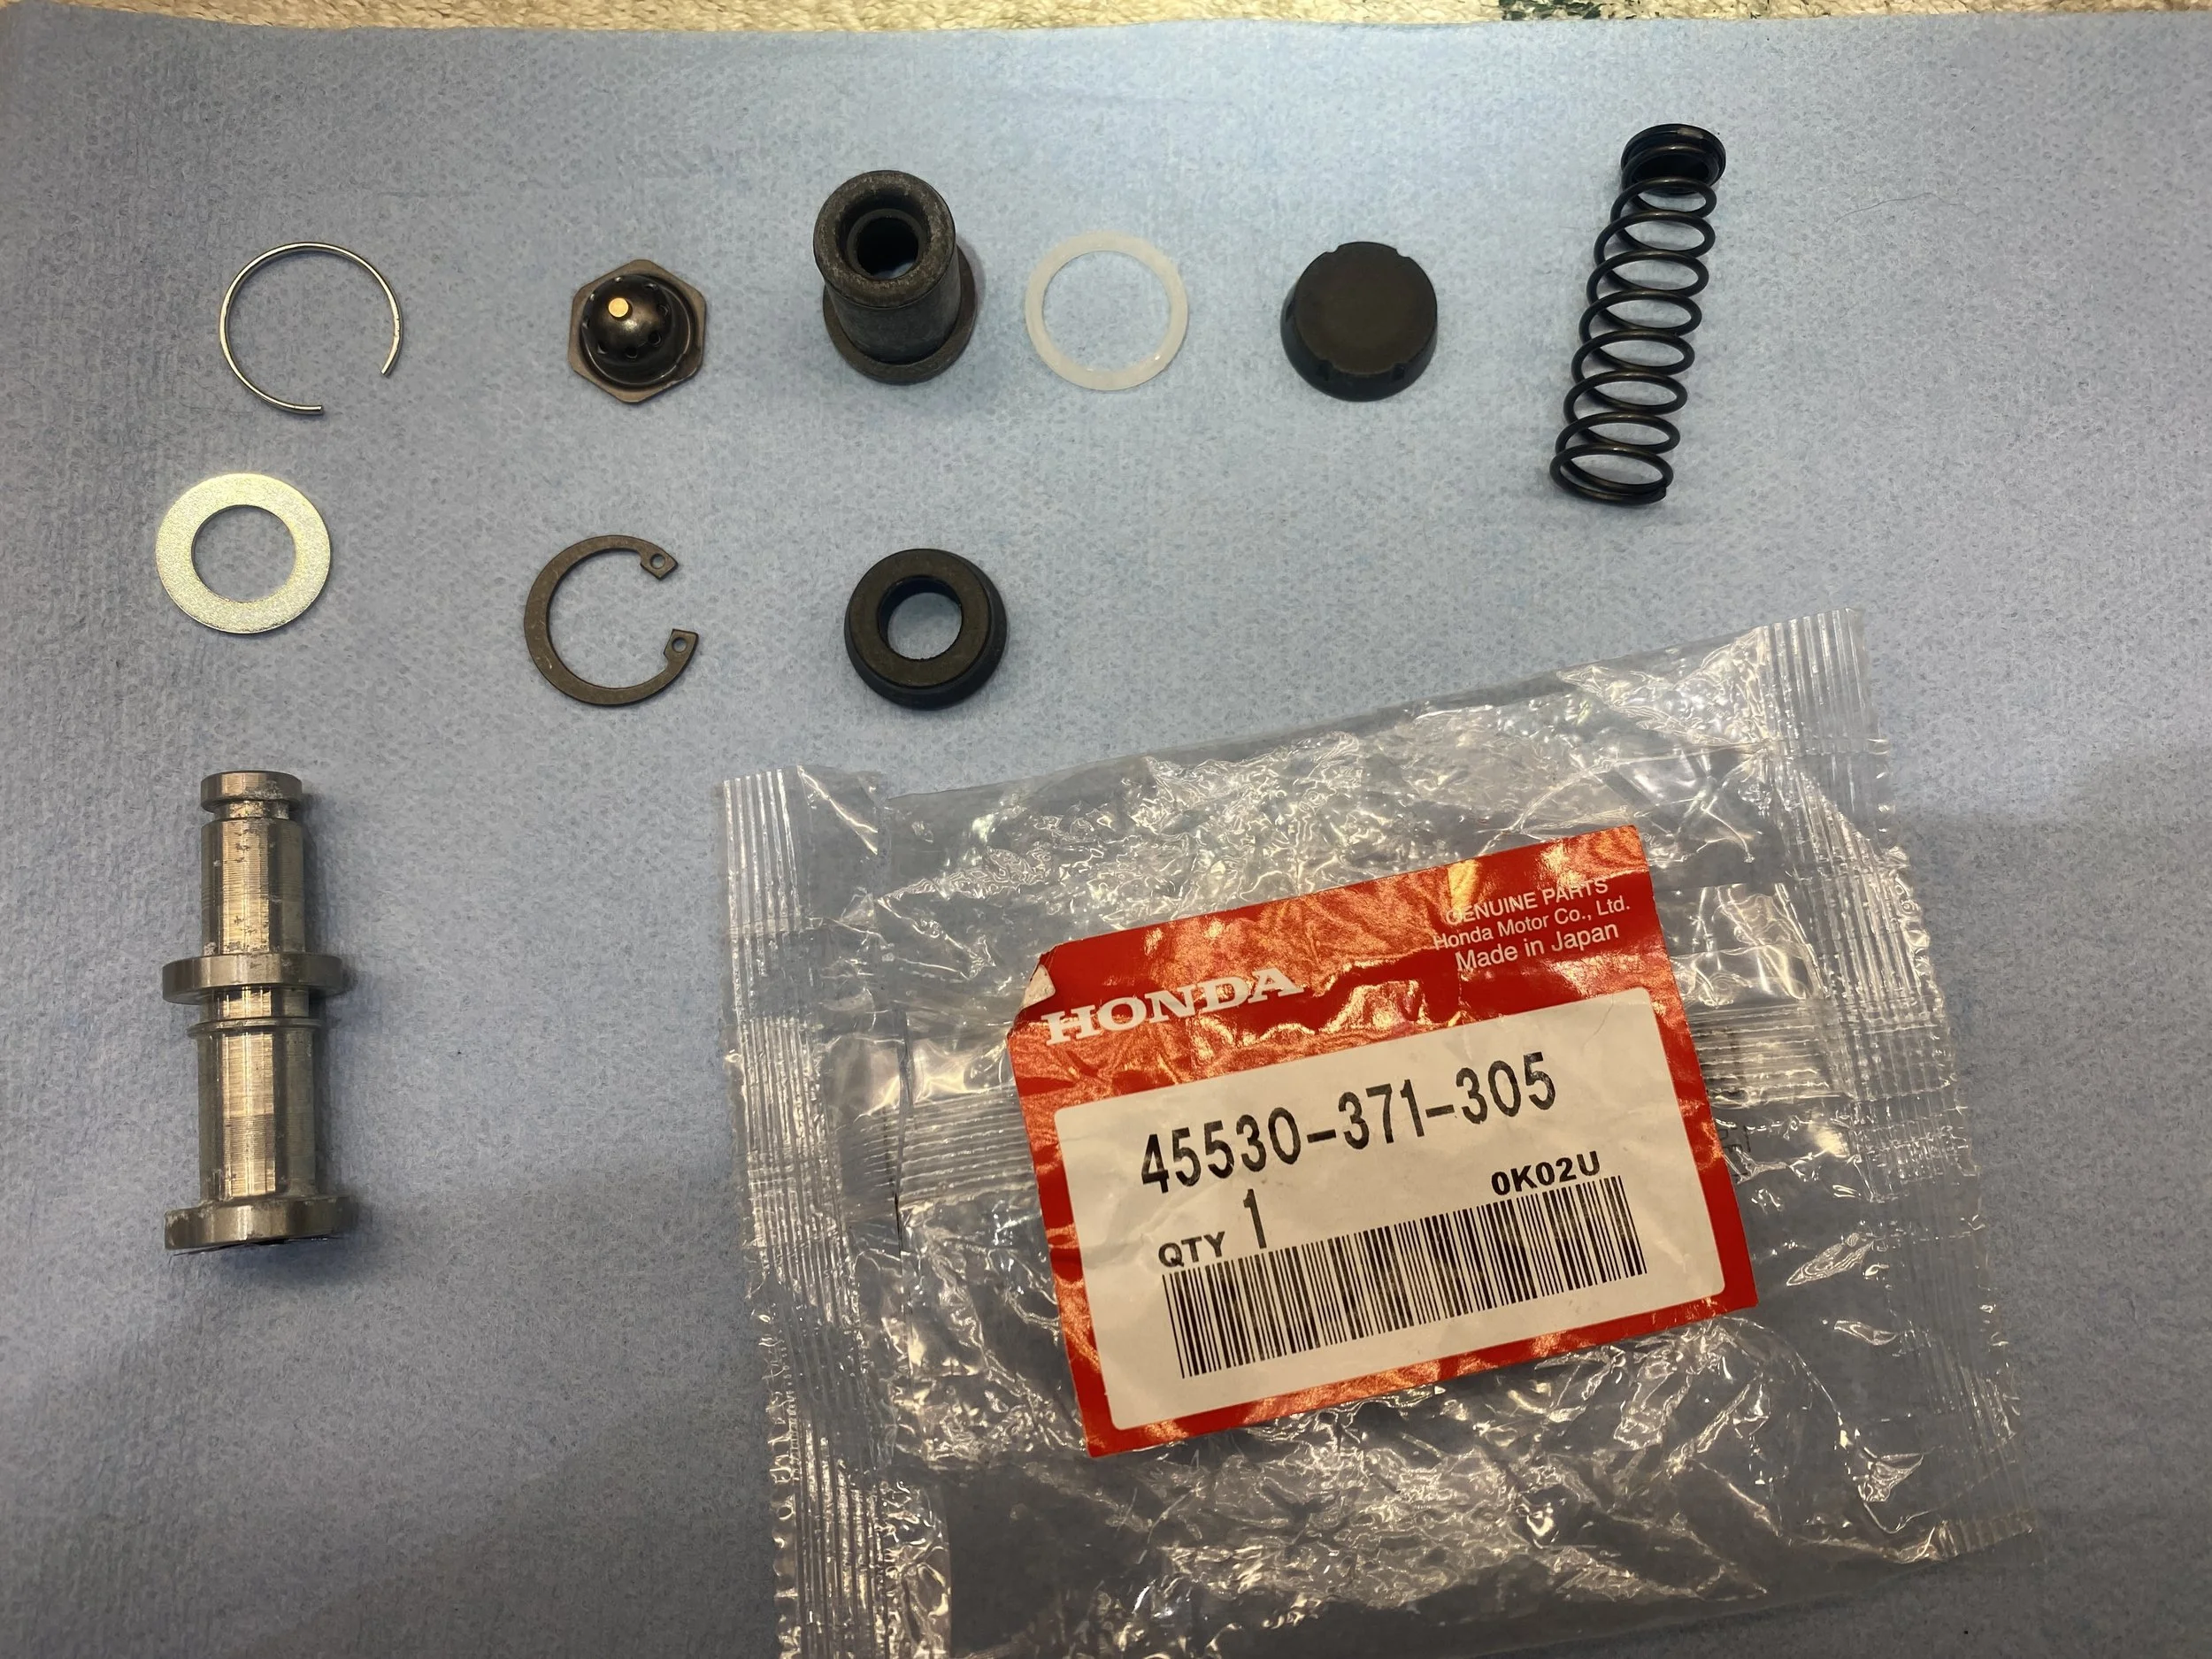
Master Cylinder Rebuild Kit Master Reservoir Rebuild Kit
New Motion Pro Throttle Cables Both Push - Pull ( 2 )
New 90 Degree Pilot Adjustment Screwdriver
New AC Generator Gasket
New ACG Coupler Kit
New After Market CBX Rear Reservoir Brake Rebuild Kit
New After Market Choke Cable
New After Market Clutch Cable
New After Market Rear Chrome Shocks
New Base Gasket
New Cam Chain Tensioner + O Ring
New Drive Chain
New Dyna Ignition
New Engine Gasket Set
New Flame Trap
New Front - Rear EBC Brake Pads
New Front Fork Seals and Wipers 4 Pieces
New Front -Rear Tire Valve Stems
New Gauge Faces All 3 Speedo - Tach - Amp
New Head Gasket New K&N Air Filter Replacement
New Motion Pro Speedometer Cable
New Motion Pro Tachometer Cable
New Motion Pro Throttle
New NGK D8EA Spark Plugs (6)
New Oil Pan Gasket
New Oil Seal Kit
New Oil Sending Boot
New Oiler Cooler Lines
New Pipe Masters 6 into 6 Pipes from Australia
New Primary Shaft Seal
New Rear Brake Pistons ( 1 Set )
New Speedo - Tach - Amp Gauges Complete Rebuild - Calibration - Serviced
New Tim's Euro Alternator Installed - Still Have Original Alternator - Rectifier to Be Included
New Tires Front - Rear
New Wheel Bearings Front - Rear Wheels
New Yuasa Battery
NOS Front - Rear Brake Piston Rebuild Kits Labor
NOS Gasket Alternator Covers NOS (3) Wire Grommet
NOS 8mm Cap Nuts (6)
NOS 8mm Nuts (14)
NOS Air Cleaner Connecting Tube Bands (6)
NOS Air Cleaner Connecting Tube Bands
NOS Pan Head Screws (6)
NOS Air Cleaner Element
NOS Alternator Cover
NOS Brake Lever
NOS Break in Speedometer Decal
NOS Carb Intake Rubber Boots ( 6 )
NOS Carb Syncing Gauges ( 6 )
NOS CBX Controls
NOS Chain Adjuster Nuts (2)
NOS Chrome Headlight Ring - Assembly
NOS Clip B Fuel Tank Molding
NOS Clutch Cover
NOS Clutch Lever
NOS Clutch Lever - Boot Cover
NOS Drive Chain Caution Label
NOS Drive Sprocket 15 Tooth
NOS Fork Caps (x2)
NOS Fork Inner Threaded Inserts (x2)
NOS Fork Top Caps (x2)
NOS Frame Thru Bolt End Nuts 14mm (2)
NOS Front - Rear Brake Bleeder Screw Caps
NOS Front - Rear Brake Lines NOS
Front Brake Lever
NOS Front Brake Pistons ( 2 )
NOS Front Left Fork Pan Head Screw
NOS Front Rider Left - Right Foot pegs - Rubbers (x2)
NOS Fuel Filler Cap Gasket
NOS Fuel Lines
NOS Fuel Petcock
NOS Fuse Block
NOS Gas Cap
NOS Gas Line from Gas Tank to Petcock
NOS Gasket Clutch Cover
NOS Gasket Crank End Cover
NOS Grease Nipple
NOS Handlebar Controls
NOS Headlight - Bezel Ring NOS Headlight Bulb Stanley 12V 60/55WNOS Headlight Rim
NOS Honda Fuel Line Clamps
NOS Honda Grips
NOS Honda Tank Emblems N
OS Idiot Warning Lights
NOS Ignition Cover Gasket
NOS Inner Speedometer Cable
NOS Inner Tachometer Cable
NOS Keihn Jets
NOS Keys All Matching - Seat - Ignition - Fork Lock
NOS Left - Right Step Holder Flange Bolts (2)
NOS Left - Right Step Holder Flange Nuts (2)
NOS Left Side Engine Gasket
NOS Main Foot peg Pivot Bolt (2)
NOS Main Foot peg Pivot Nuts (2)
NOS Mirrors - NOS Arms
NOS Molding FR Fuel Tank
NOS Muffler Caution Label
NOS Odometer Knob
NOS Oil Cooler
NOS Oil Dip Stick
NOS Oil Dipstick - Oil O-ring
NOS Oil Level Gauge Emblem
NOS Oil Lines Exchange
NOS Rear Axle Nut
NOS Rear Axle Nut Split Pin
NOS Rear Brake Arm Special Bolt Flange
NOS Rear Caliper Pins (4)
NOS Rear Caliper Dust Covers (4)
NOS Rear Caliper Spring Pad
NOS Rear Chain Rear Drive Chain Case Protector Bolt (2)
NOS Rear Change Pedal Rubber
NOS Rear Foot peg Pivot Bolts (2)
NOS Rear Foot peg Pivot Nuts(2)
NOS Rear Footrest Bolt Special Flange Bolts and Nuts Left Side
NOS Rear Footrest Bolt Special Flange Bolts and Nuts Right Side
NOS Rear Inner FenderNOS Rear Master Cylinder
NOS Rear Passenger Foot Pegs Left - Right
NOS Right Rear Brake Pedal Cap Rubber
NOS Right Rear Pillion Decal
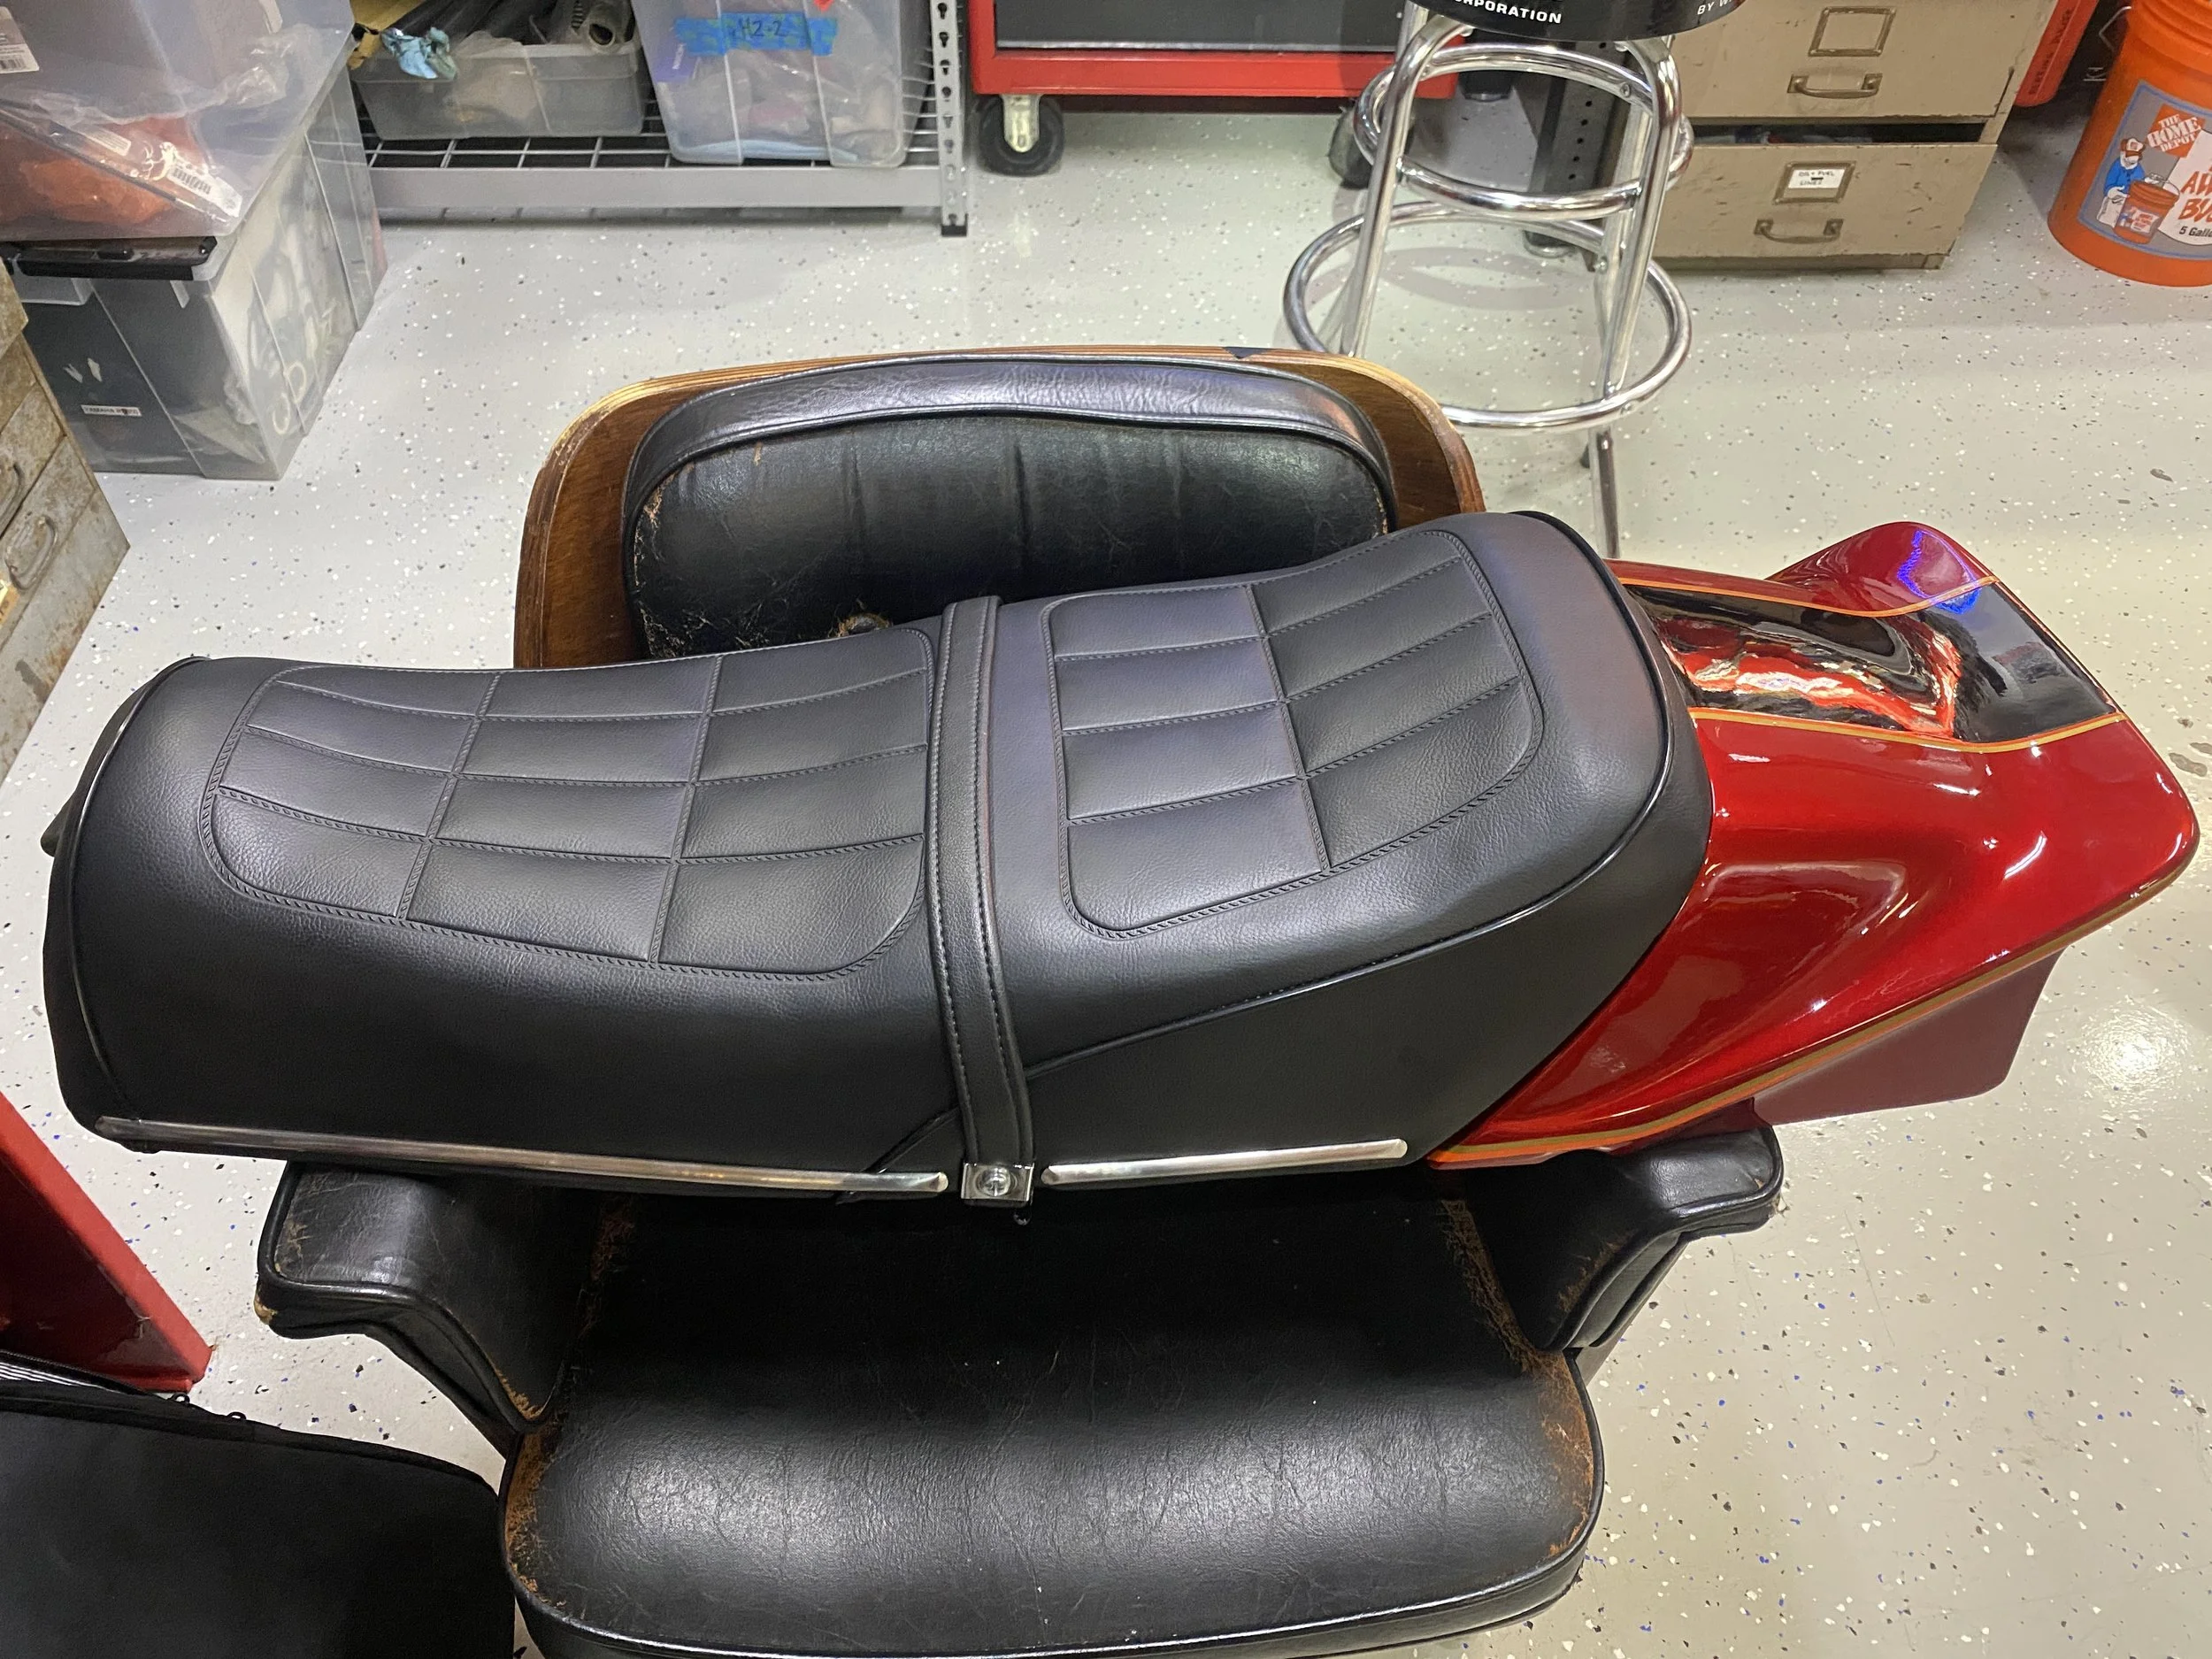
NOS Seat Cover
NOS Self Lock Swingarm Bolt 14mm
NOS Shift Pedal Pivot Bolt
NOS Cap Nut
NOS Shifter Bolt Shift Pedal Pivot and Nut Cap
NOS Shifter Boot
NOS Shifter Rubber Change Pedal Pad
NOS Special Flange Bolt Rear Brake Arm
NOS Special Flange Bolts Left - Right Rear Foot pegs
NOS Special Flange Nuts Left - Right Rear Foot pegs
NOS Speedometer Cable ScrewNOS Speedometer Clamp Screw Panhead
NOS Stanely Blinkers Left - Right Side Both Front 3 Wire - Rear 2 Wire
NOS Swing Arm - Engine Nuts Numerous Numerous Honda Nuts - Bolts - Washers
Original Tool Kit
Paint - Powder Coating Includes Everything
Rear Caliper Rebuild Kits - Including New PistonWashers 10mm For LF Bracket Engine Hangar (4)”
All that being said….what’s it like to ride?
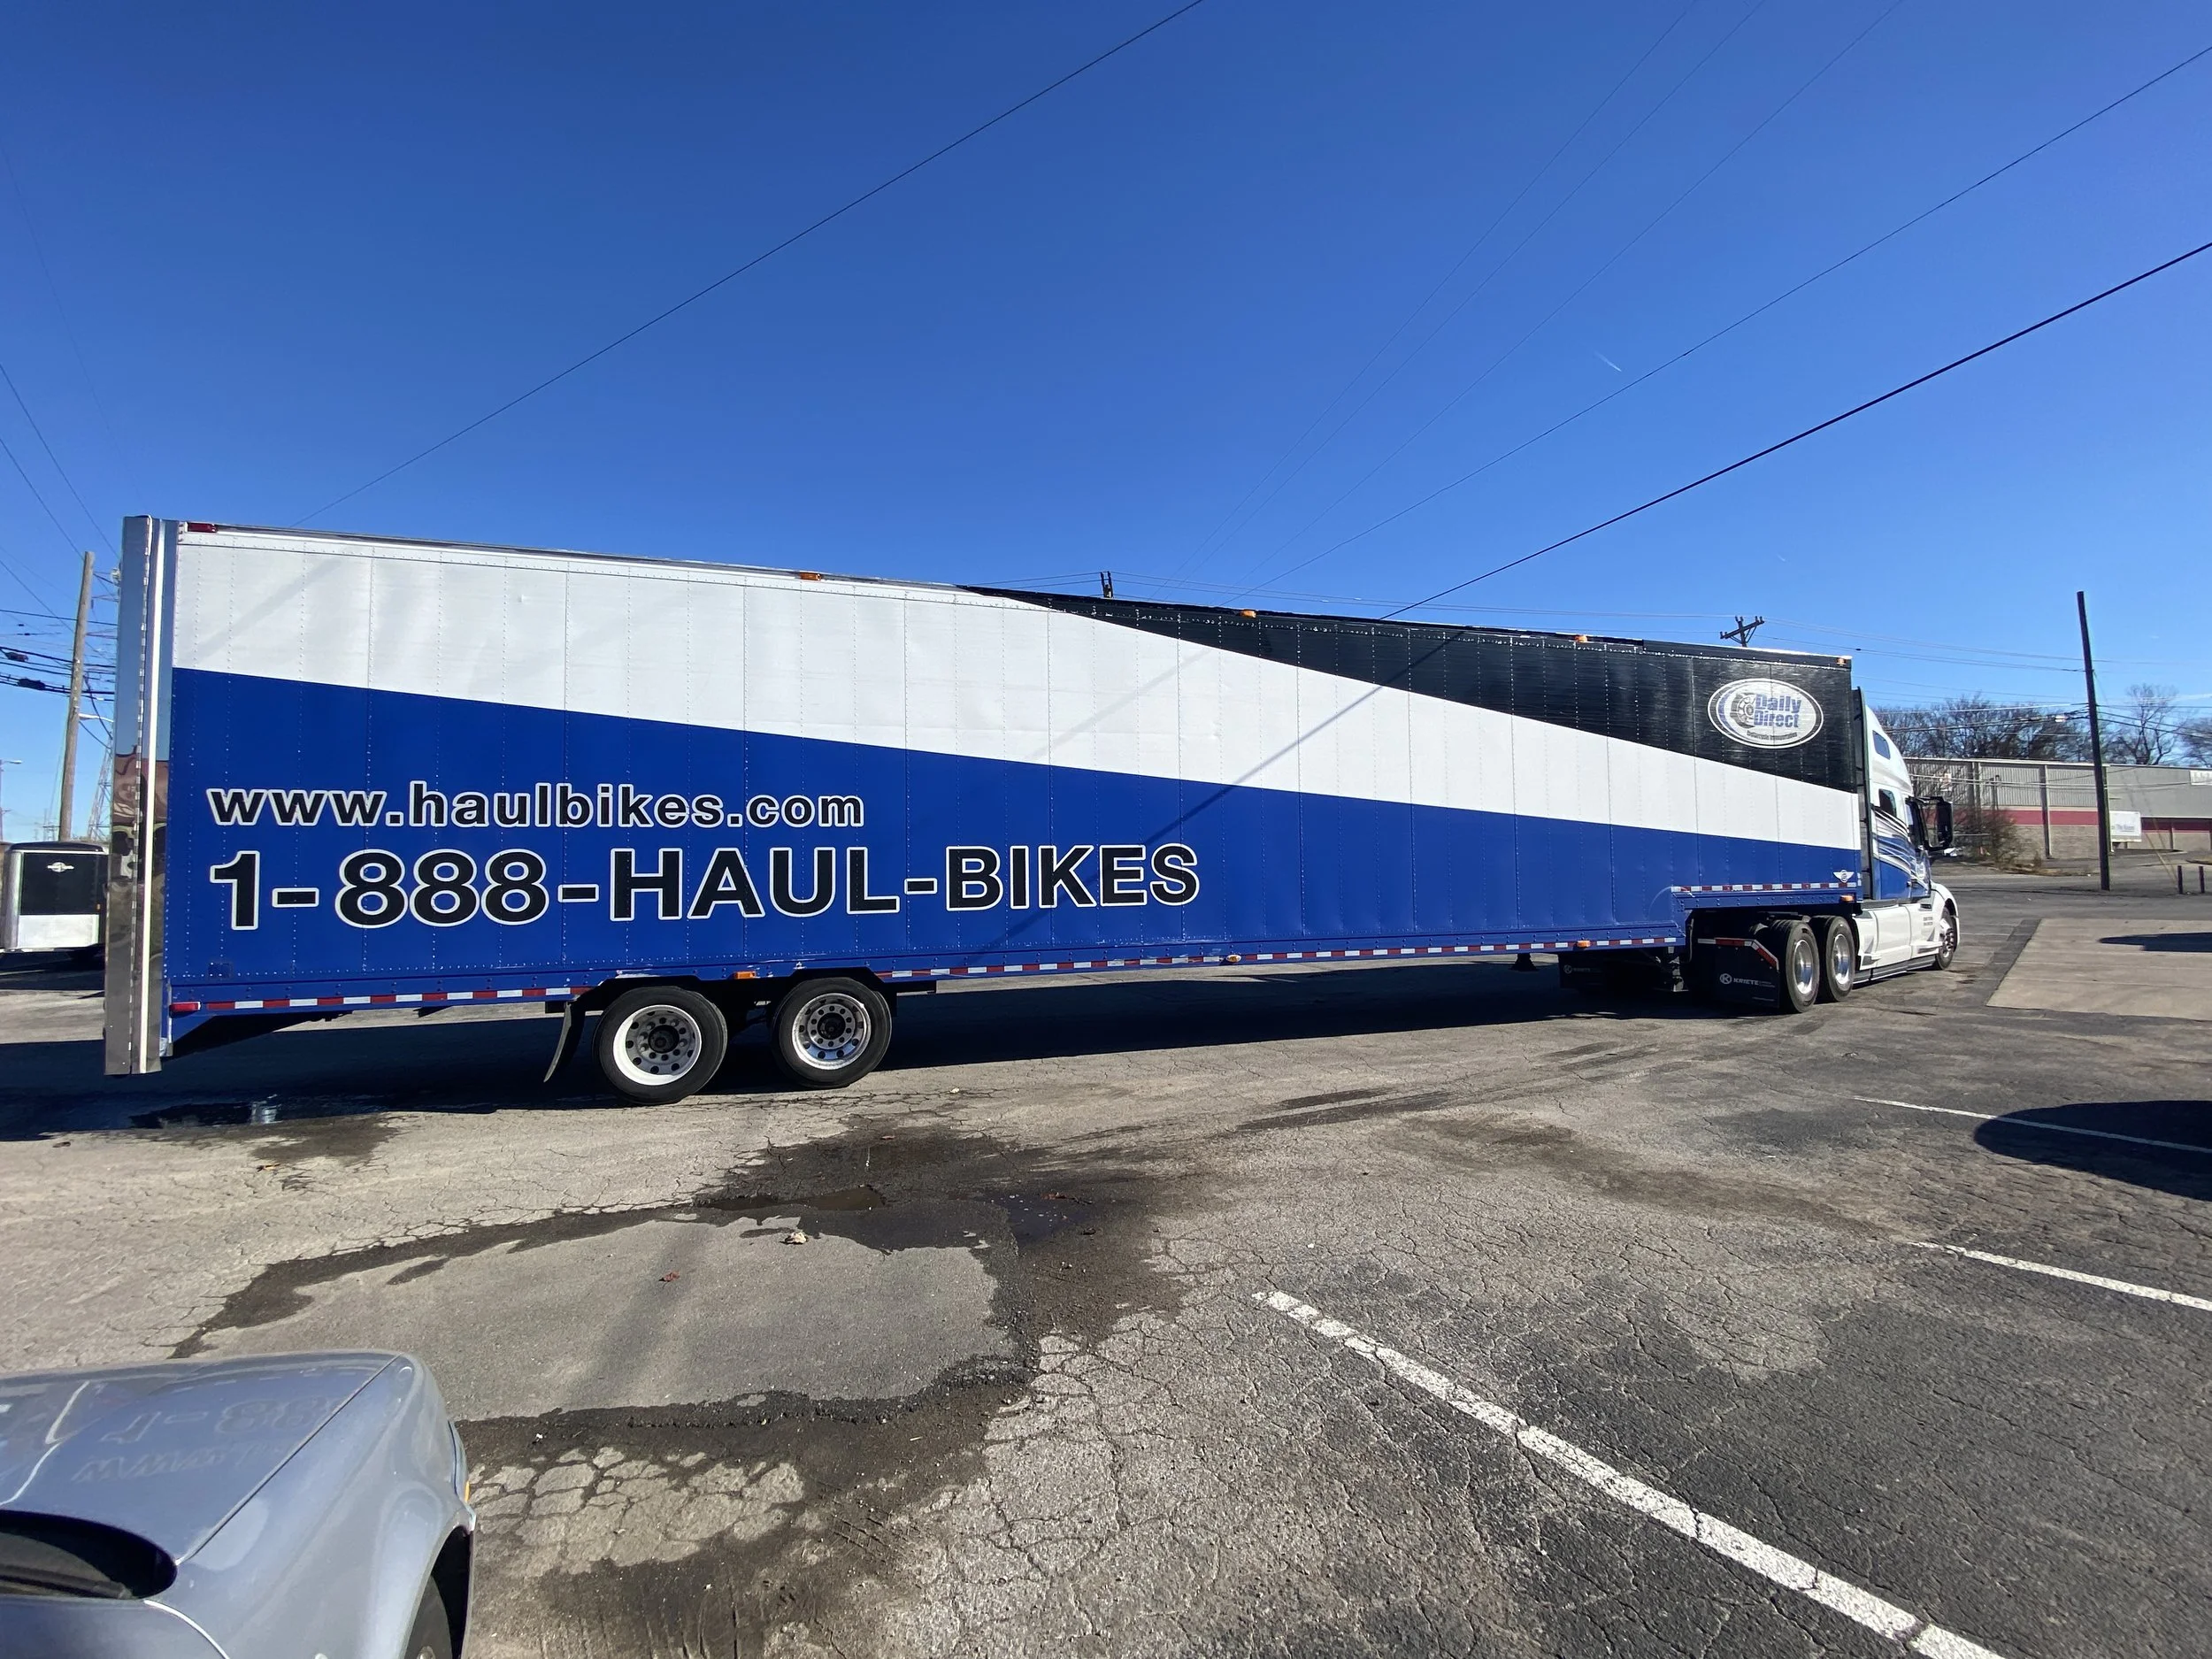
Bike arrives from Idaho via Haul Bikes...
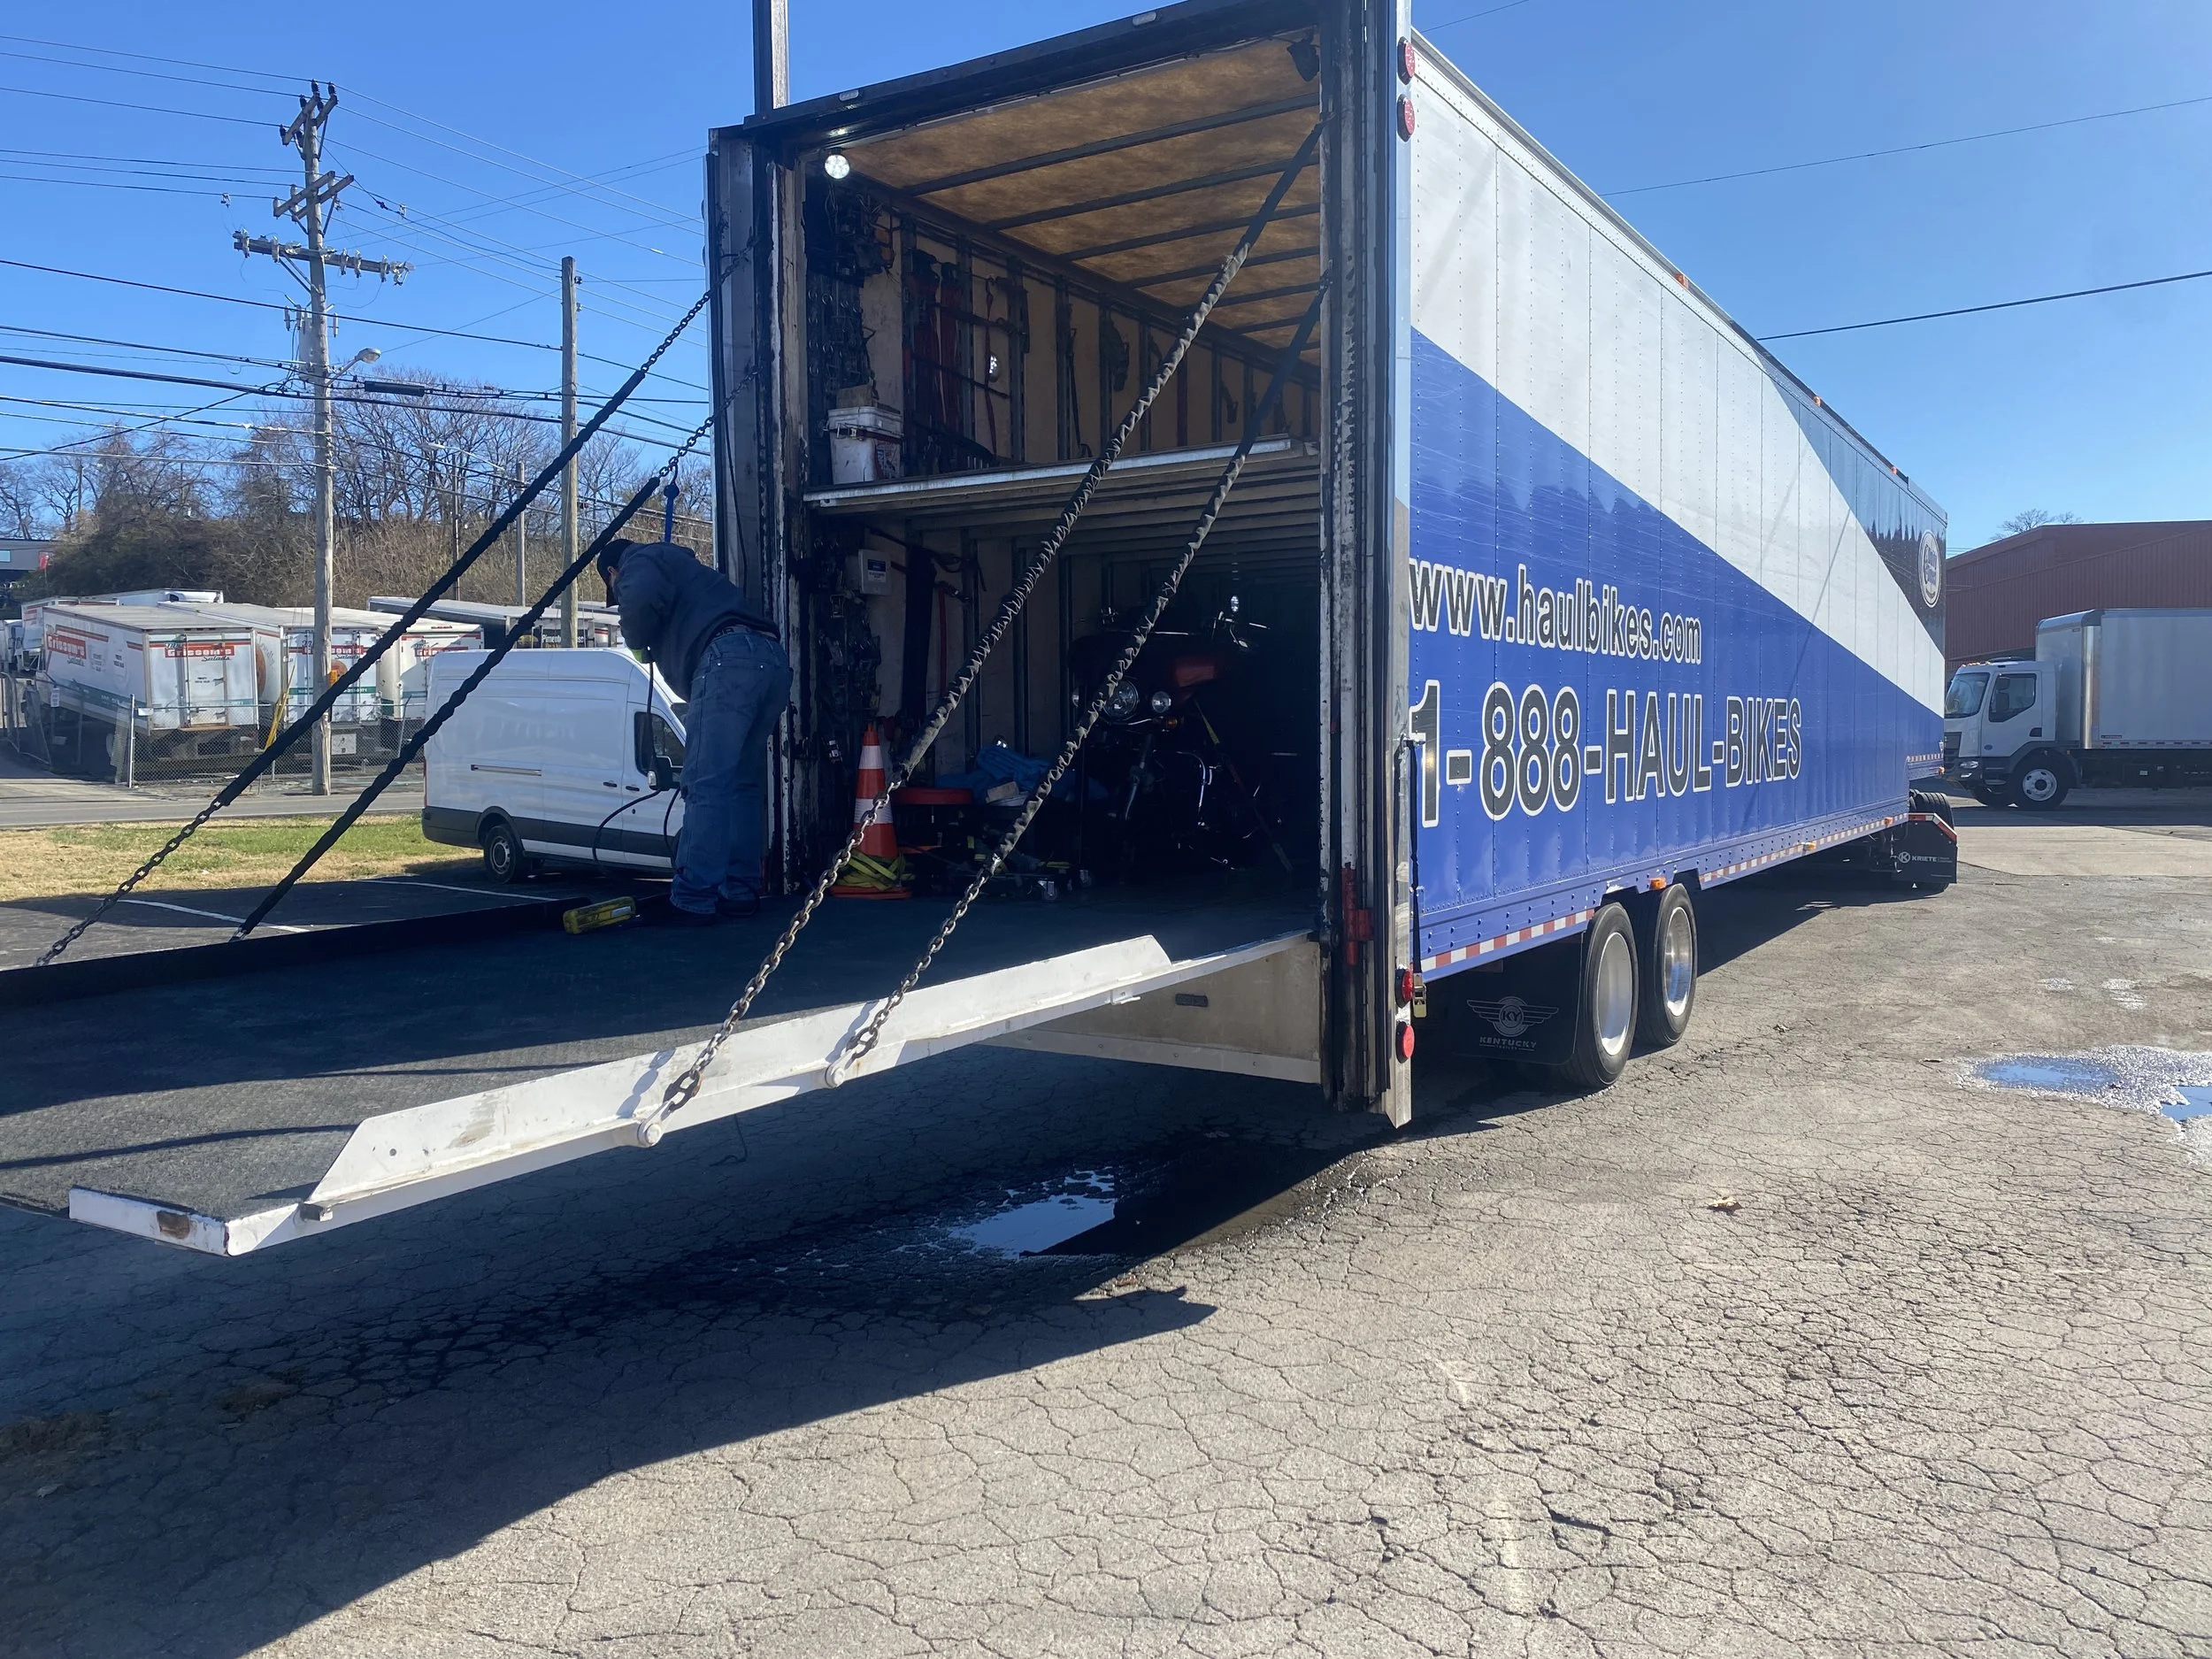
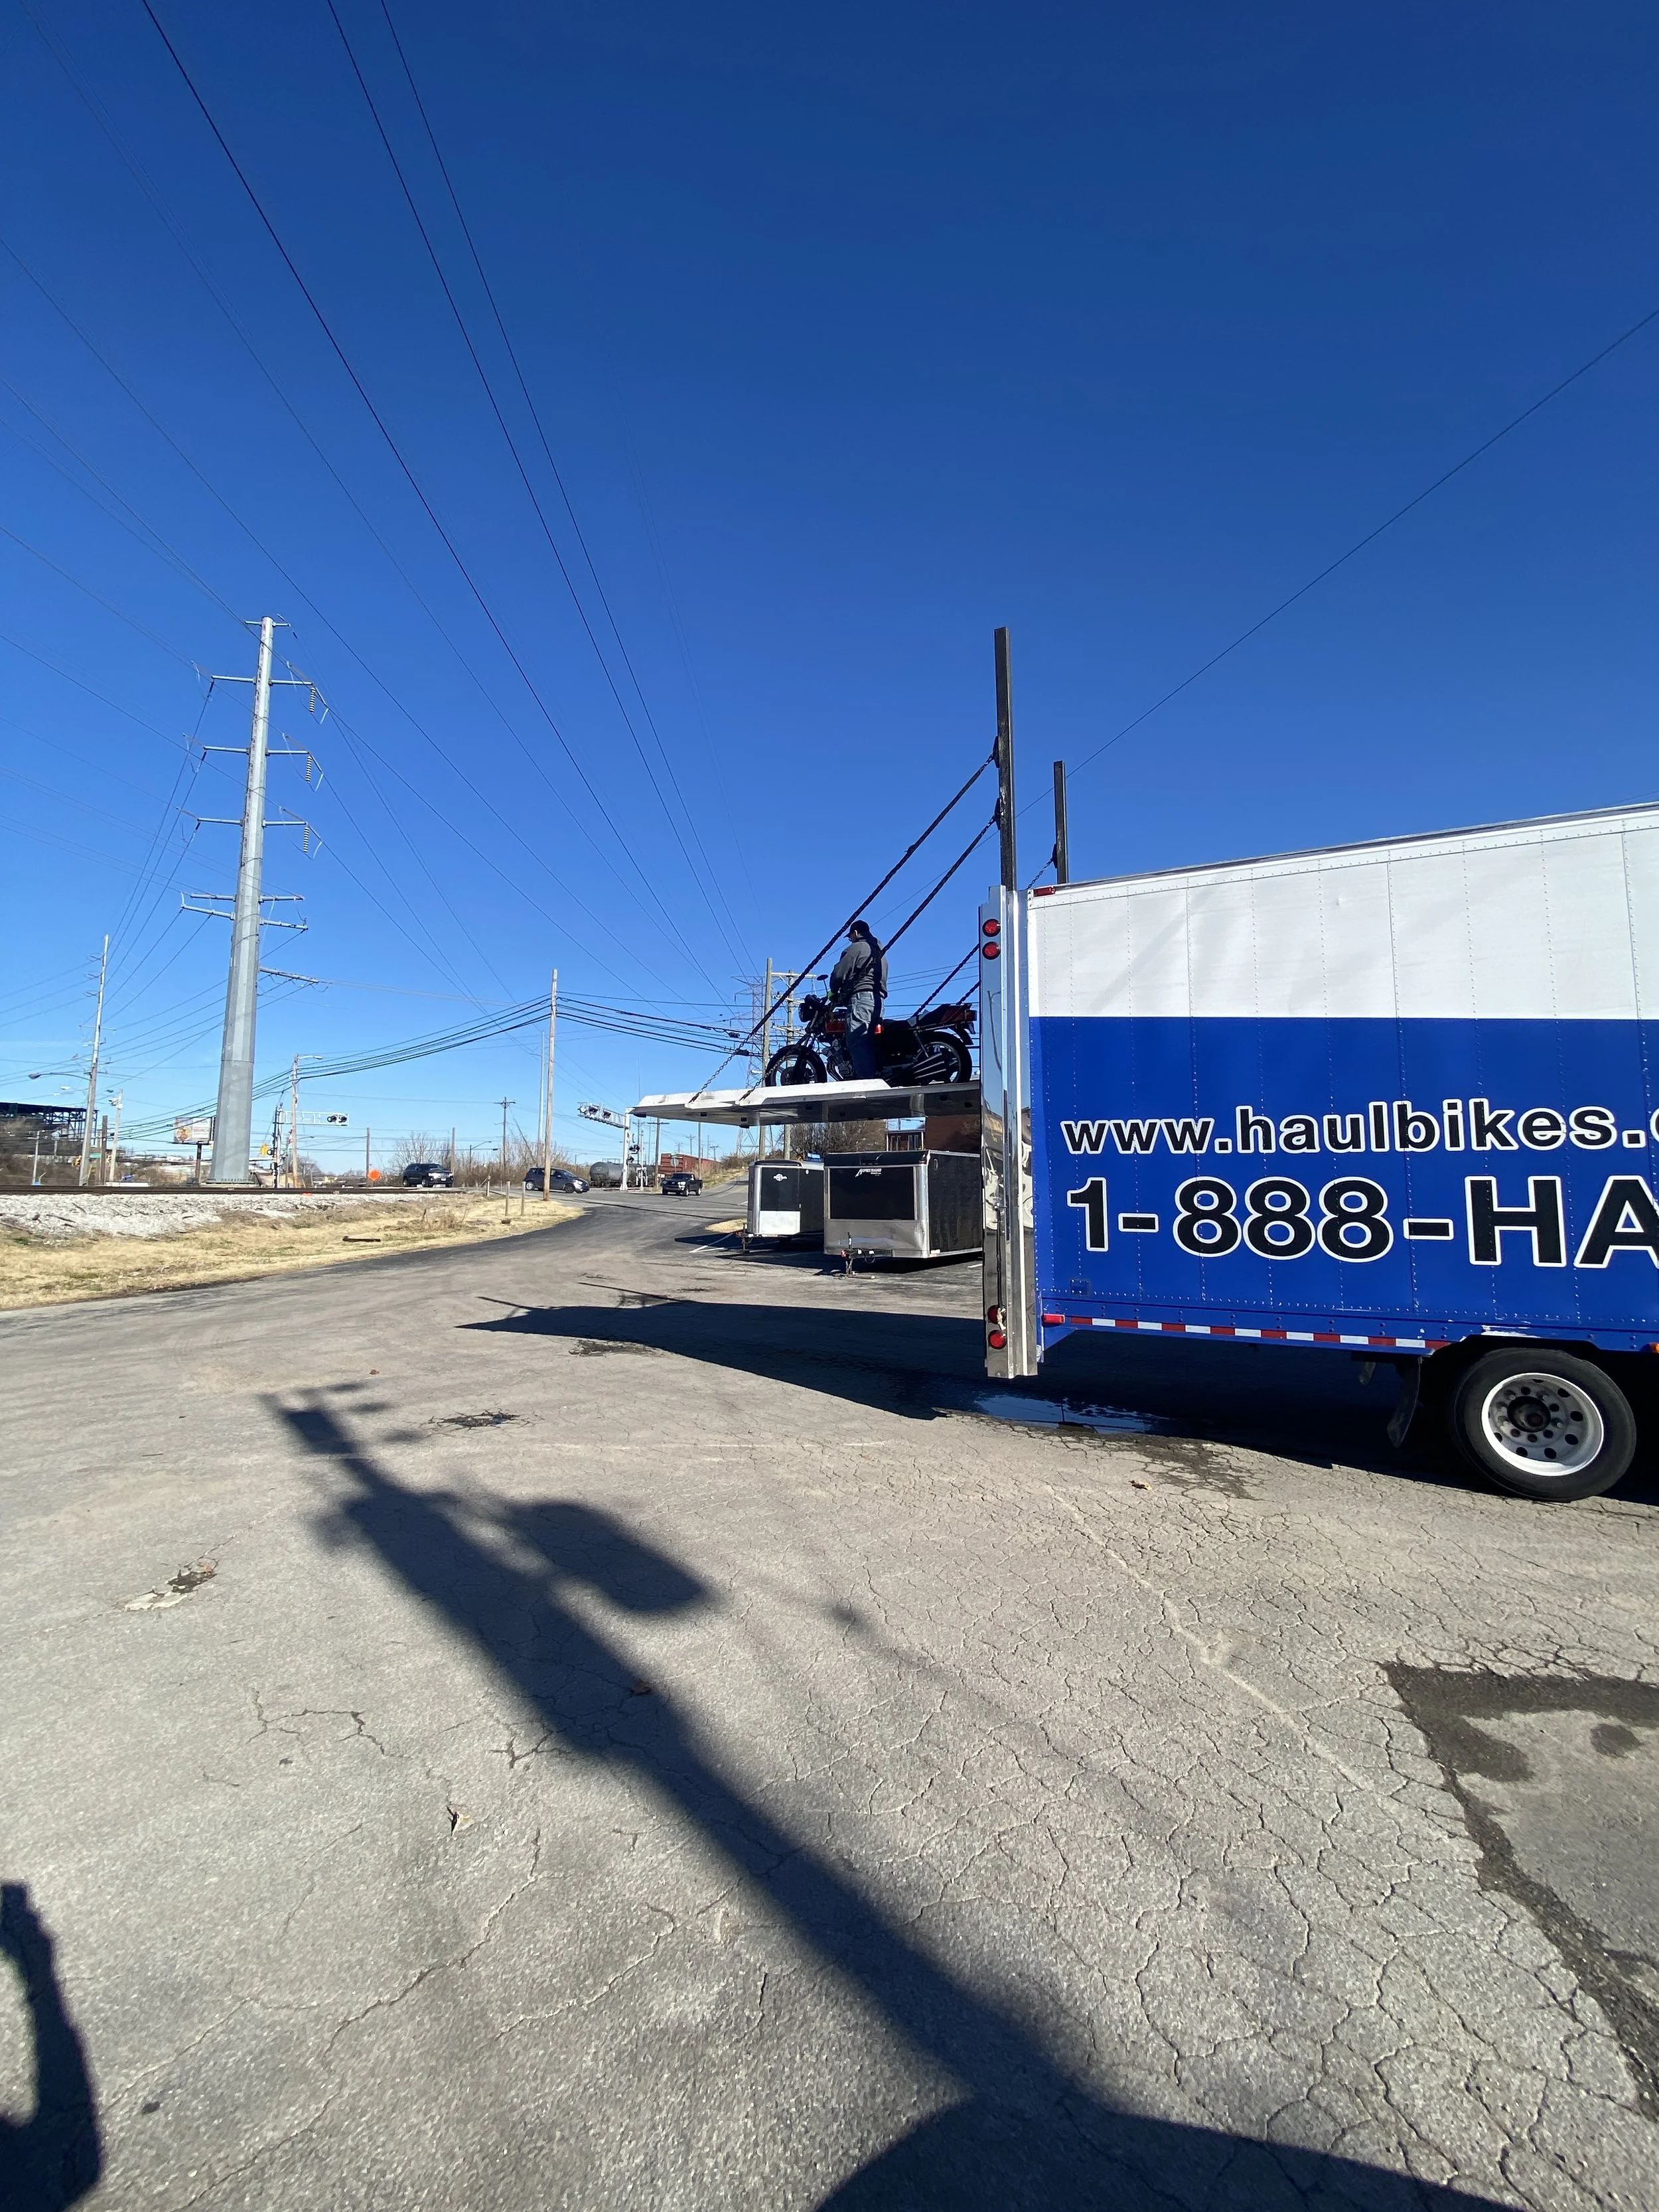
Customized trailer had two floors stashed with bikes....the CBX was on the 2nd floor..
Well heeled race teams have these kind of trailers...
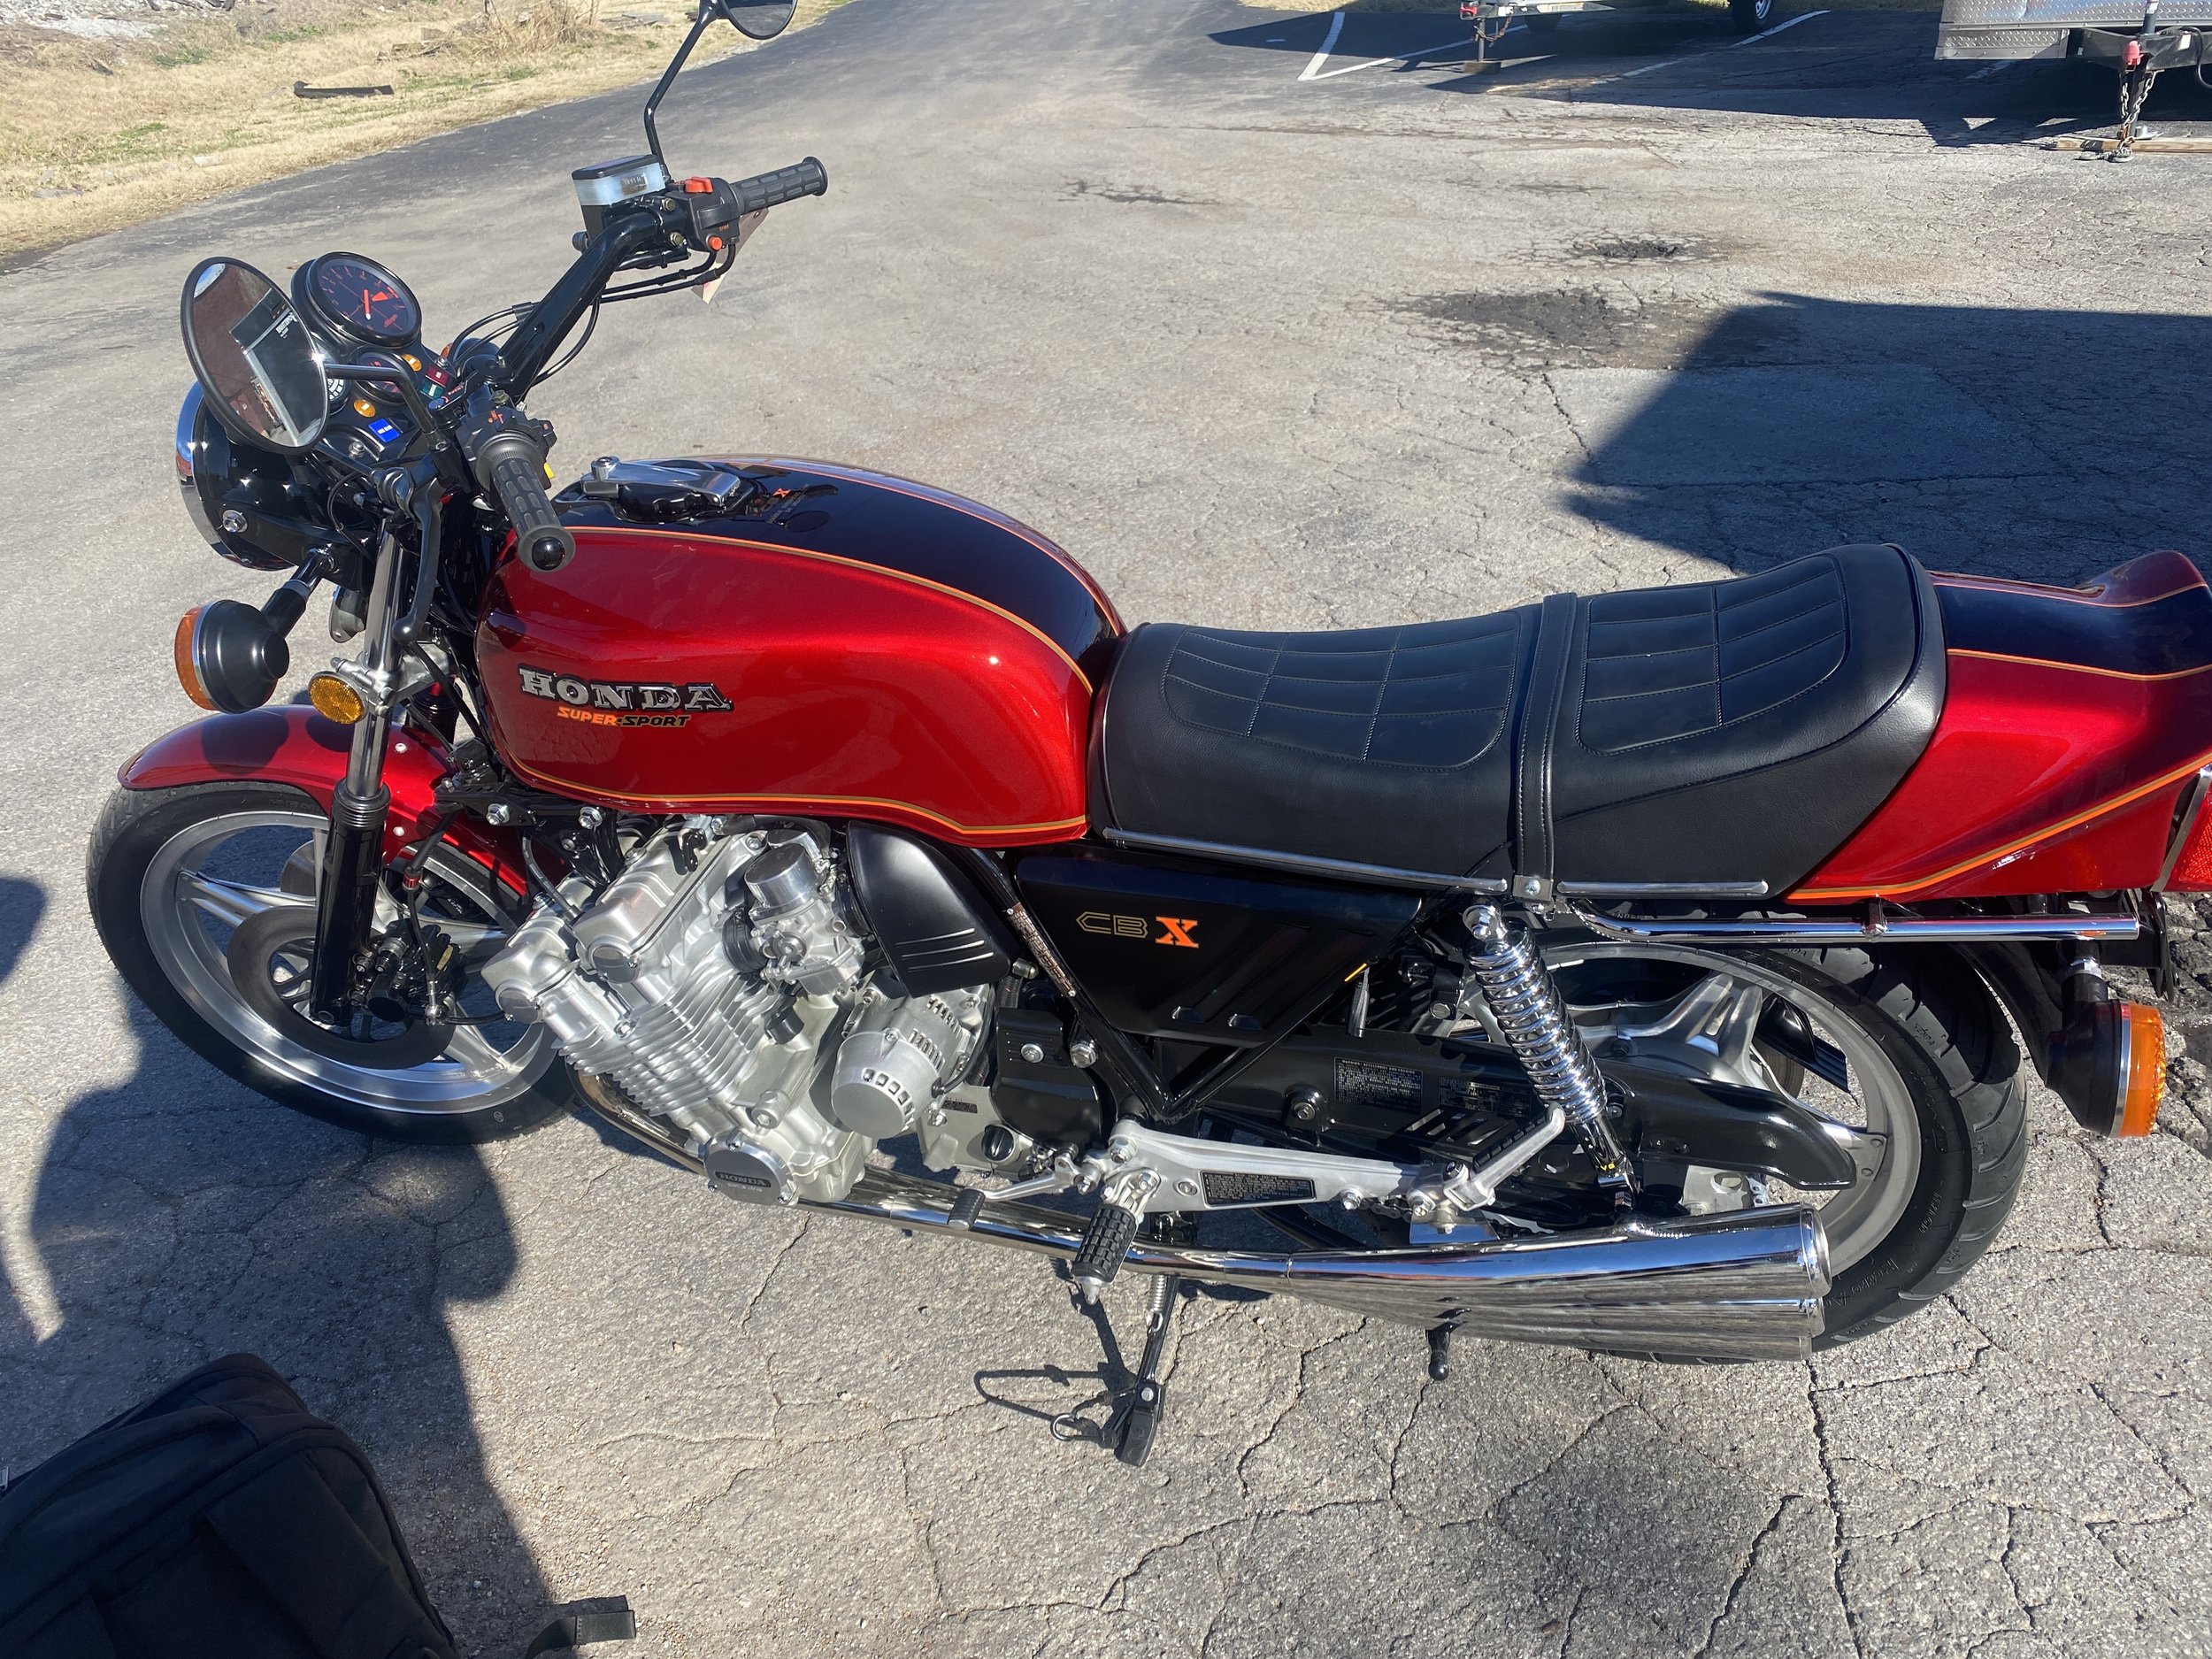
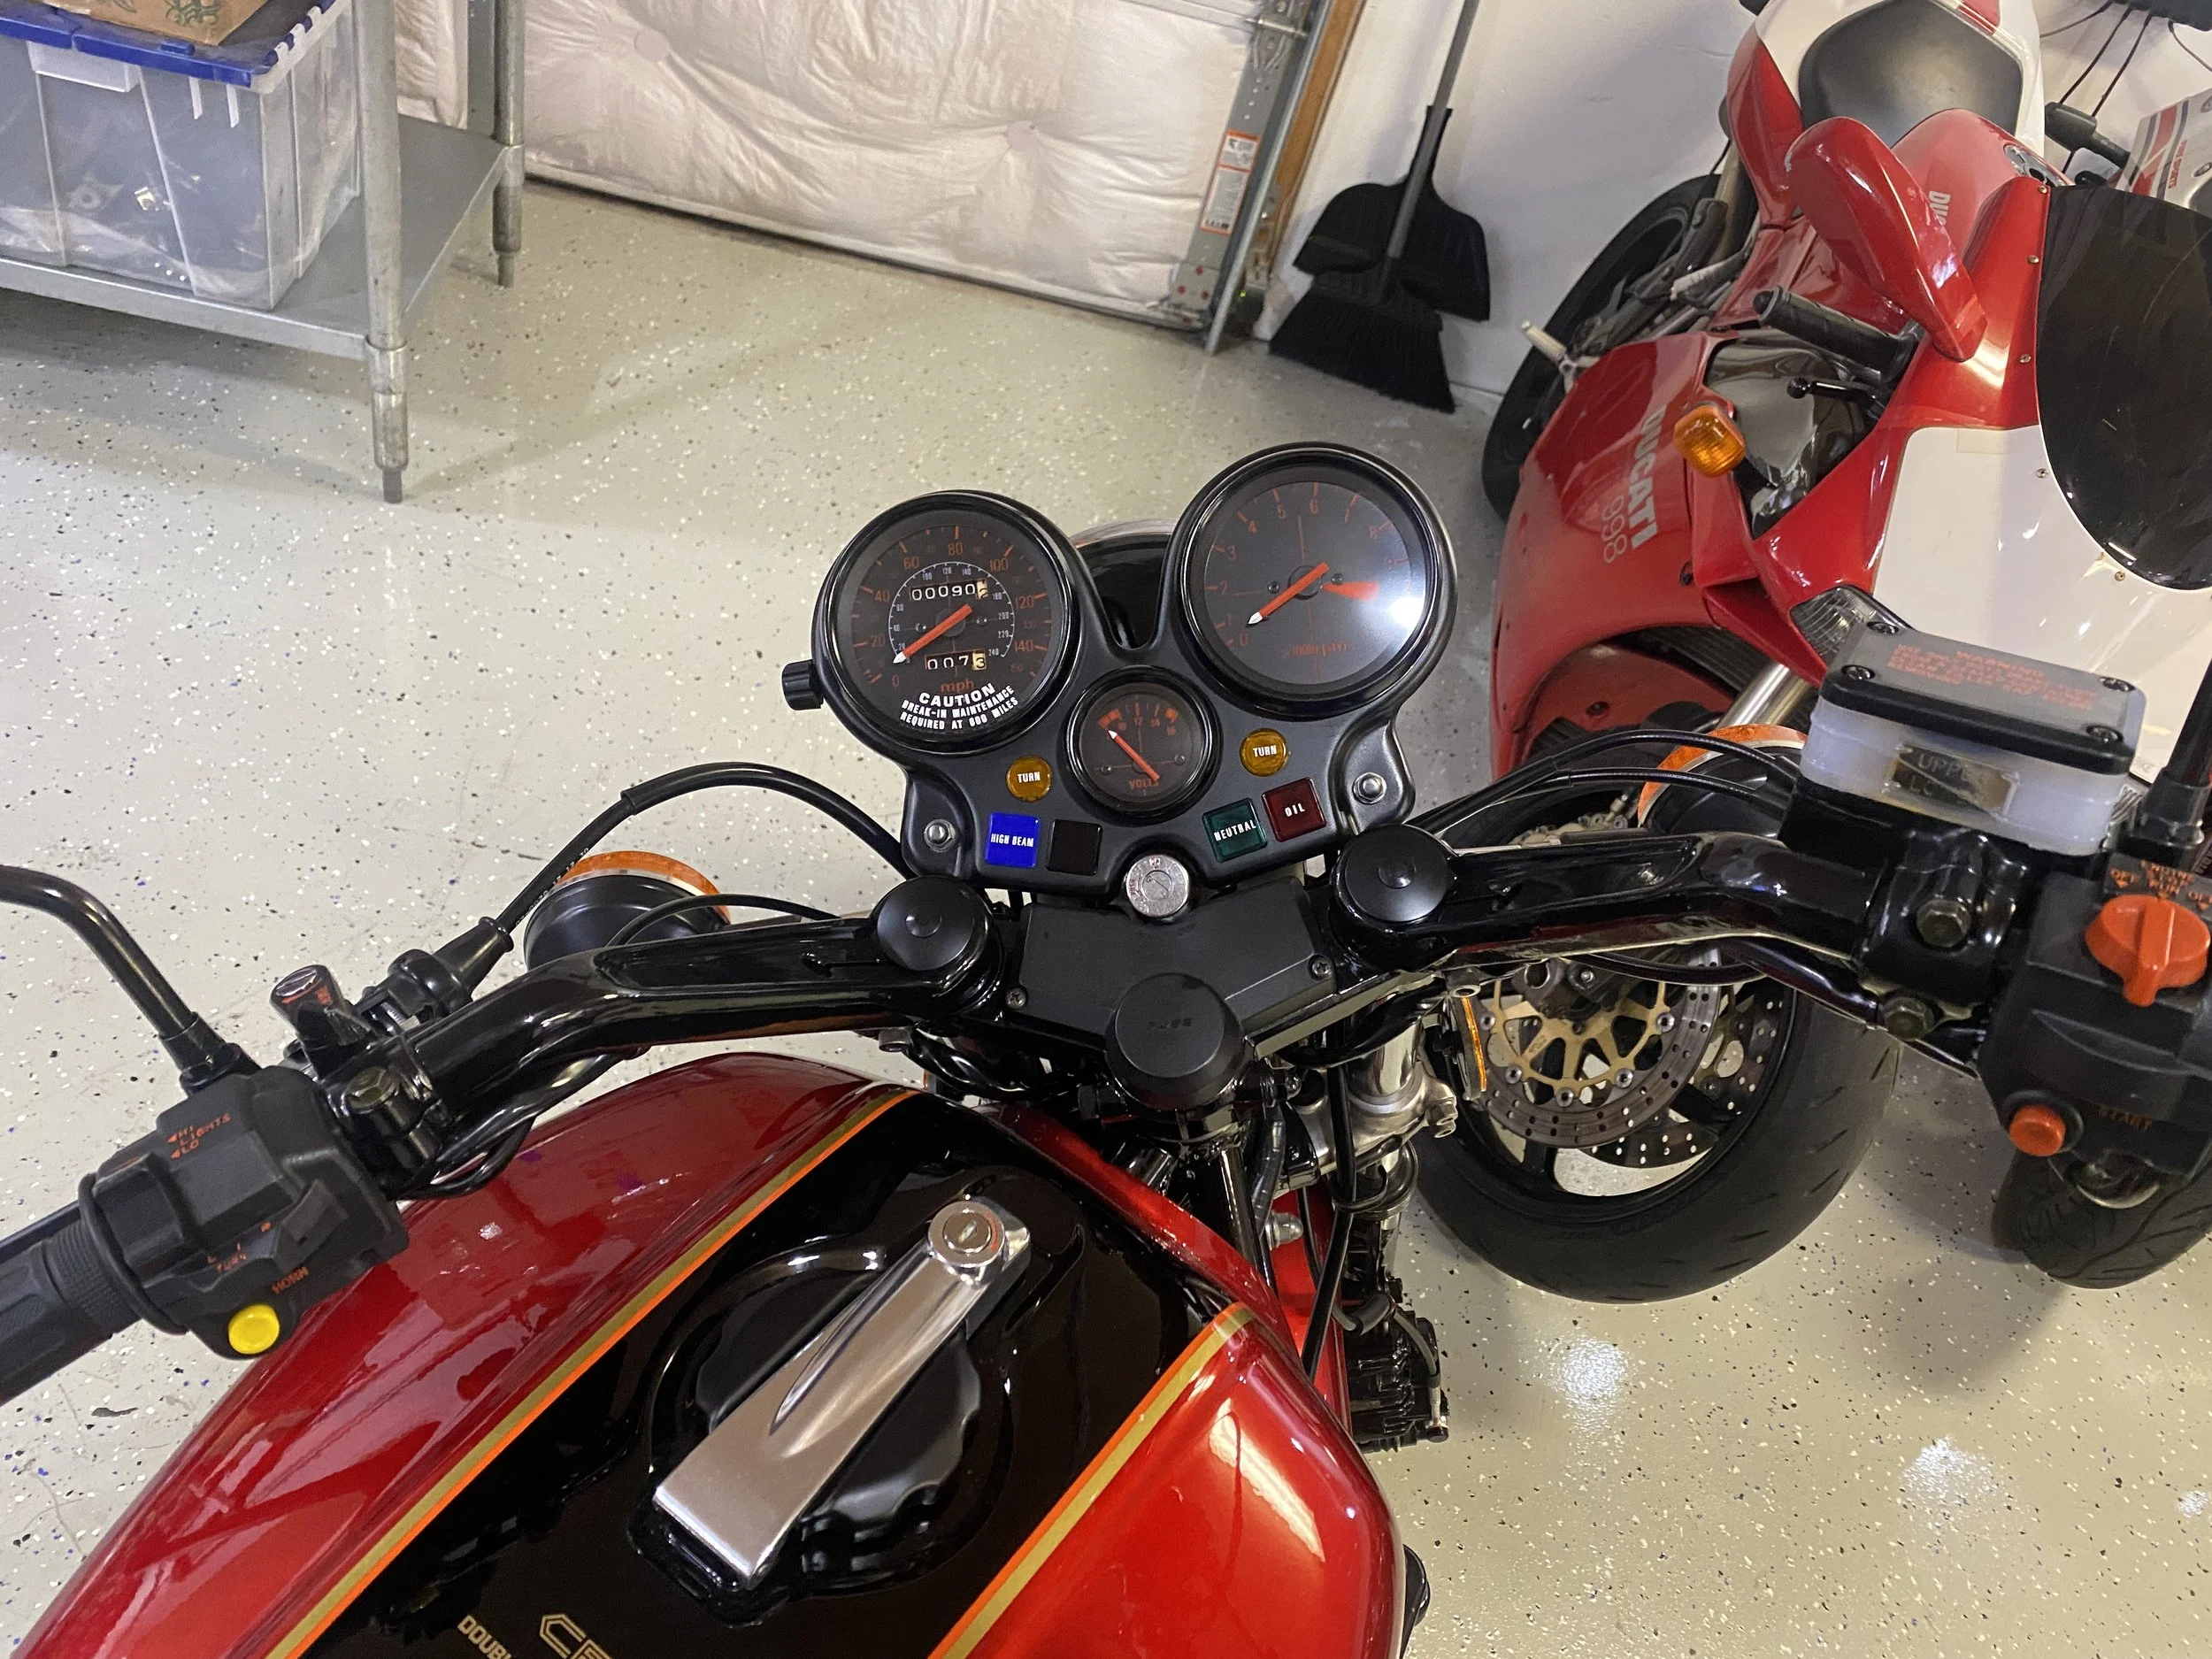
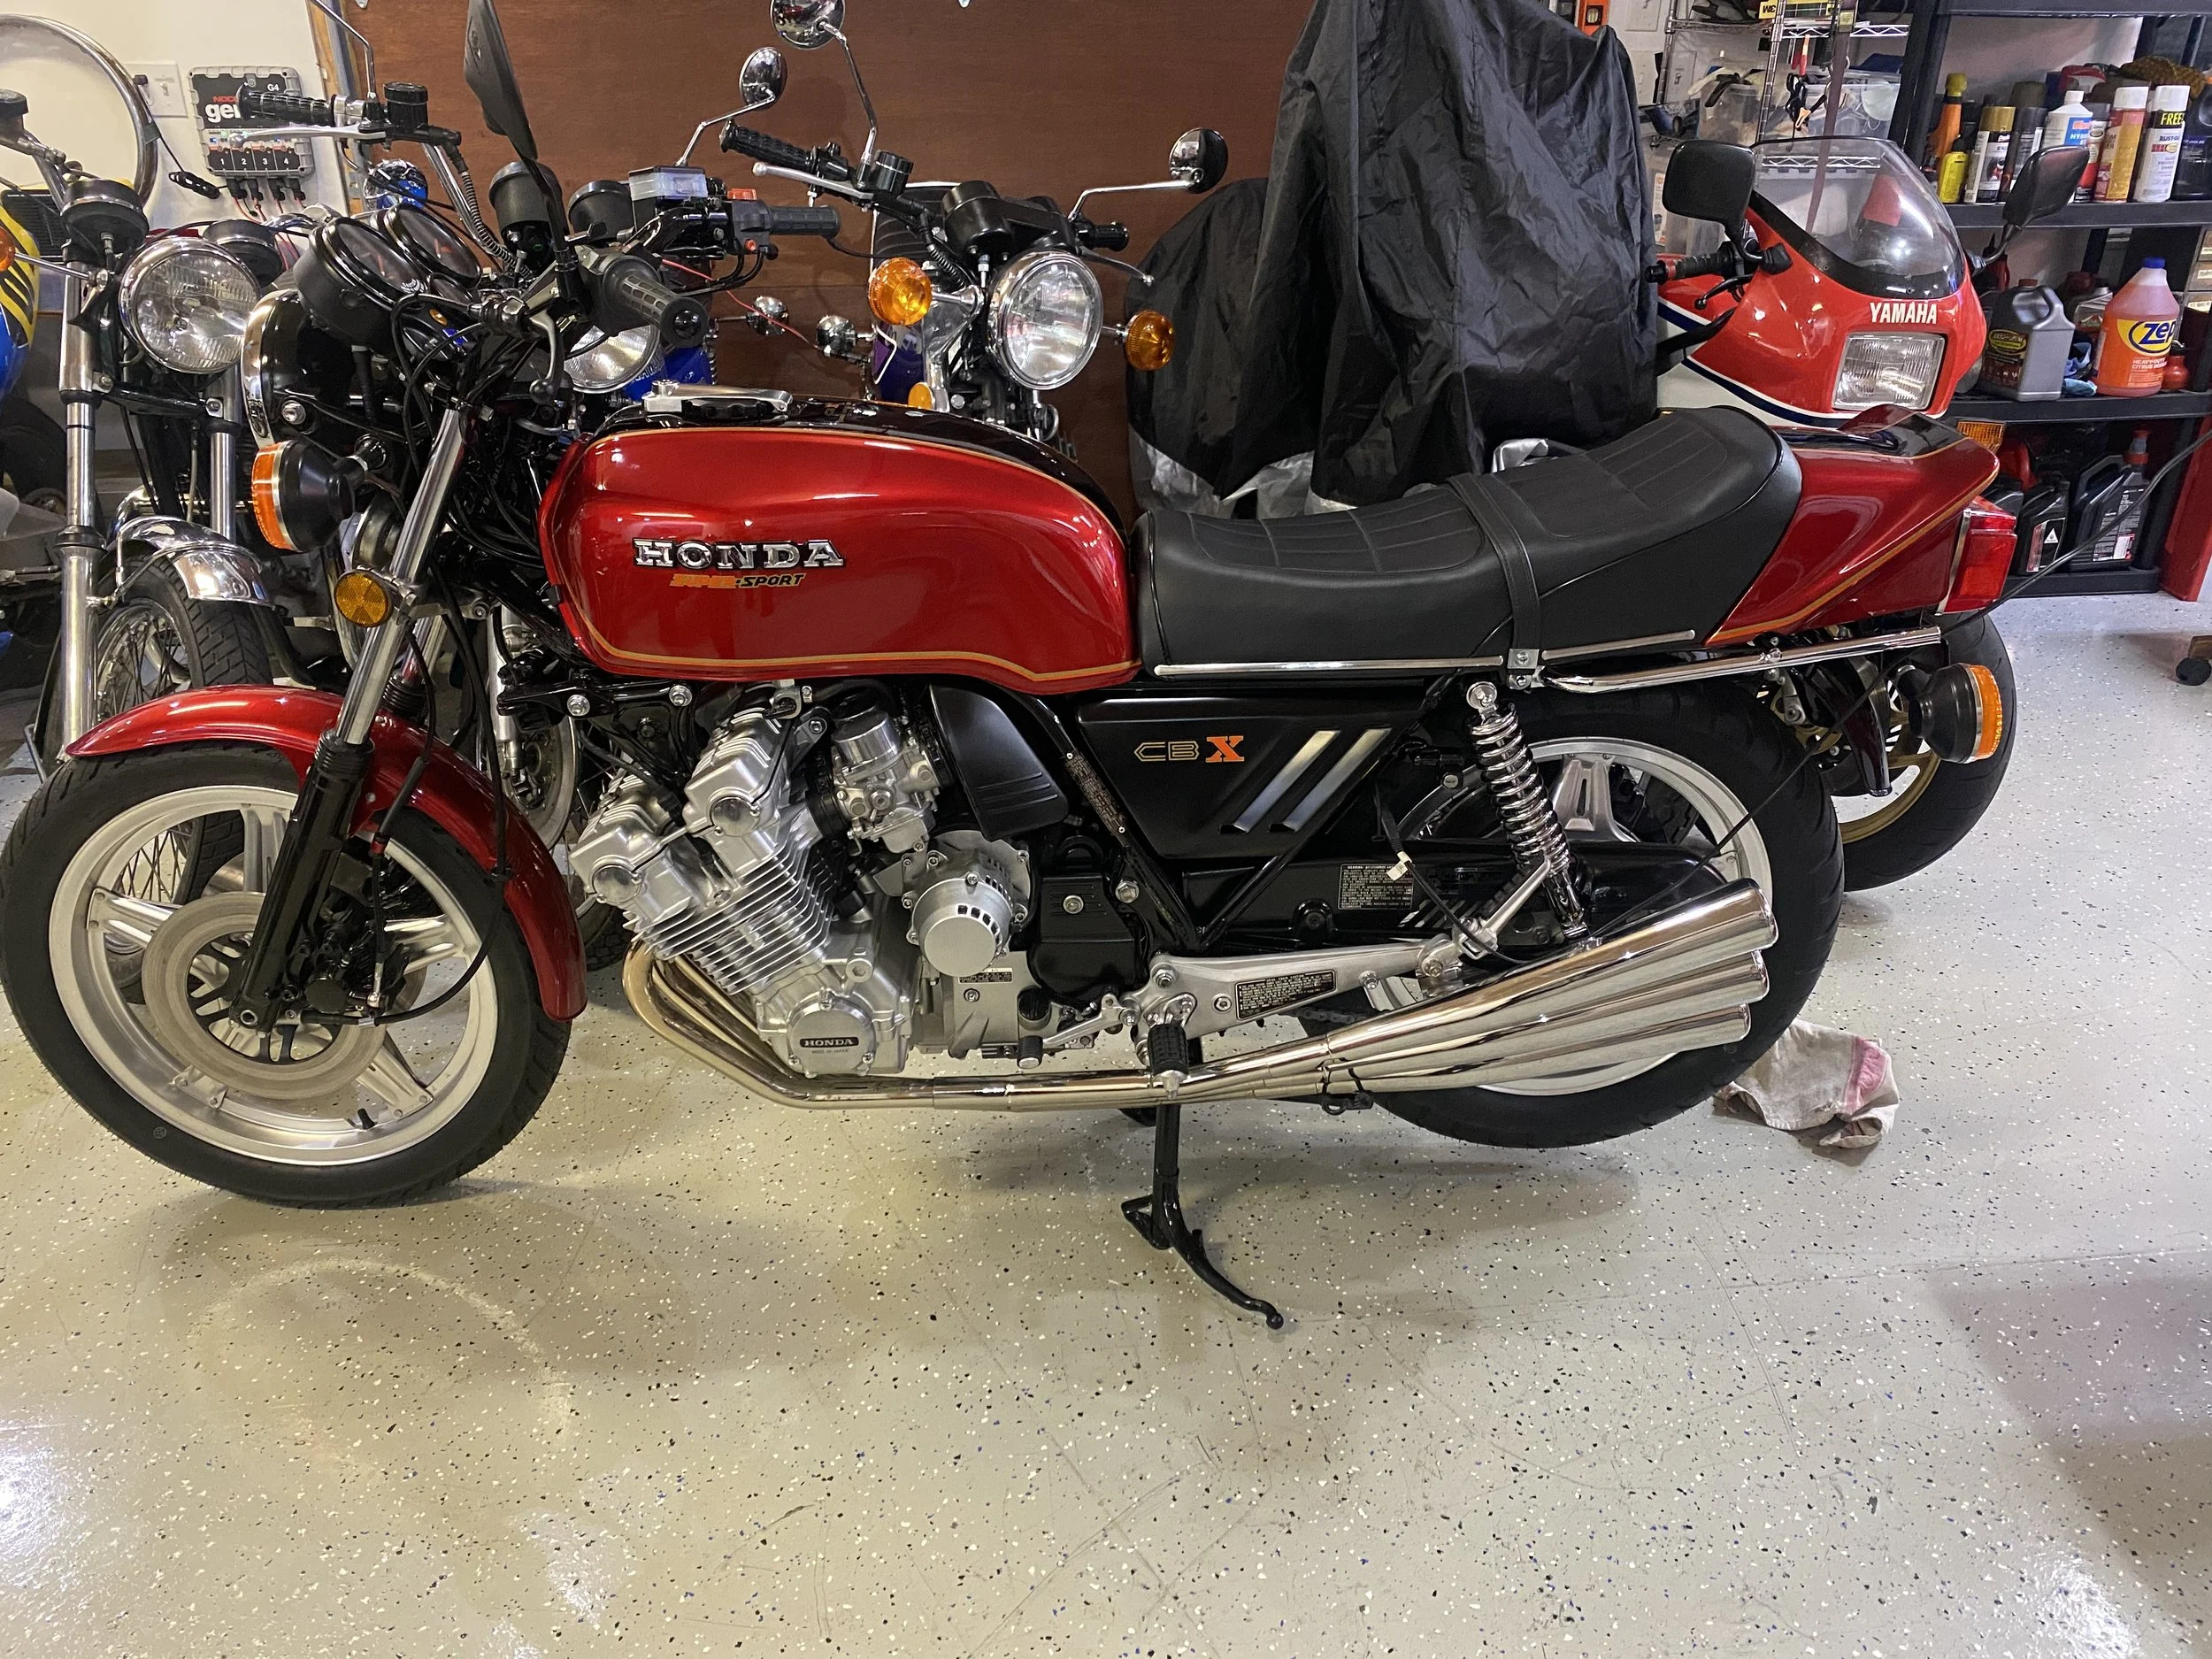
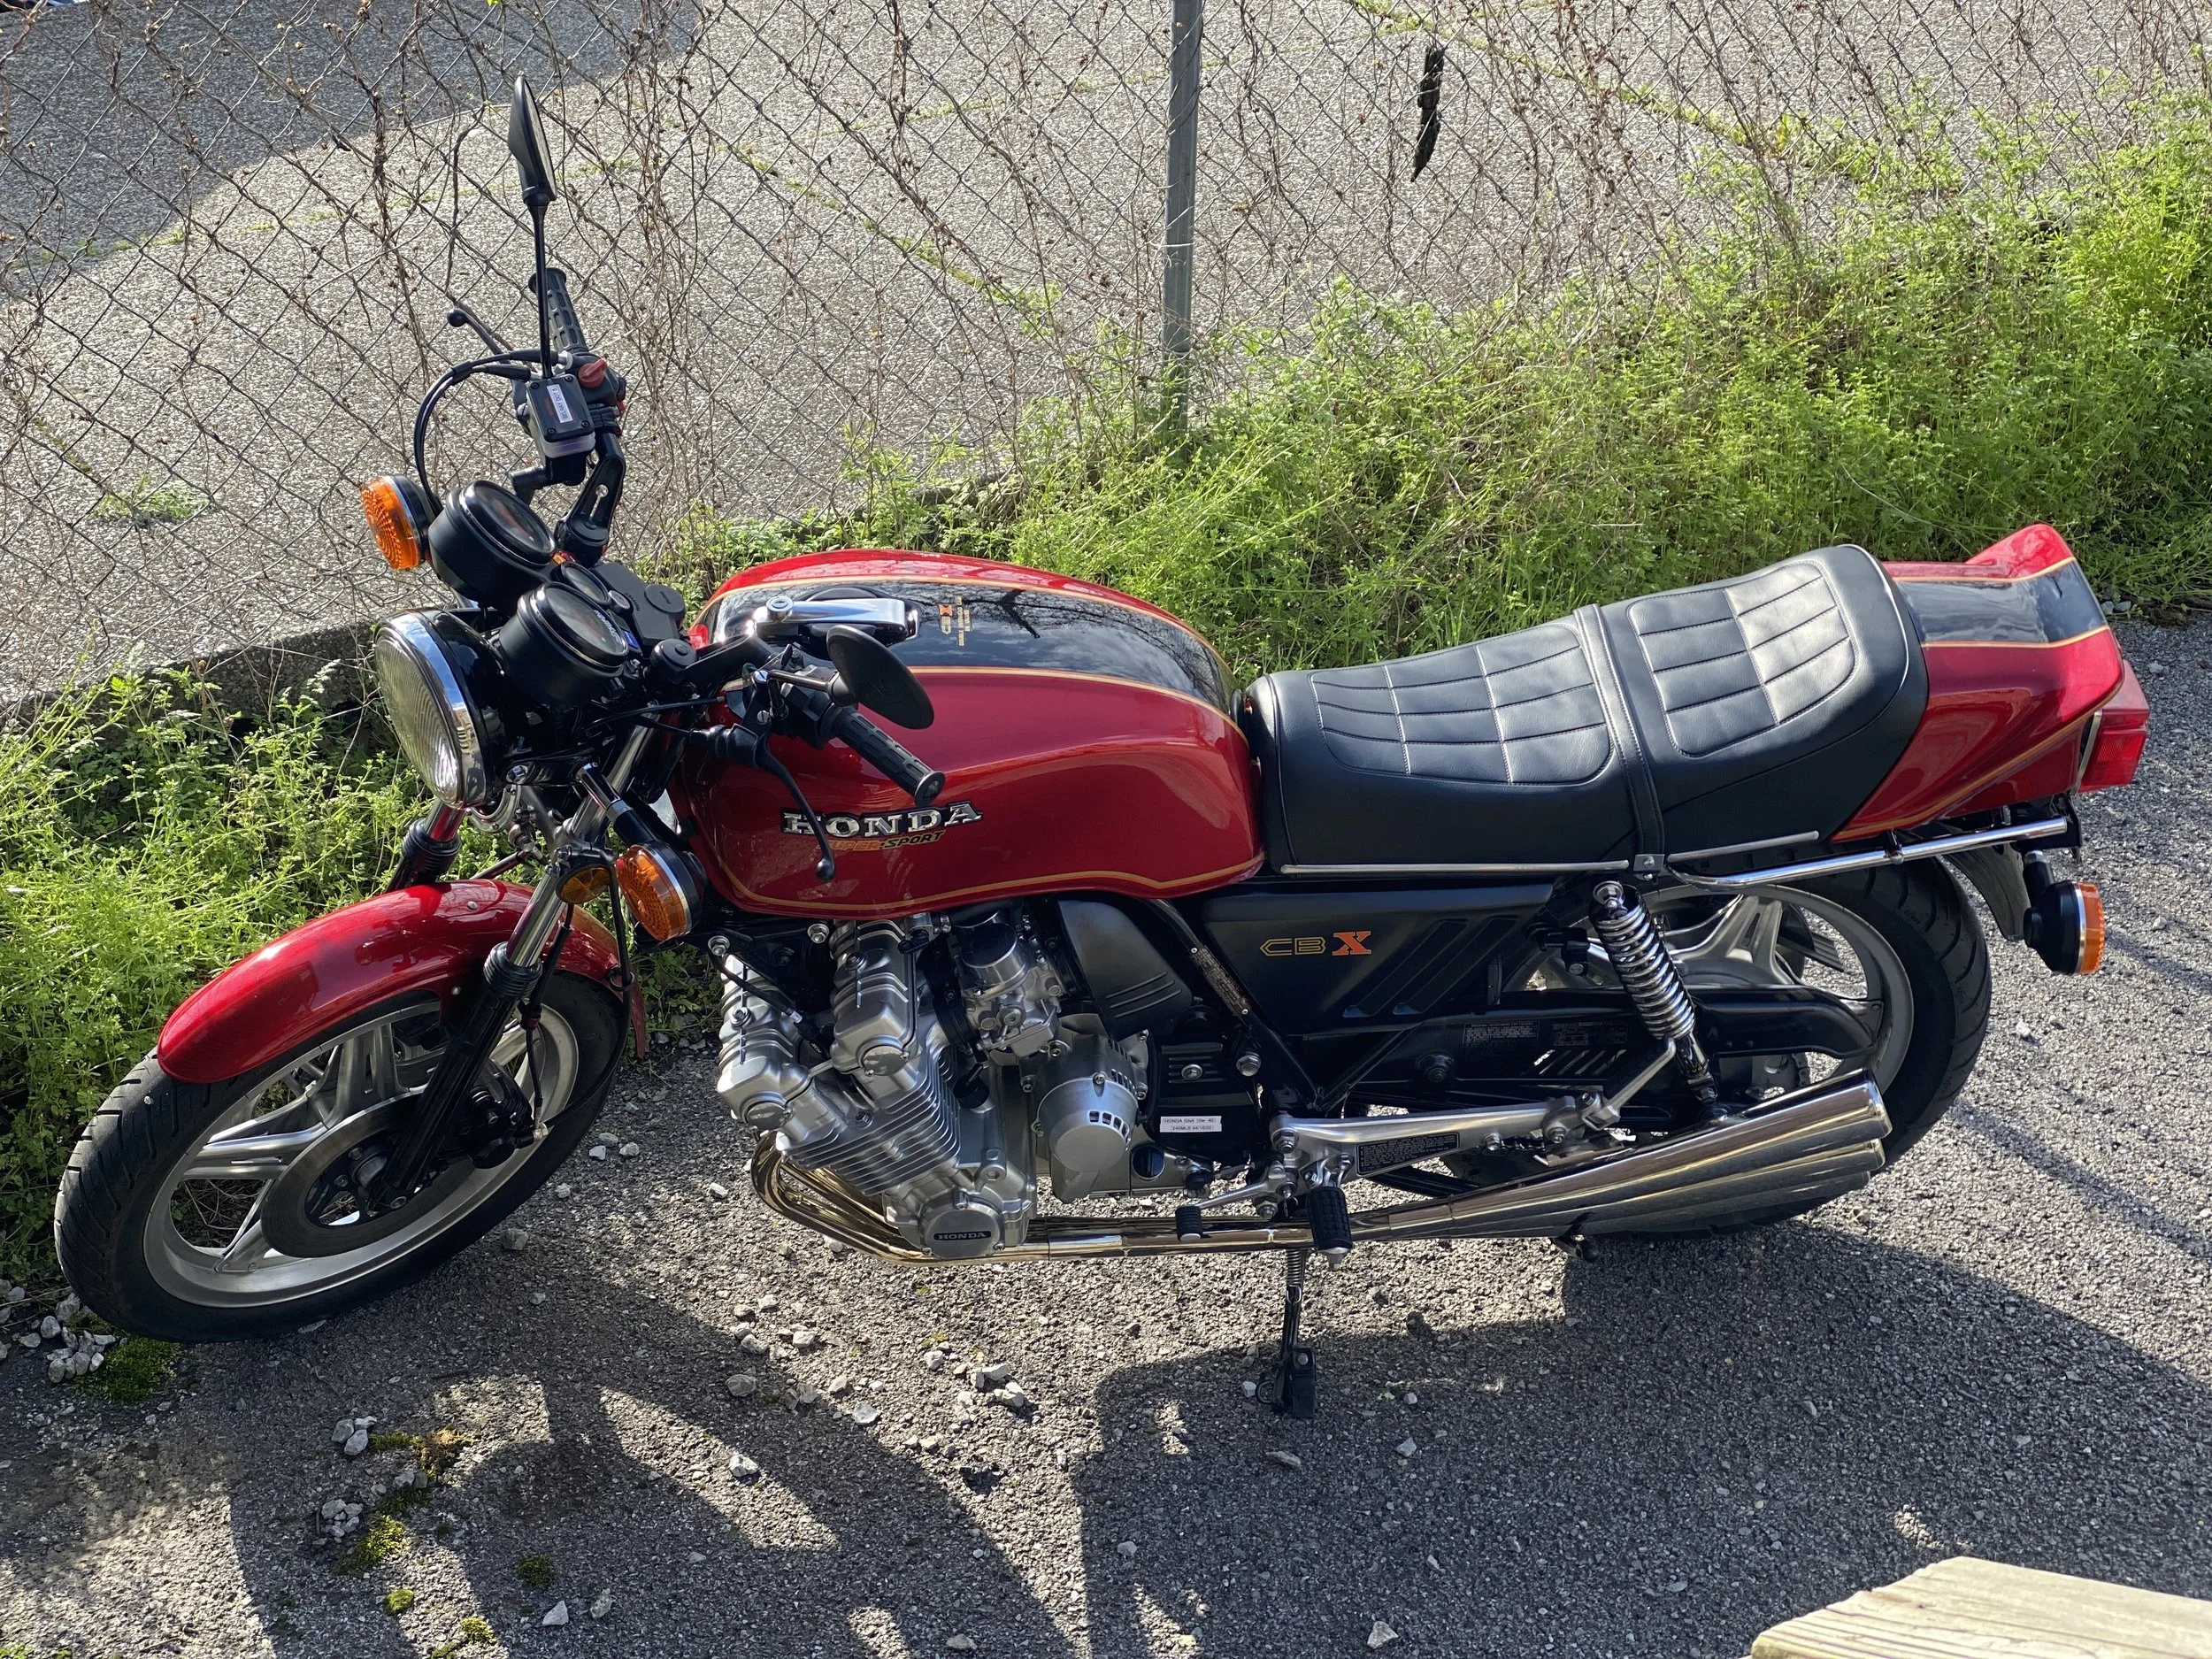
Bike touches ground in Nashville, TN and, yep, it's beautiful. That being said: beauty is only skin deep. With 80 miles on the clock I know it's been started and run at least once a month, but I don't think this has been ridden much in the last 6 years. Case in point, once the motor had warmed up a bit, clicking it into gear with the clutch in killed it, but a quick twiddle with the clutch lever adjuster made sure that didn't happen again.
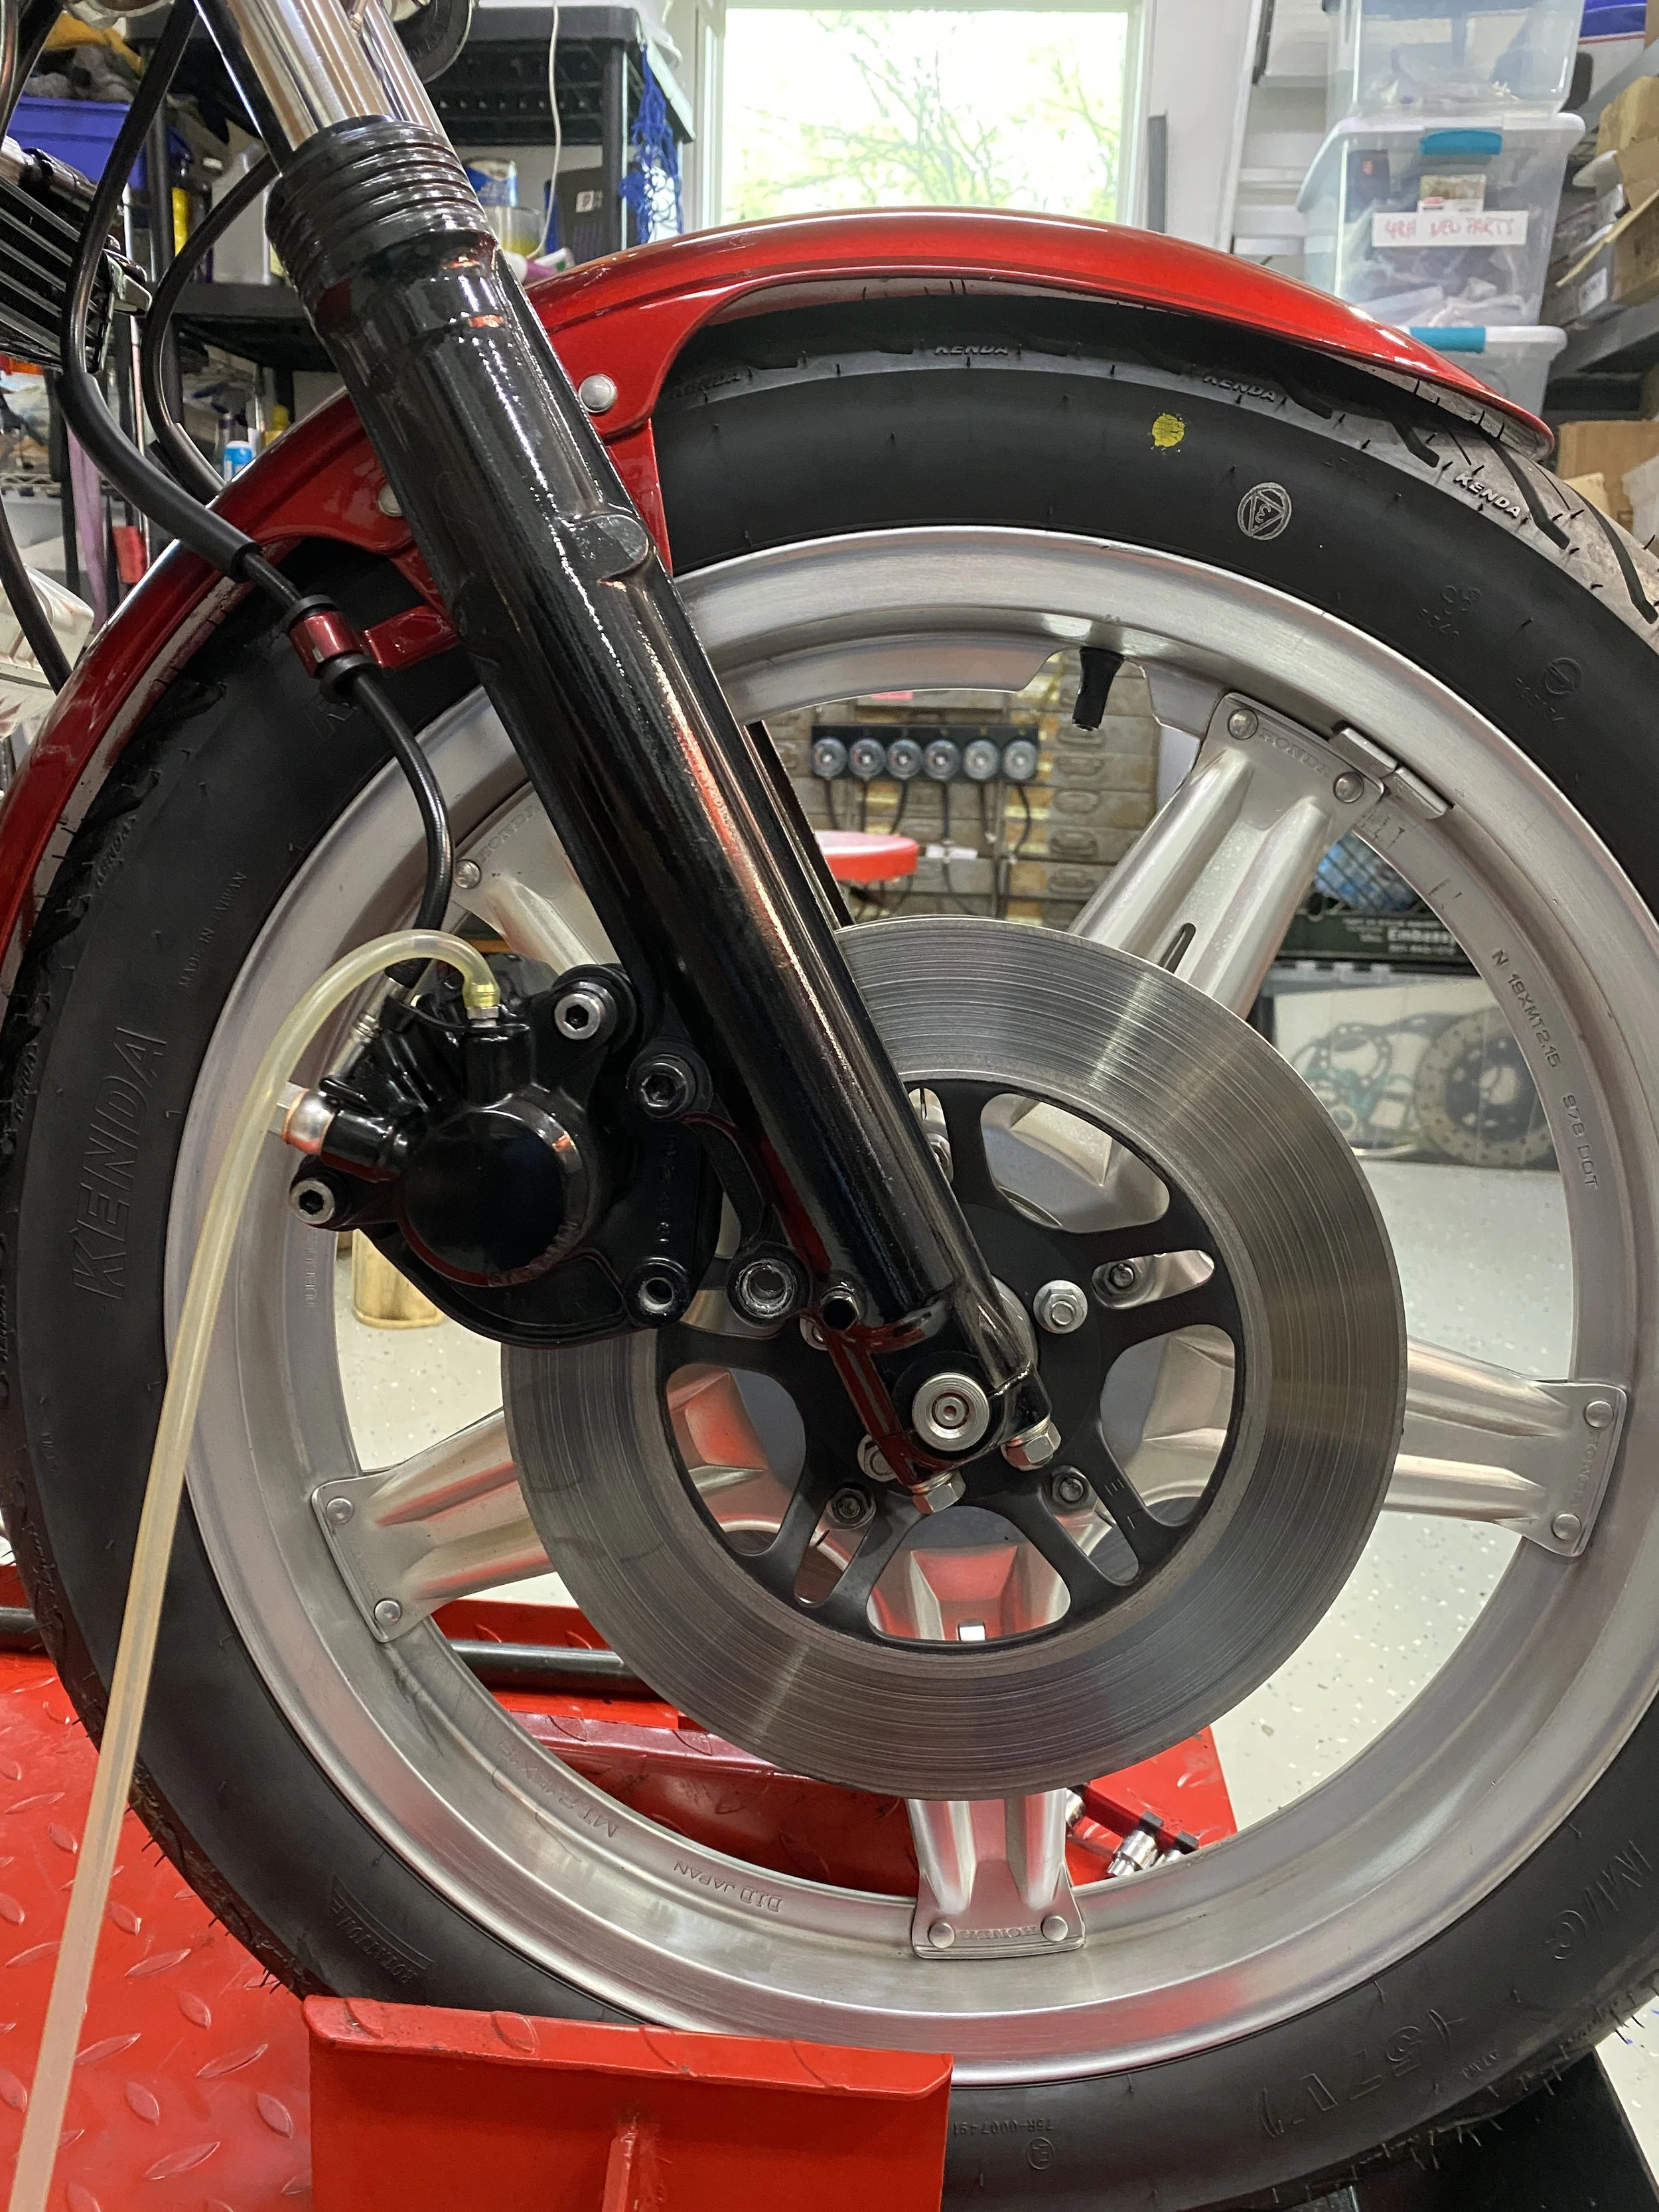
My first ride off the truck came to a grinding halt right here just minutes into it’s journey home. The engine was humming along fine, but I could sense a braking sensation when pulling in the clutch while coasting up to an intersection. I stopped on the side of the road, hauled it on it’s center stand, and examined how free the wheels were turning. Front was ok. Then, ensuring the bike was in neutral, I tried the rear and discovered that it took some muscle to make it turn. I could feel the telltale heat from the disc.
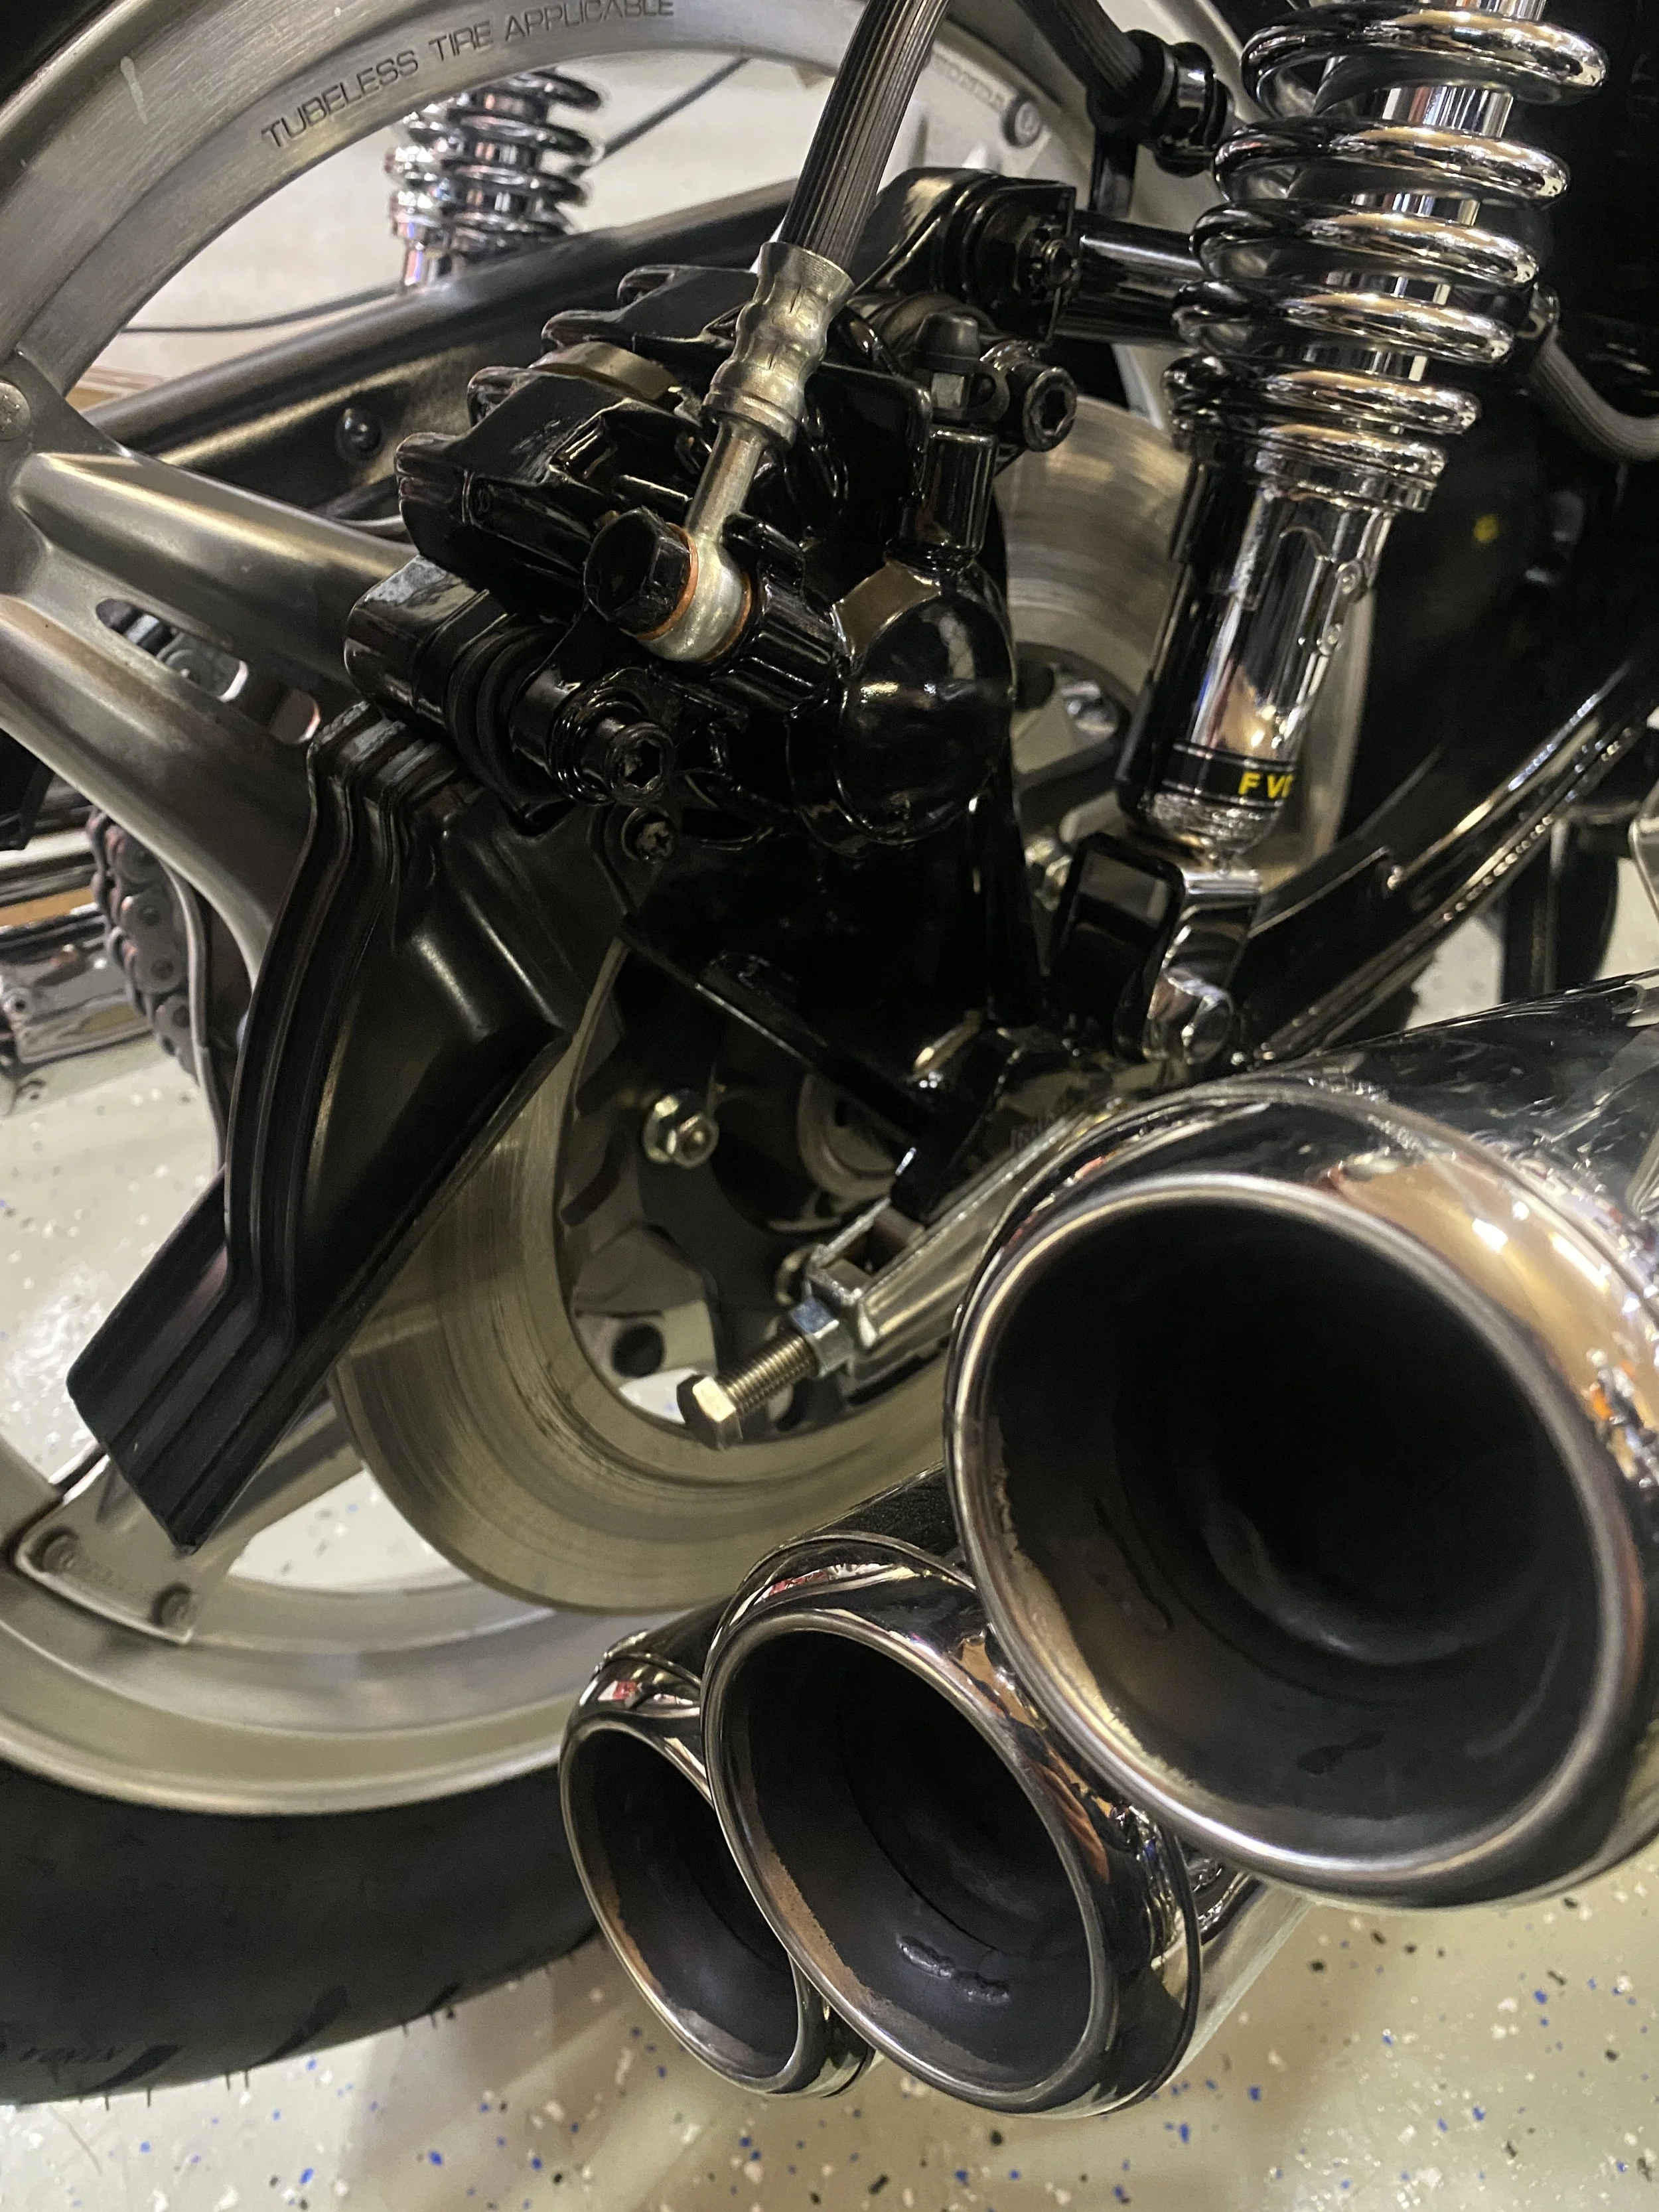
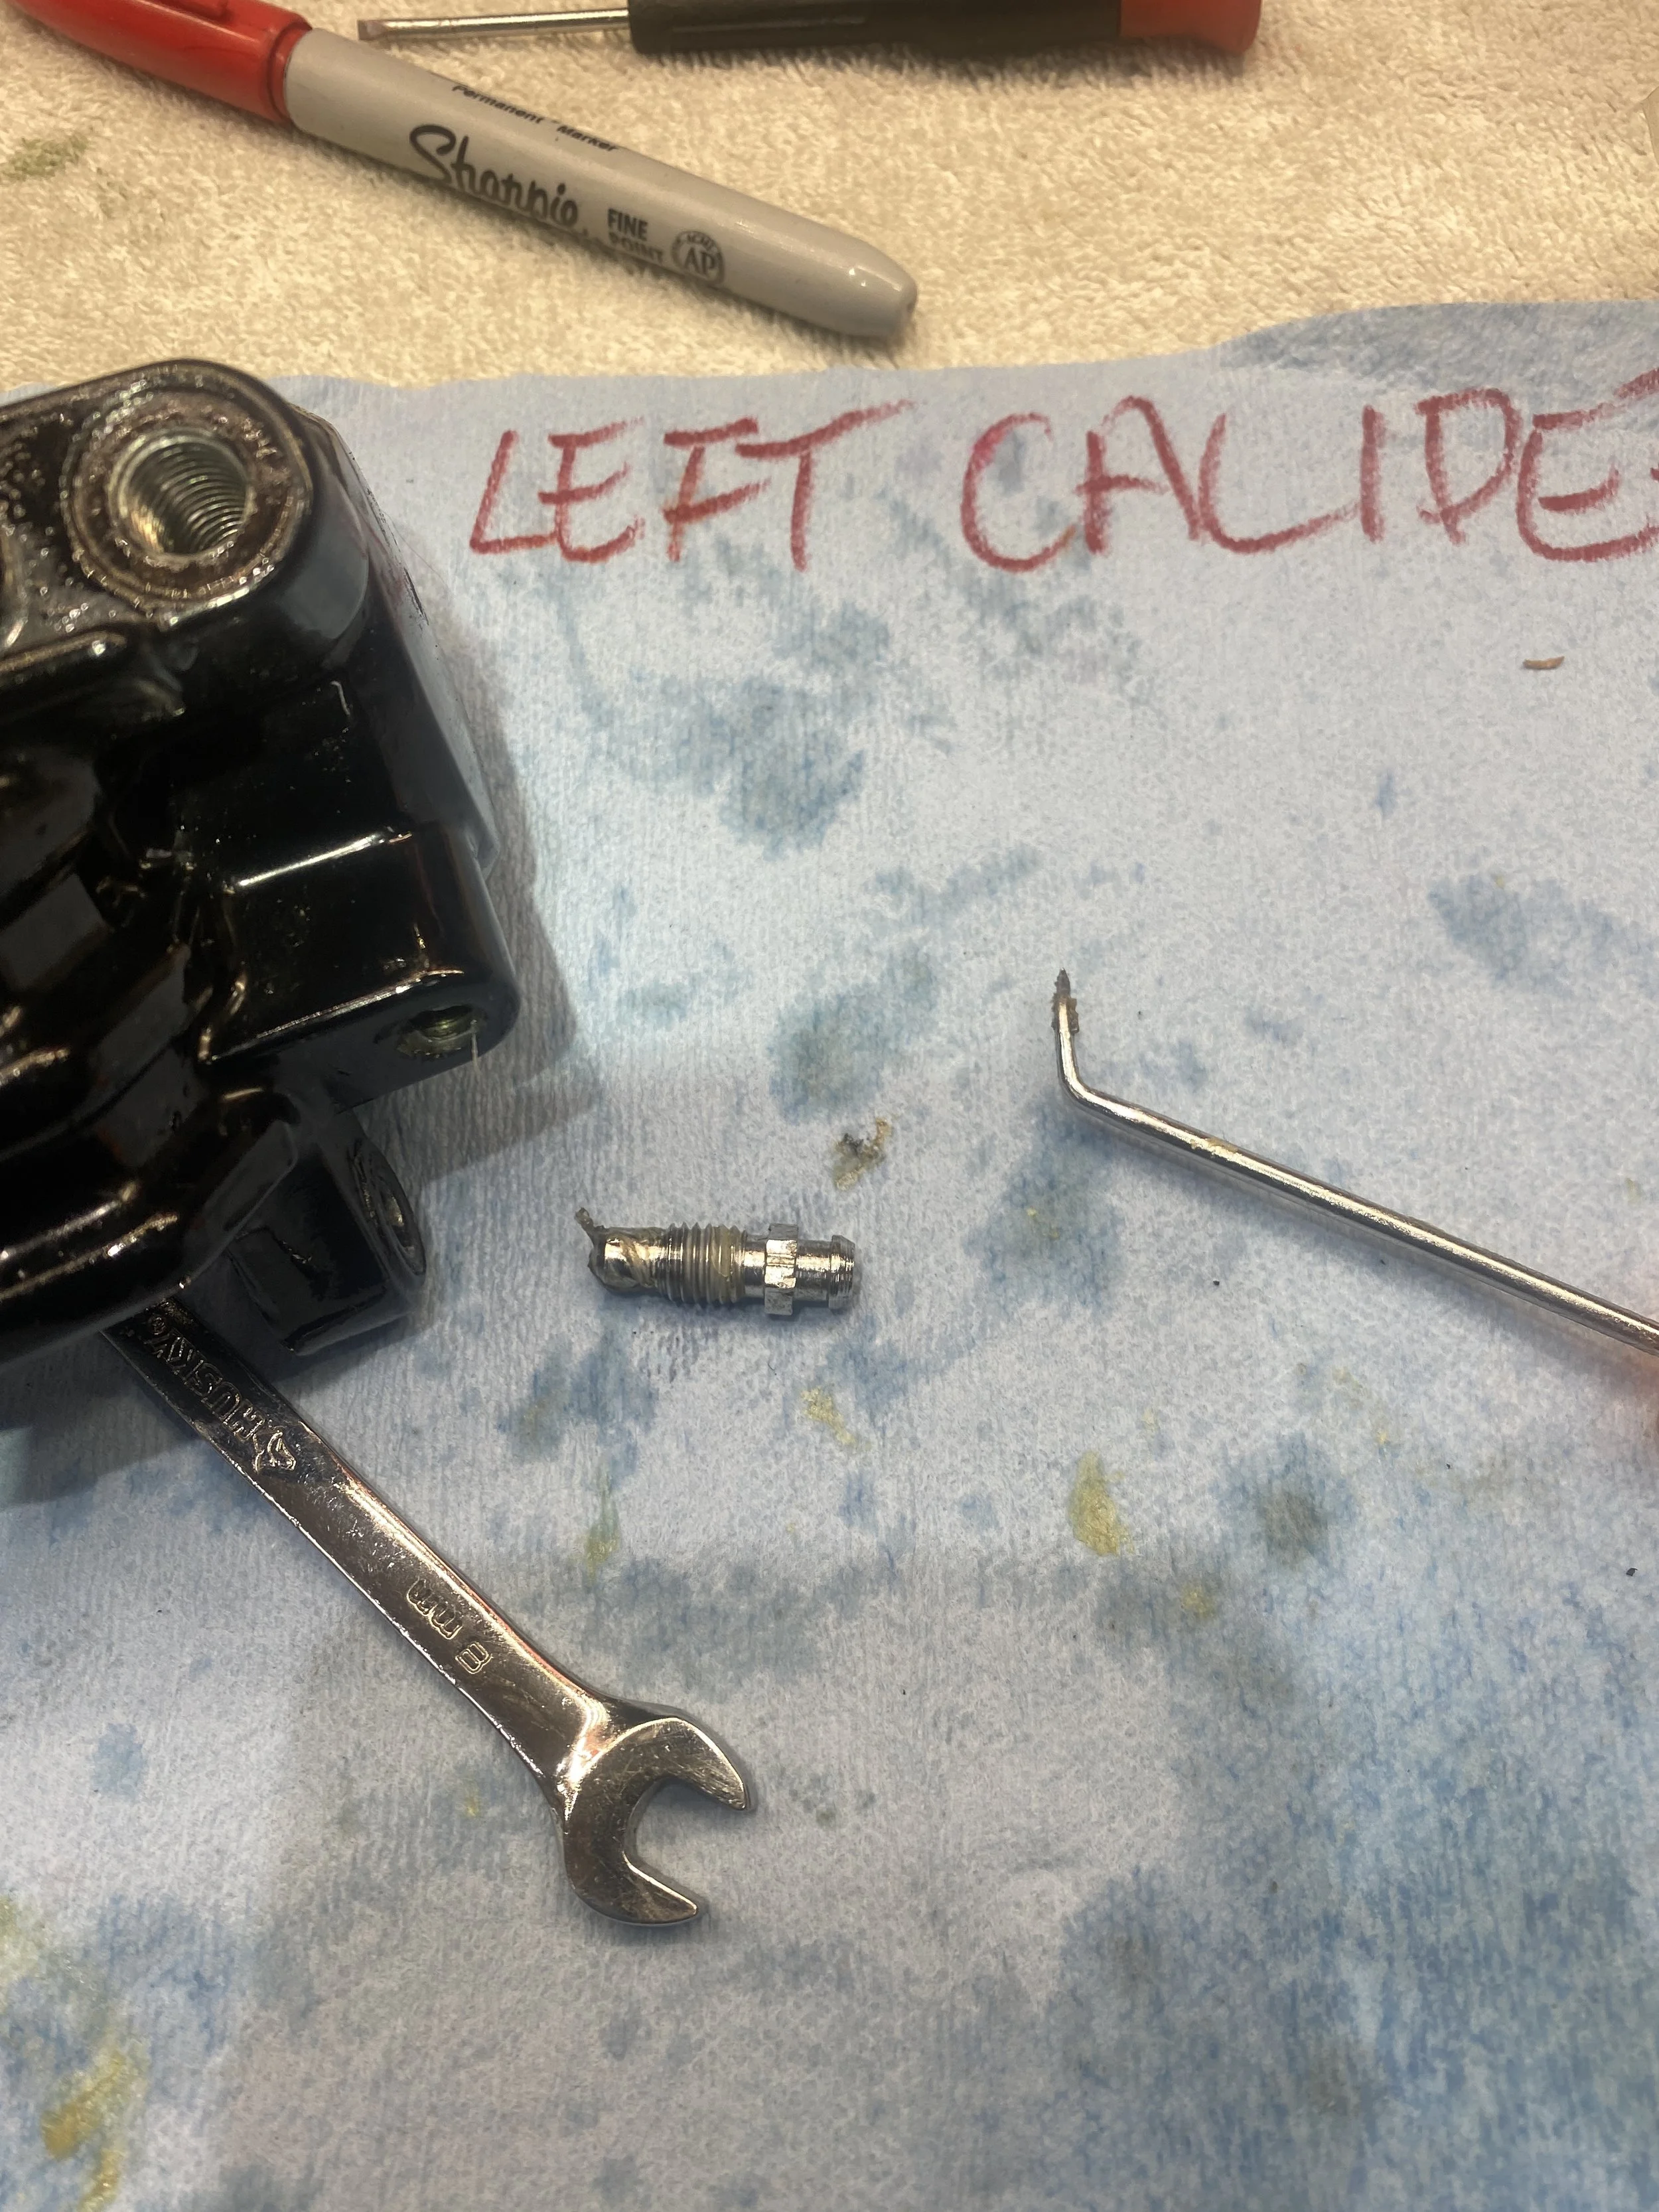
I silently praised the previous owners who kept track of the OEM tool kit, including it with the sale, and pulled out the 12mm/14mm spanner and adjusted the rear brake pedal, but to no effect. As I suspected, it only raised or lowered the pedal itself. So in order to get home, I took the drastic measure of bleeding some fluid into a rag and that freed the pads away from the disc. That process also, not surprisingly, made them relatively ineffective but I could handle that for the moment. Calipers have been powder coated. Look beautiful but wonder if that's restricting caliper movement resulting in the brake binding?
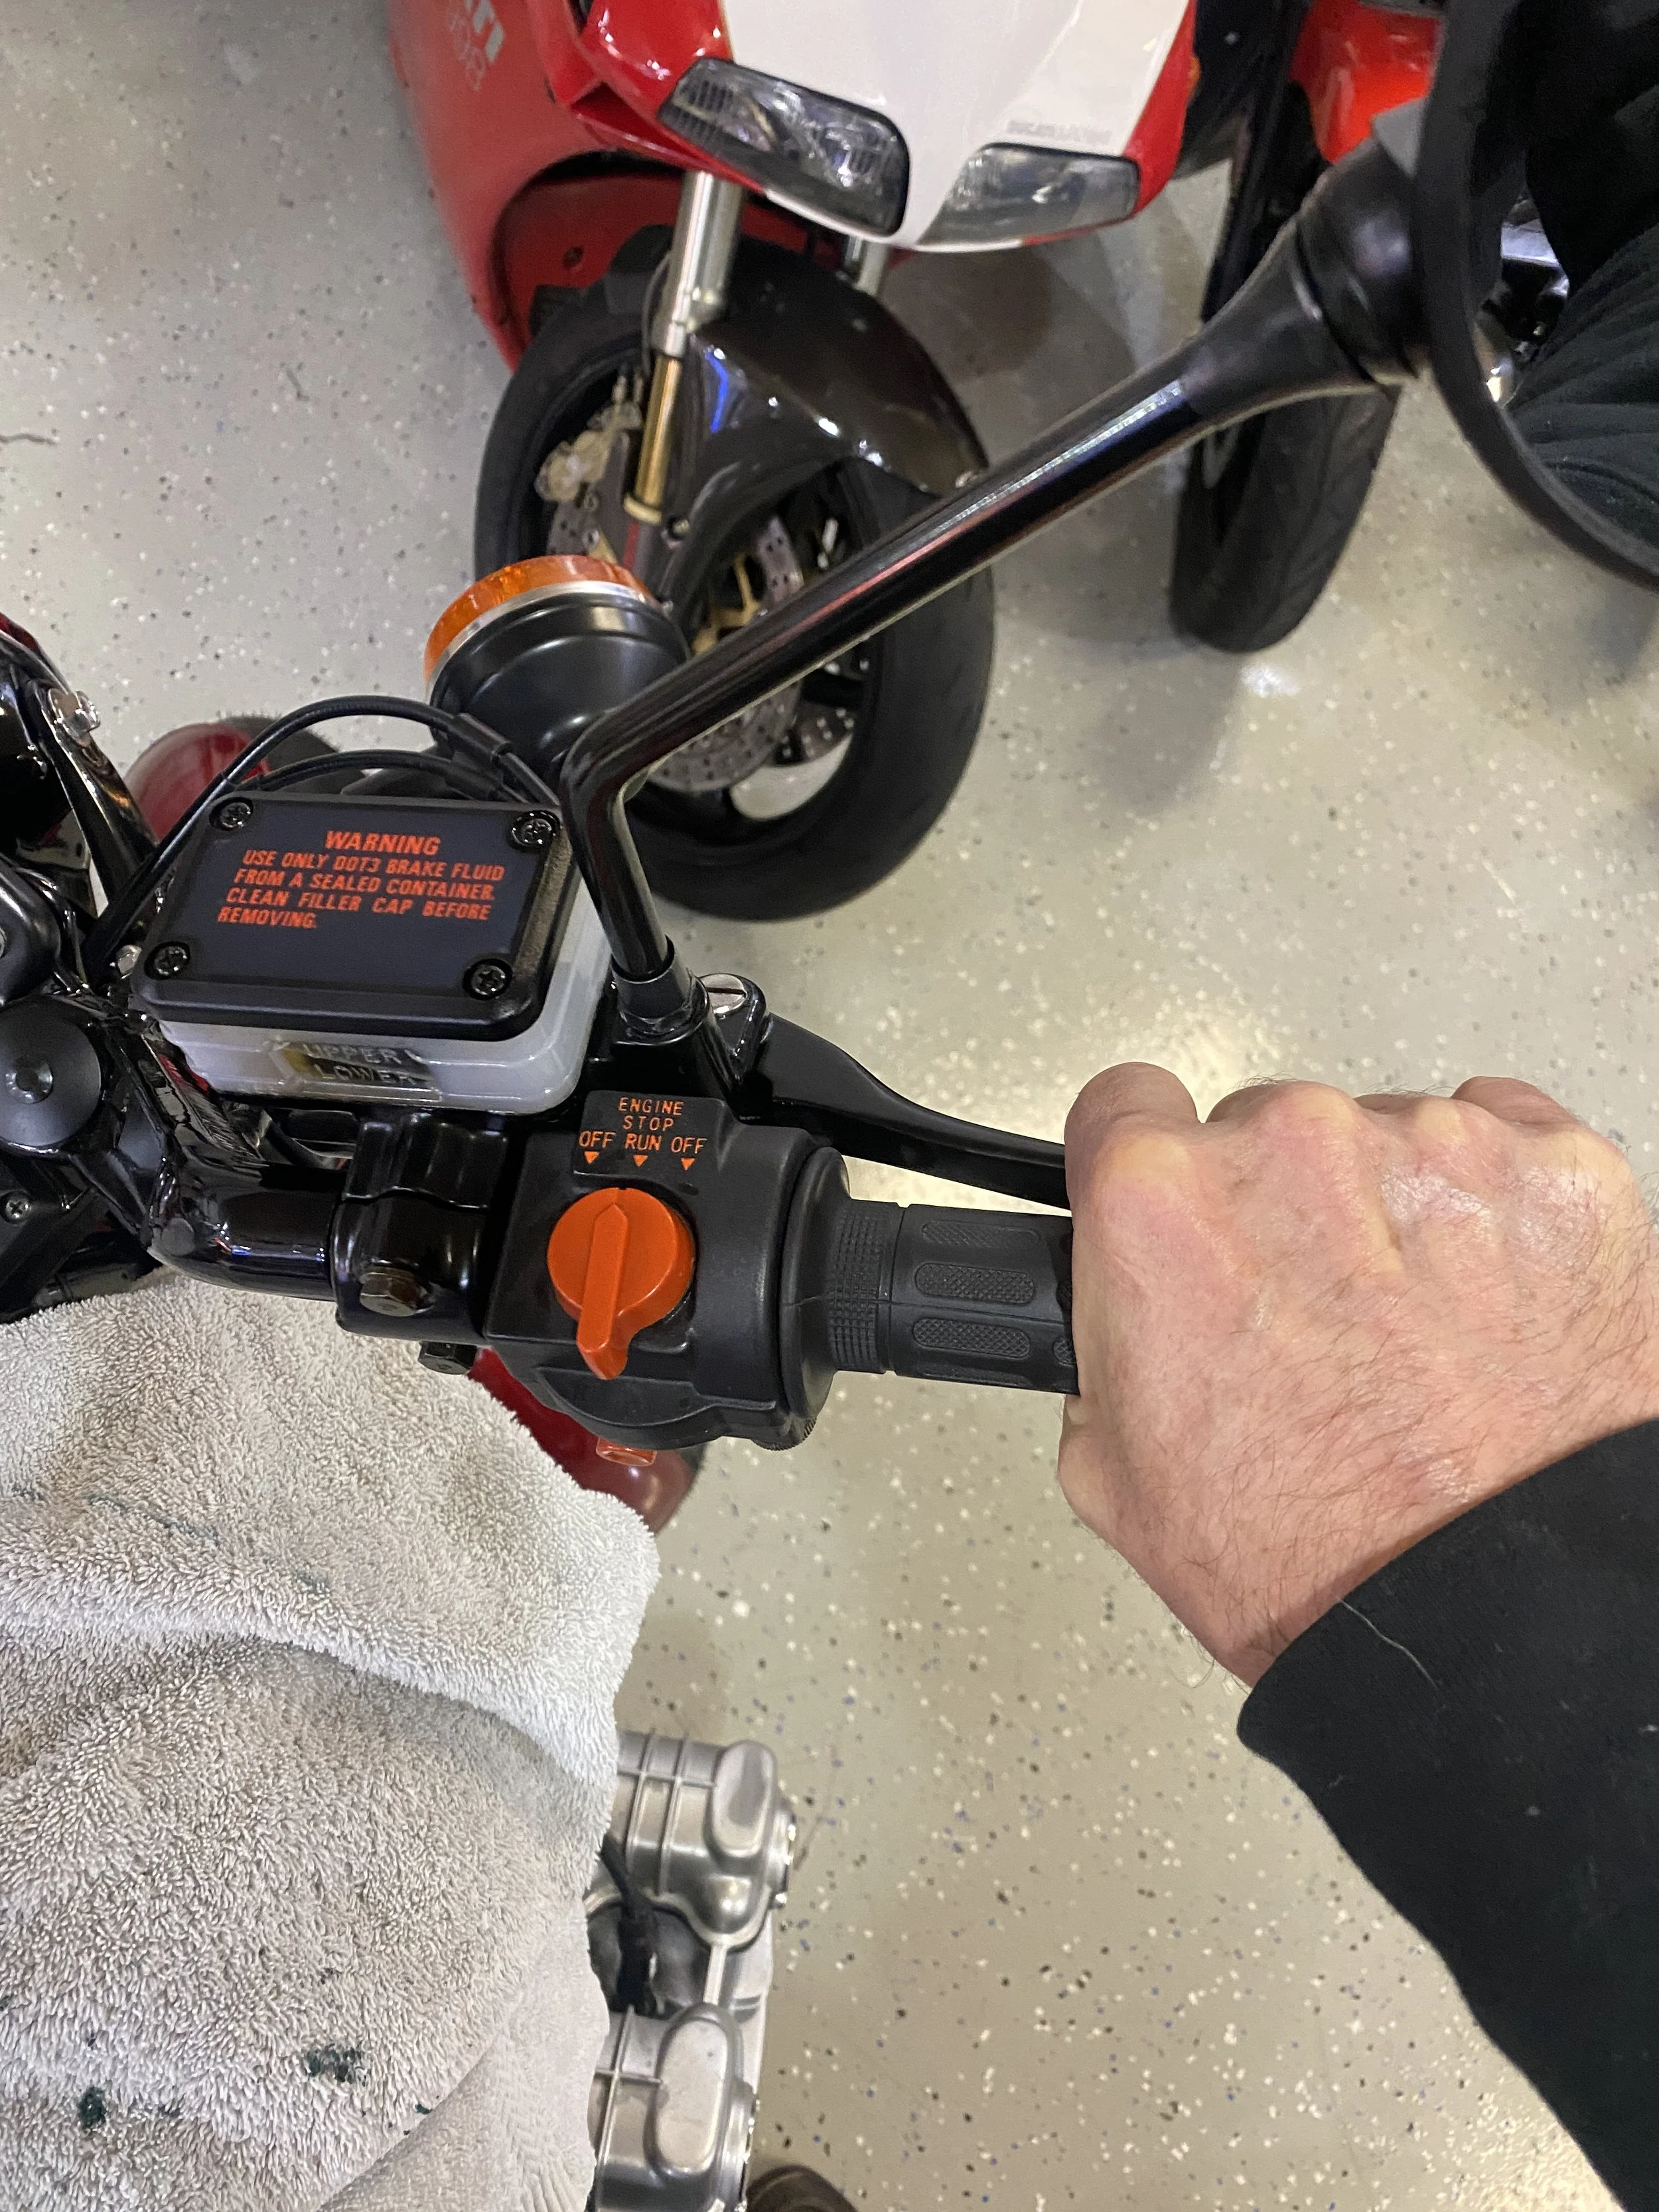
Knowing I had only the front brakes to rely on, I pulled the front lever to double check their function. It felt very spongy coming almost all the way to the bar. (Yeah- I'm back in the garage at this point, but I neglected to casually take pics of the drama as it unfolded).
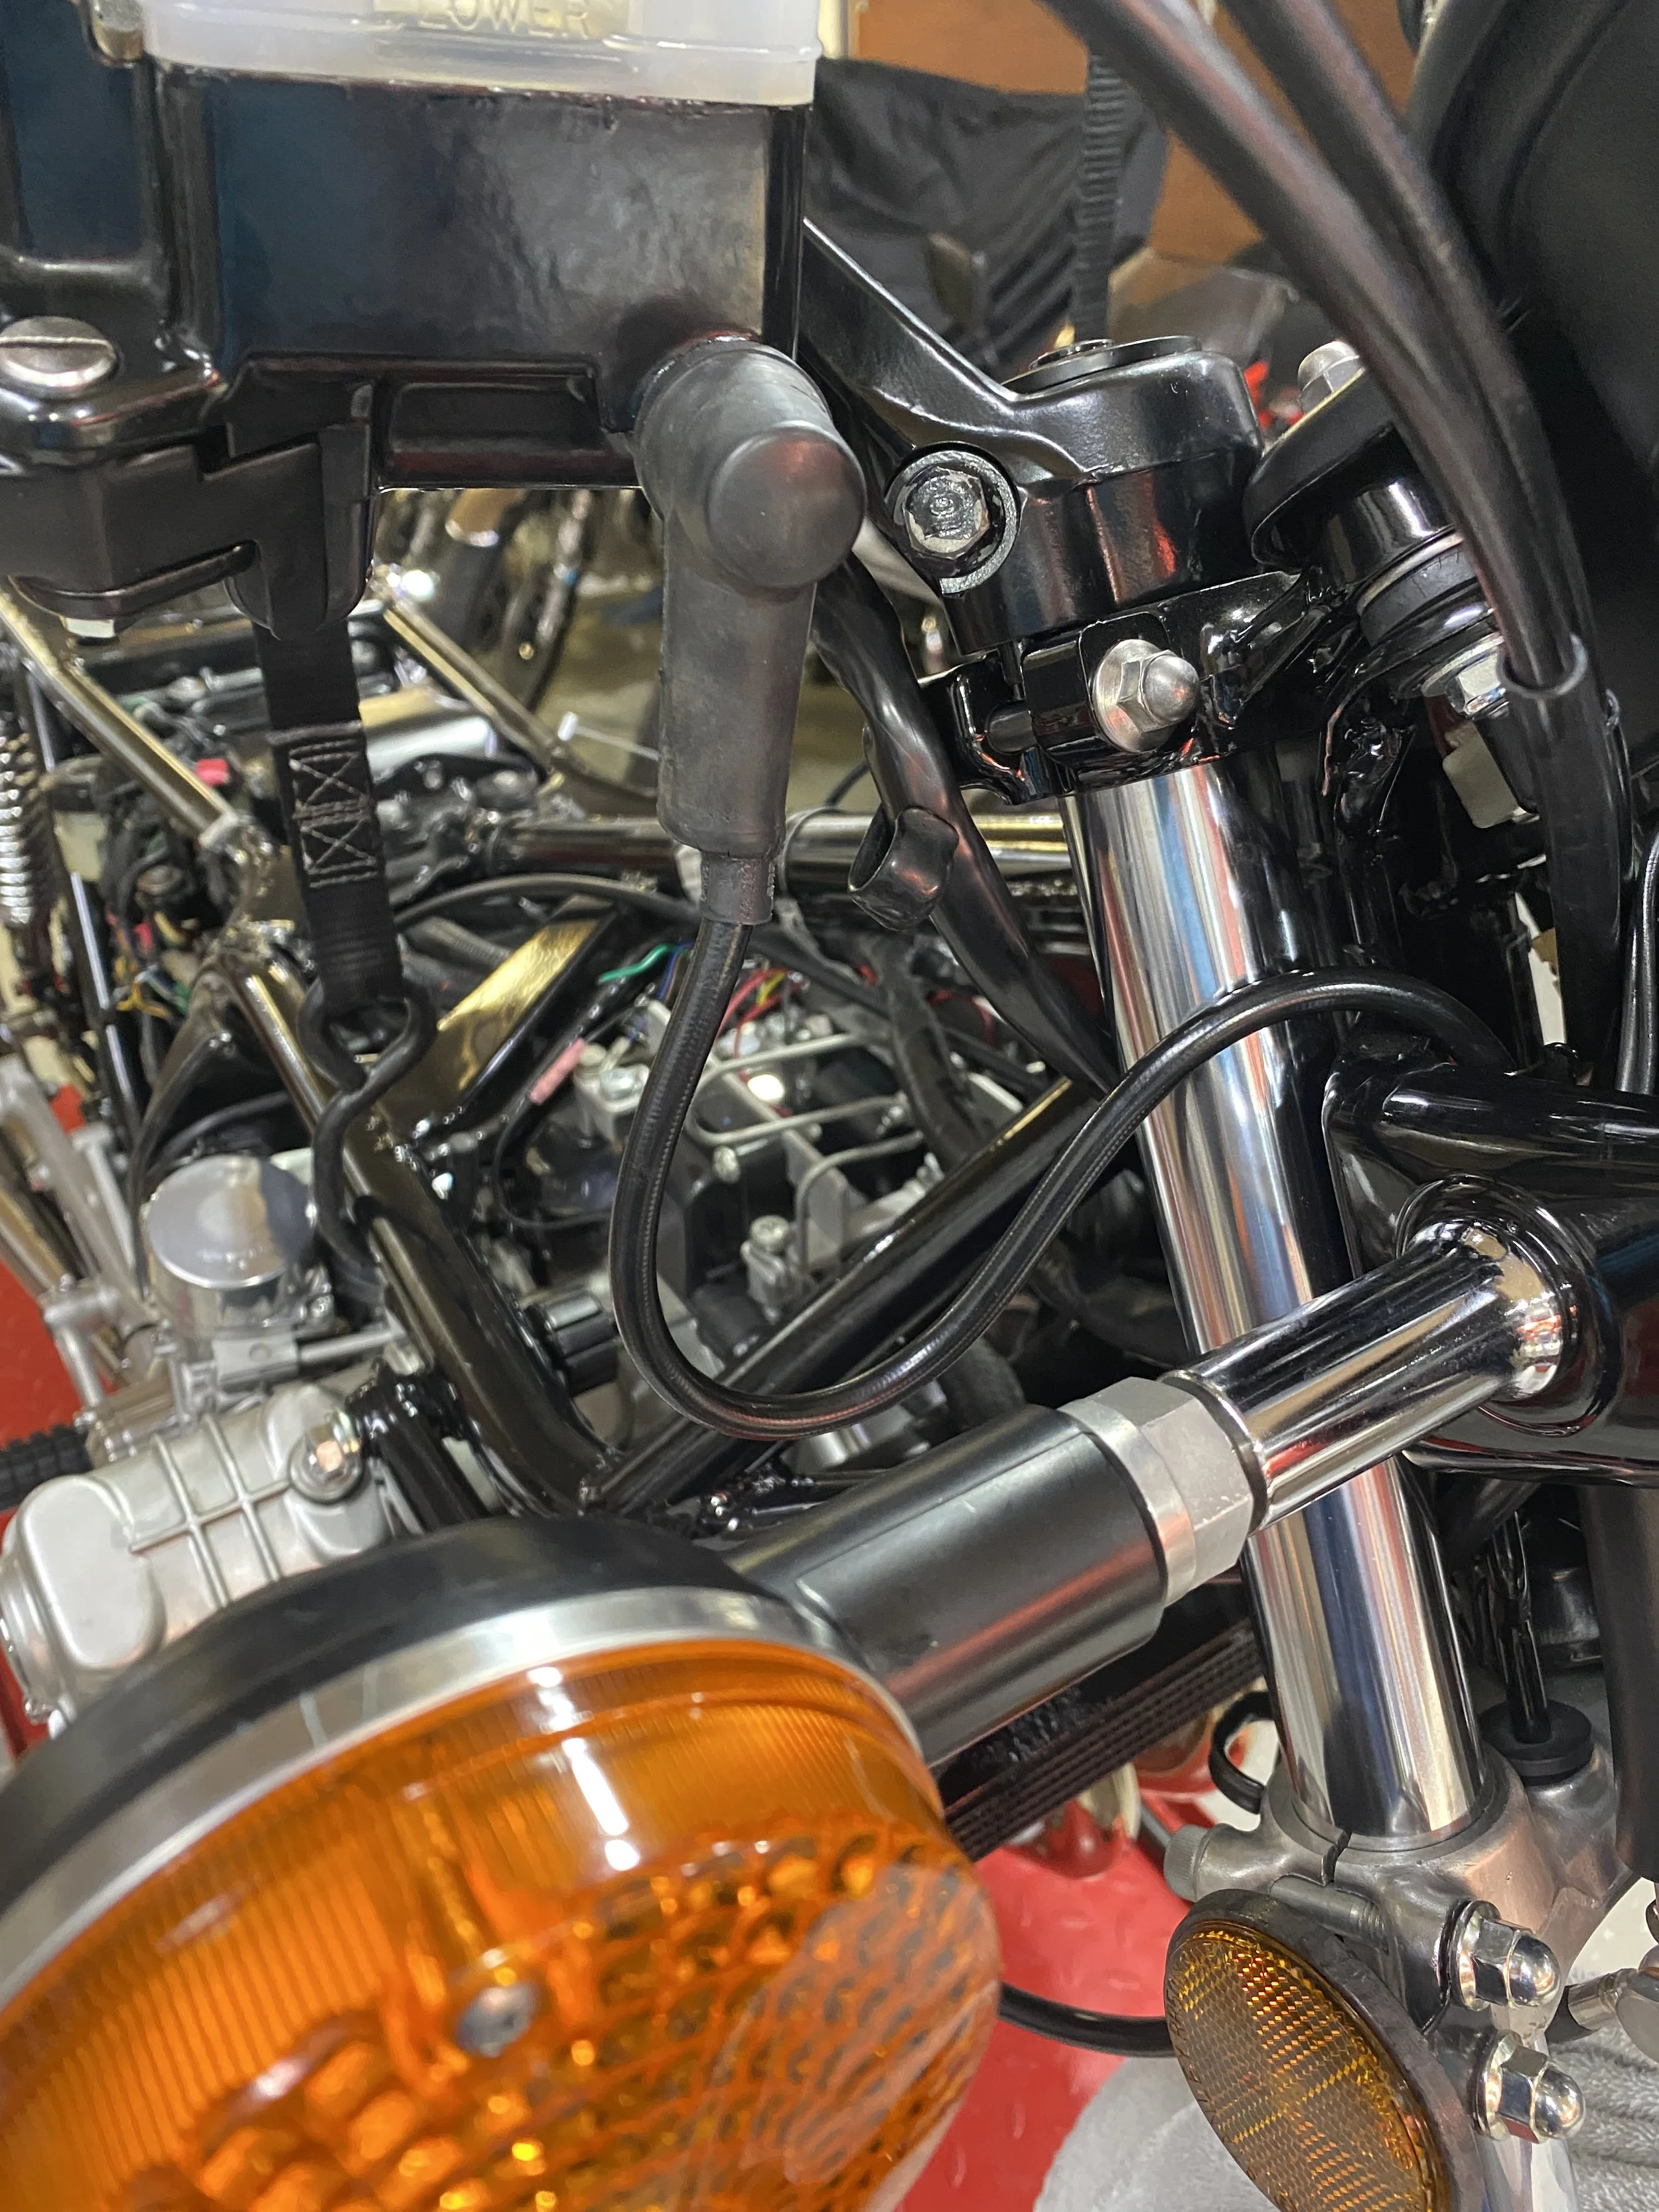
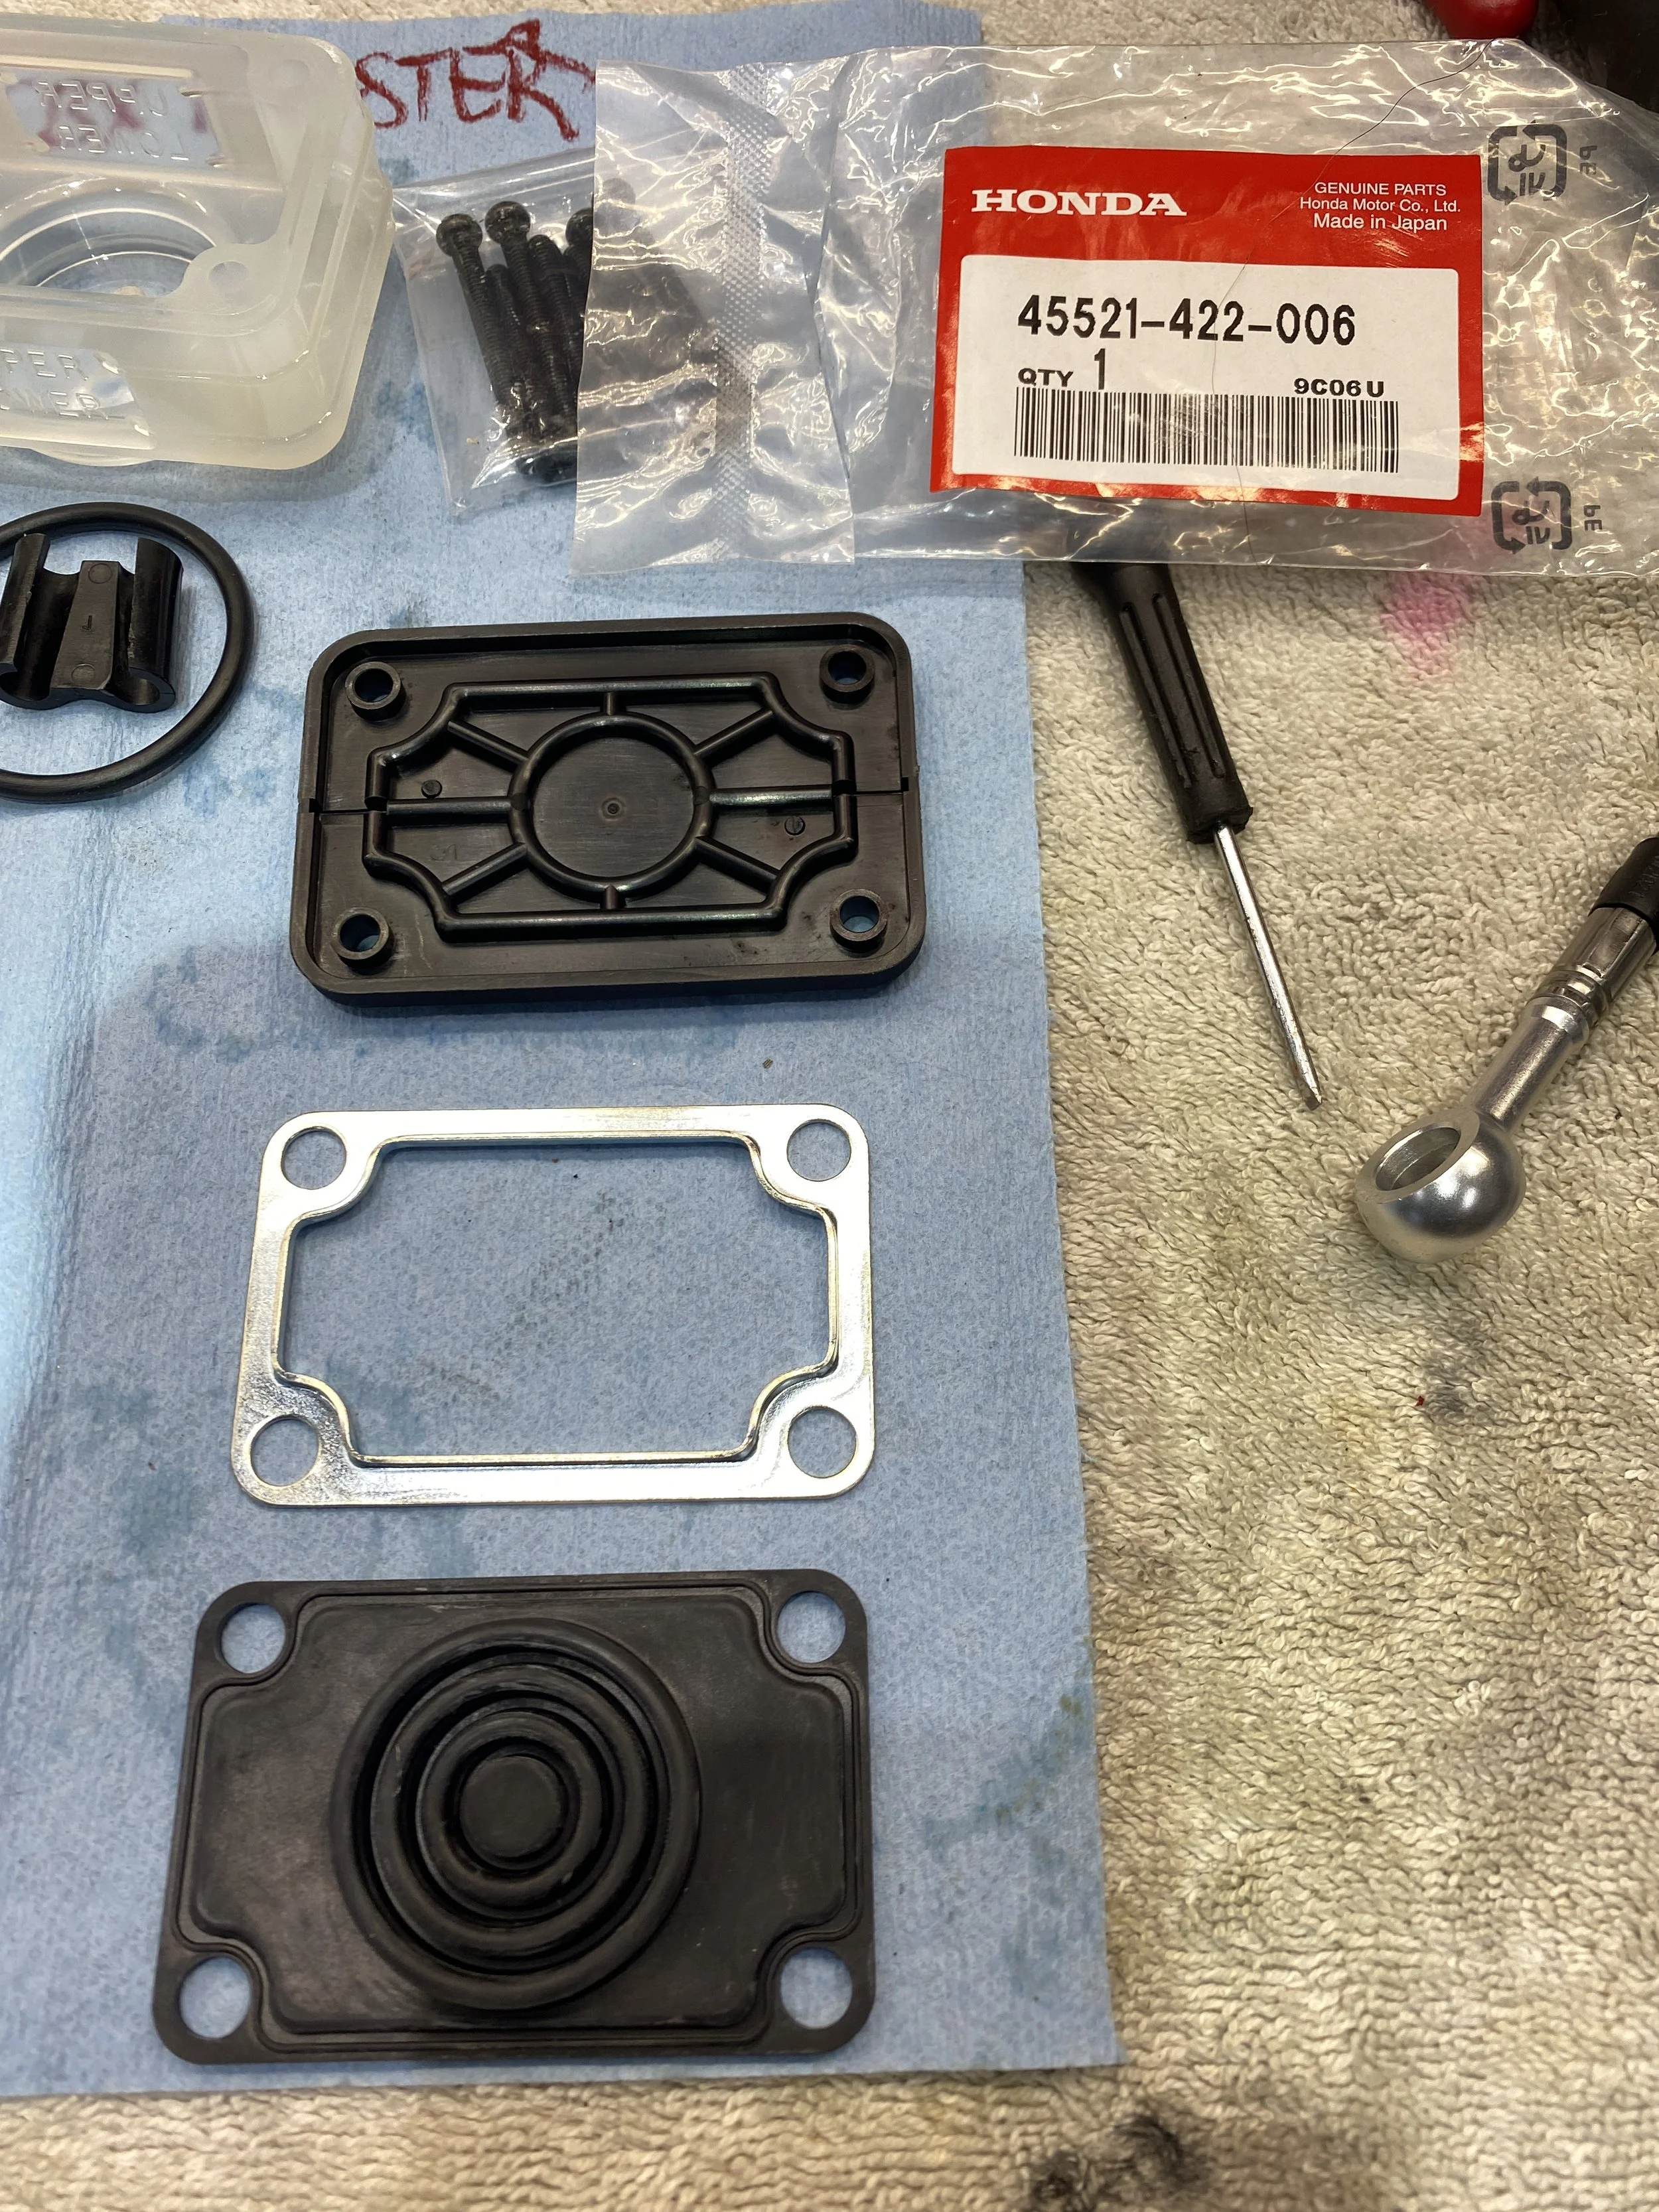
the weep of hydraulic fluid you never want to see.

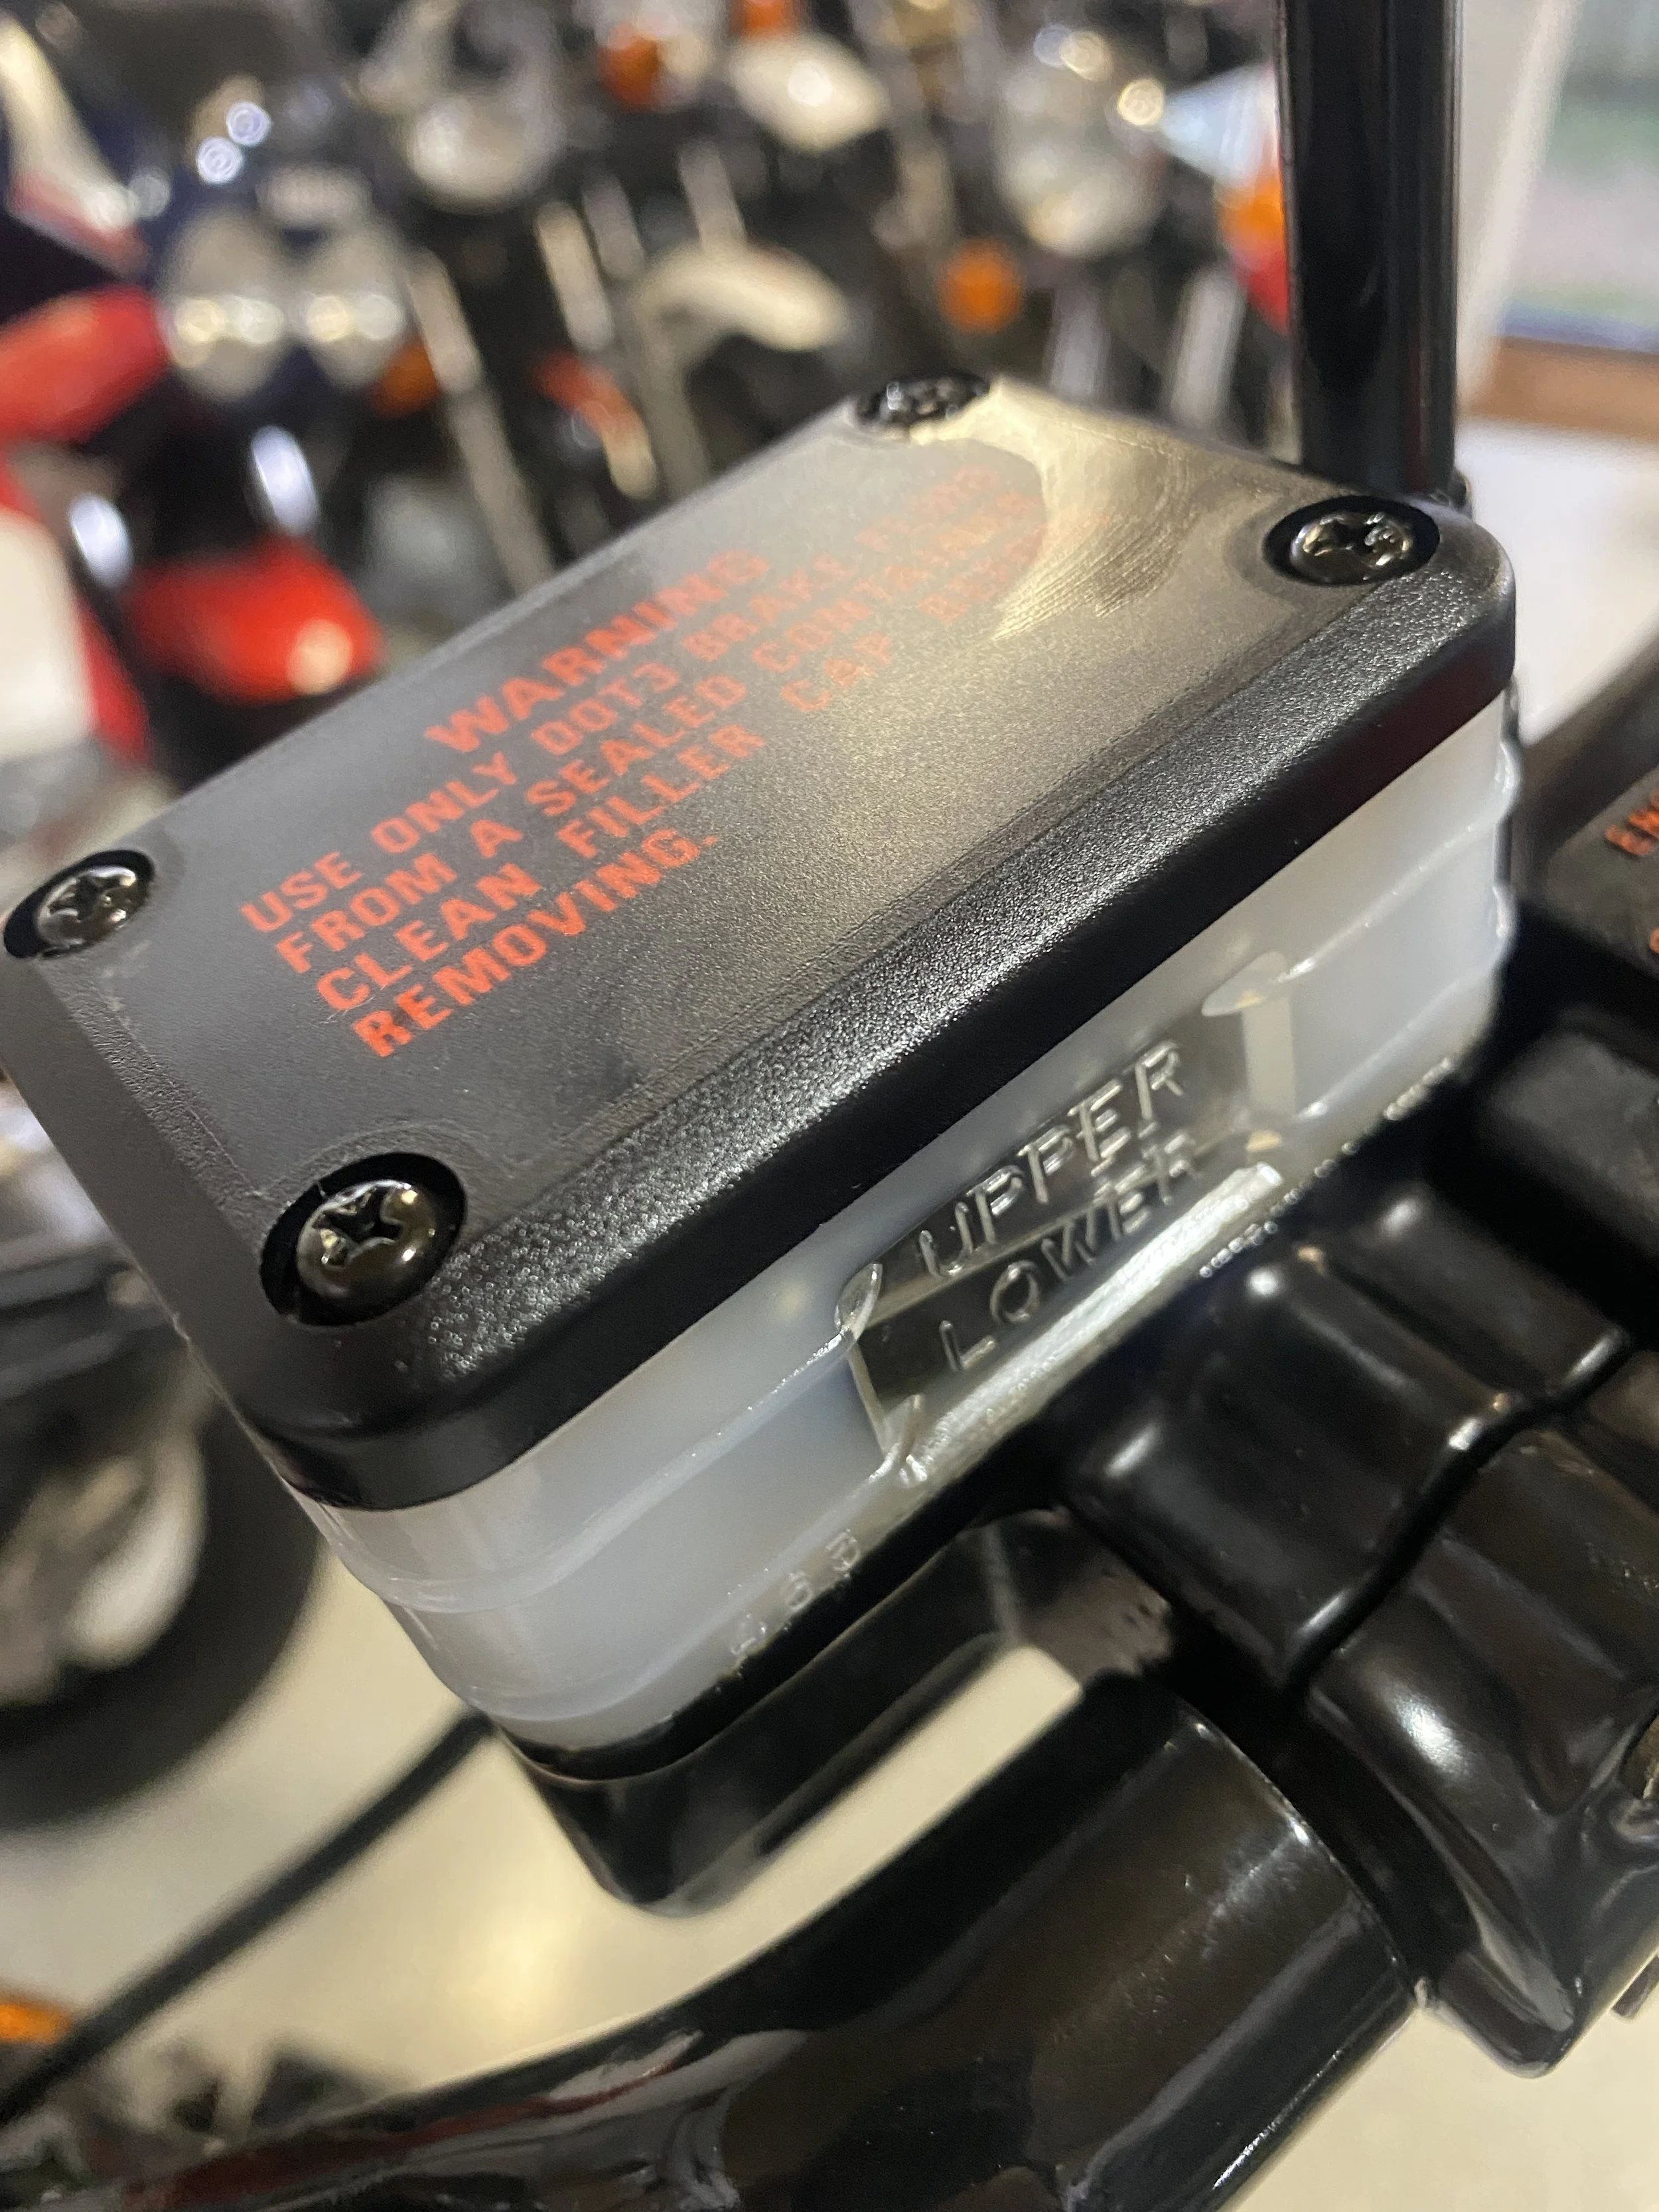
I remember The PO saying some hydraulic fluid had leaked onto the cylinder head leaving a mark for which he had included some paint to remedy that one flaw. I was sure he had told me he had fixed the master cylinder leak but out on the side of the road I could see a small pool of fluid just sitting on the top of the reservoir. Concerned about the glorious paintwork I wiped it up quickly and carefully criss cross tightened up the four screws on the top. That seemed to solve the problem for the moment but further investigation is going to be necessary if I want to survive.
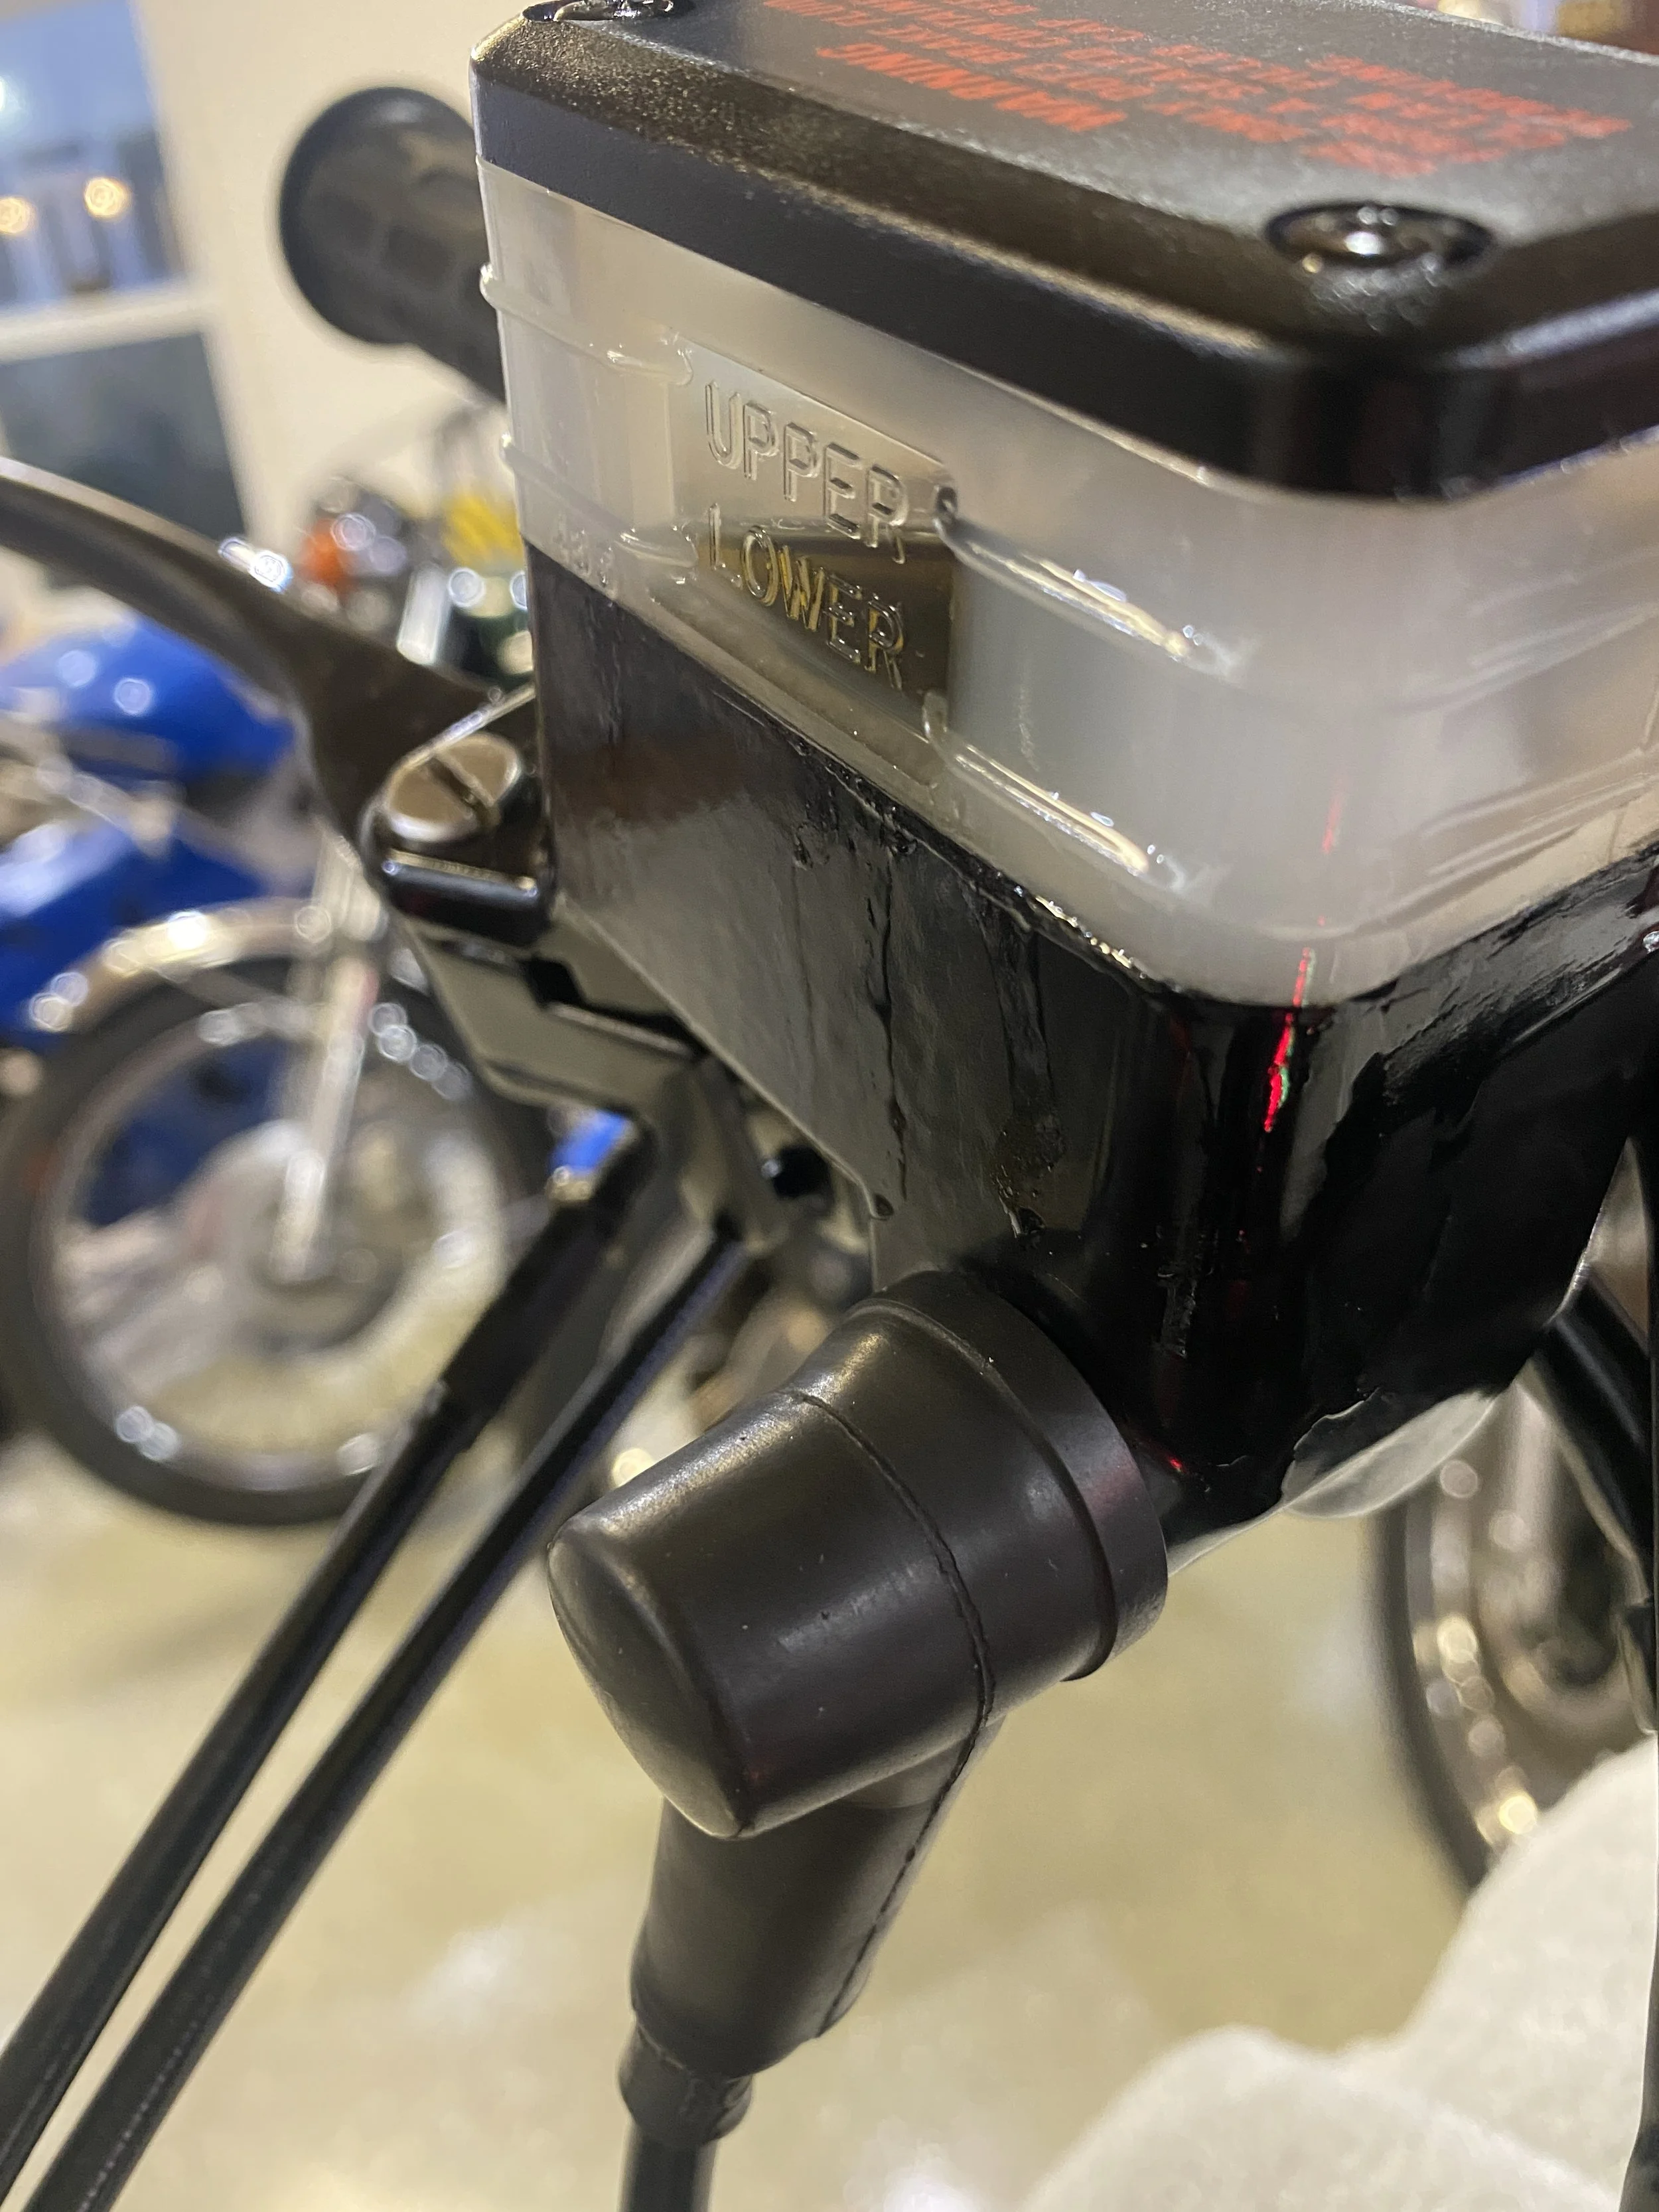
More concerning is the leak appears to be coming from the bottom also- the manual does not indicate there is a seal between the clear capsule and the base, but CBX expert (and racer) Robby Ringnalda (https://www.mrcbx.com/) says "There is a seal at the bottom. Fyi. I would clean the seals and go from there on all brakes if they really haven't been used."

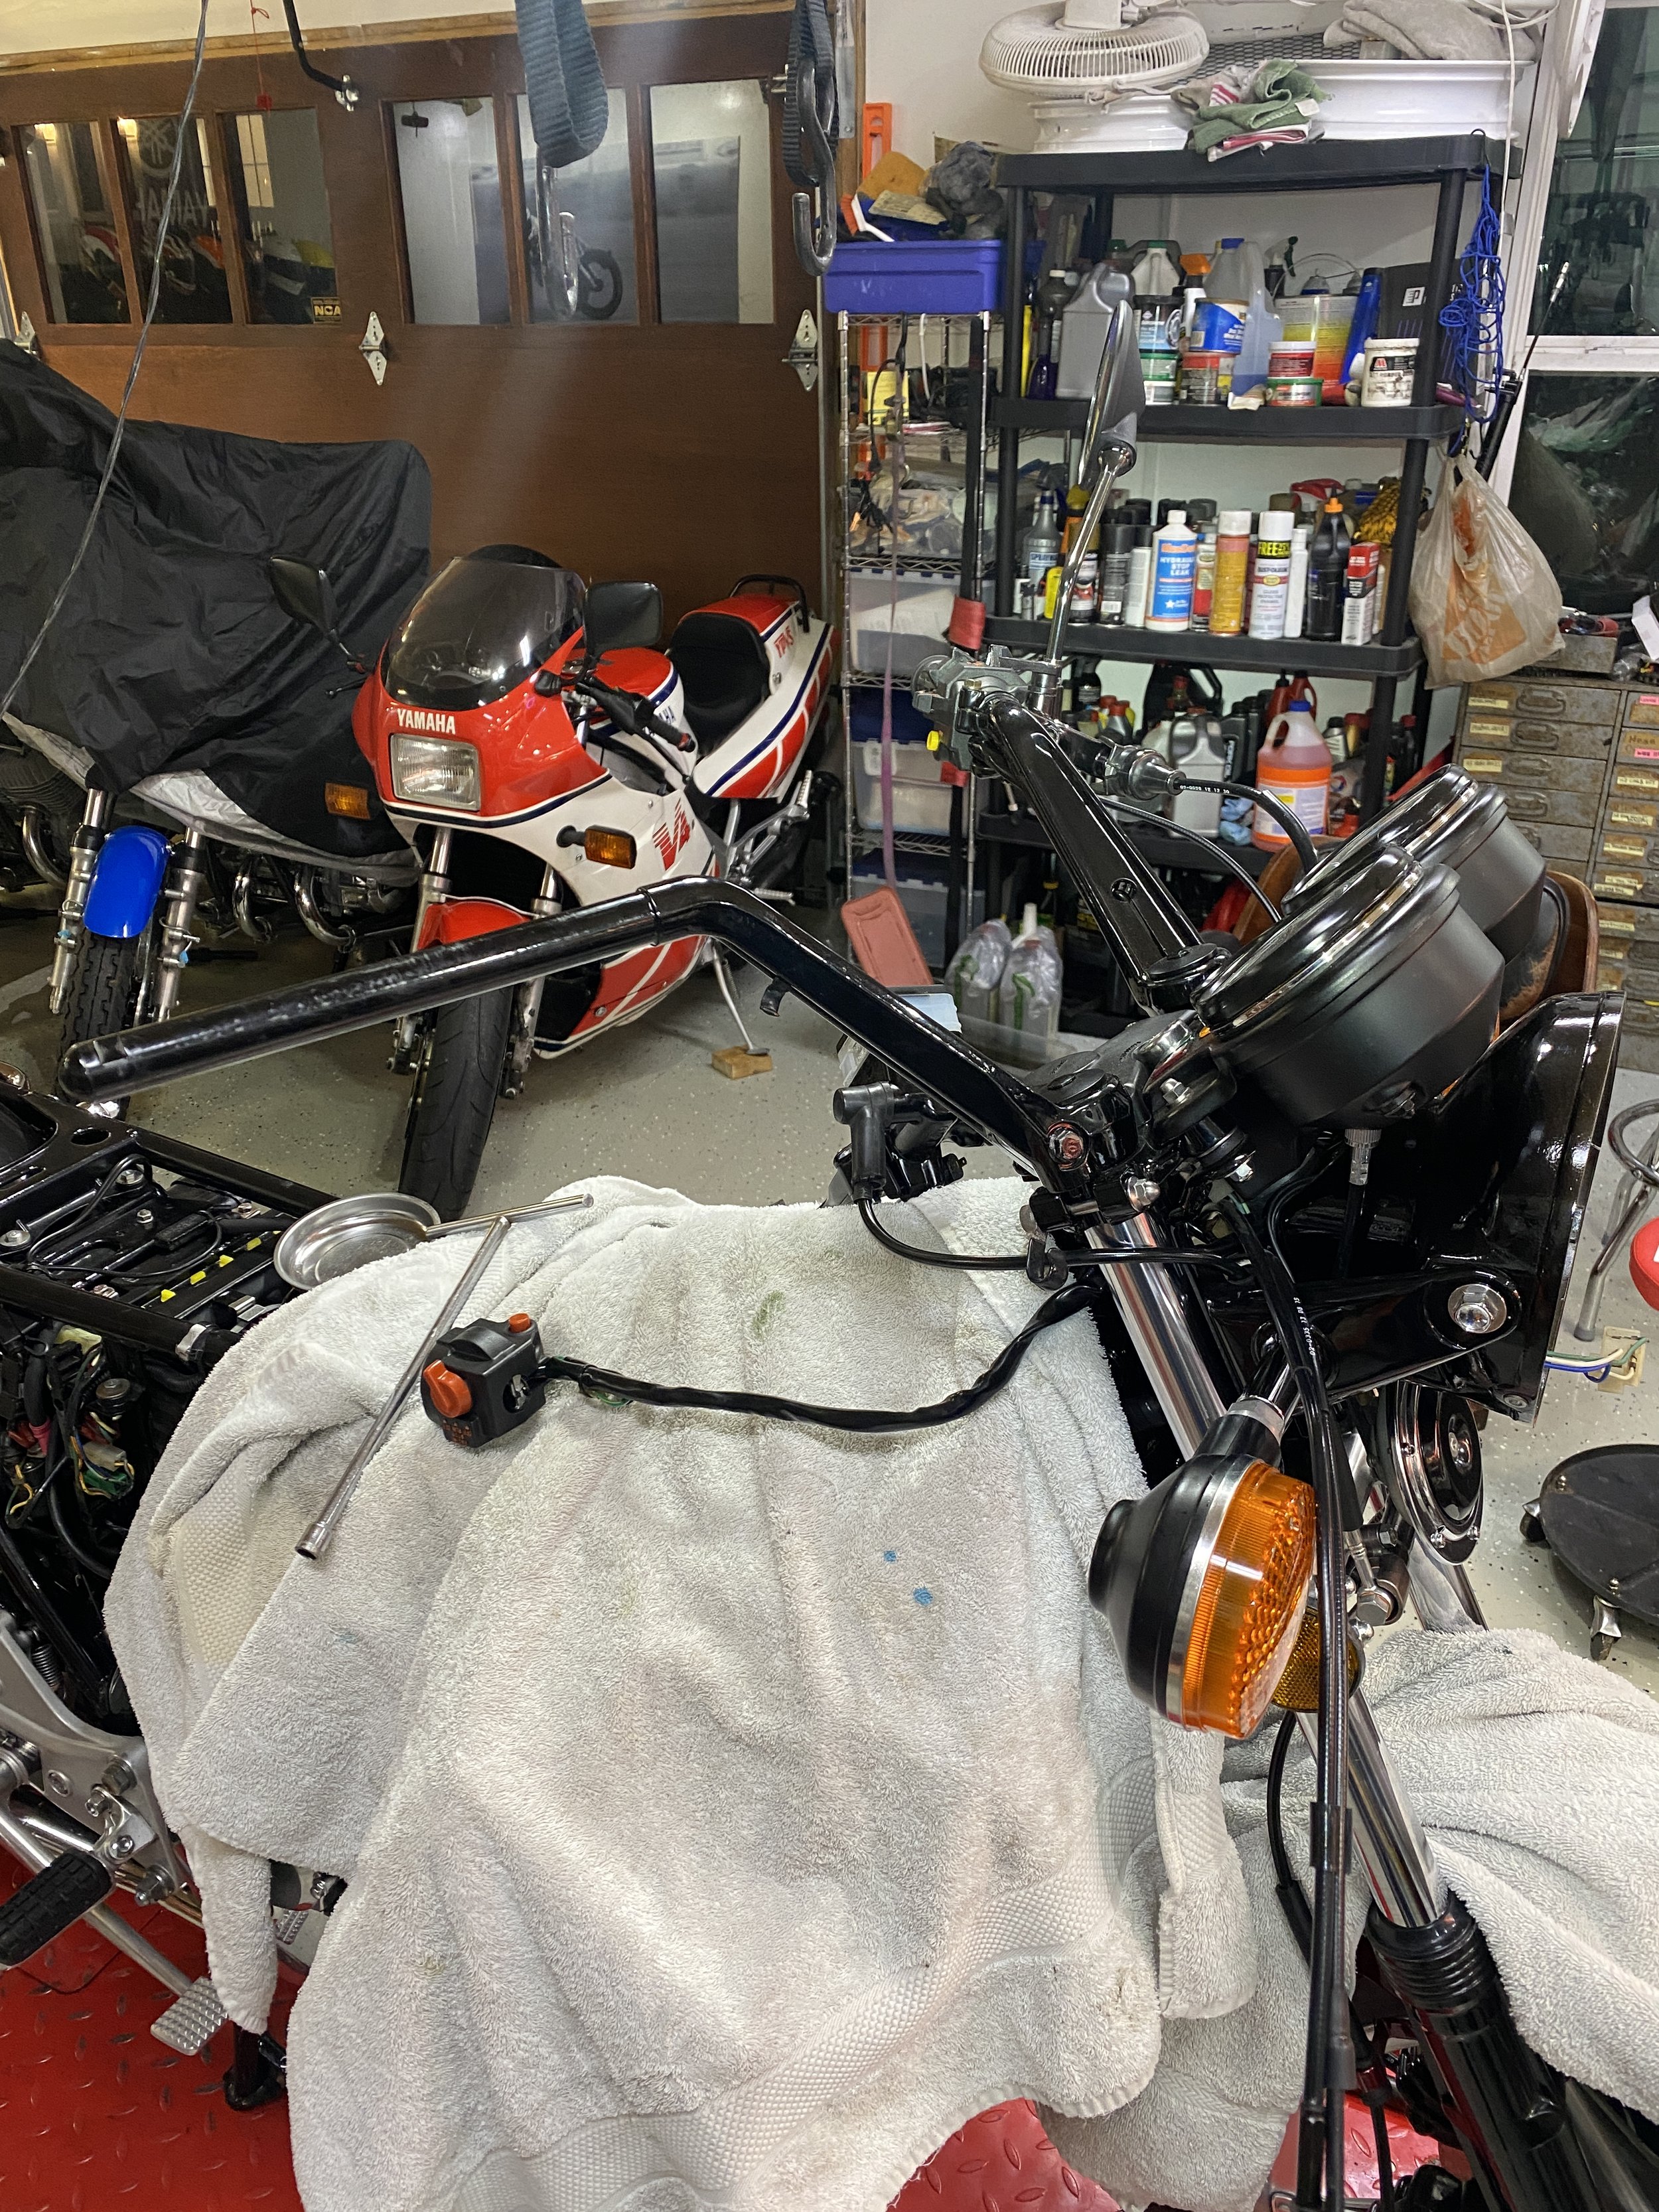
Front turn signals illuminate with the lights. Throwback from the '70's or a malfunction? Discuss.
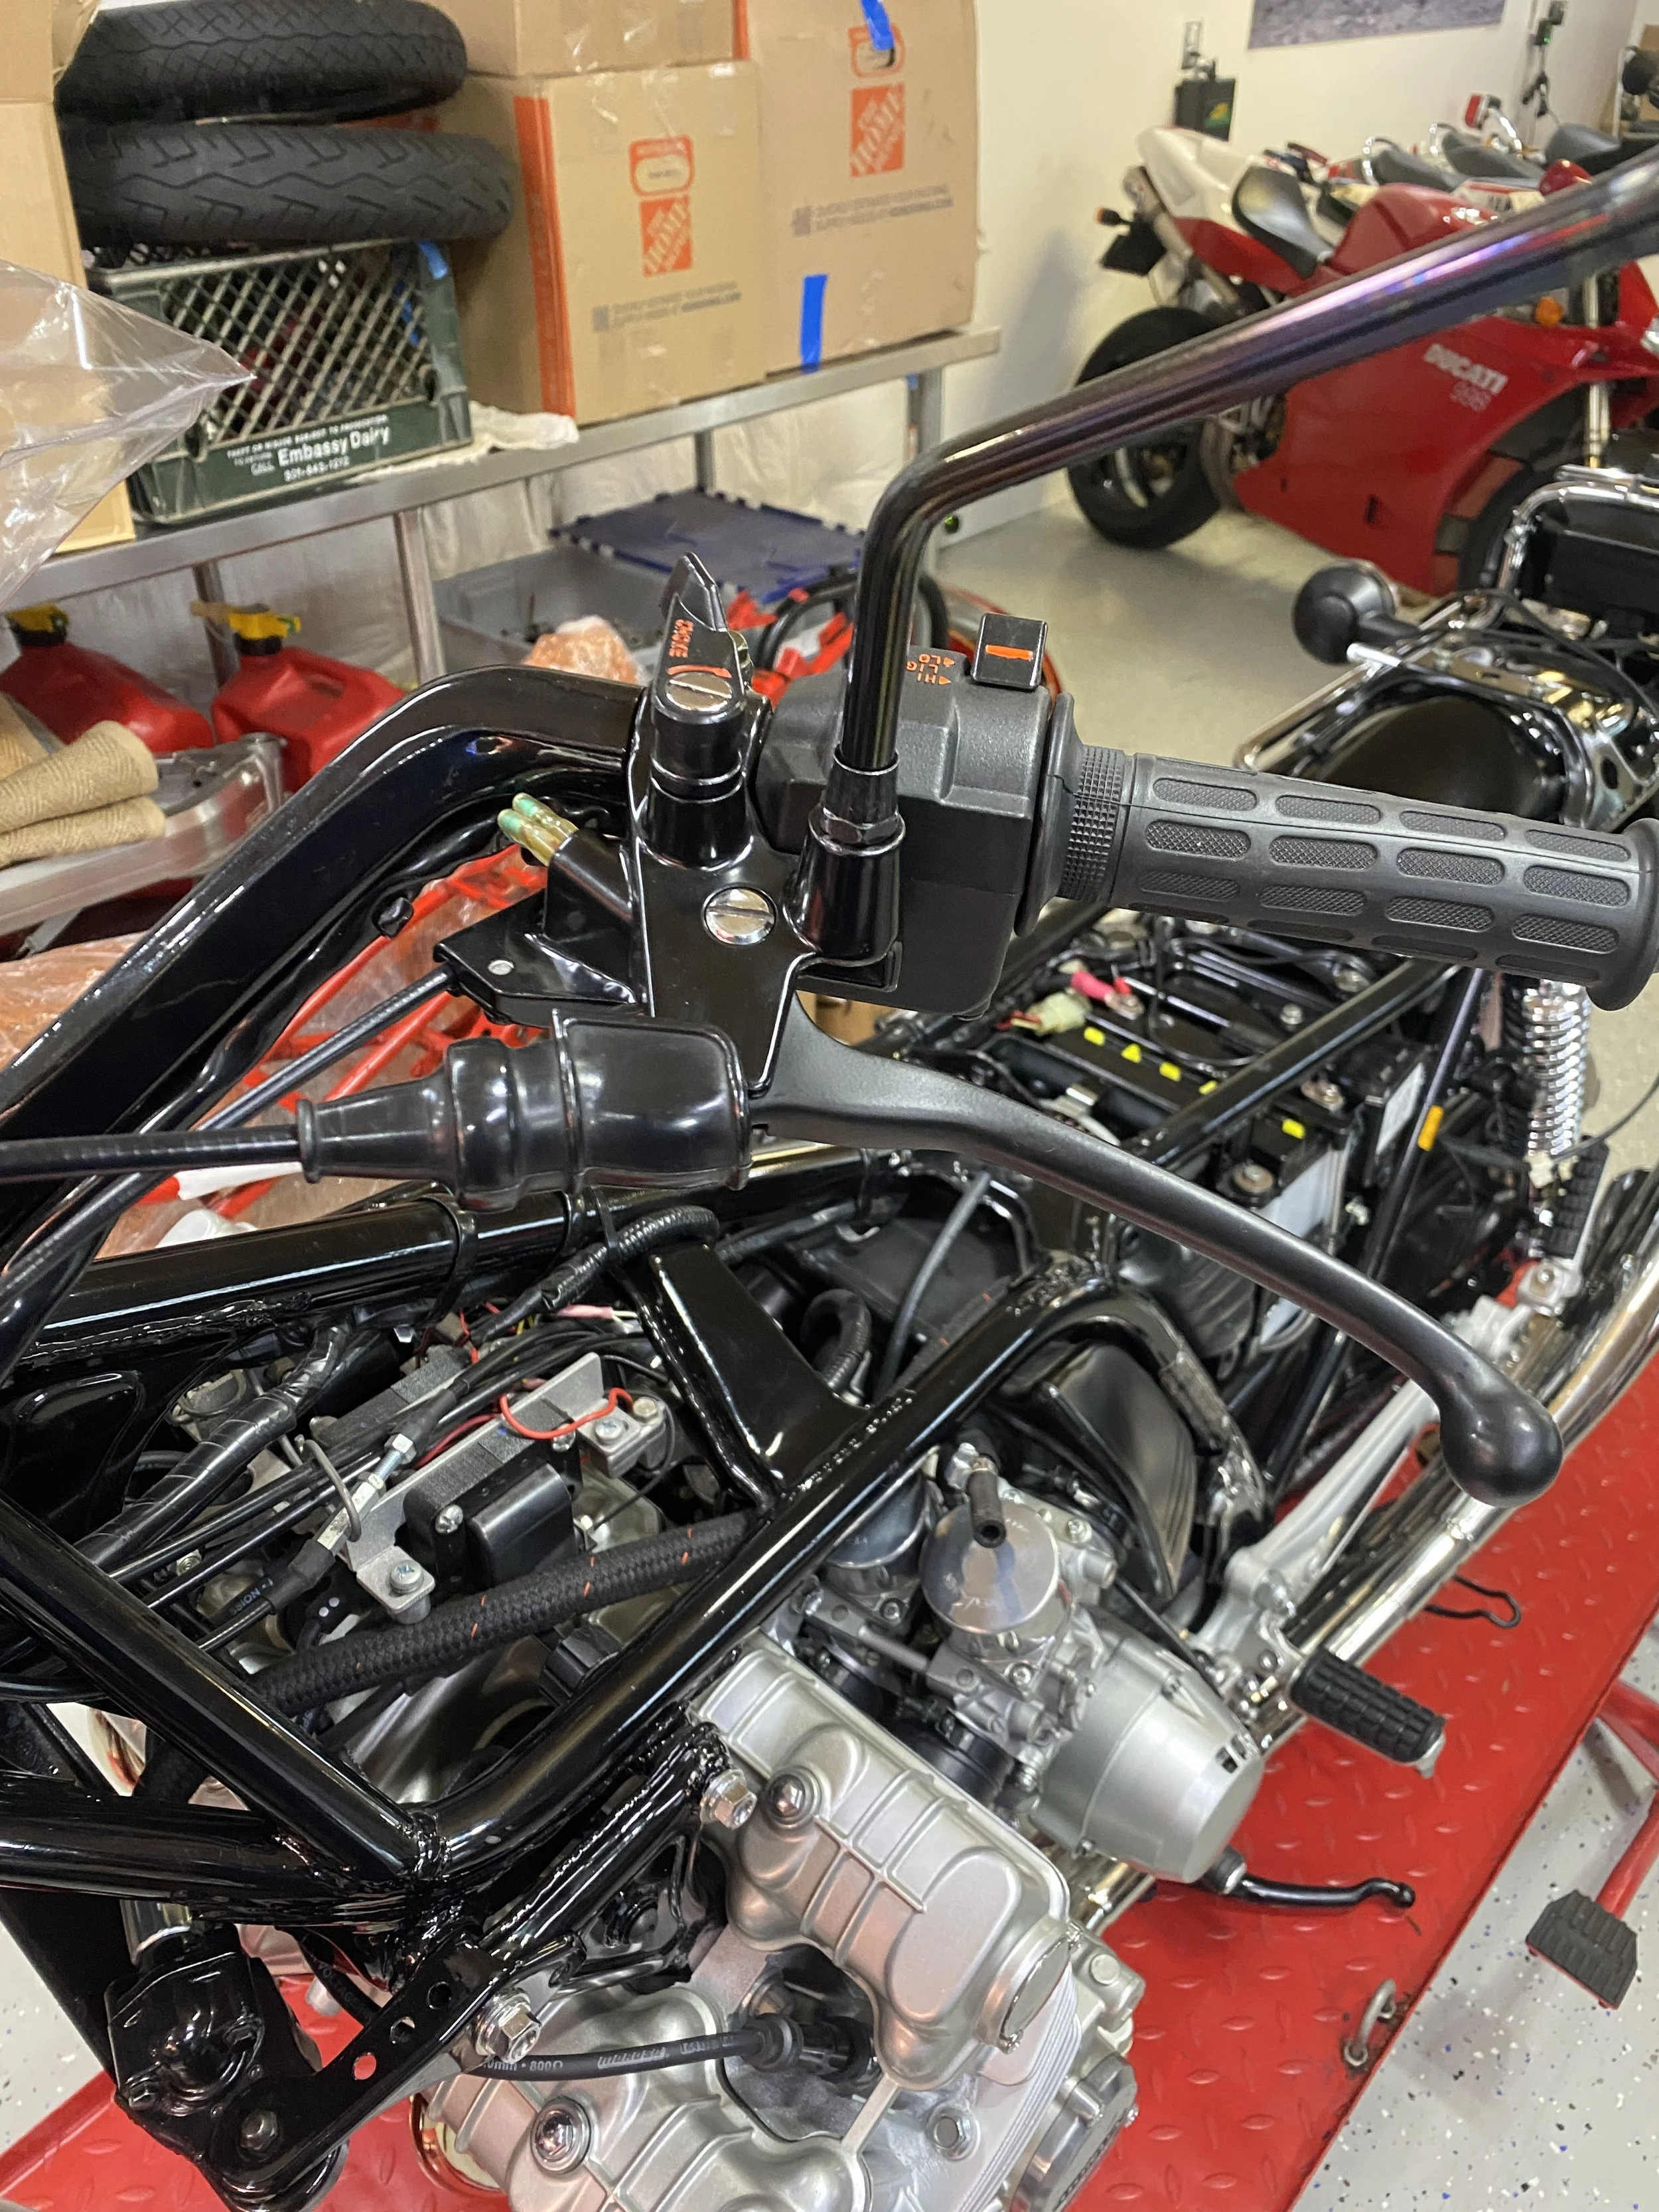
Having grown up riding bikes in Europe, I am really not a fan of these high bars. It feels like the clocks are 2 miles away. On the hunt for a Sports Kit. Have learned in a very short time that the components to these (the bars, top exit switch gear, and if you really want to go there: further rear positioned pegs=different hangers) are not cheap. The PO recommended Louis at https://www.usedcbxparts.com/ for parts and he actually seems to have everything I need with the choice of NOS or used. Amazing.
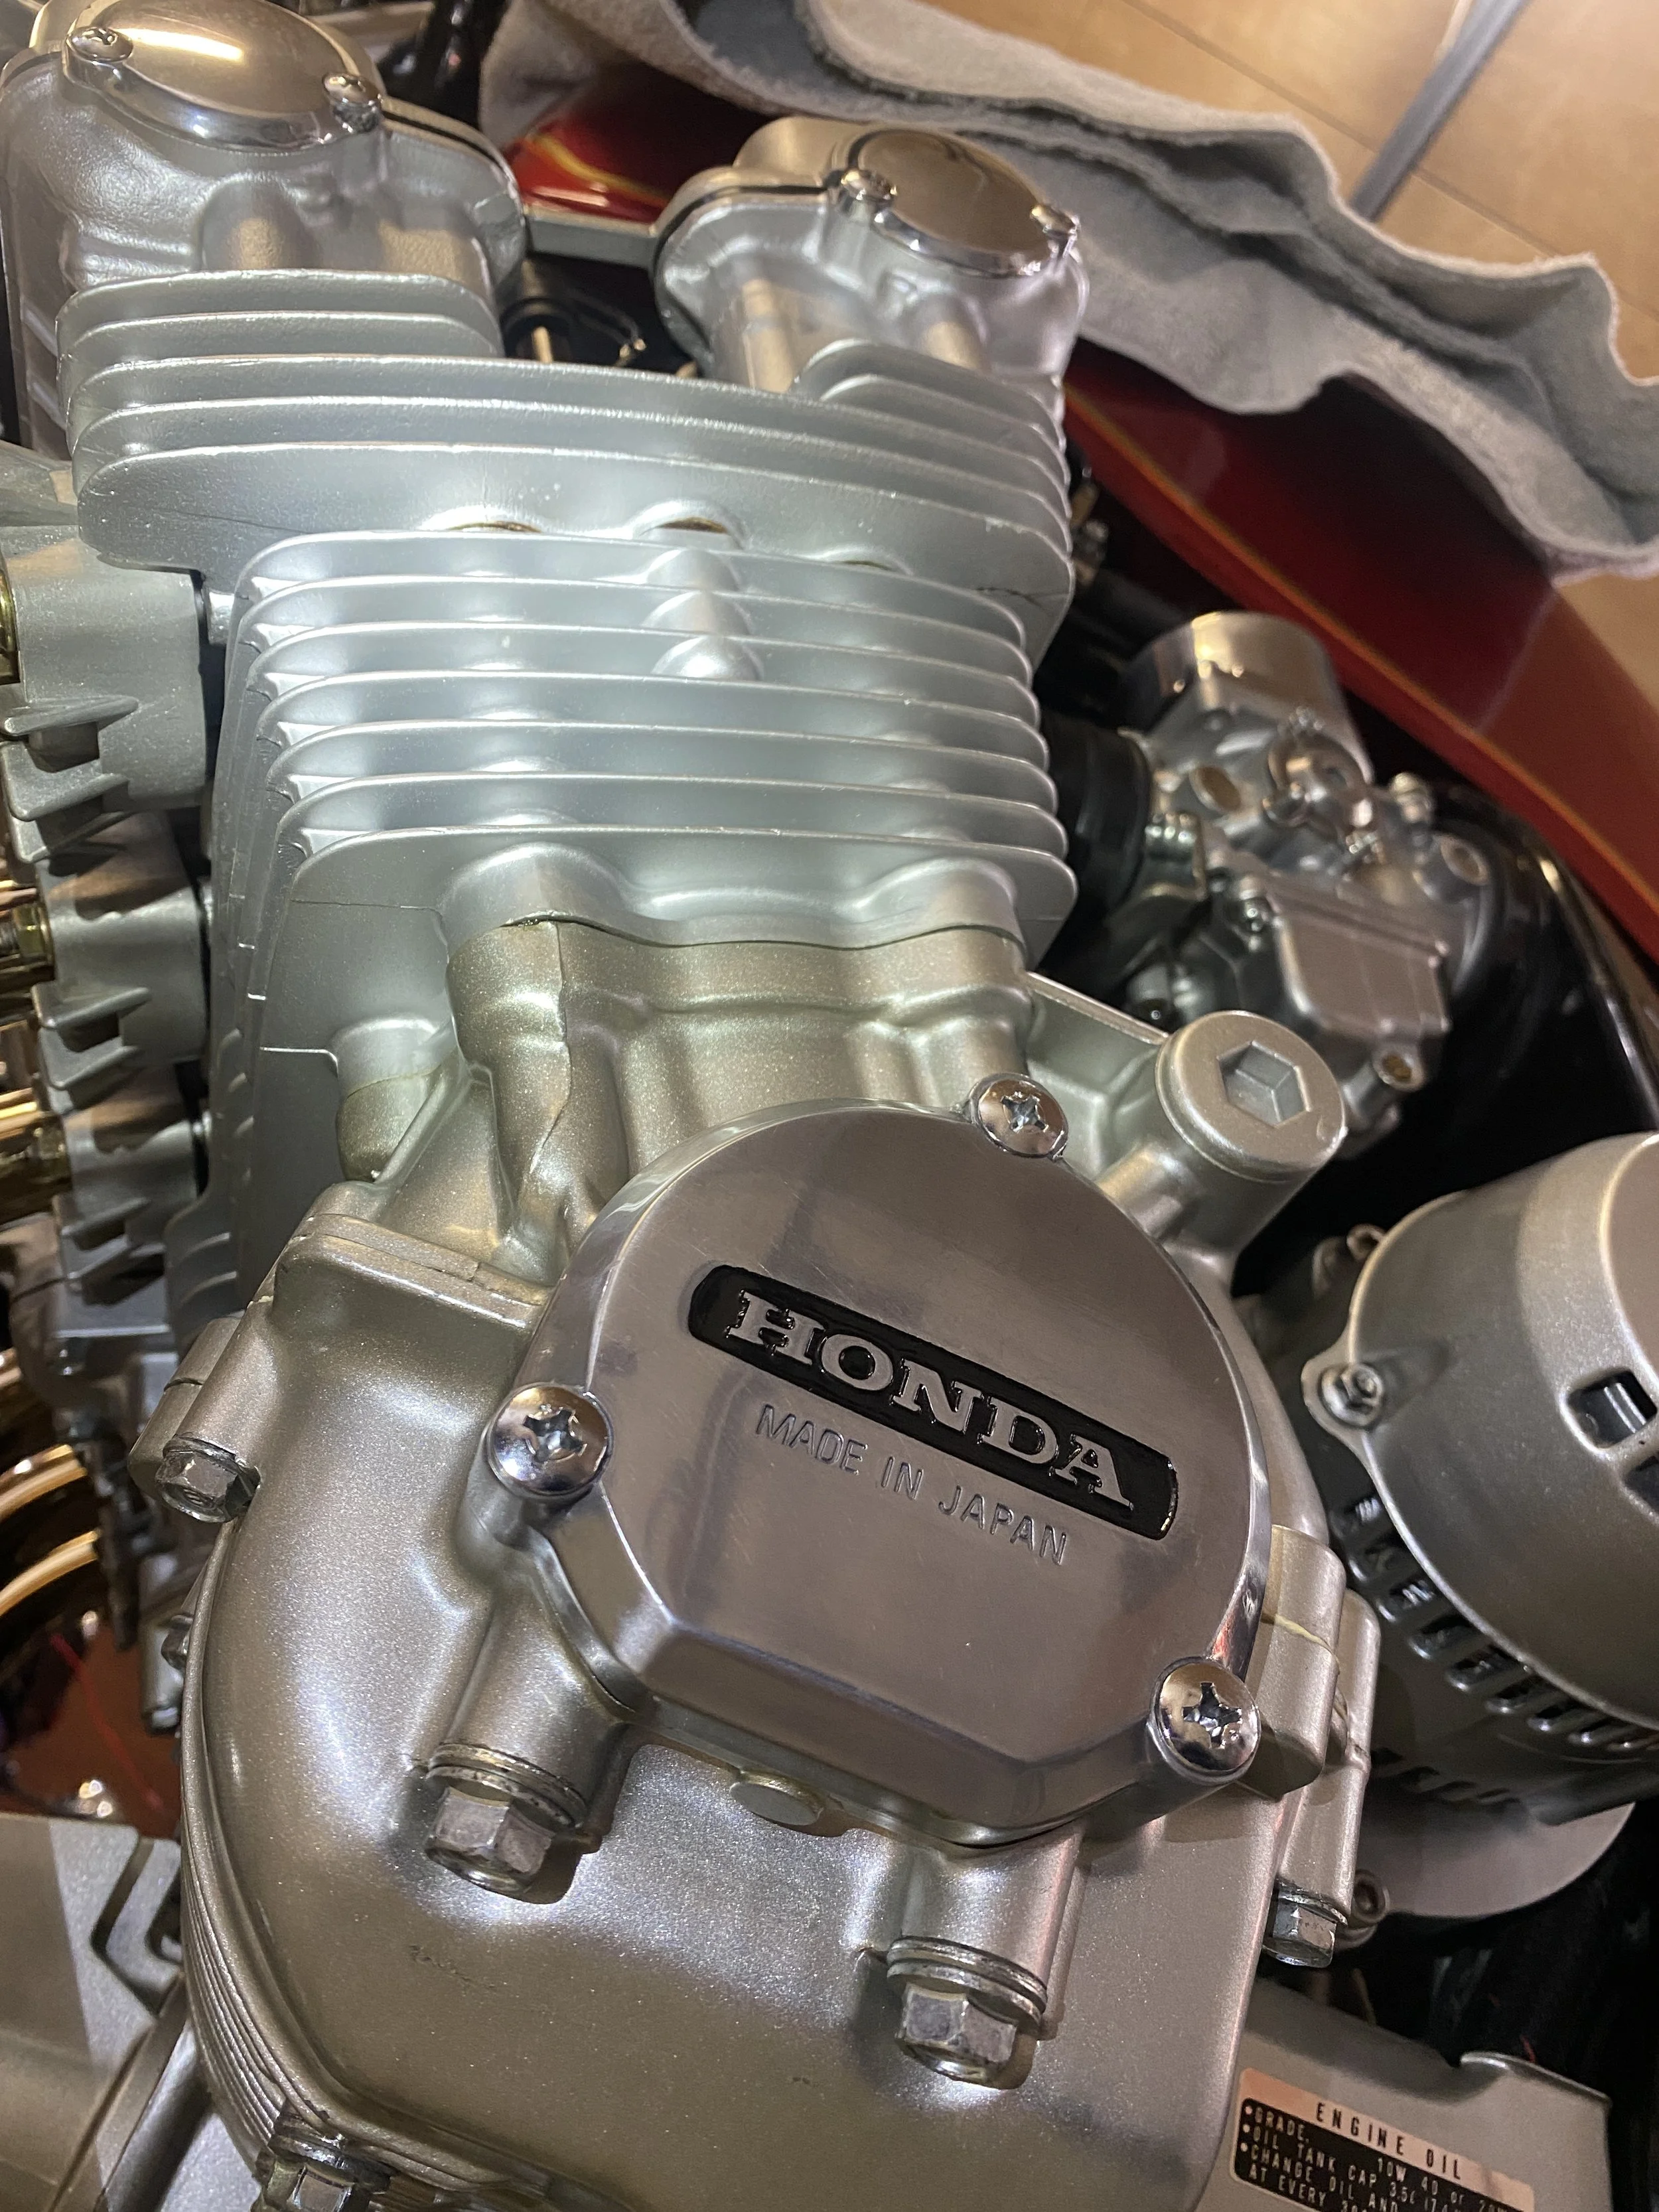
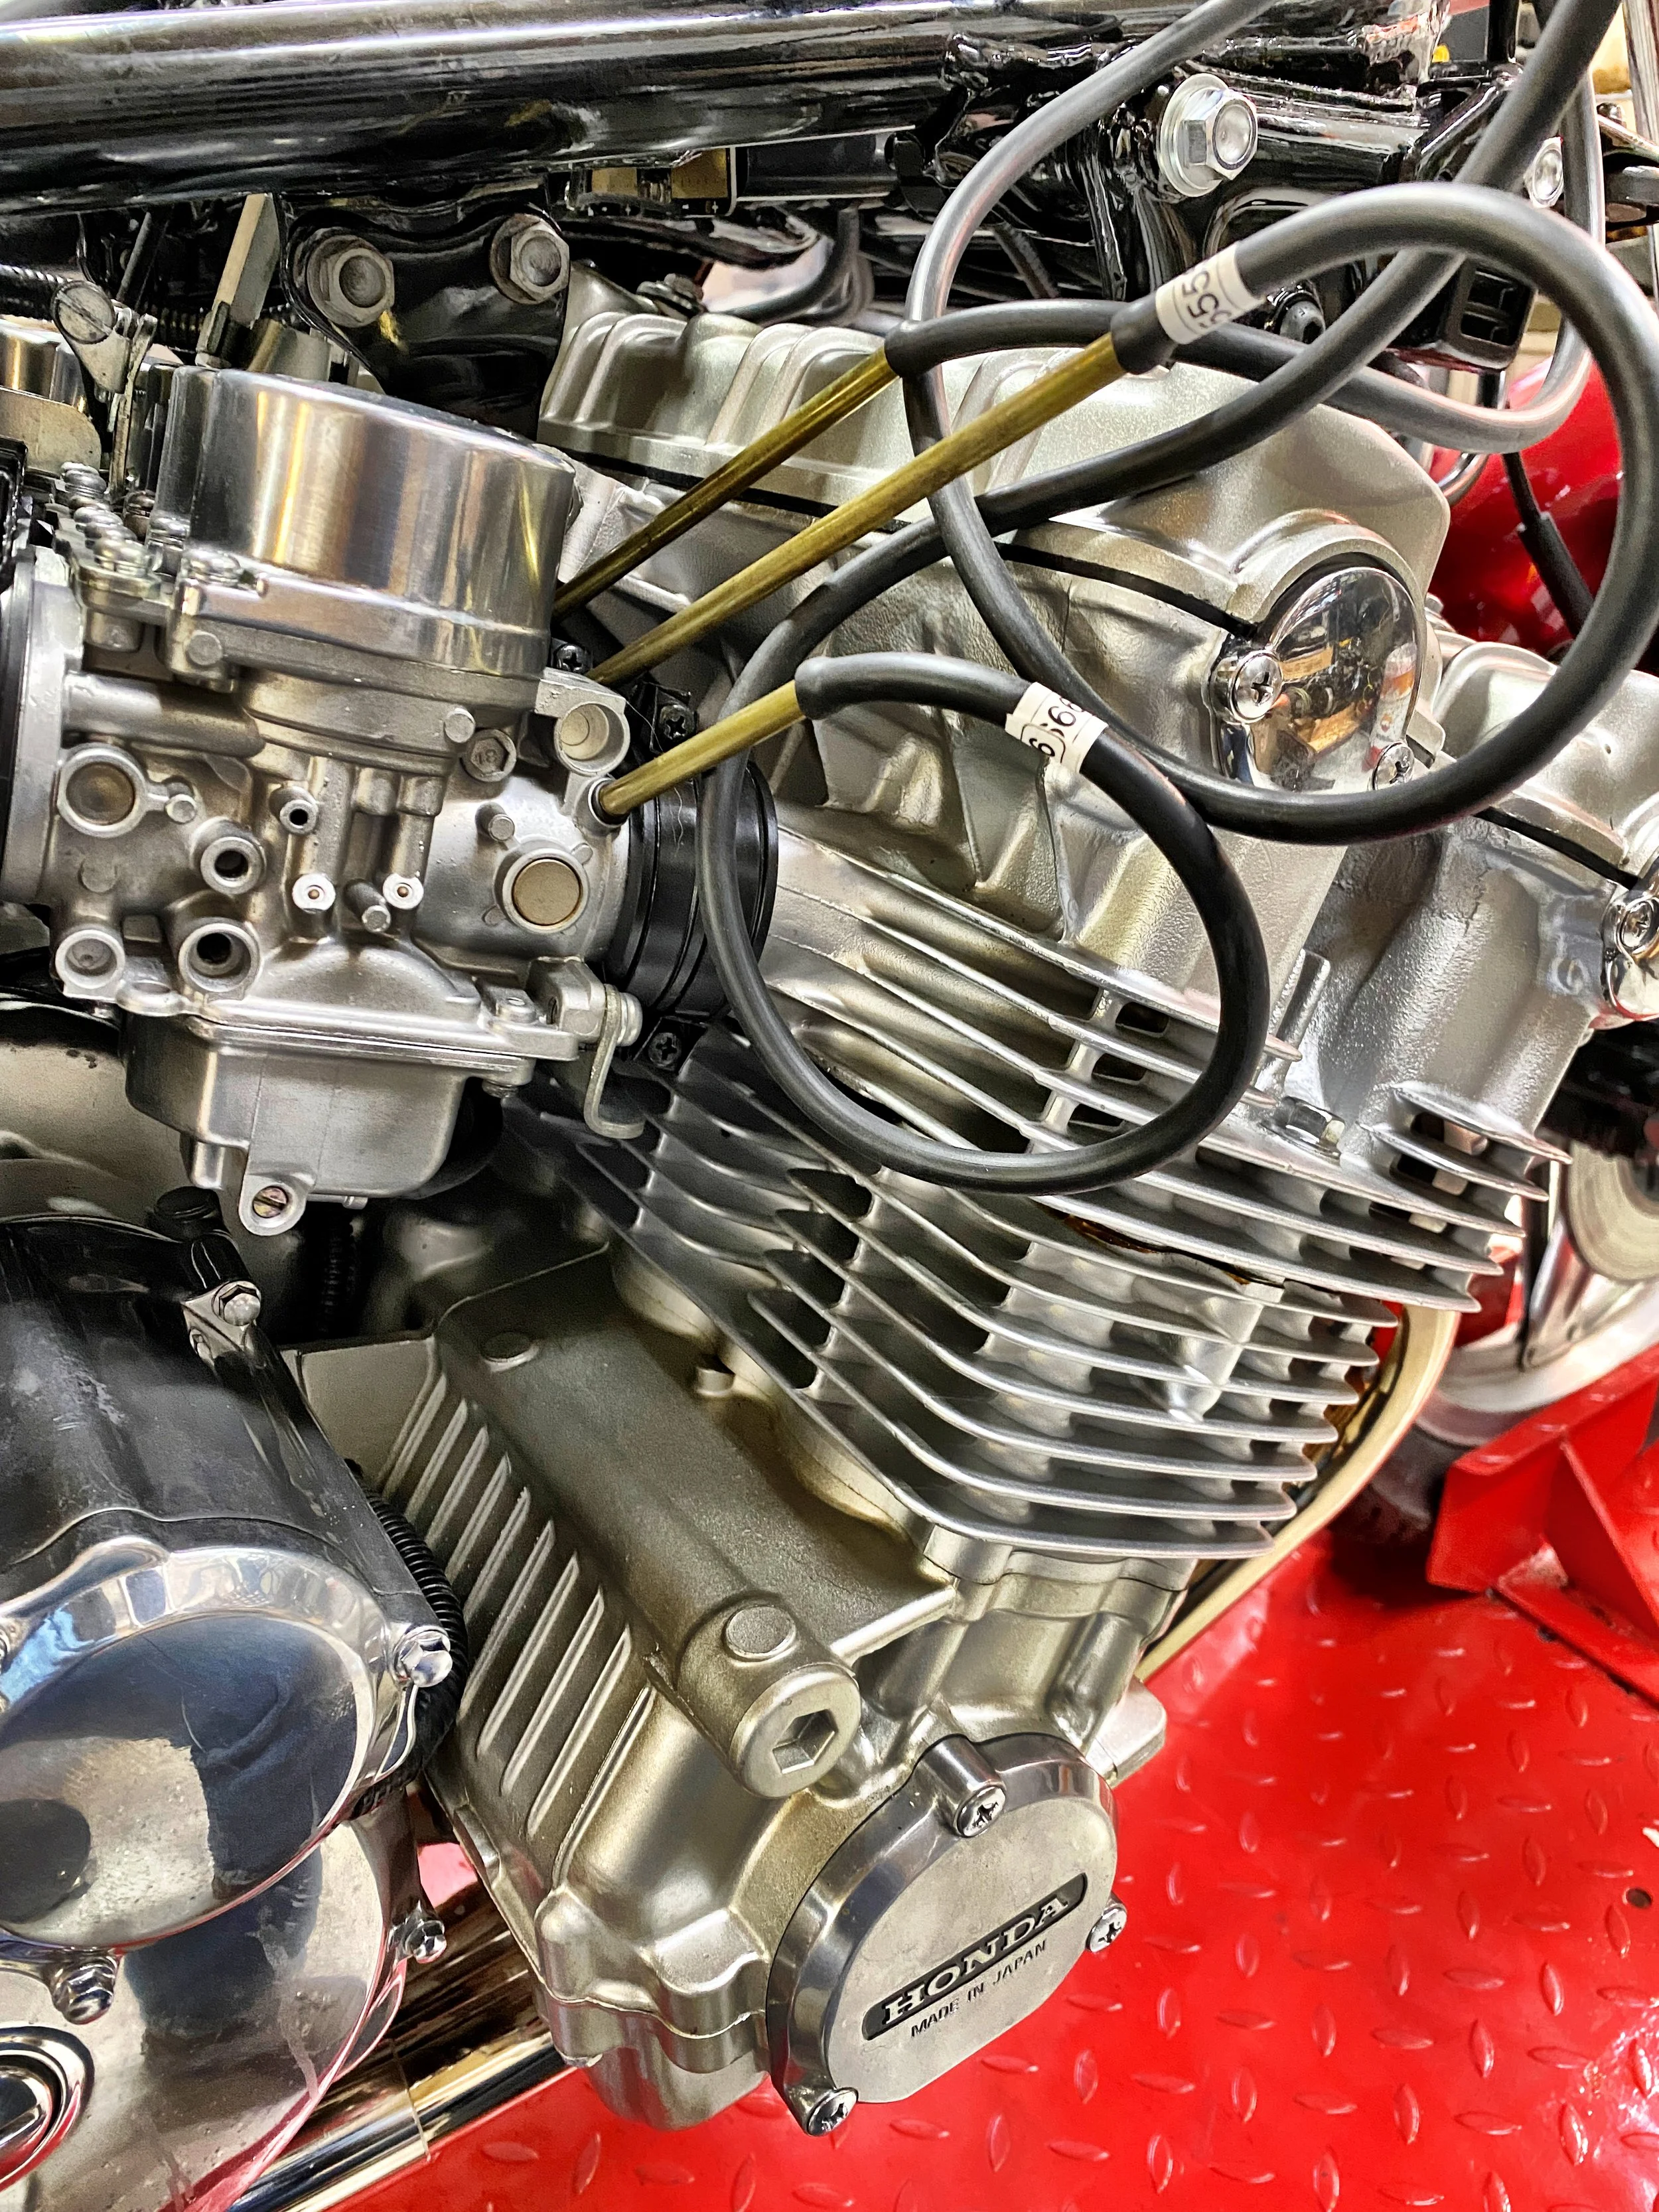
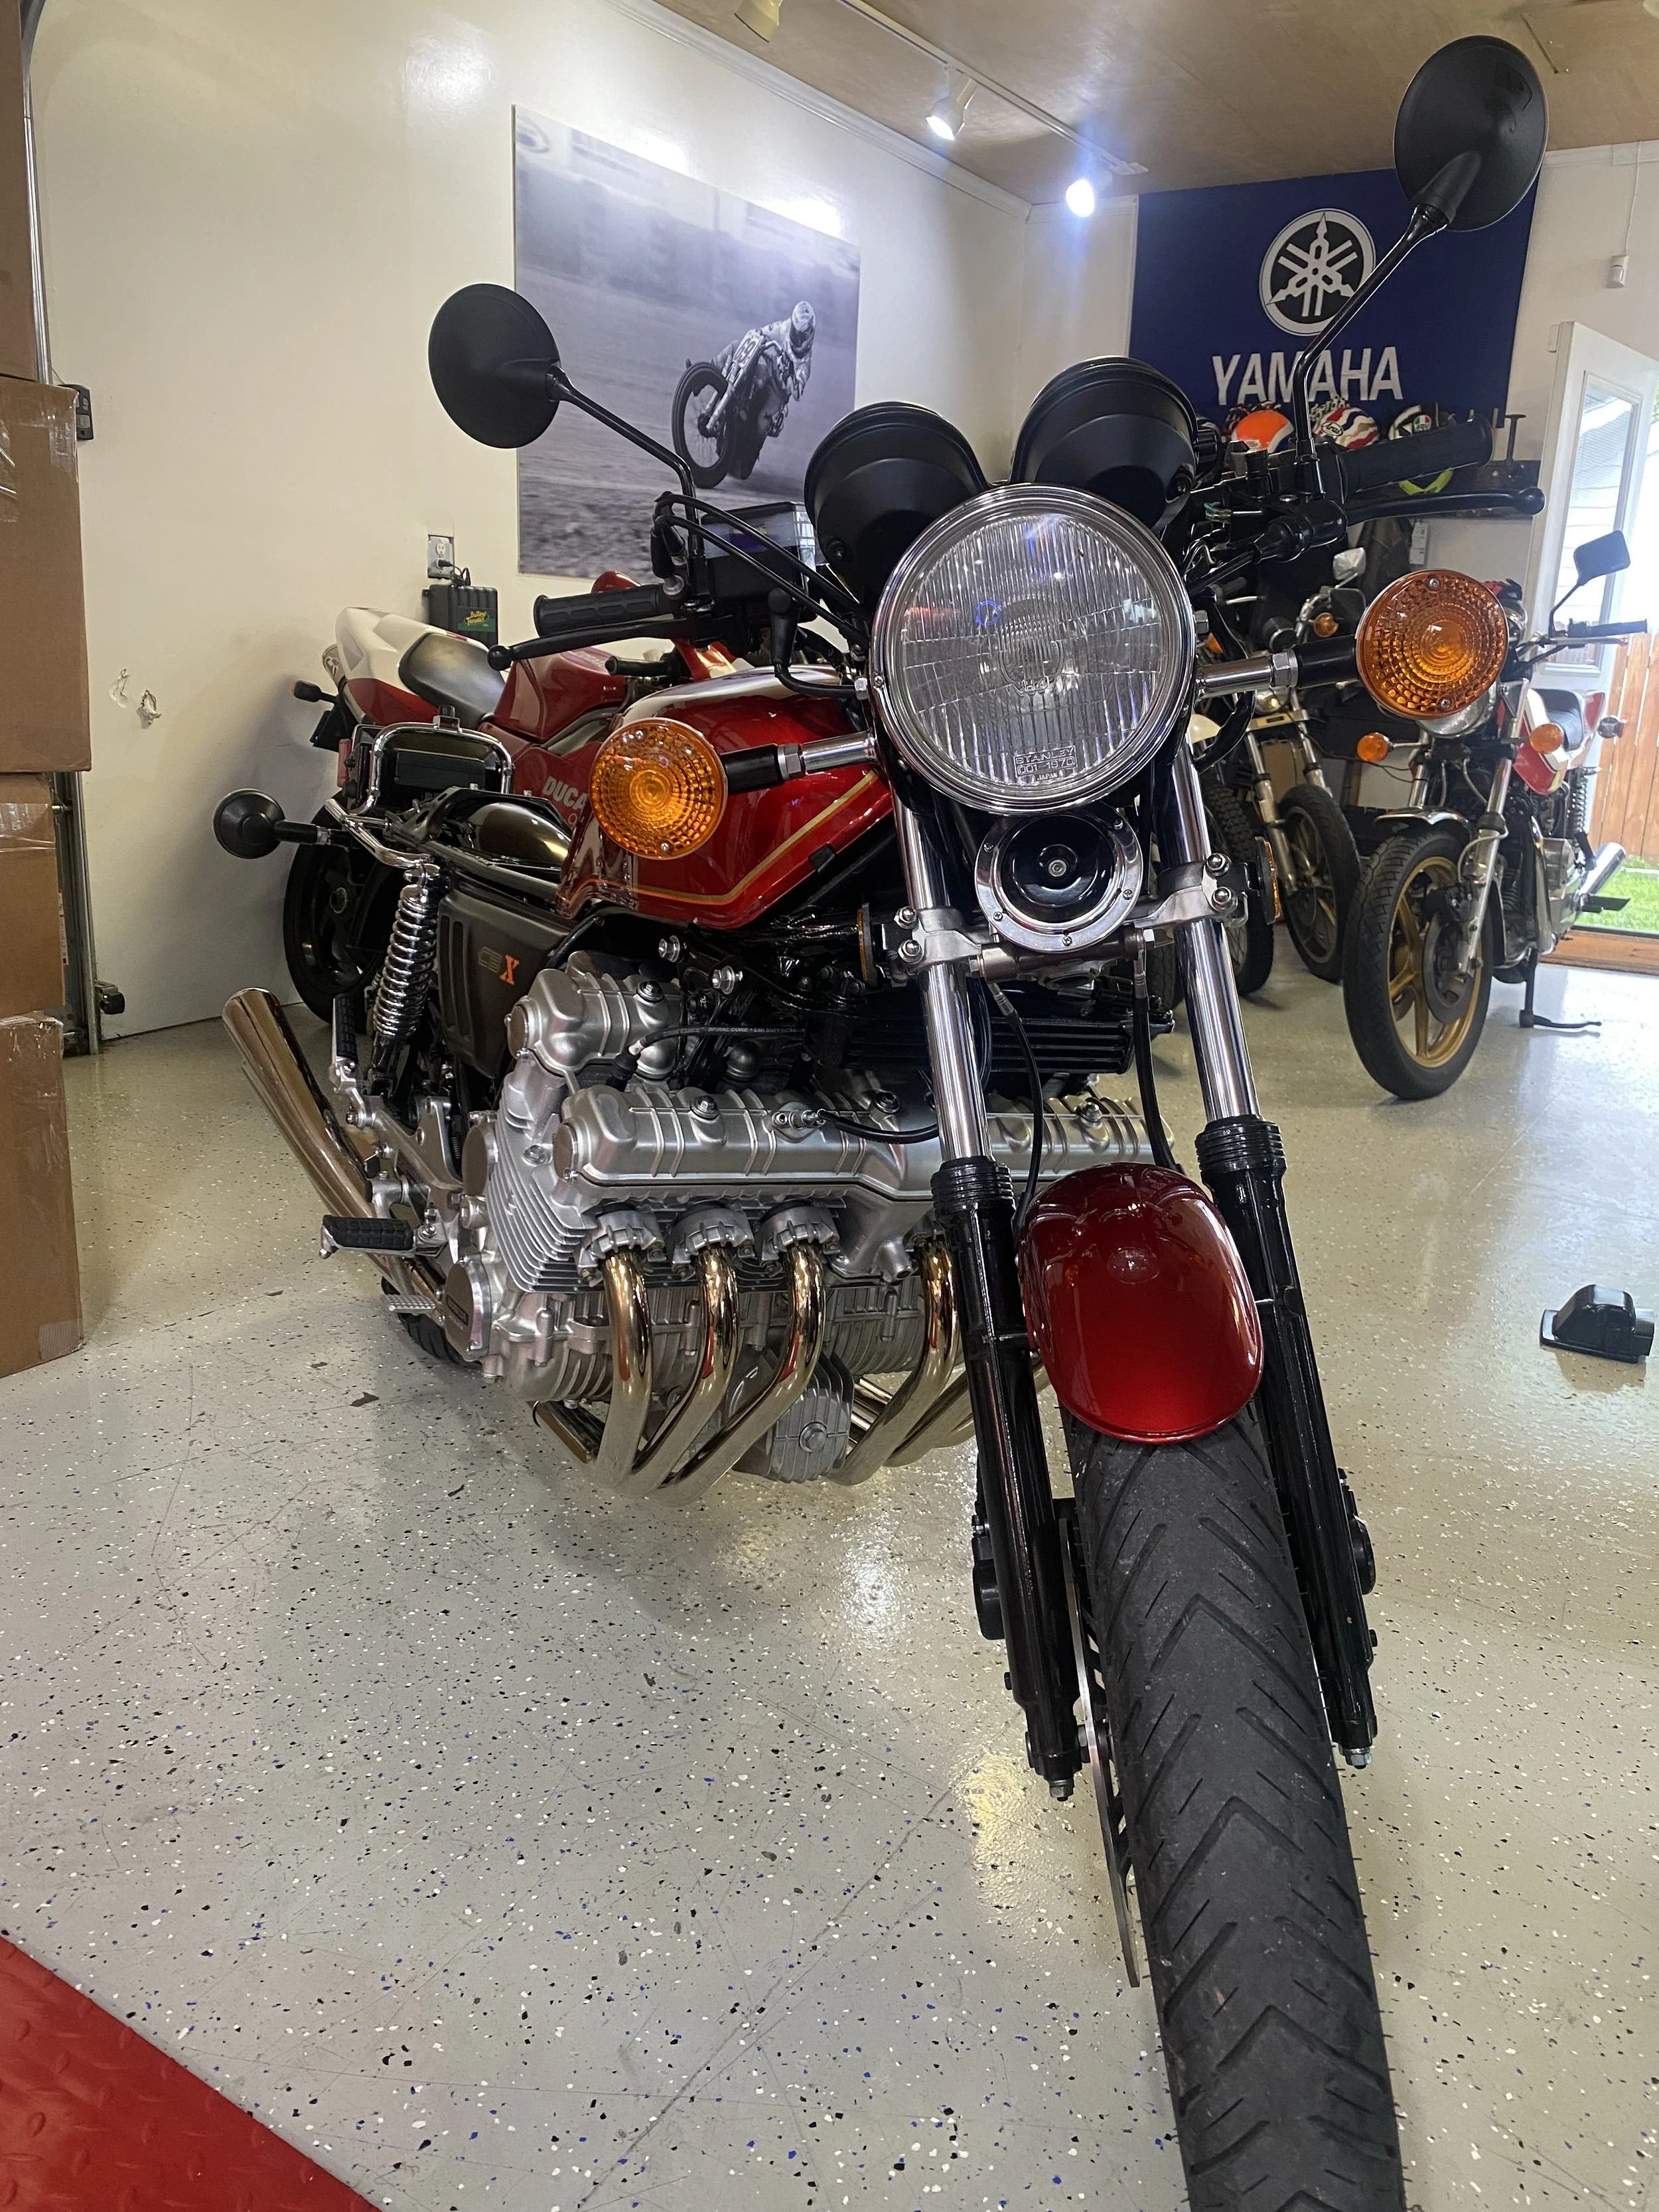
Clearly not a two stroke. Super clean motor. No question there.
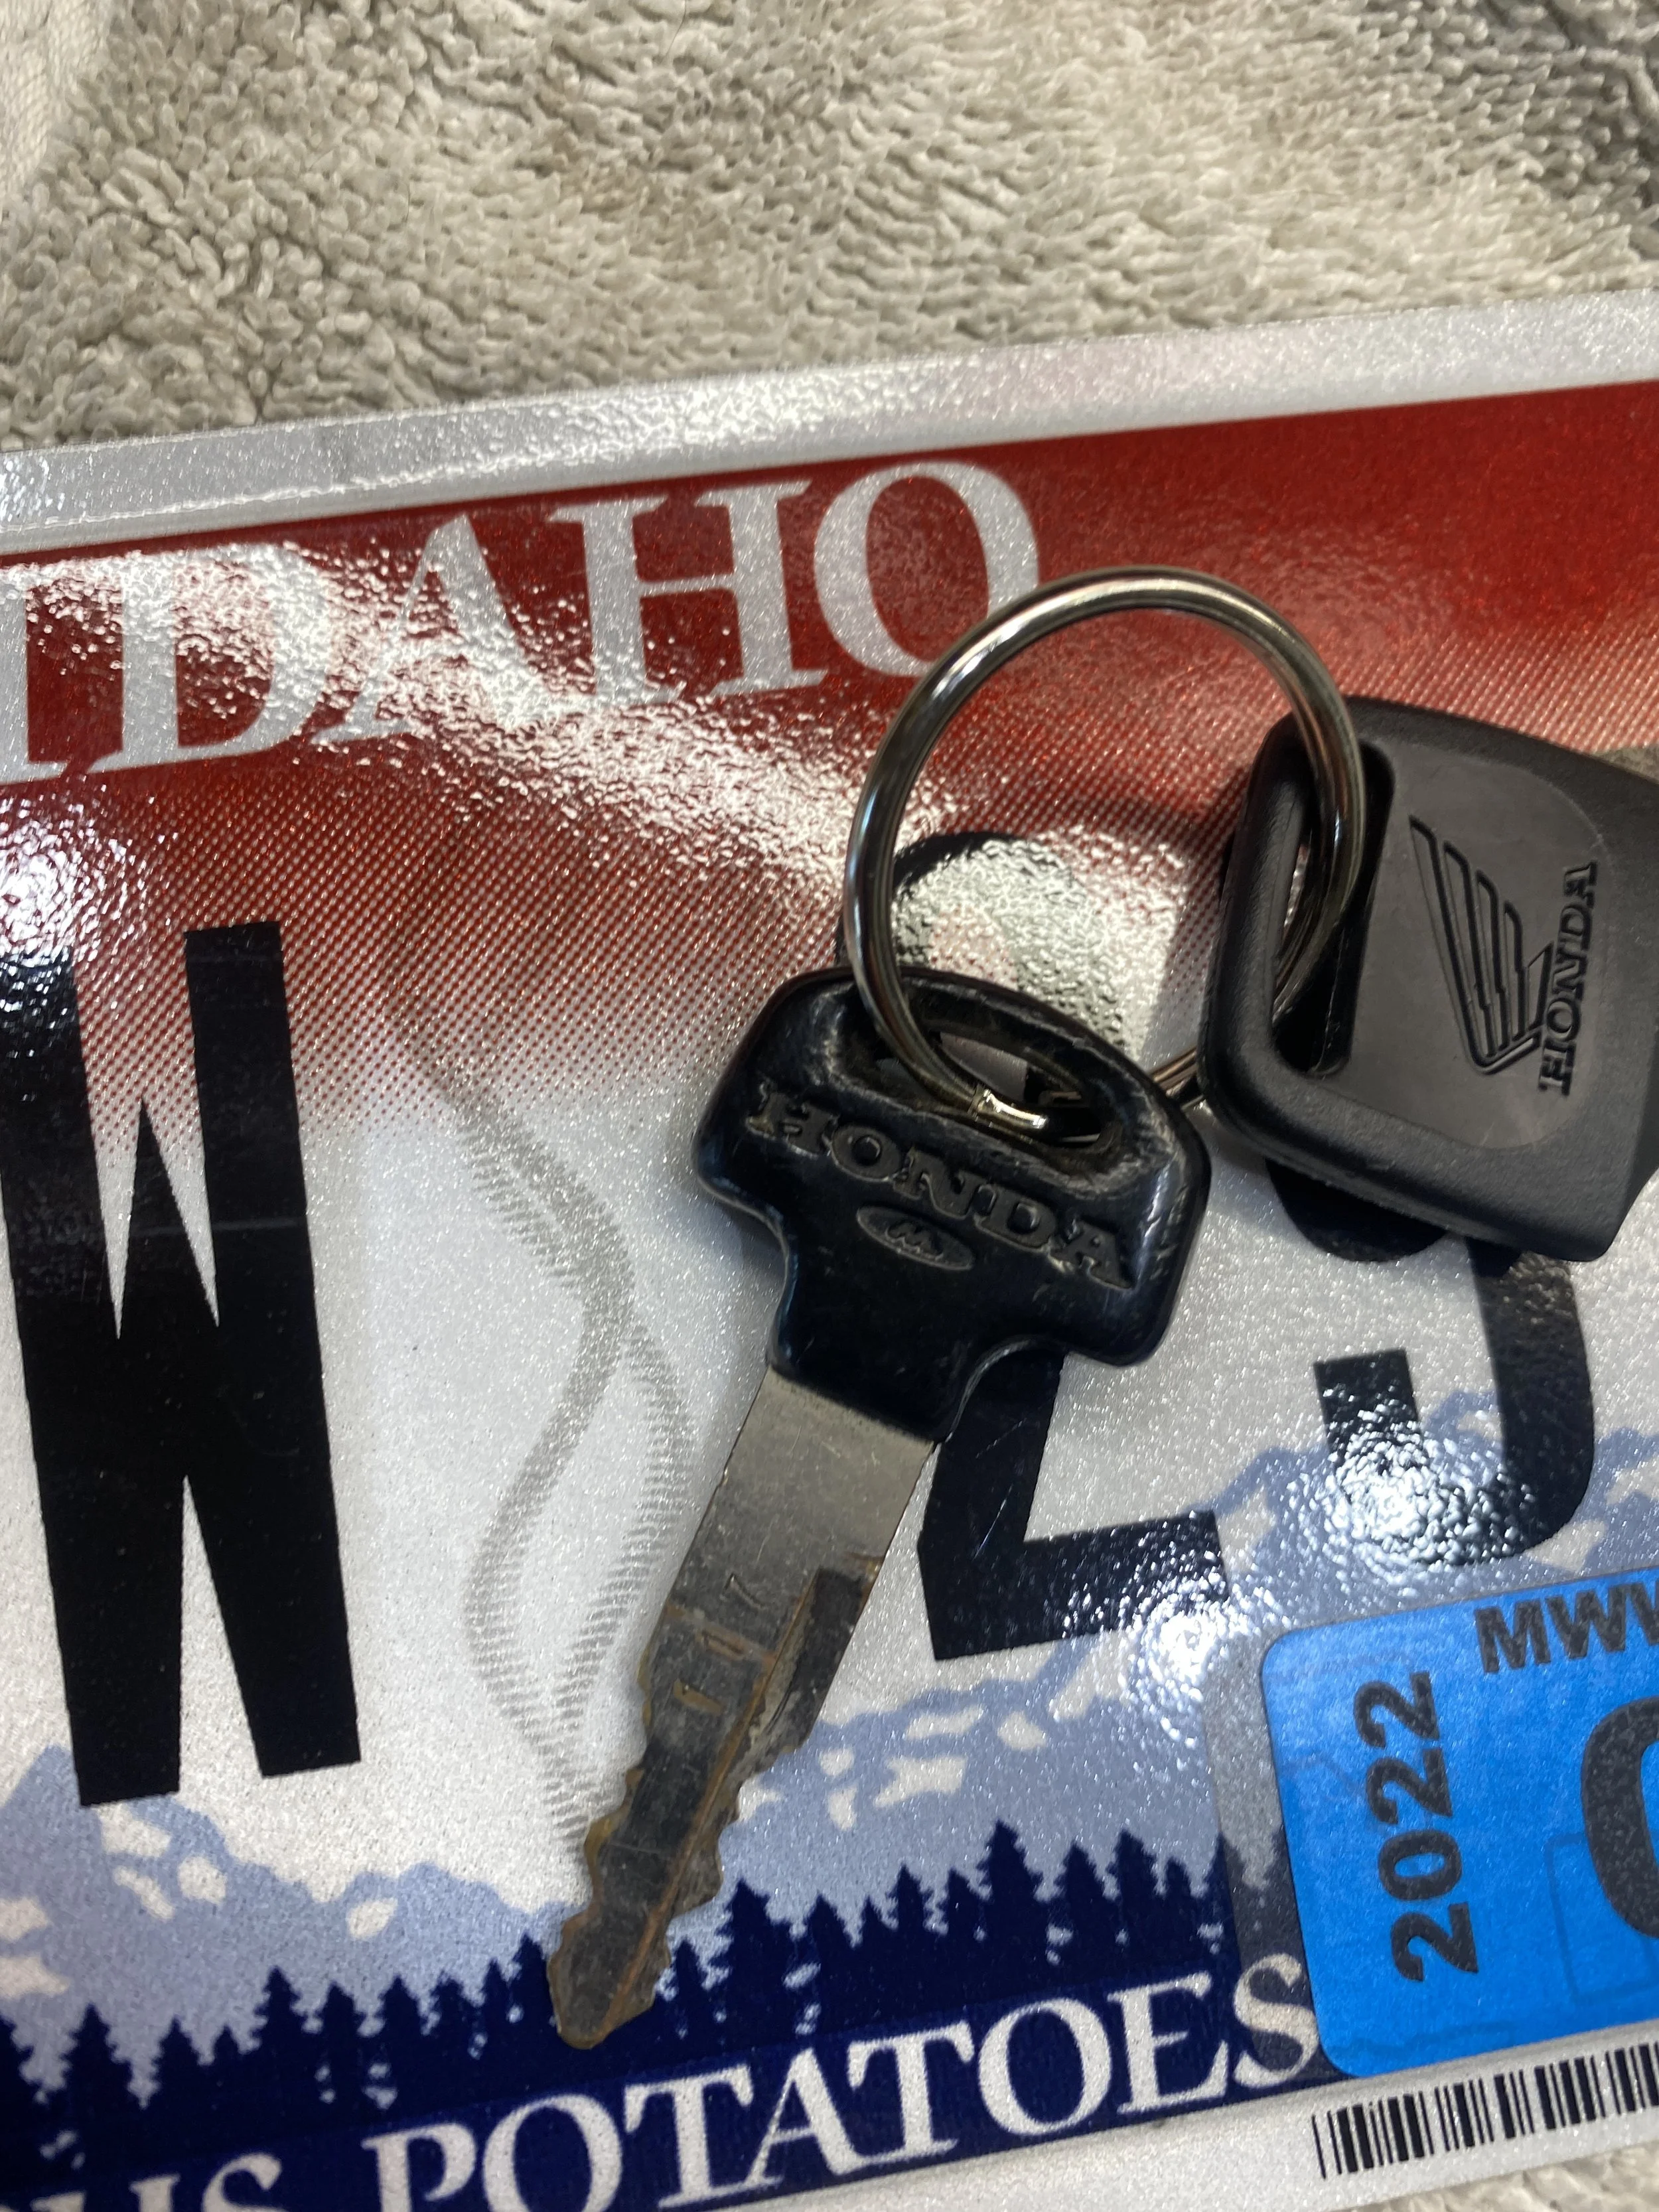
Two of the three keys. One is OEM!
Not the most iconic angle but looks great.
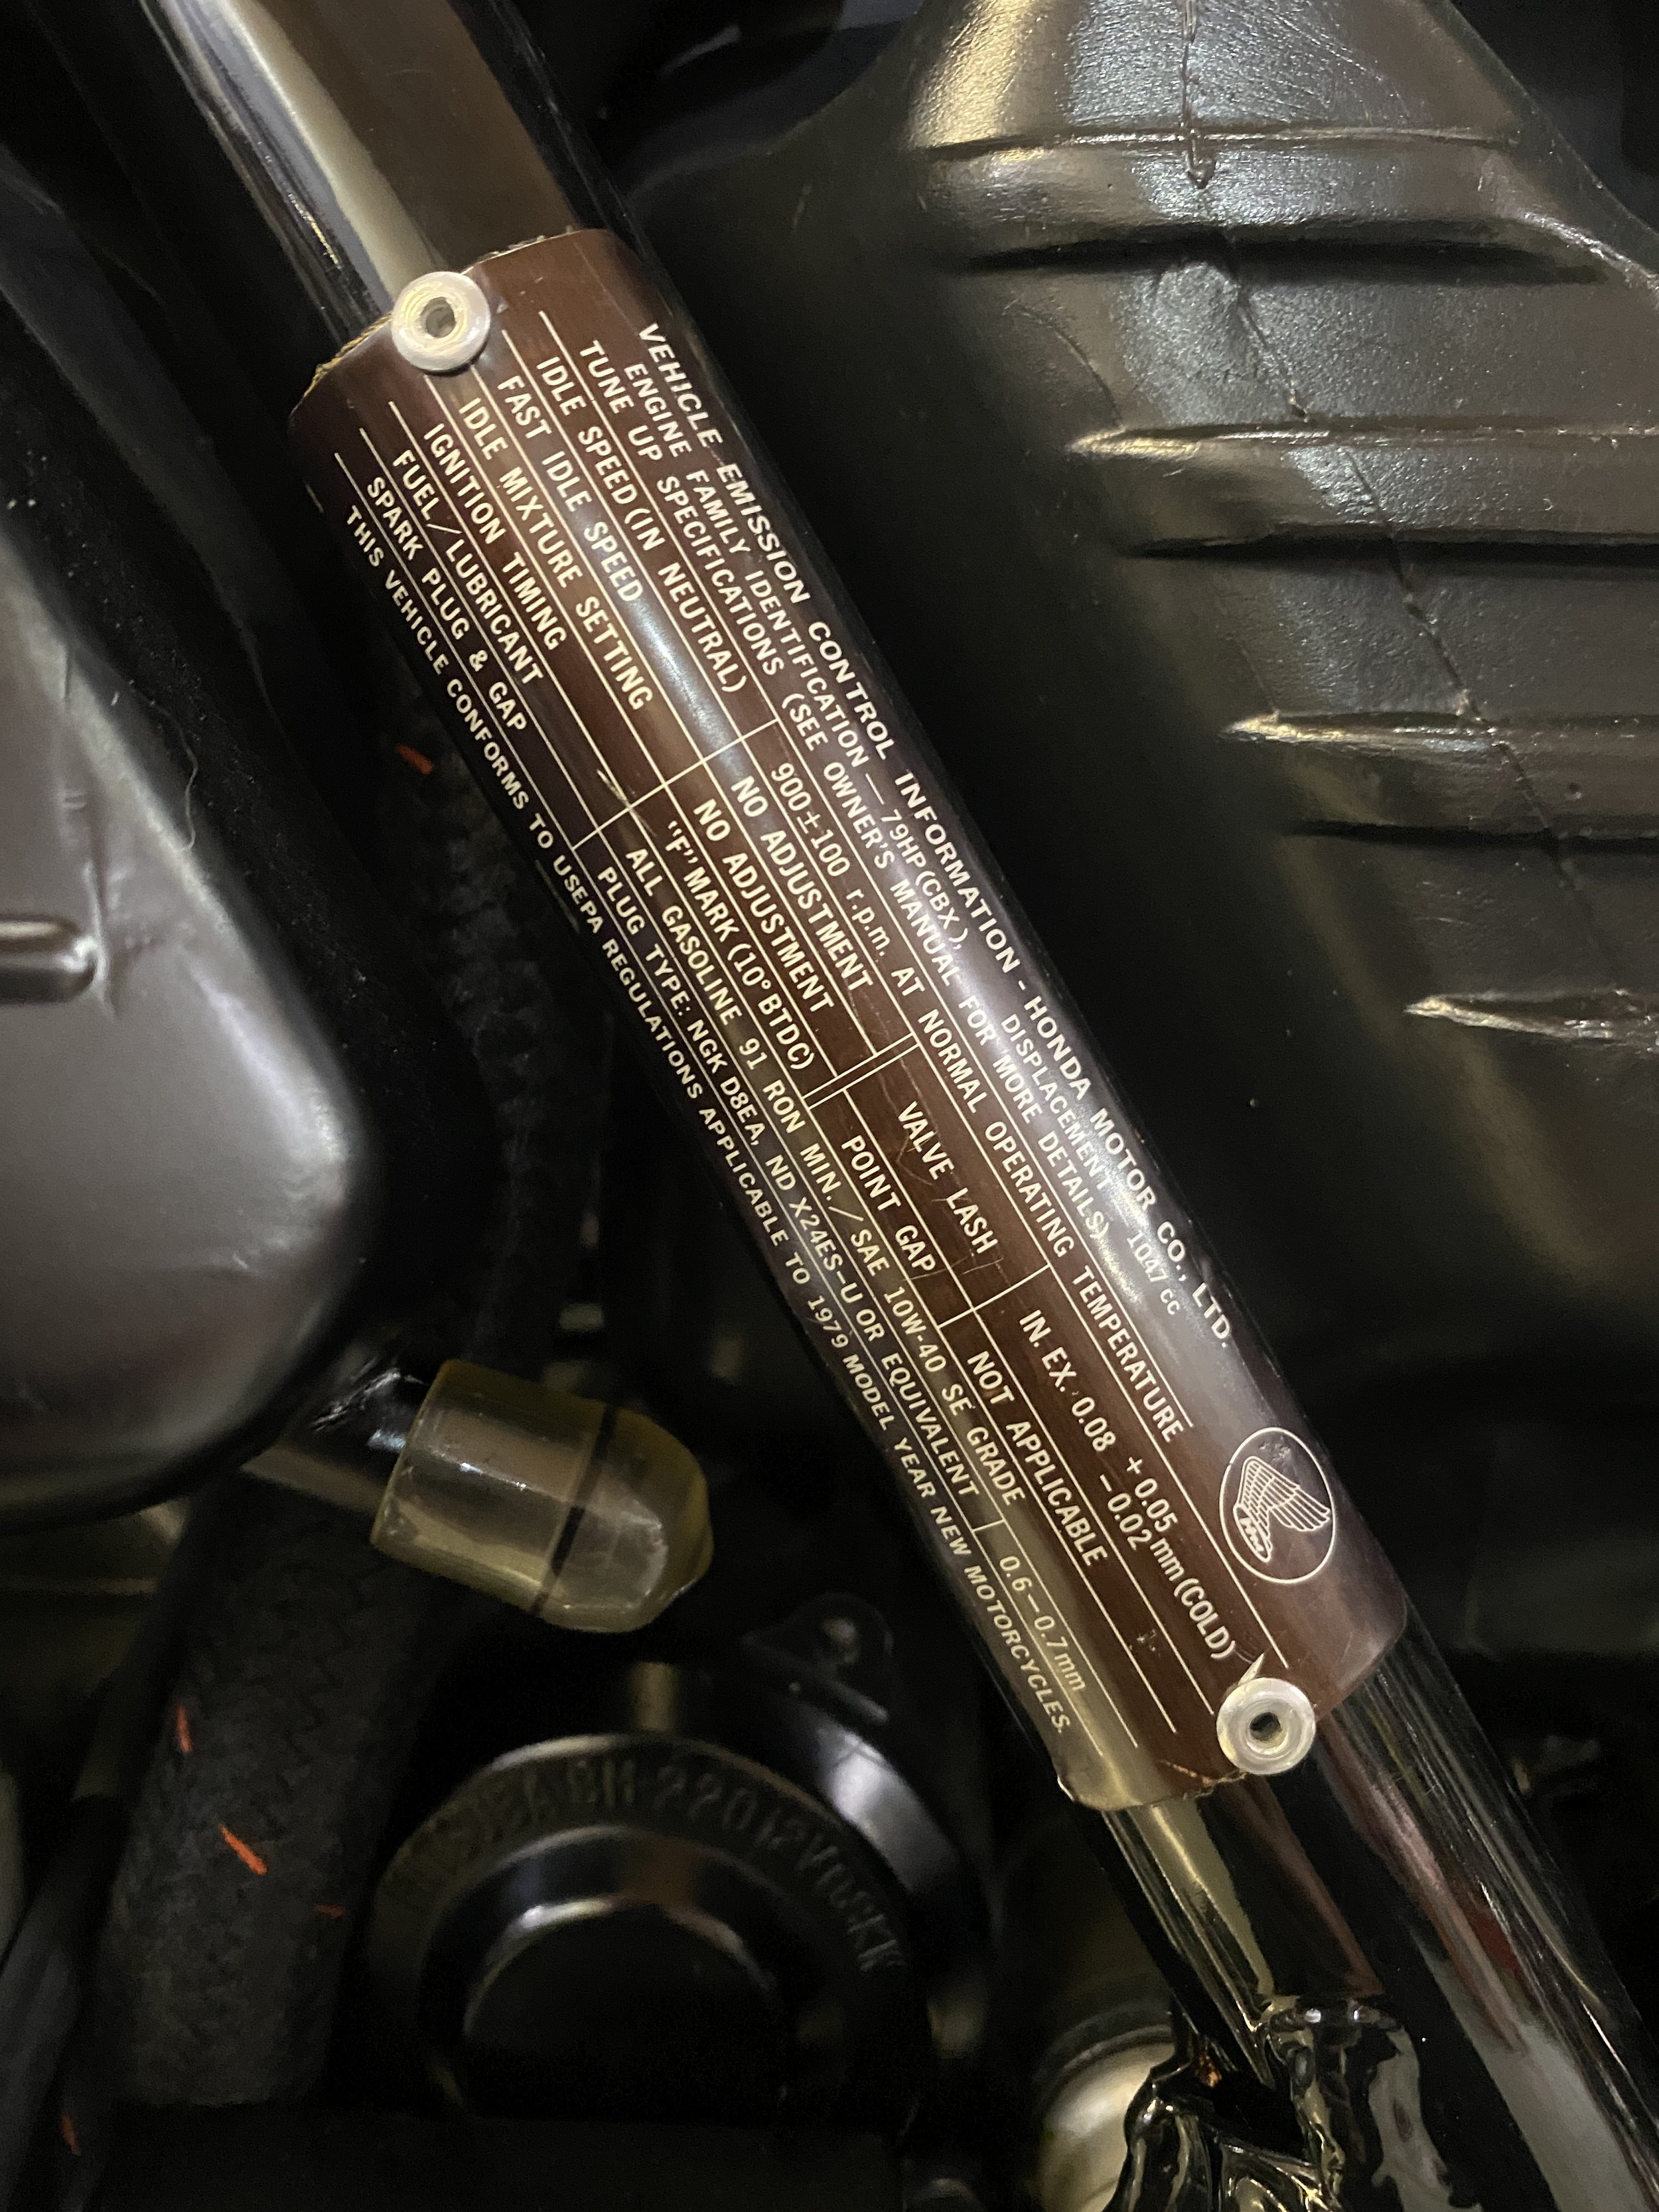
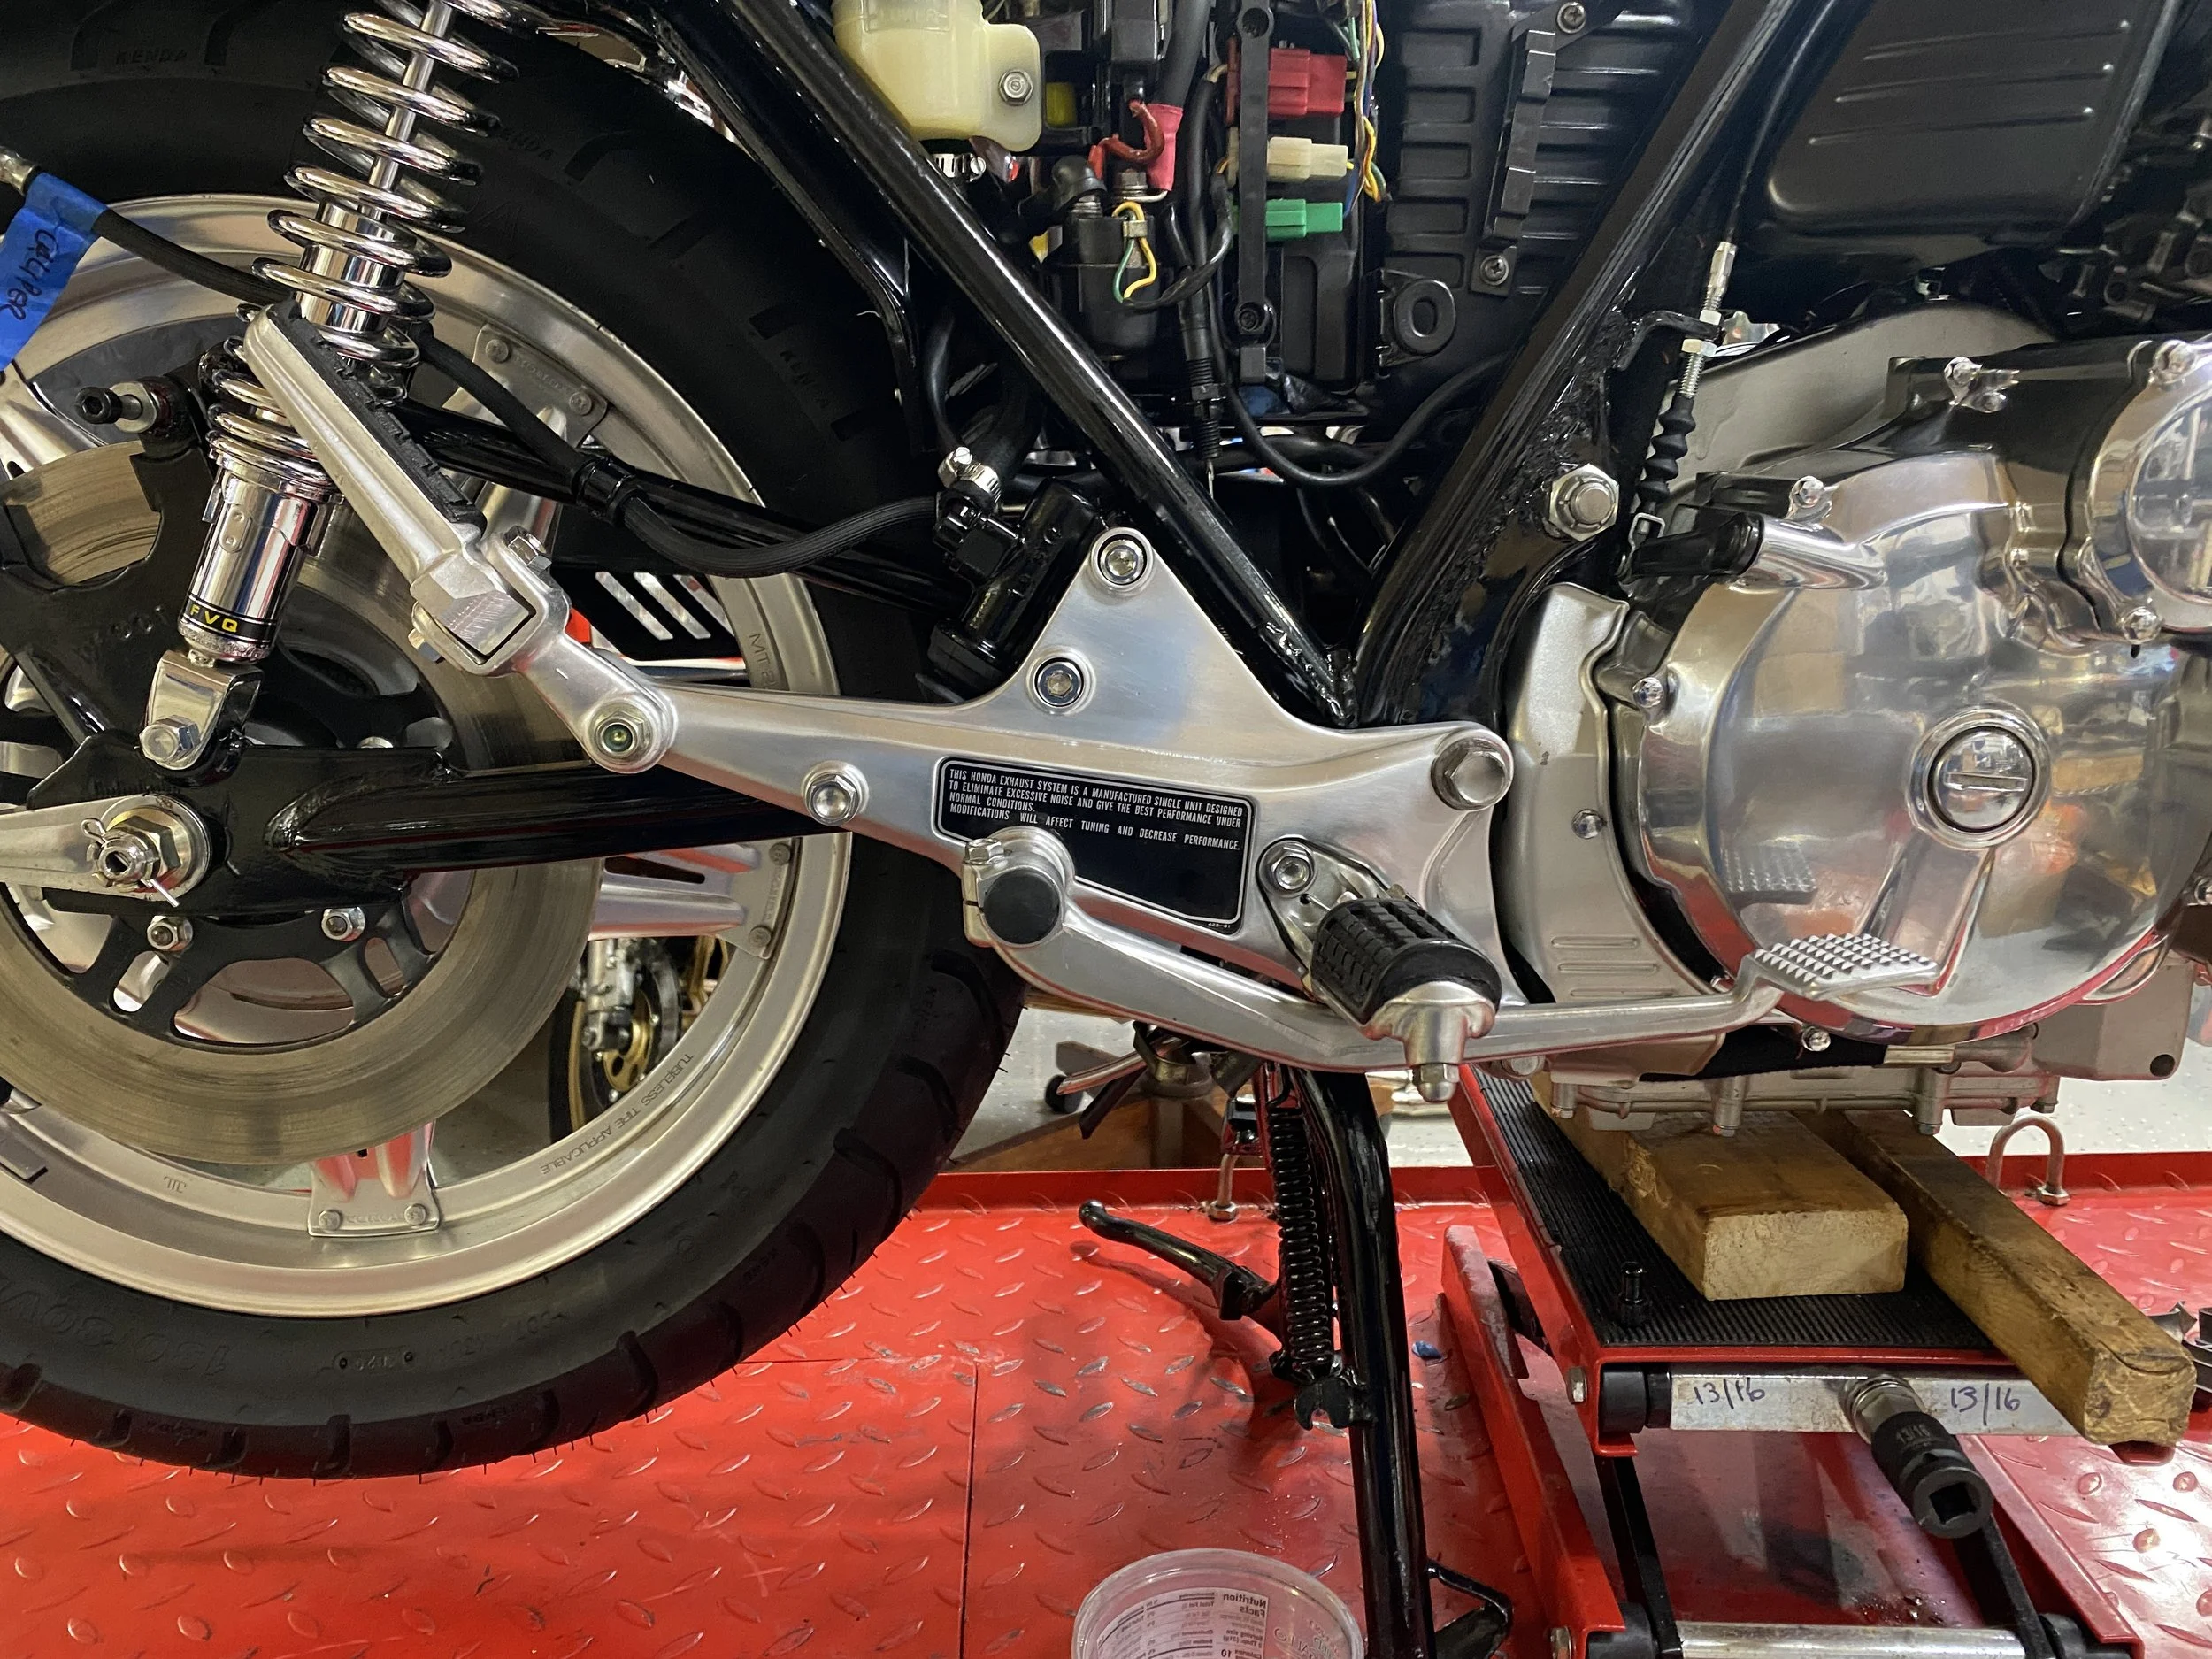
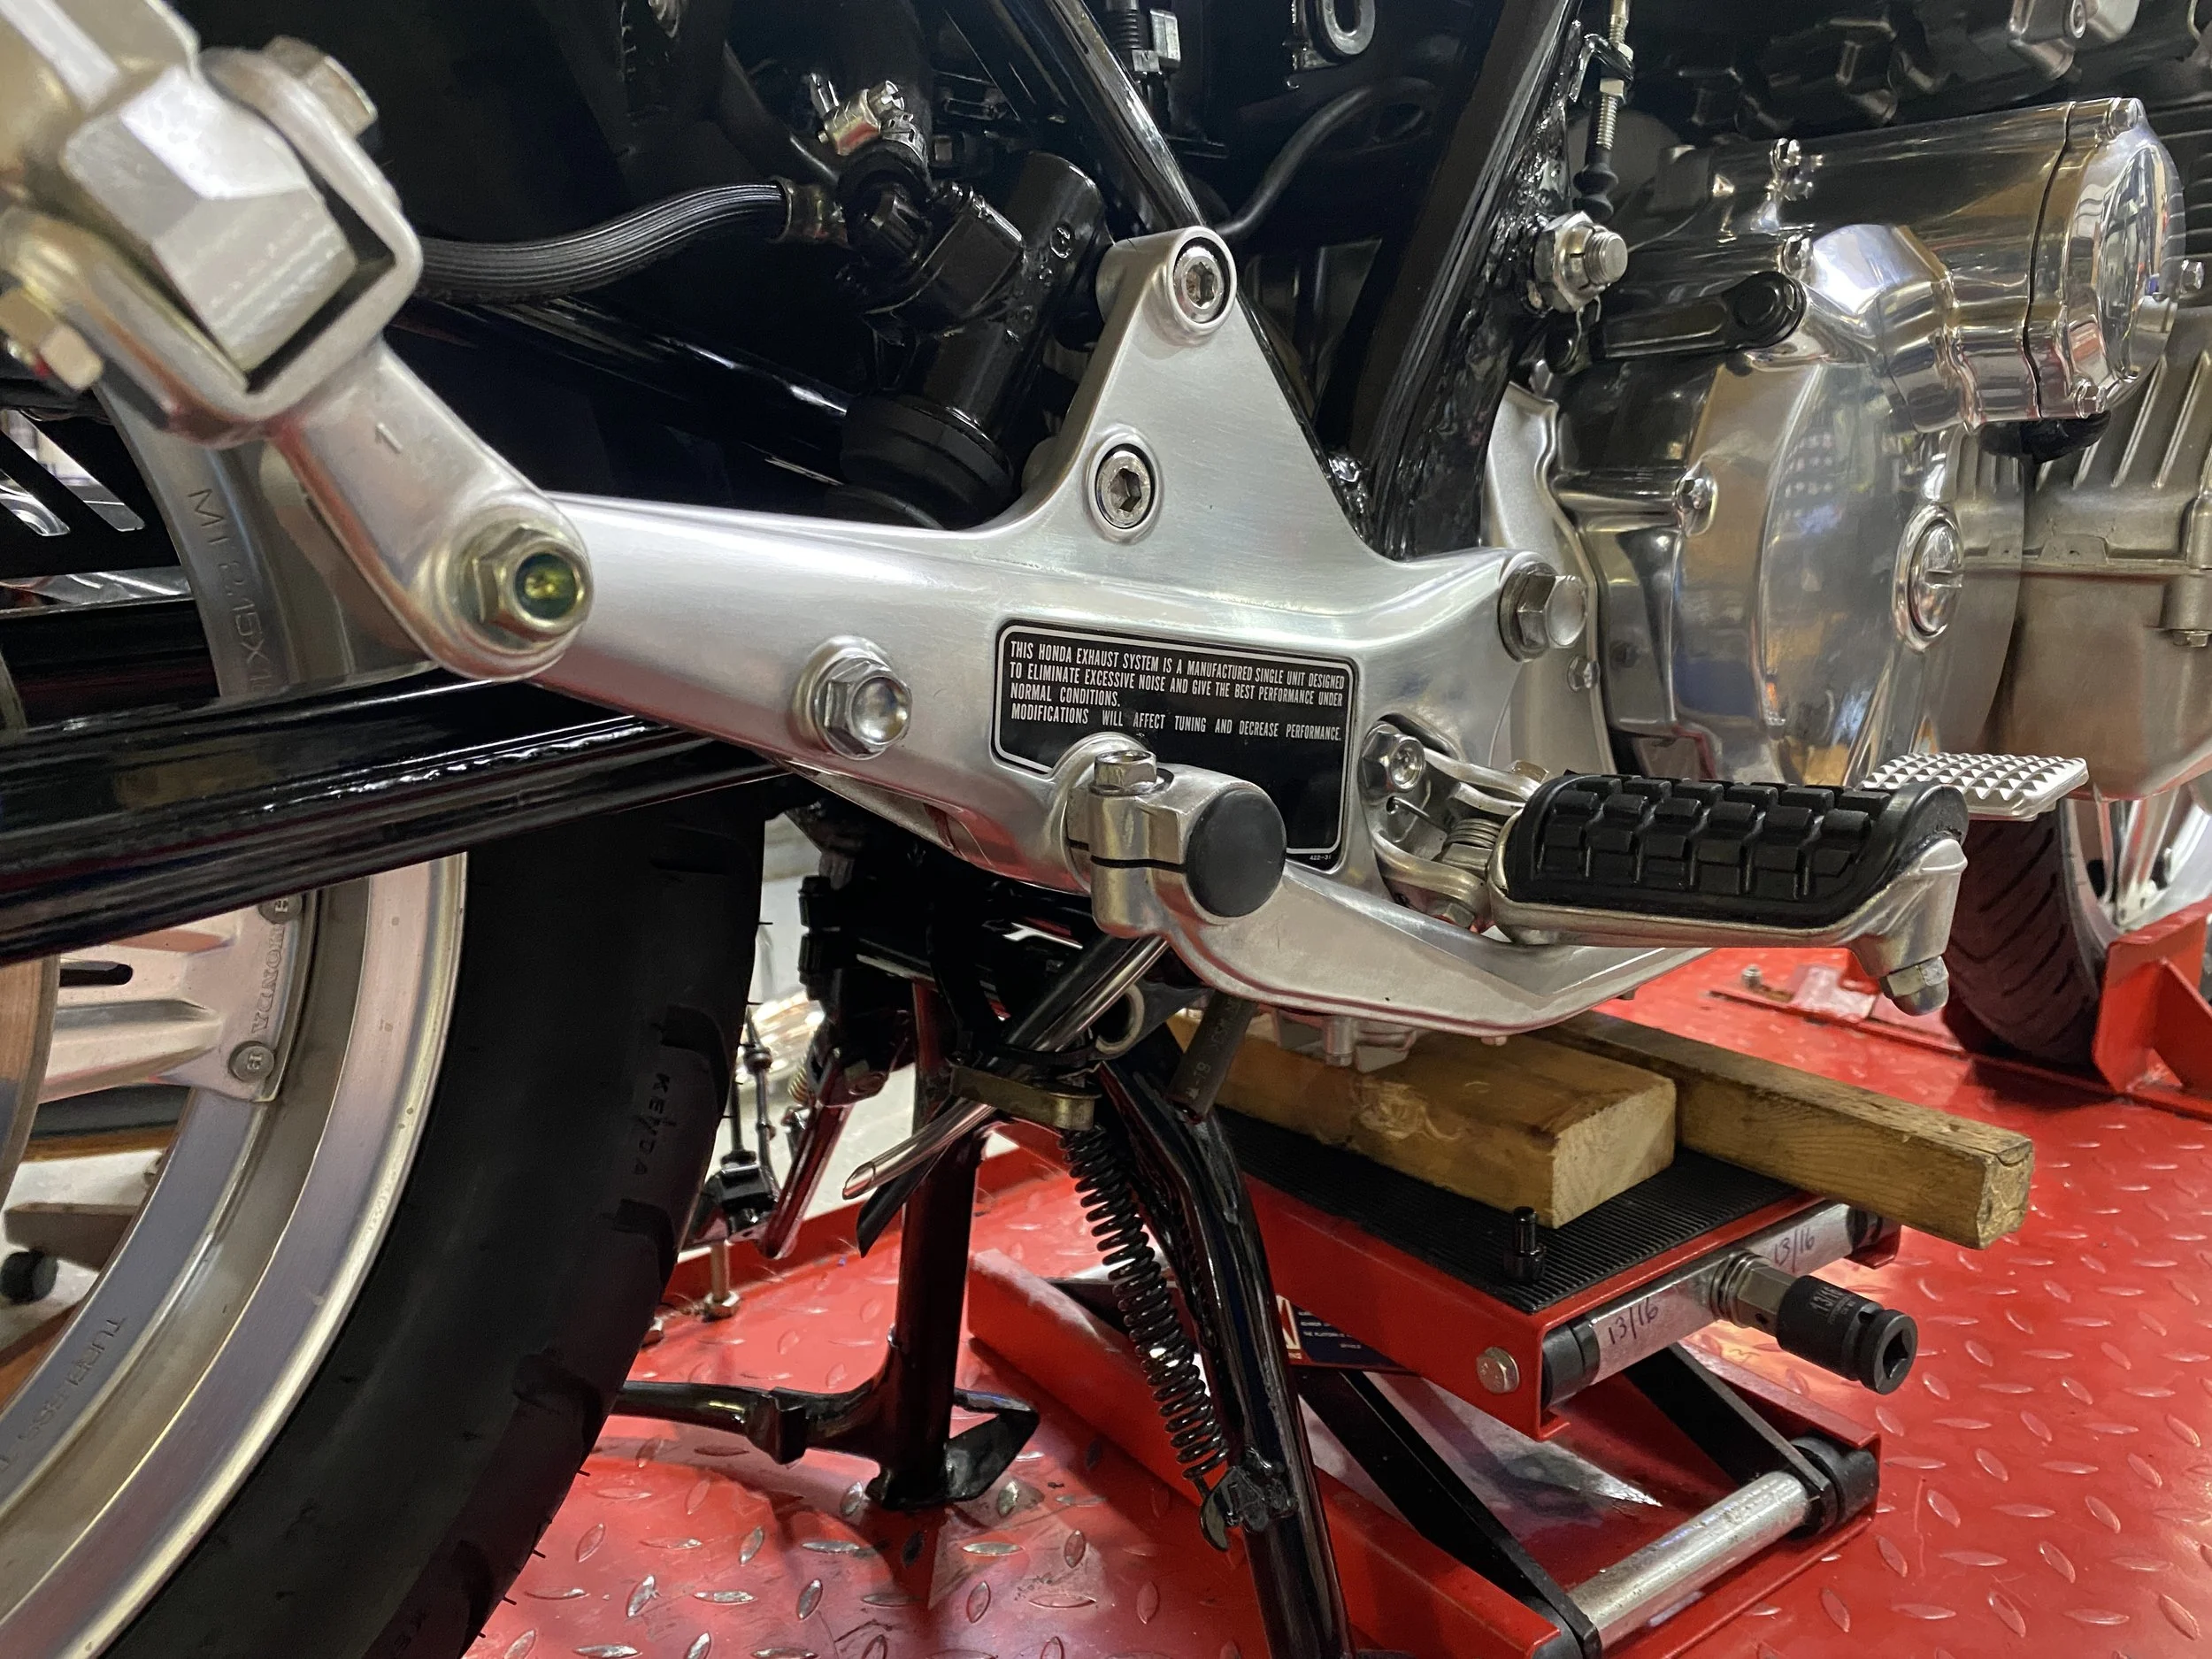
Seems a little aggressive to pop rivet this directly on to a frame spar, but I'm happy it's there.
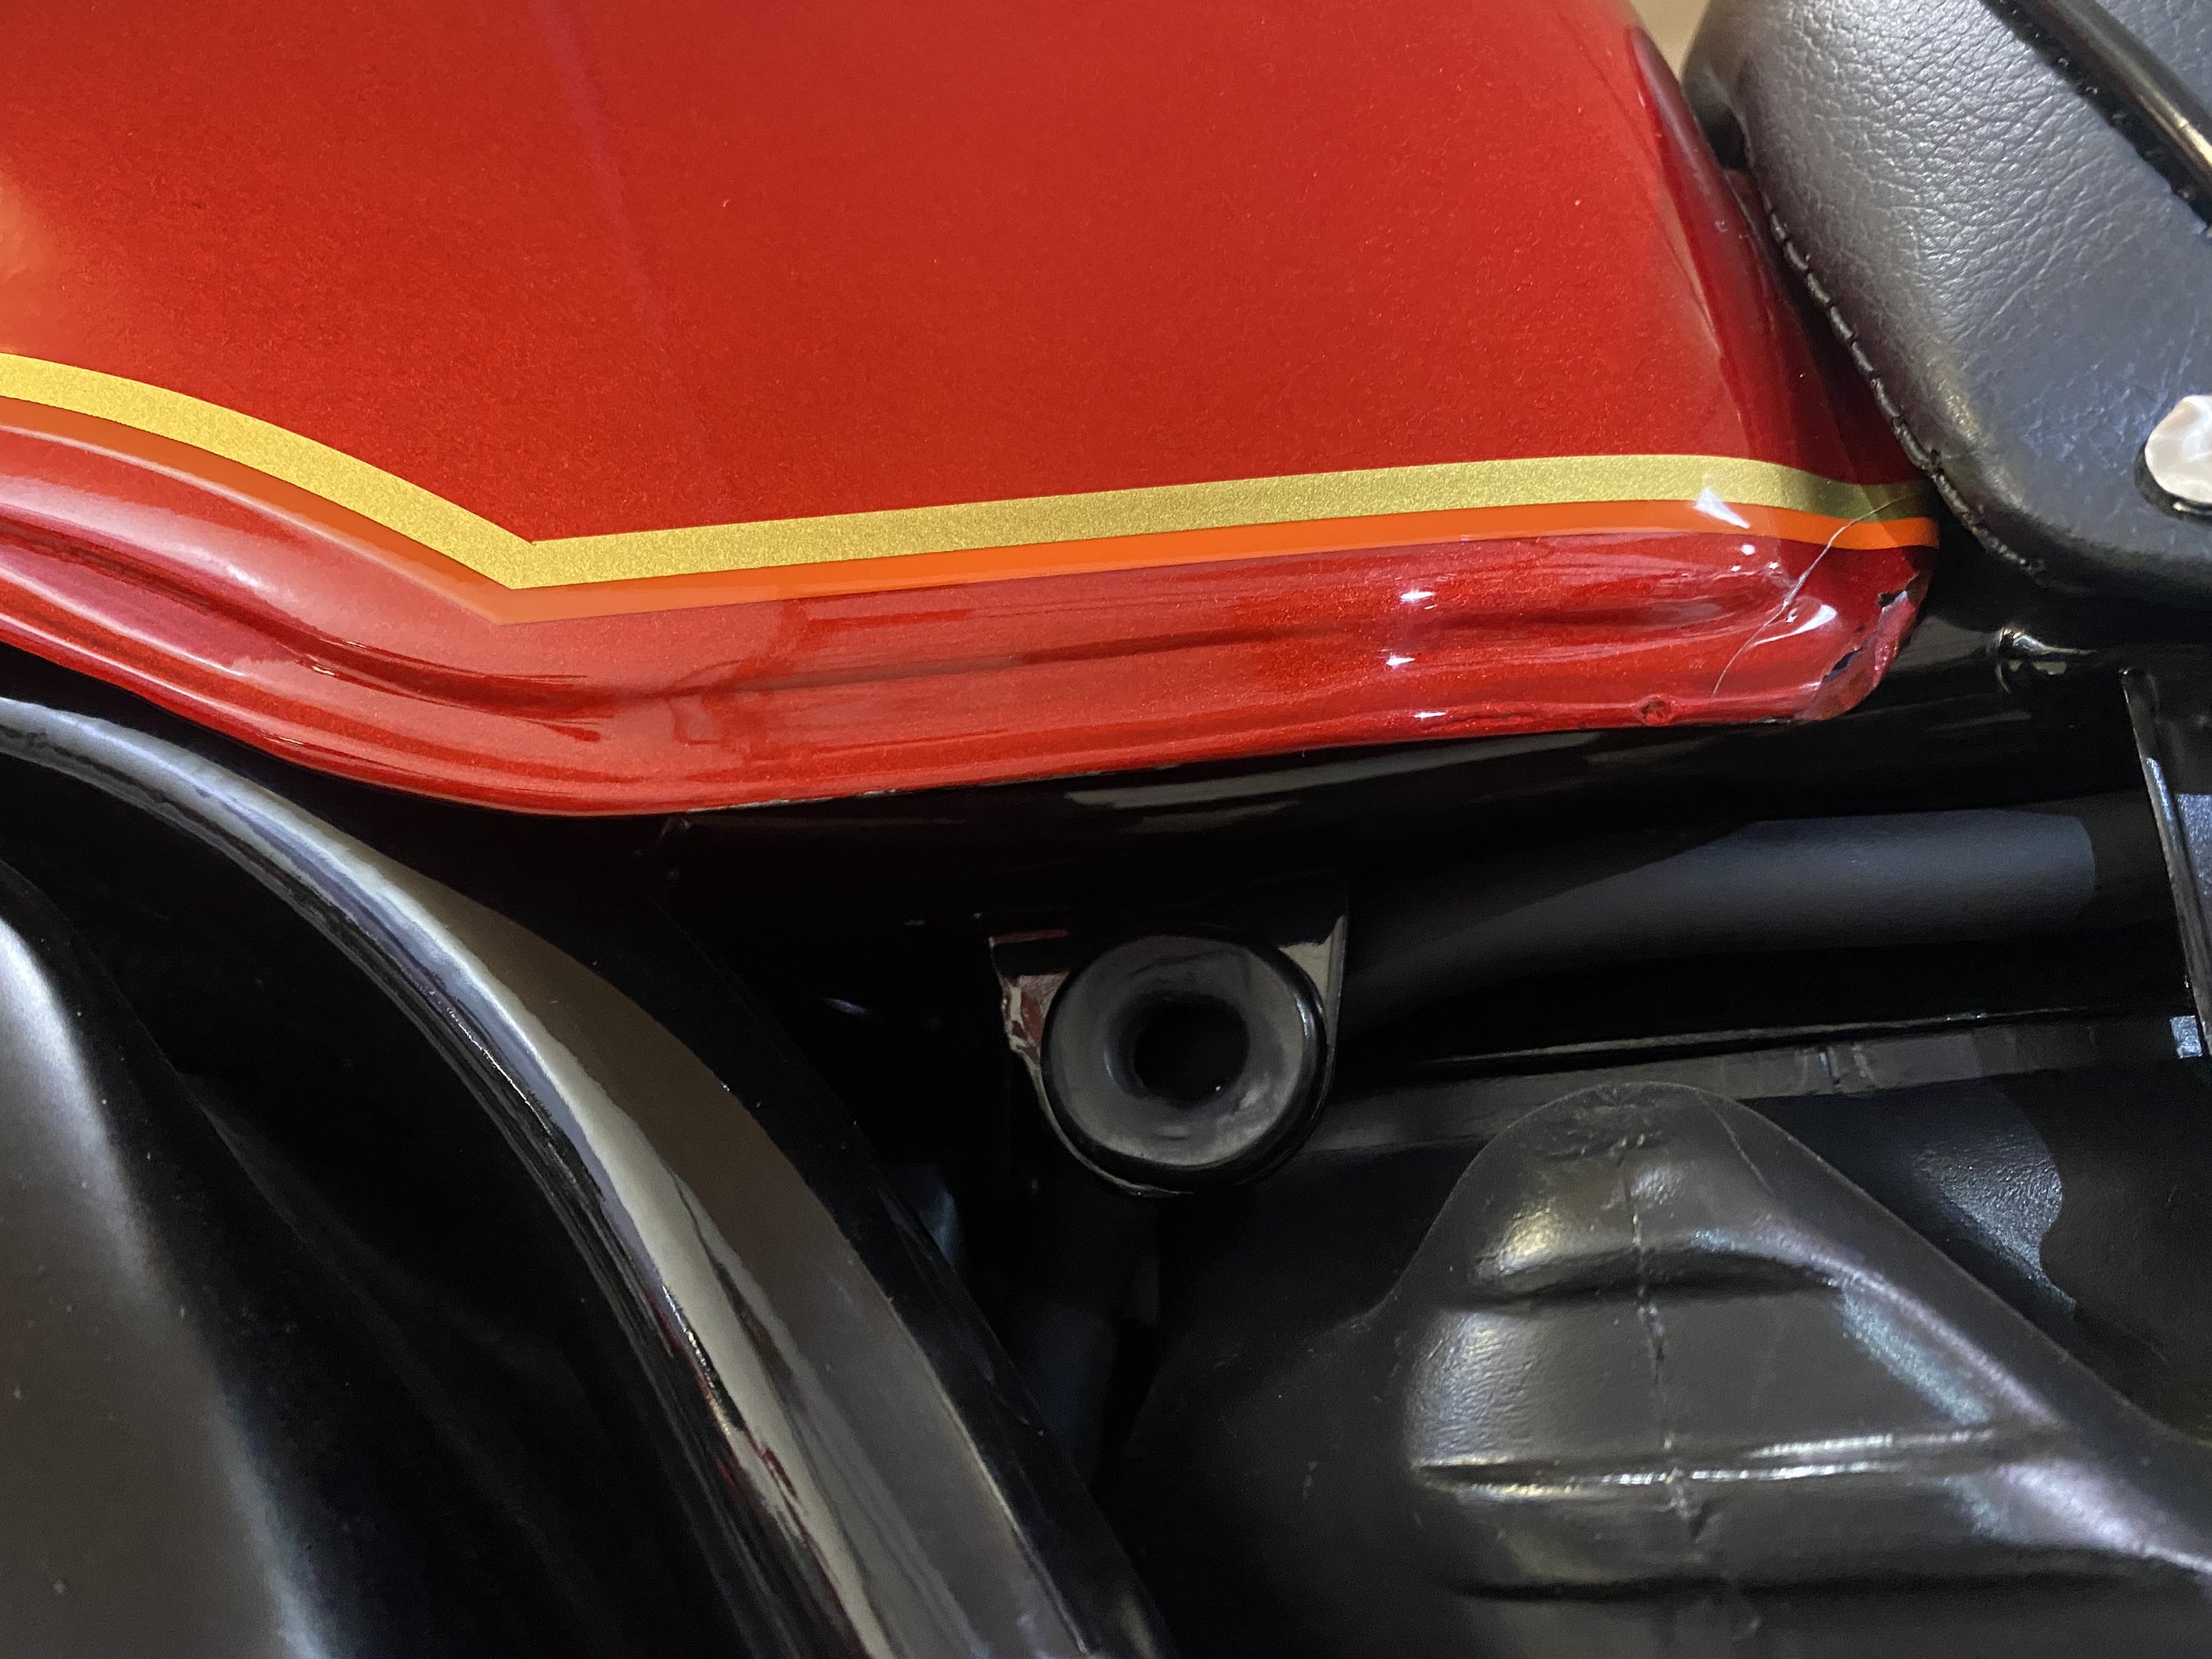
Of course I discovered the one paint flaw....
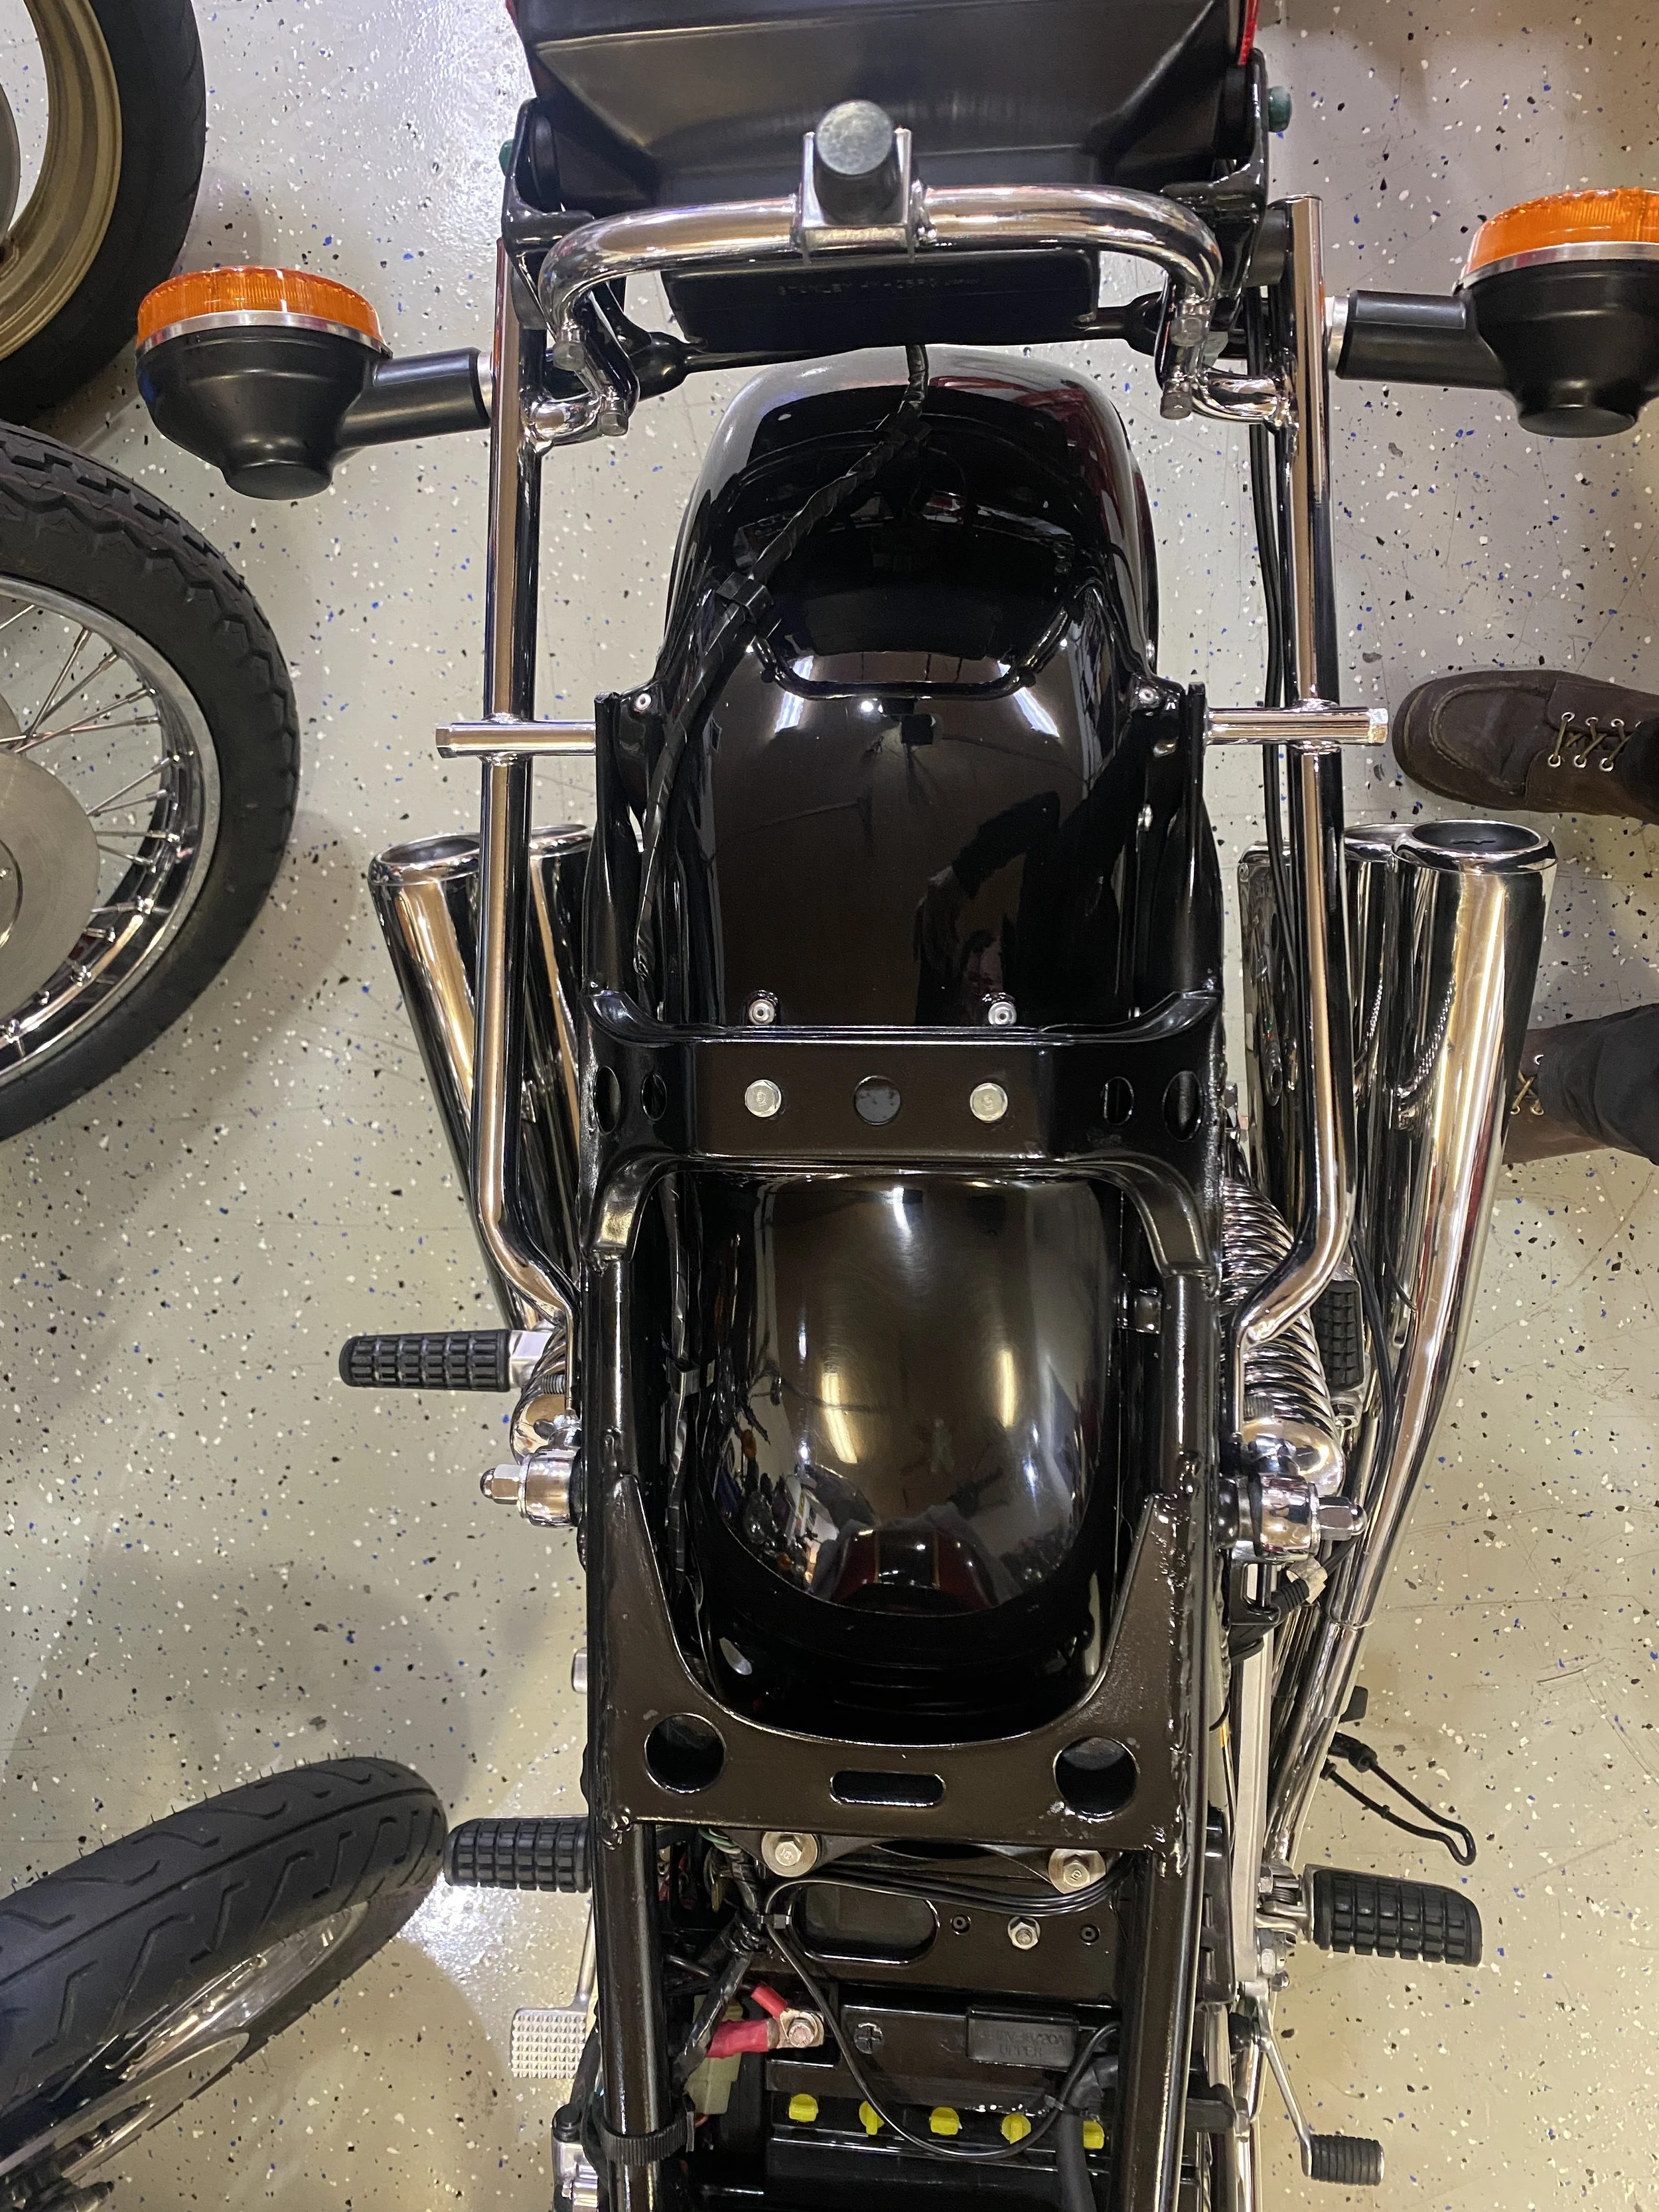
Very clean under the seat.
I was surprised that the tail was bolted onto the seat pan. Engine aside, this bike is put together in a simple fashion.
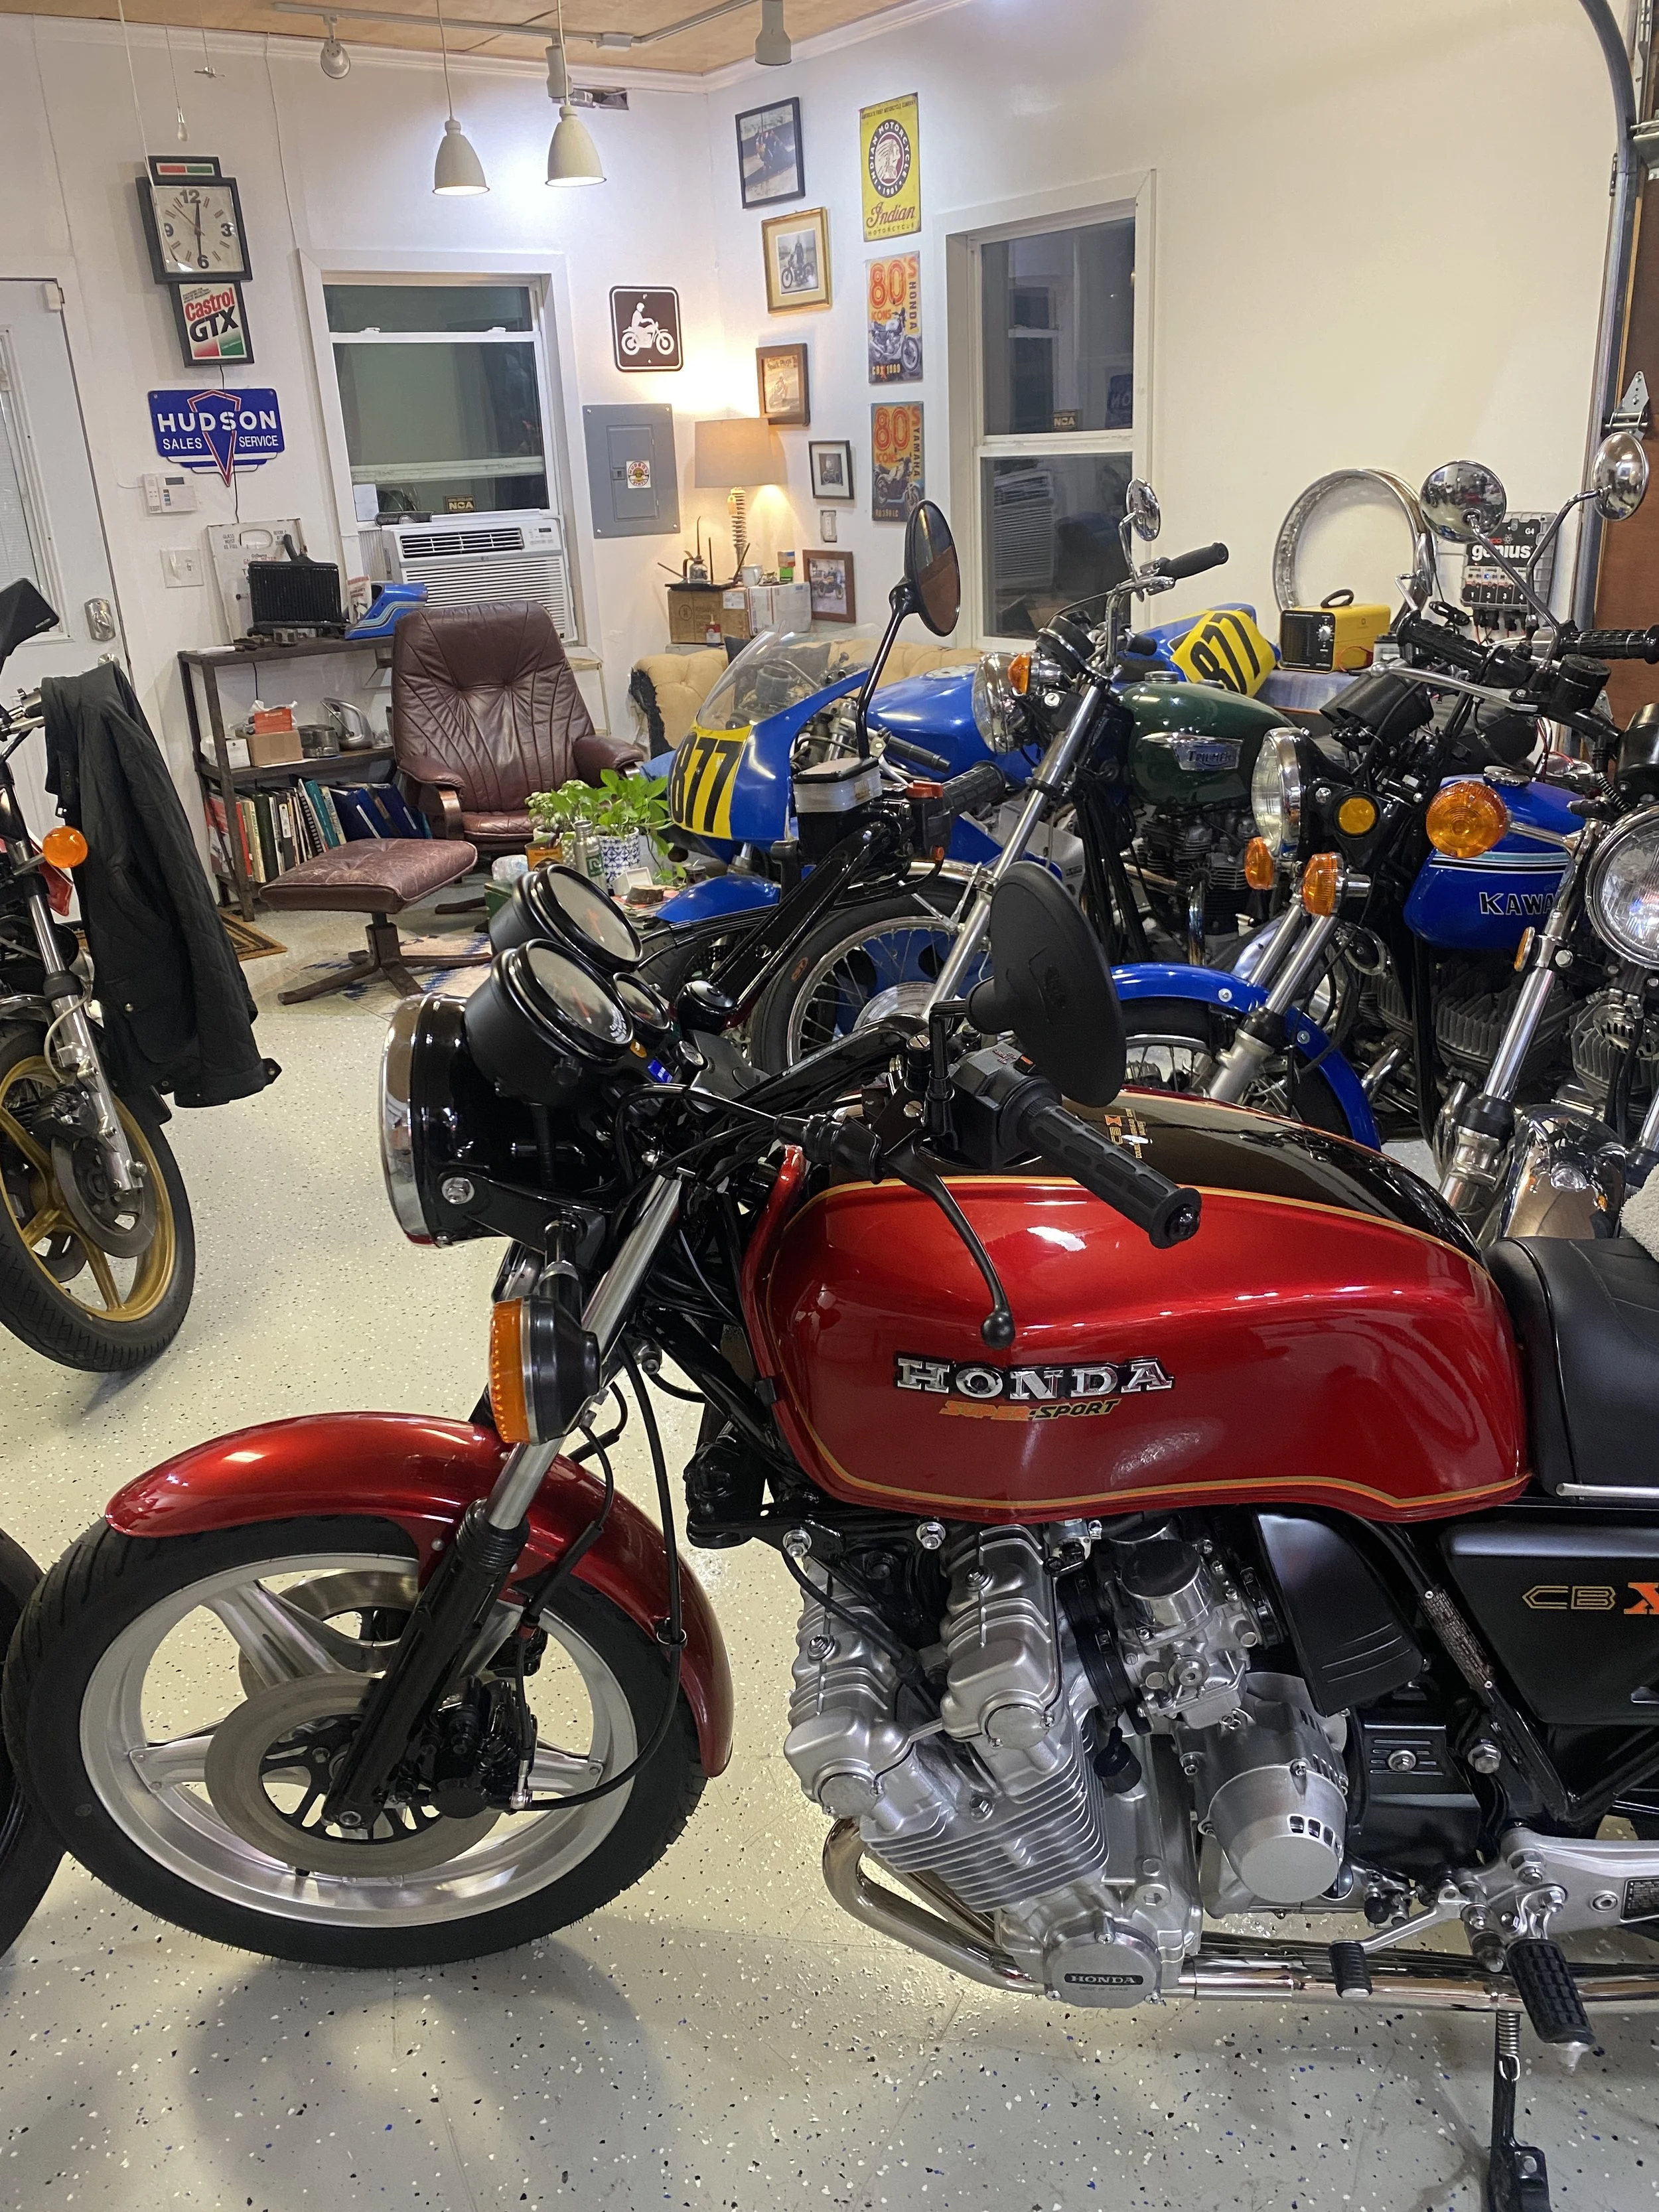
What is the point of this picture? Ah yes. Vision Board. Years ago I got a couple of those tin vintagey signs celebrating motorcycles of the 80's and I hopefully stuck them on the wall of the garage. One had an RD350LC on it. An LC came along to me soon enough........the other sign had the mighty silver CBX on it. Close enough.

don't really want an Indian tho.....not that there's anything wrong with that...

Dream it.....and it will come.....
Brake Refurbishment & Sport Kit Install
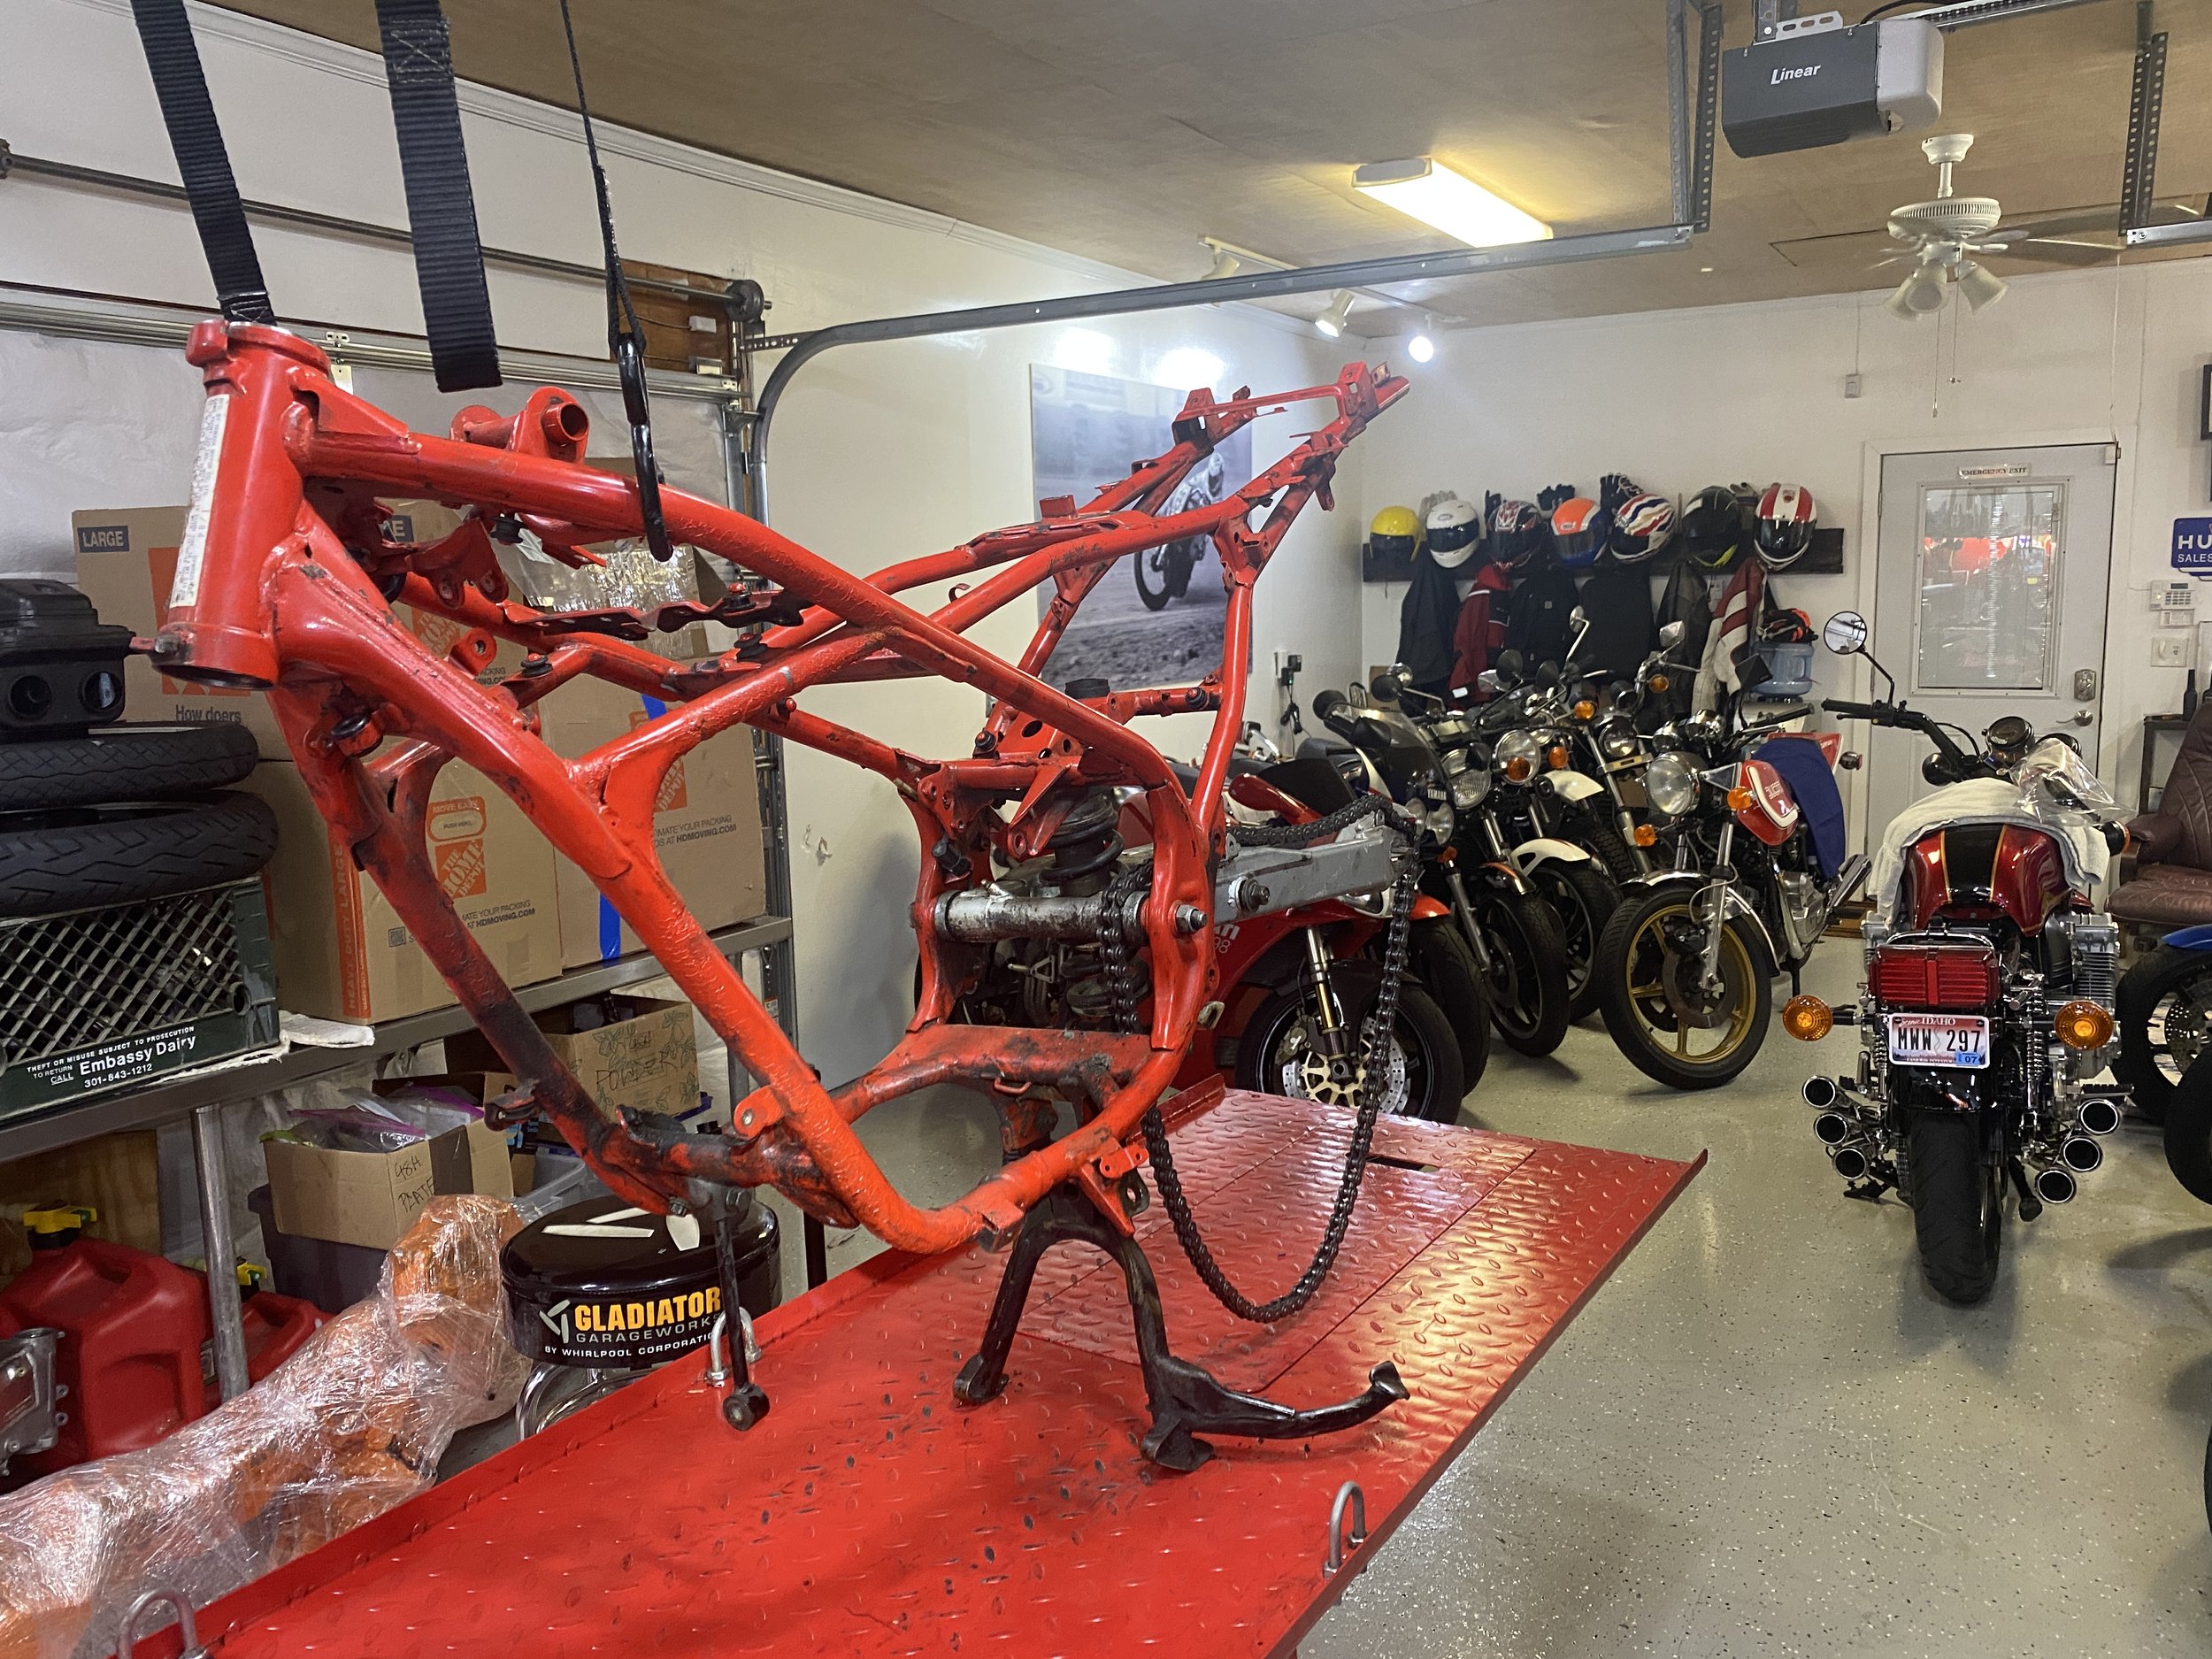
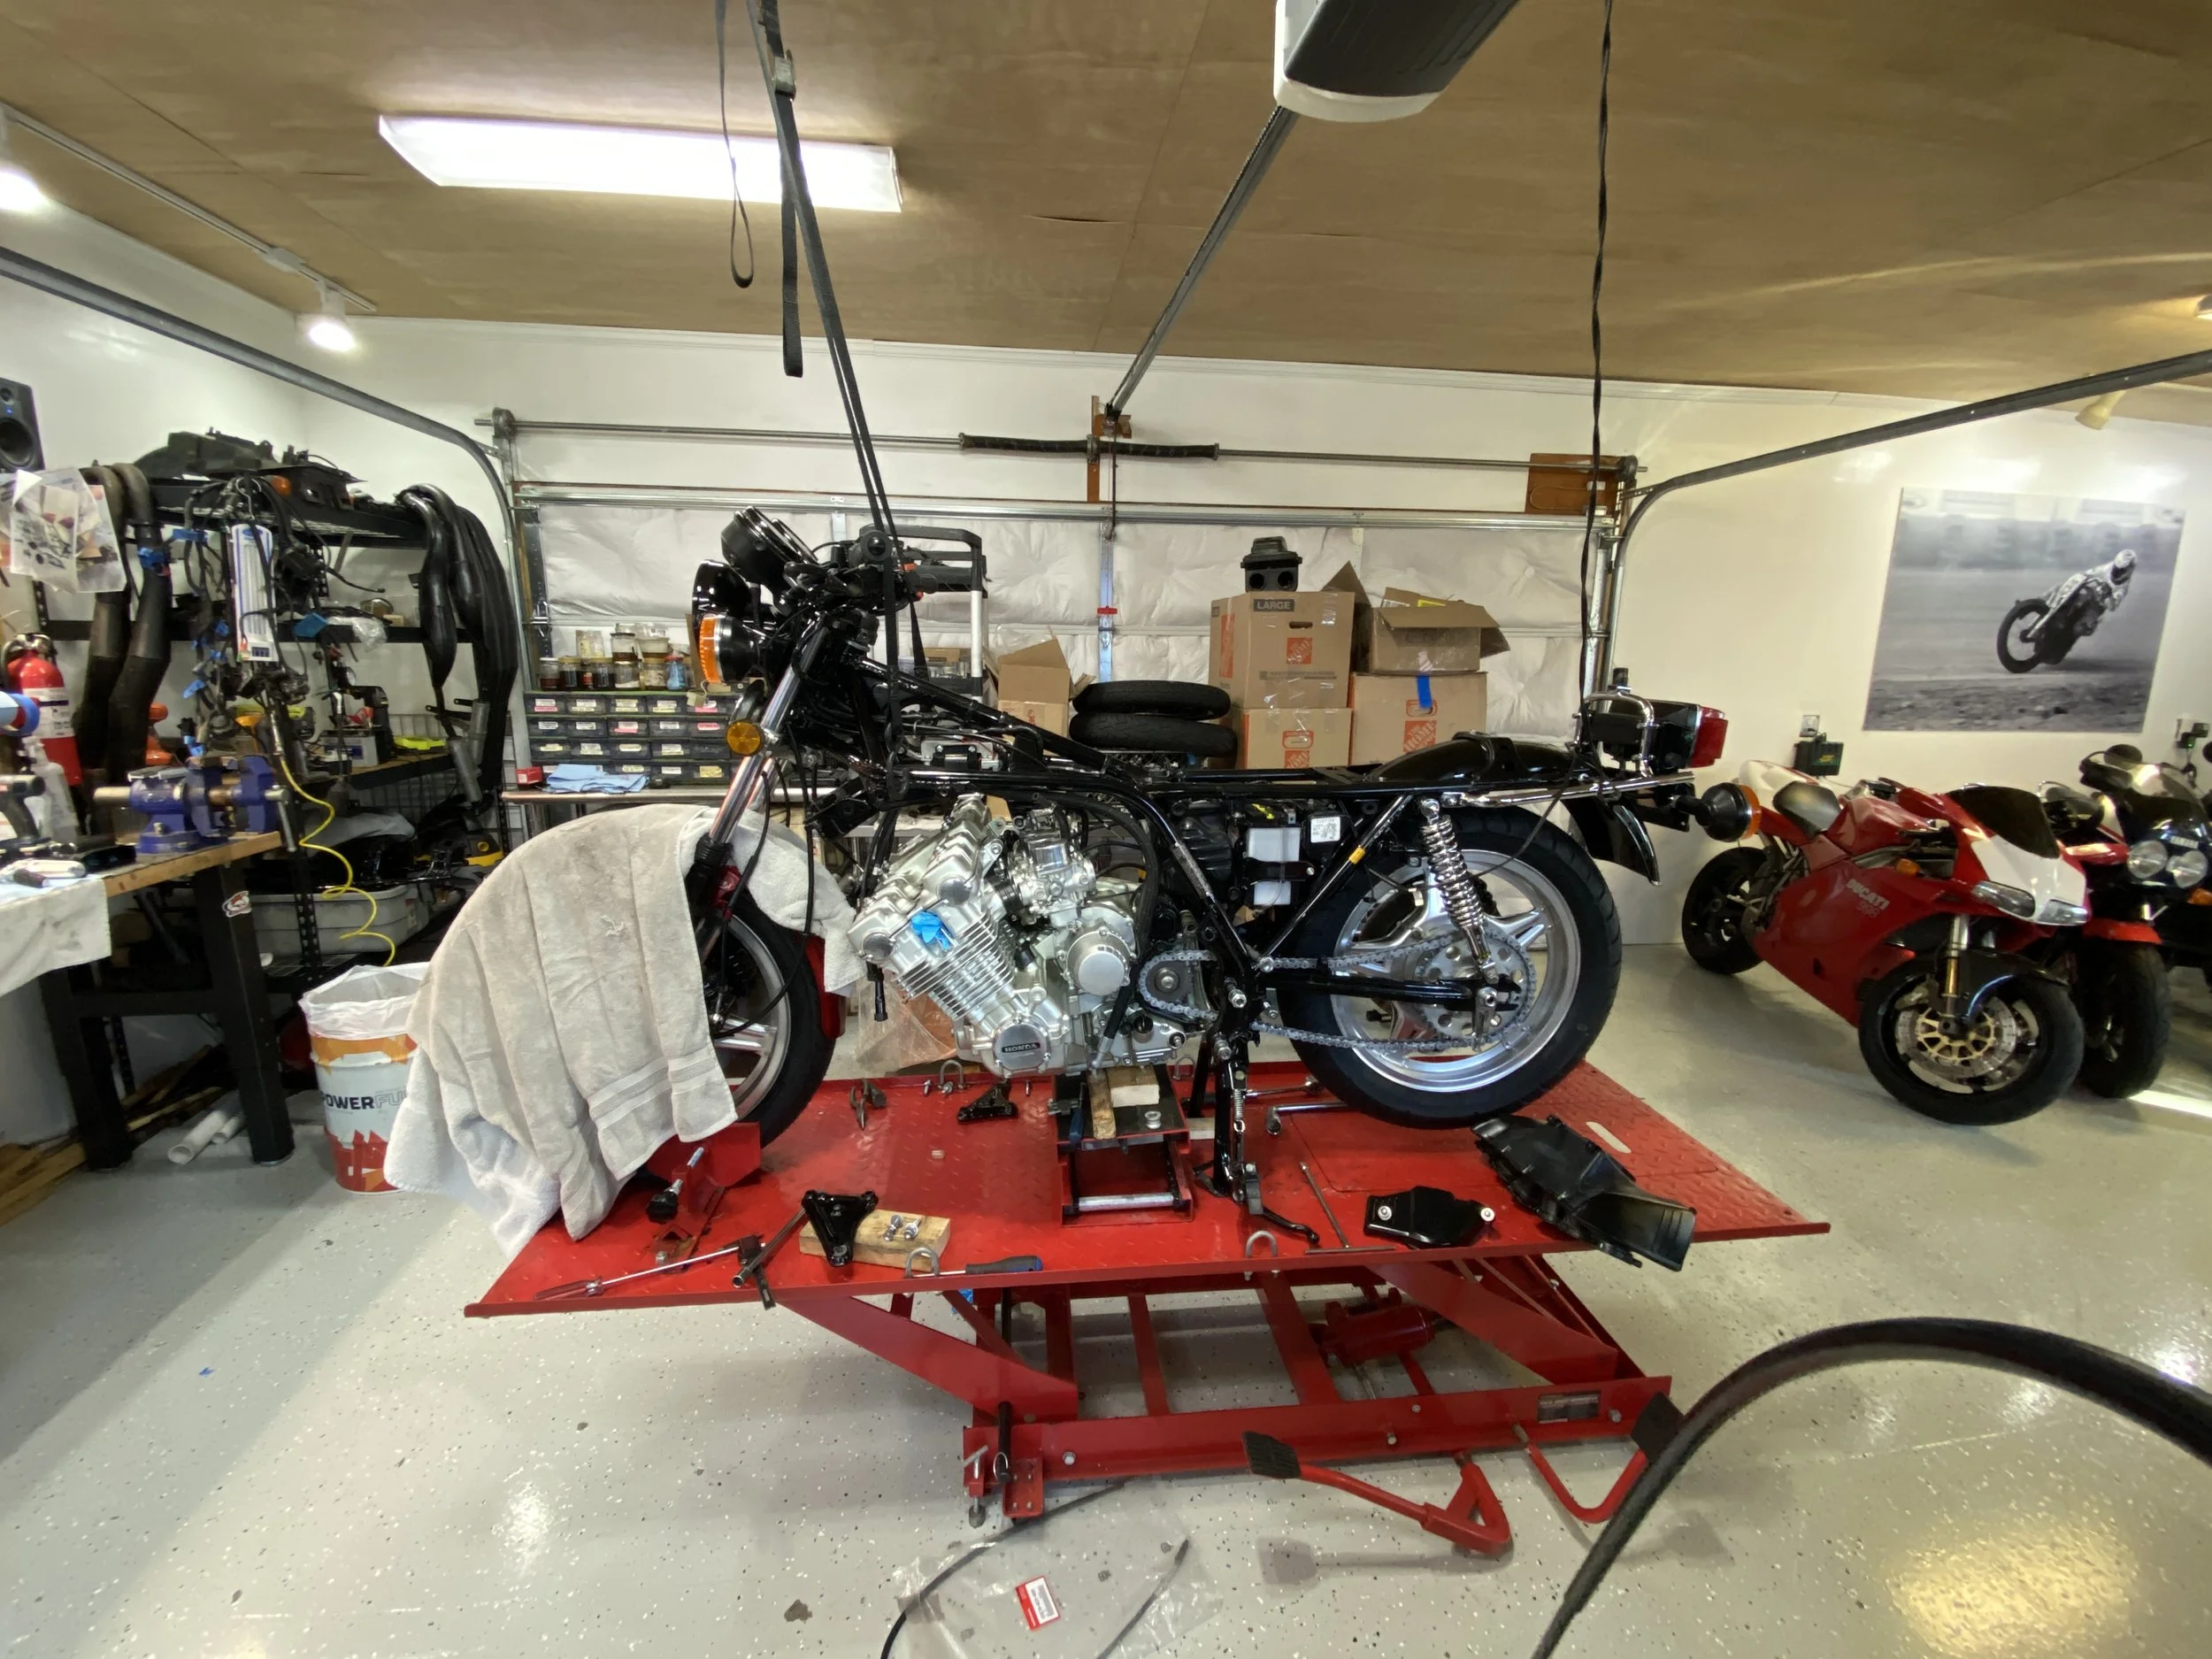
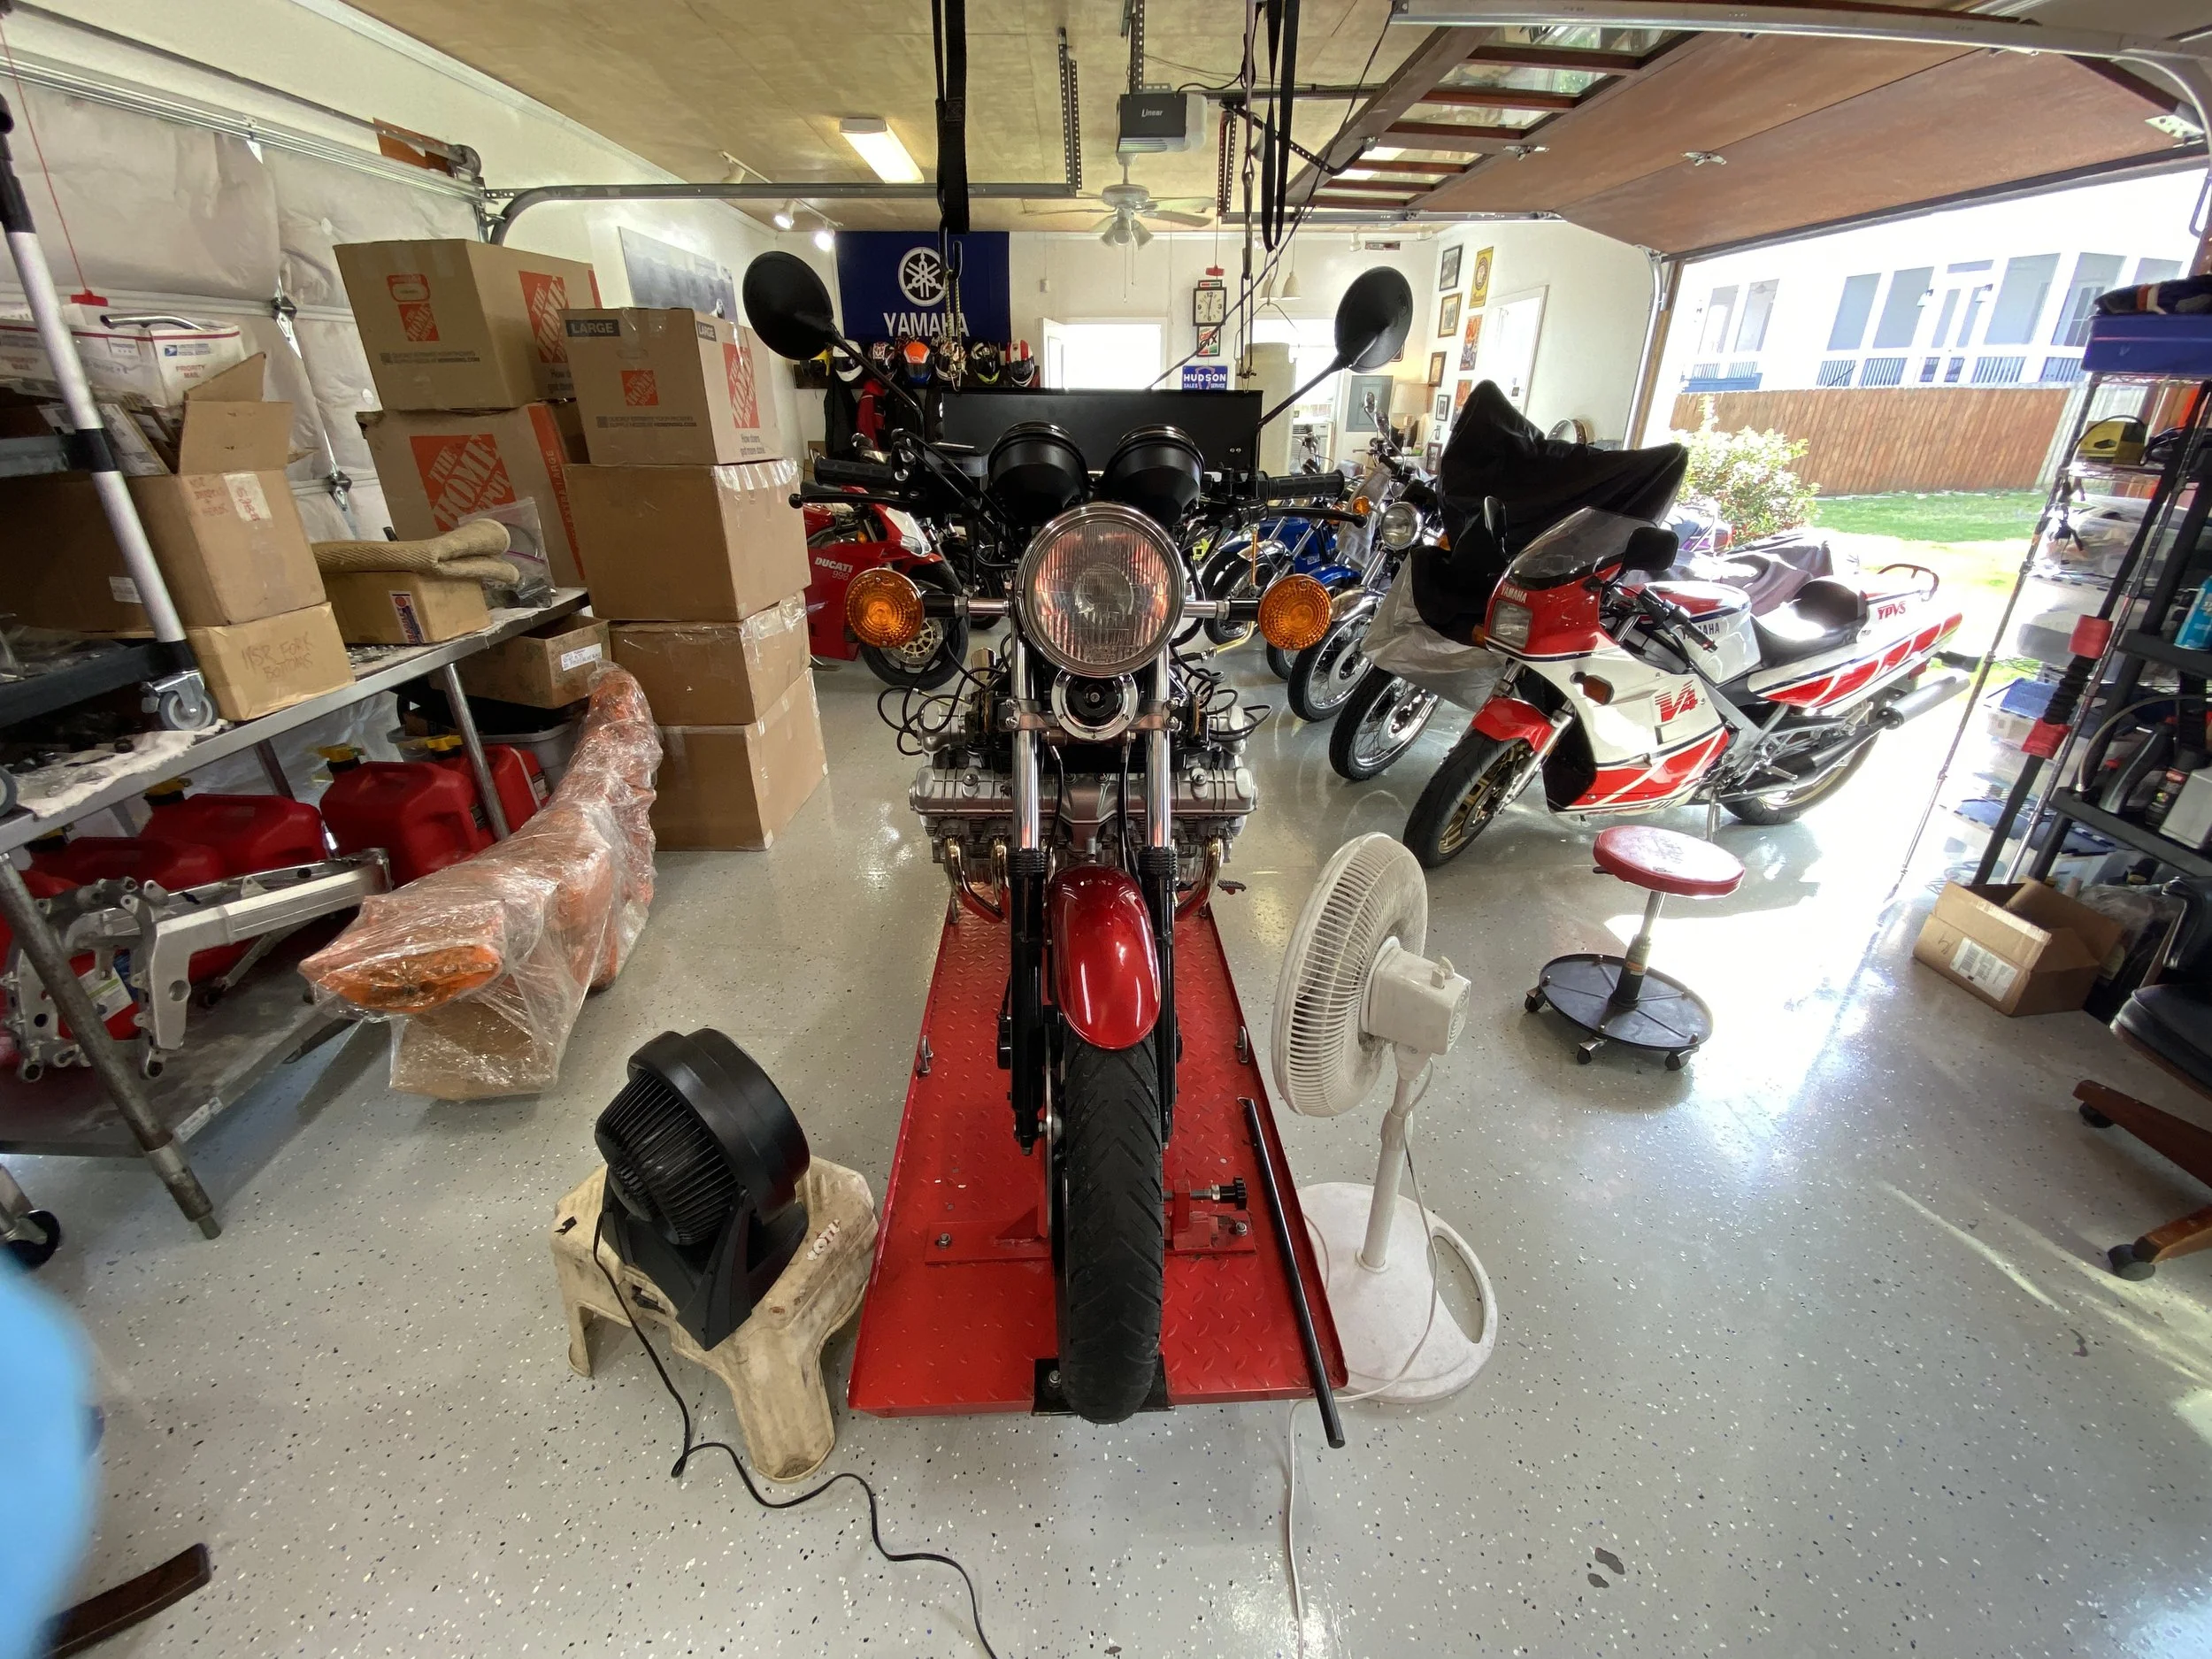
just waiting to get this off the lift!
Finally.....every day I tell myself I'll be there to start this project, but my real job is always intervening with a never ending to-do list. I'm turning into a weekend only mechanic!!
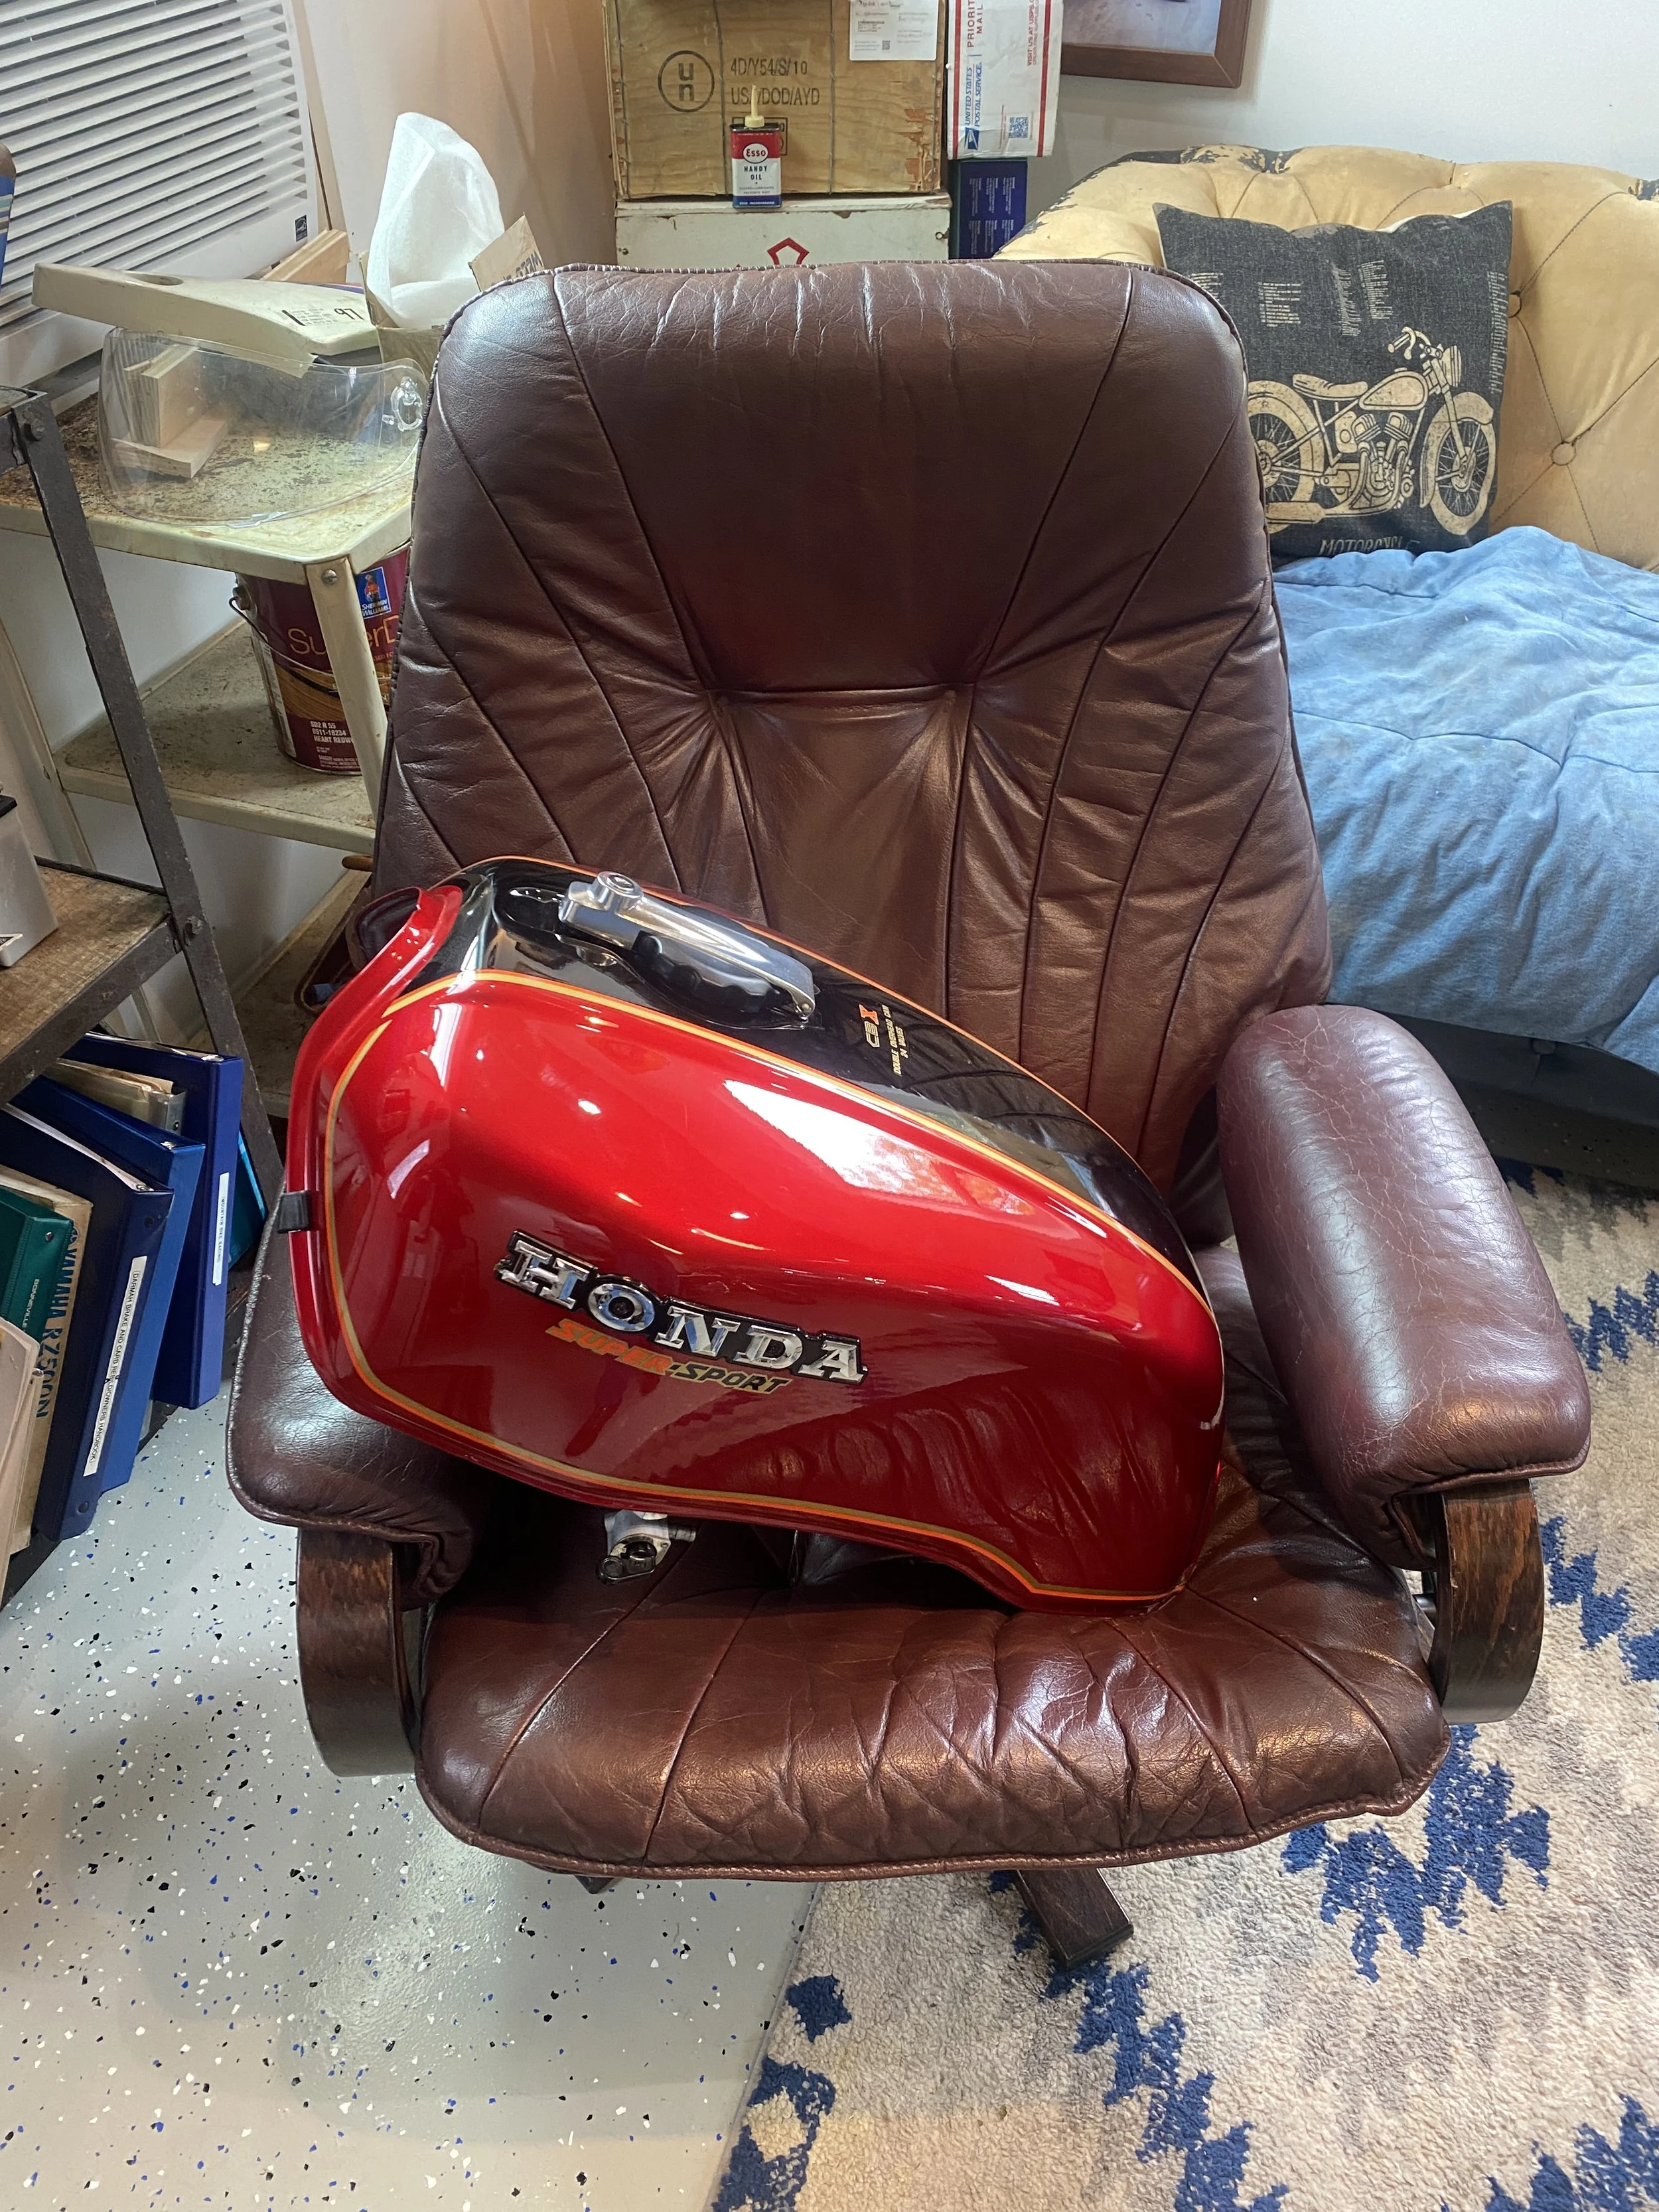
tank off.....

Clean and tidy underneath.....
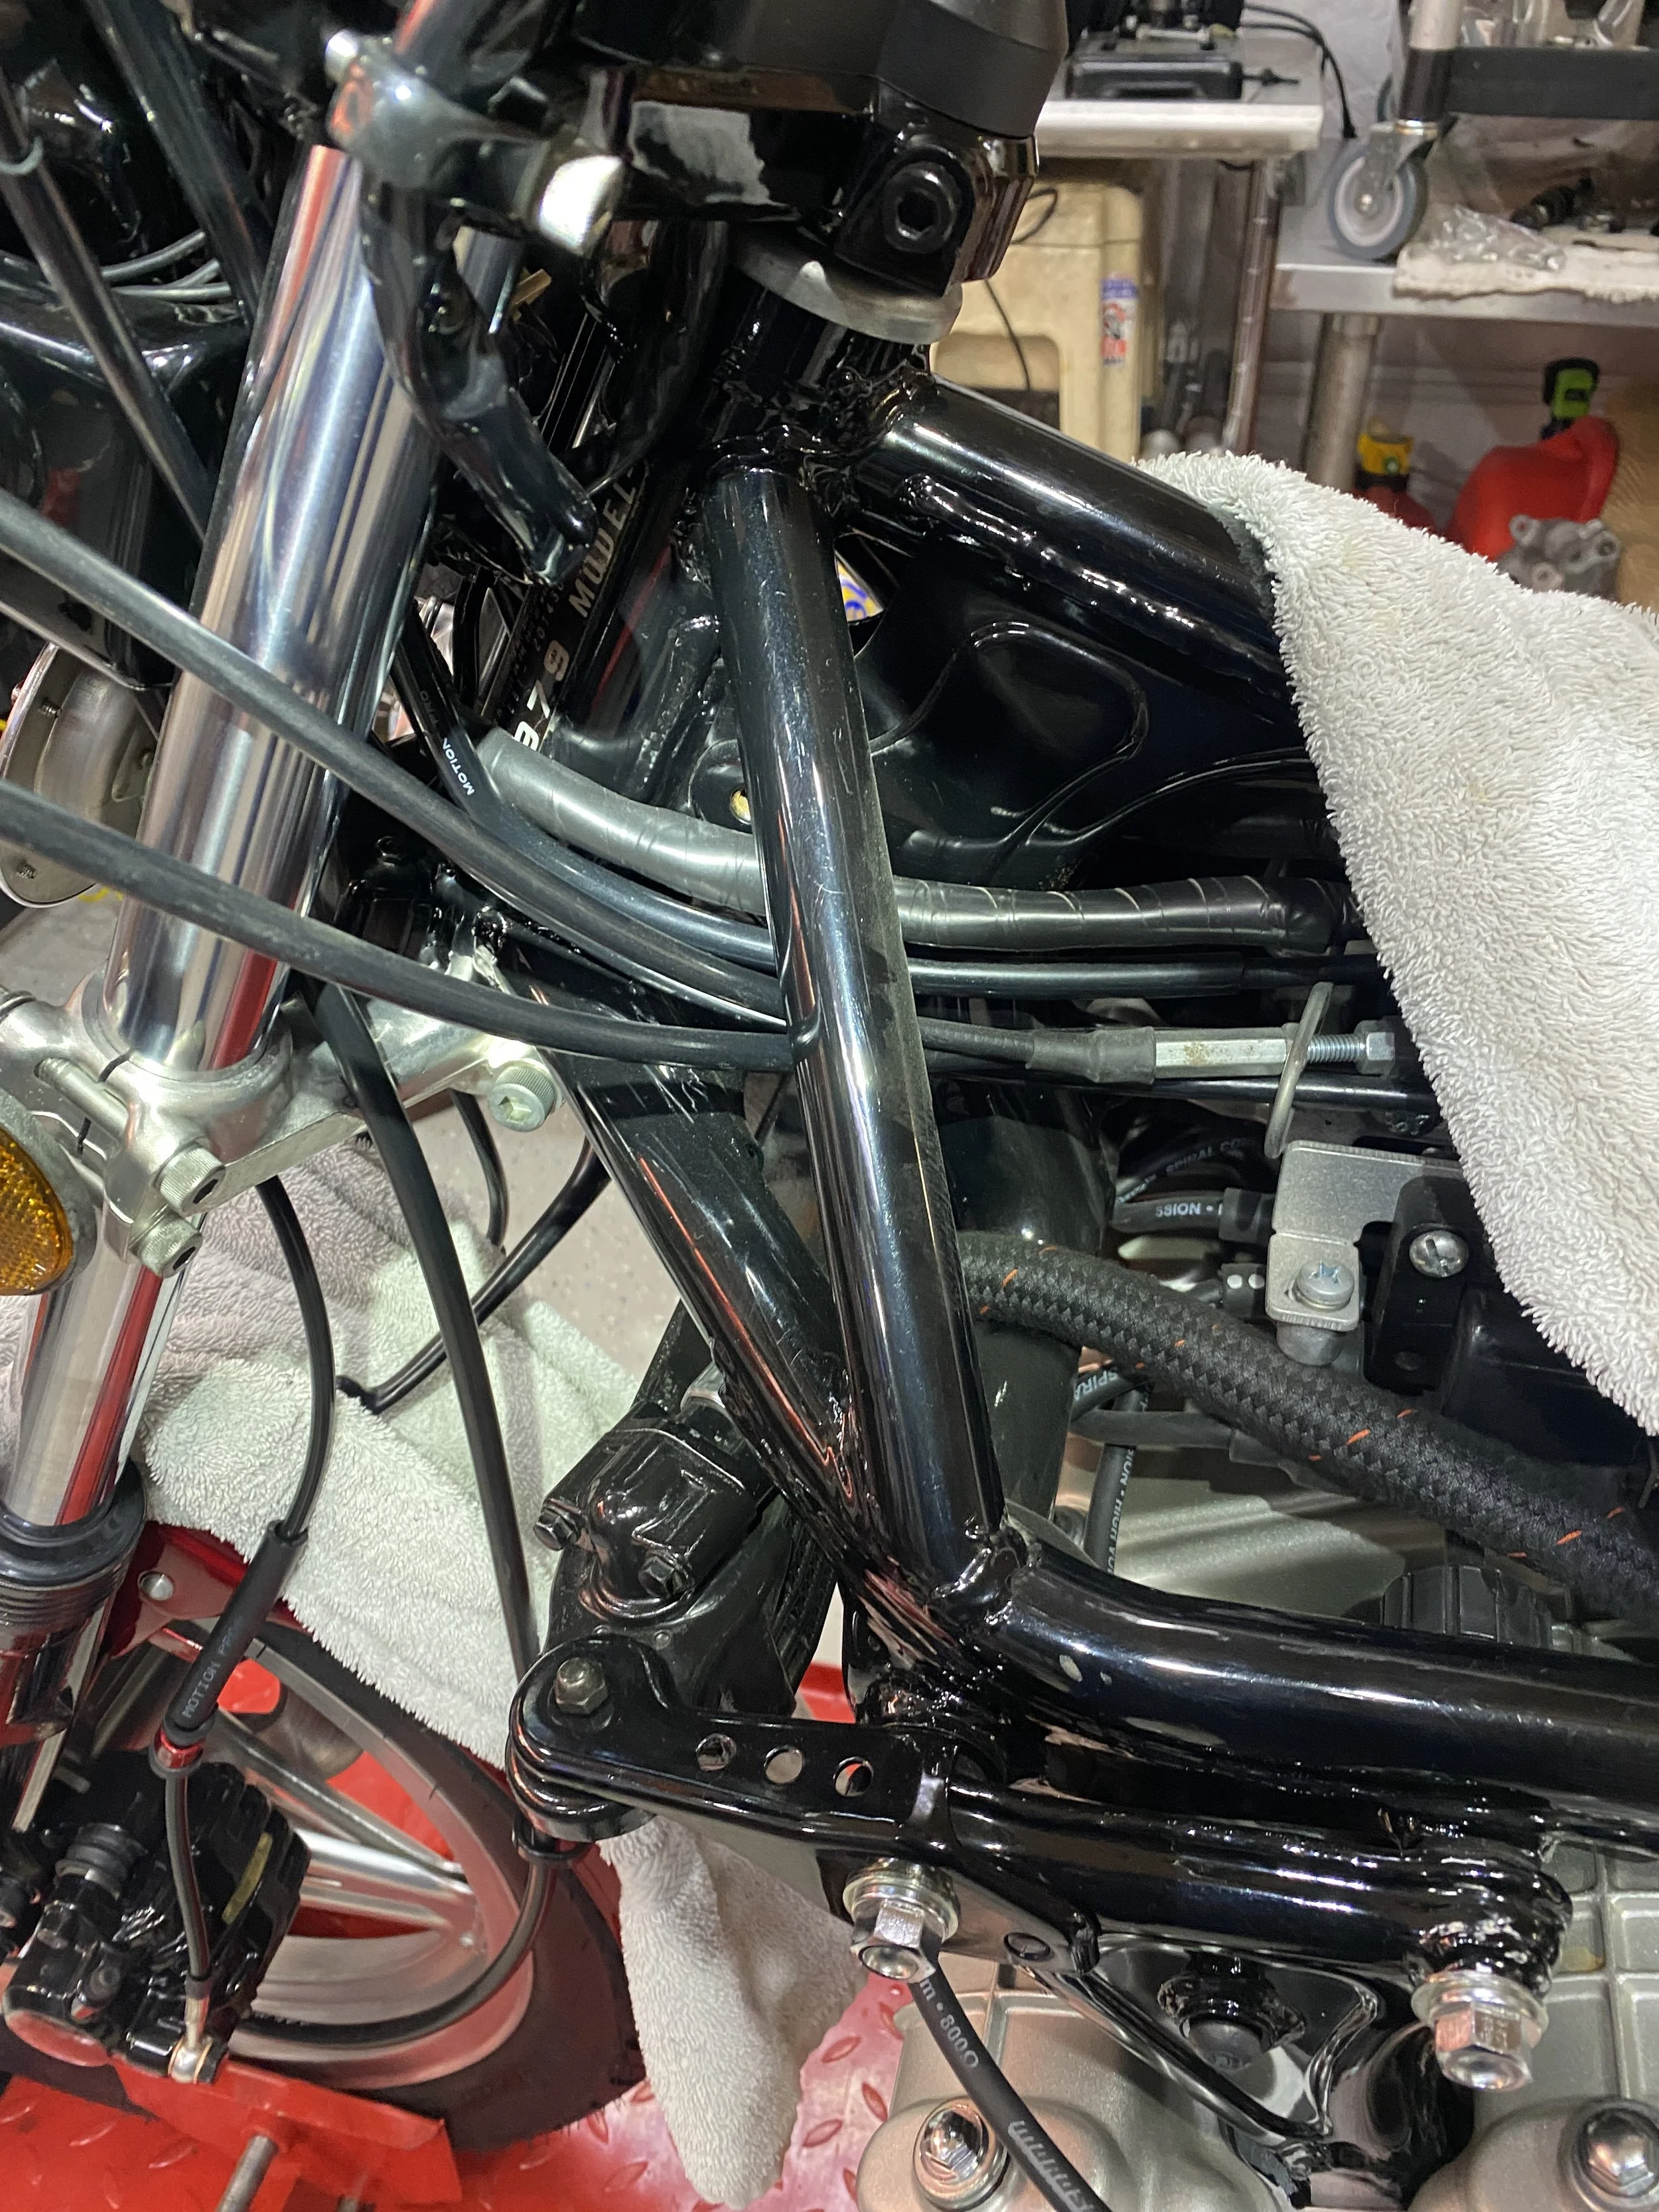
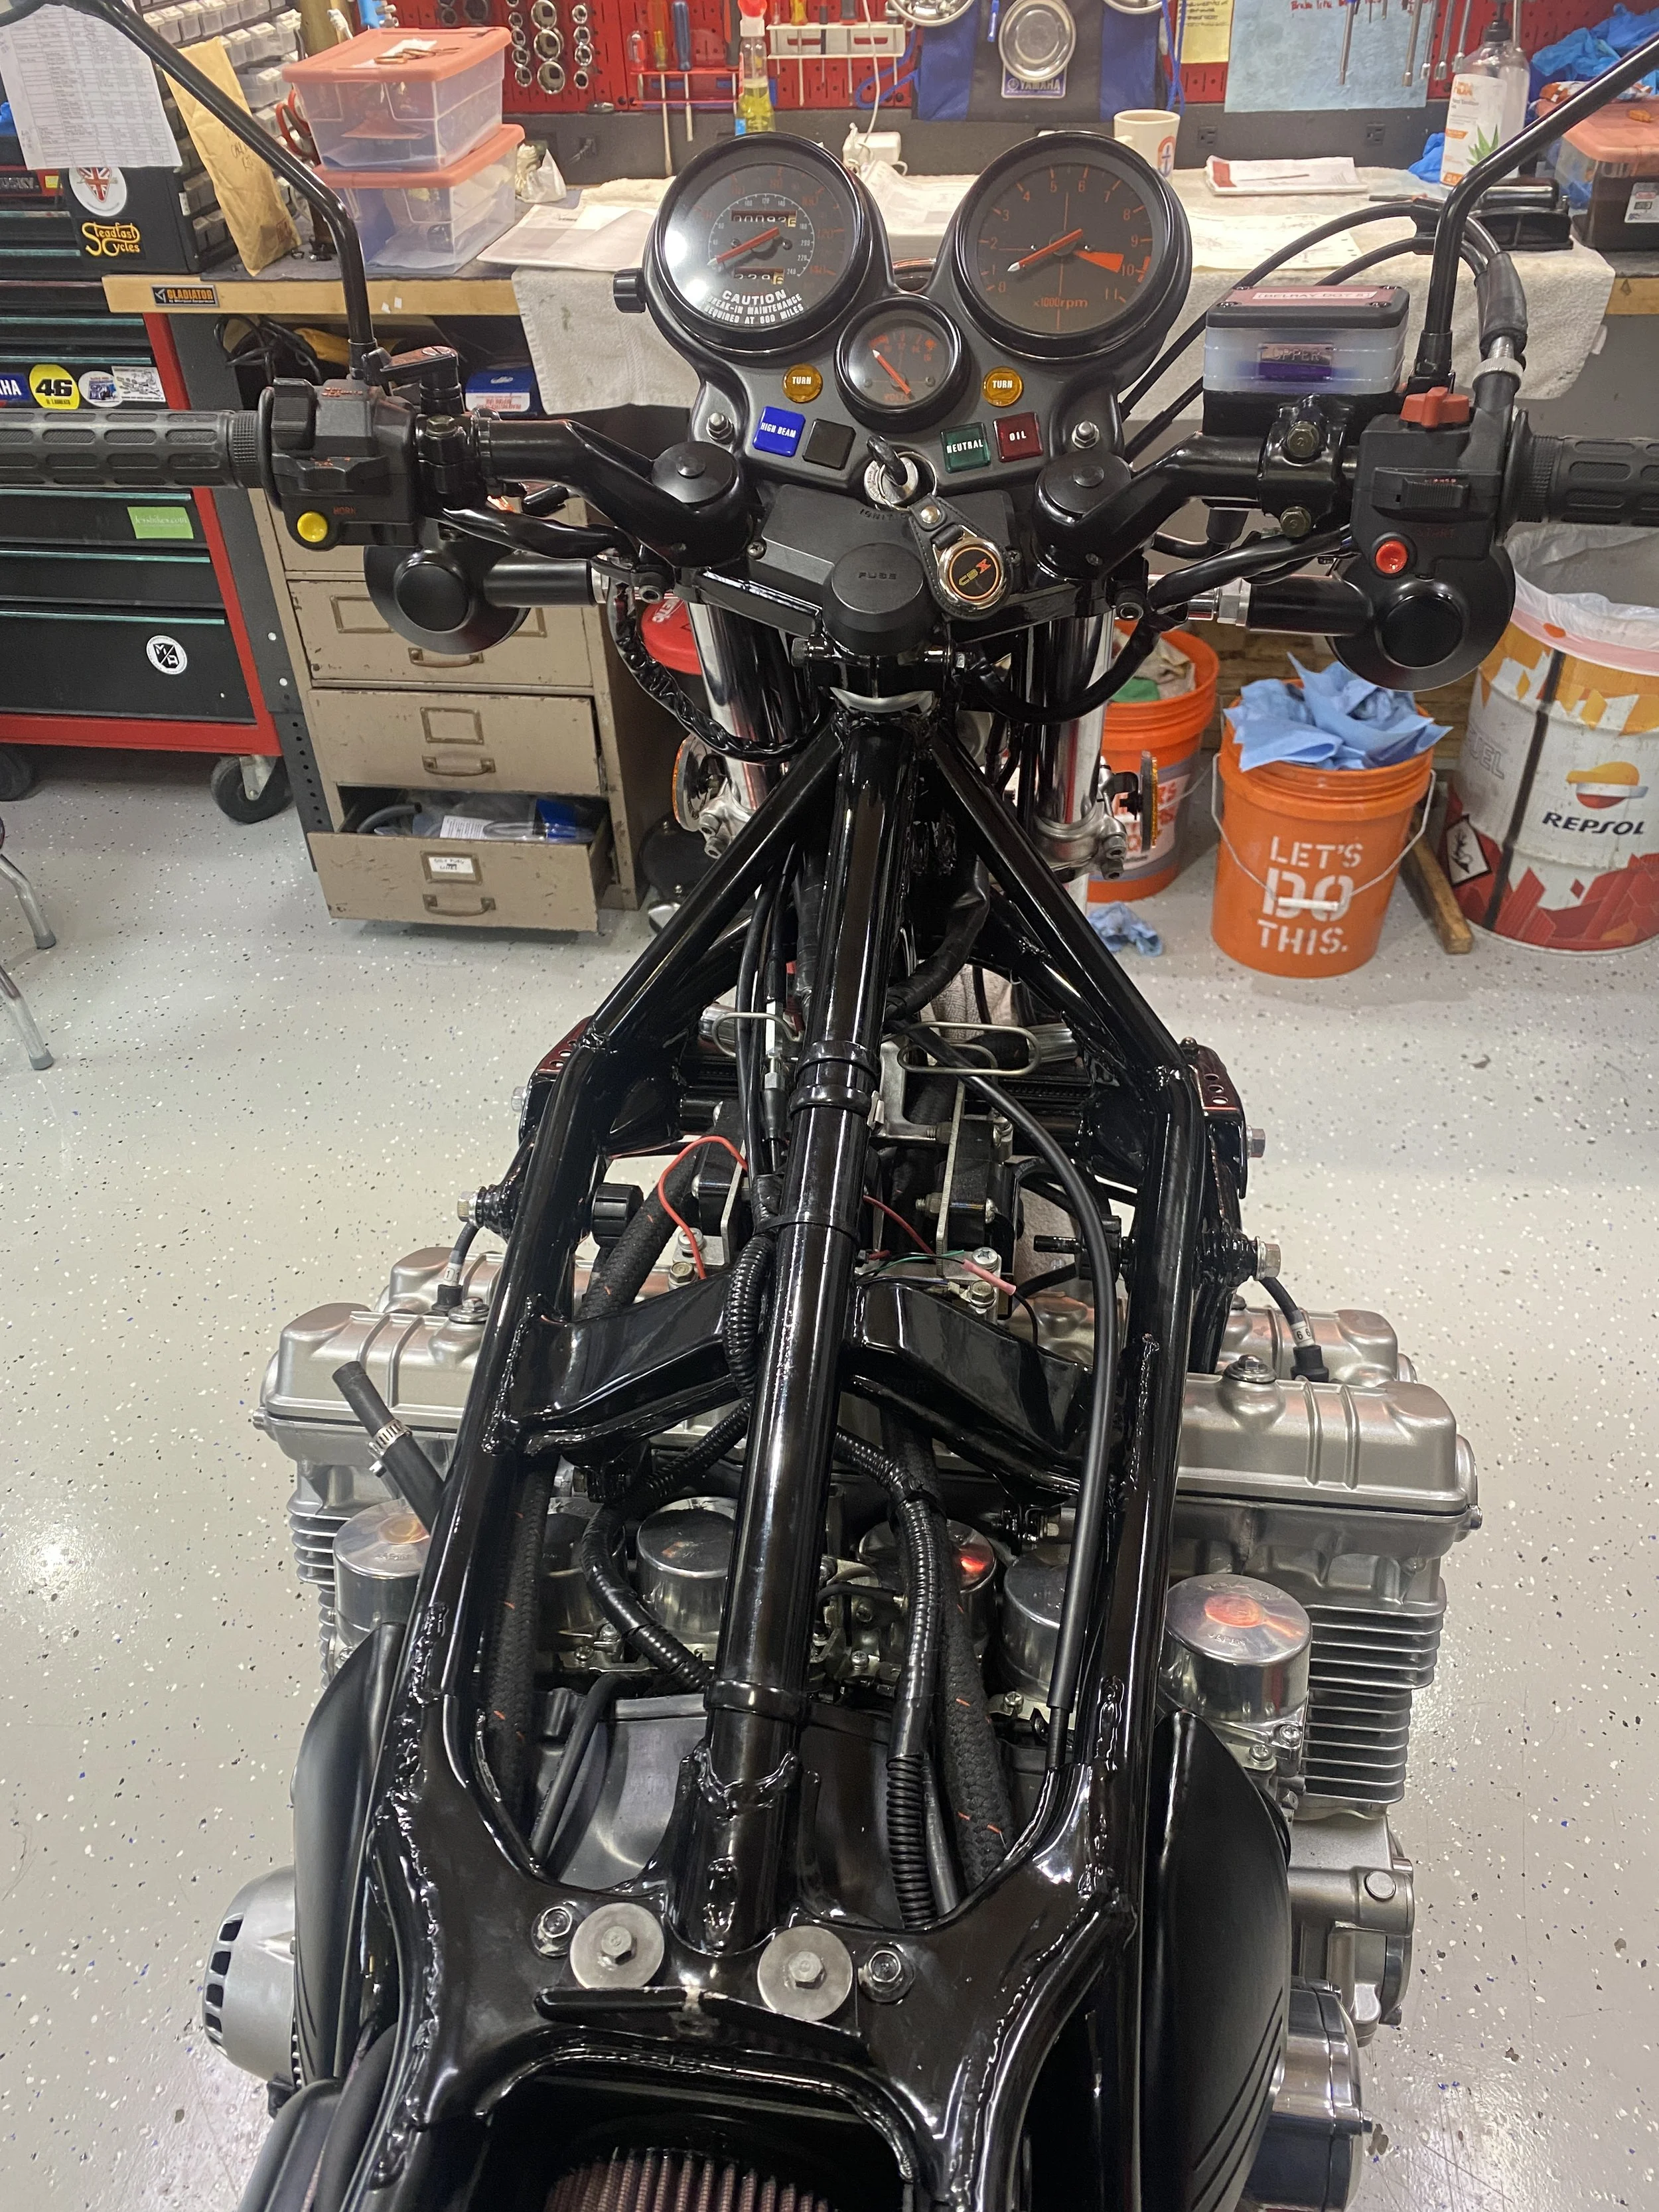
Not the most robust frame I have ever seen. A Facebook wag likened these bars to a mere bunch of black broomsticks.
Interesting....2 wires into a switch which registers when the clutch is pulled in. Wonder what part on the bike needs to know this?
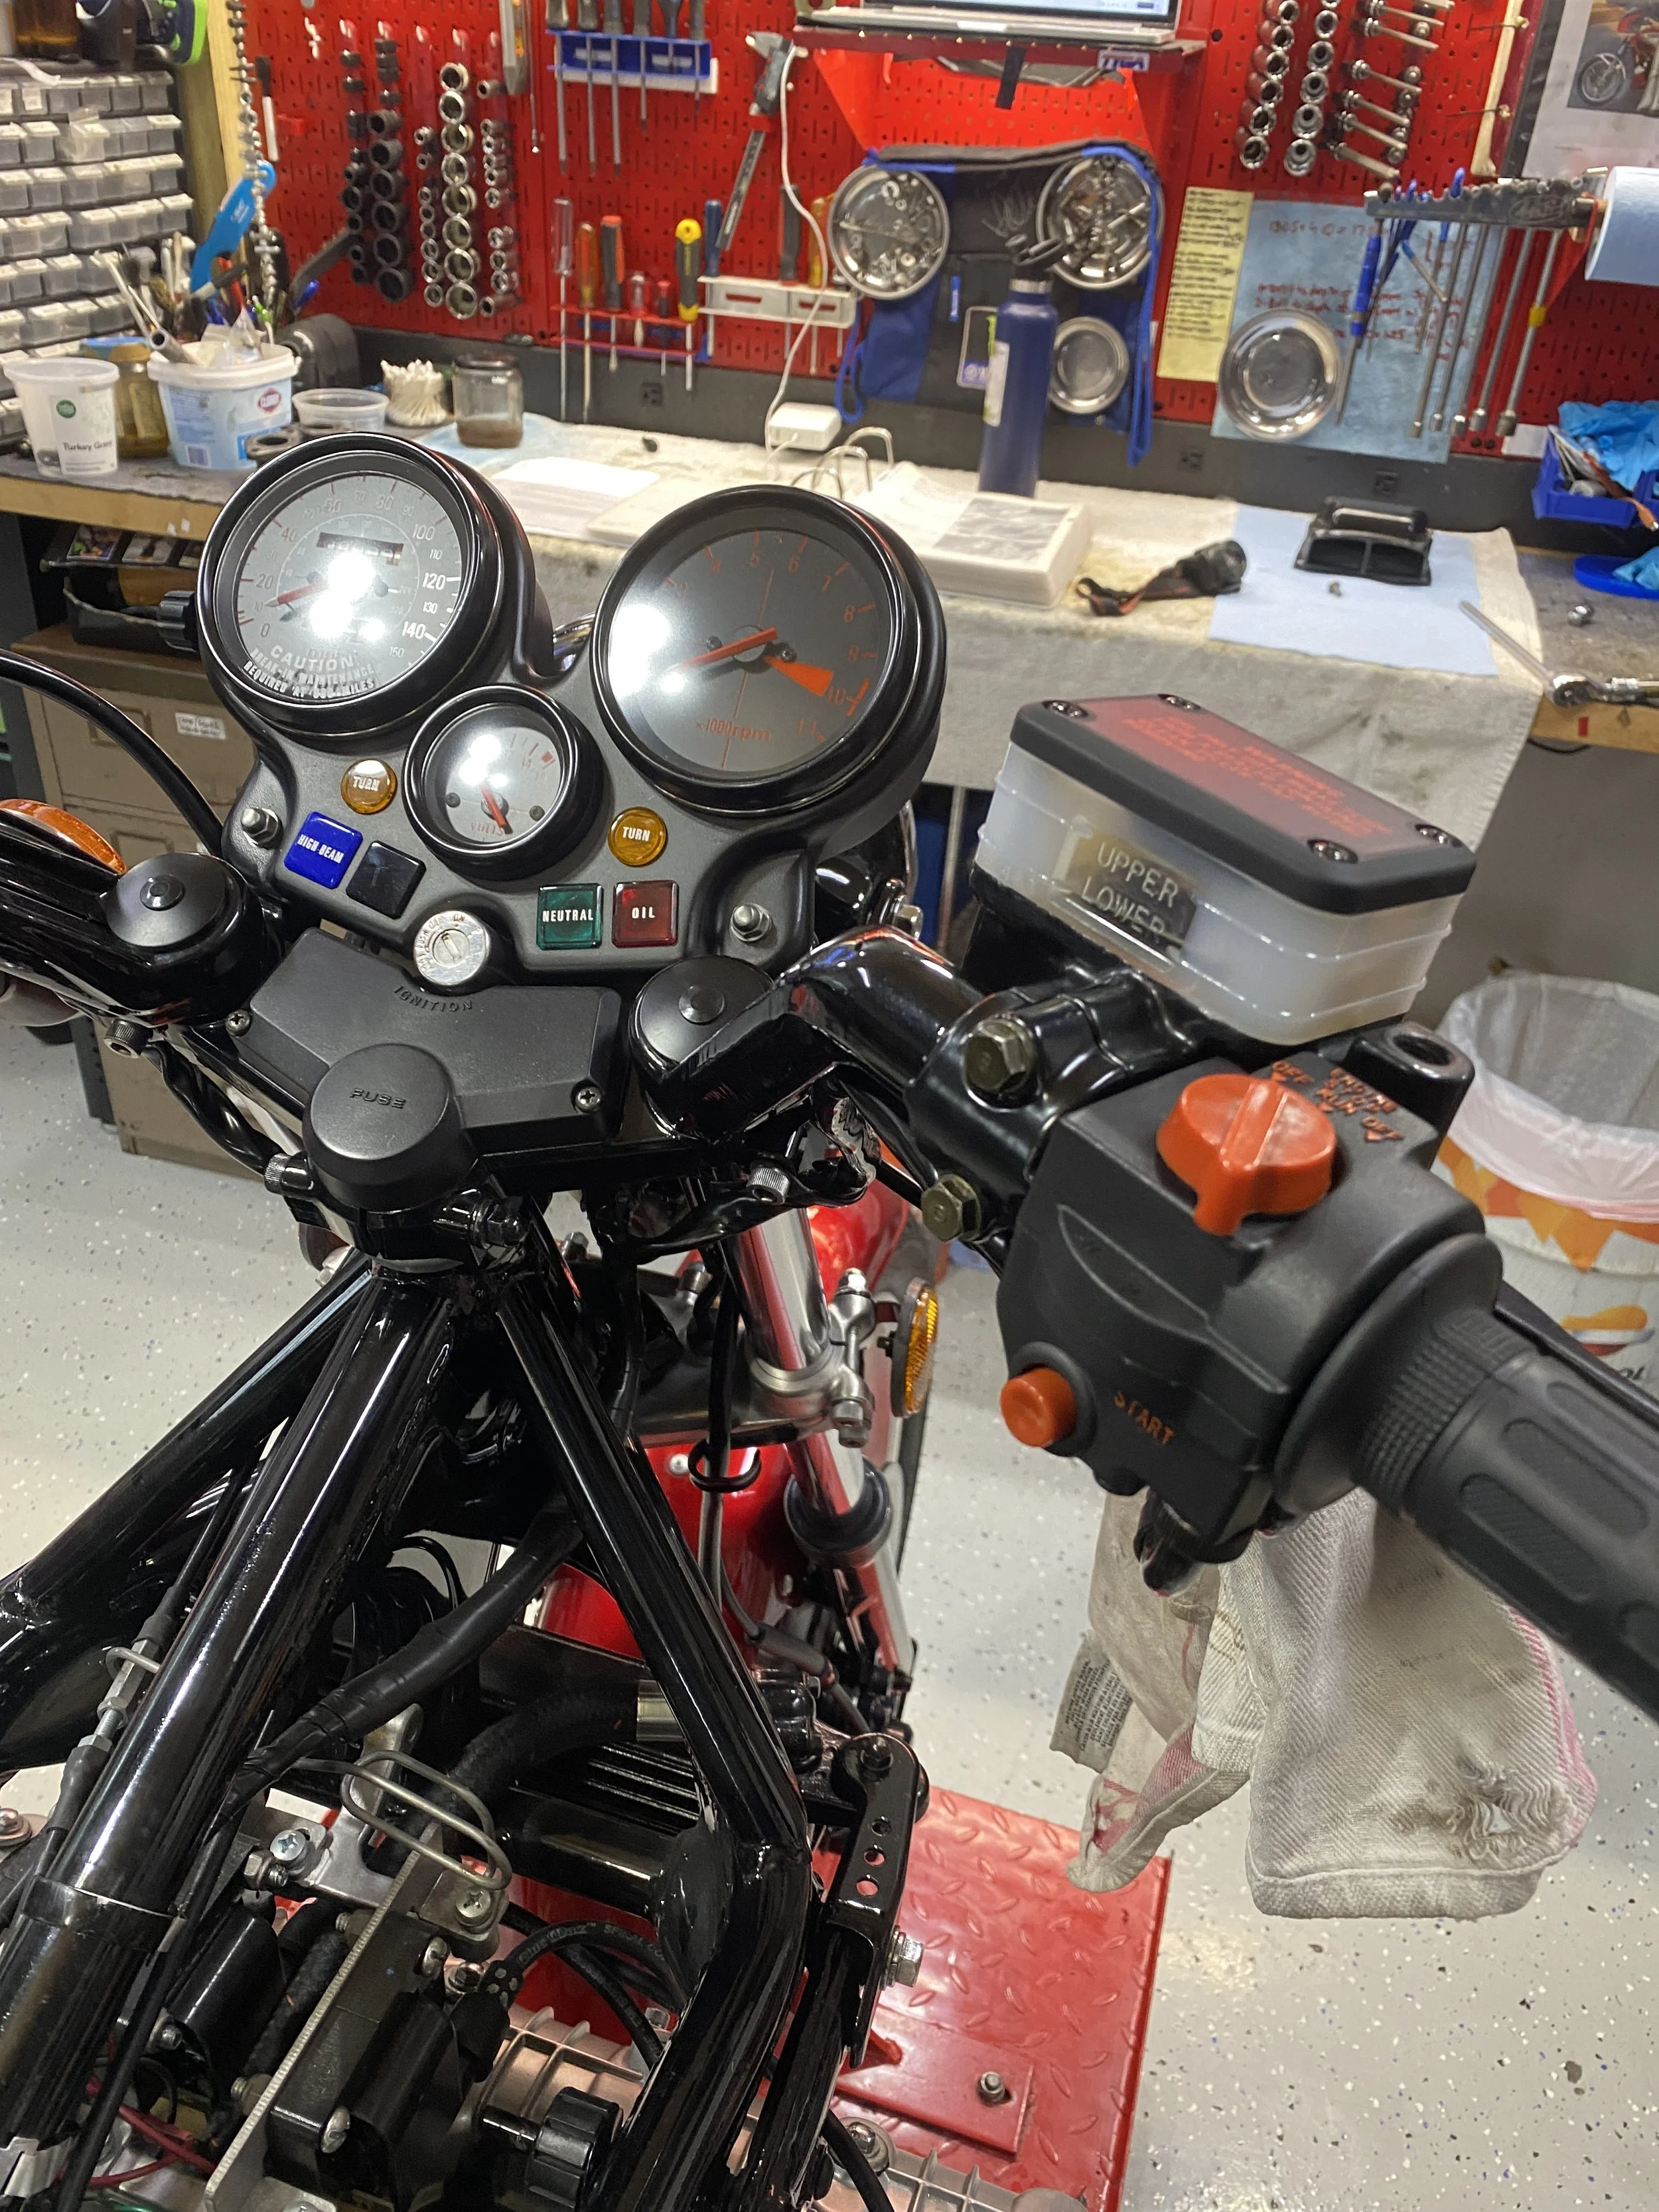
So with the new 'top exit' switchgear I notice I get the manual option to switch my lights on or off. The installed headlight however does not have a bulb for the P option. A useless option from the past.
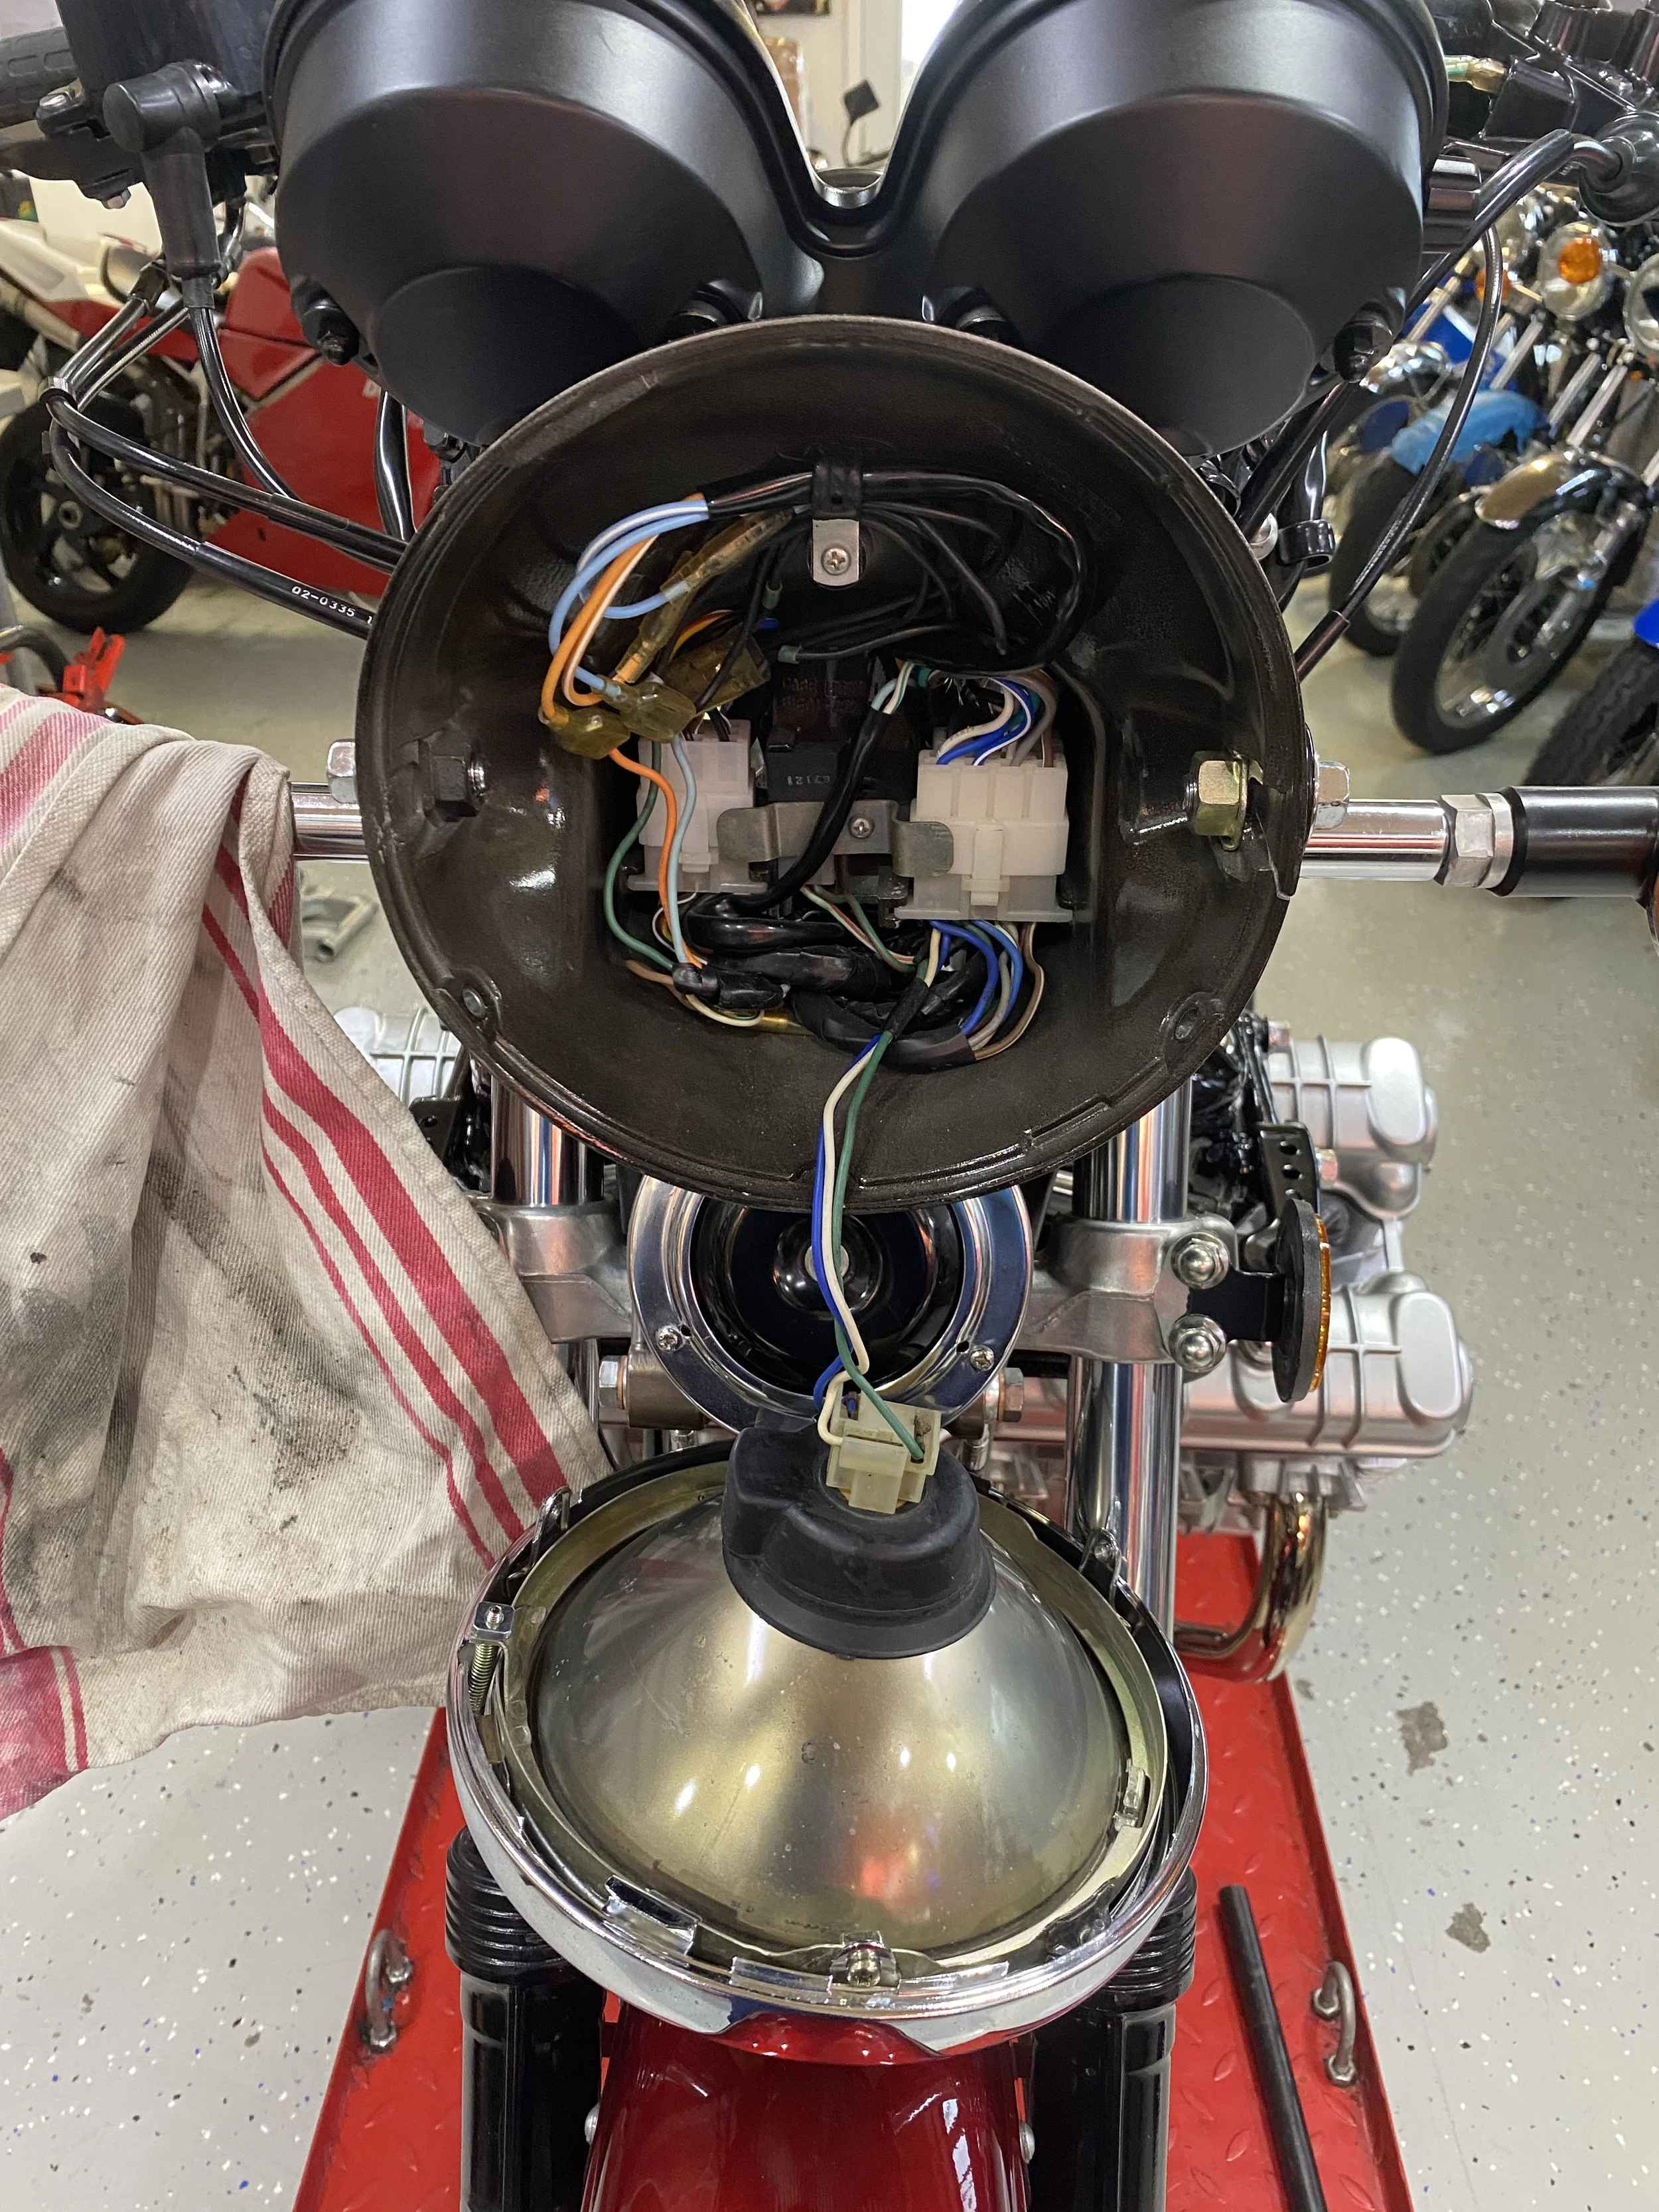
This is the tidiest inside of a headlamp I have ever witnessed.
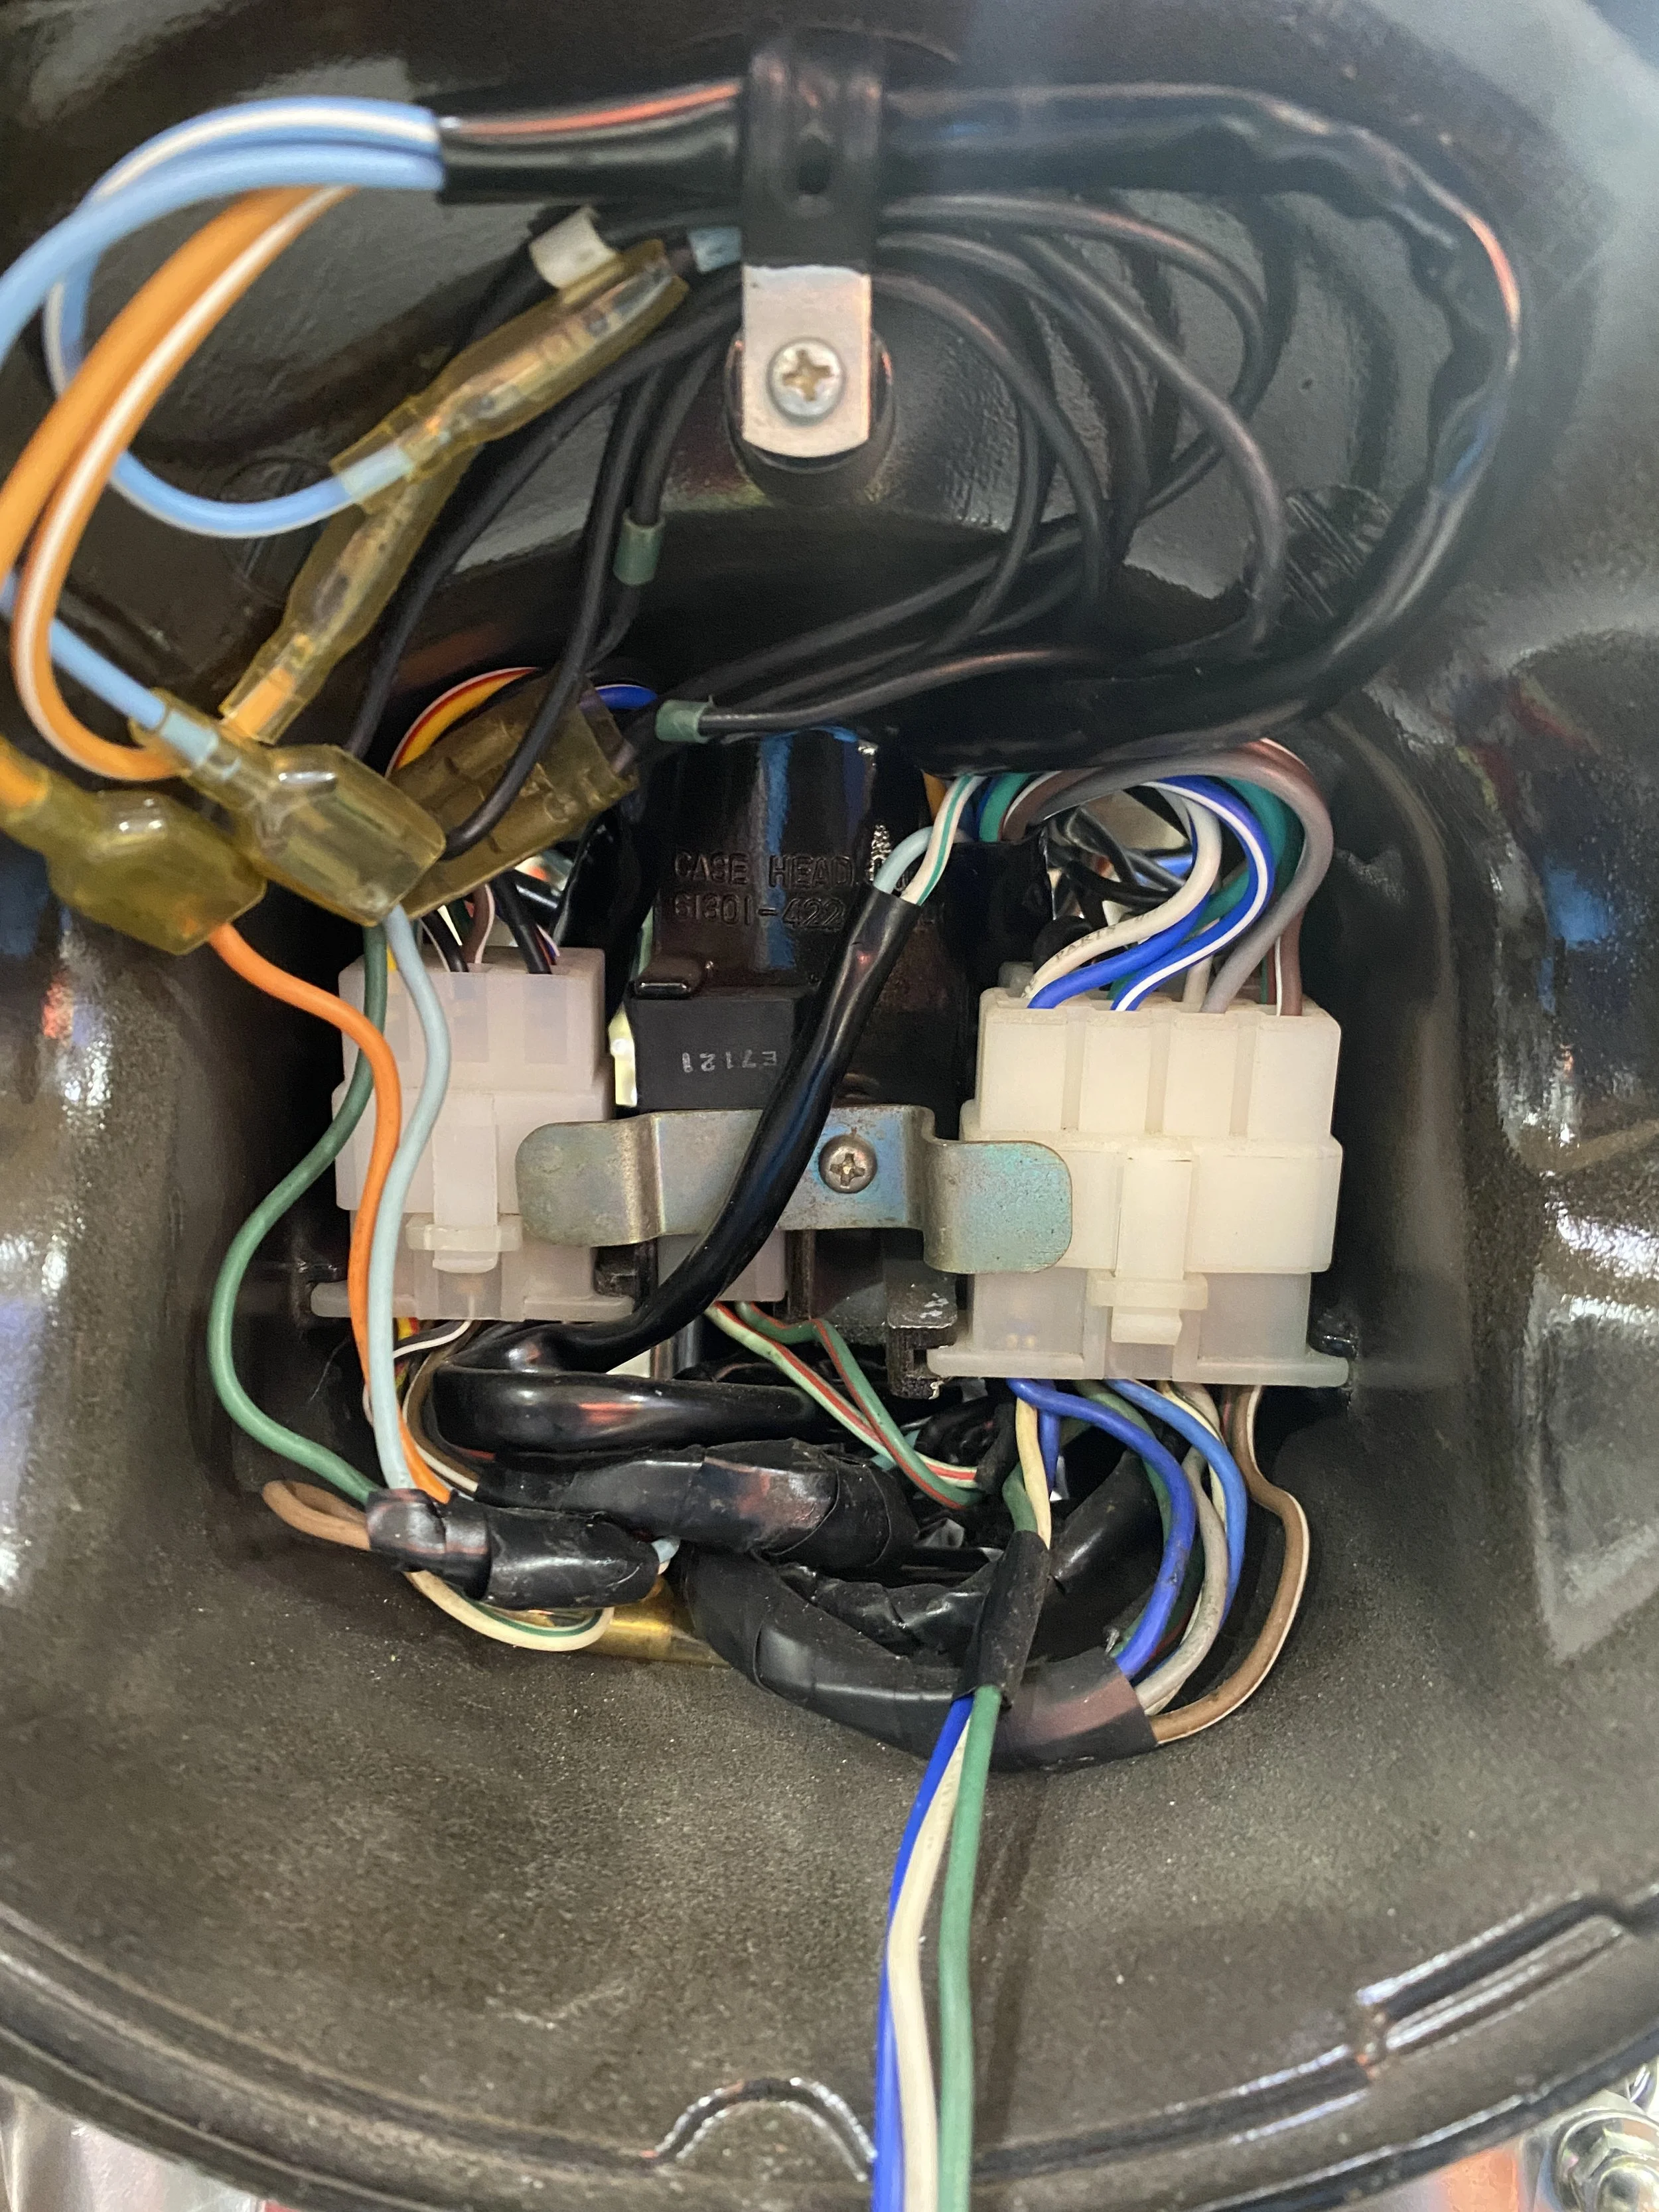
Inside the '75 CB125S headlamp shell it's a multicolored spaghetti. On the CBX produced some 14 years later, wiring is still hidden behind the headlamp. It's just a little more sophisticated....looking.

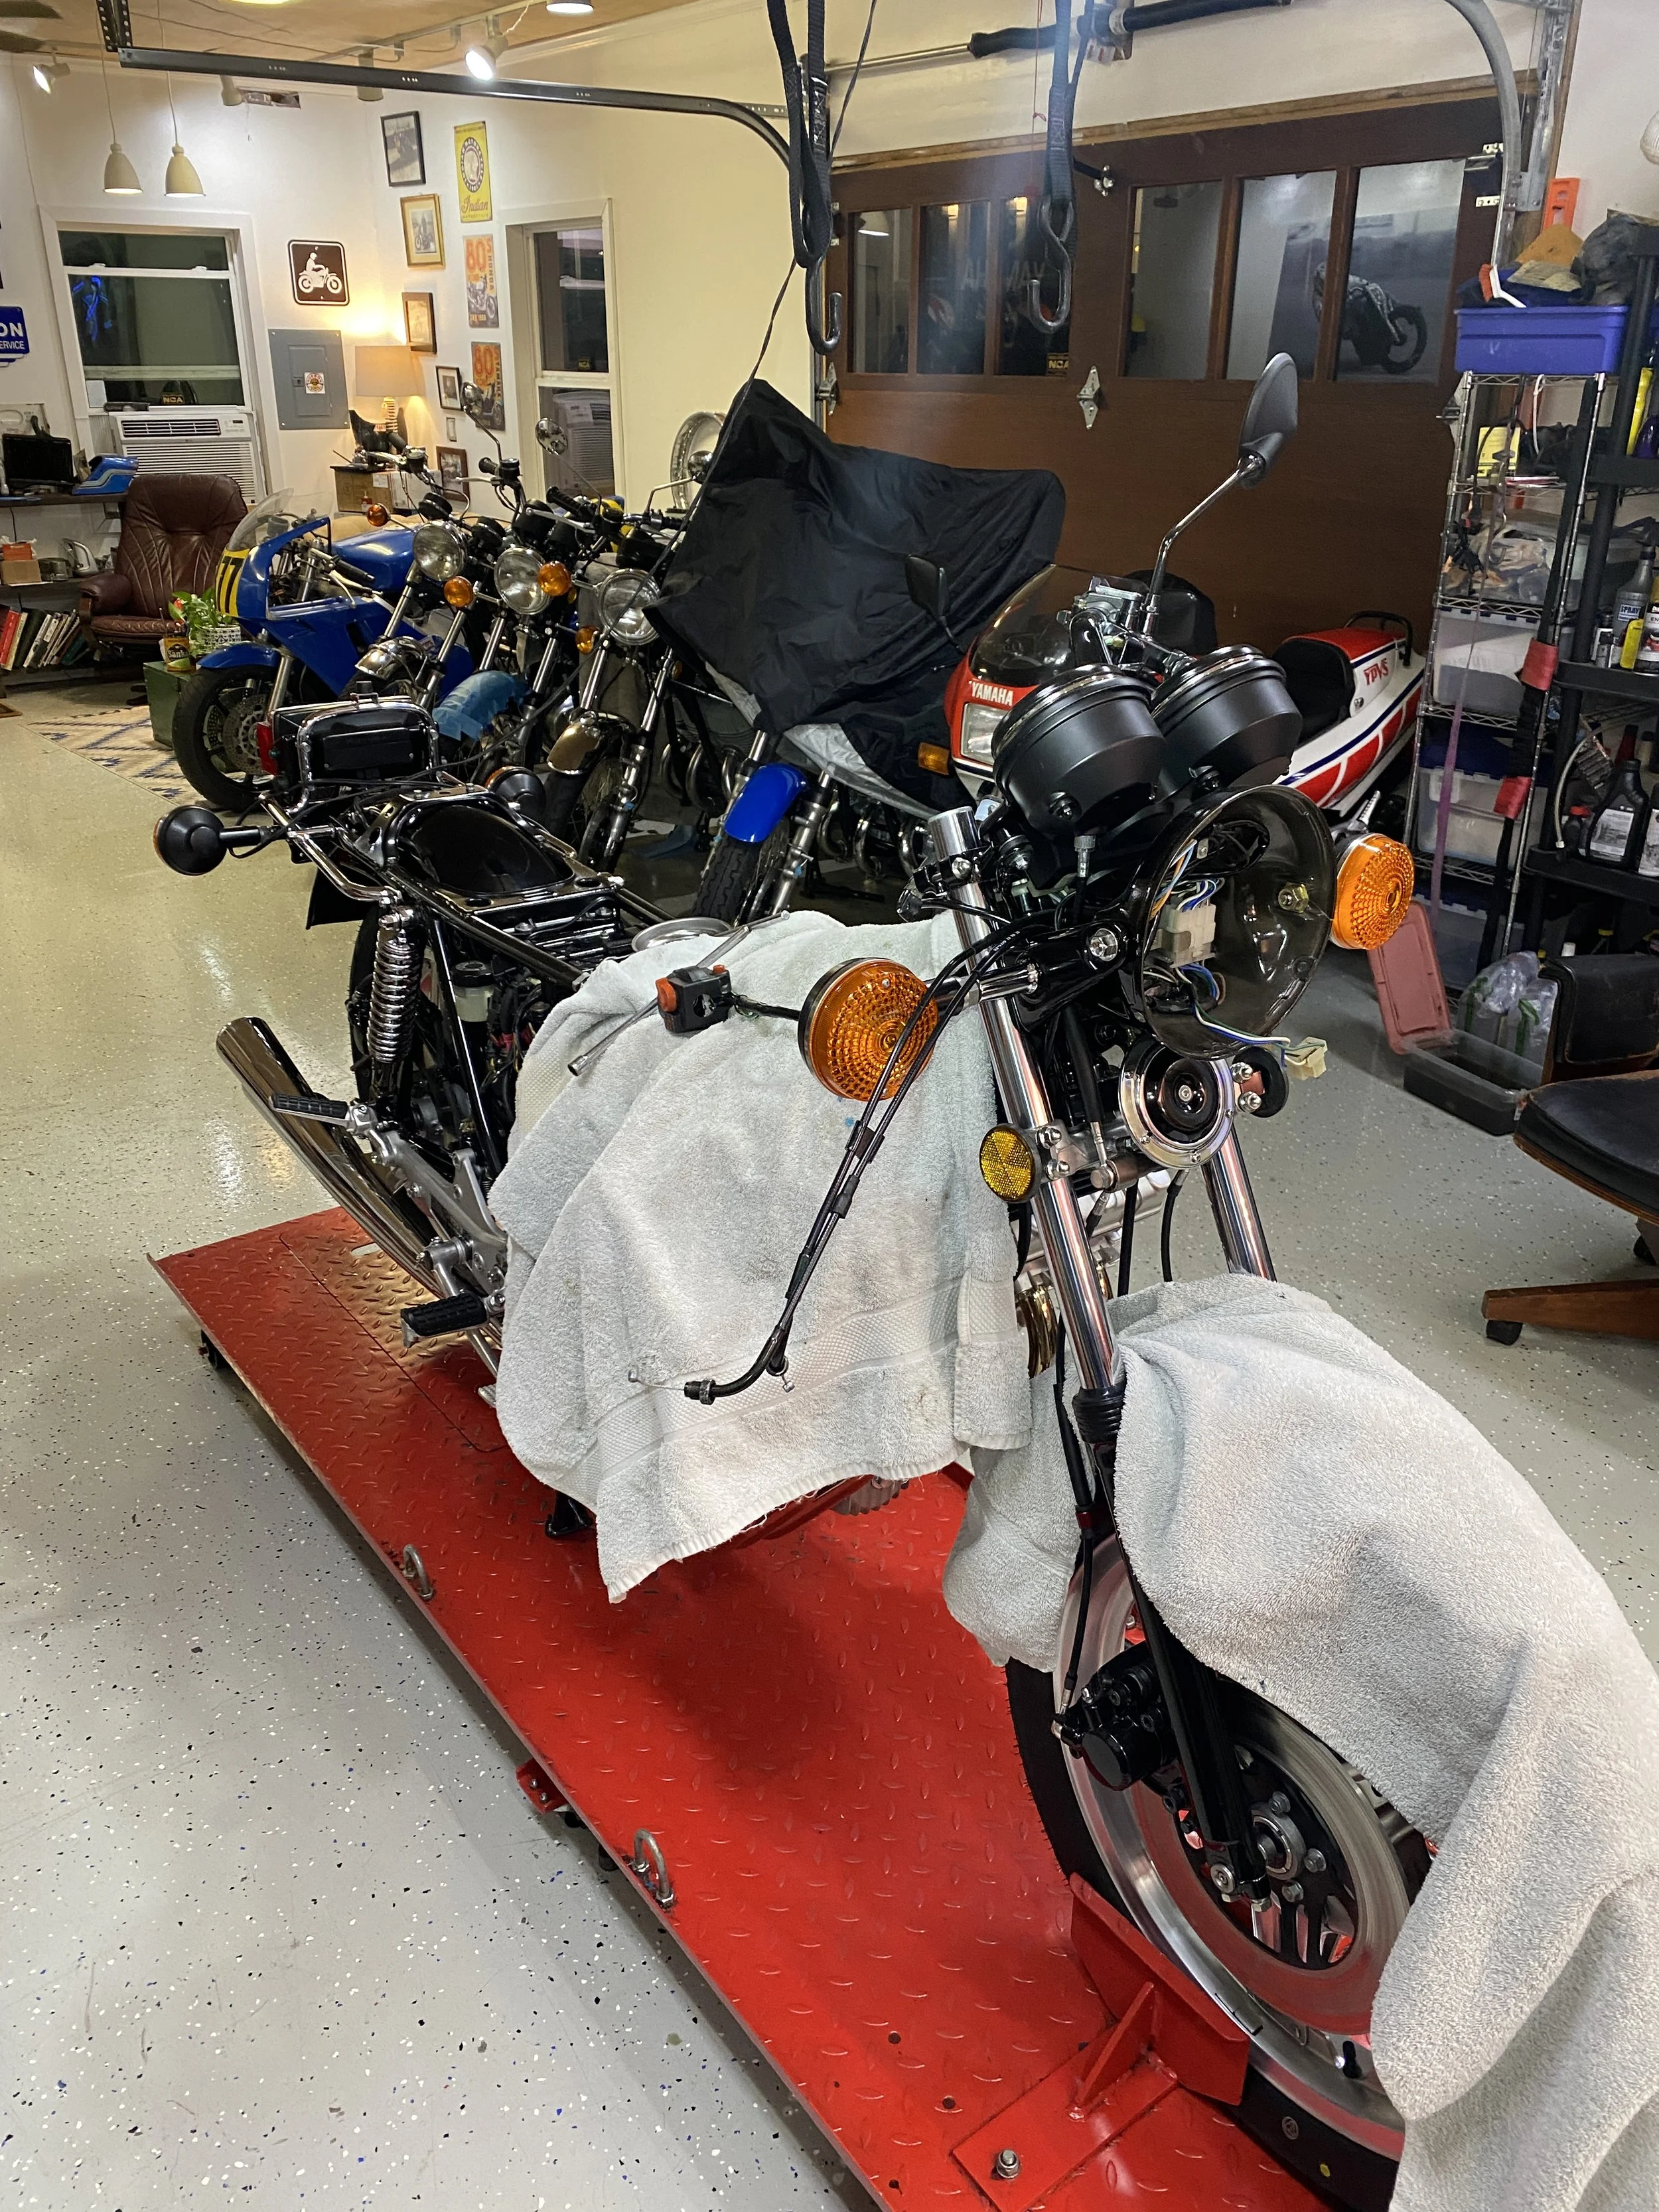
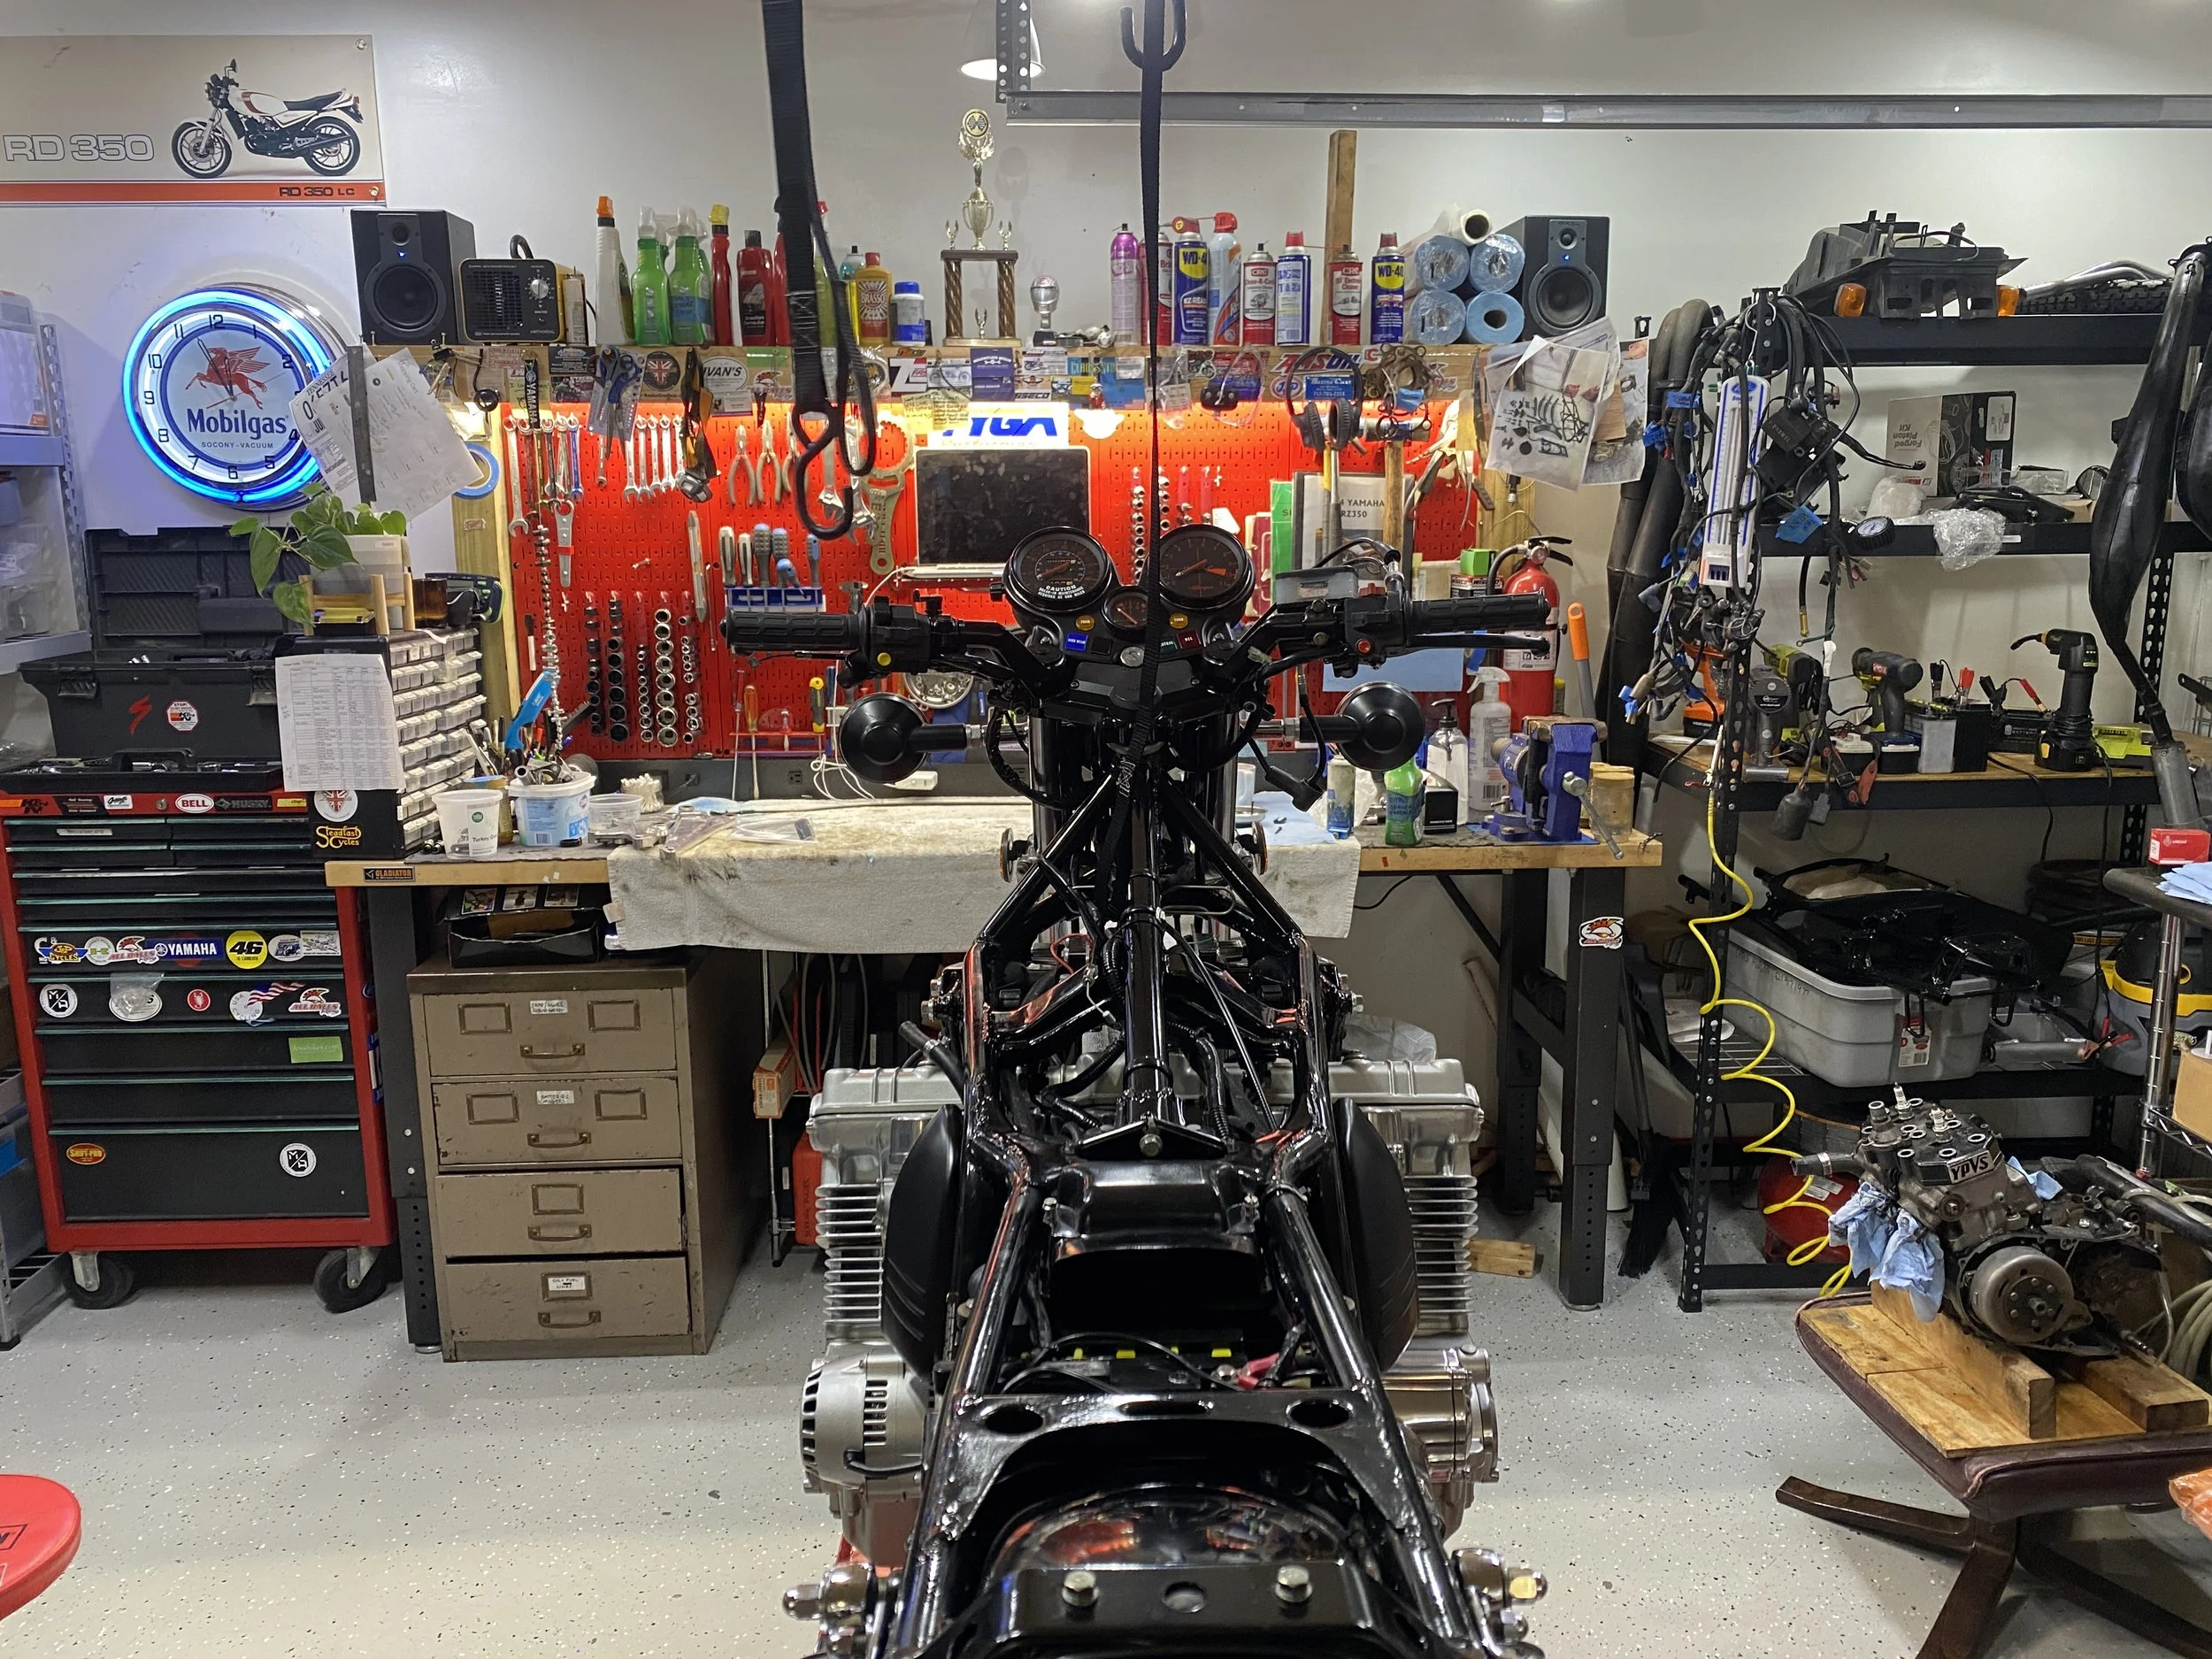
bars must go...engine doesn't really look that wide.
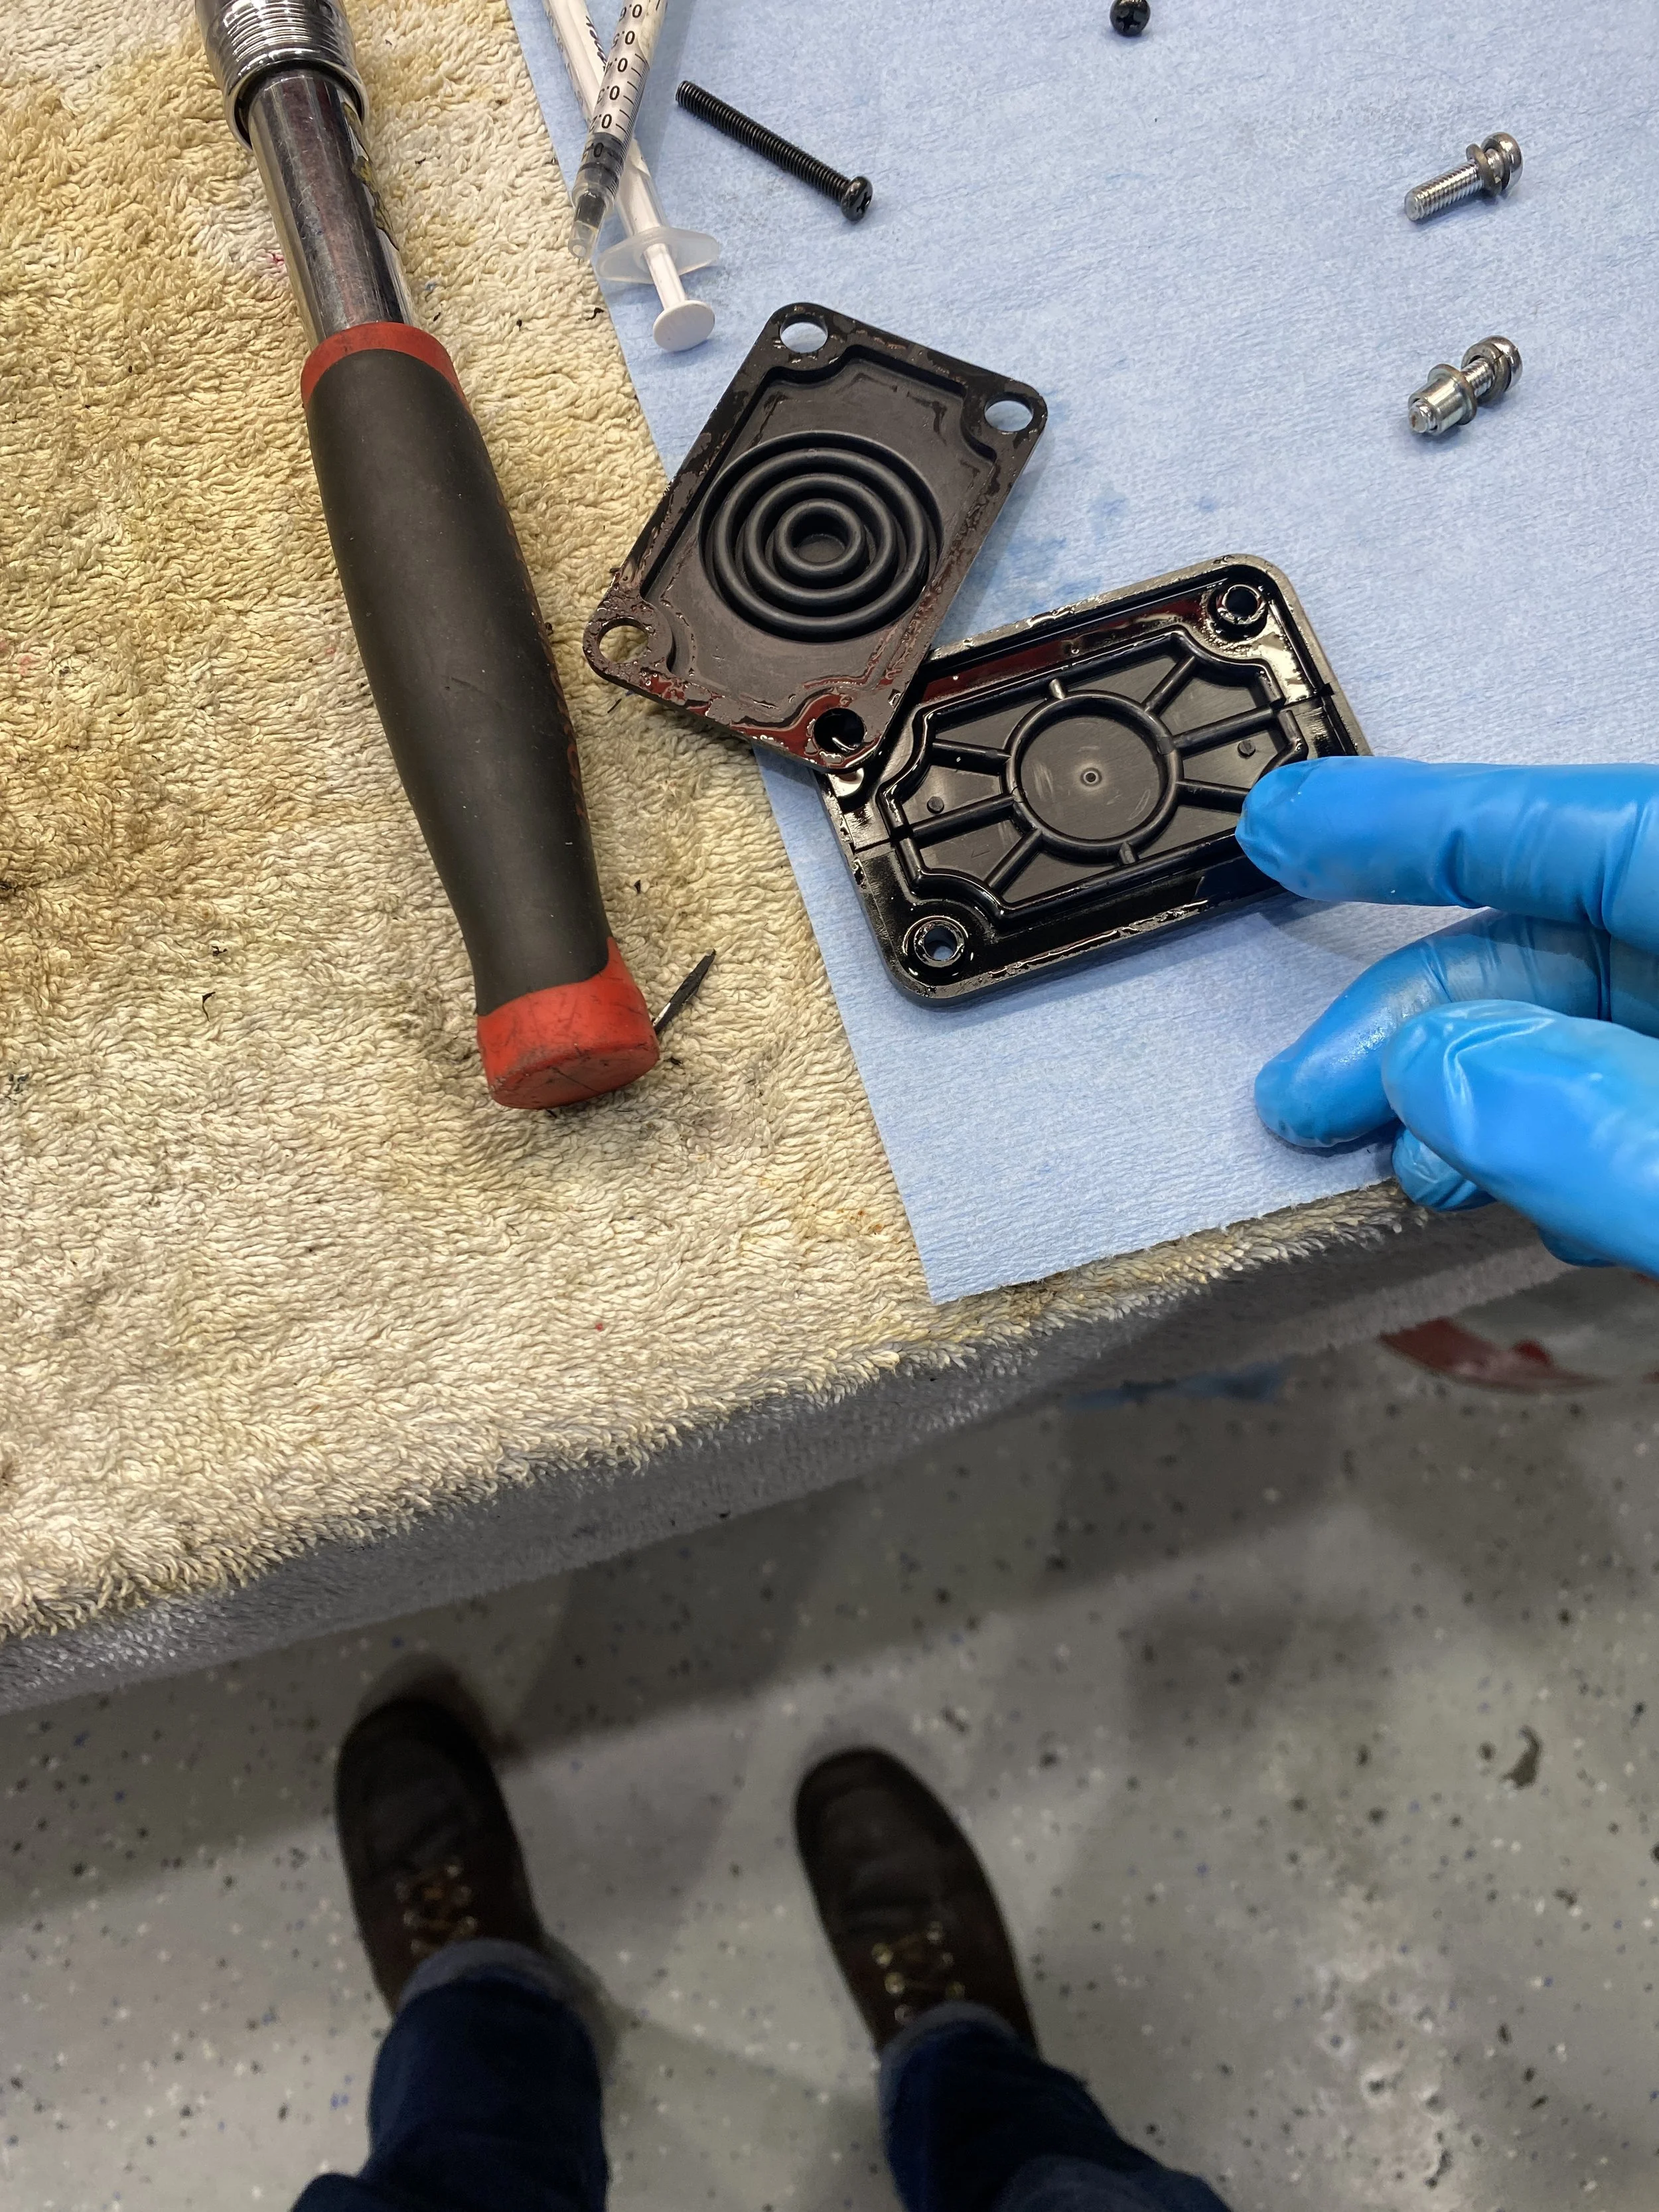
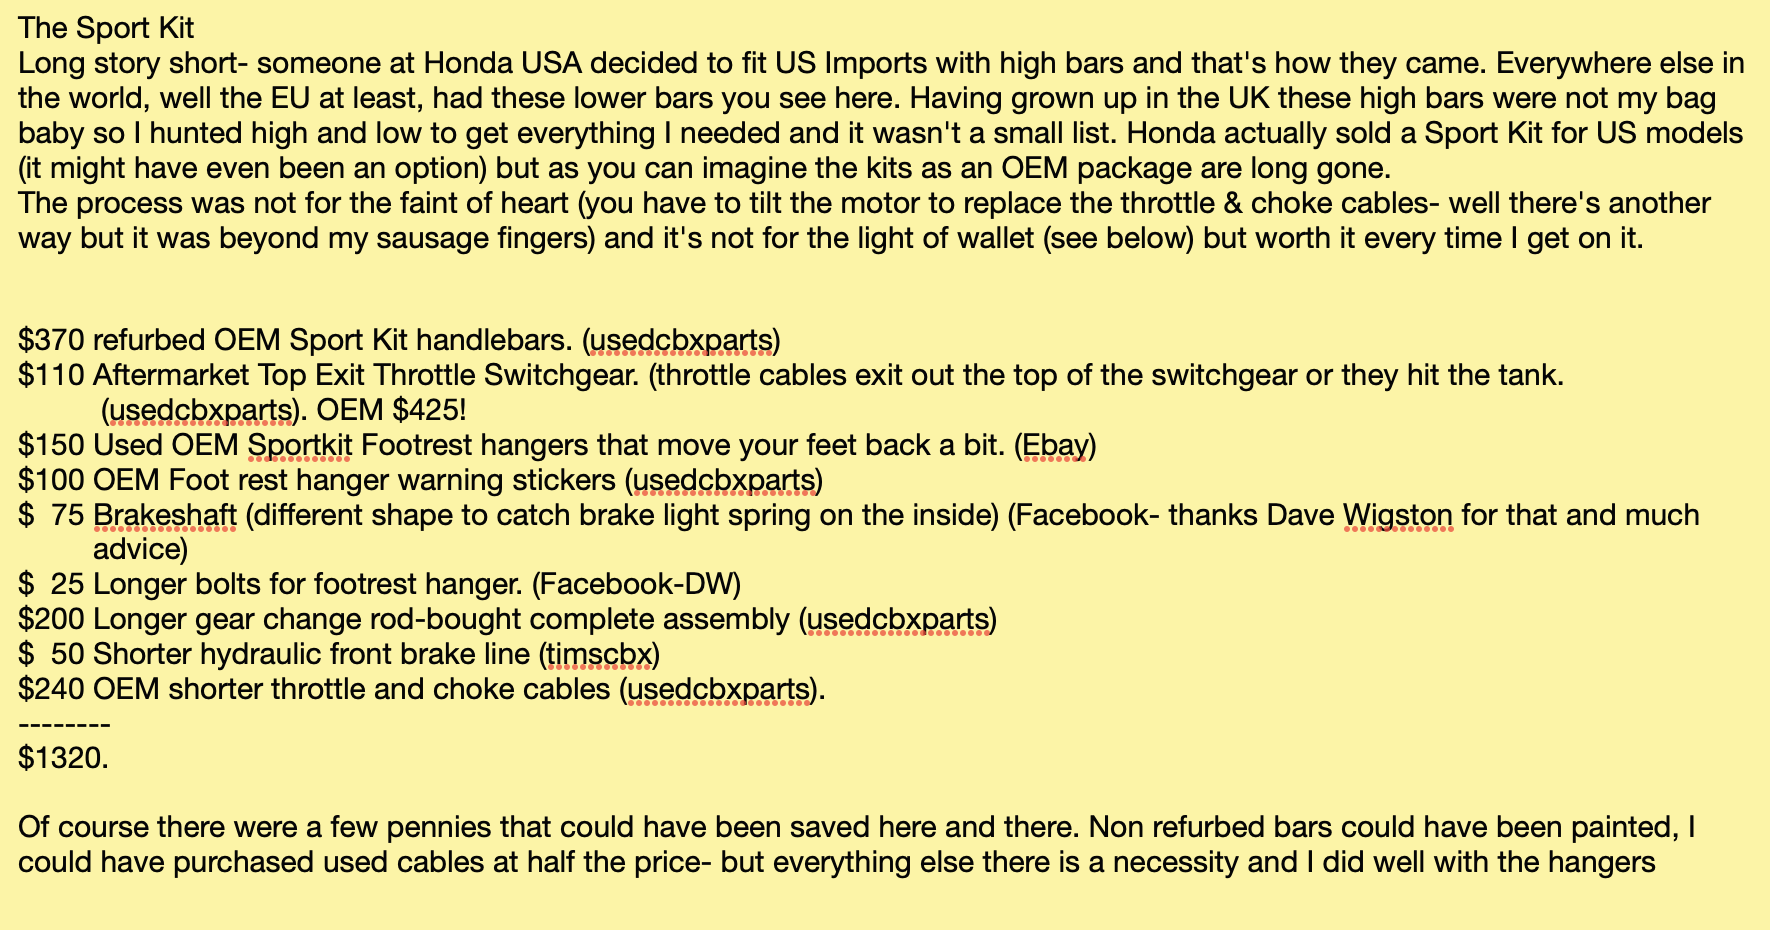
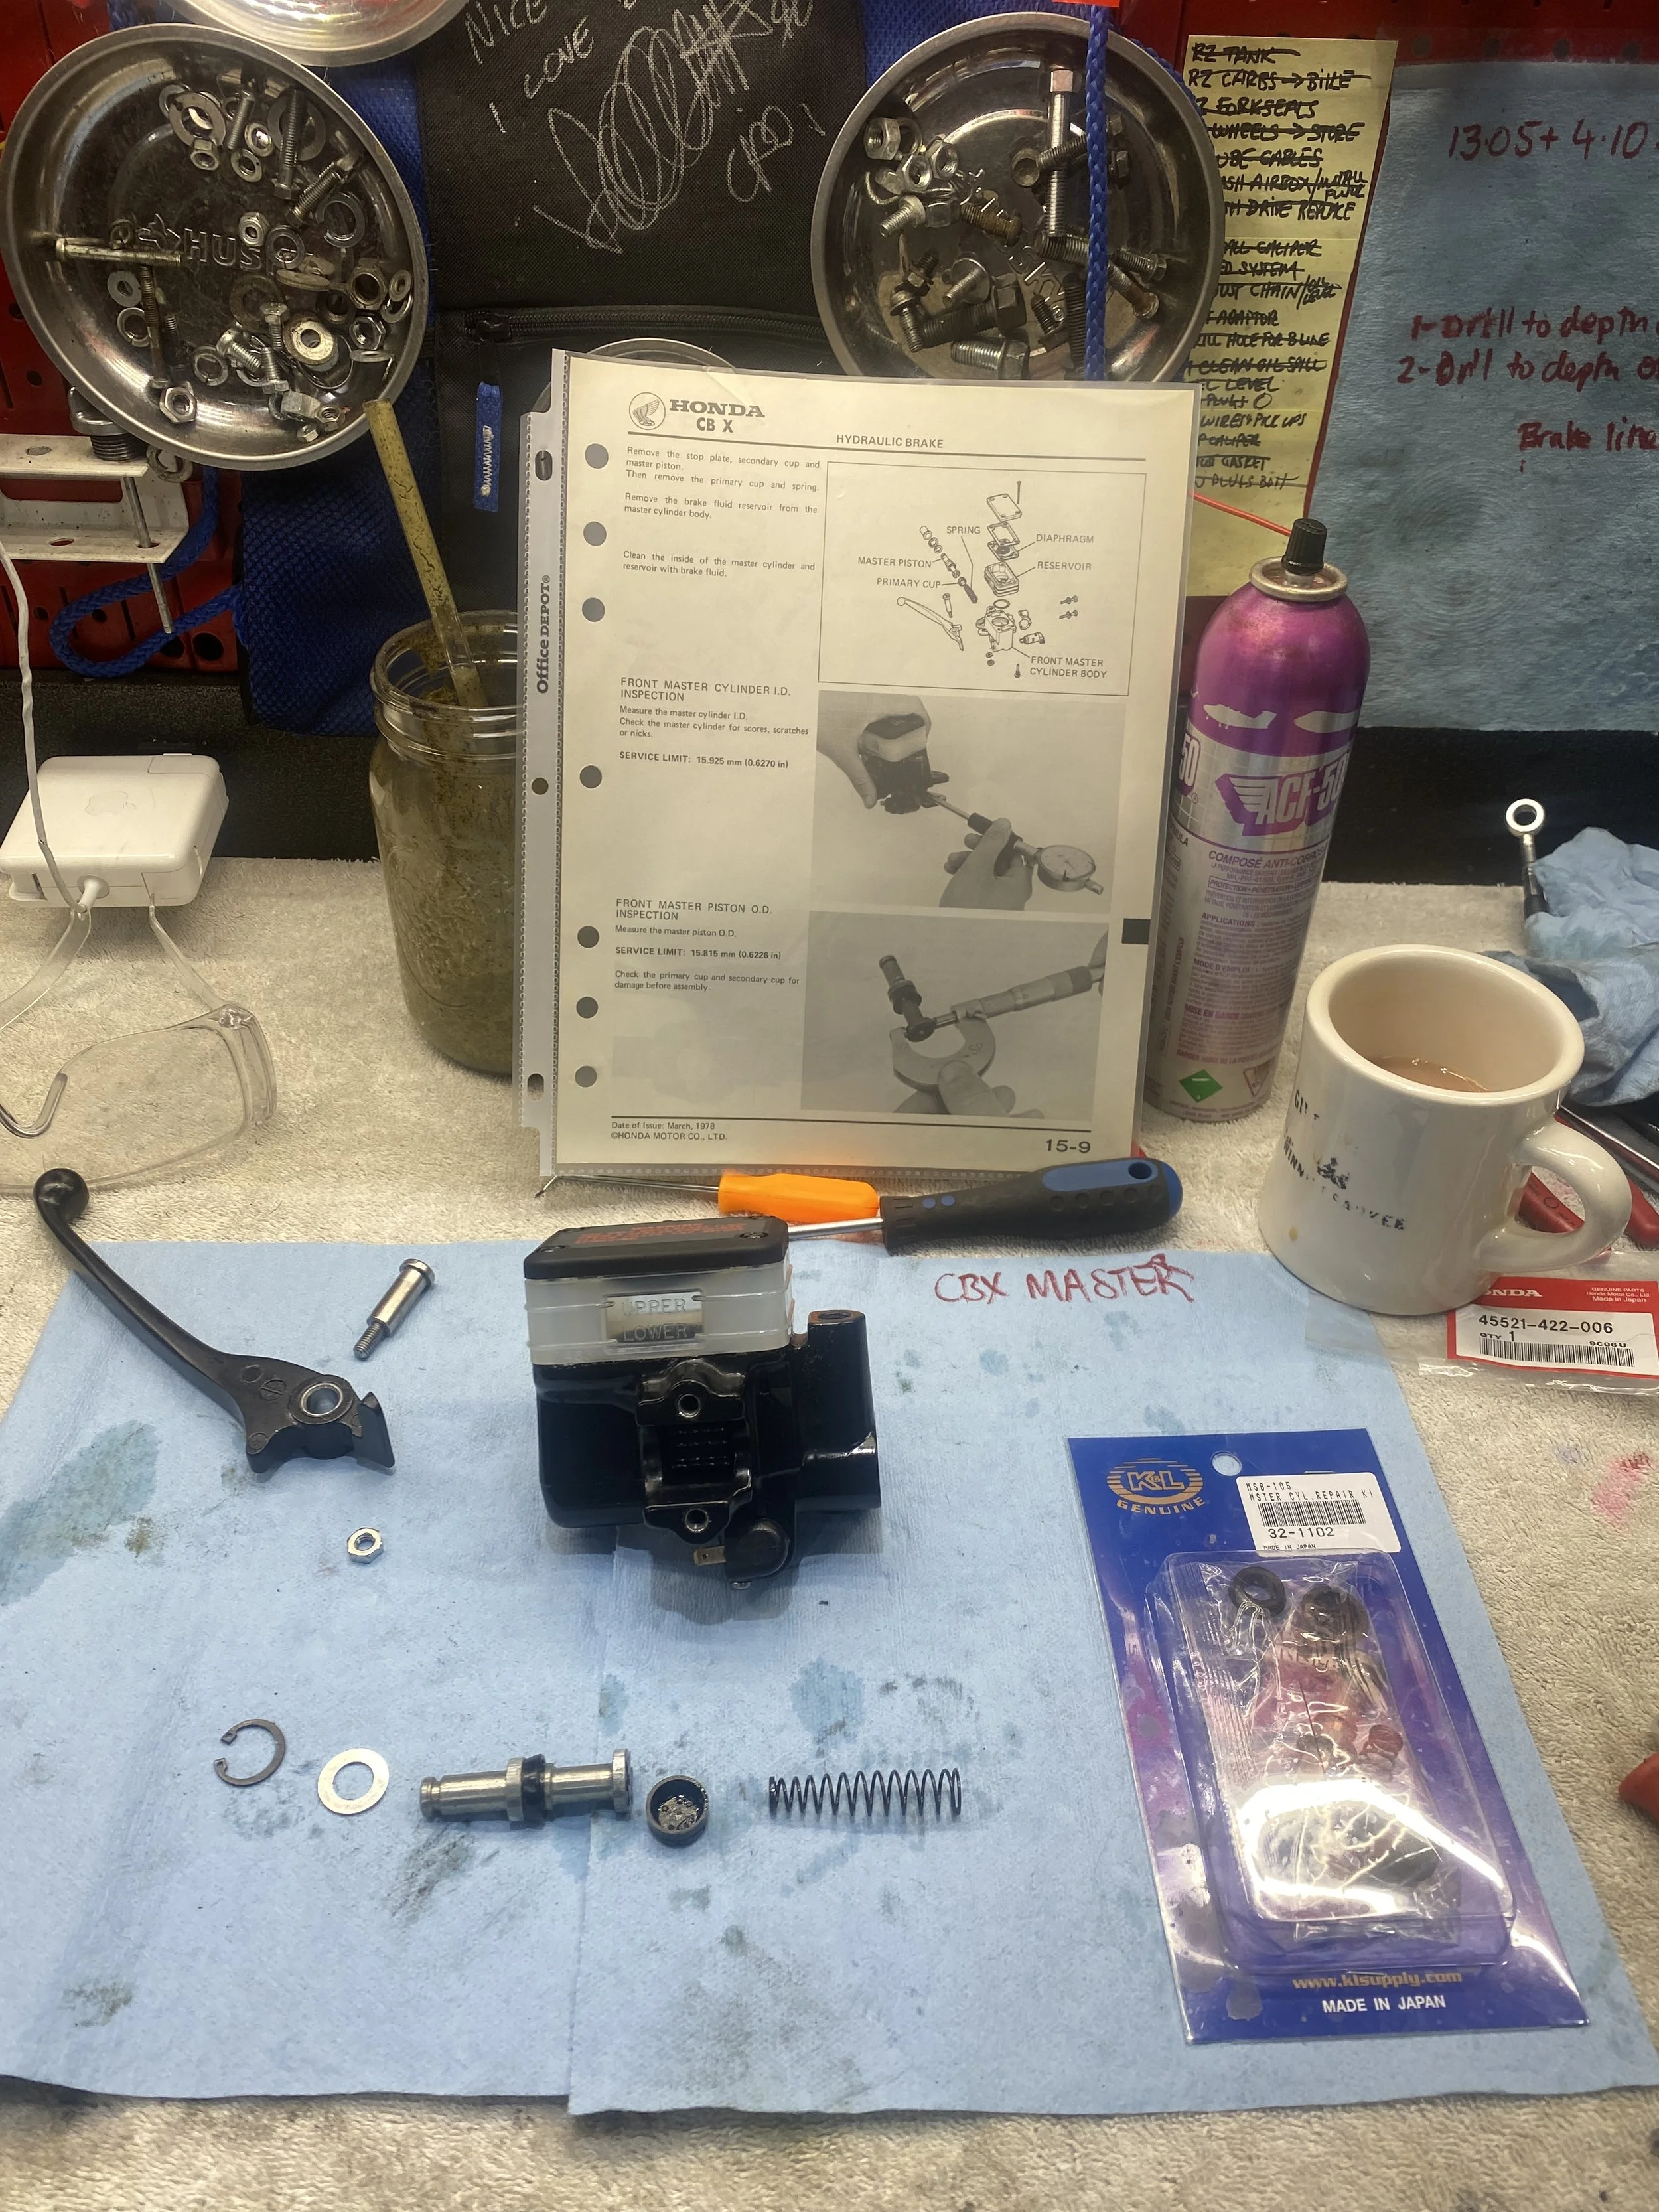
While dismantling the front master cylinder I discovered why it was leaking....it's missing the metal spacer something that is not included in any of the re-build kits and without which, the master cylinder is destined to leak, and it in fact did, leaving a mark on the valve cover and ruining the finish on the brand new oil cooler. :(
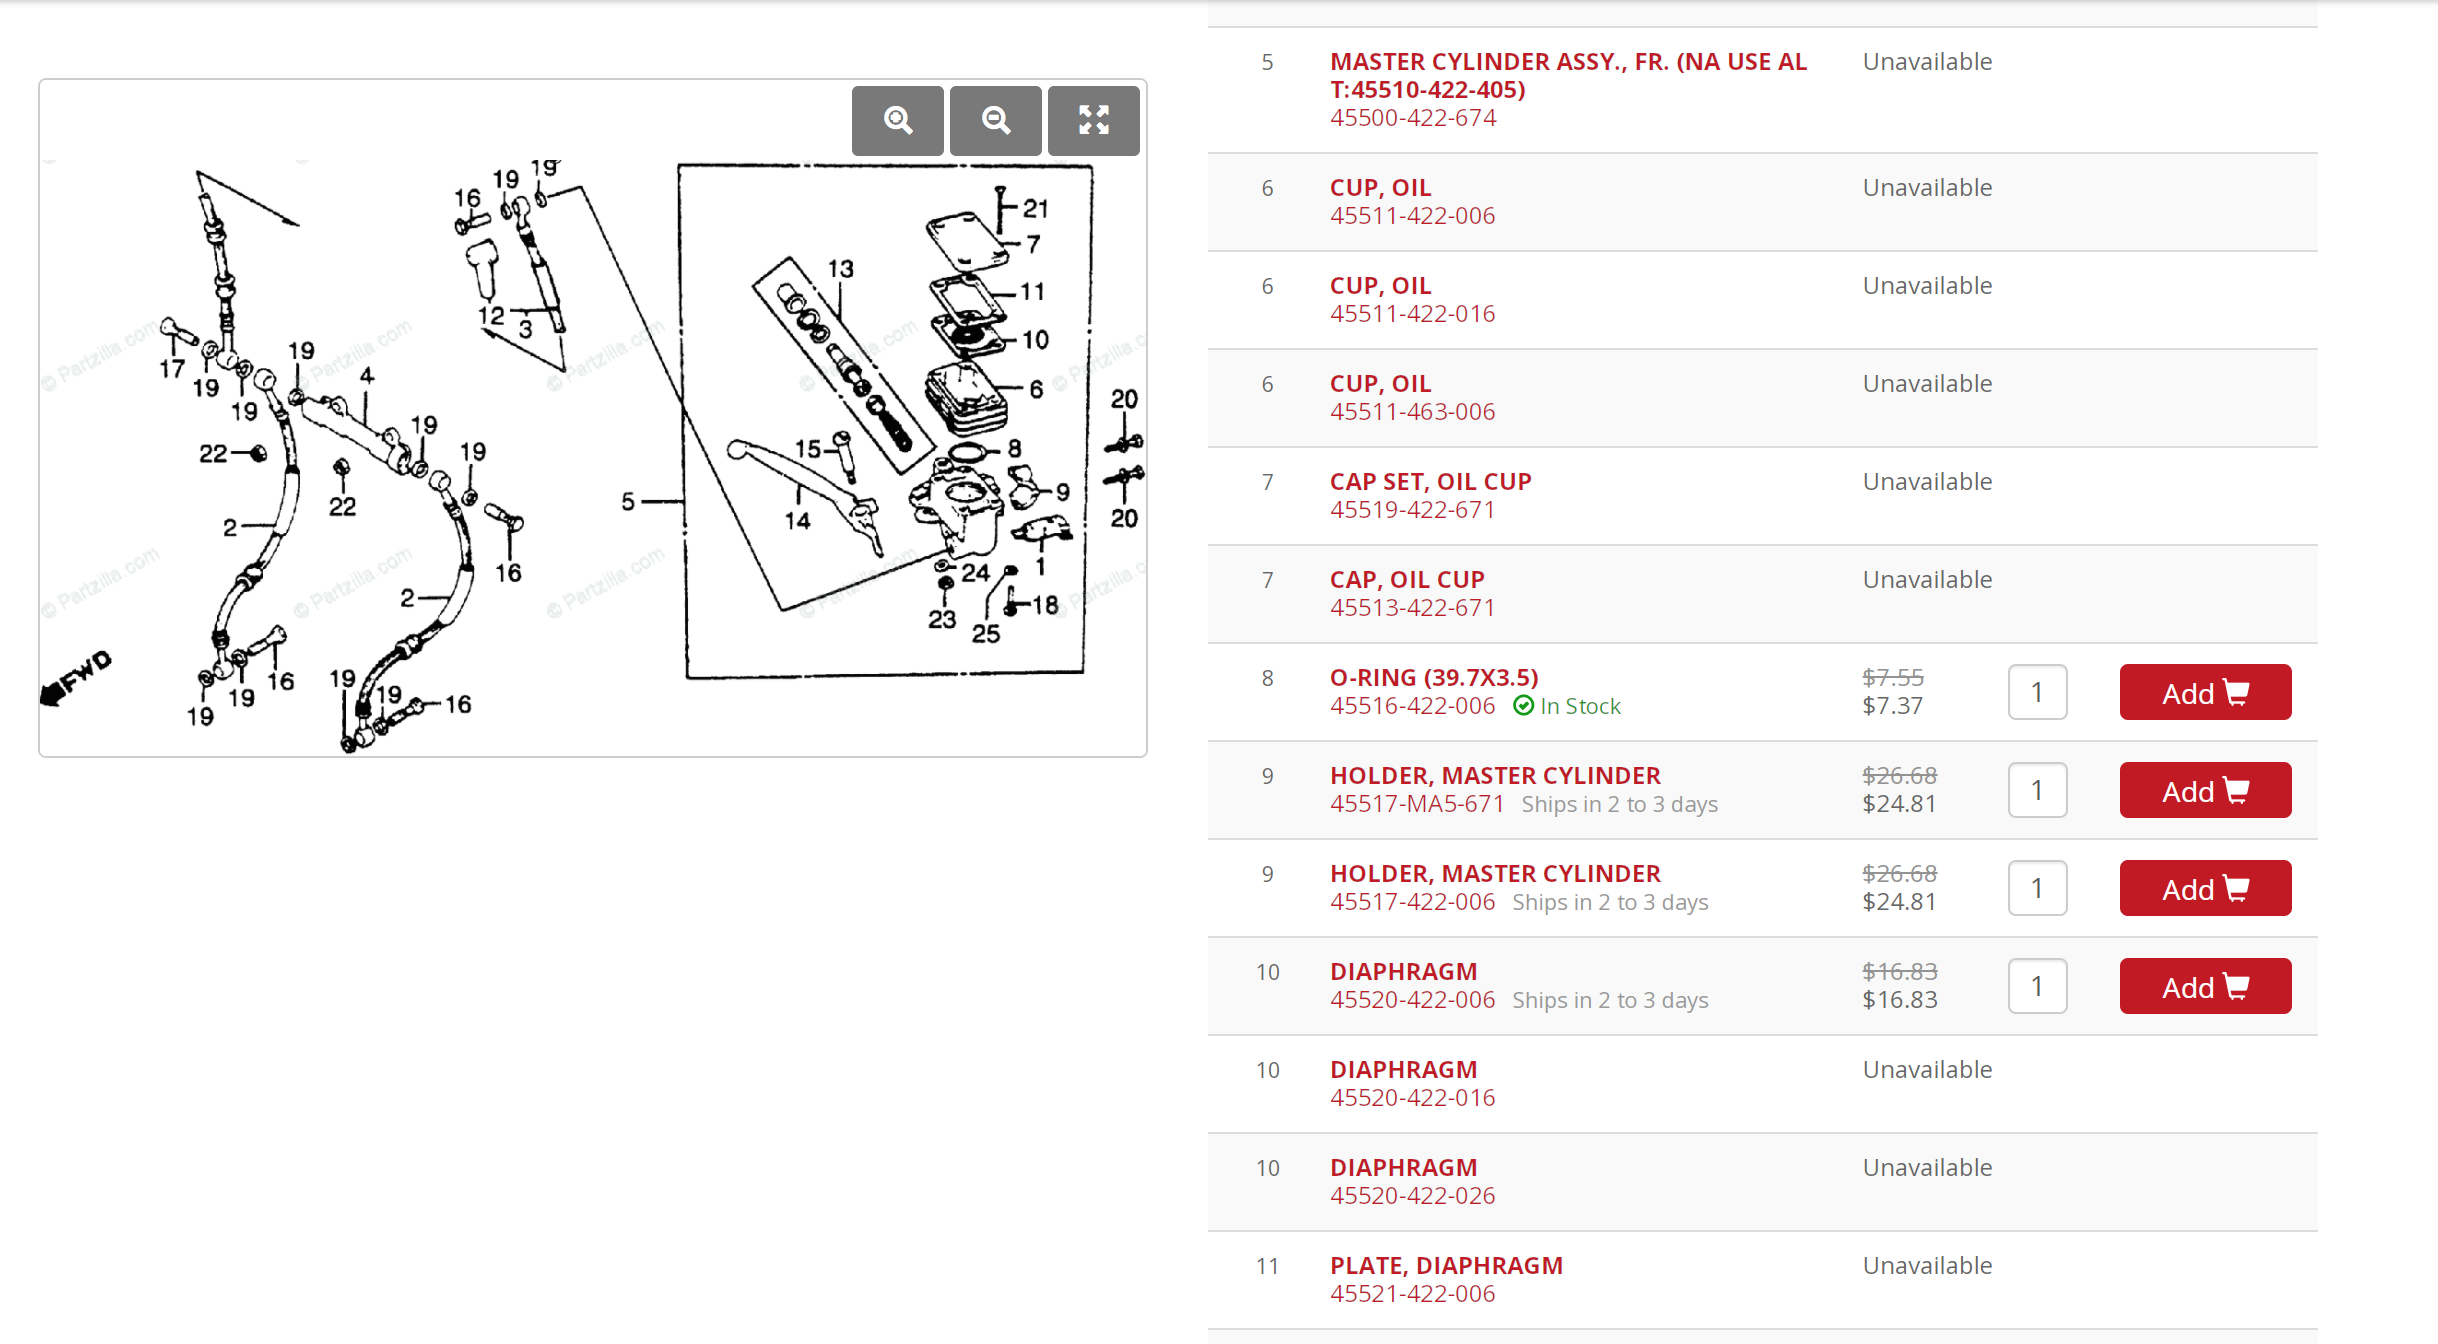
#11 Plate Diaphragm is what I'm after....no longer available......
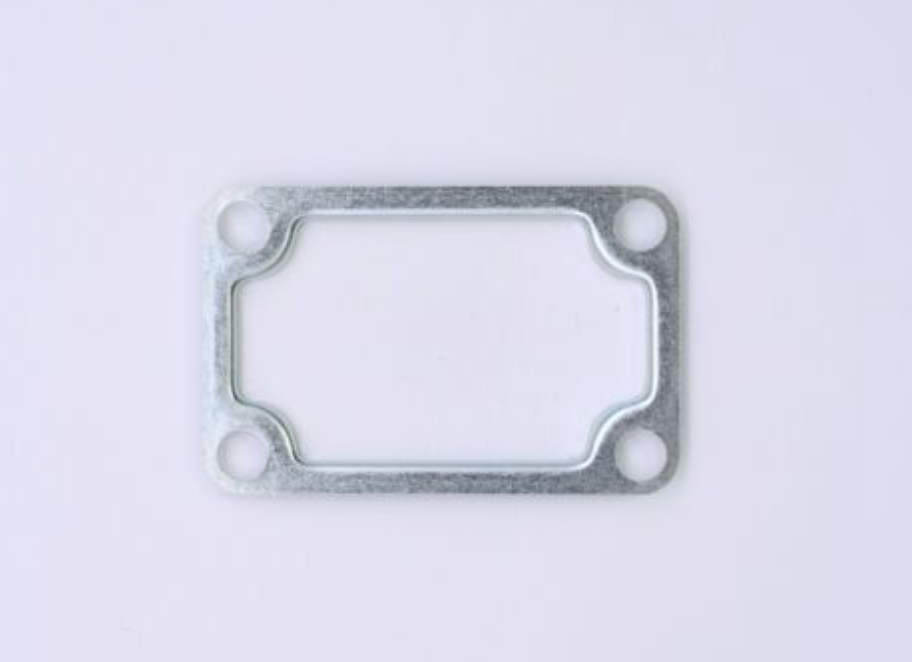
....no longer available only to the lazy and the resourceless that is. Found one on E-bay within minutes. As you can see it's designed to fit right into the plastic top.
The RZ500 in the background was produced some 5 years later after the CBX and would outrun the technological laden six cylinder within seconds. That's not what it's all about though. Or is it?
a bit lazy not actually removing the front fender, but on a resto I think every nut and bolt that is left undisturbed is preserved.
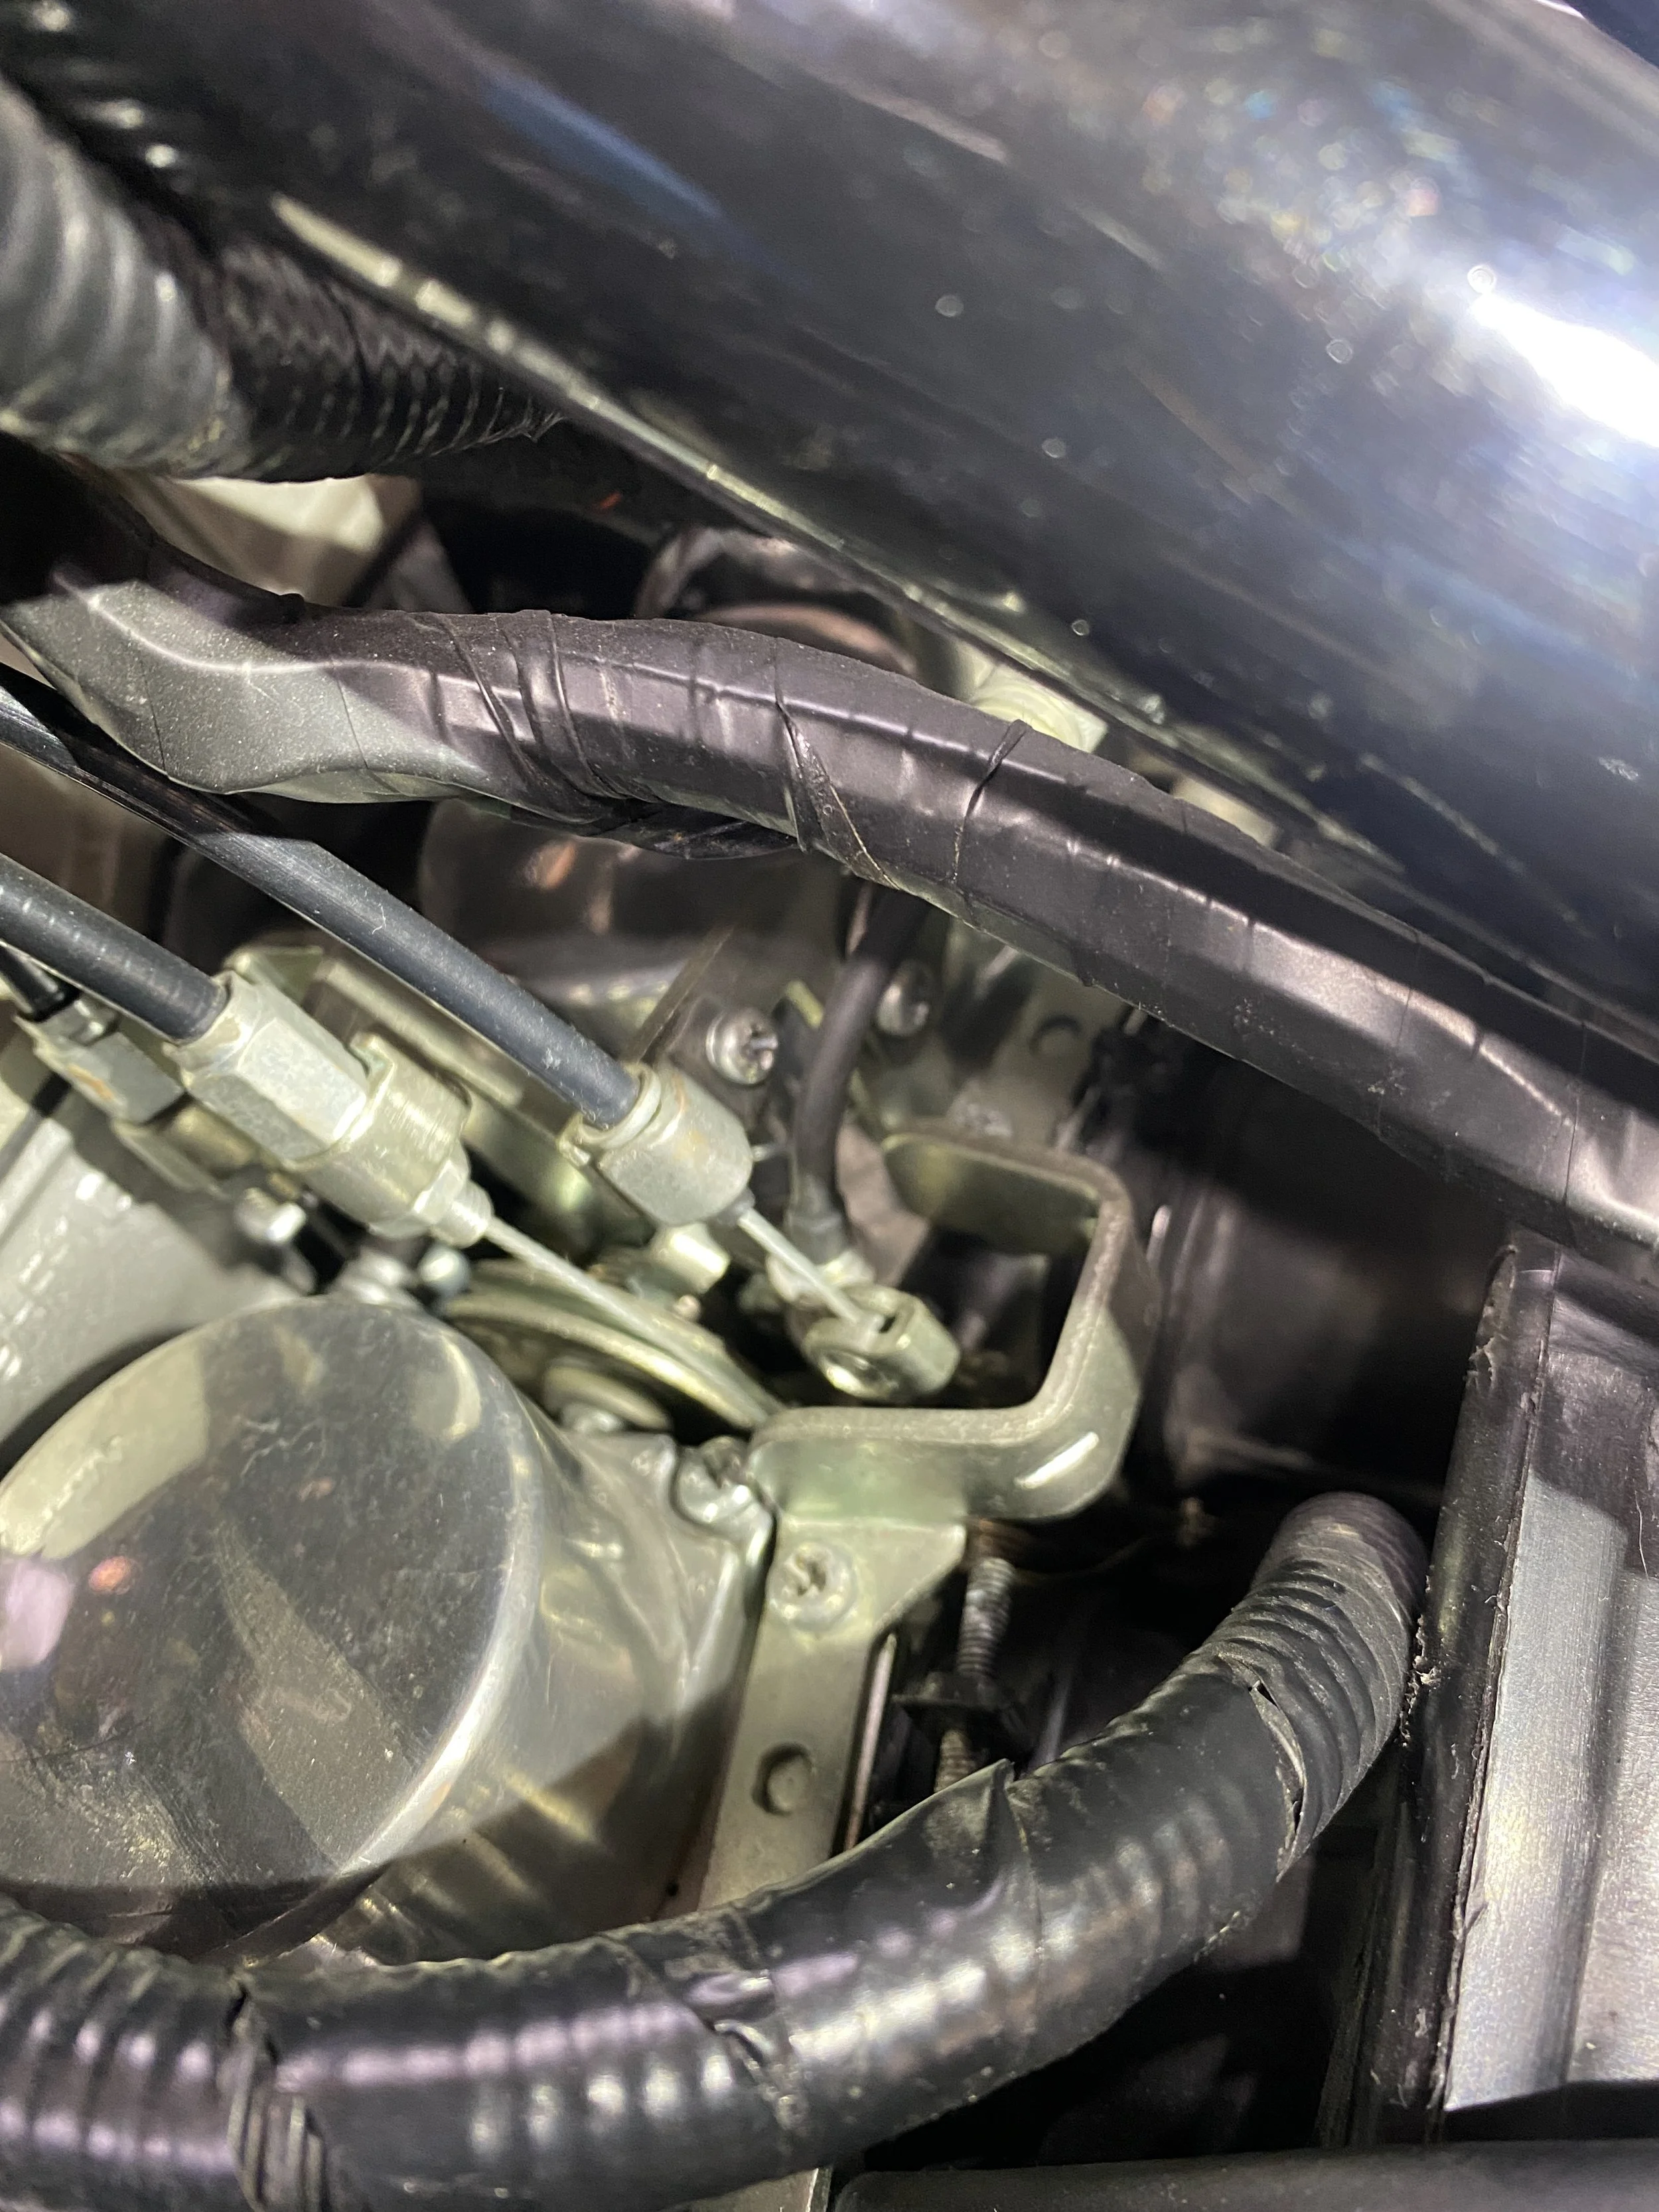
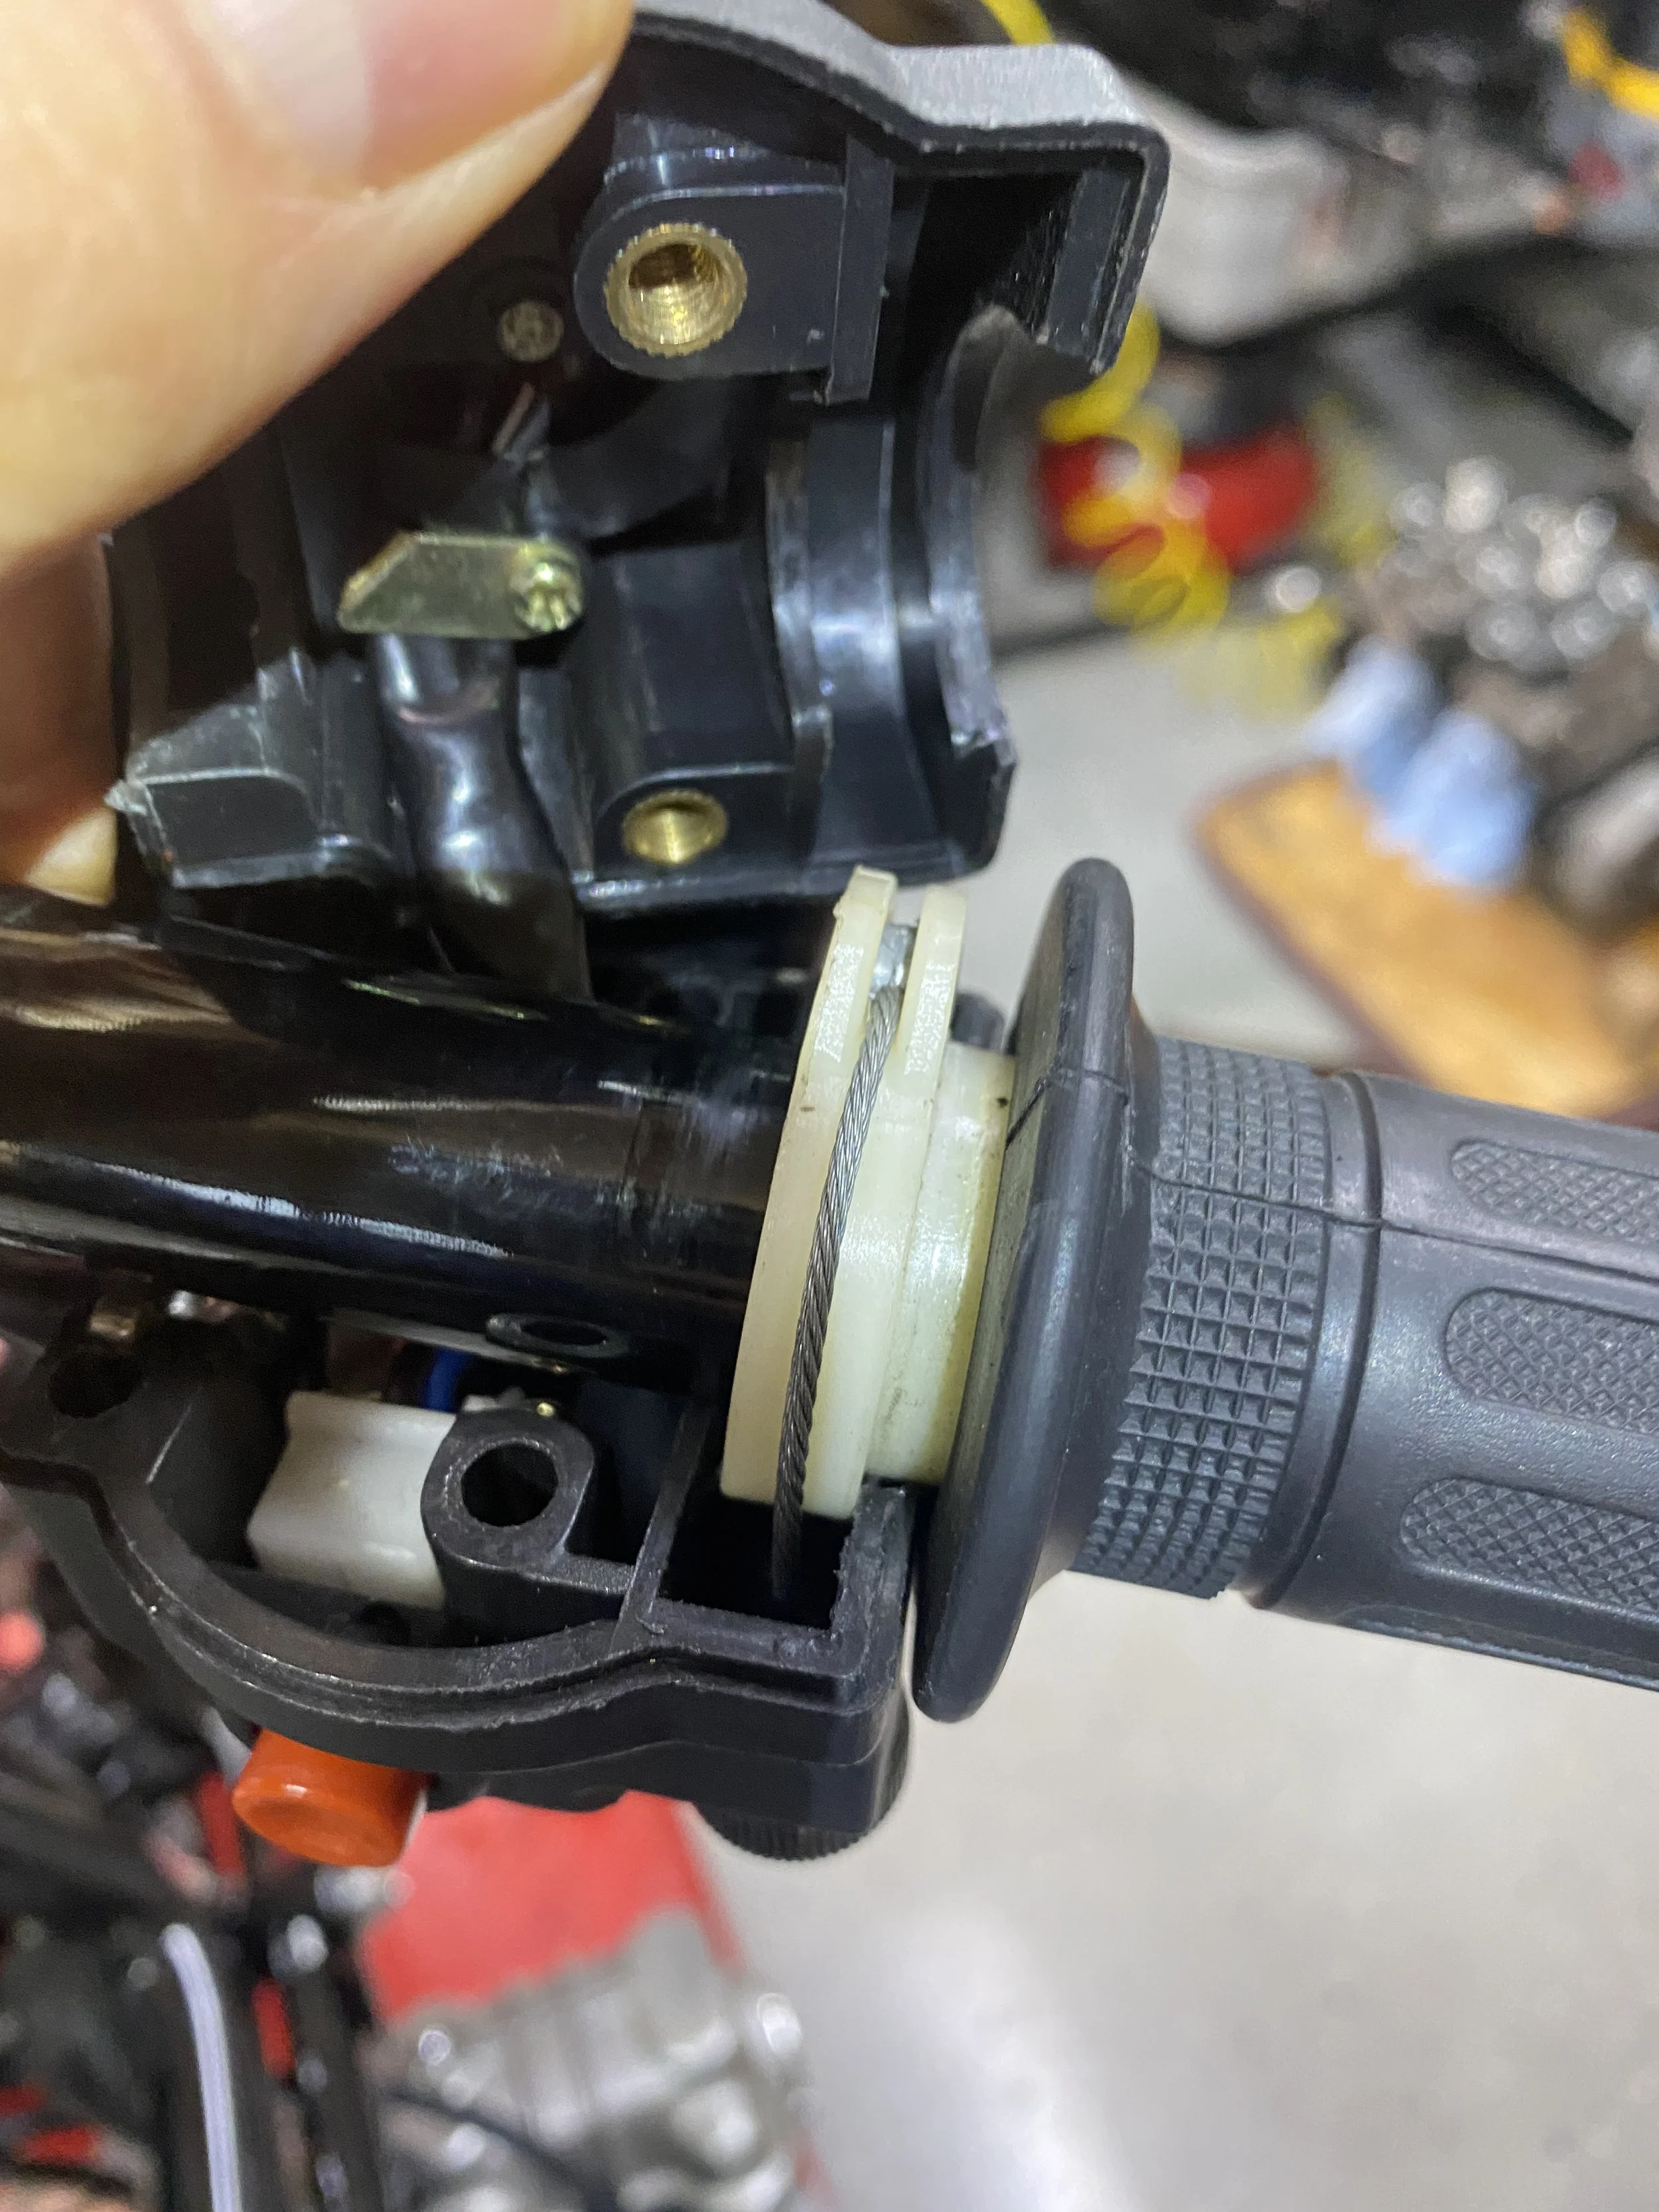
just a quick shot to record the routing of the throttle cables. never assume.
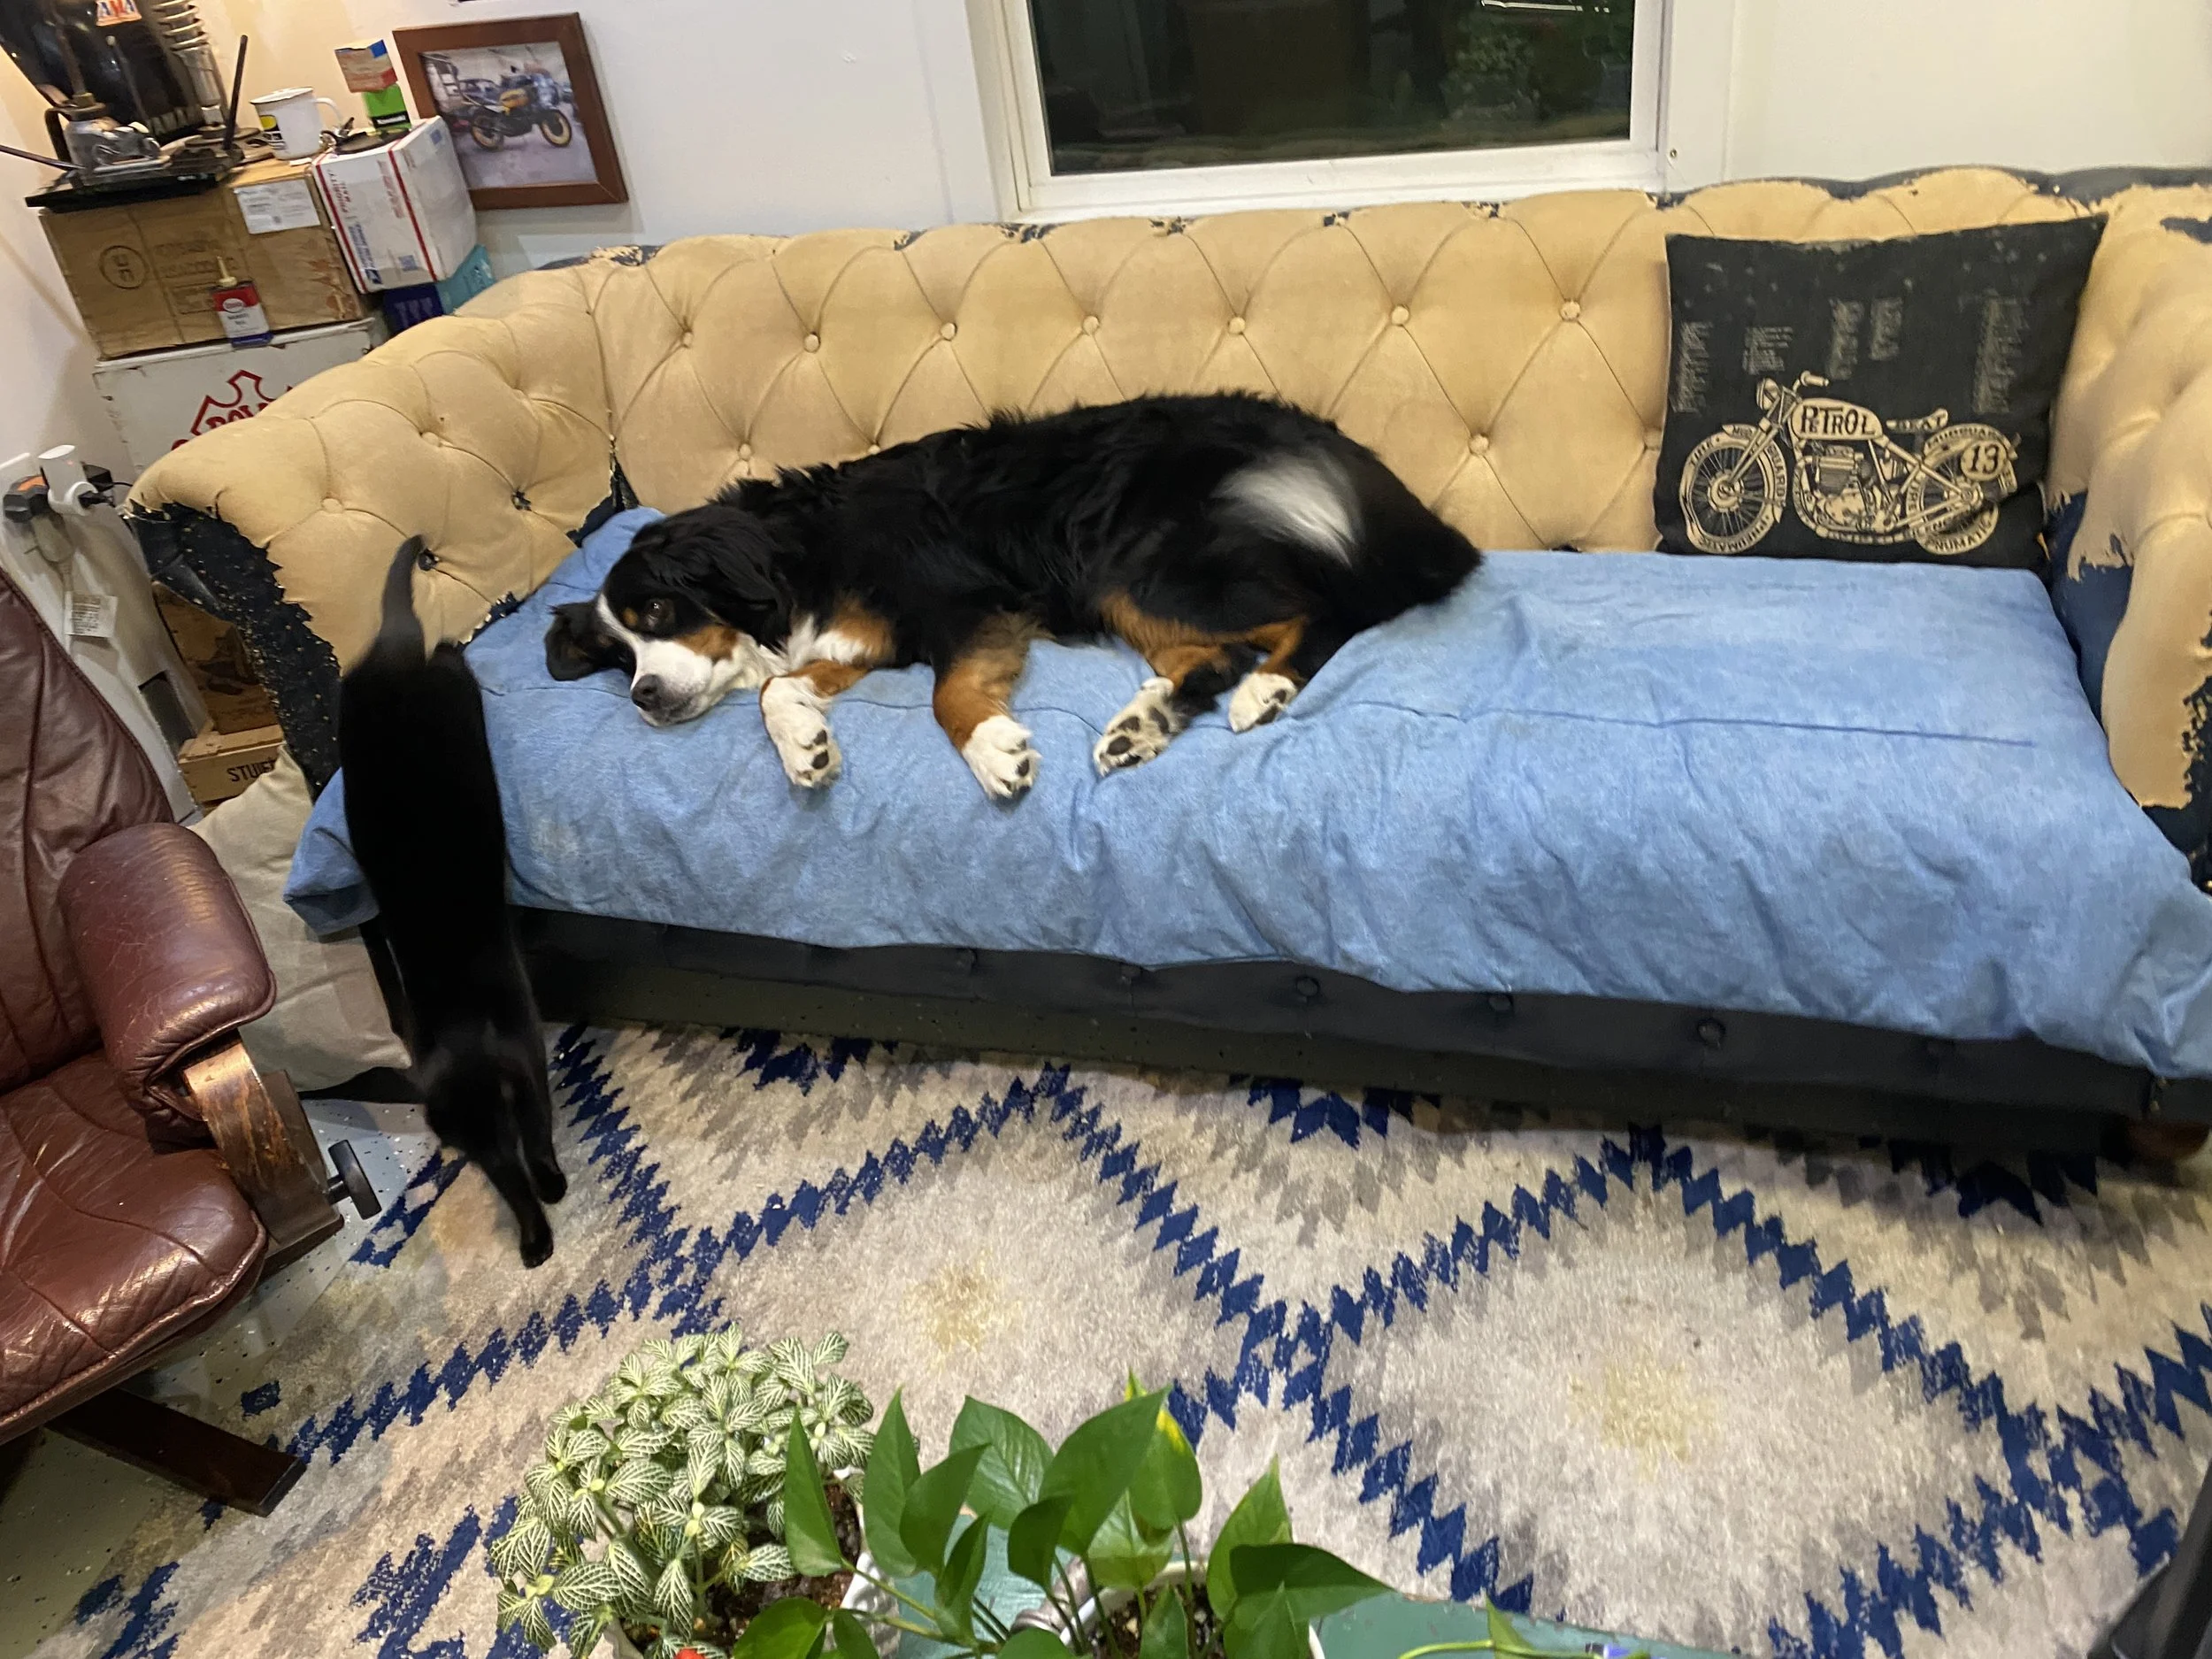
The garage cat and dog were in deep slumber until the photographer arrived.
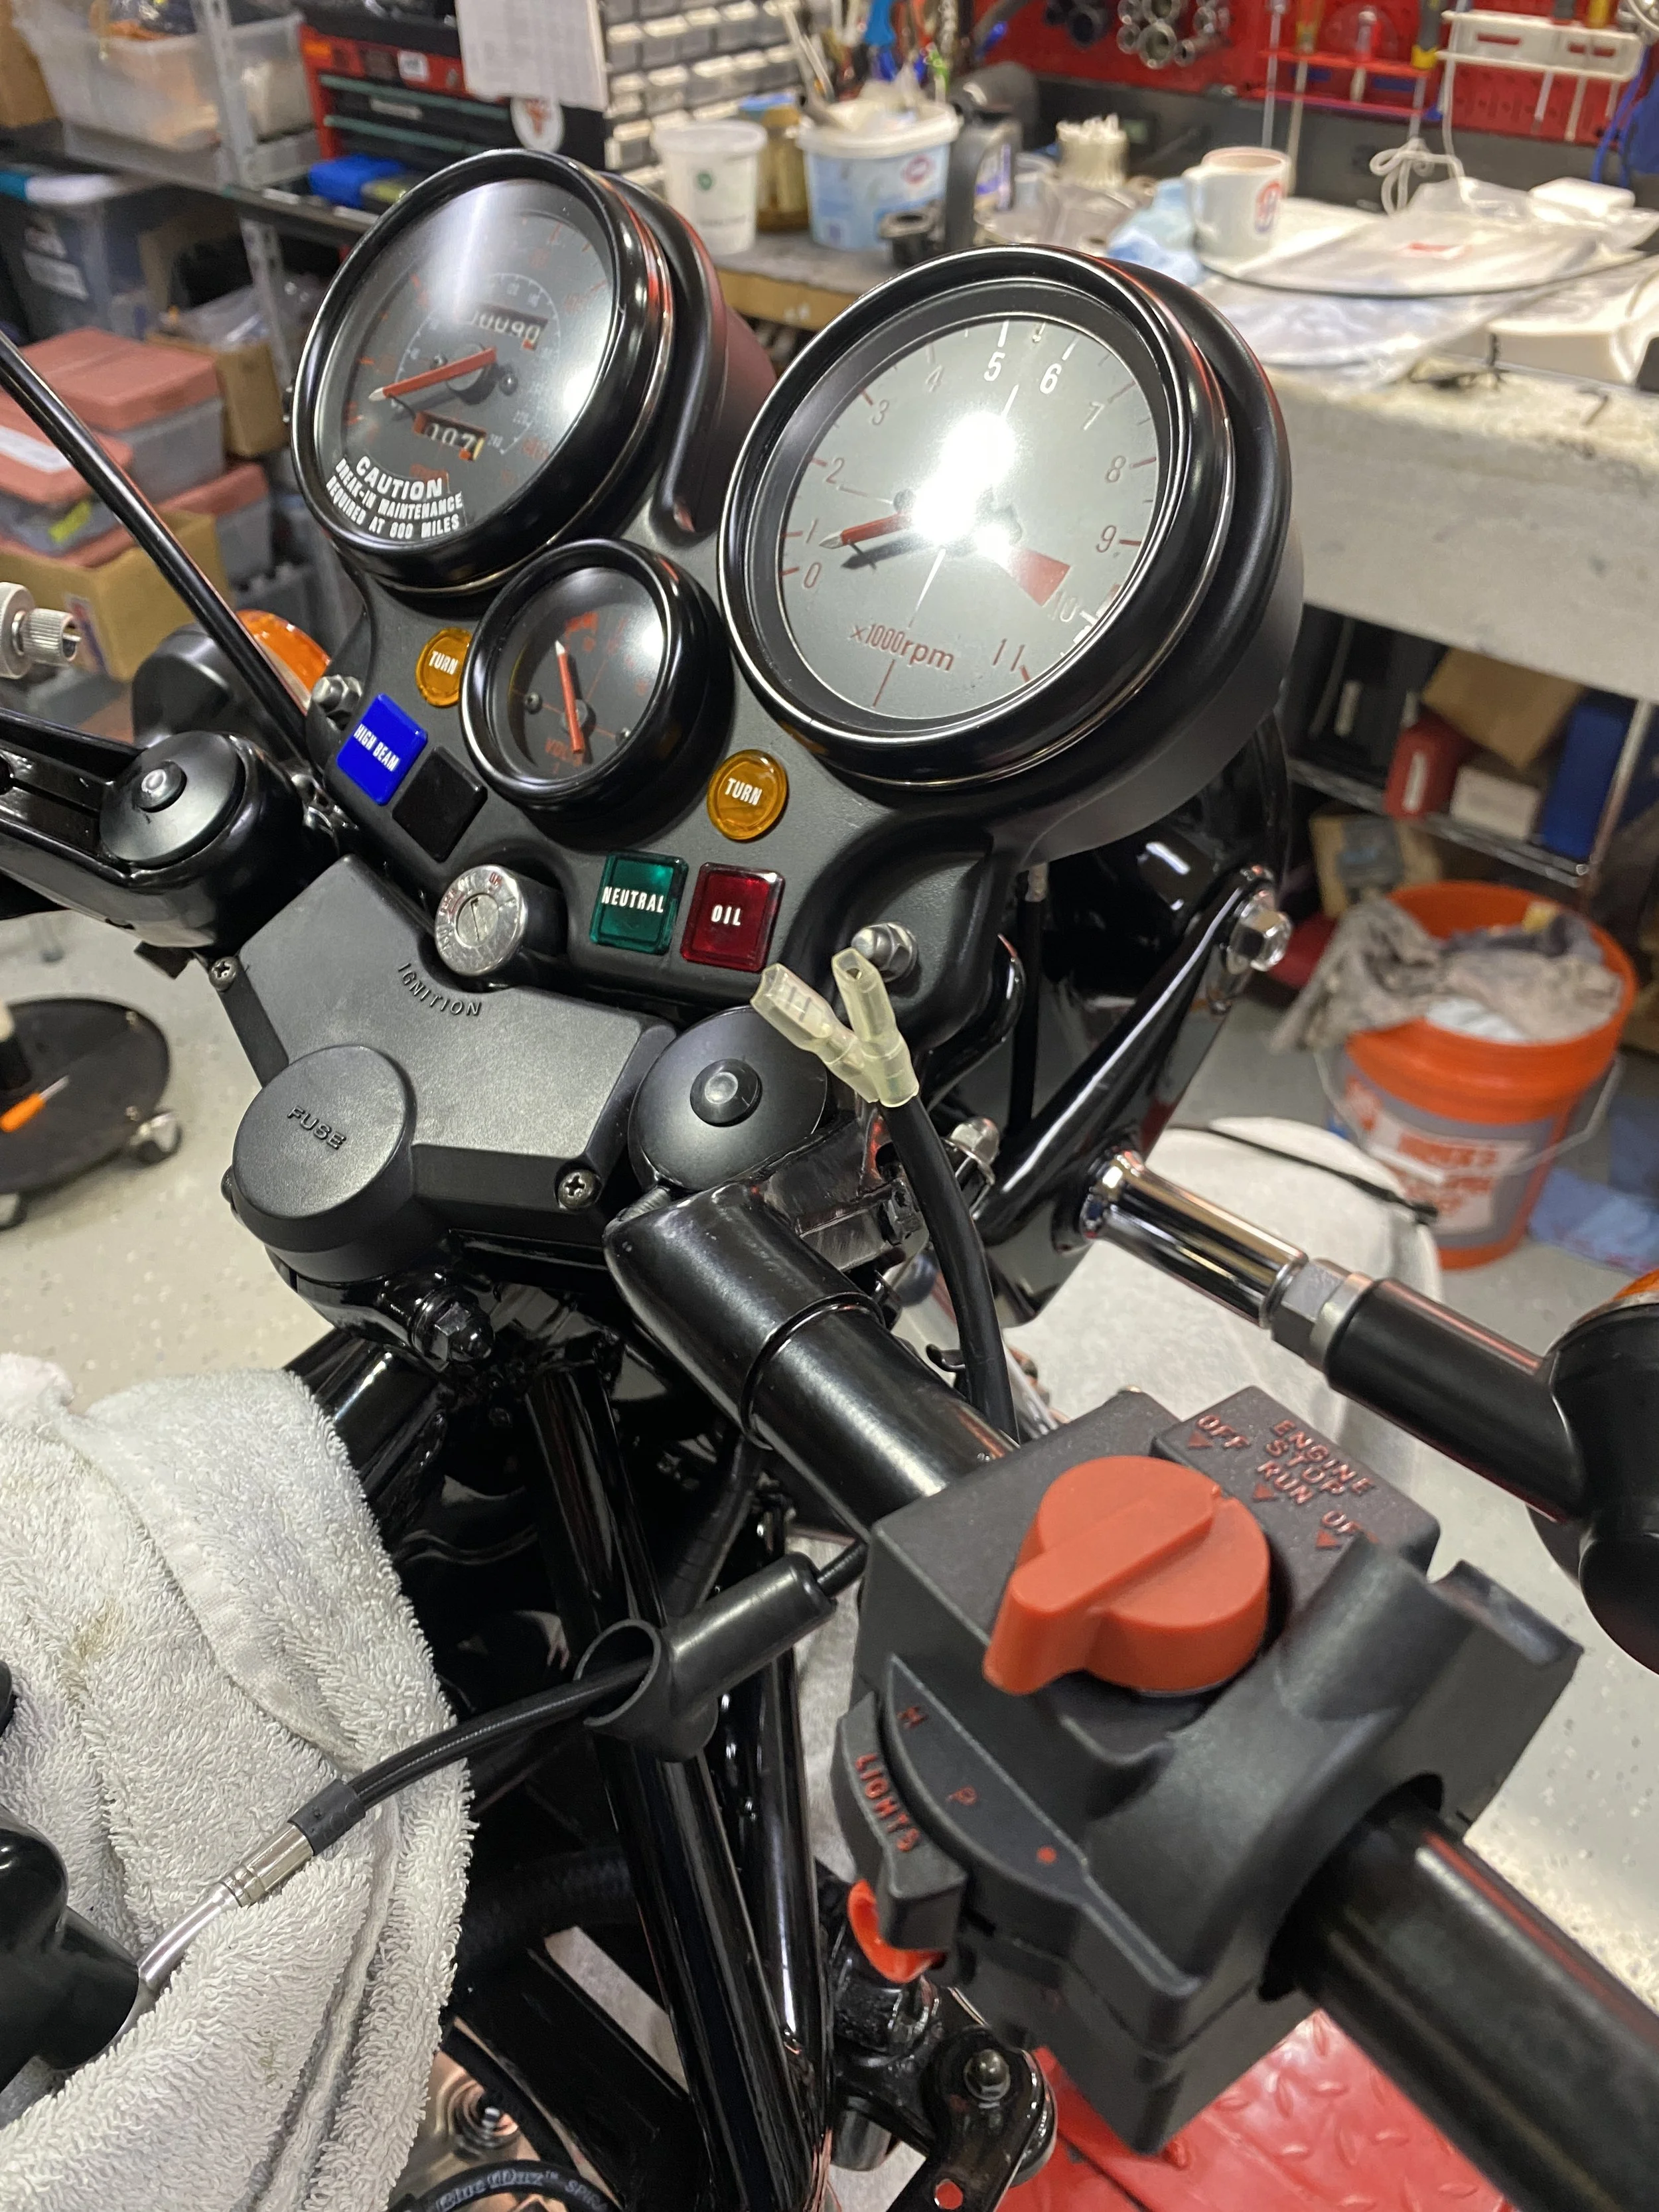
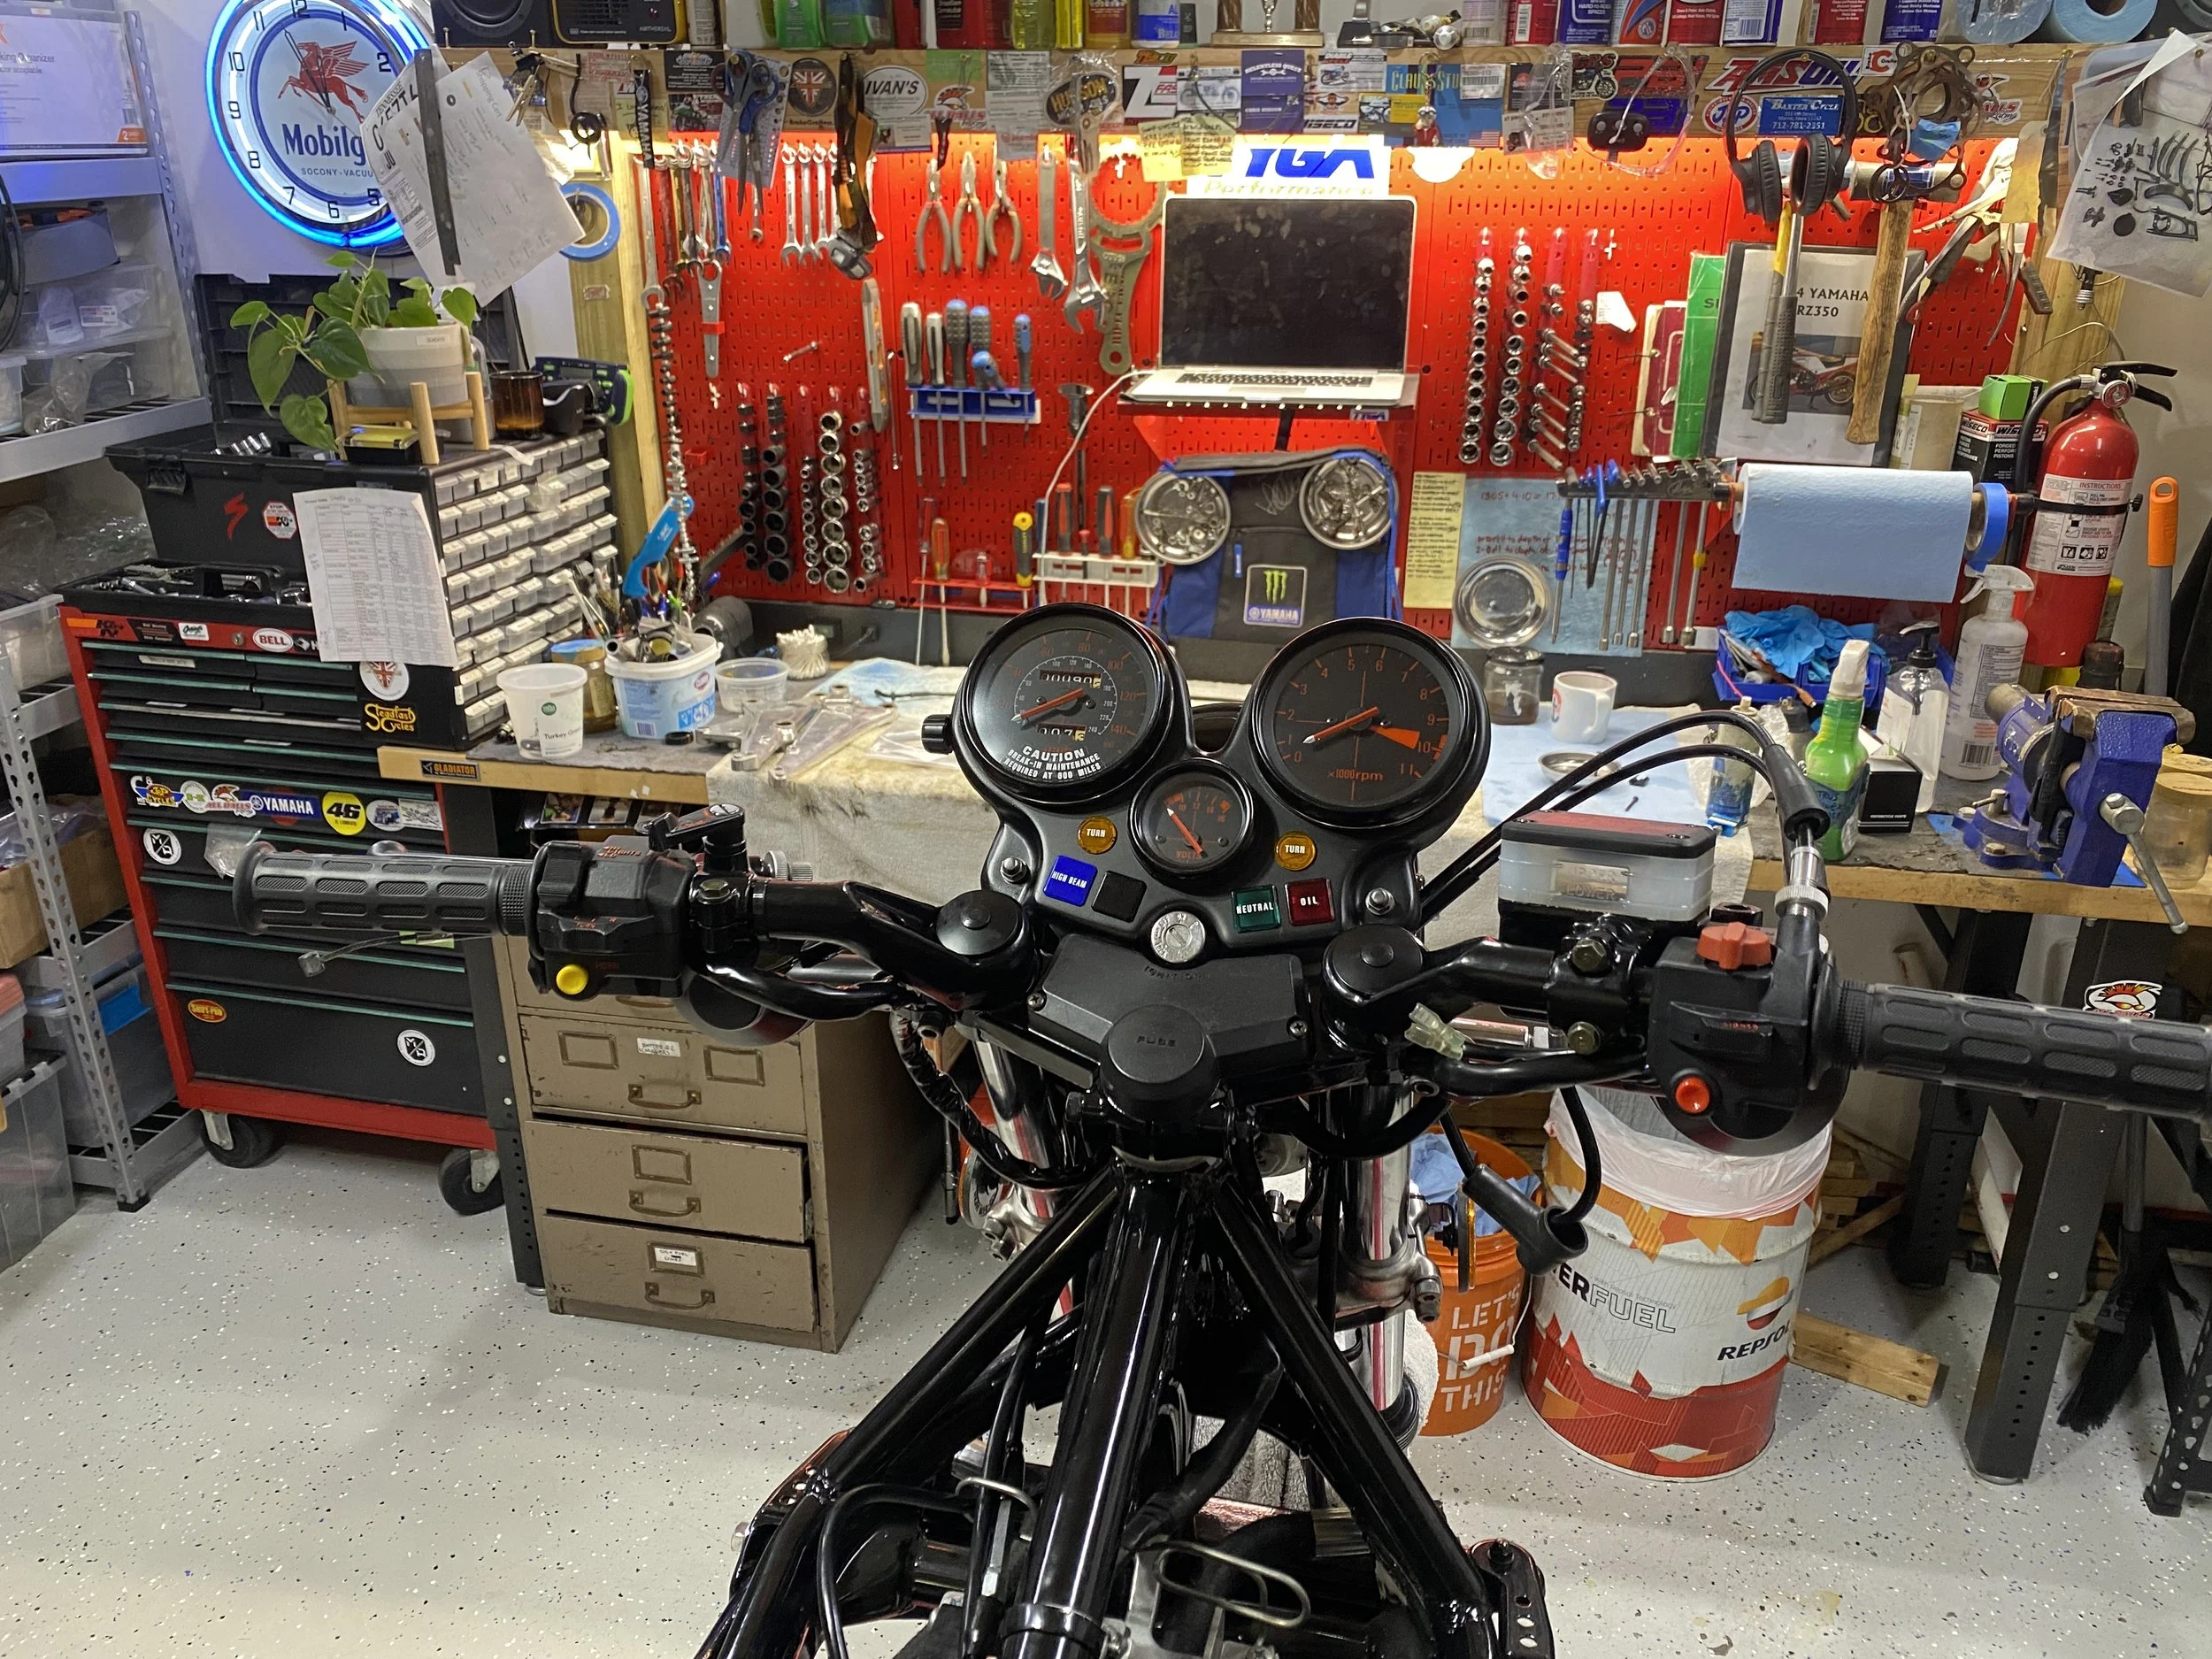
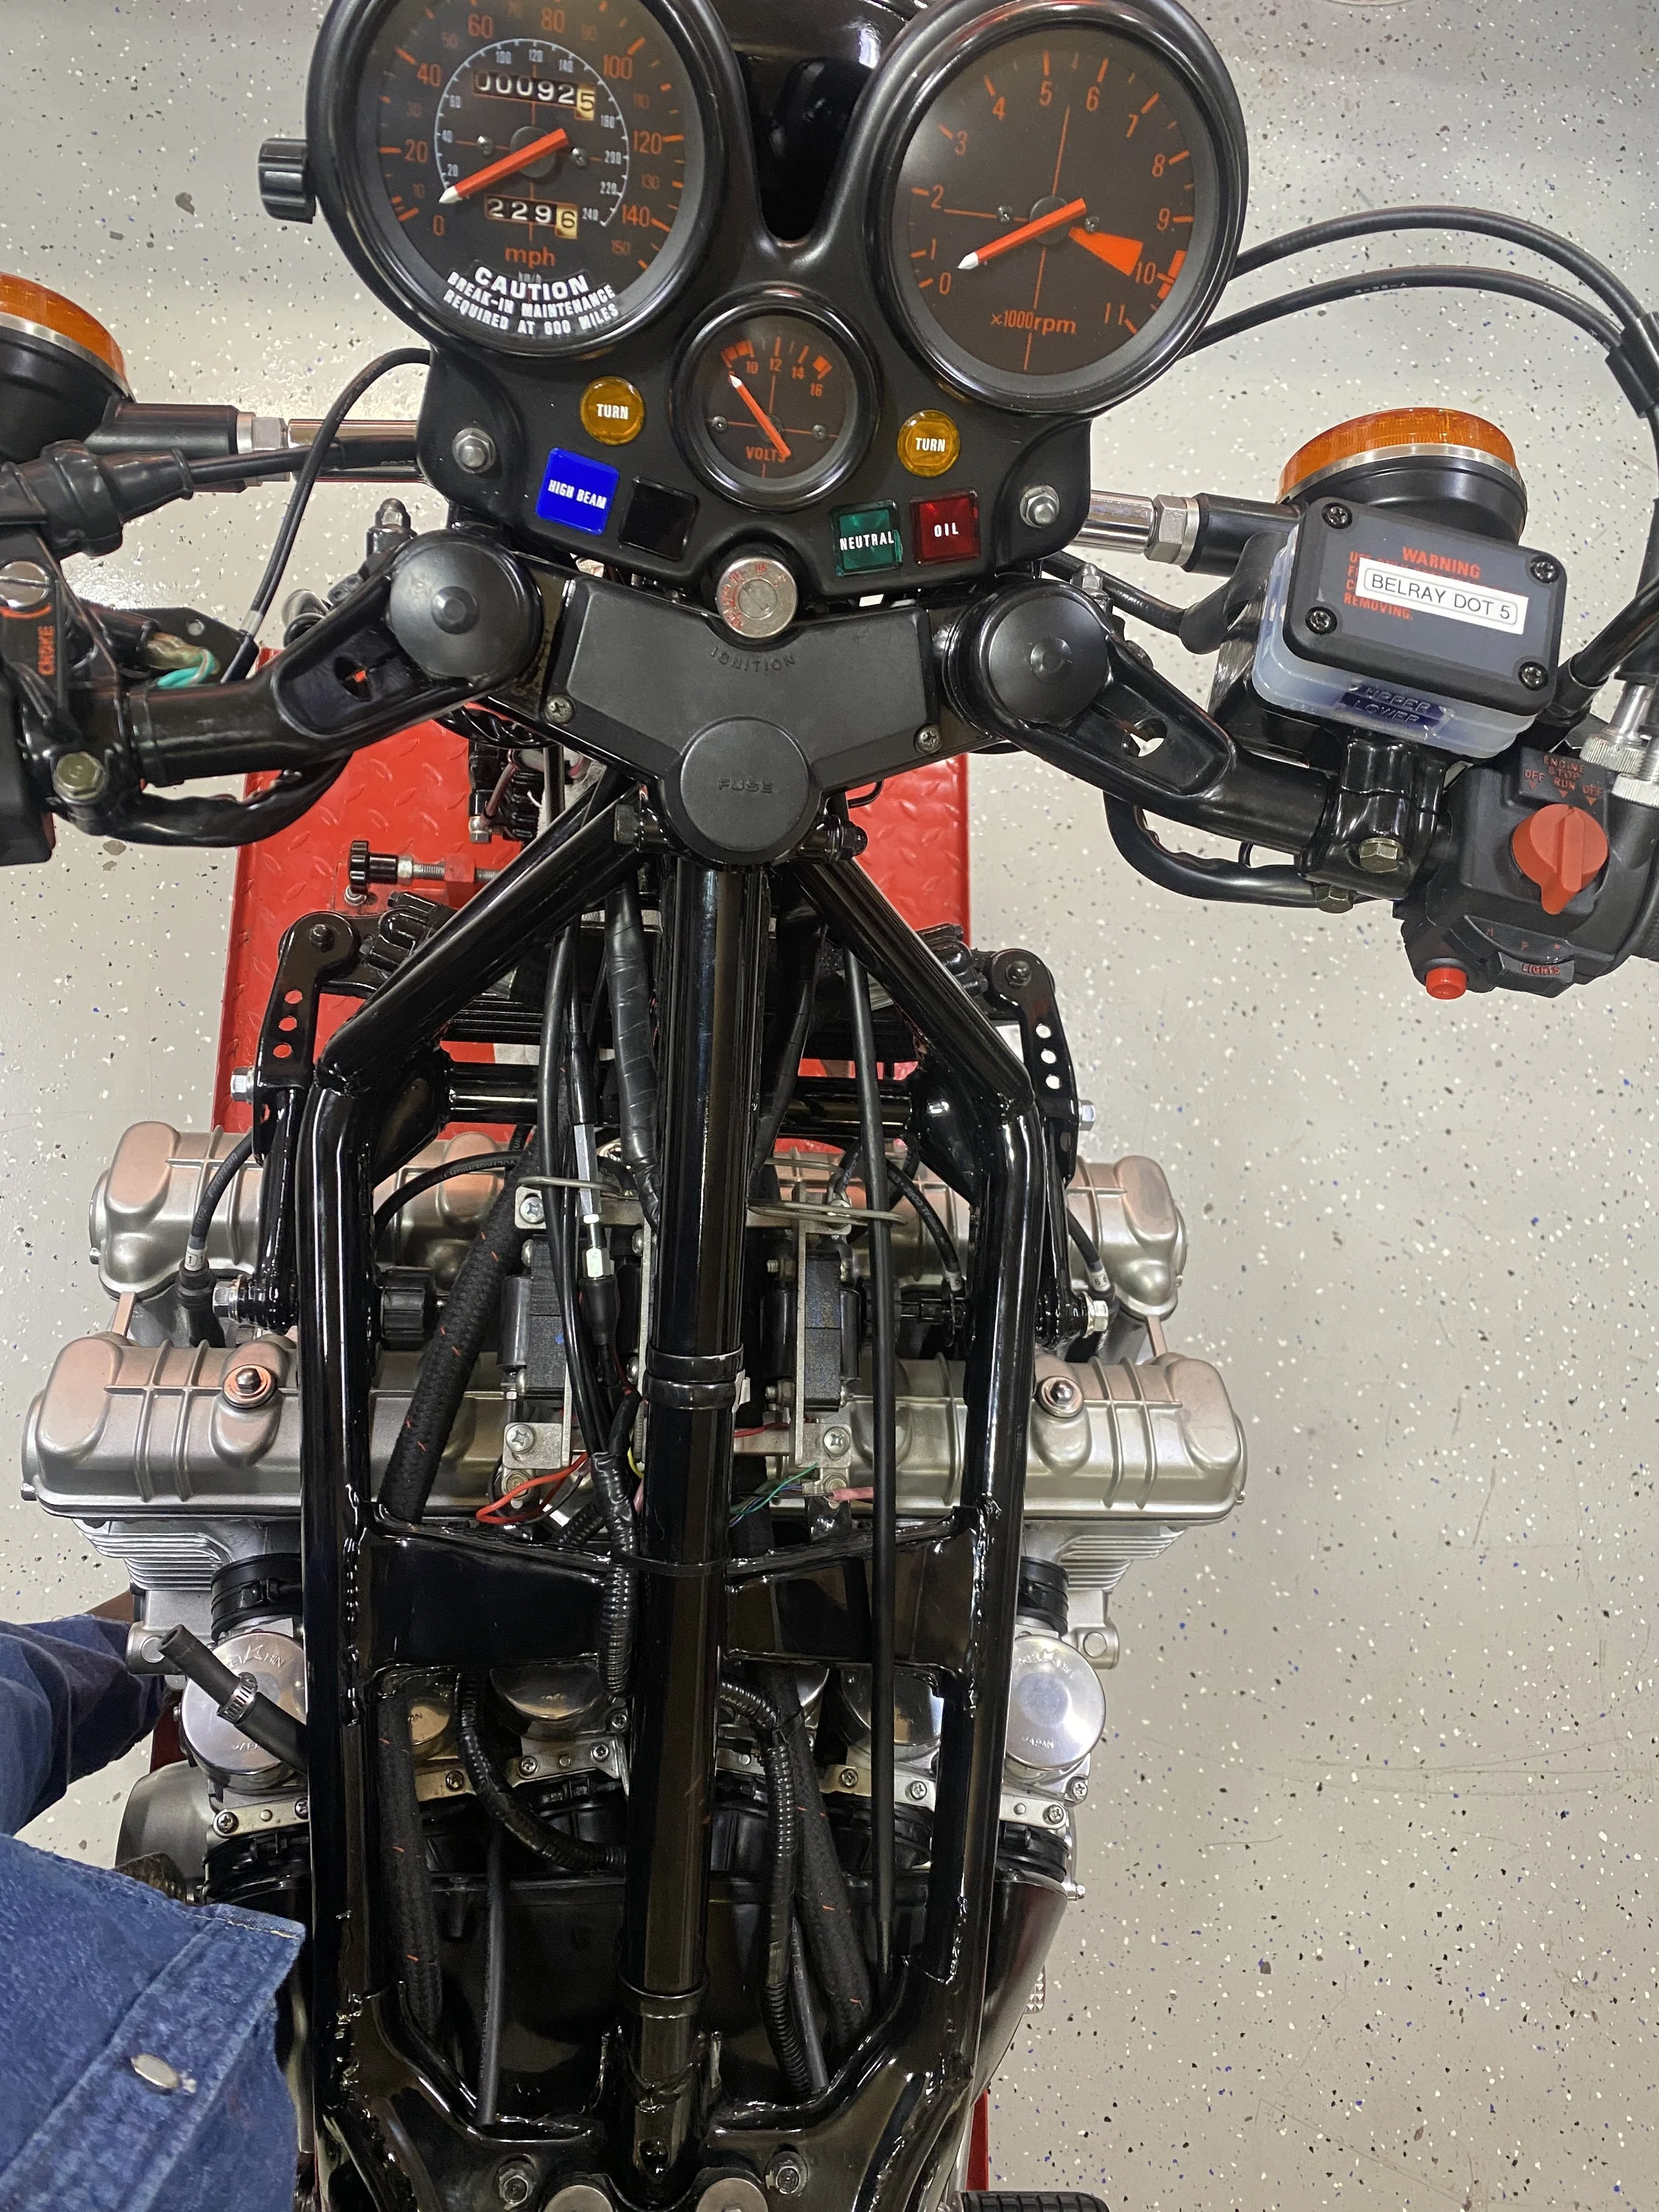
Clocks and cockpit.
and it's about here when i realize I'm going to have to tilt the engine to attach the new throttle cables.
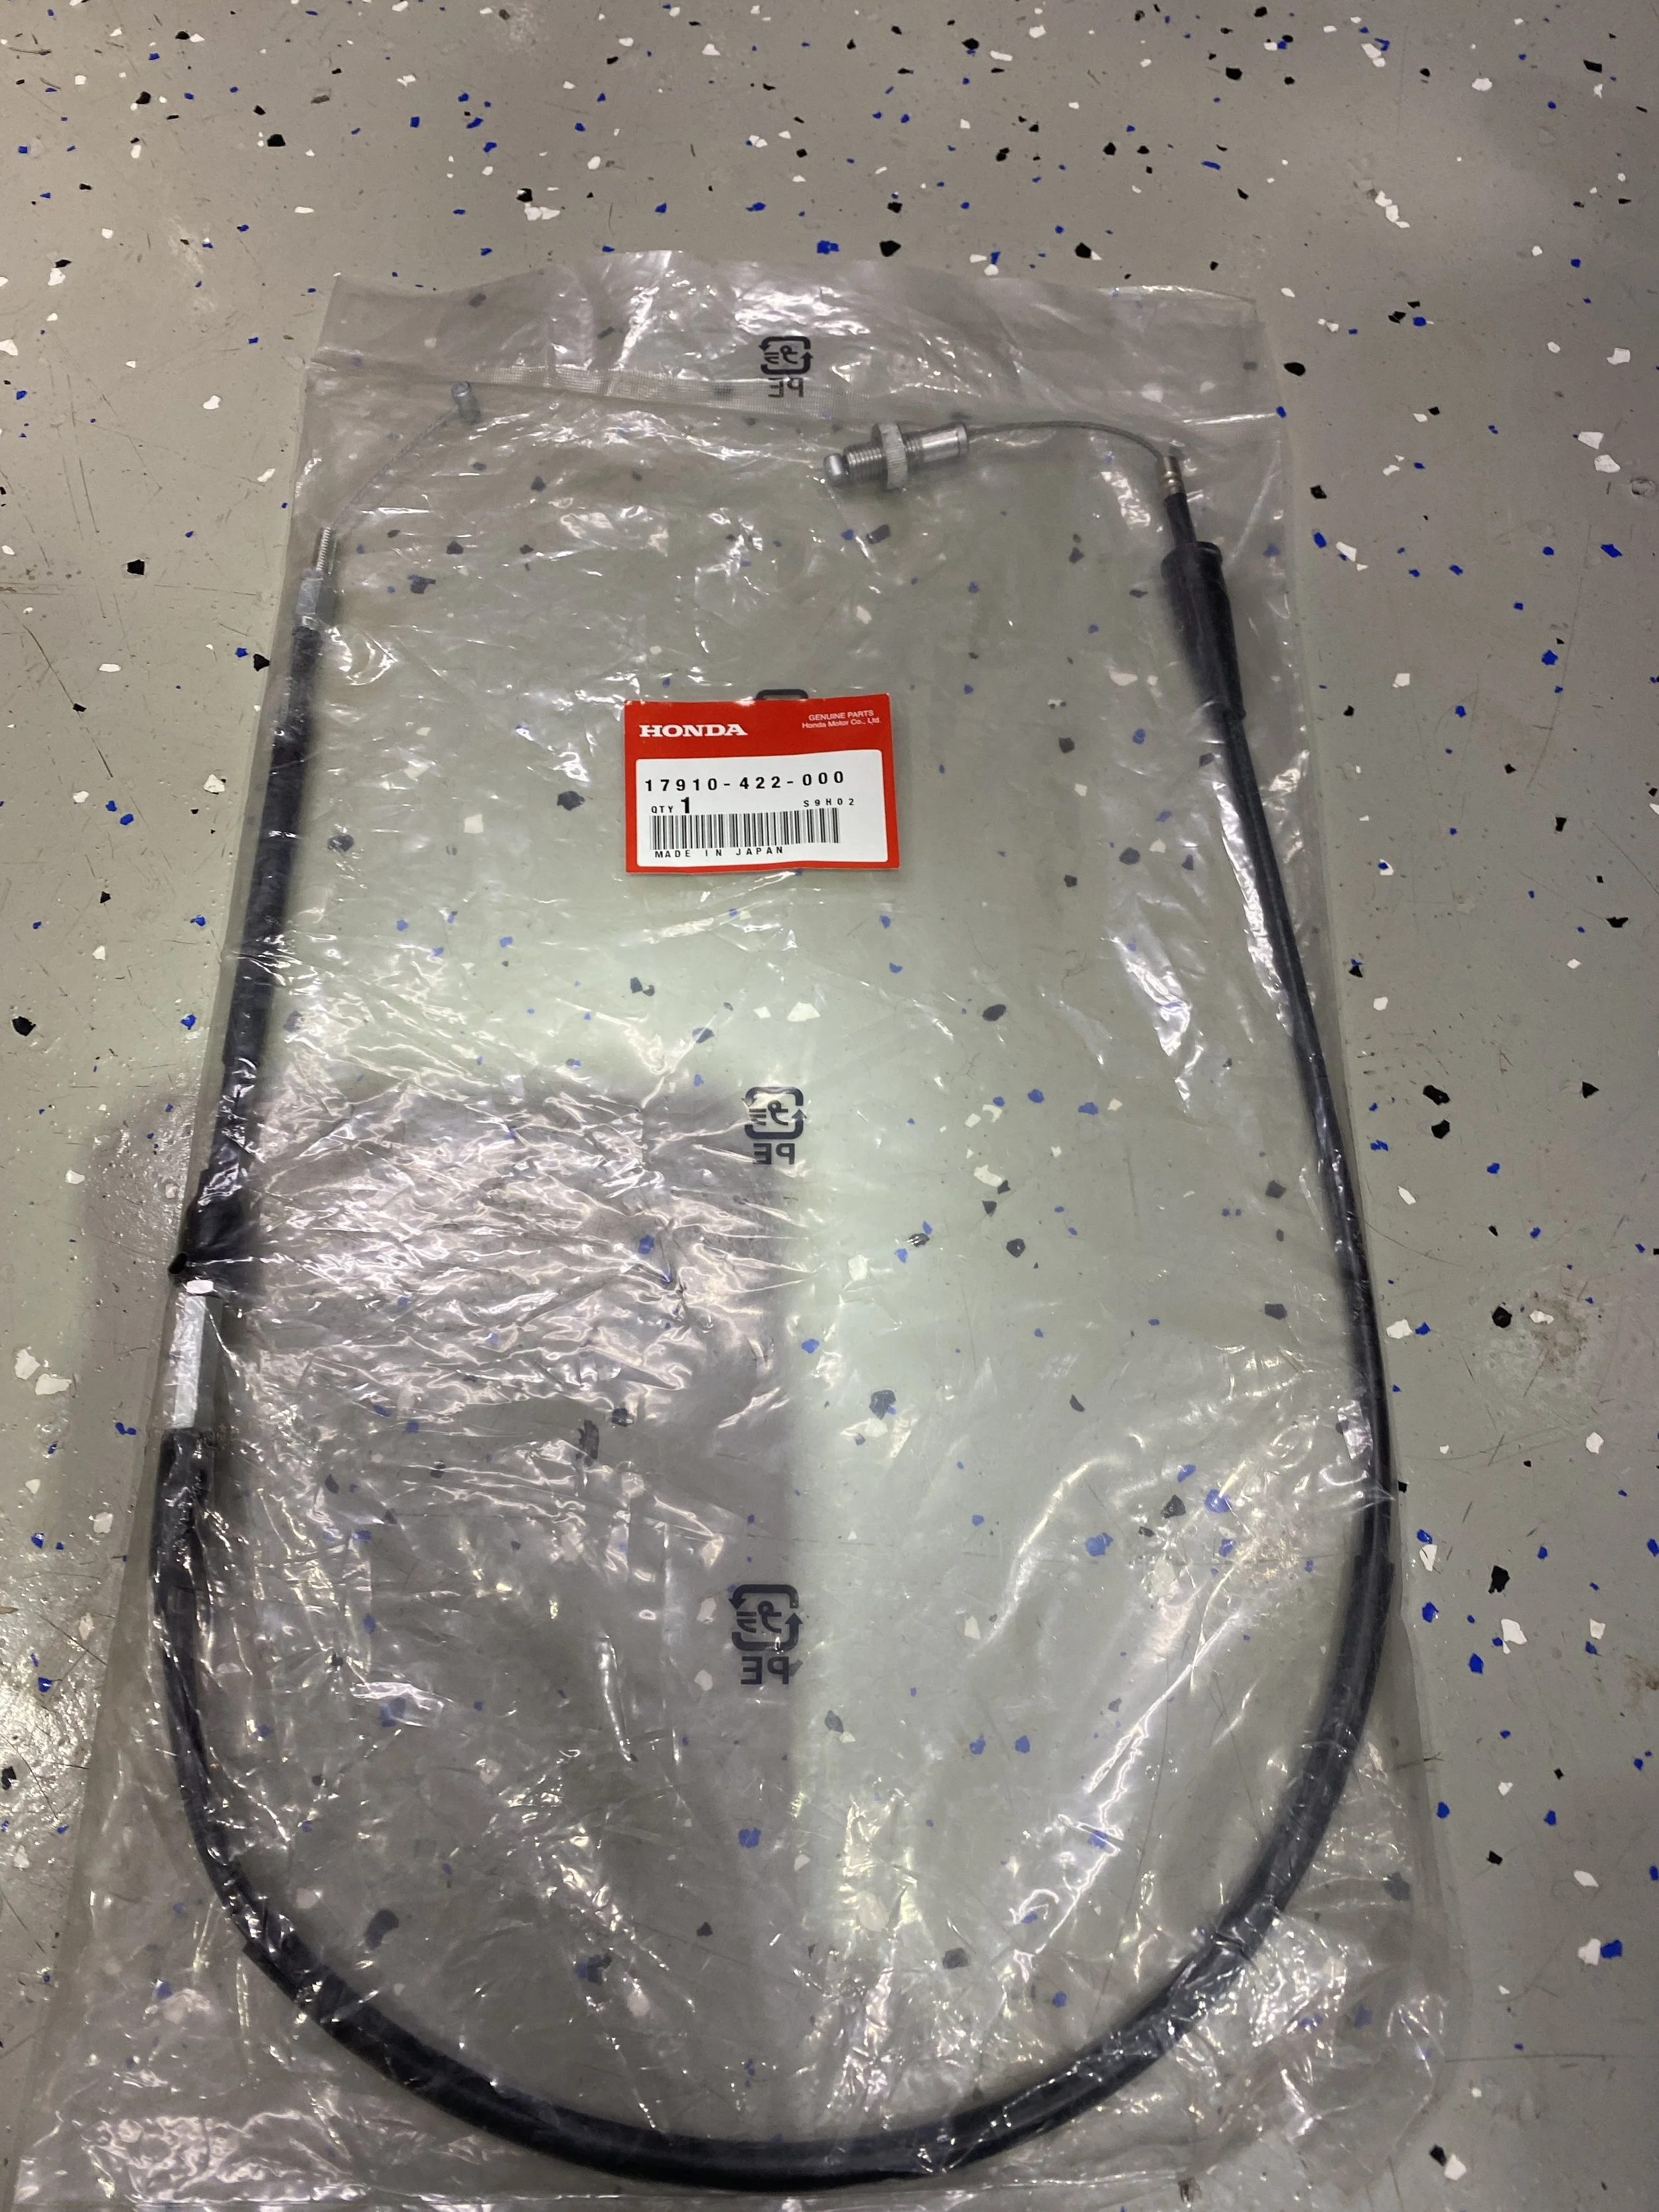
Honda OEM throttle cable.
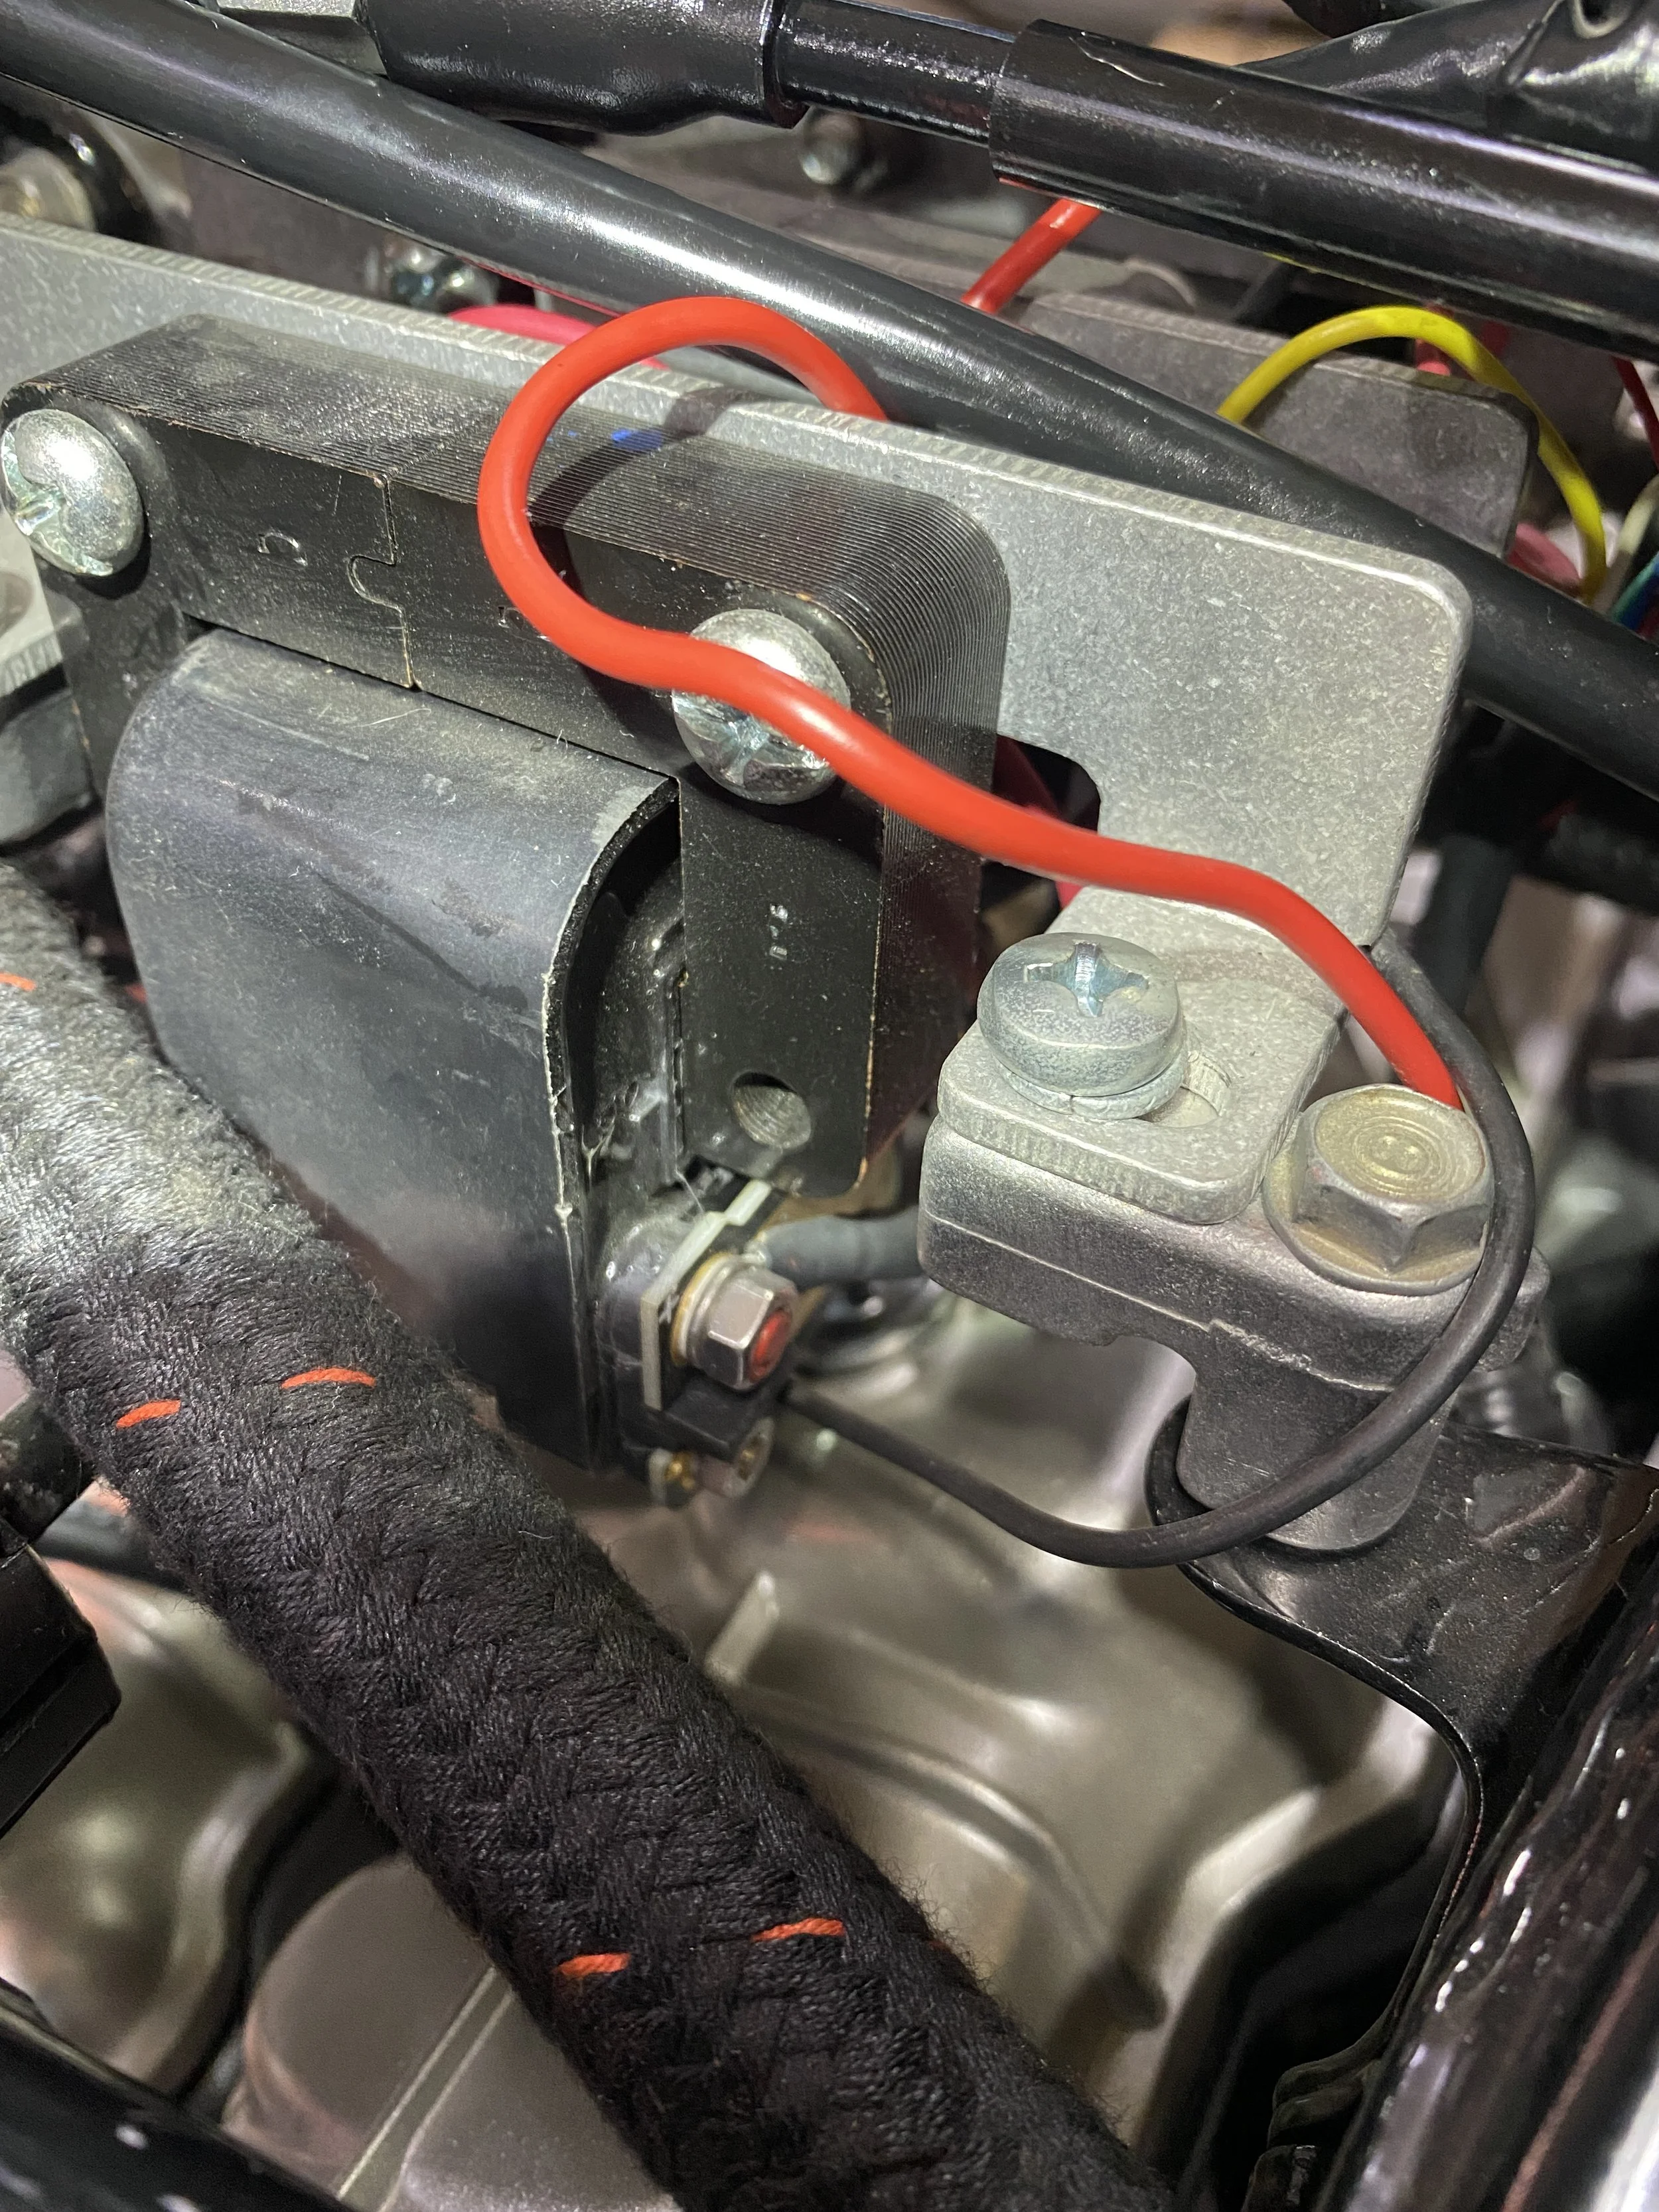
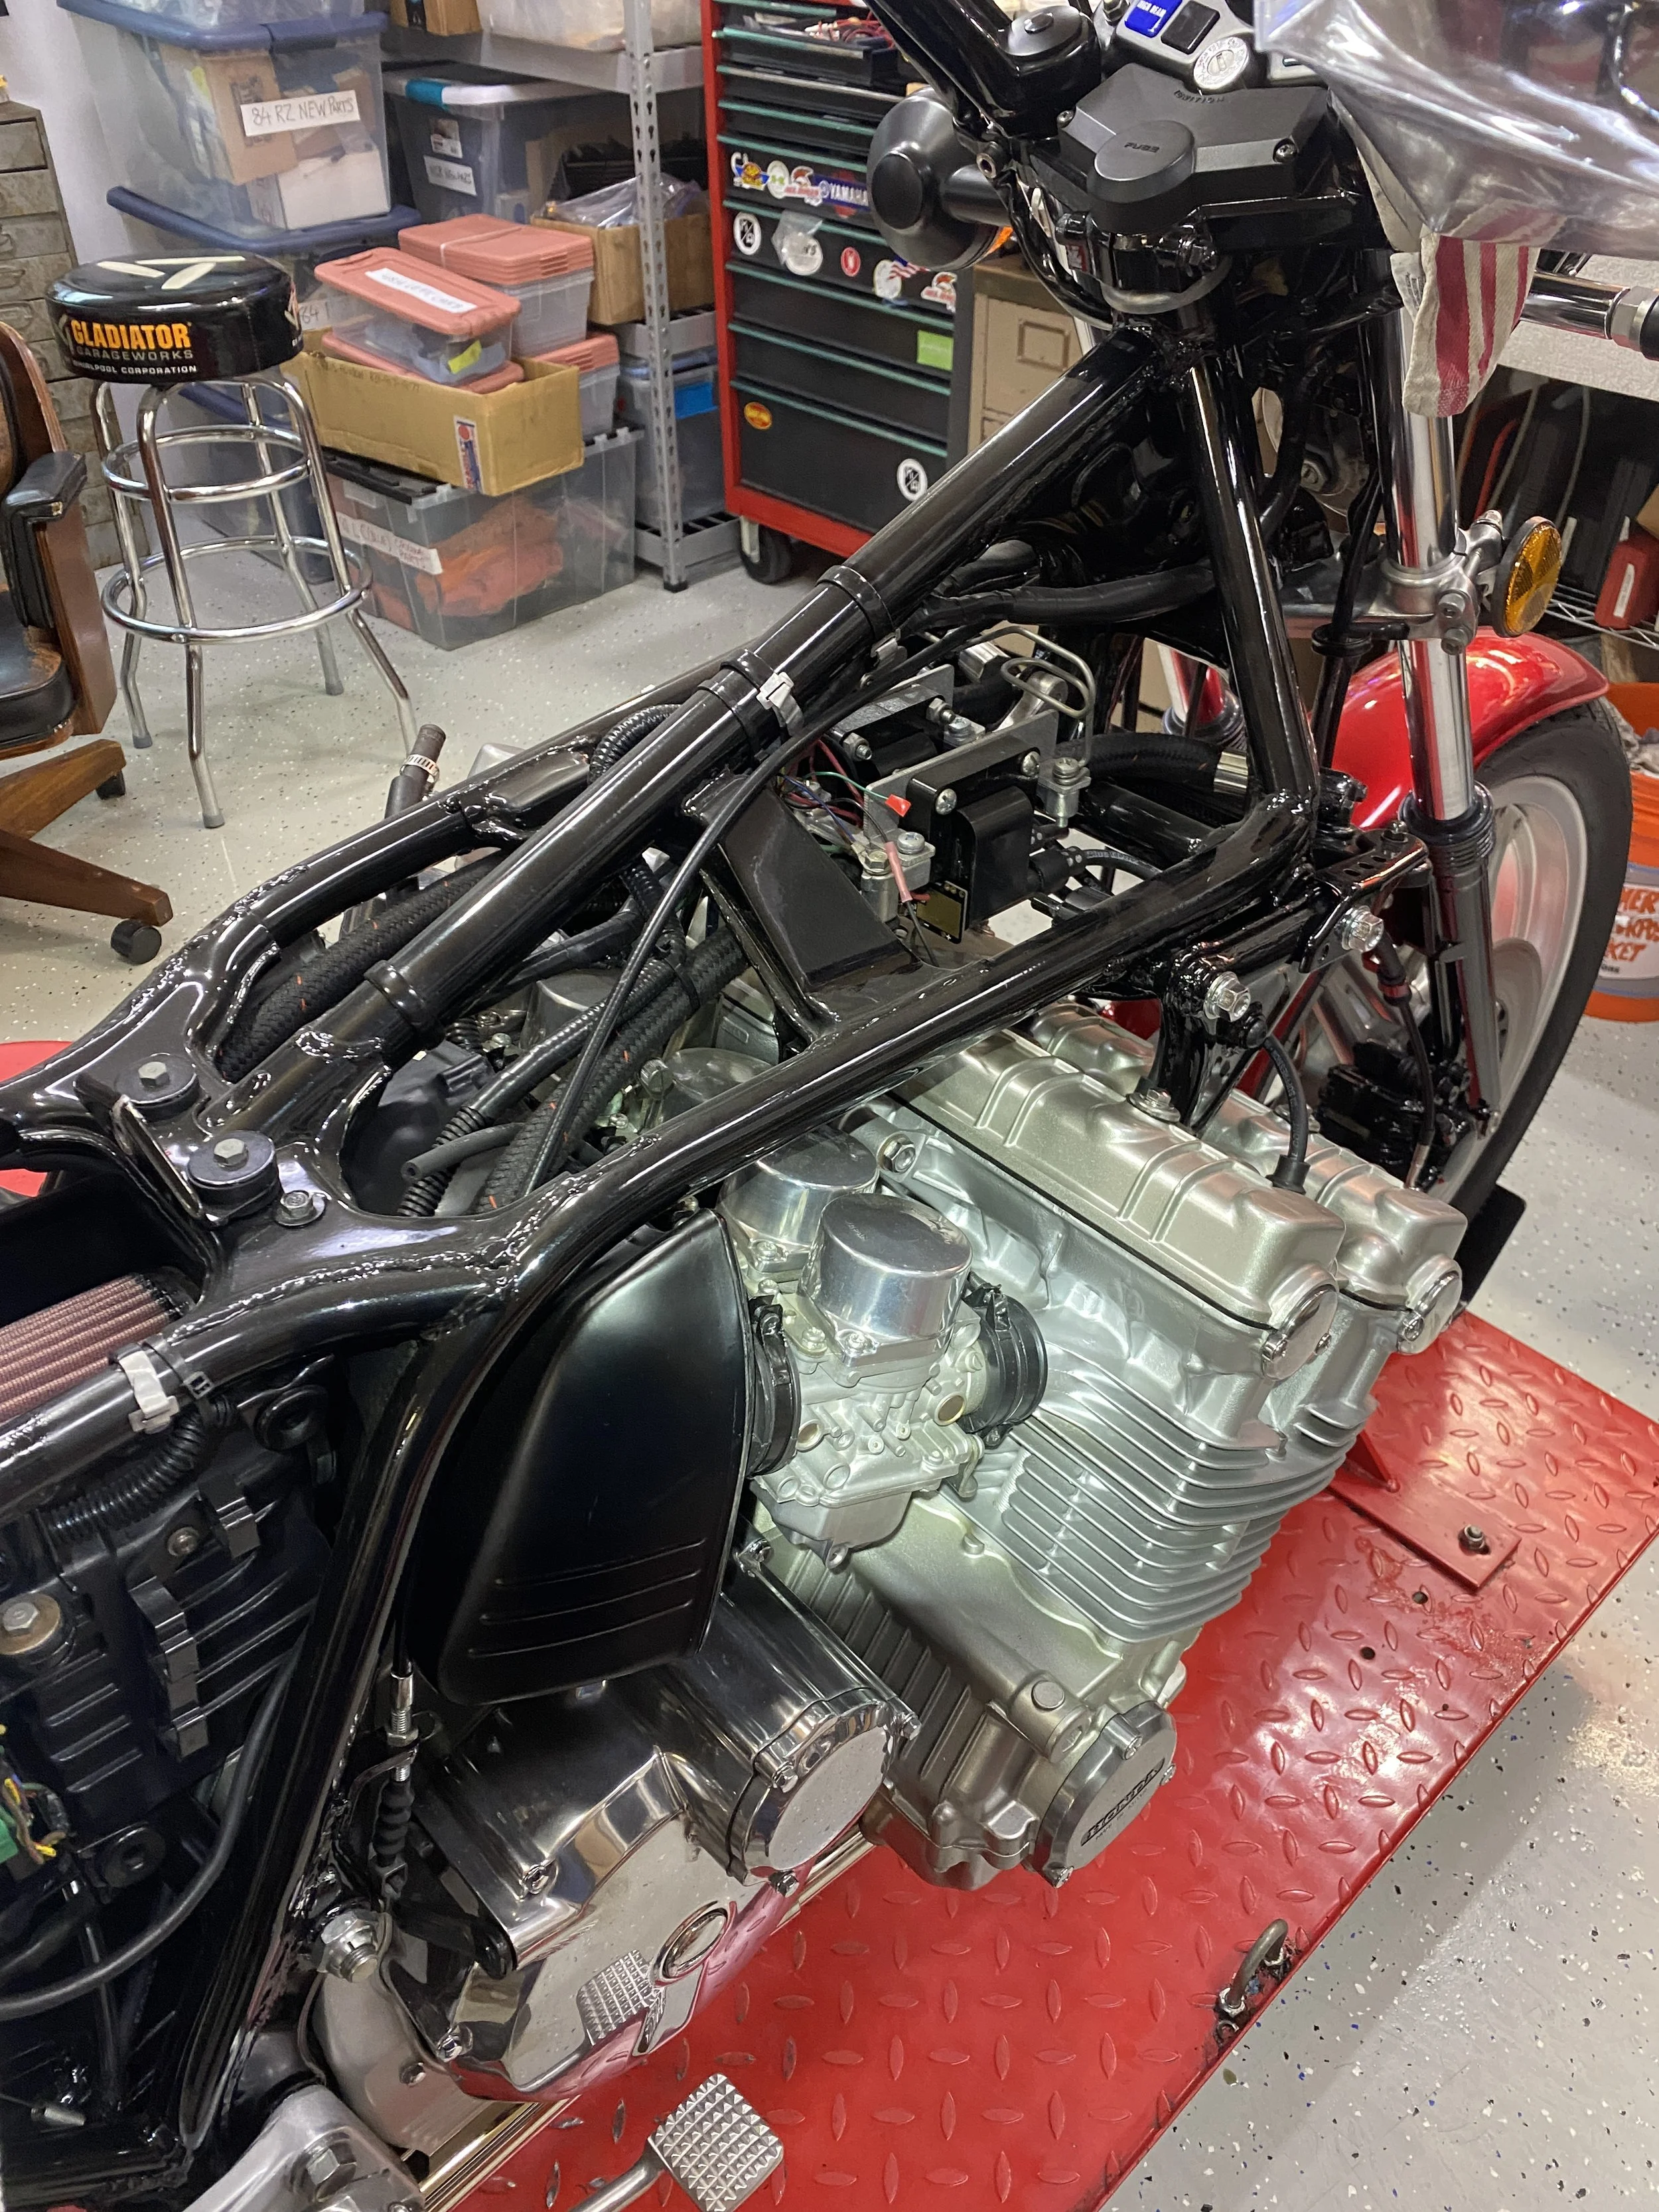
Apparently these are not OEM coils....

exposed circuit board. hmmm.
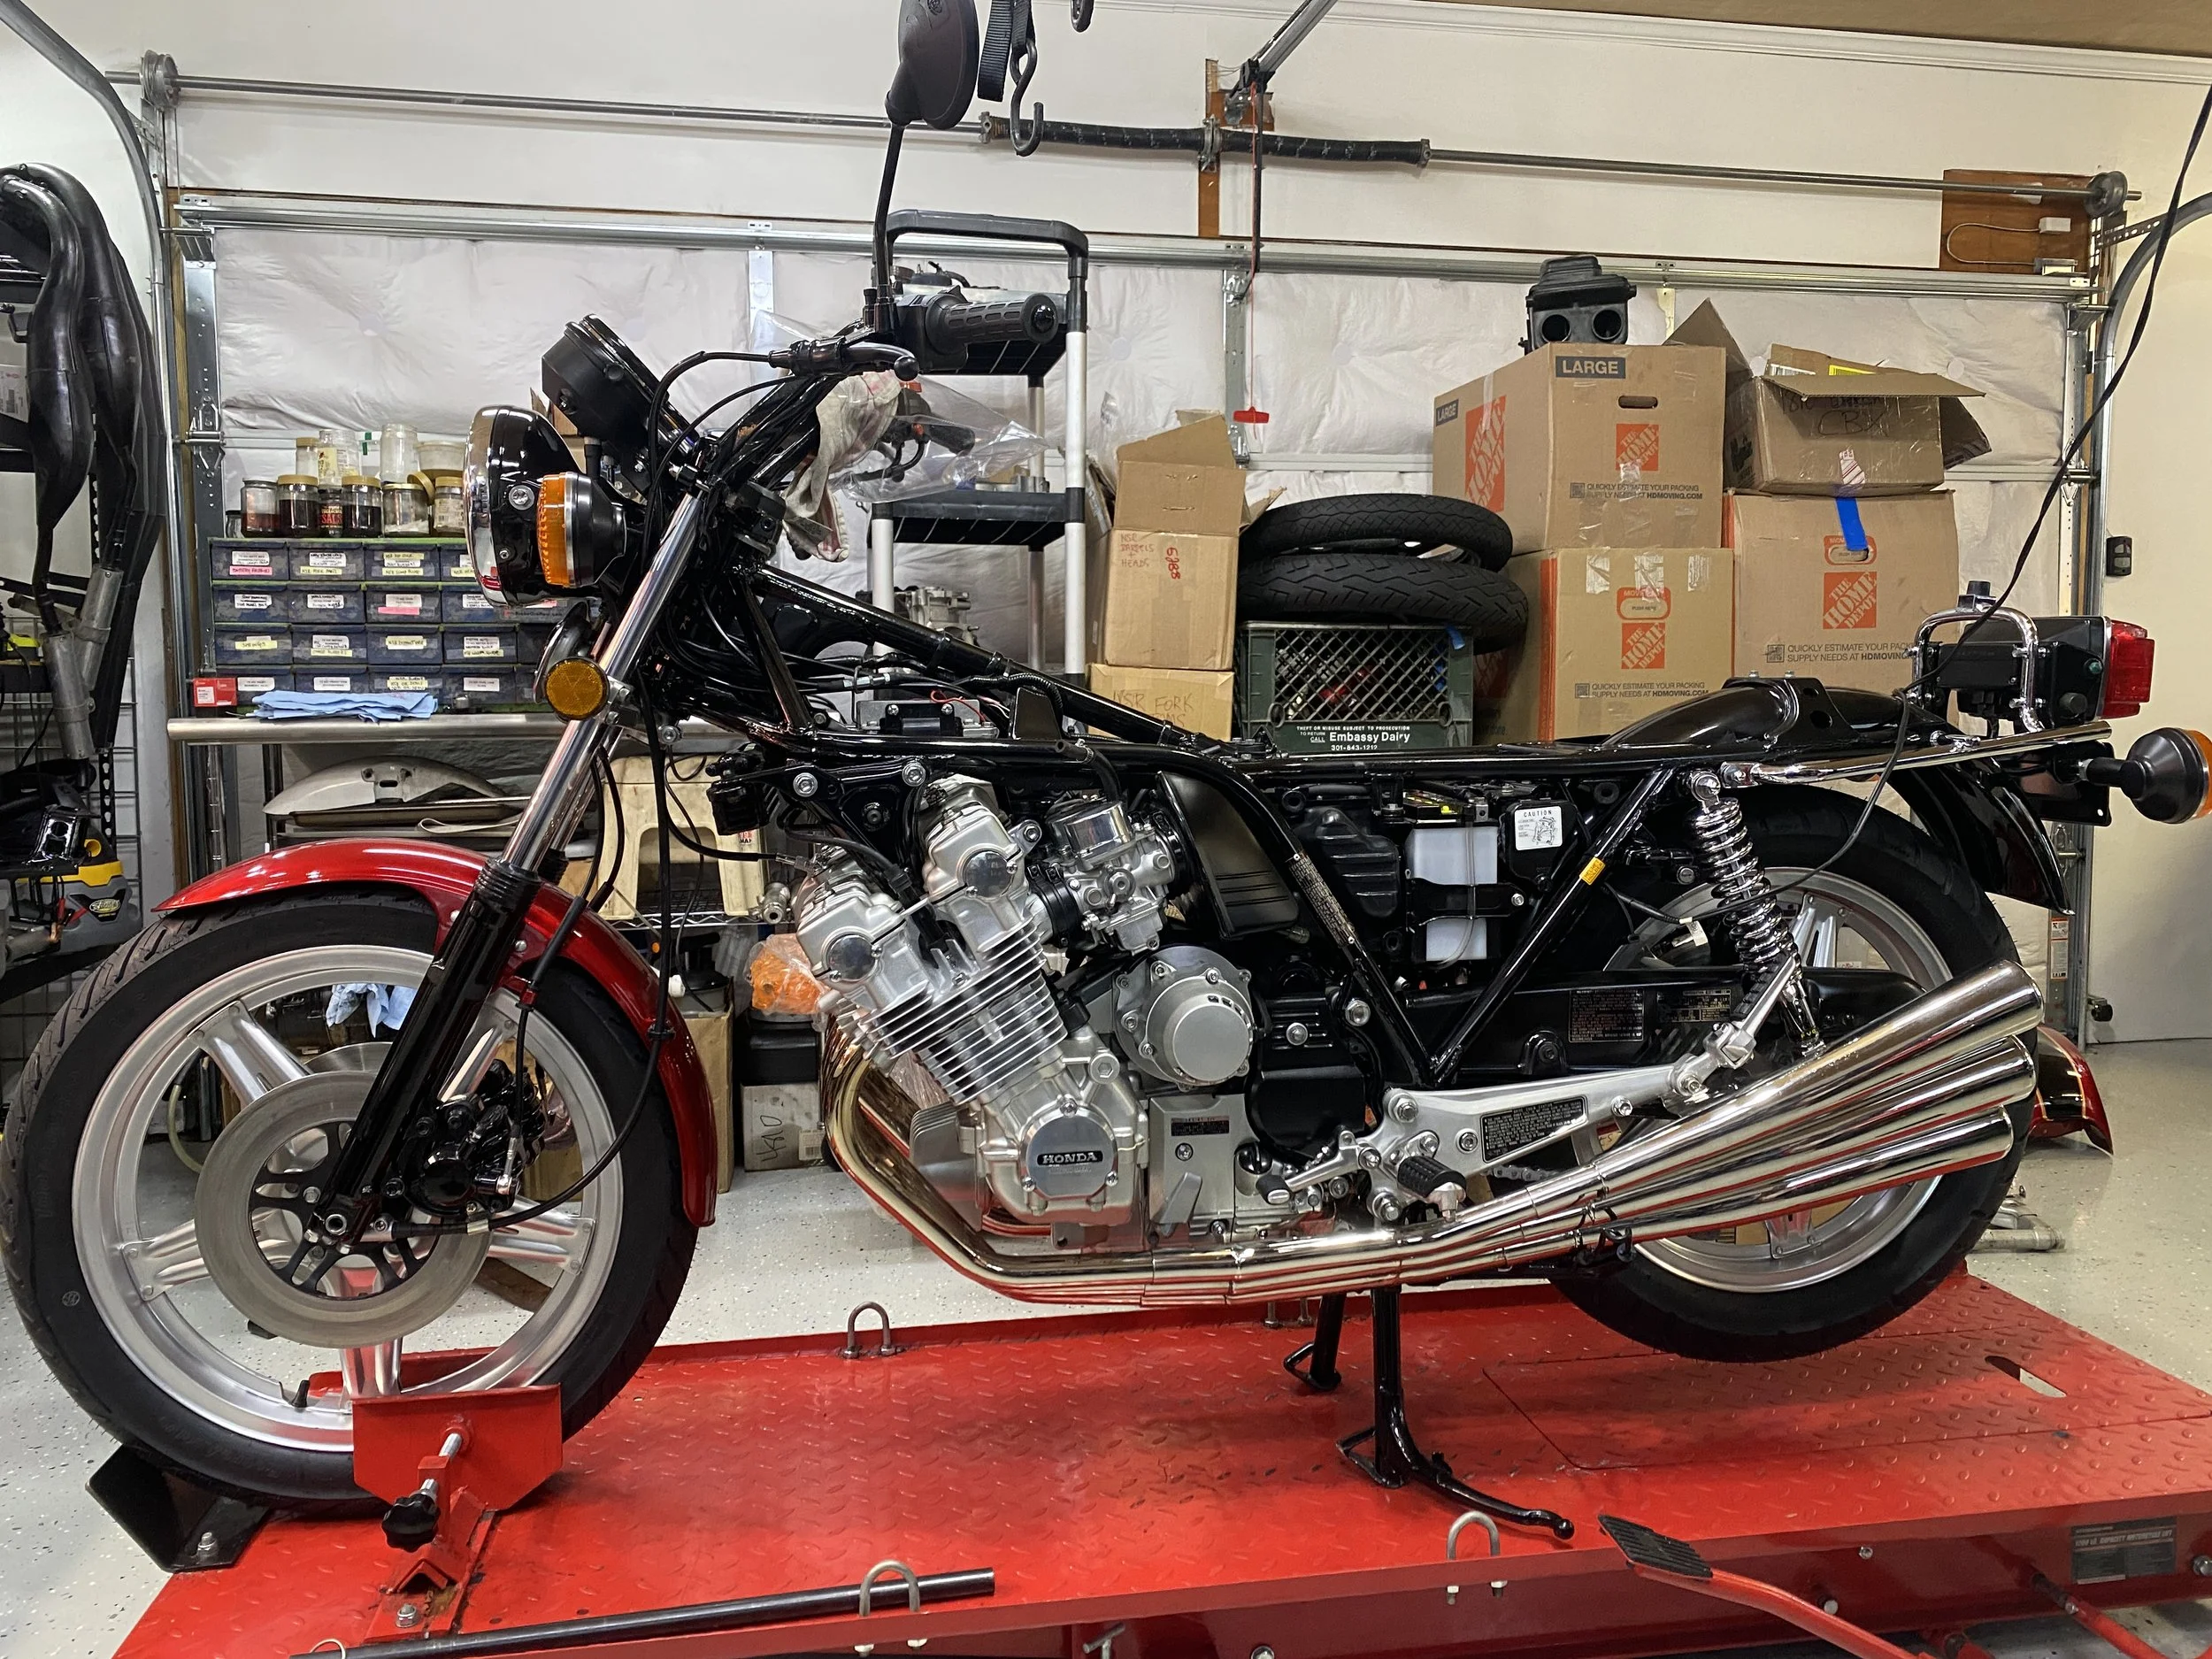
these bars are much more my style
Flat...
still in a quandry on how to re-finish the Sport Kit hangers
Top brake pipe that once led to the Master Cylinder on the original high bars is now too long for the Sport Bars. I mean, it will work, It's just not a good look. Sourced a shorter version of this same style from Bill @ Tim's CBX. Add $50 to the $1200ish total spent on Sport Kit parts. Had I known....etc.
Attaching Sport Kit (shorter) Cables
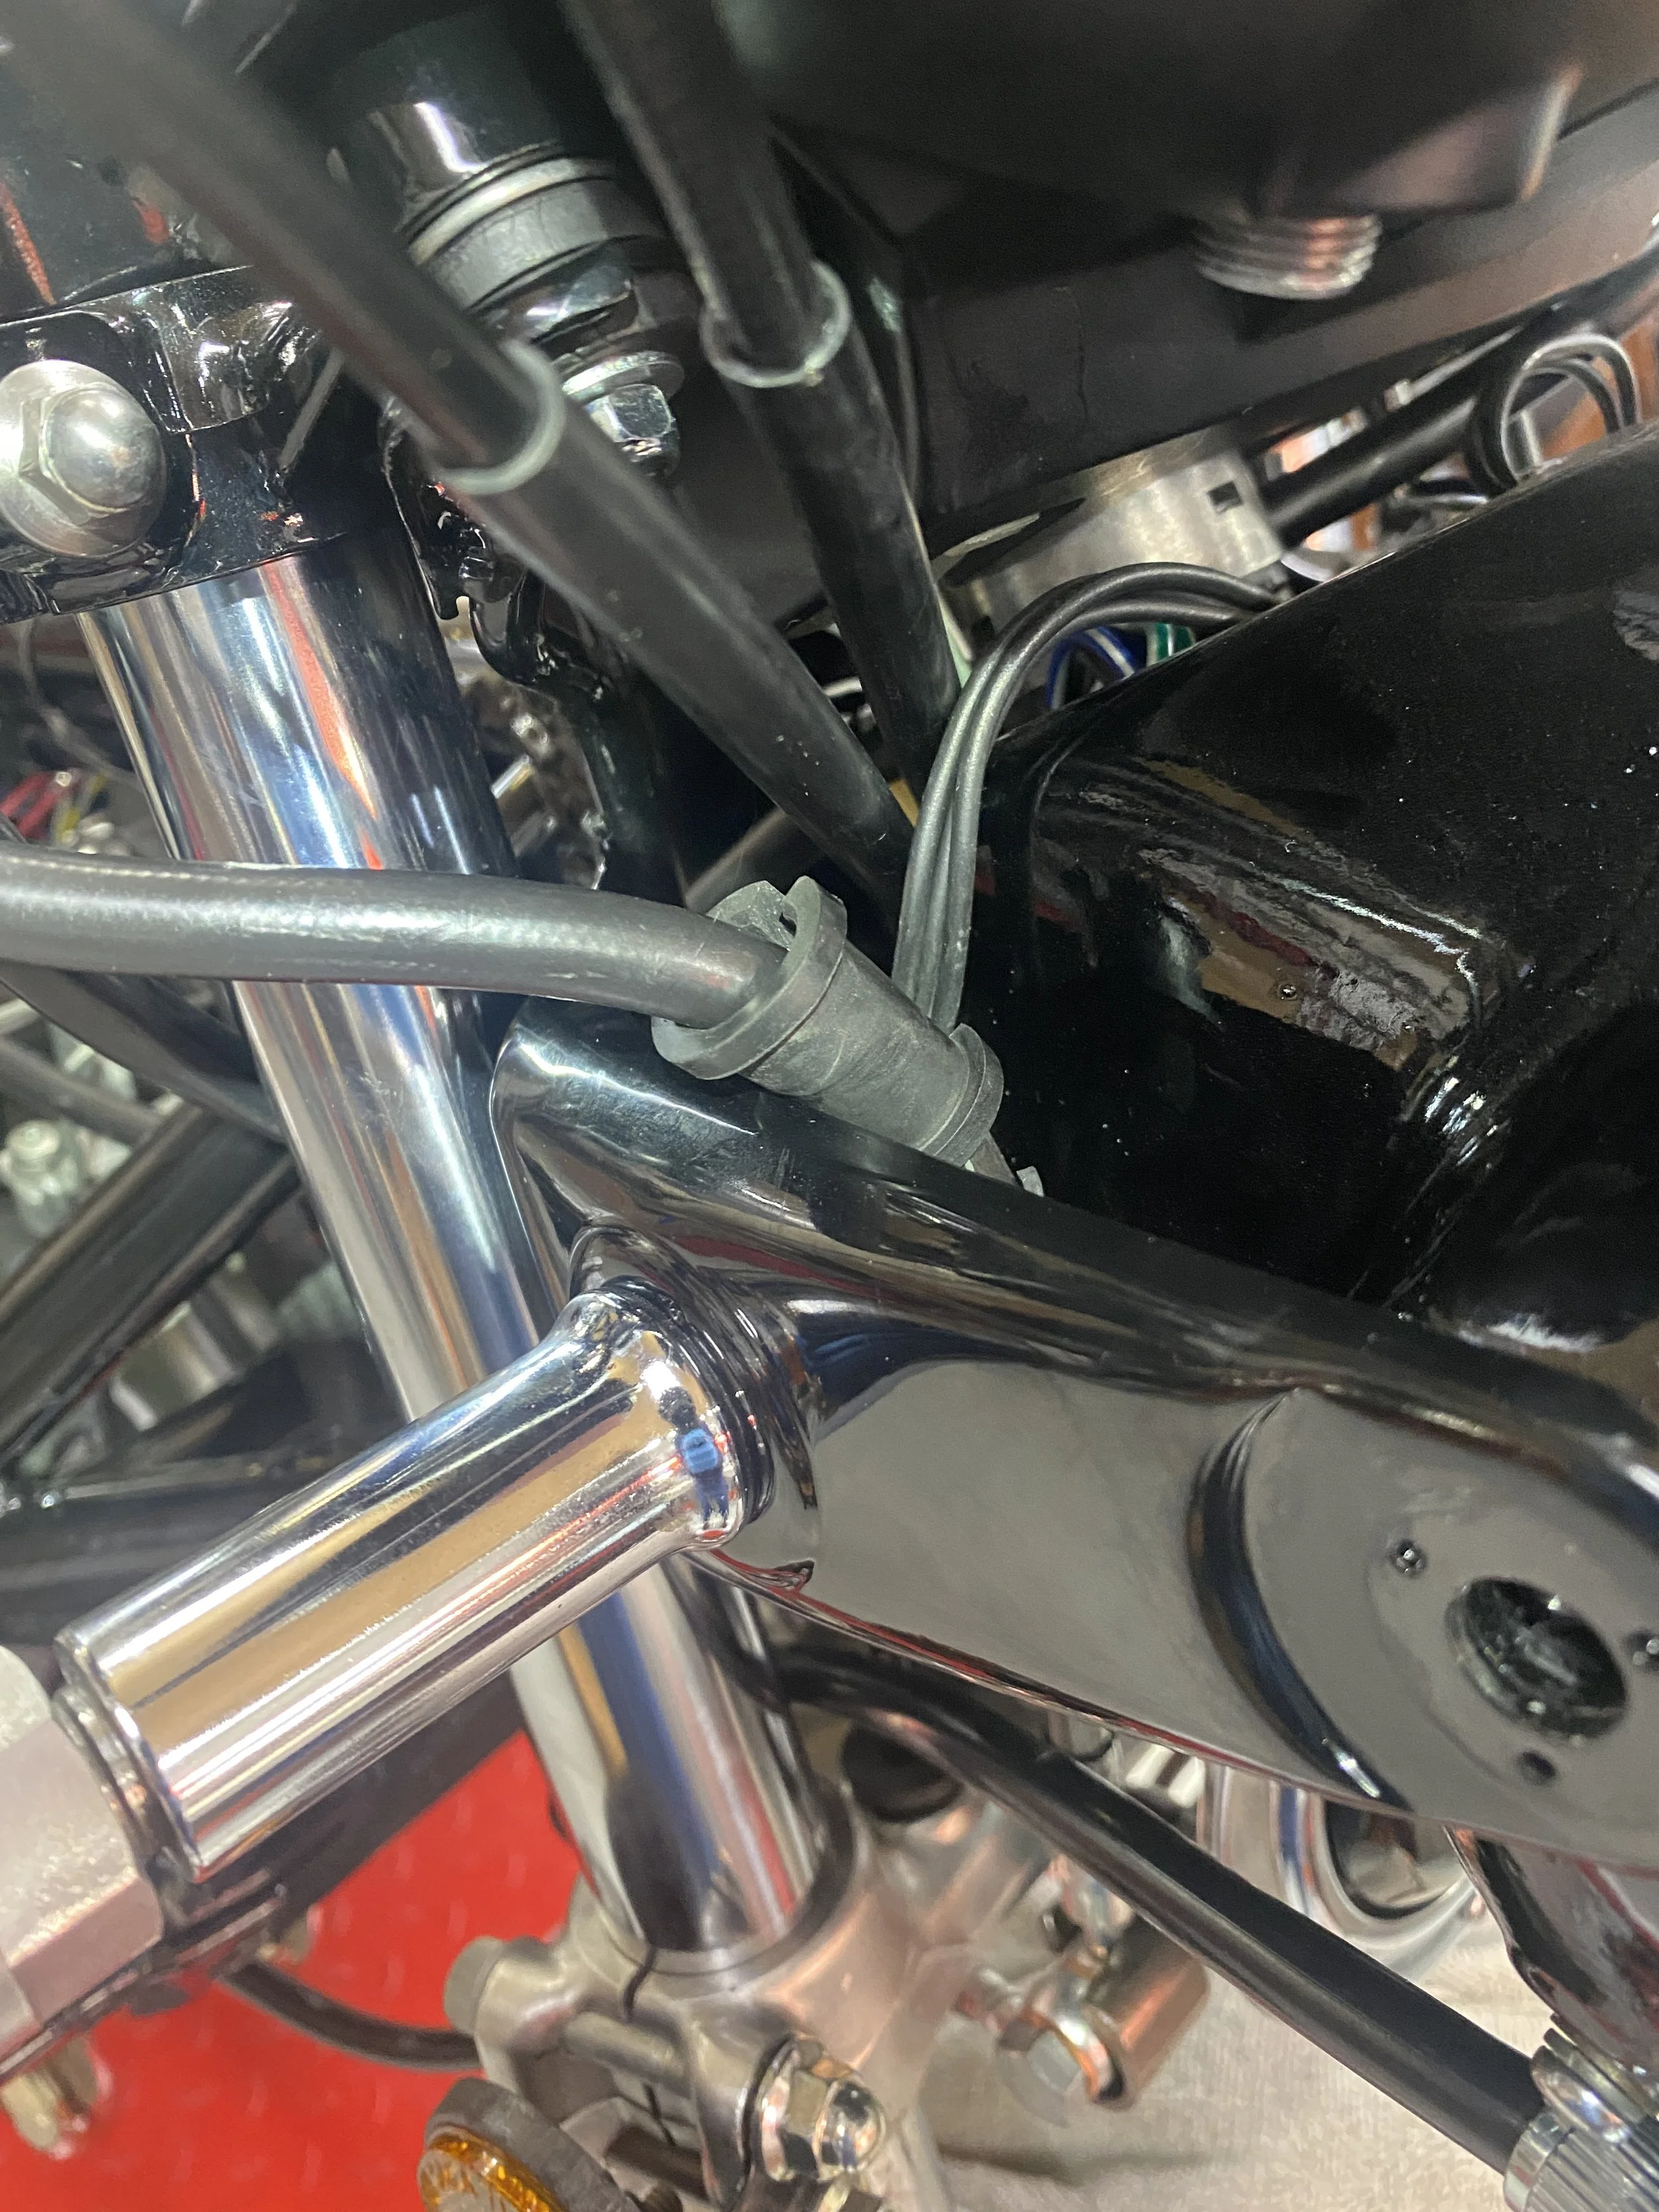
Was REALLY disappointed when I found out that I simply could not access the exact point where I would have to connect the new shorter sport kit throttle cable without doing the infamous CBX Motor Tilt.


clutch cable must be detached....I like the rubber coated arm

very helpful mark on the gearshift arm and shaft

Disconnected all the plug cables in prep for tilting the motor and labelled them while at it.

I had to buy a longer connecting rod...

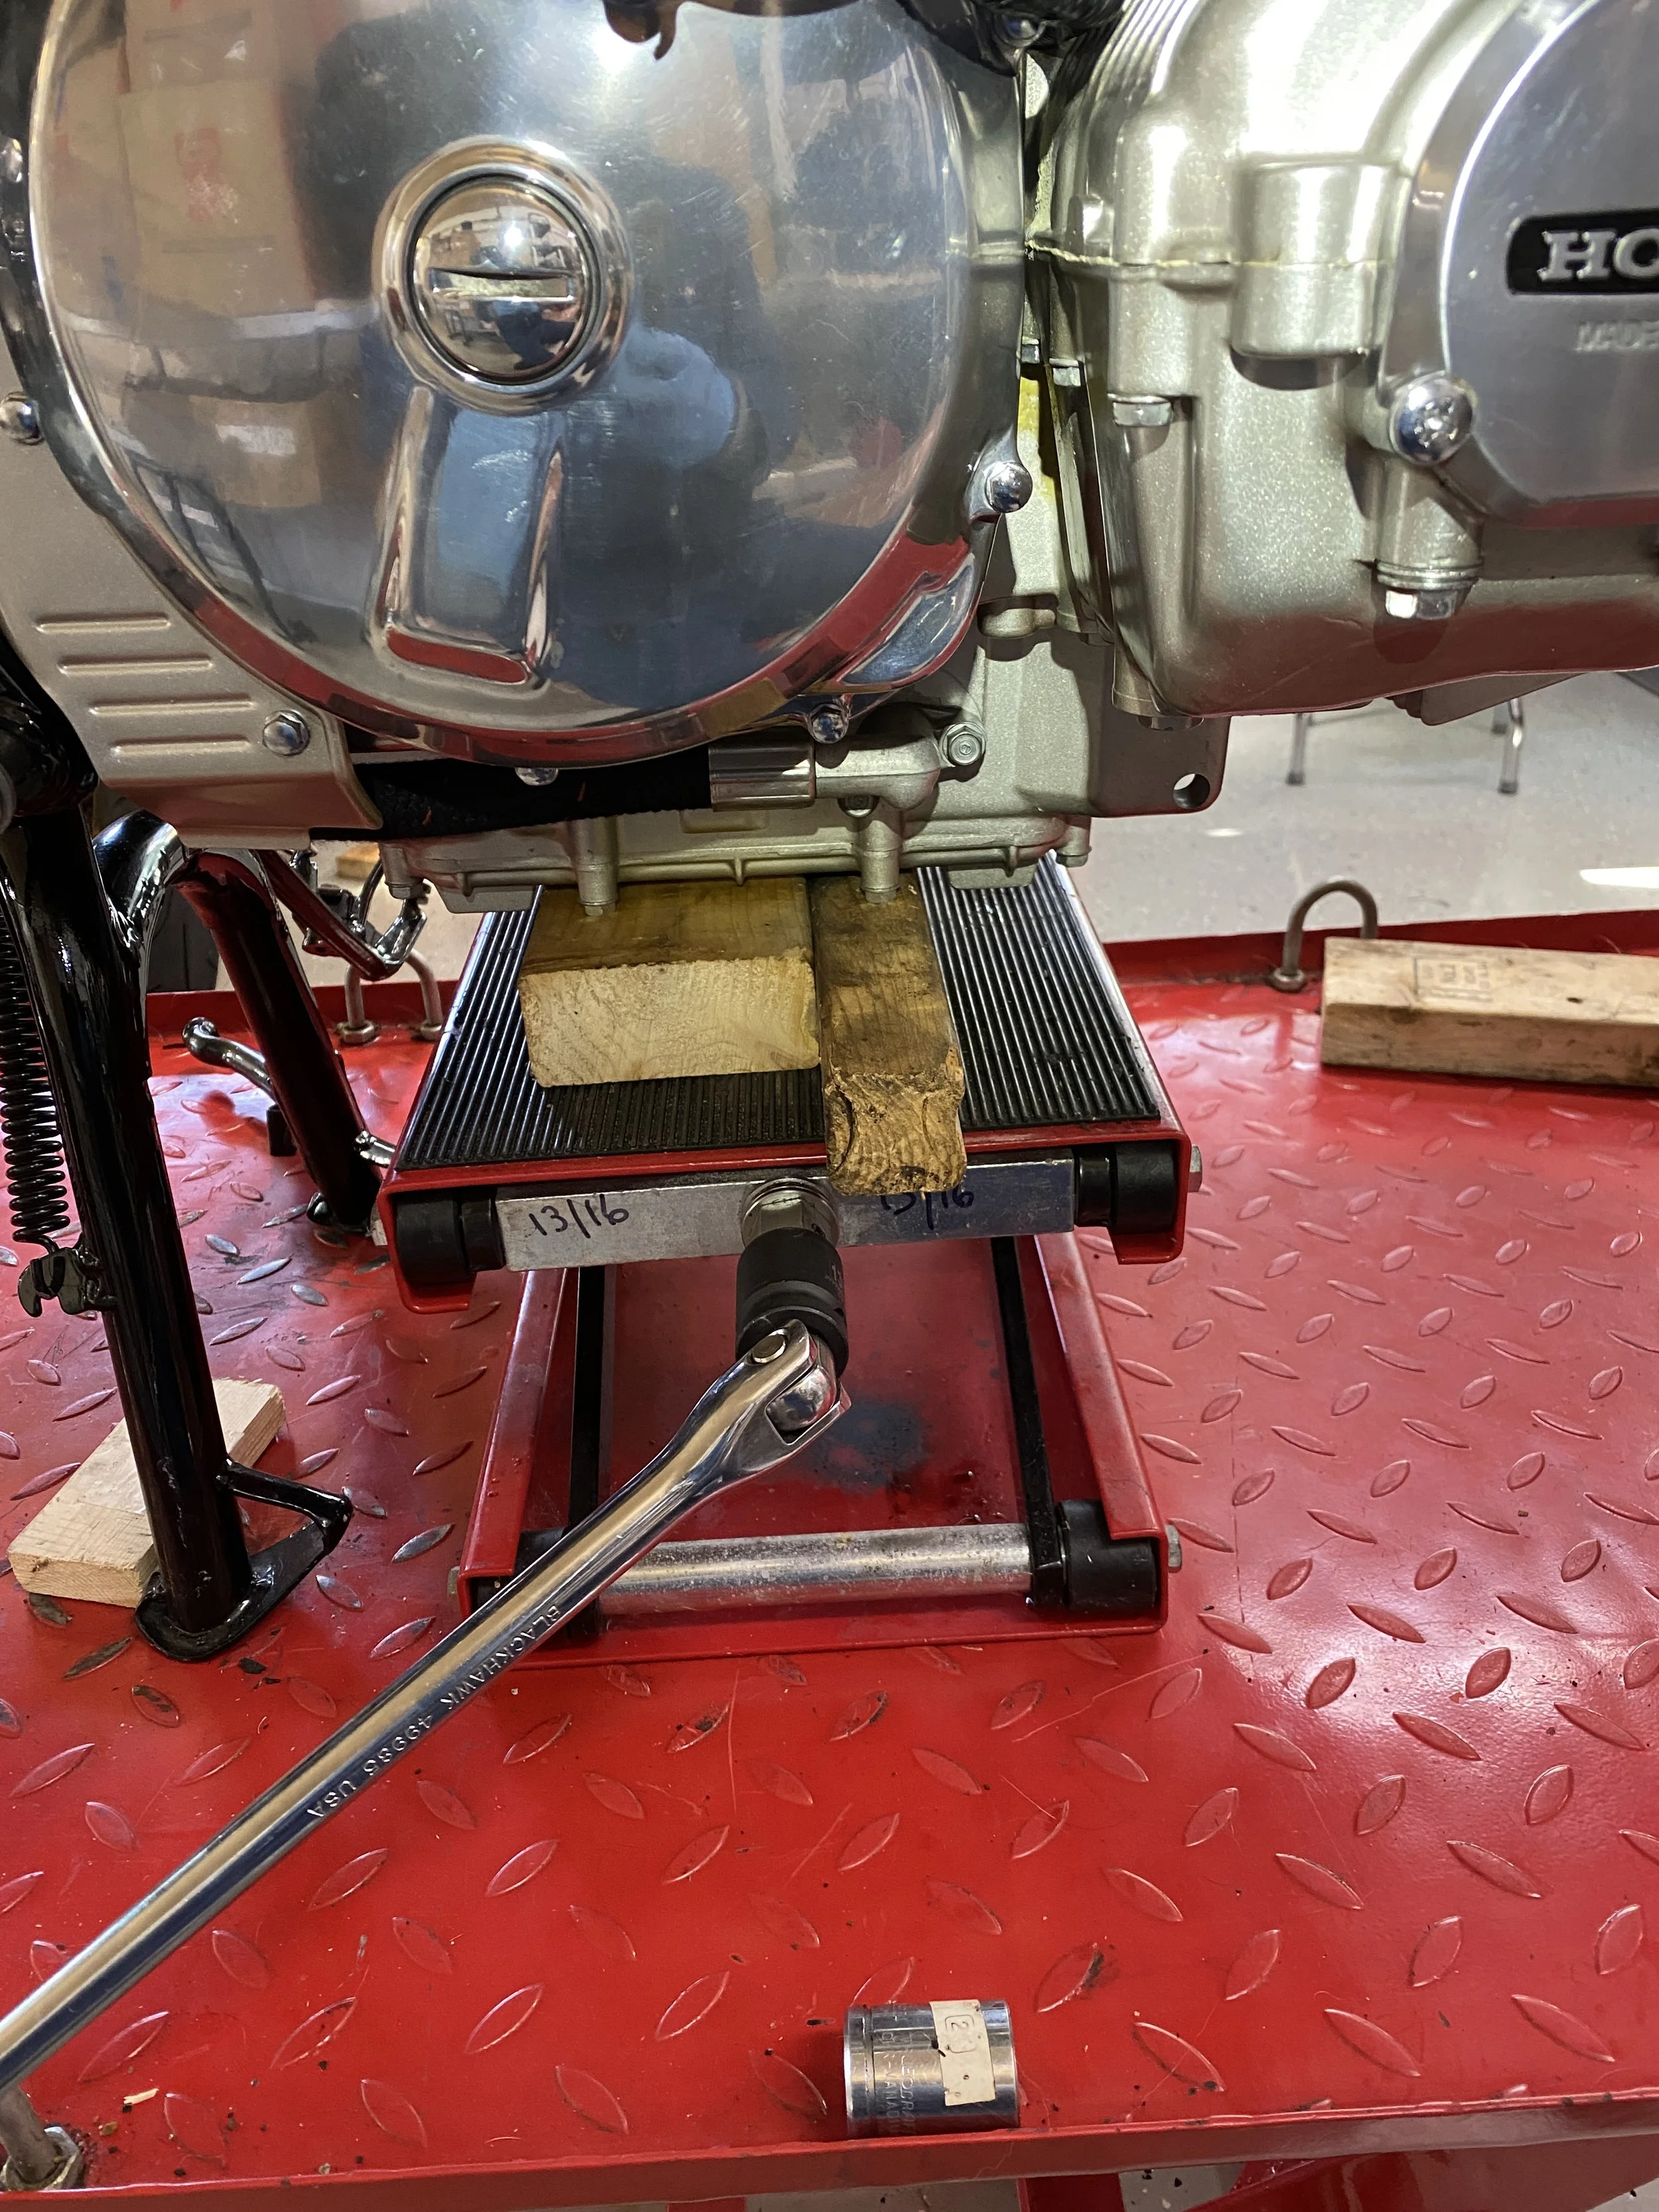
This is a 1047cc 6 cylinder beast...I expected a much more substantial swingarm bolt.
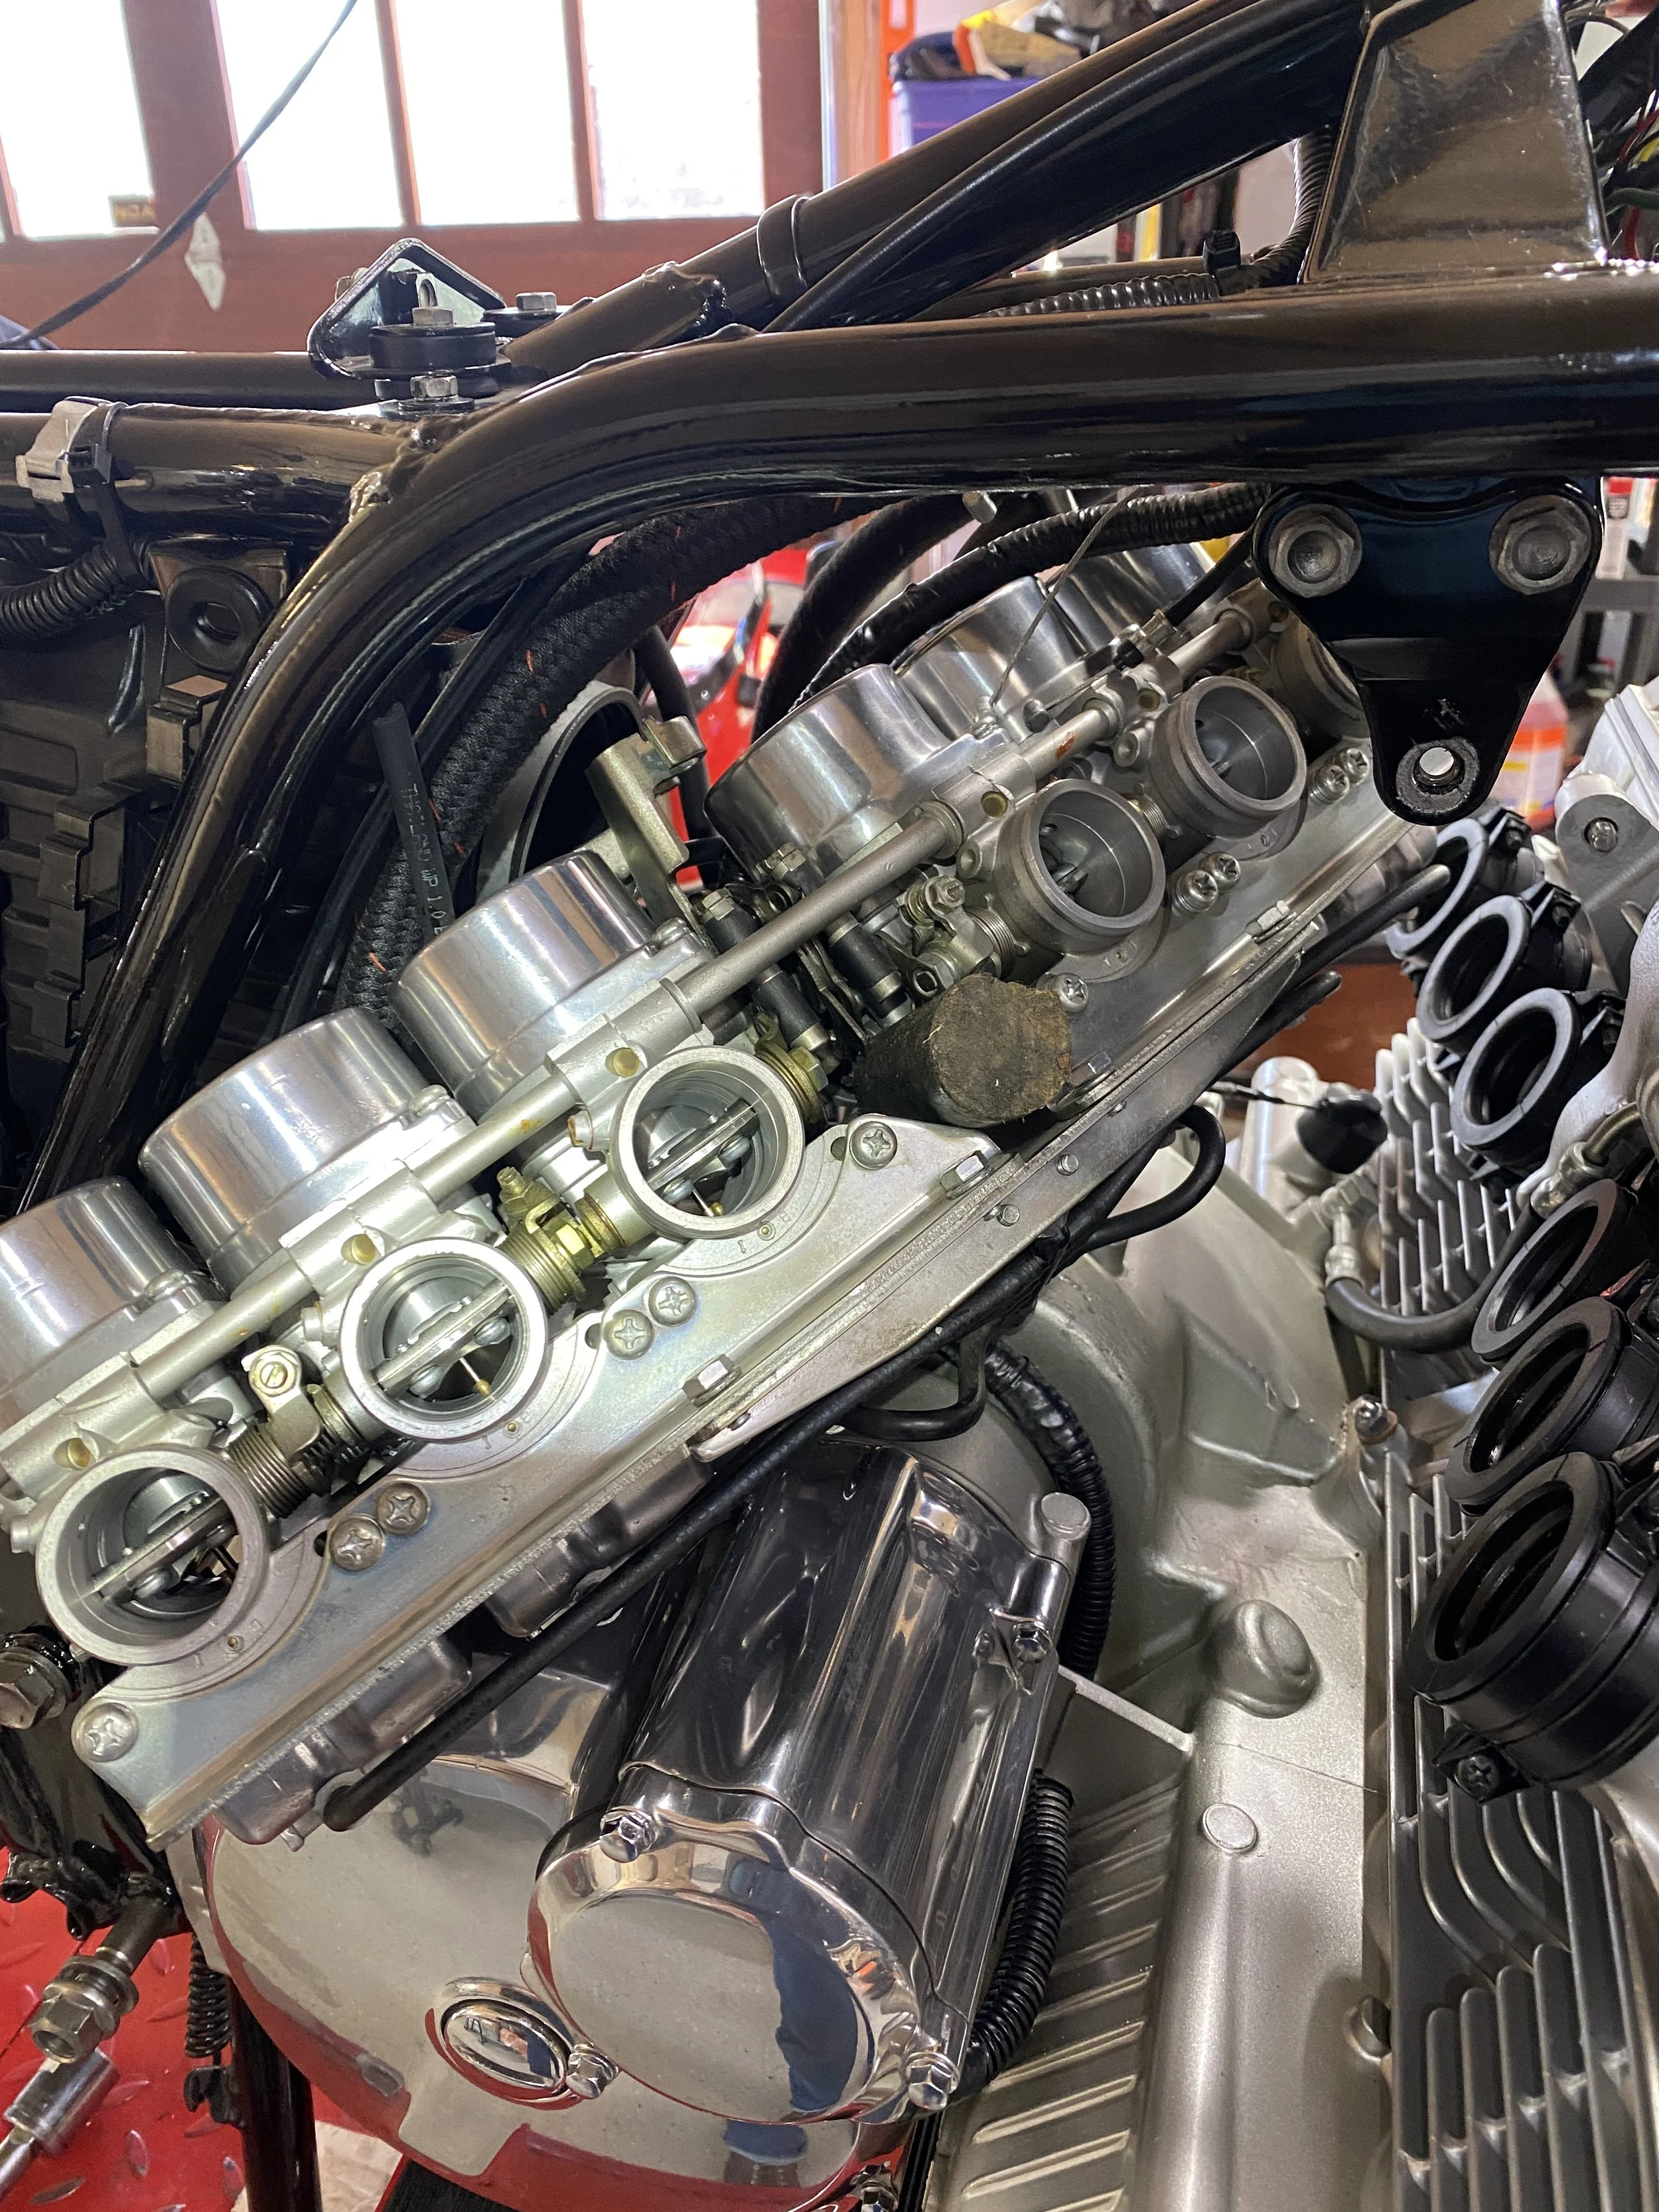
With the motor forward the carb bank comes off easily..

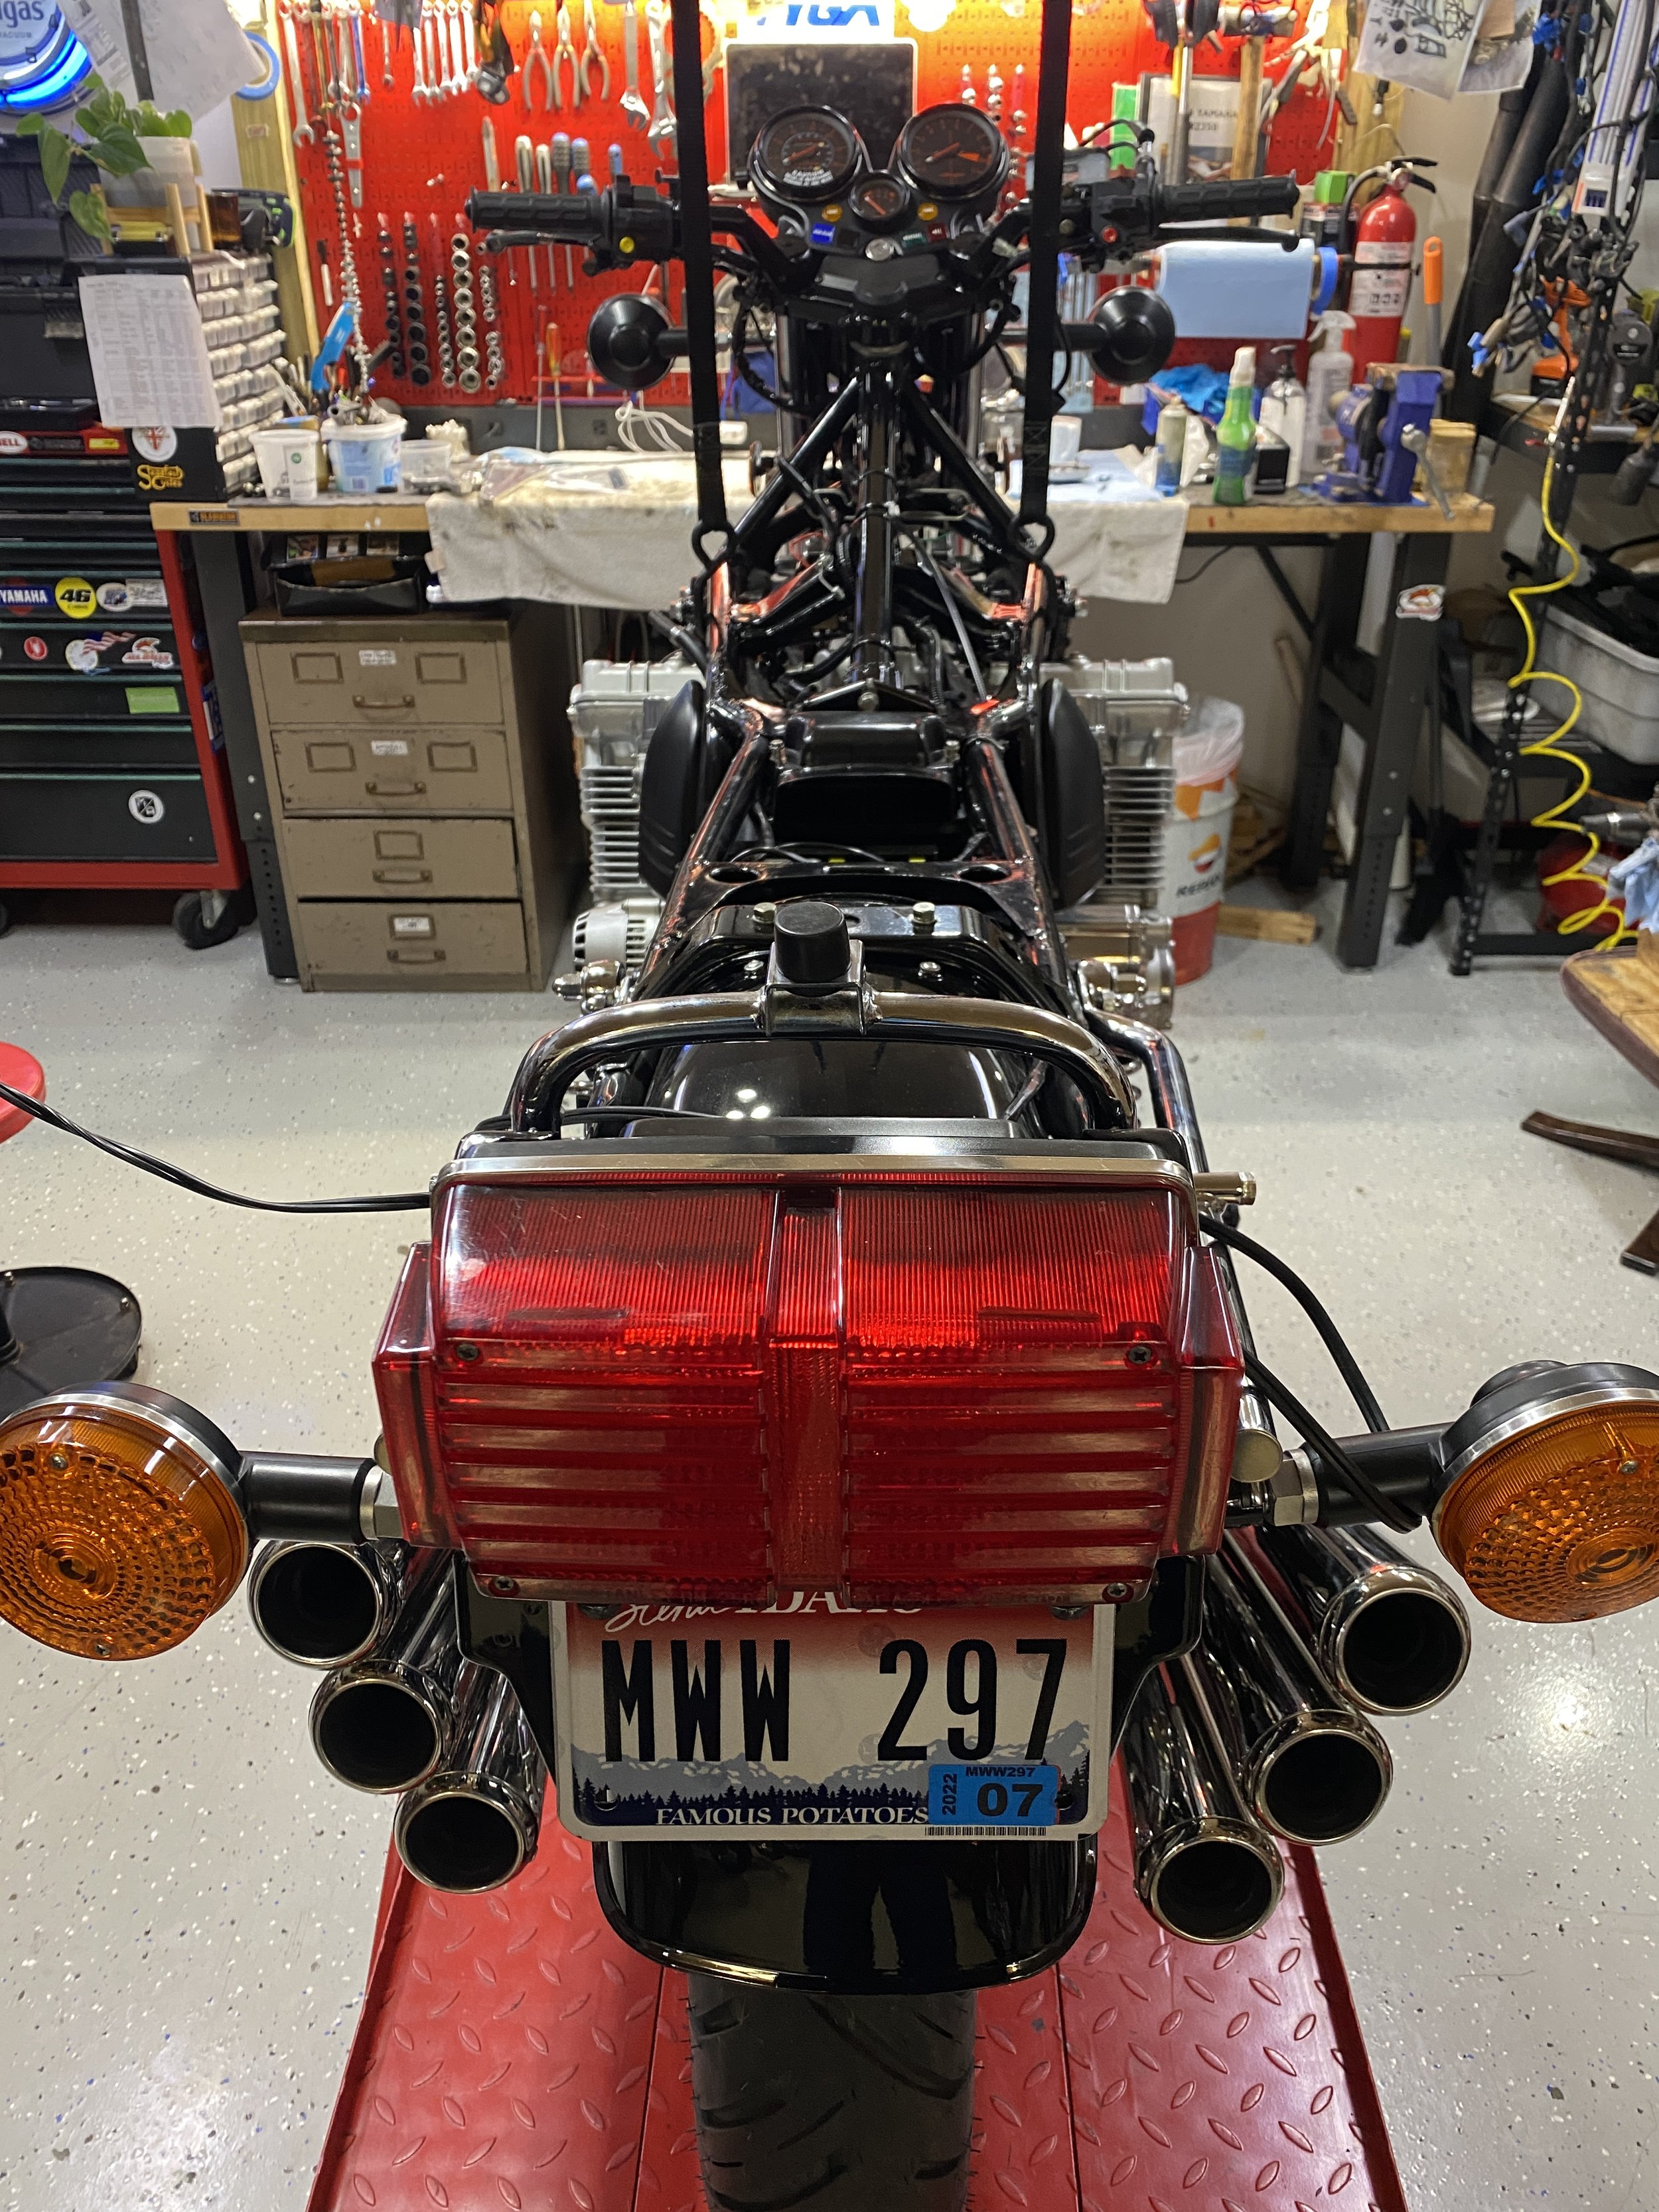
$2240 (inc shipping) worth of Pipemaster 6 into 6 exhausts from Oz. http://www.pipemasterexhausts.com.au/product/pipemasters-6-6-cbx-exhaust/
everything looks new and unused.
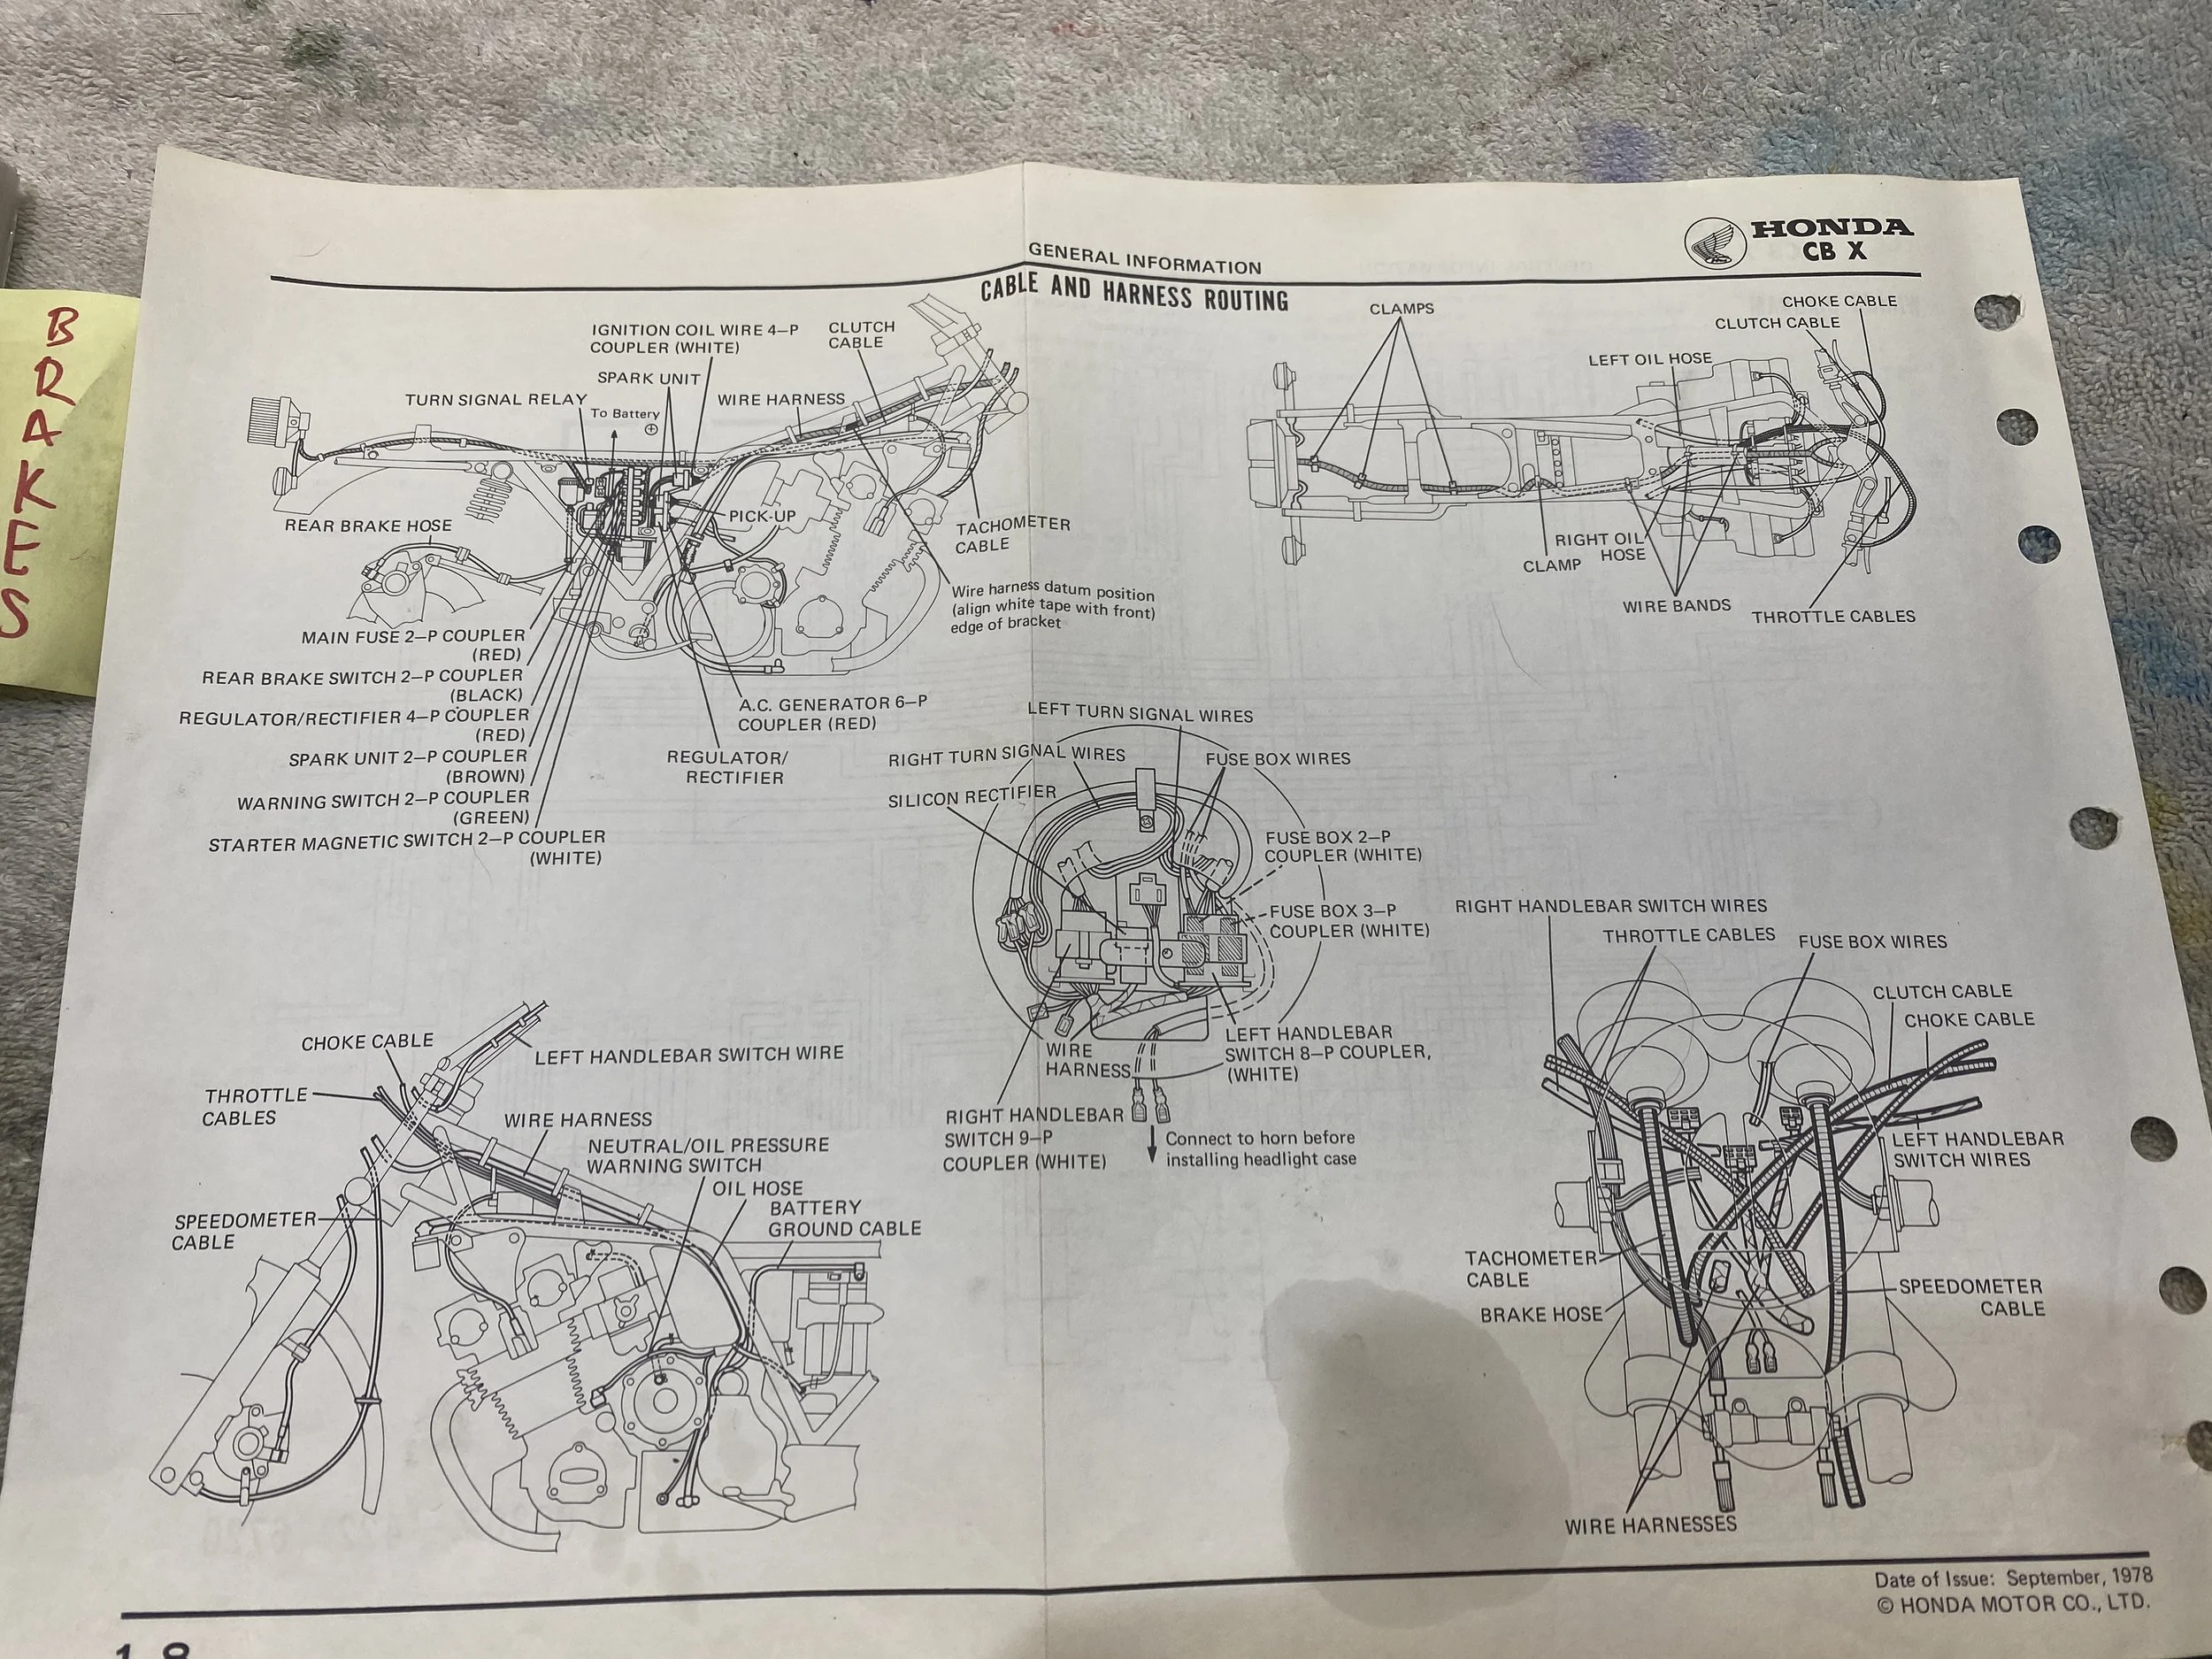
Was alerted that the clutch cable was incorrectly routed so consulted the manual.
yes this is off....
better..
front brake line wasn't so good....
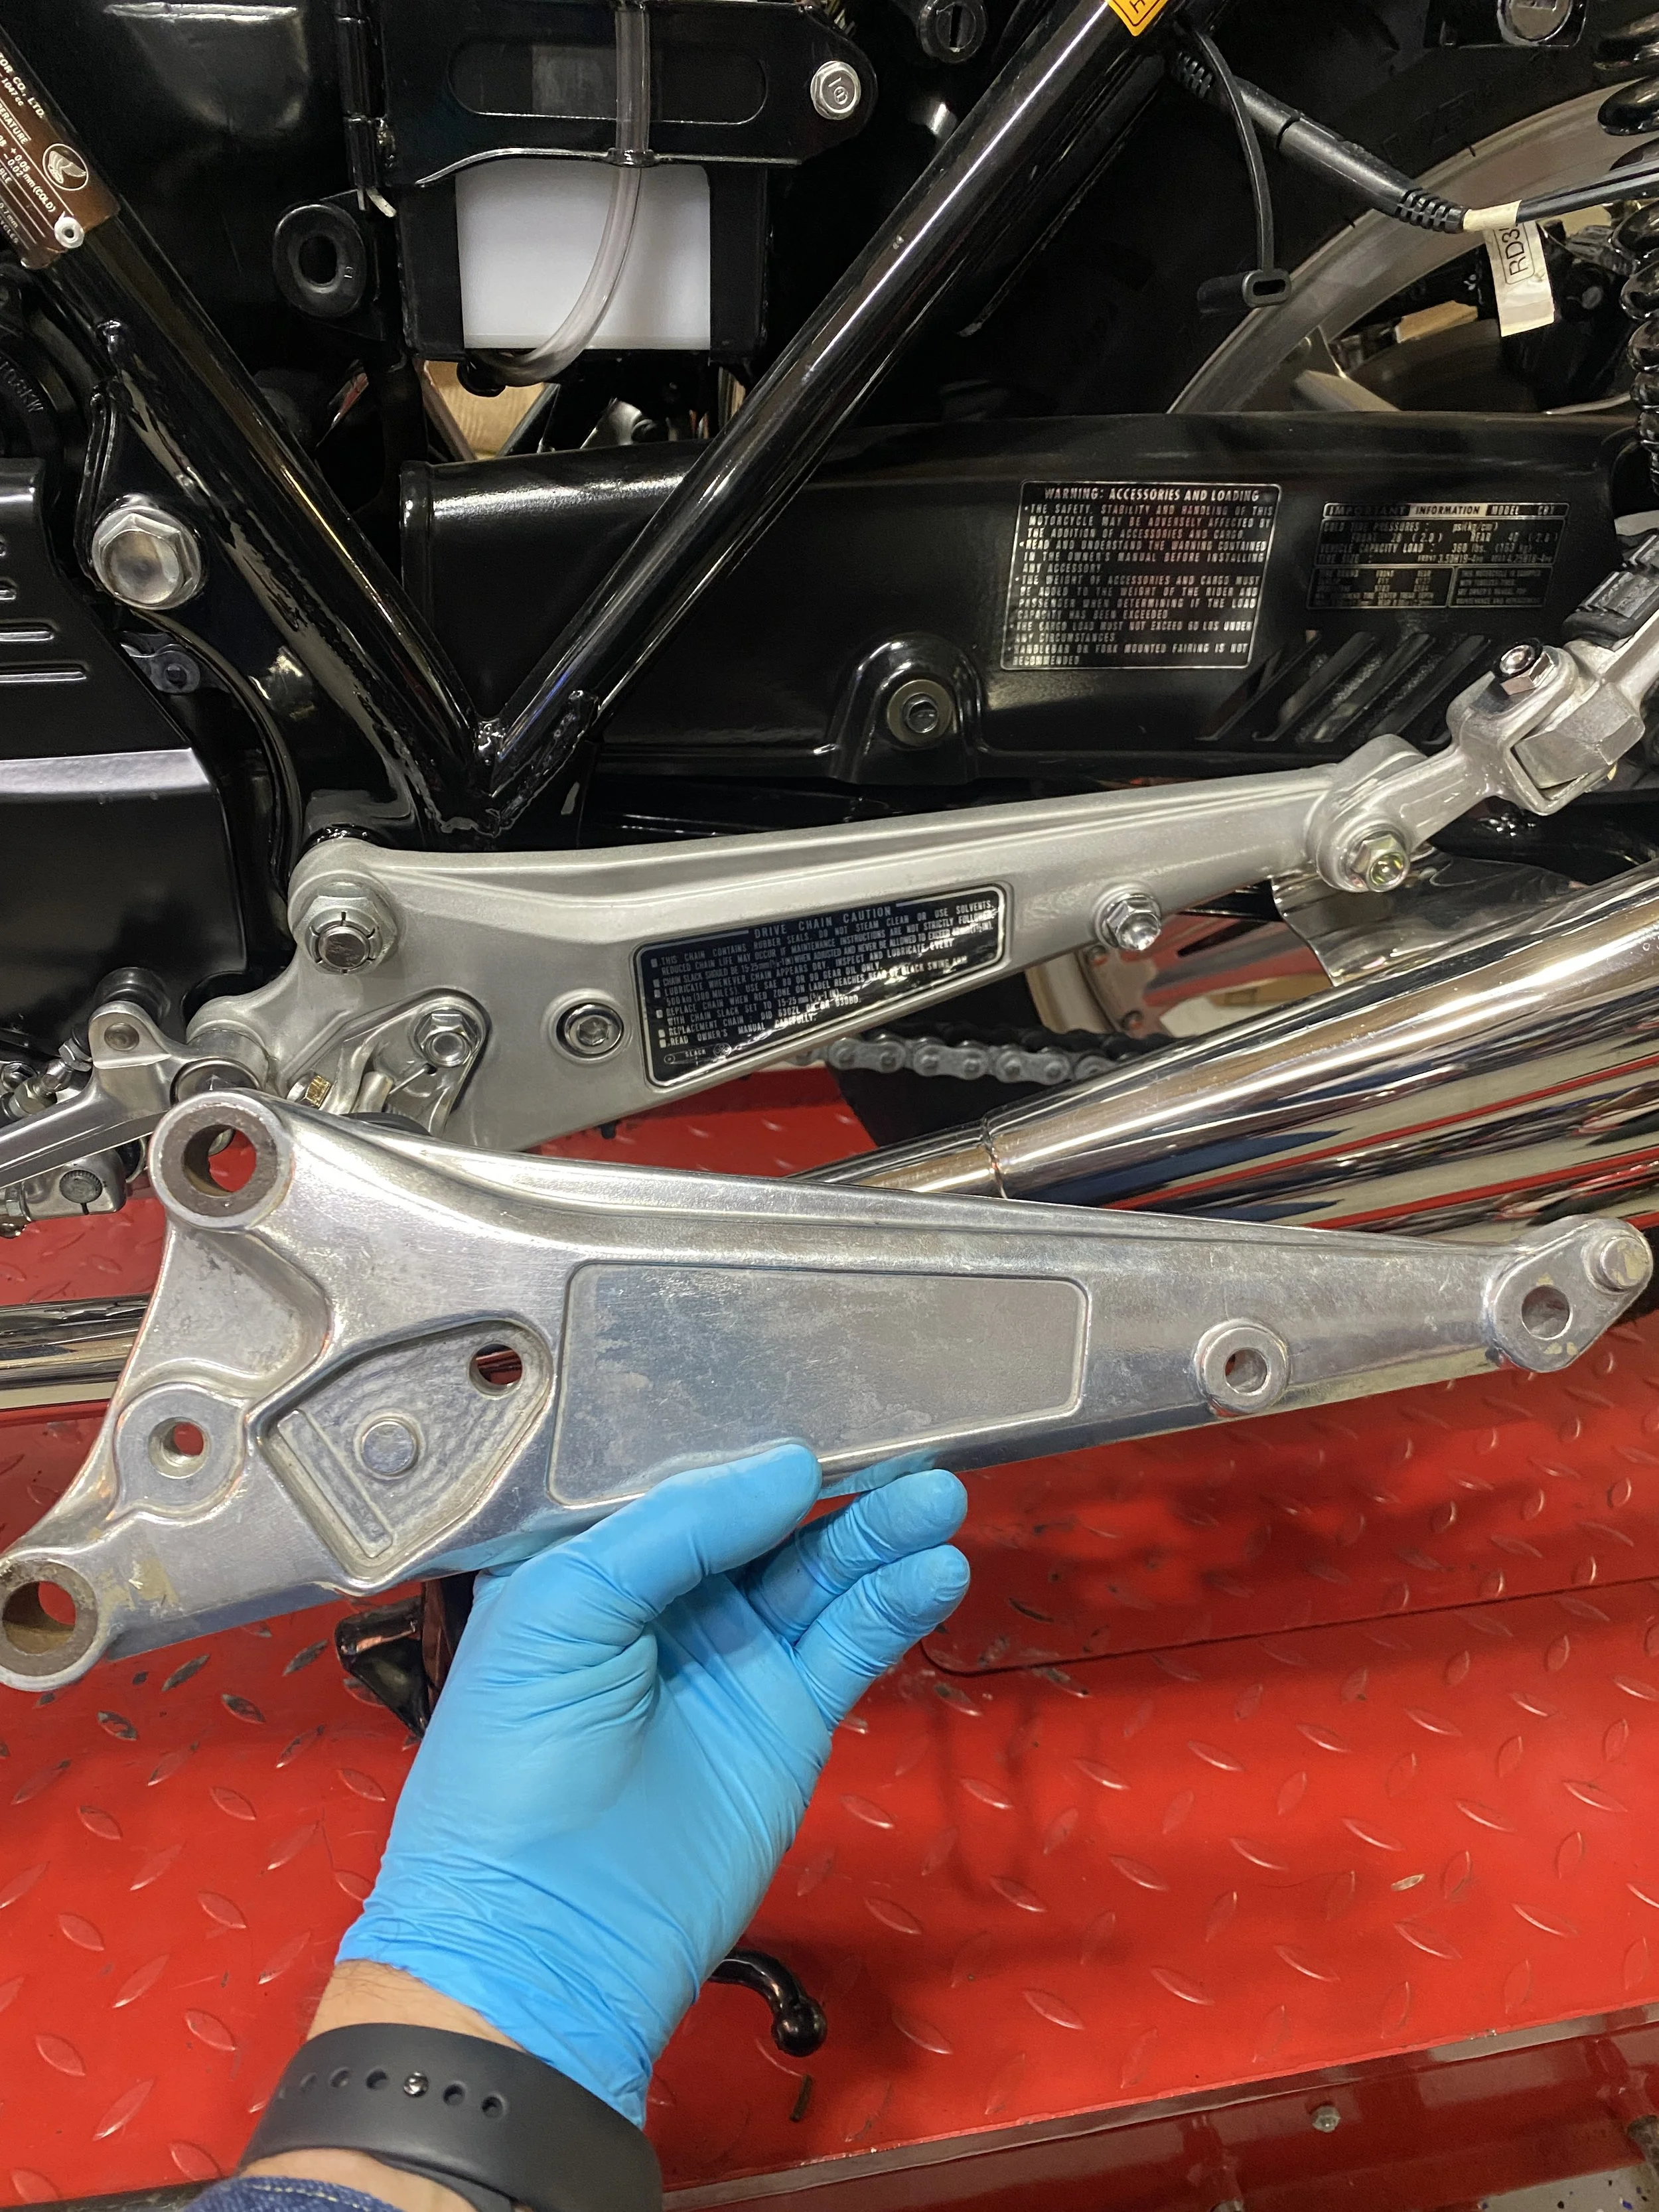
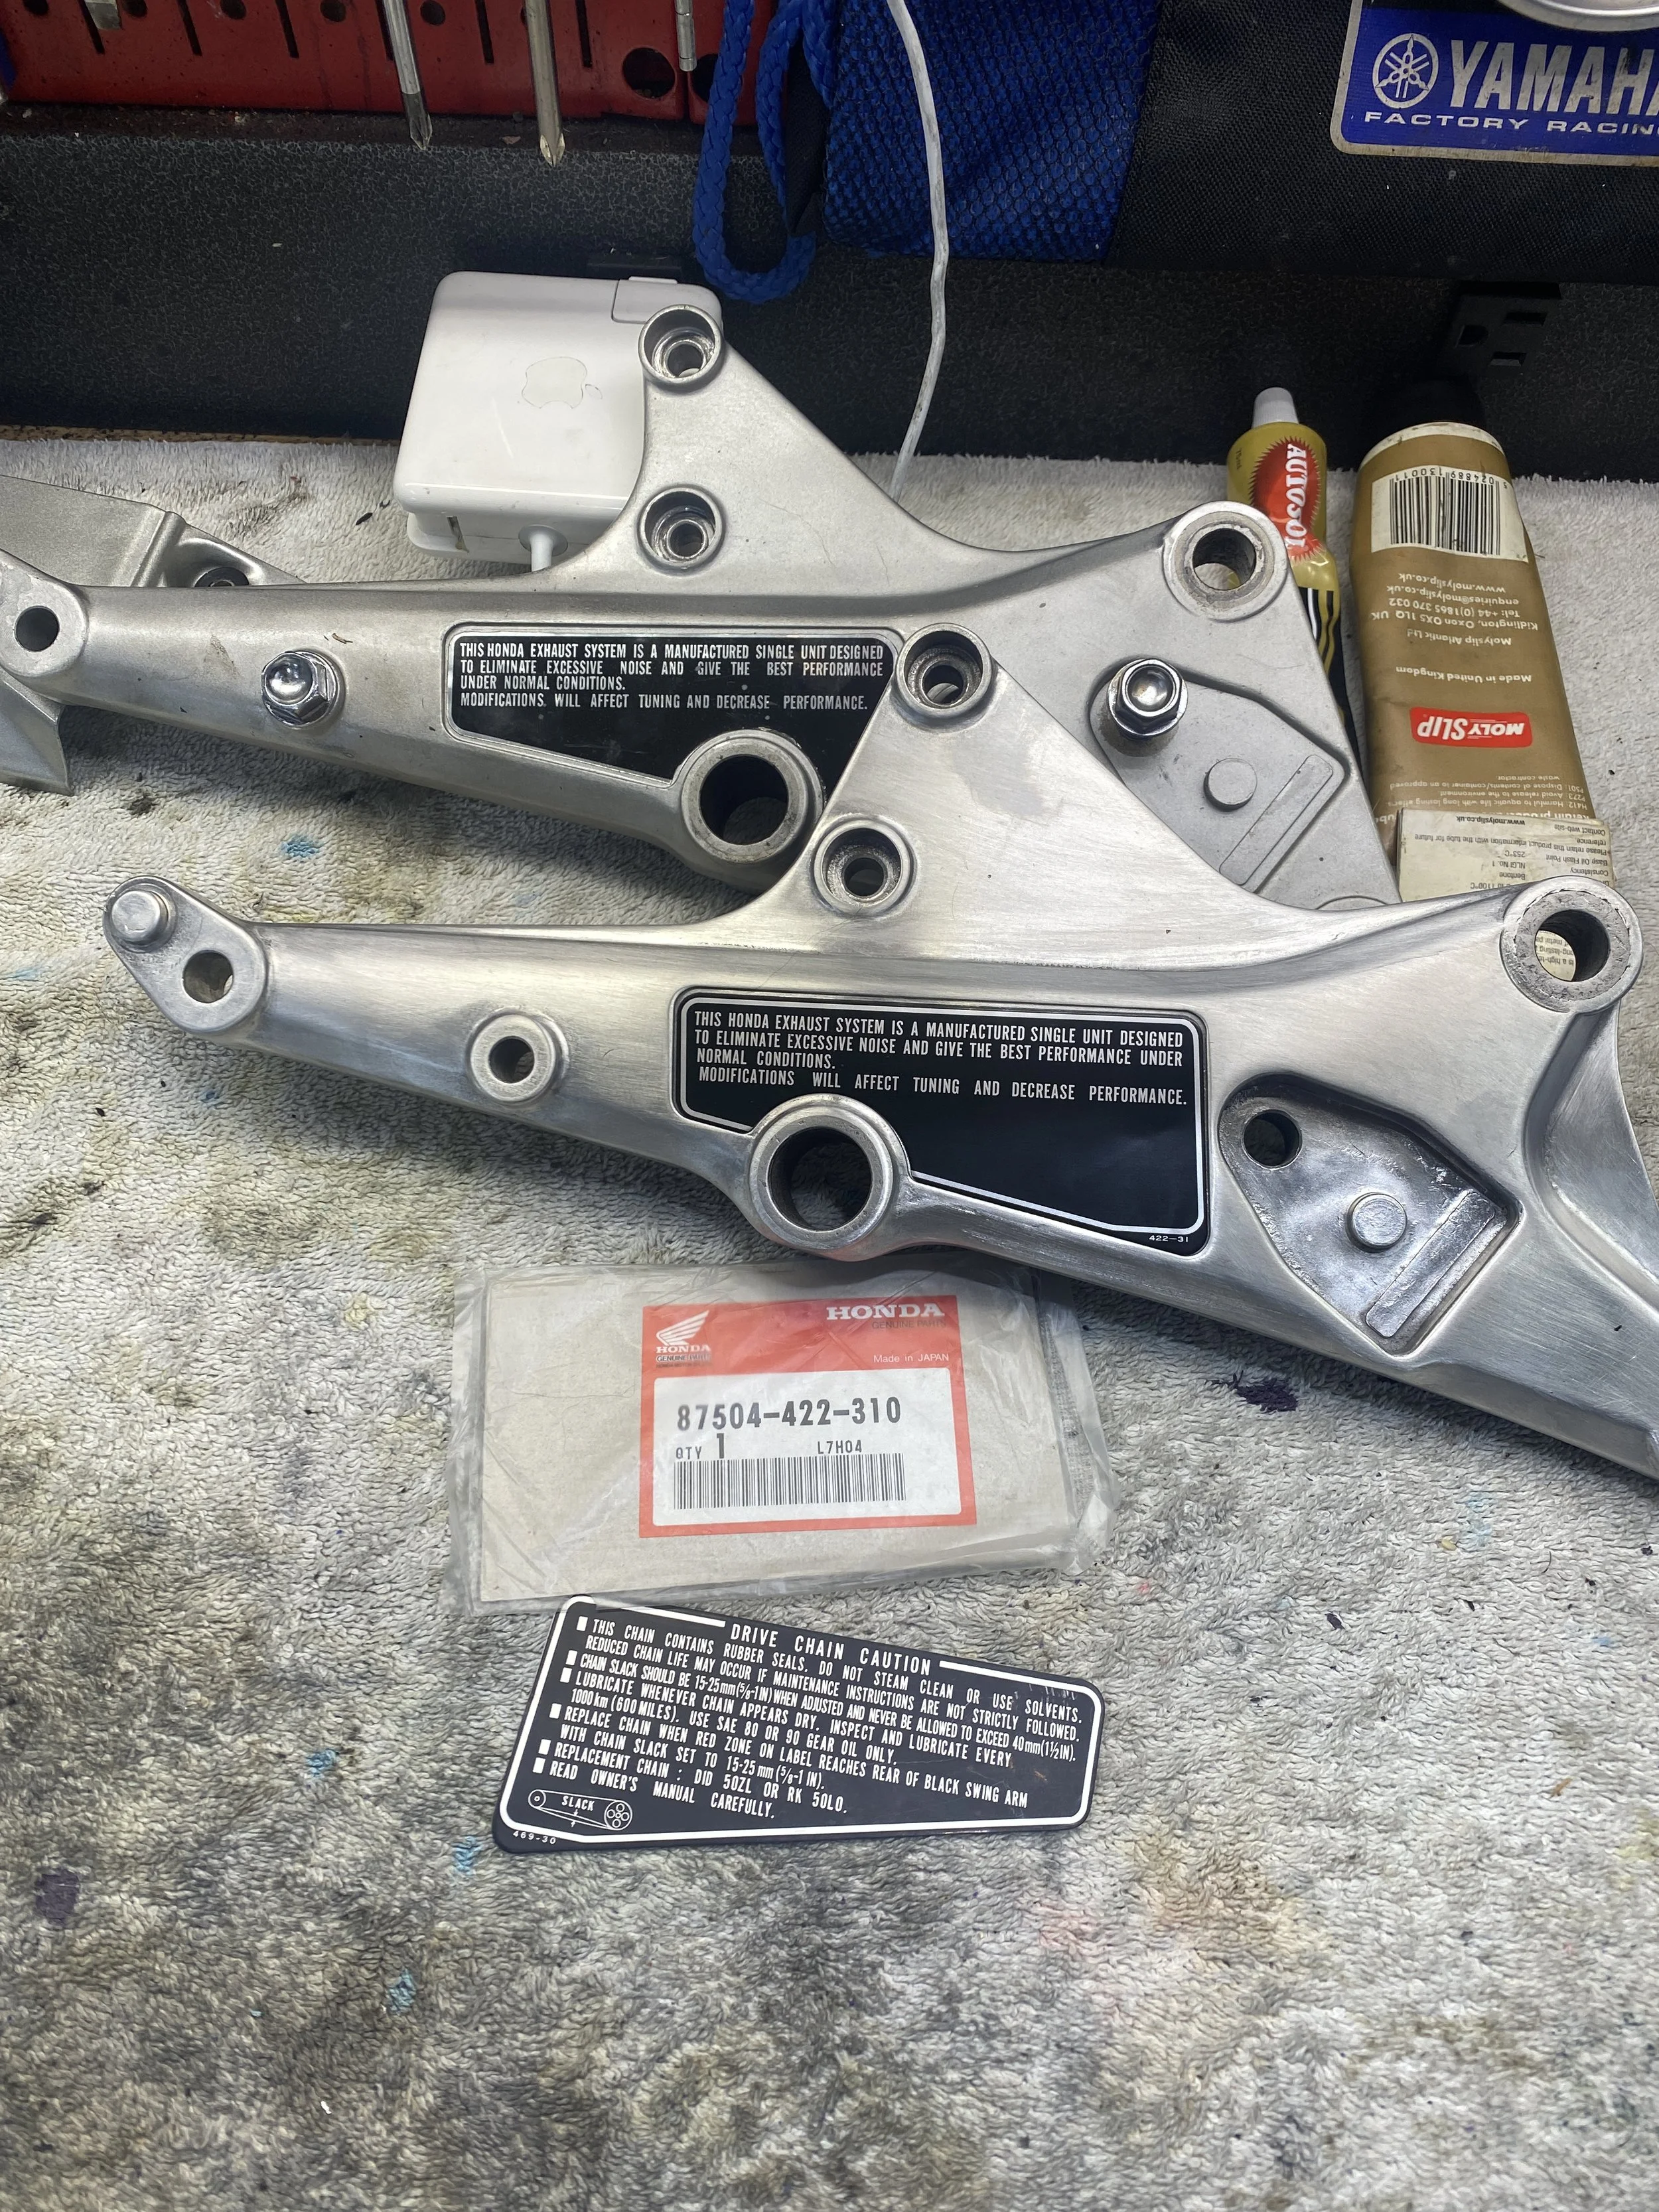
Sport Kit Hanger Finishing

$180 all in. Of course they make them sound all fancy with Sport Kit definition, in reality it was standard kit for everywhere else but the USA

How they arrived

Decided I'm going with the alloy brush finish. Started off with 150

Moved on to 220....
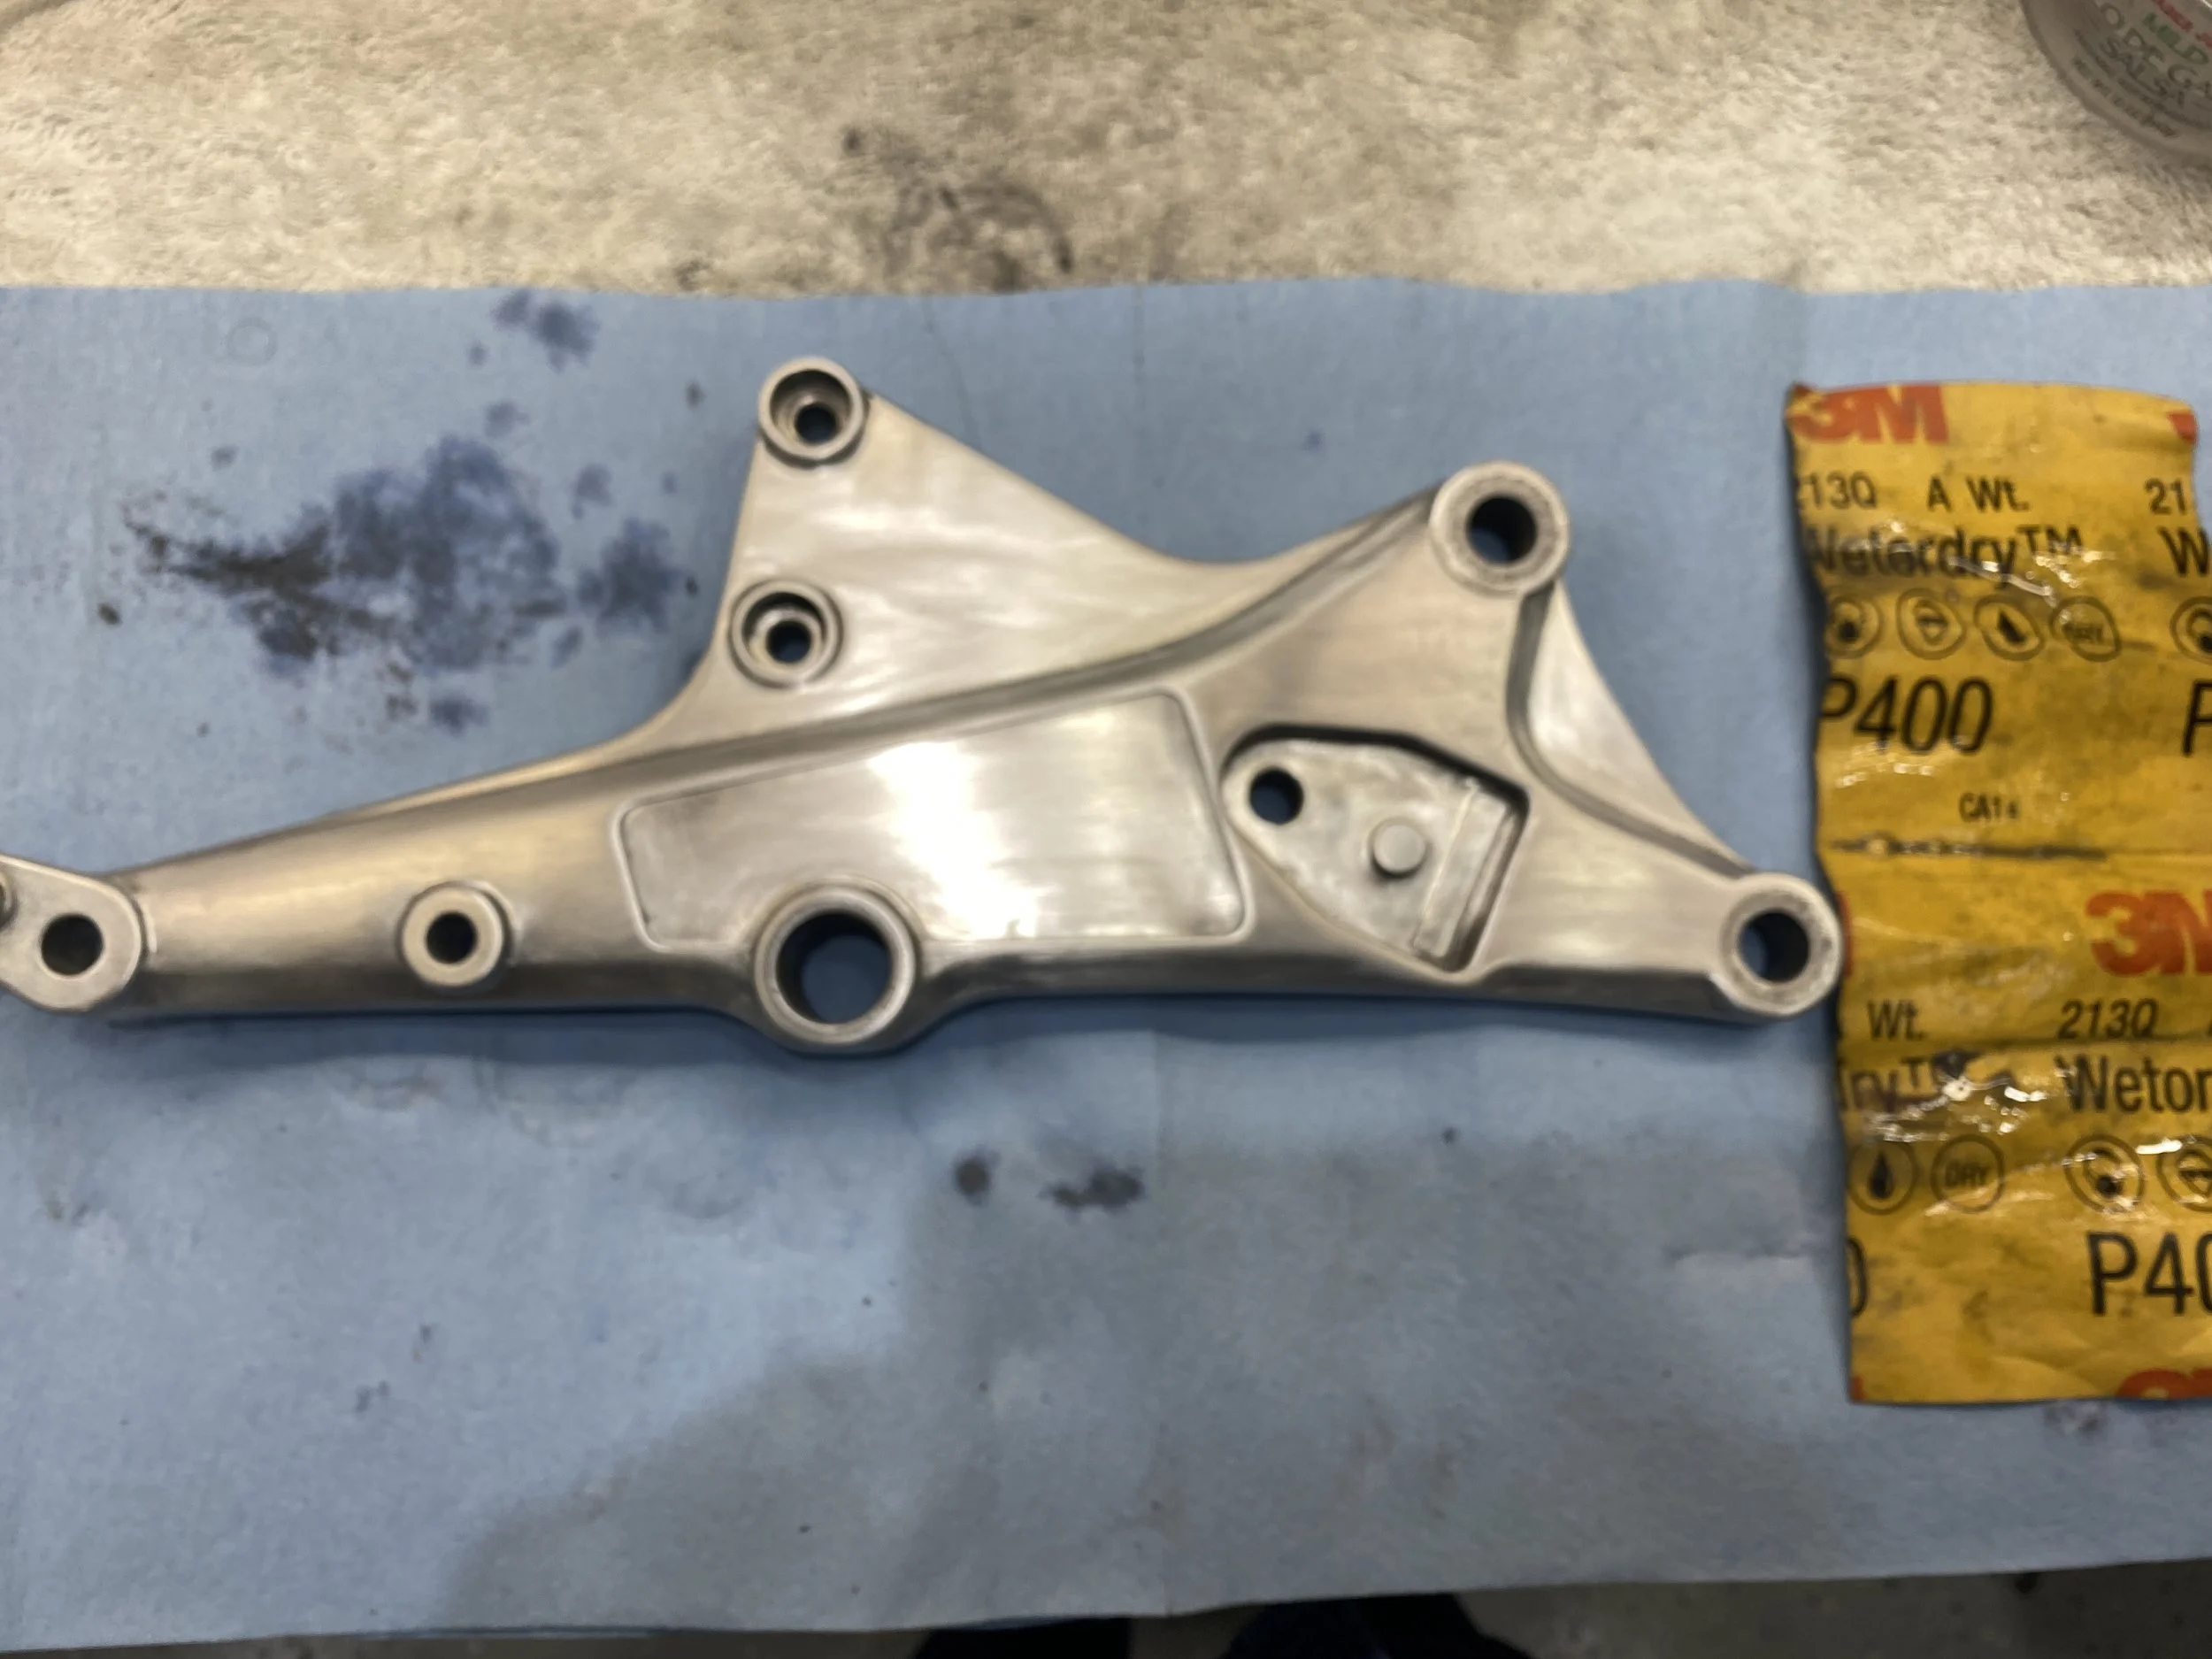
400....
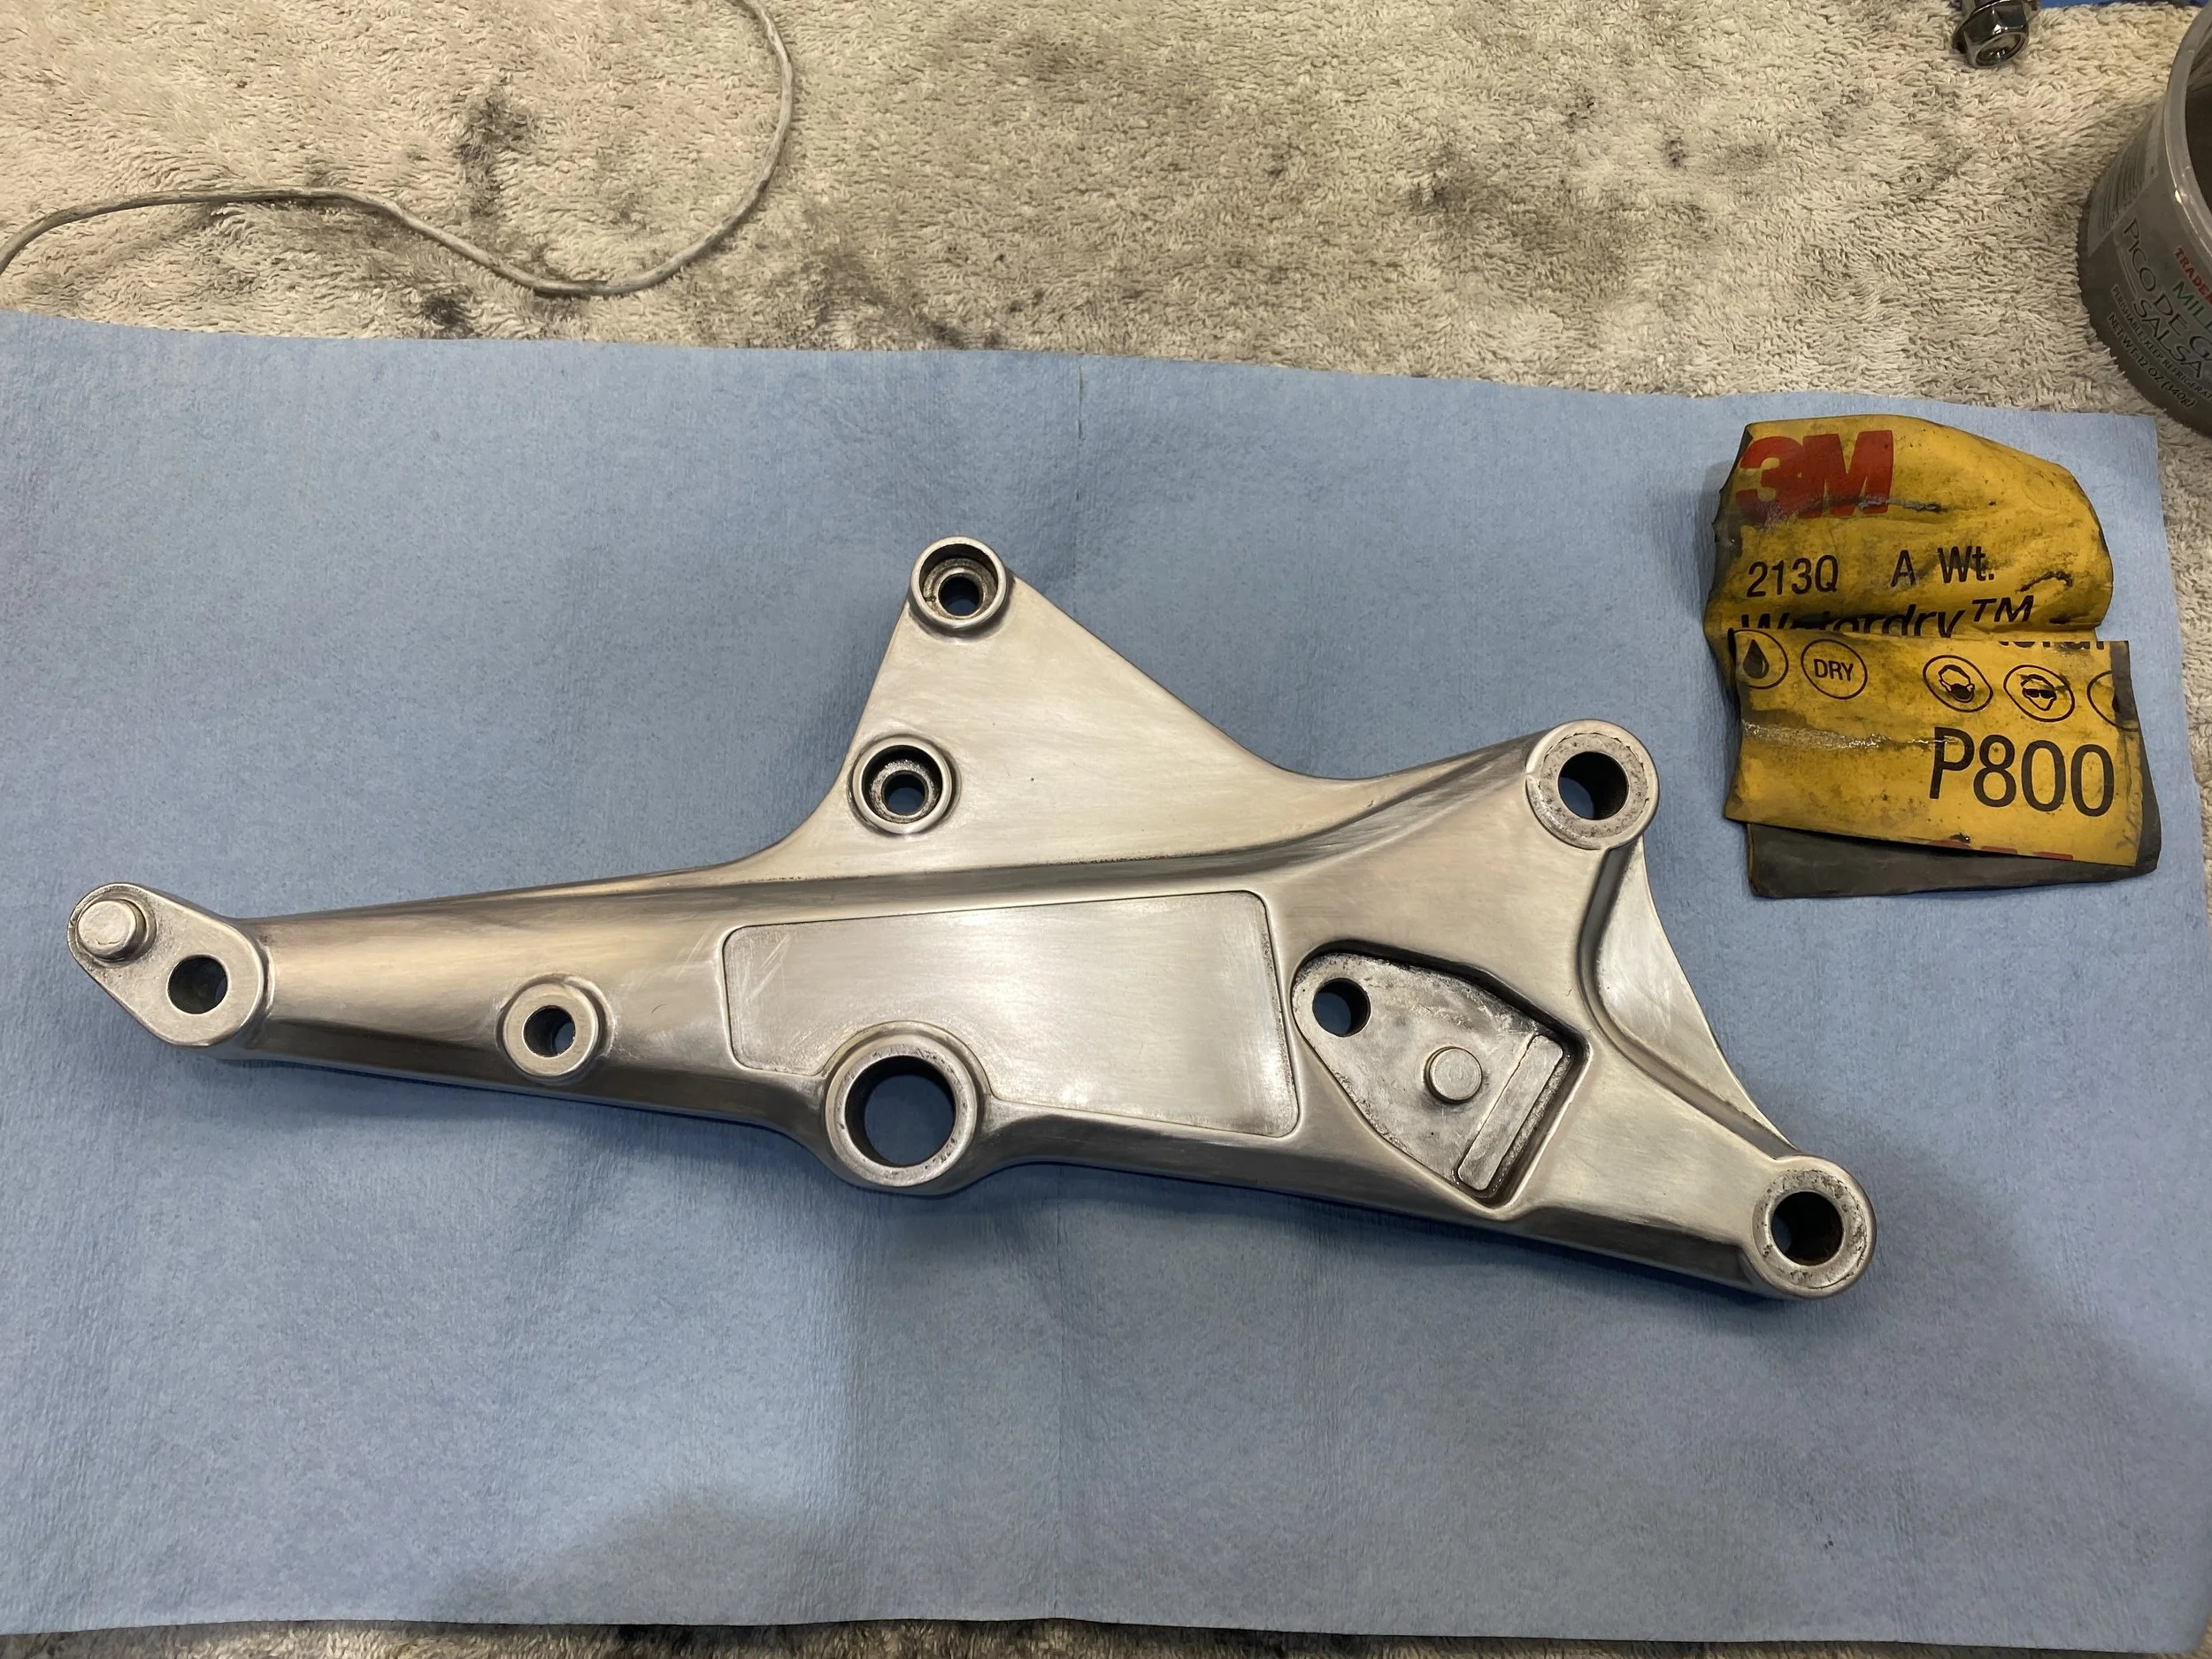
then 800.....
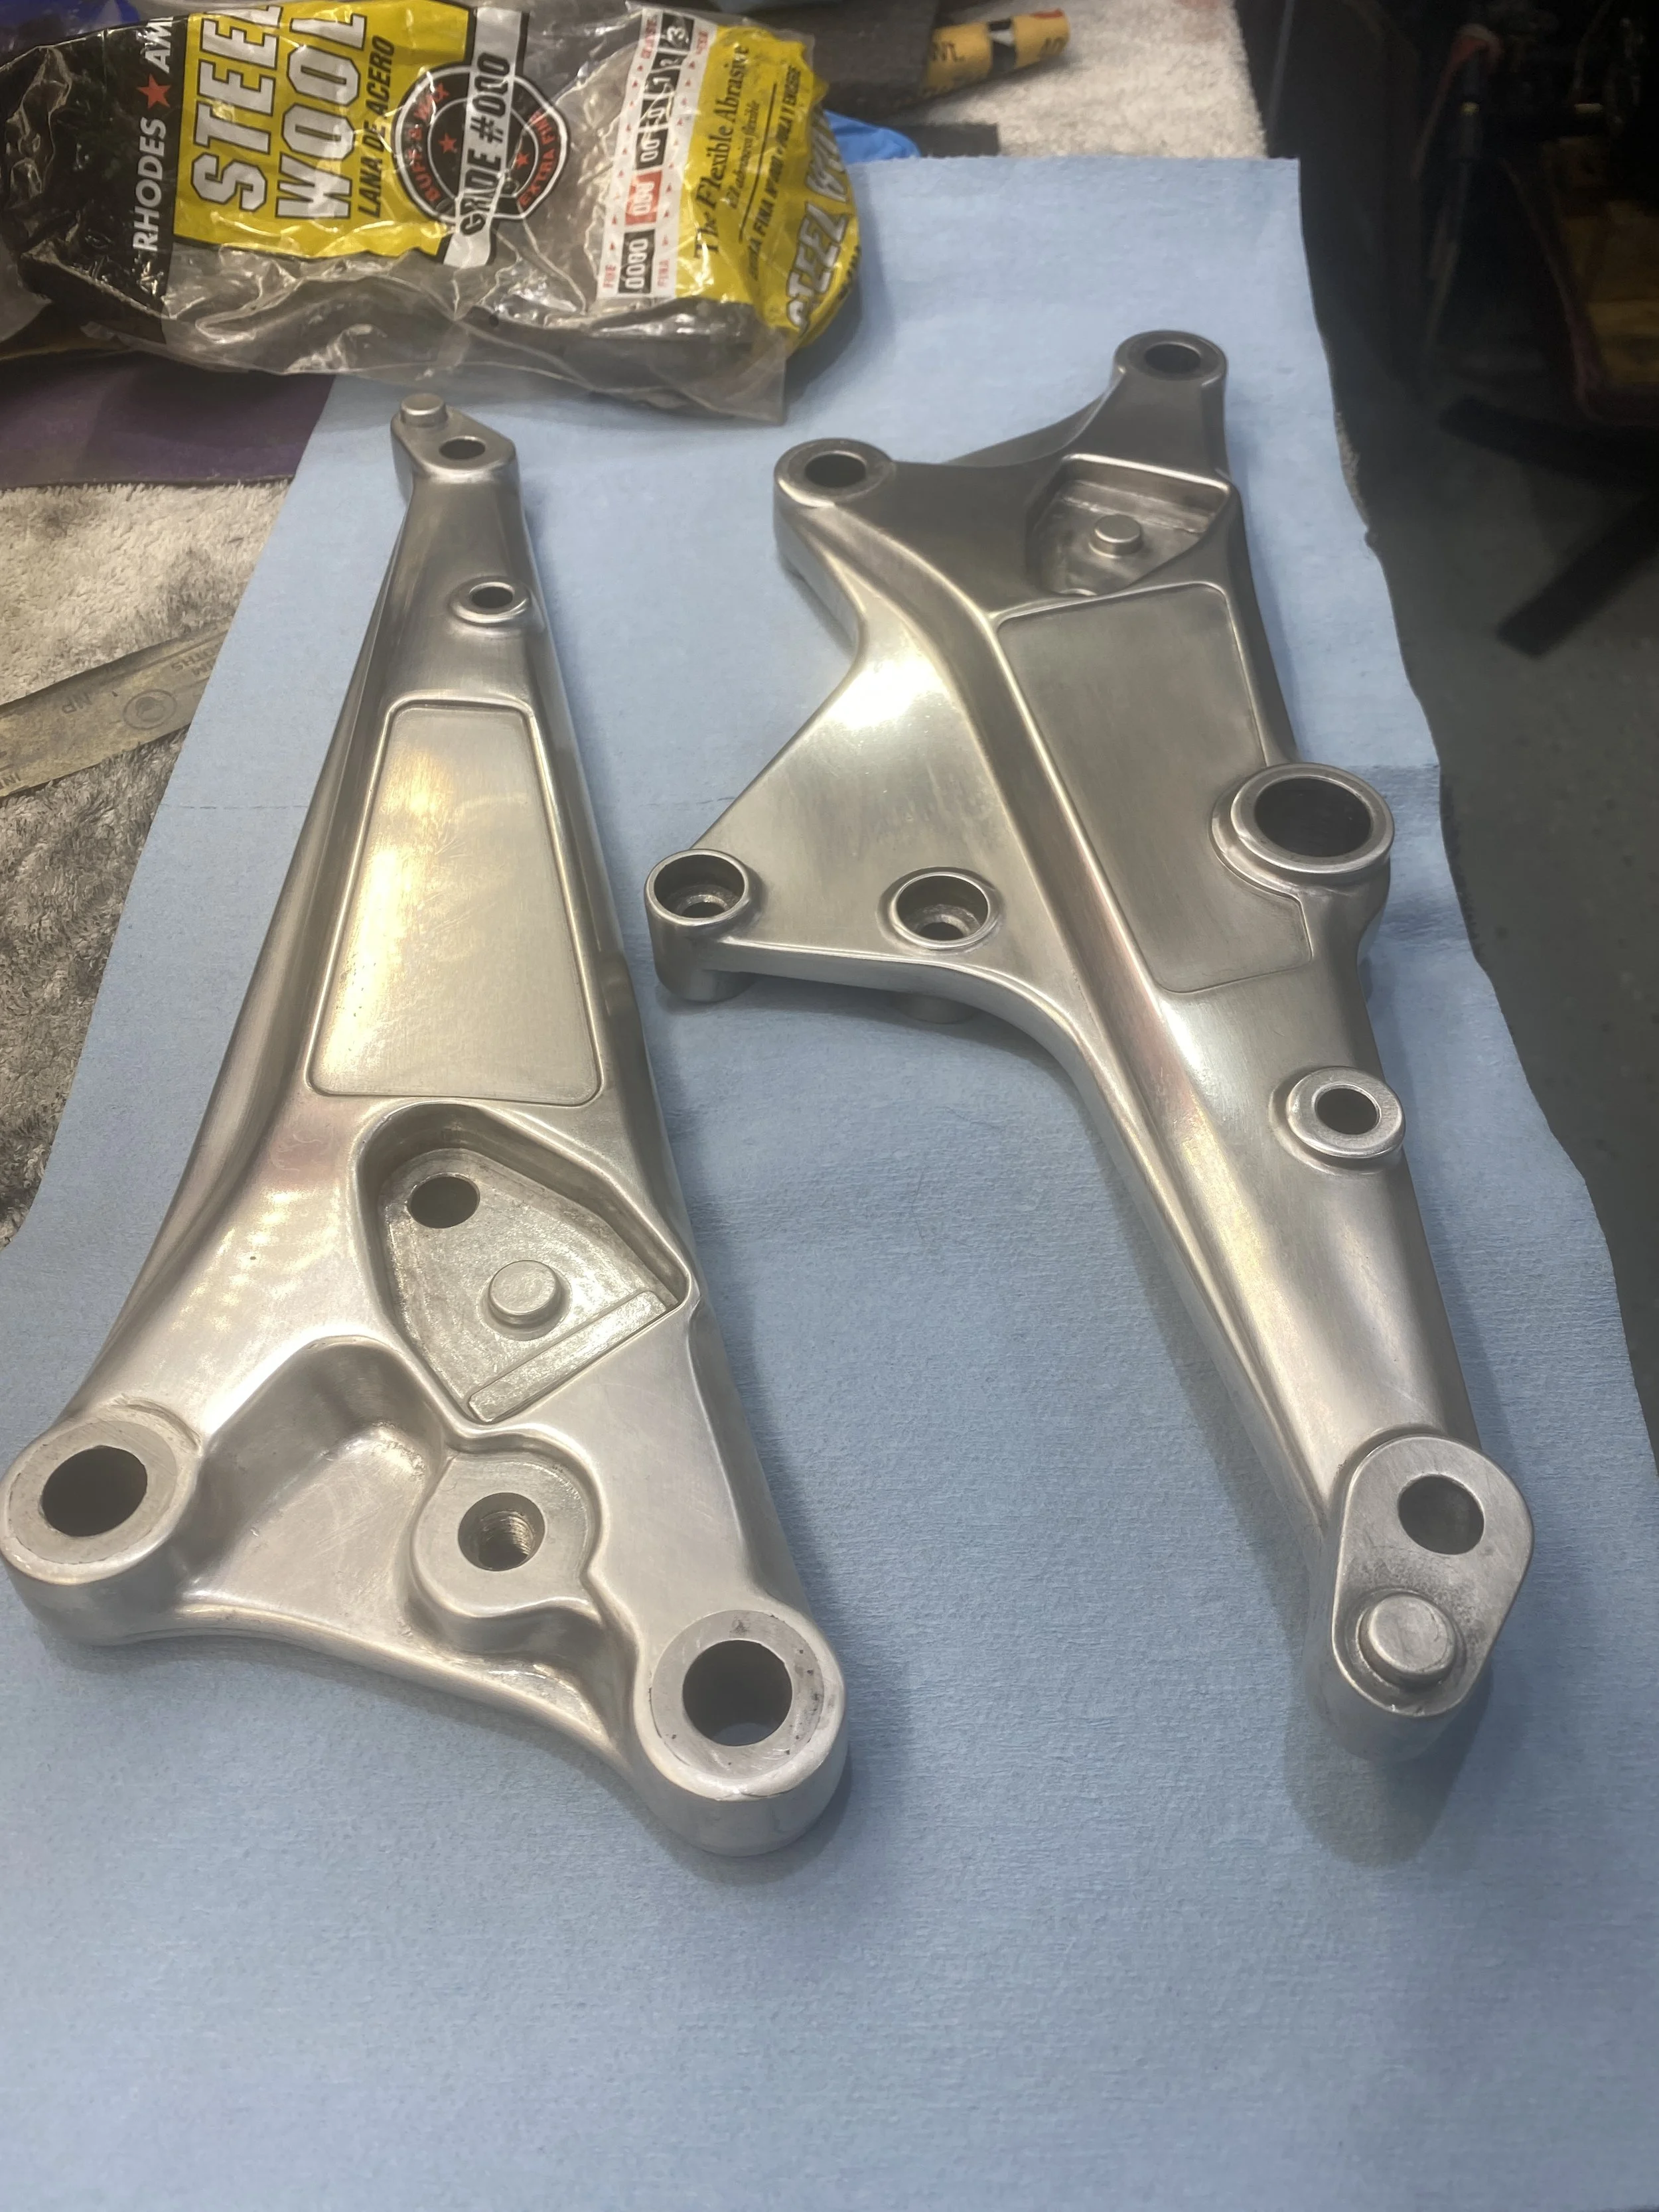
then went 0 steel wool and 000 steel wool aided by some WD40 to minimize errant scratching....
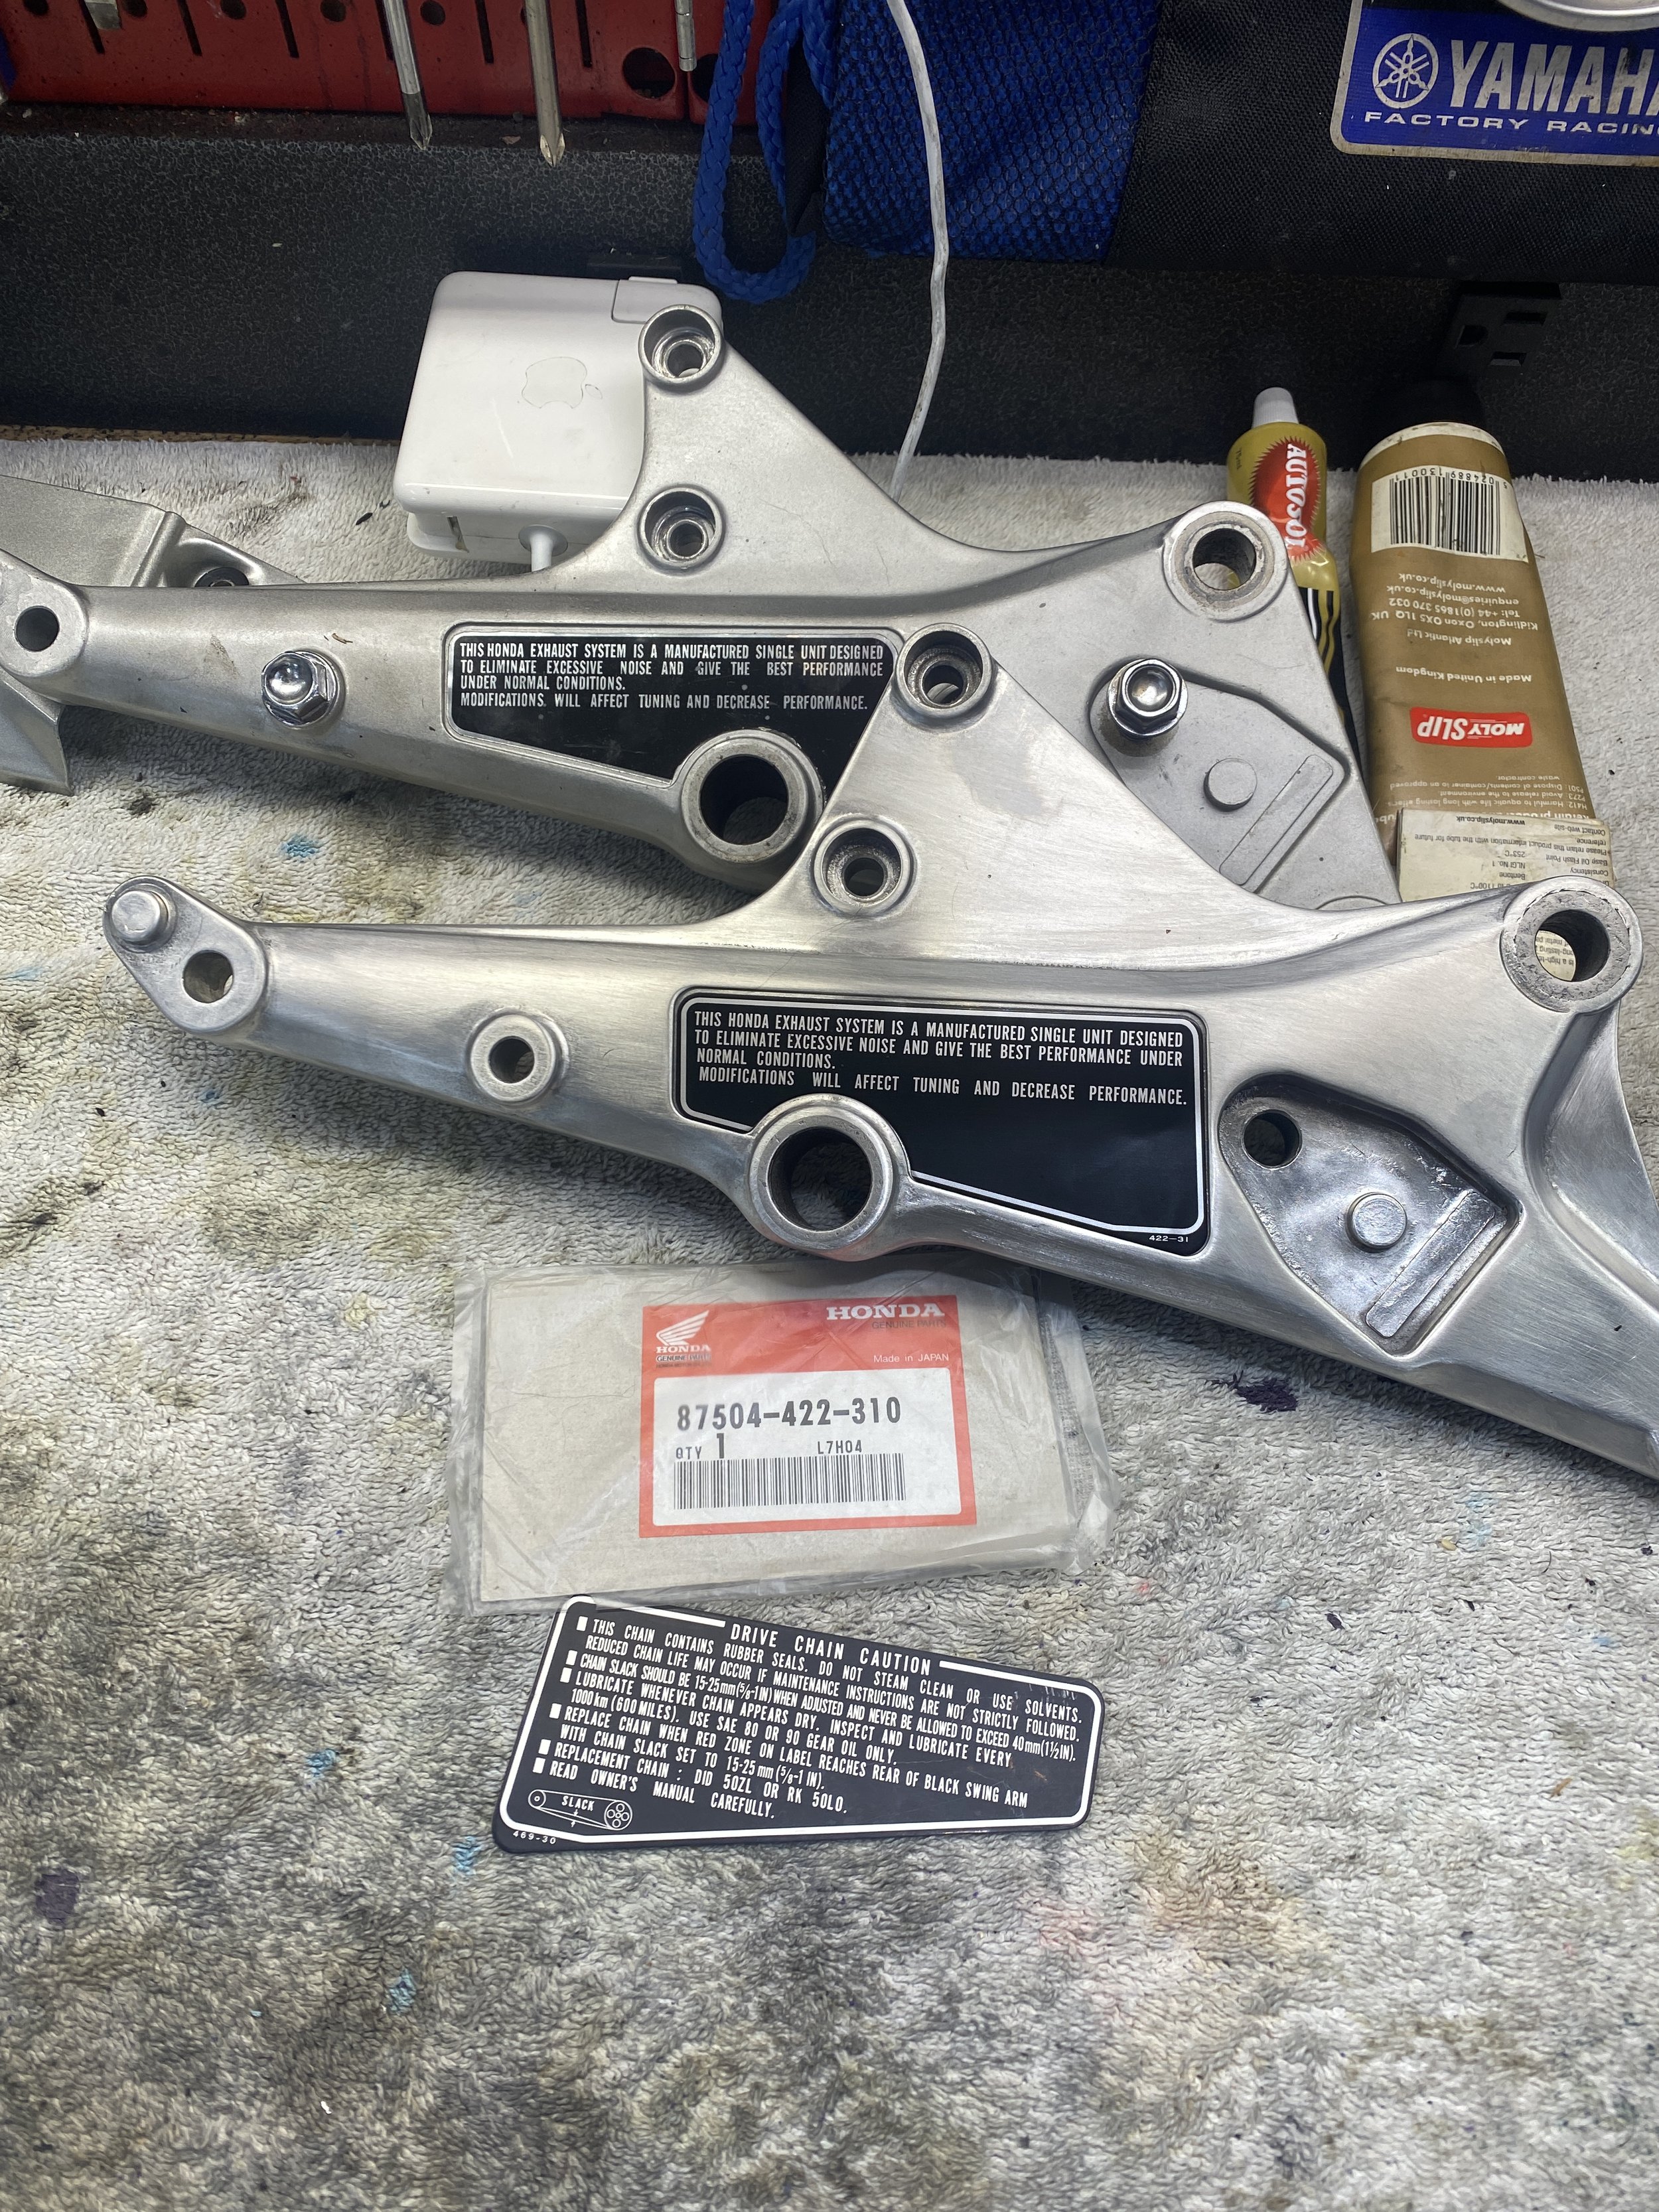
Getting the Correct Warning Decals, $90, is the benefit of working with an experienced re-seller like Louis @ usedcbxparts.com instead of going to fleabay. I wouldn't have realized the 'sport kit' stickers are differently shaped than the US Standard. Finish in this pic is not completed yet......
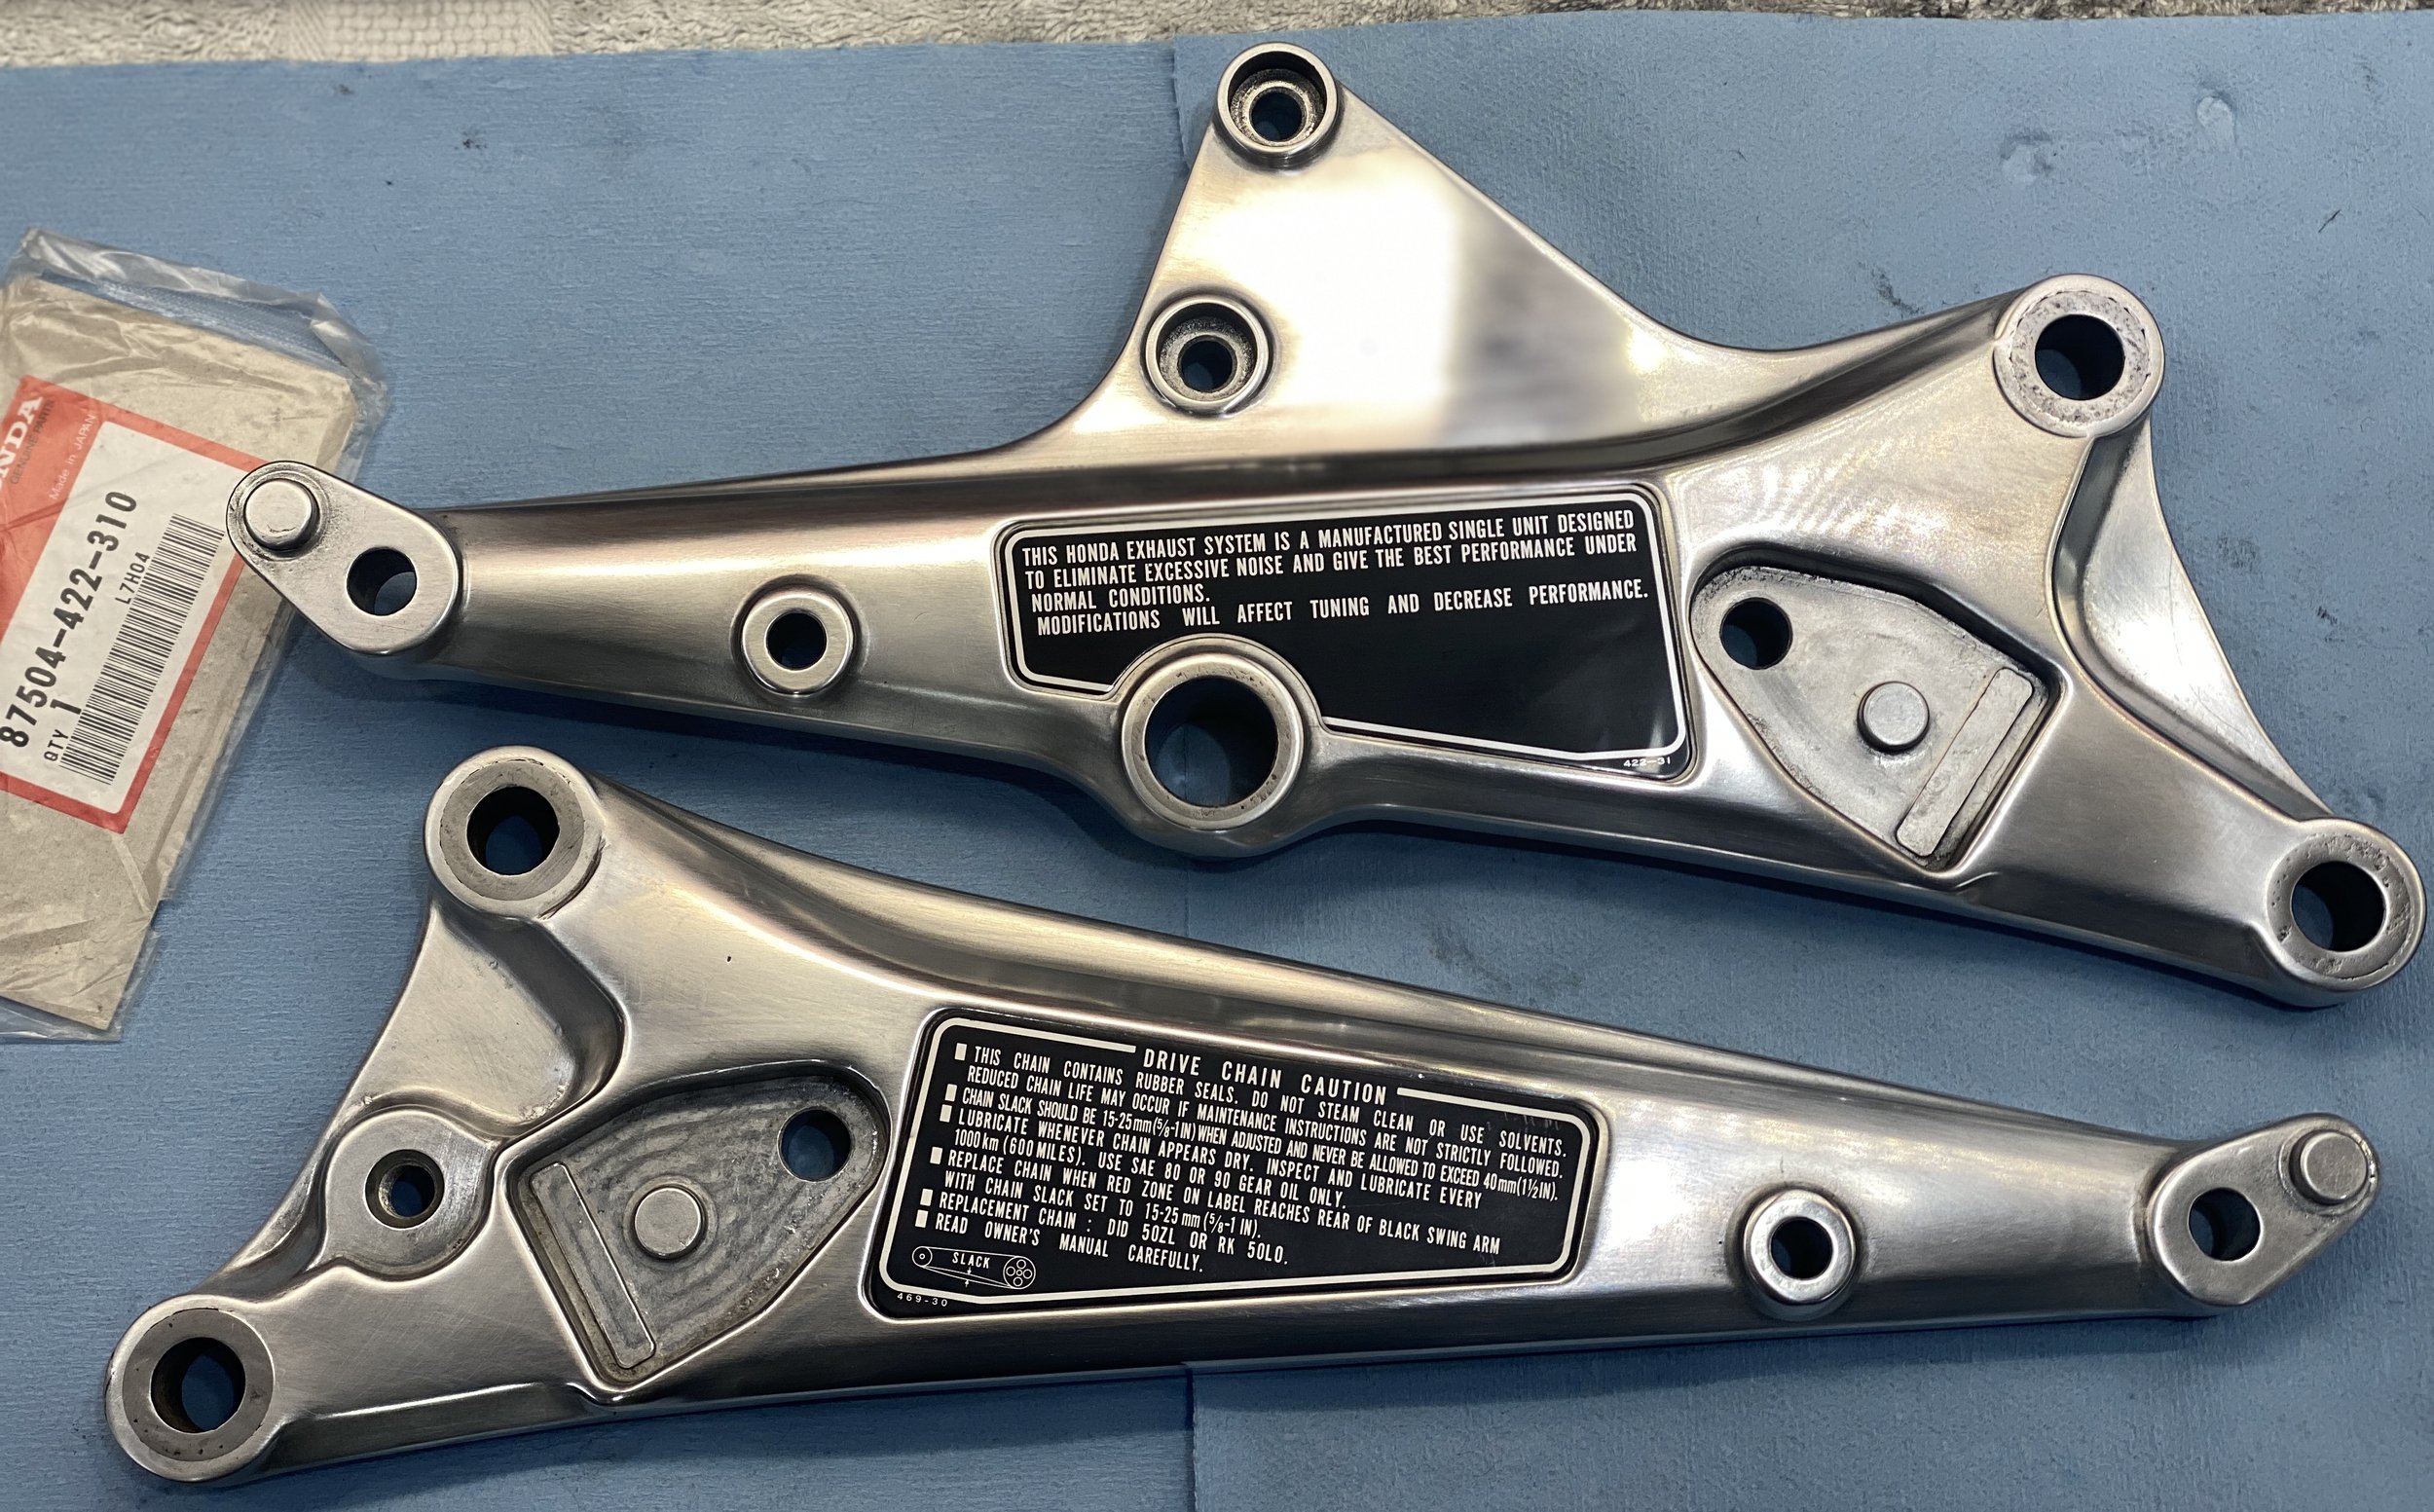
...it is here though...Went 150,220,400,800, 0, then 000 steel wool with WD40. All done by hand. Probably wasn’t the fastest way but it worked. I considered clear coating but when I read that the Eastwood 2K can asked for 70 degrees minimum temp I decided I wasn’t going to wait ‘til March, slapped on the warning stickers and wiped the alloy with ACF-50. It’s kept the fork lowers on the LC’s and H2’s pretty well preserved. It’ll do fine on these hangers too.

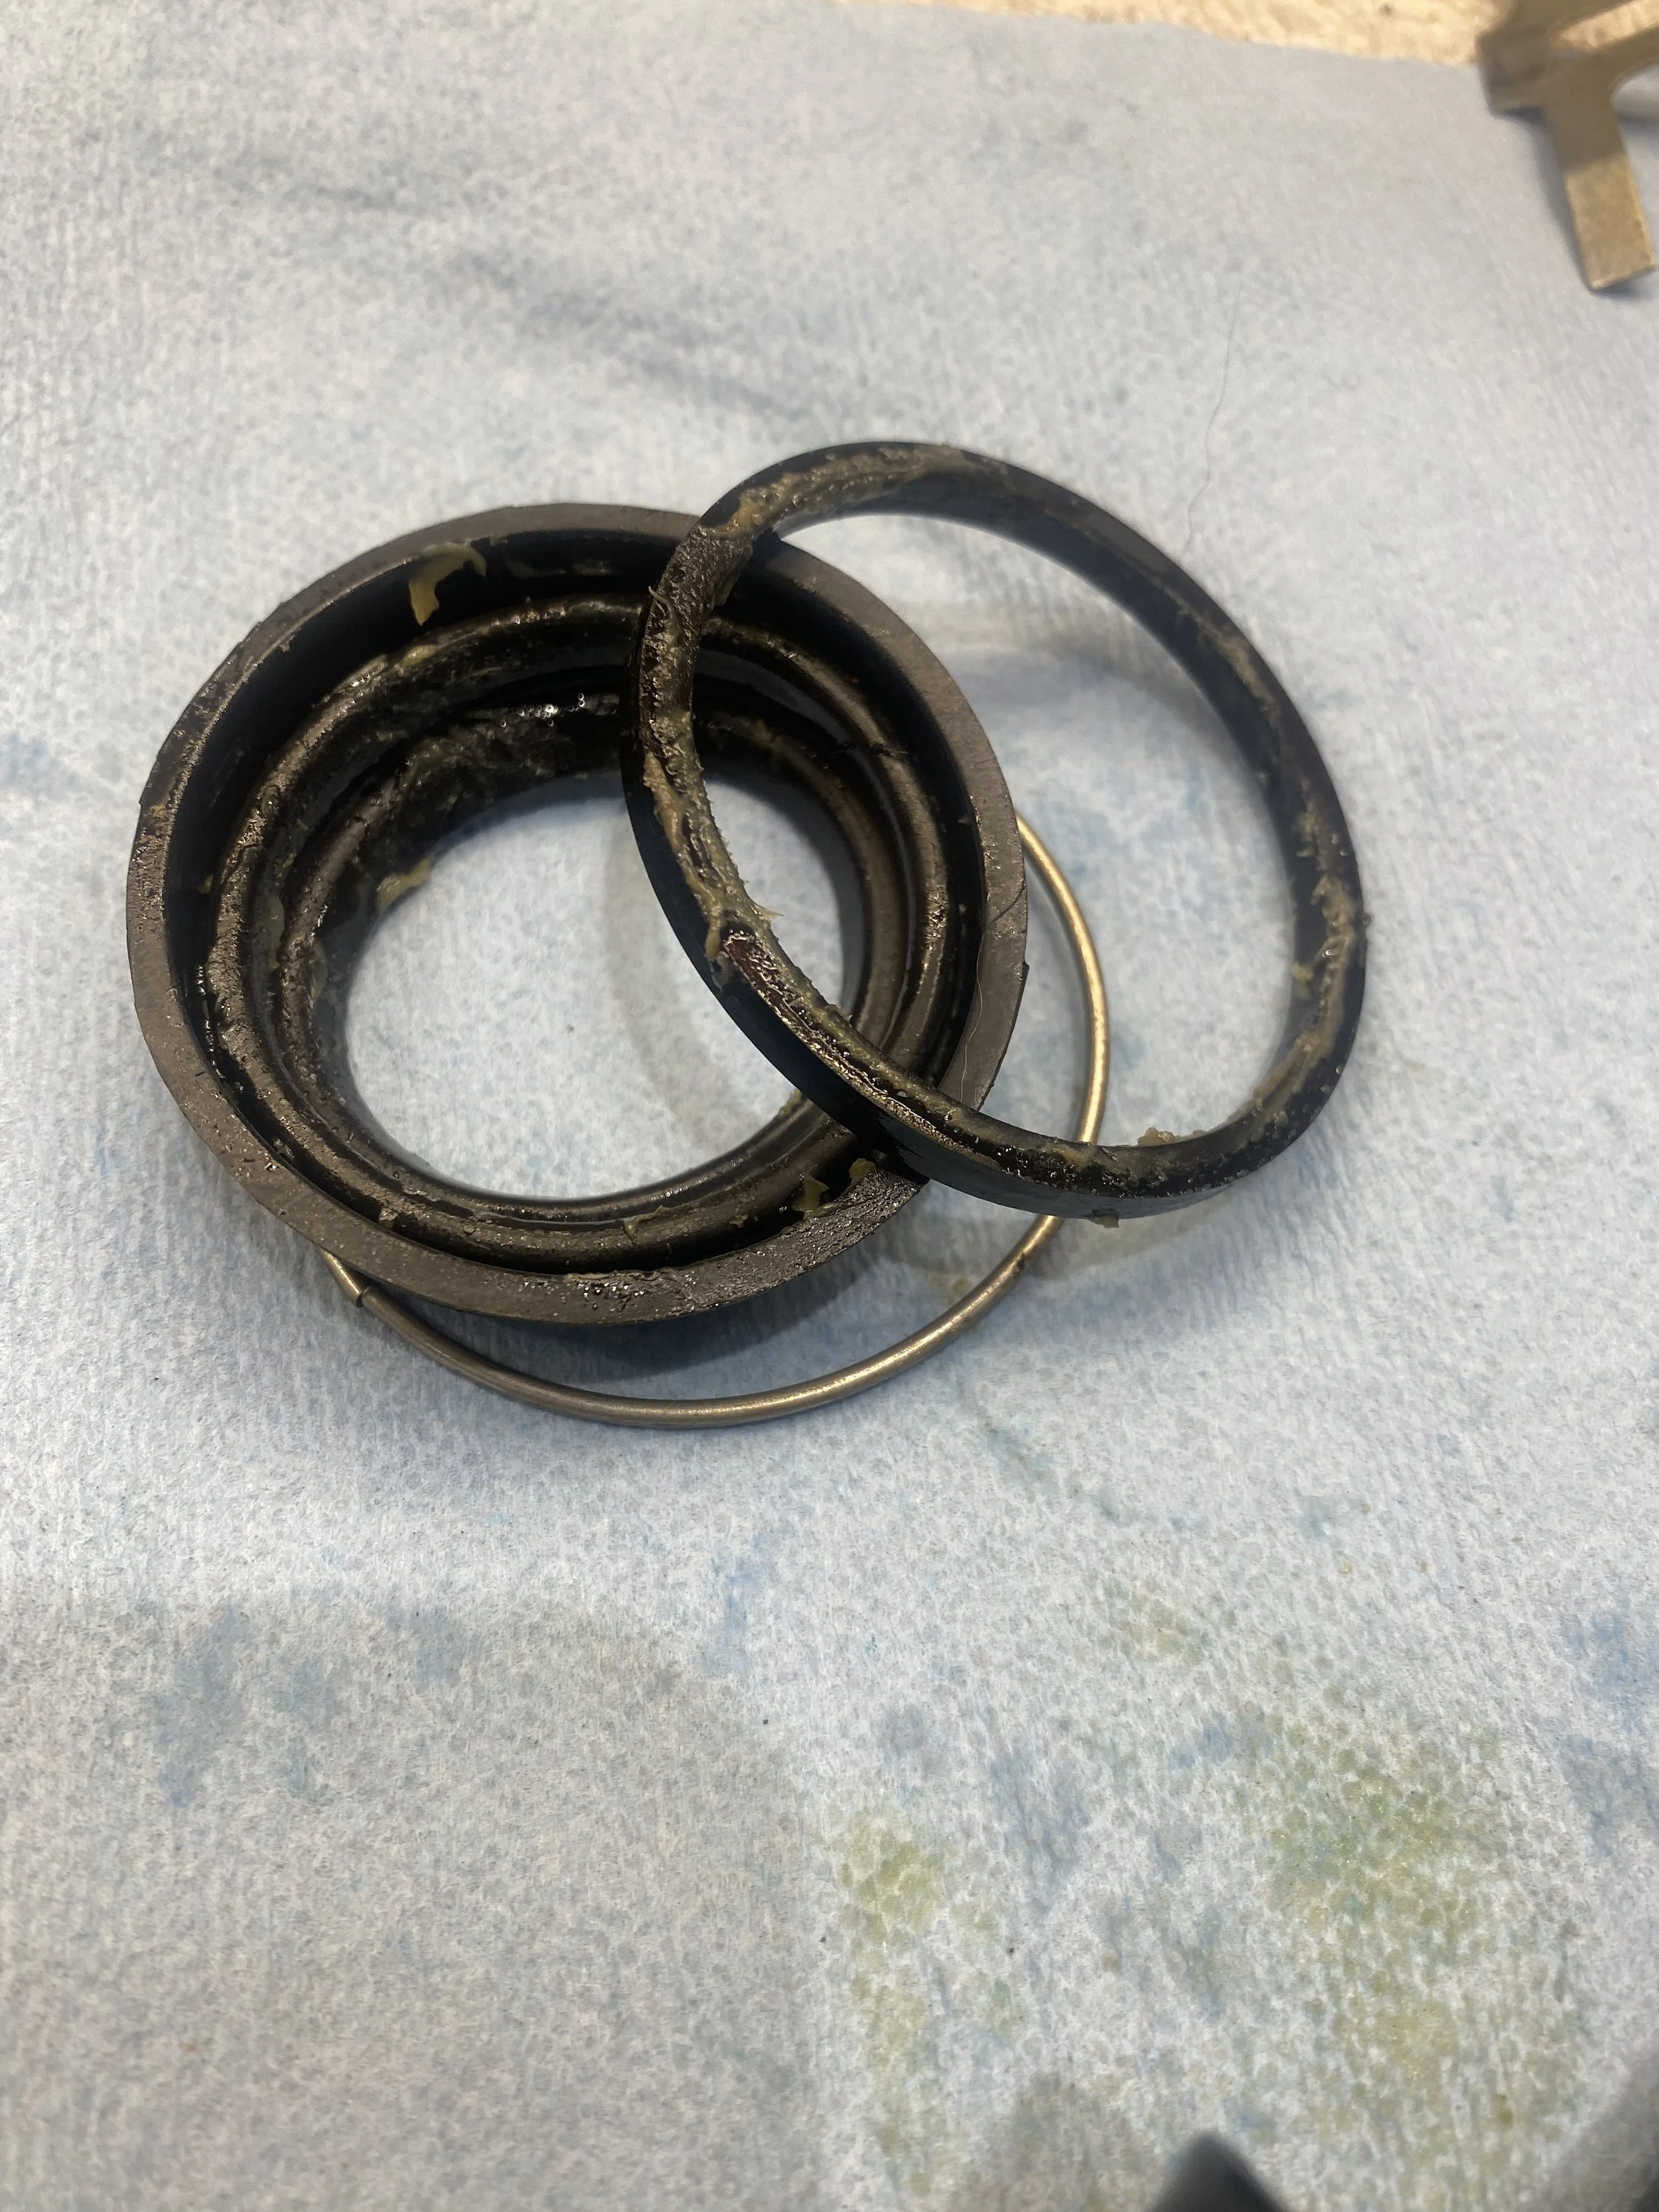
Rebuilding the Brakes
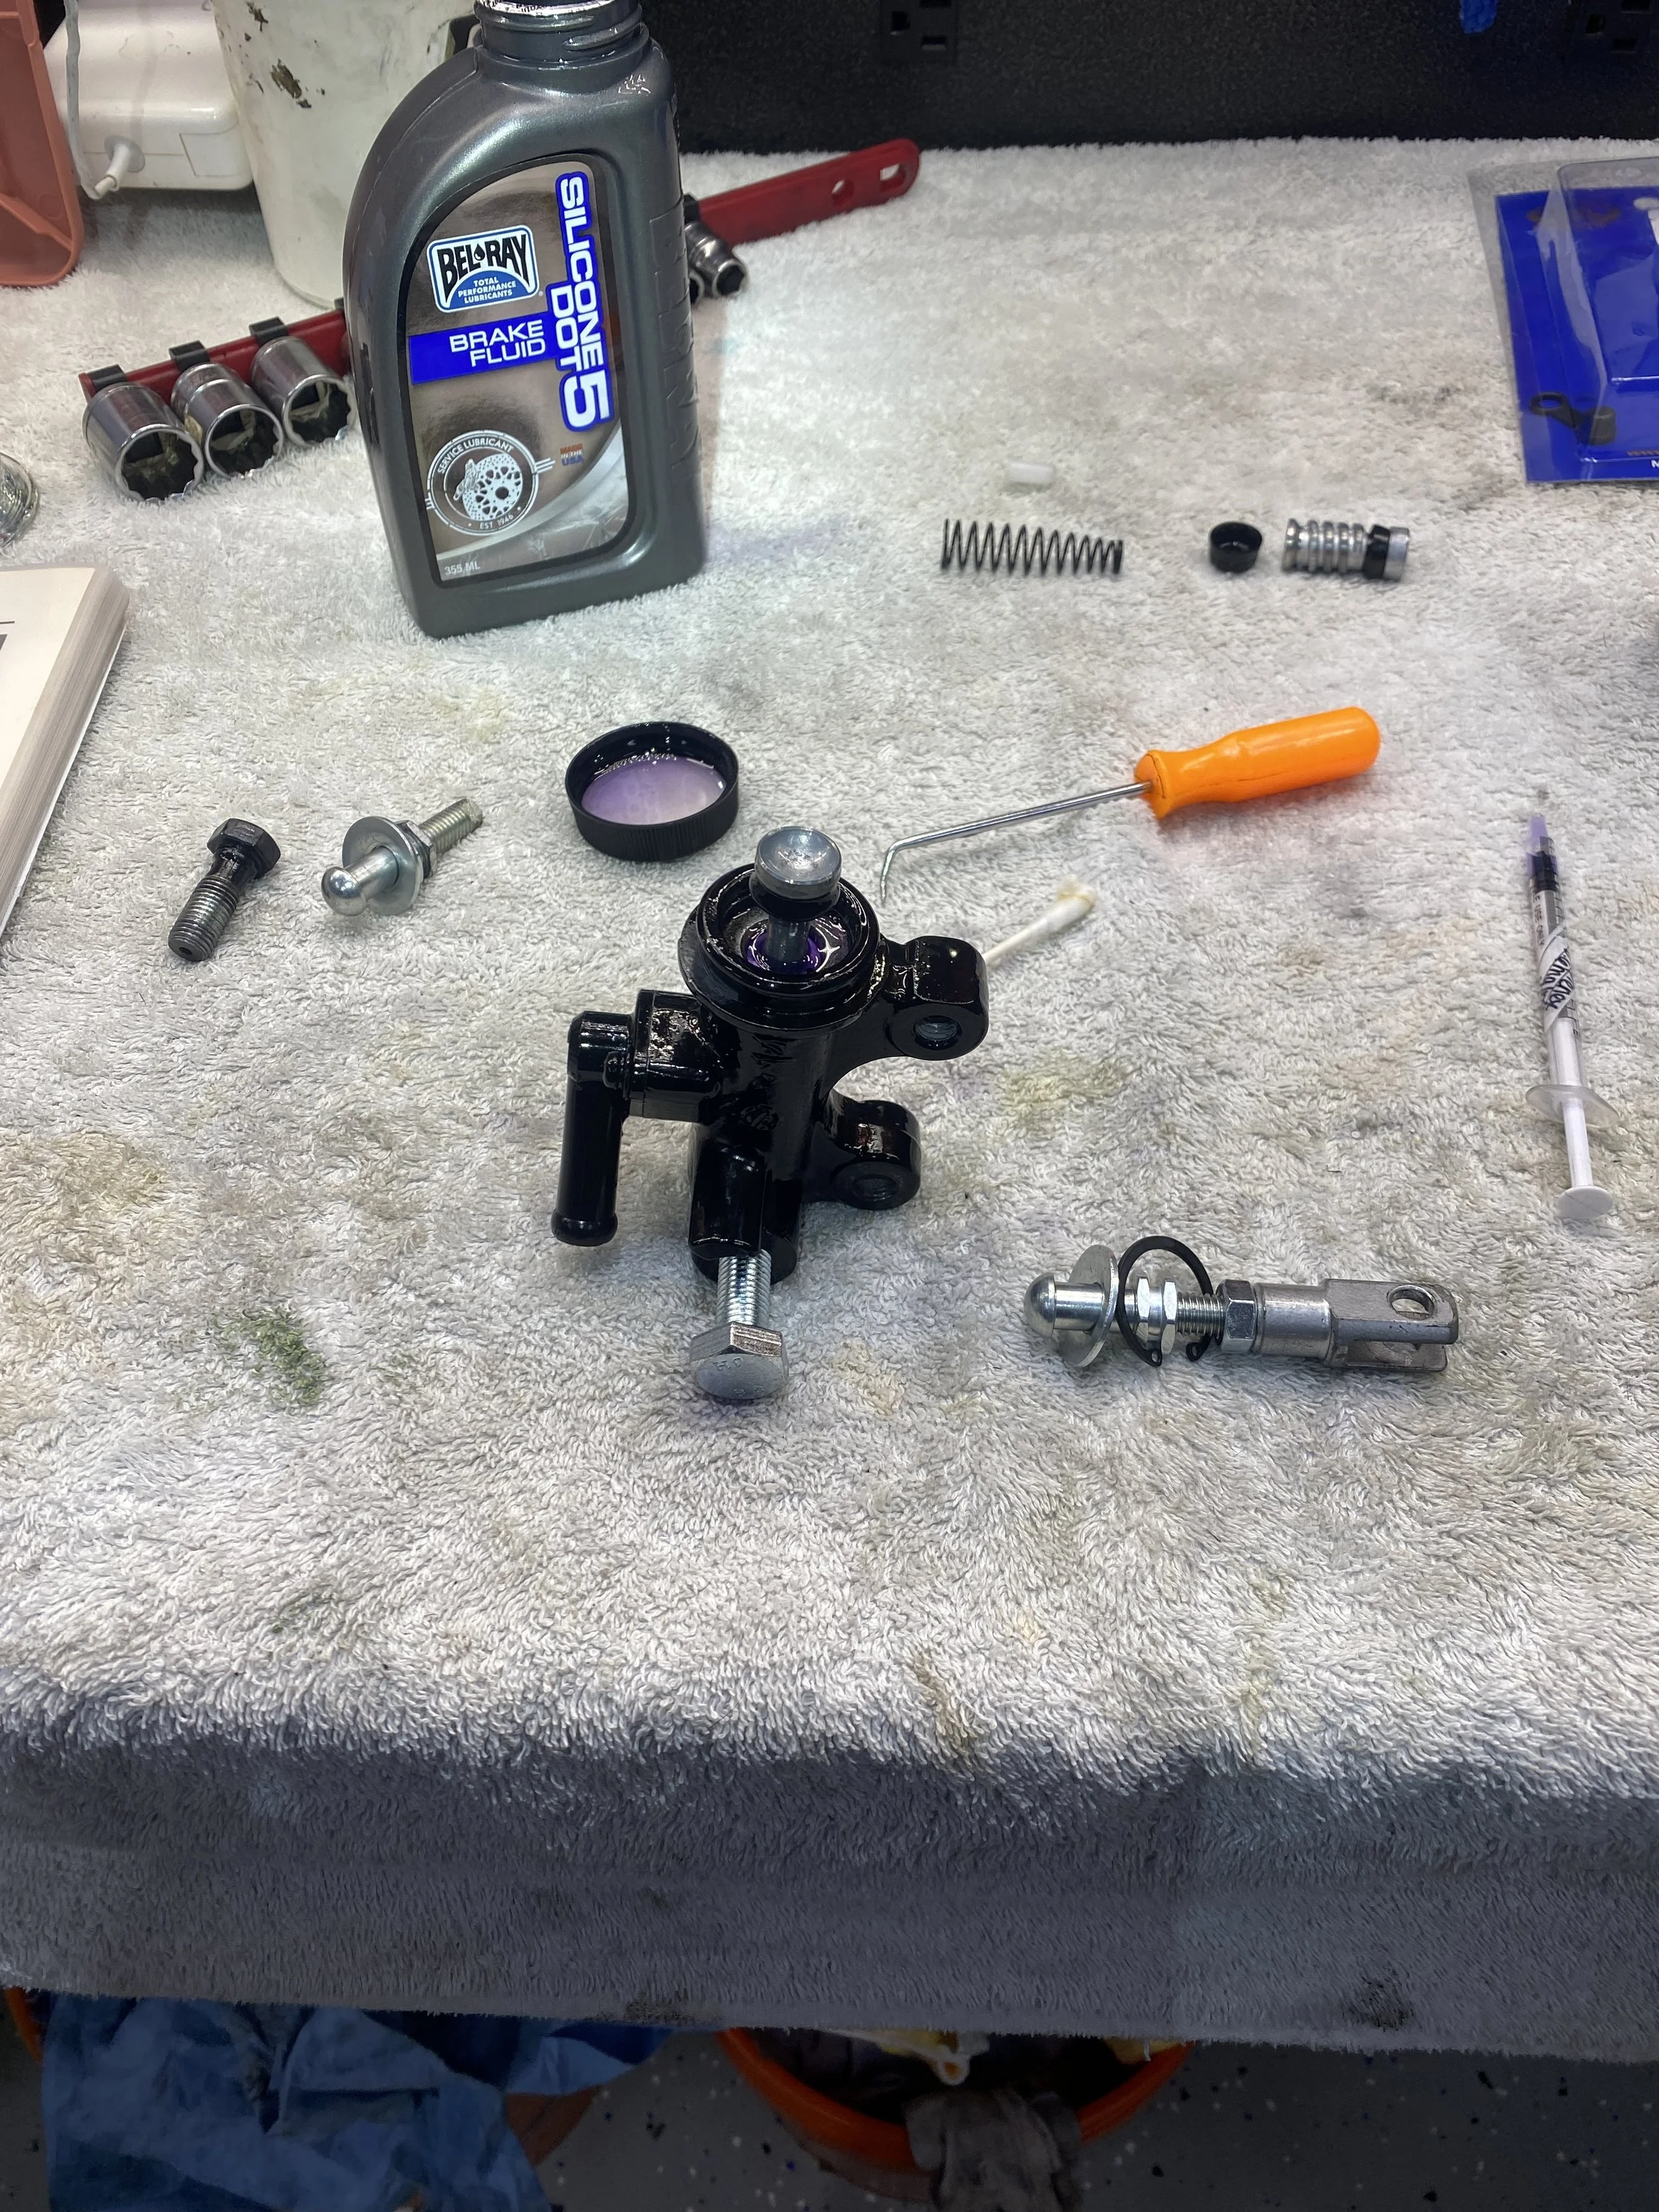
The ride home from the truck that dropped the bike revealed two problems. The rear caliper was binding, the front brakes were as squishy as an overripe peach and the front master cylinder was leaking enough to somehow develop a puddle on the master top. There was only one choice. Rebuild the brakes that had just been rebuilt and while at it switch over from the merciless Dot 3 to the more finish friendly Silicon Dot 5.
I was mystified as to why the Master Cylinder leaked. It was a brand new reservoir. And then I did some research. In between the top and the rubber diaphragm there was supposed to be this metal plate and none of these aftermarket reservoirs come with one. No matter what you do, without one your reservoir would leak just like mine. Showing NLA in all the usual places plugging in the part number in the Ebay search engine turned one up for $20.70

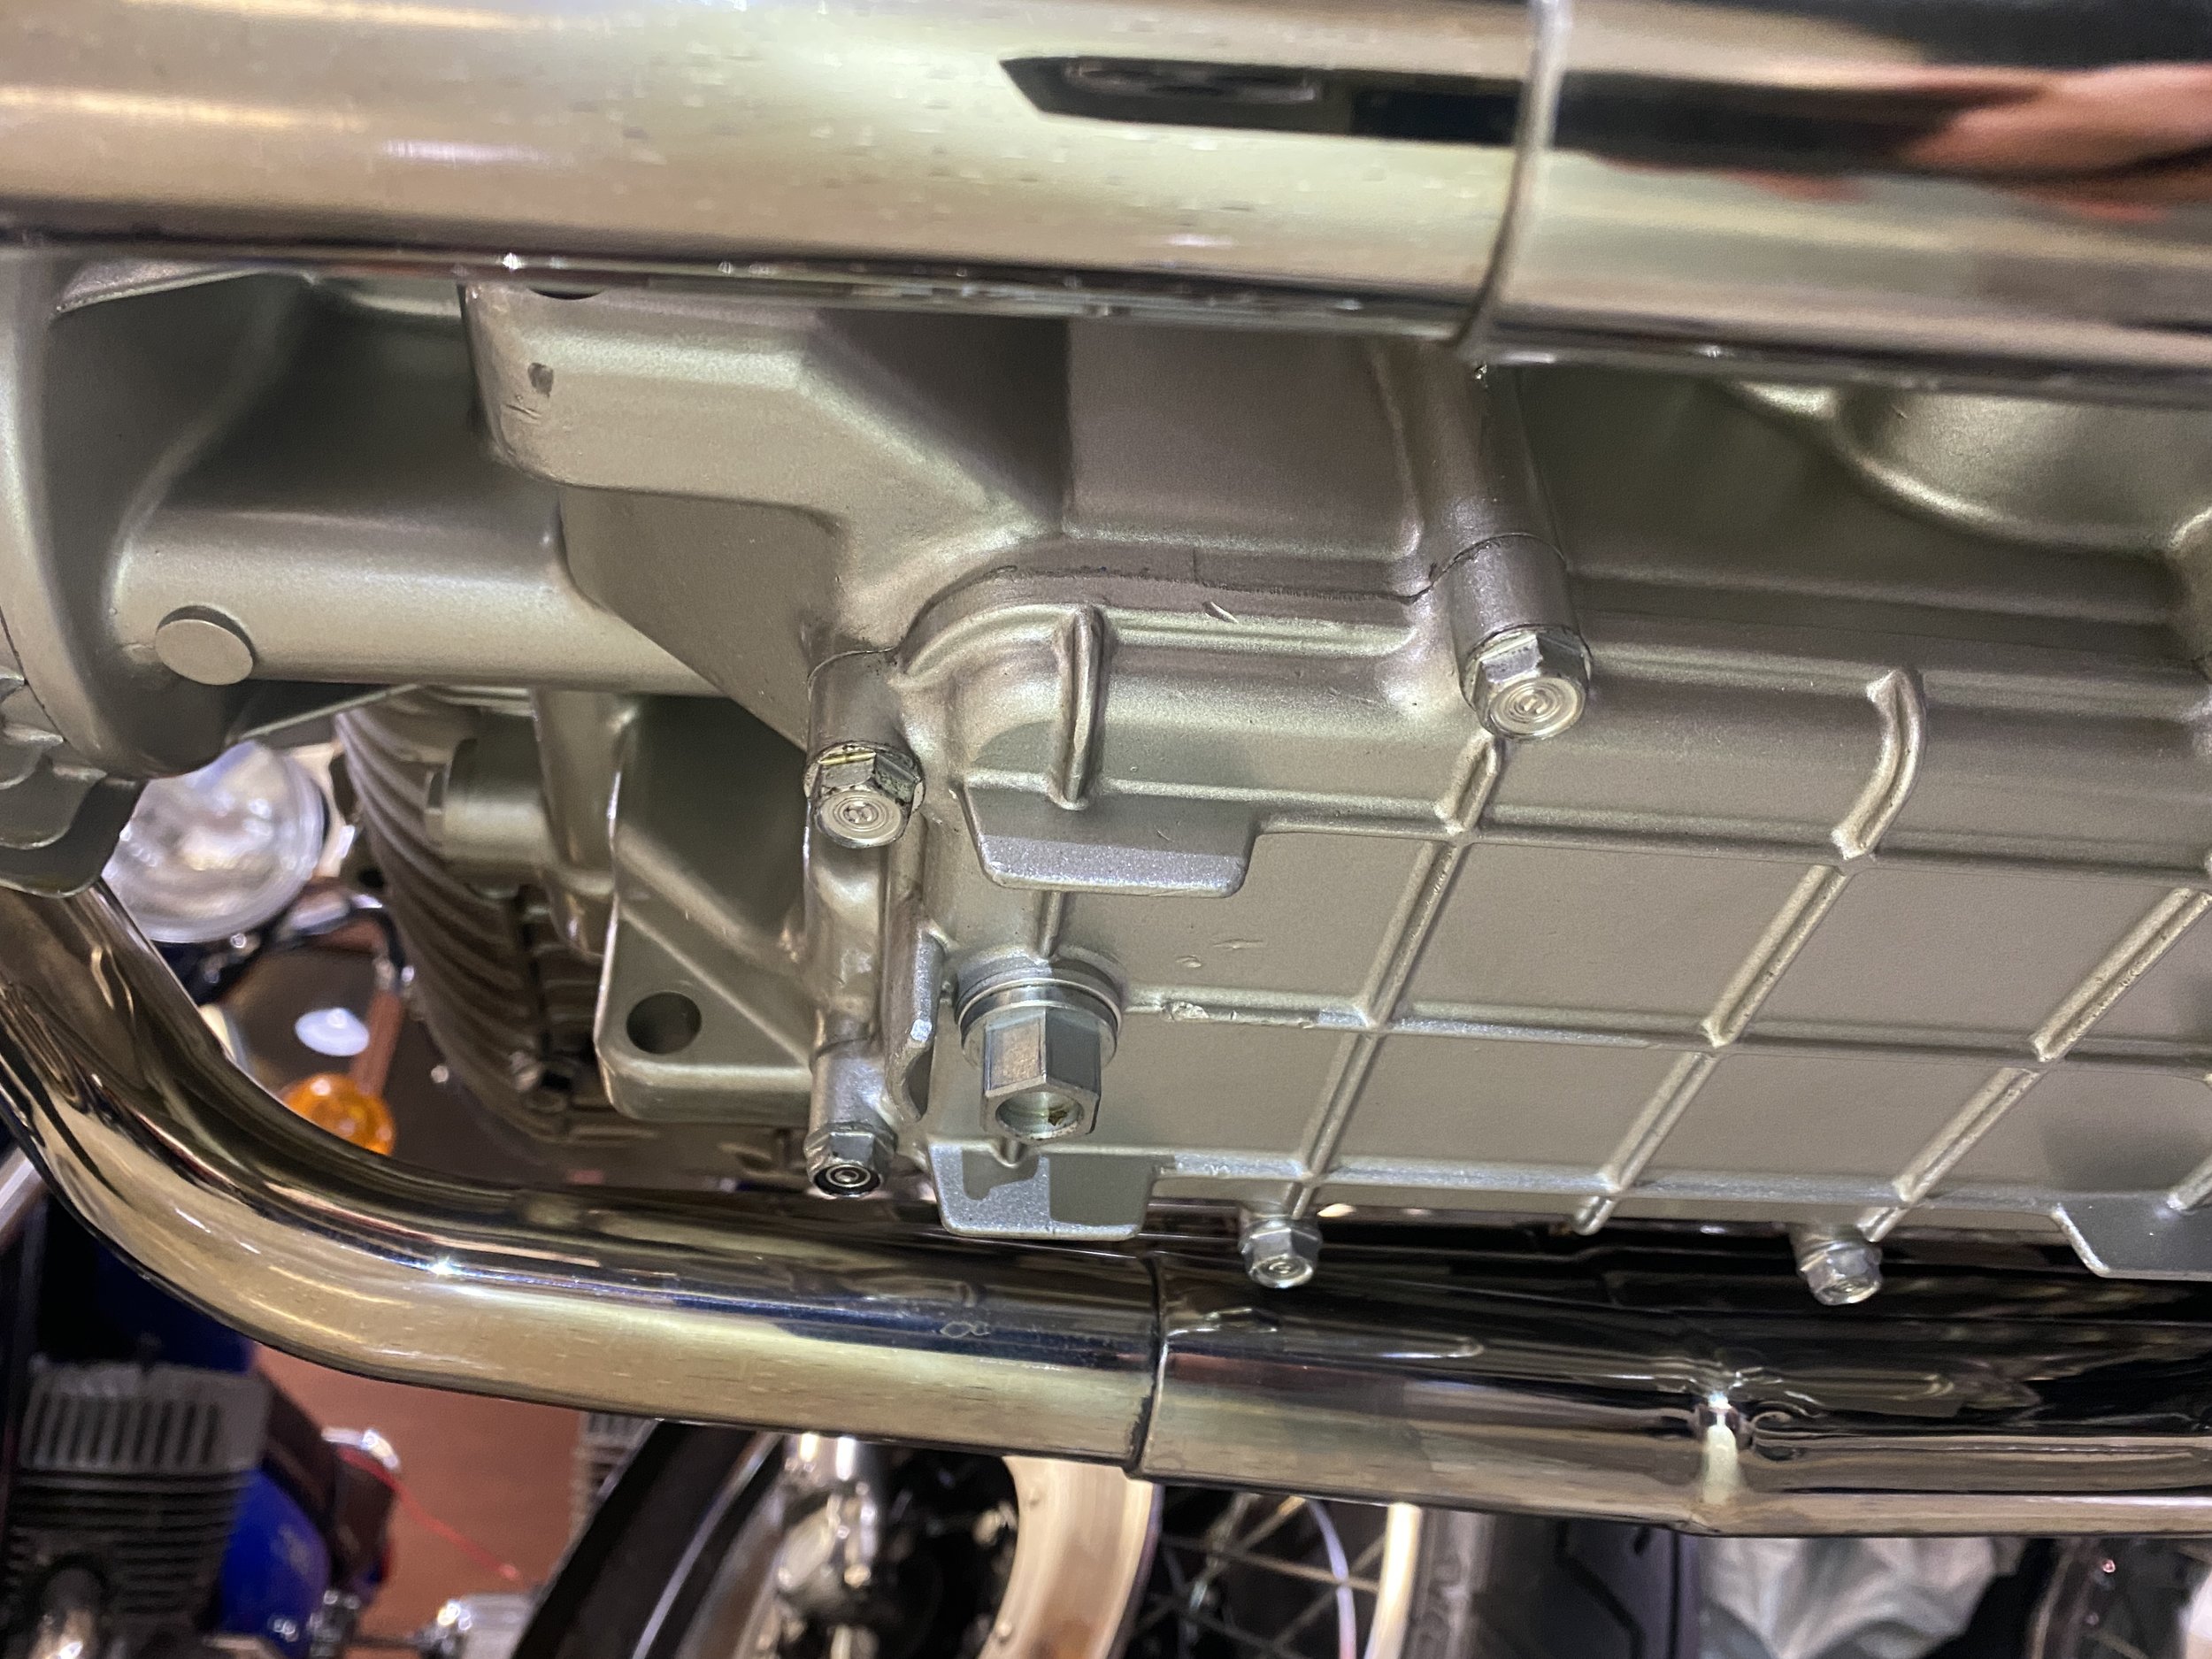
These bolts are good, clean, raw and untouched.

Someone was compelled to ensure that the bolts on the calipers were painted black...but the coating is/was not resilient....

....flaking off...
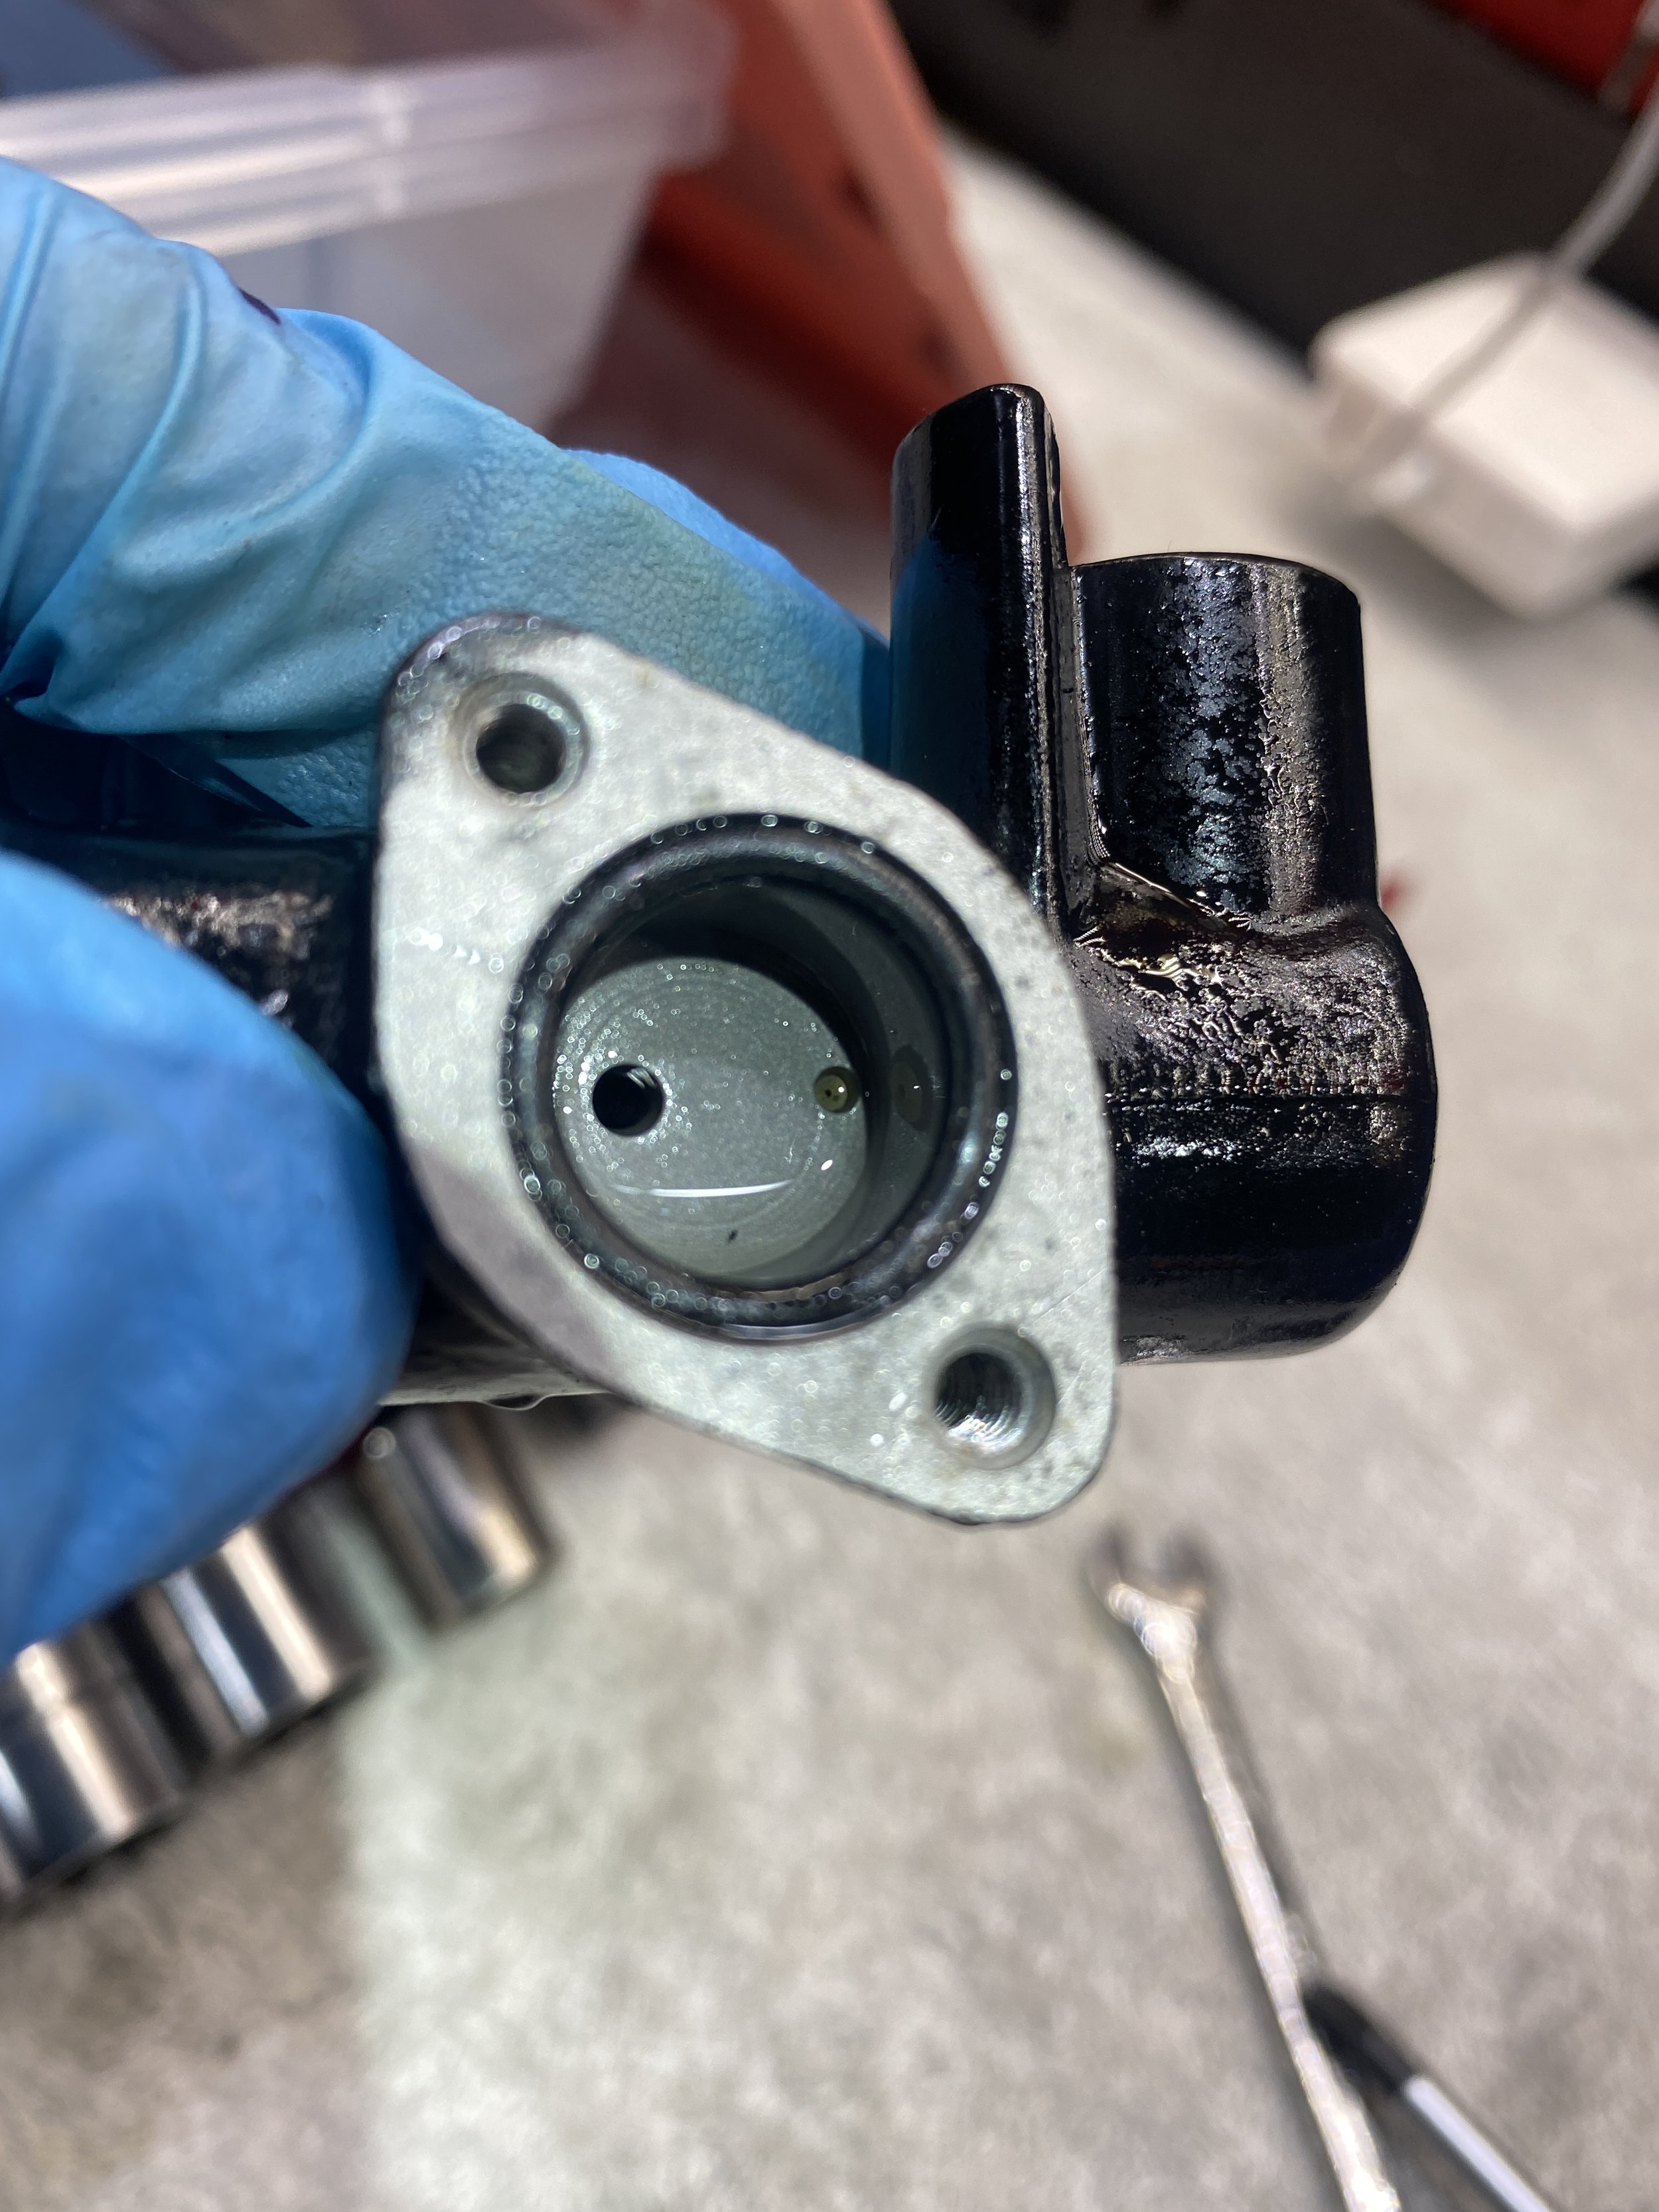
...and I suspect it was a piece of that coating that got caught in this tiny hole on the right and prevented fluid returning to the caliper and releasing the pads.
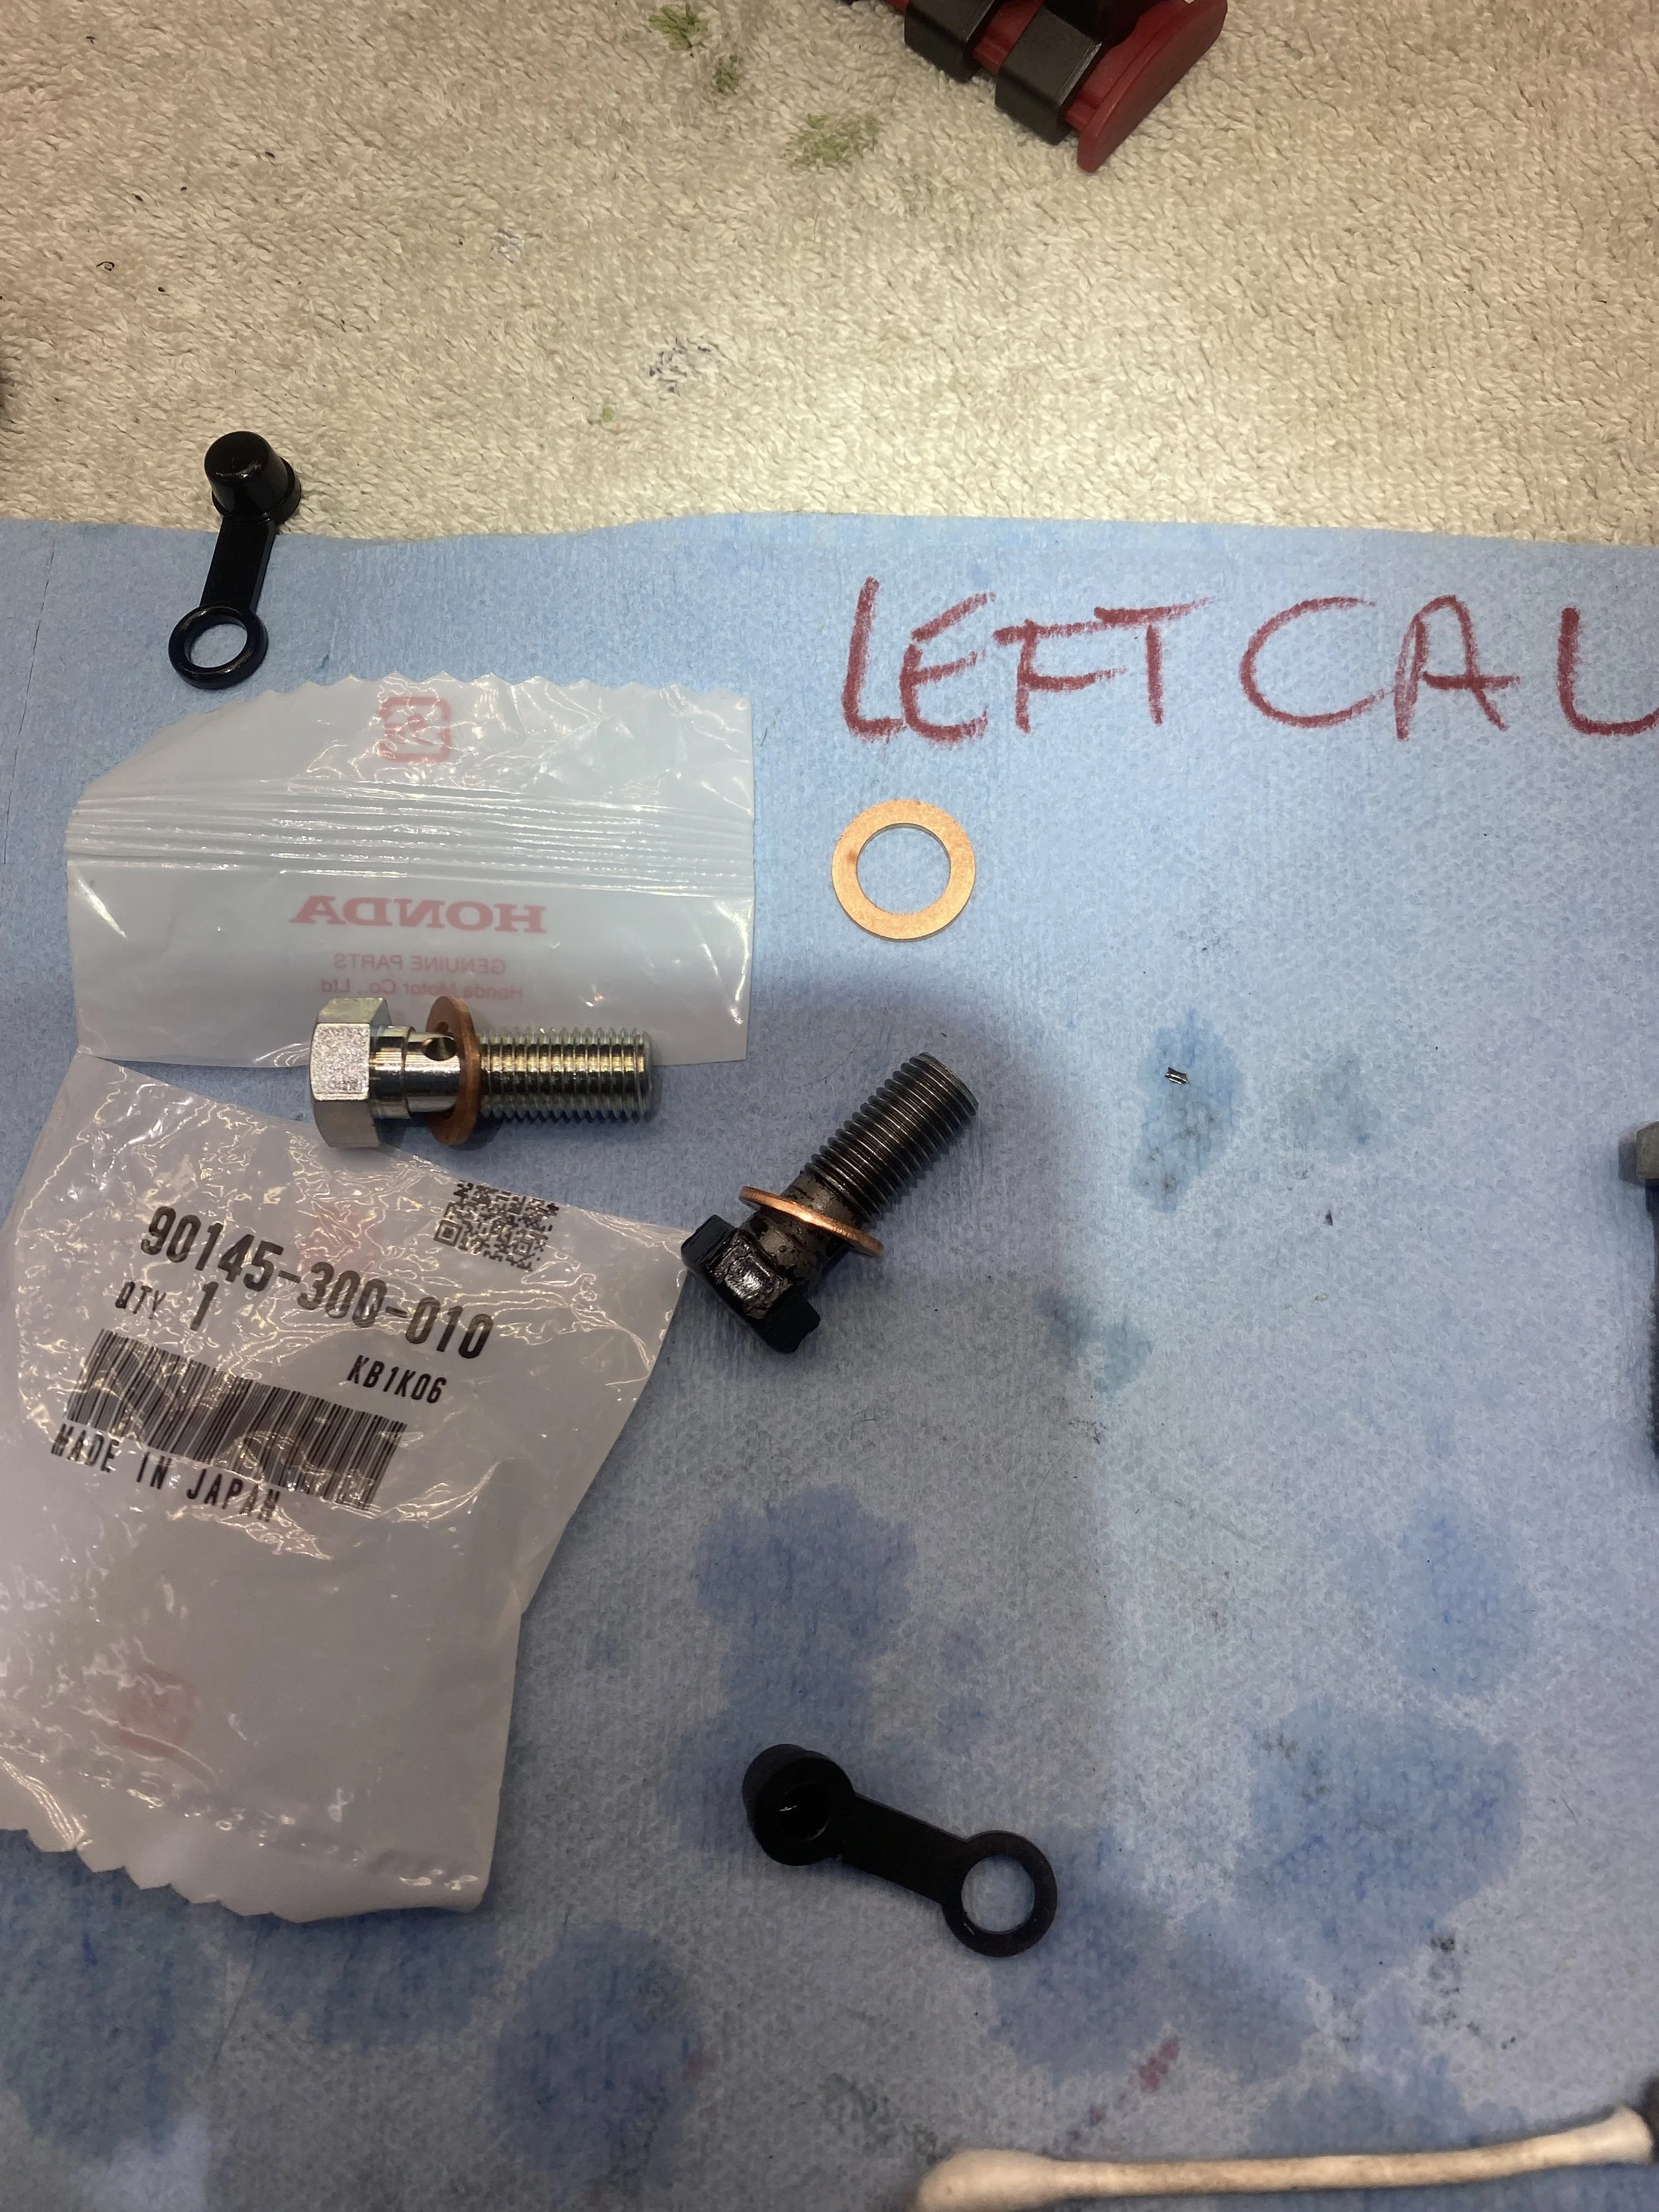
Got some real OEM bolts to replace the coated ones.
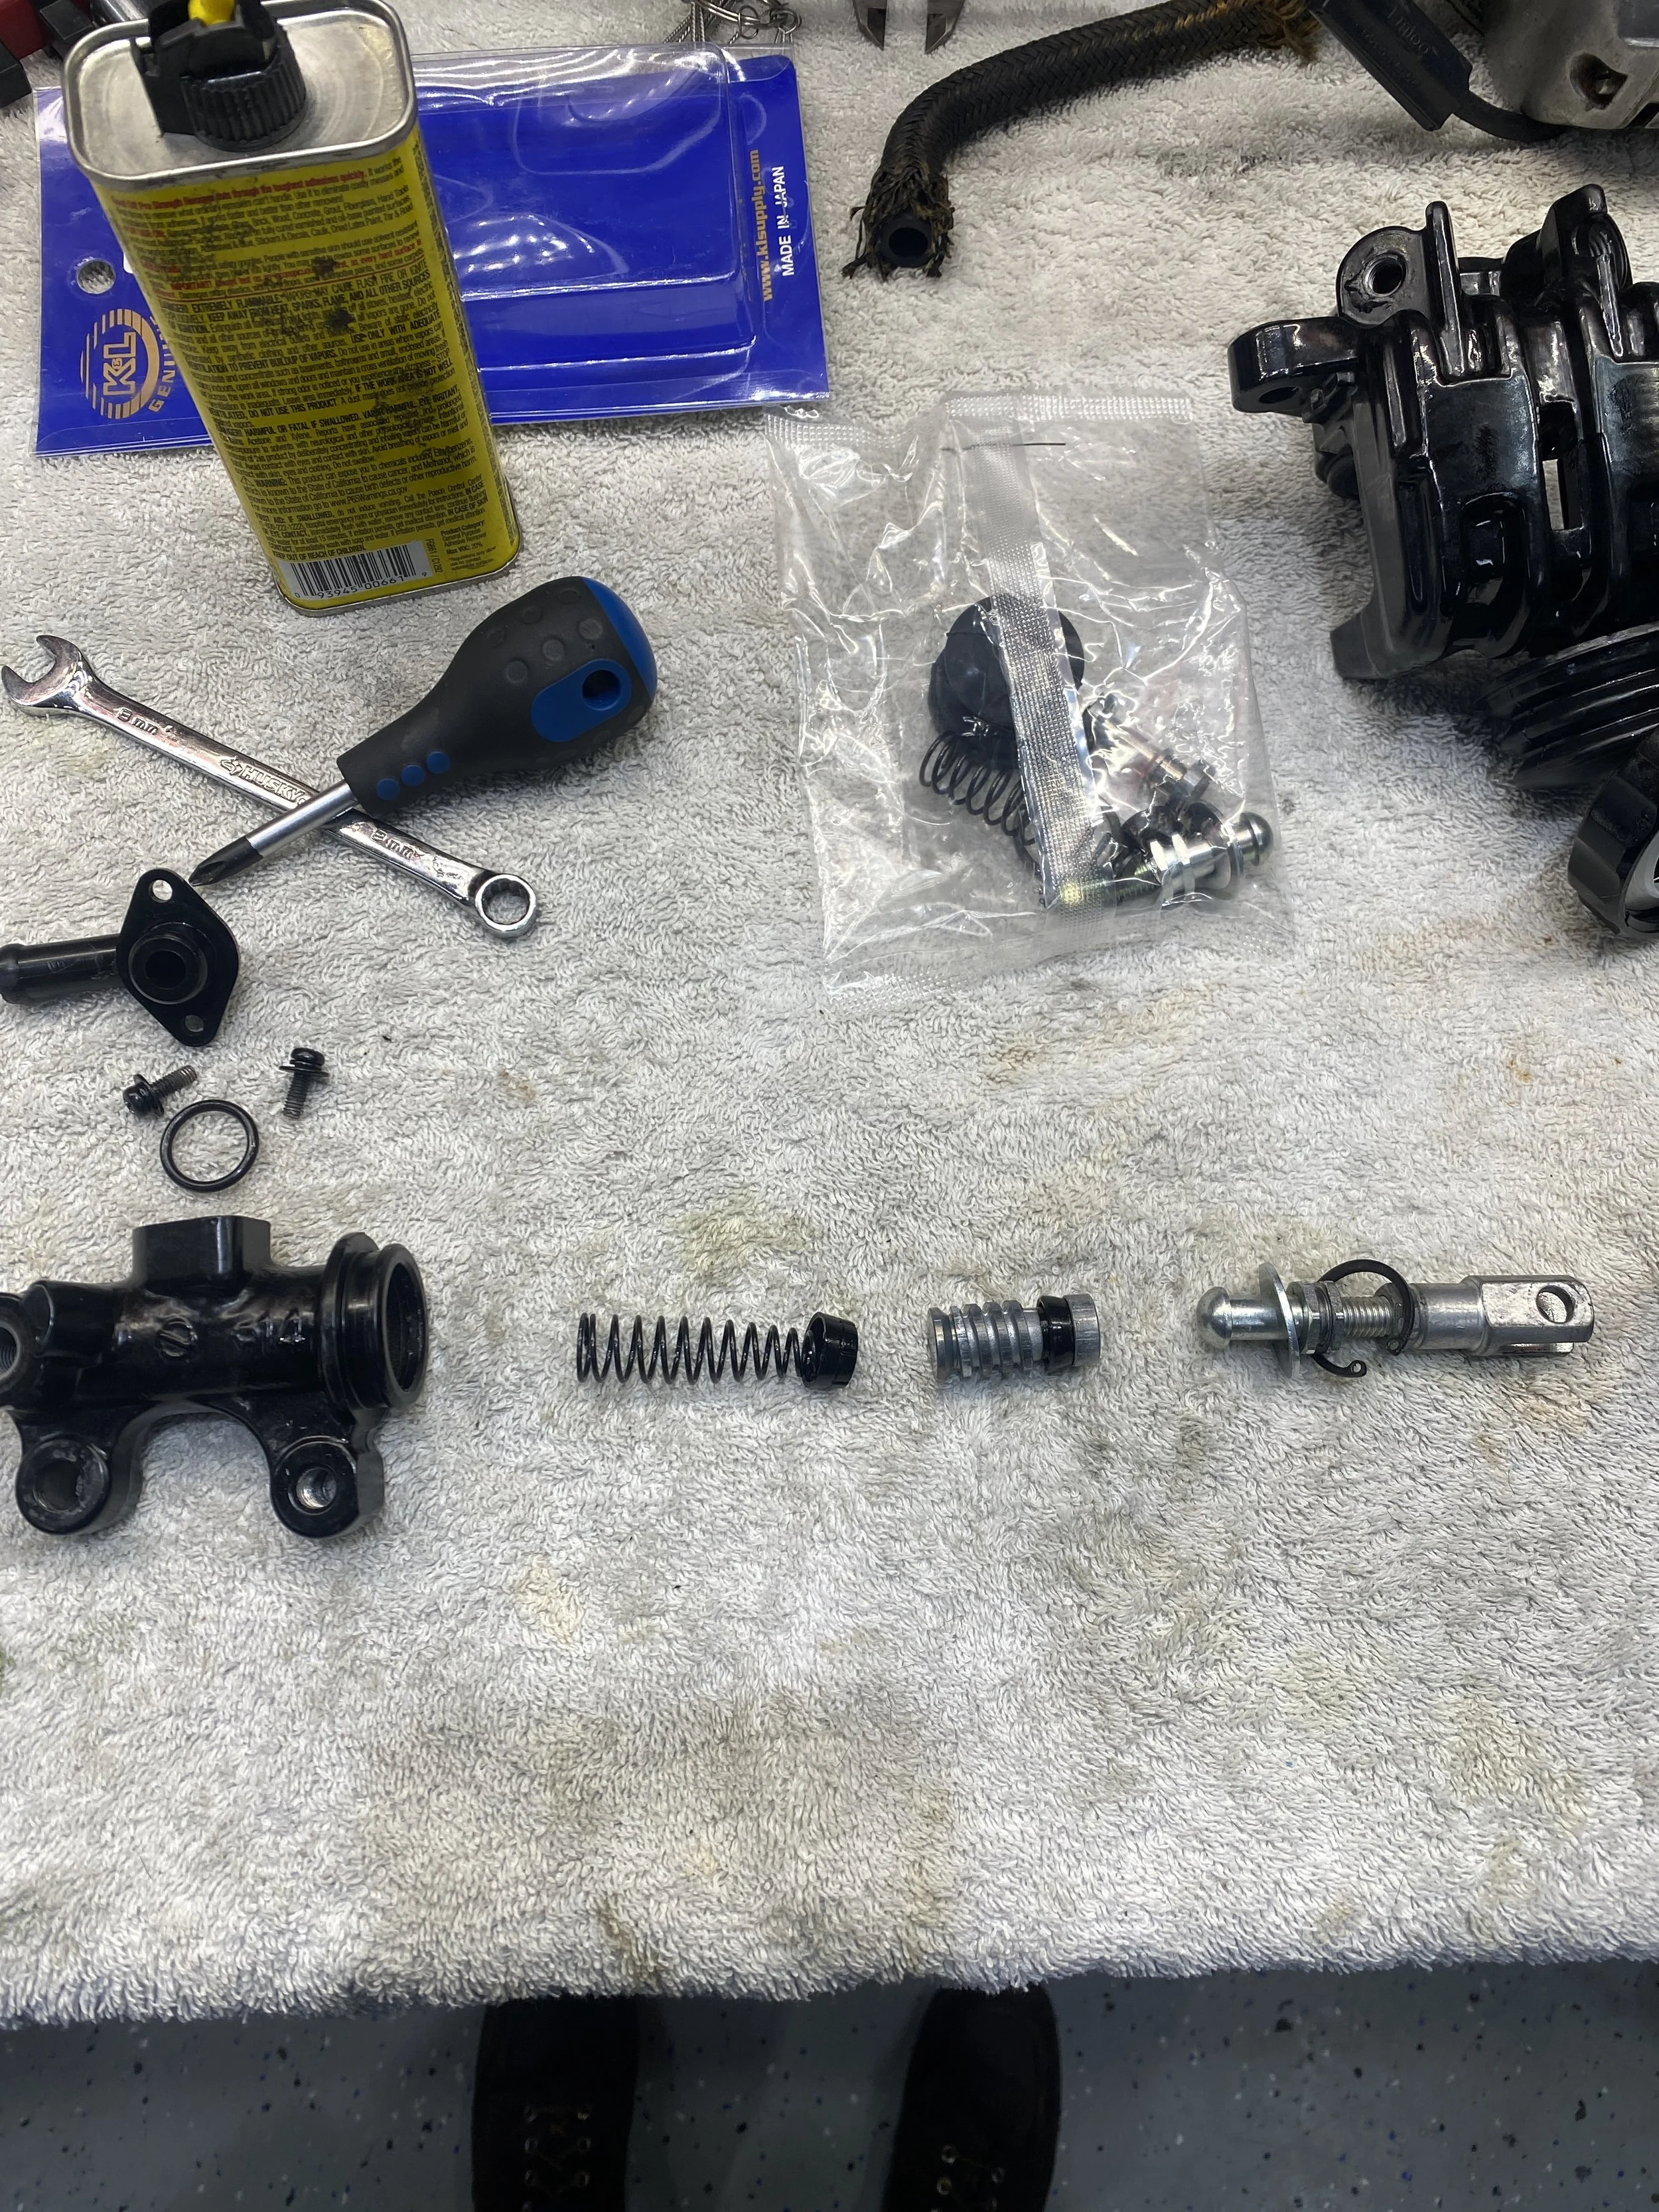
Rear master cylinder dismantled
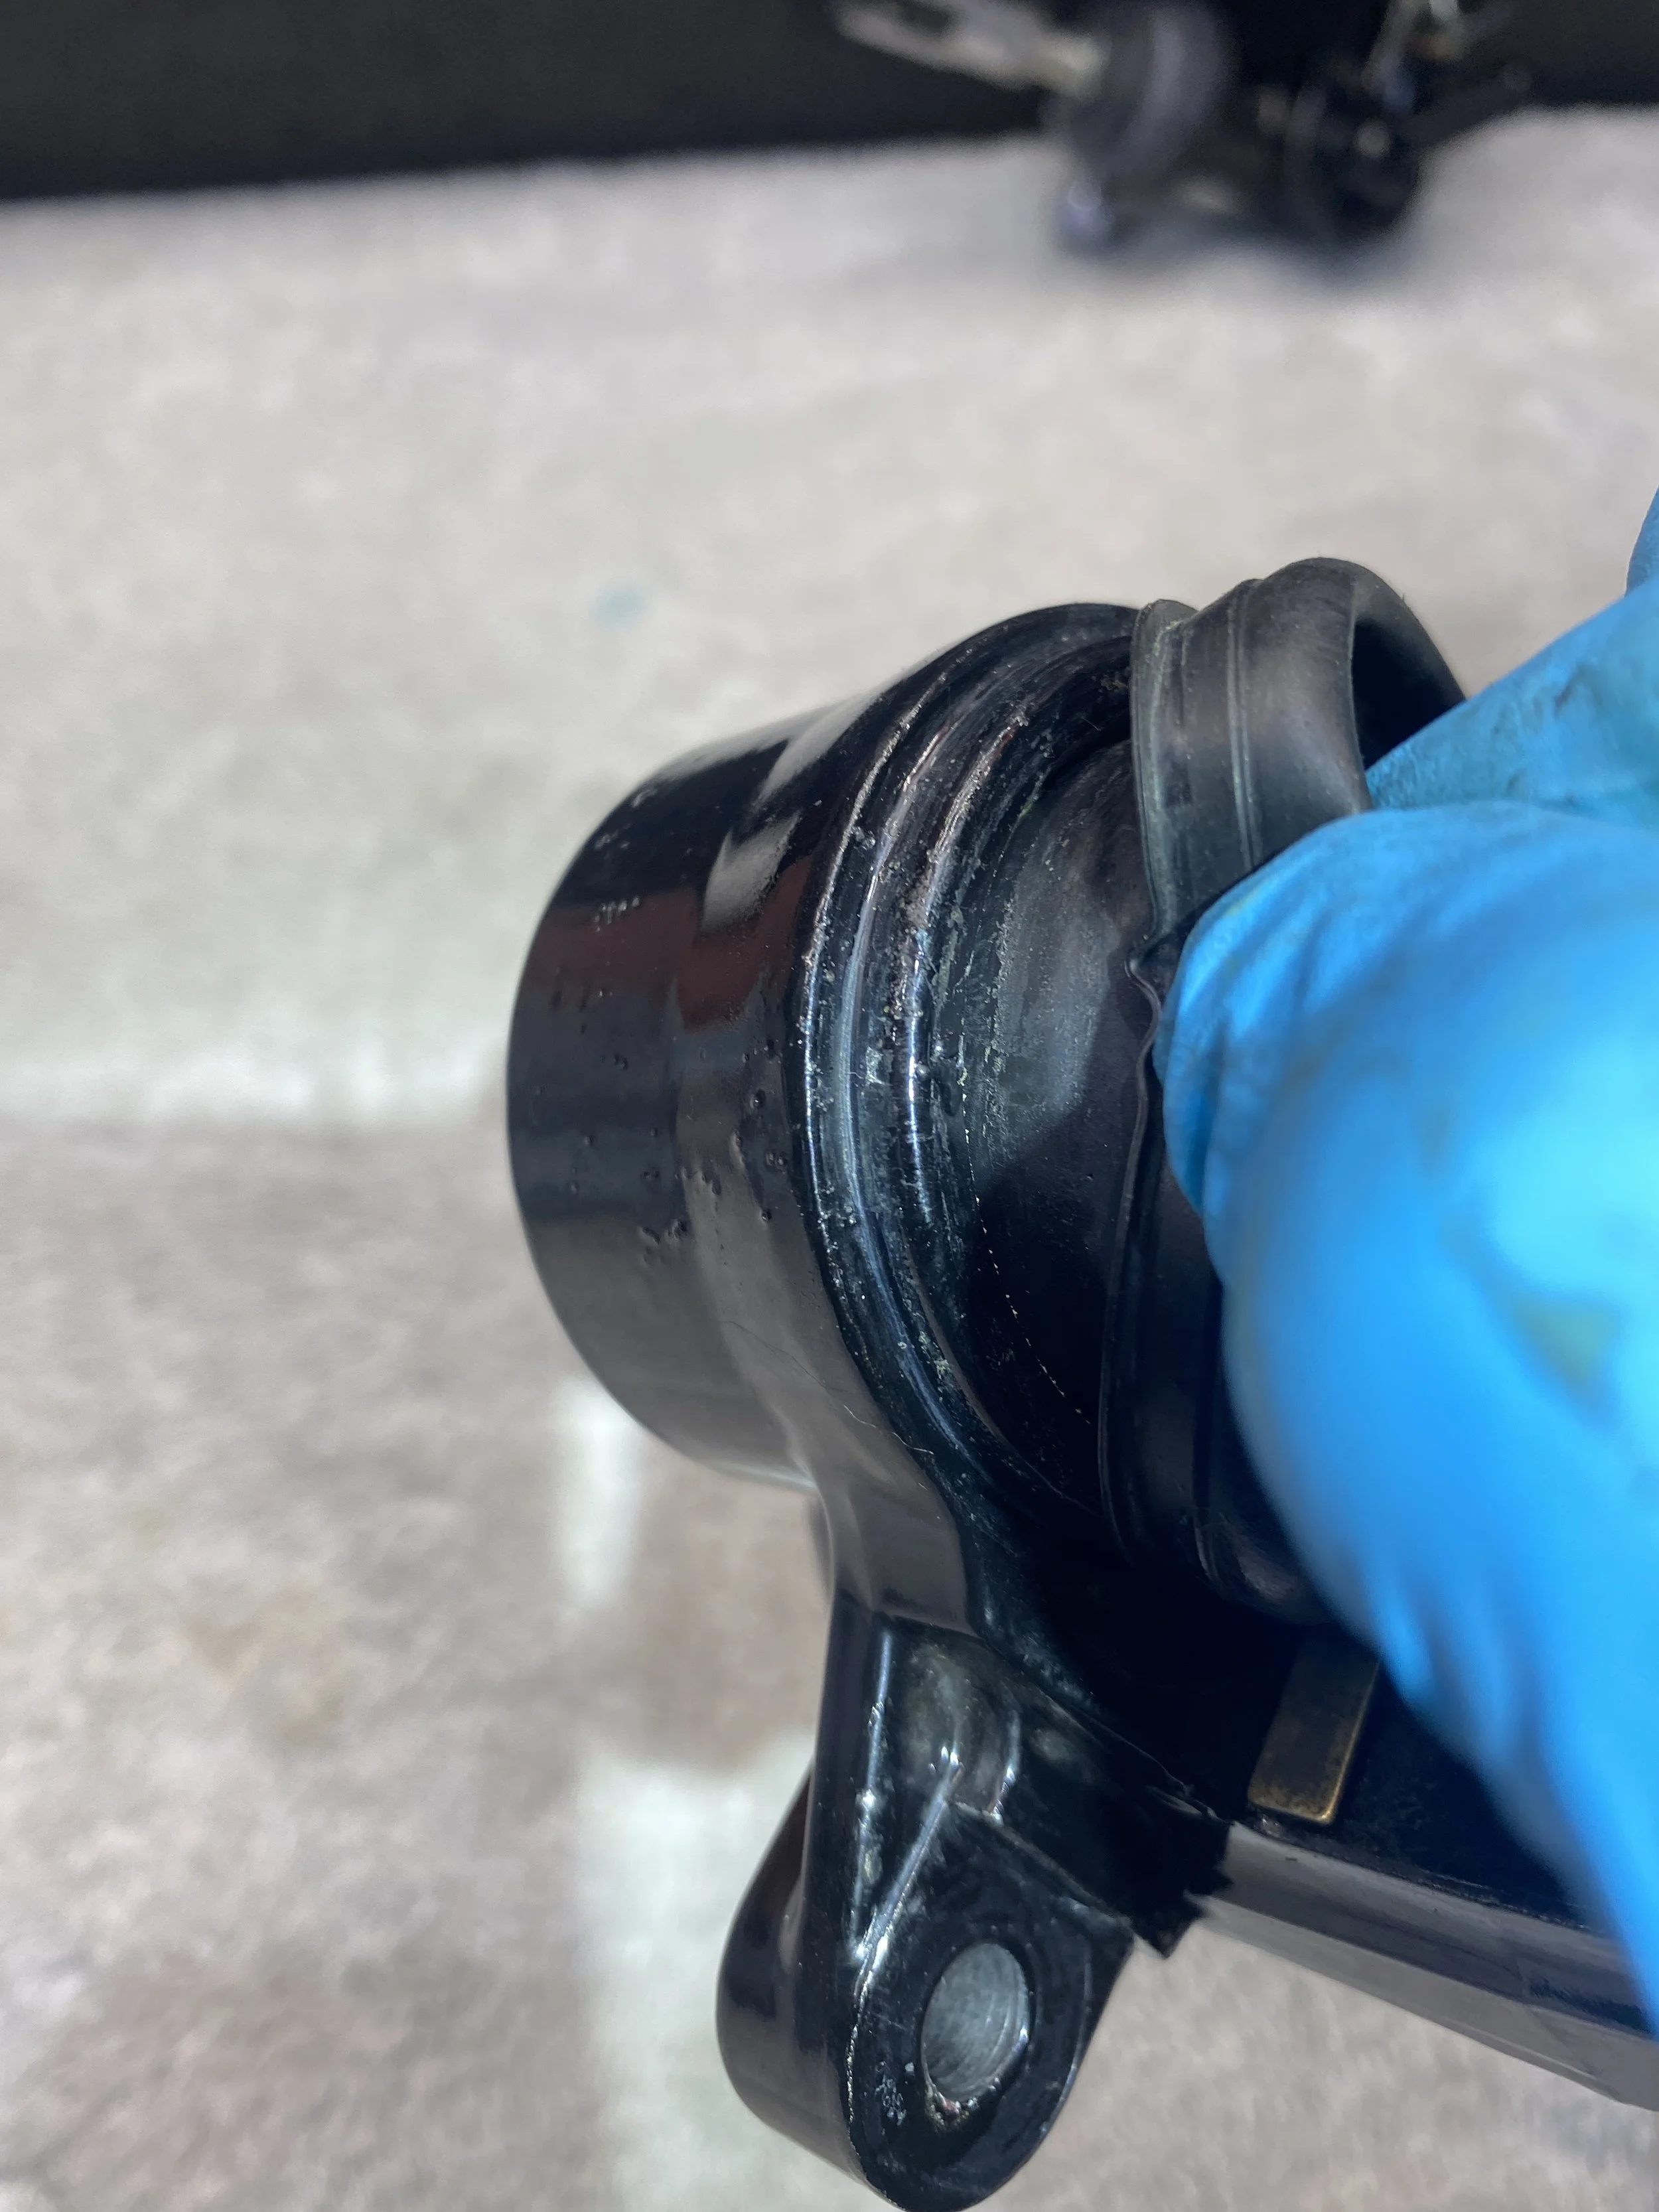
looks to me like the piston is trying to eat the dust cover....
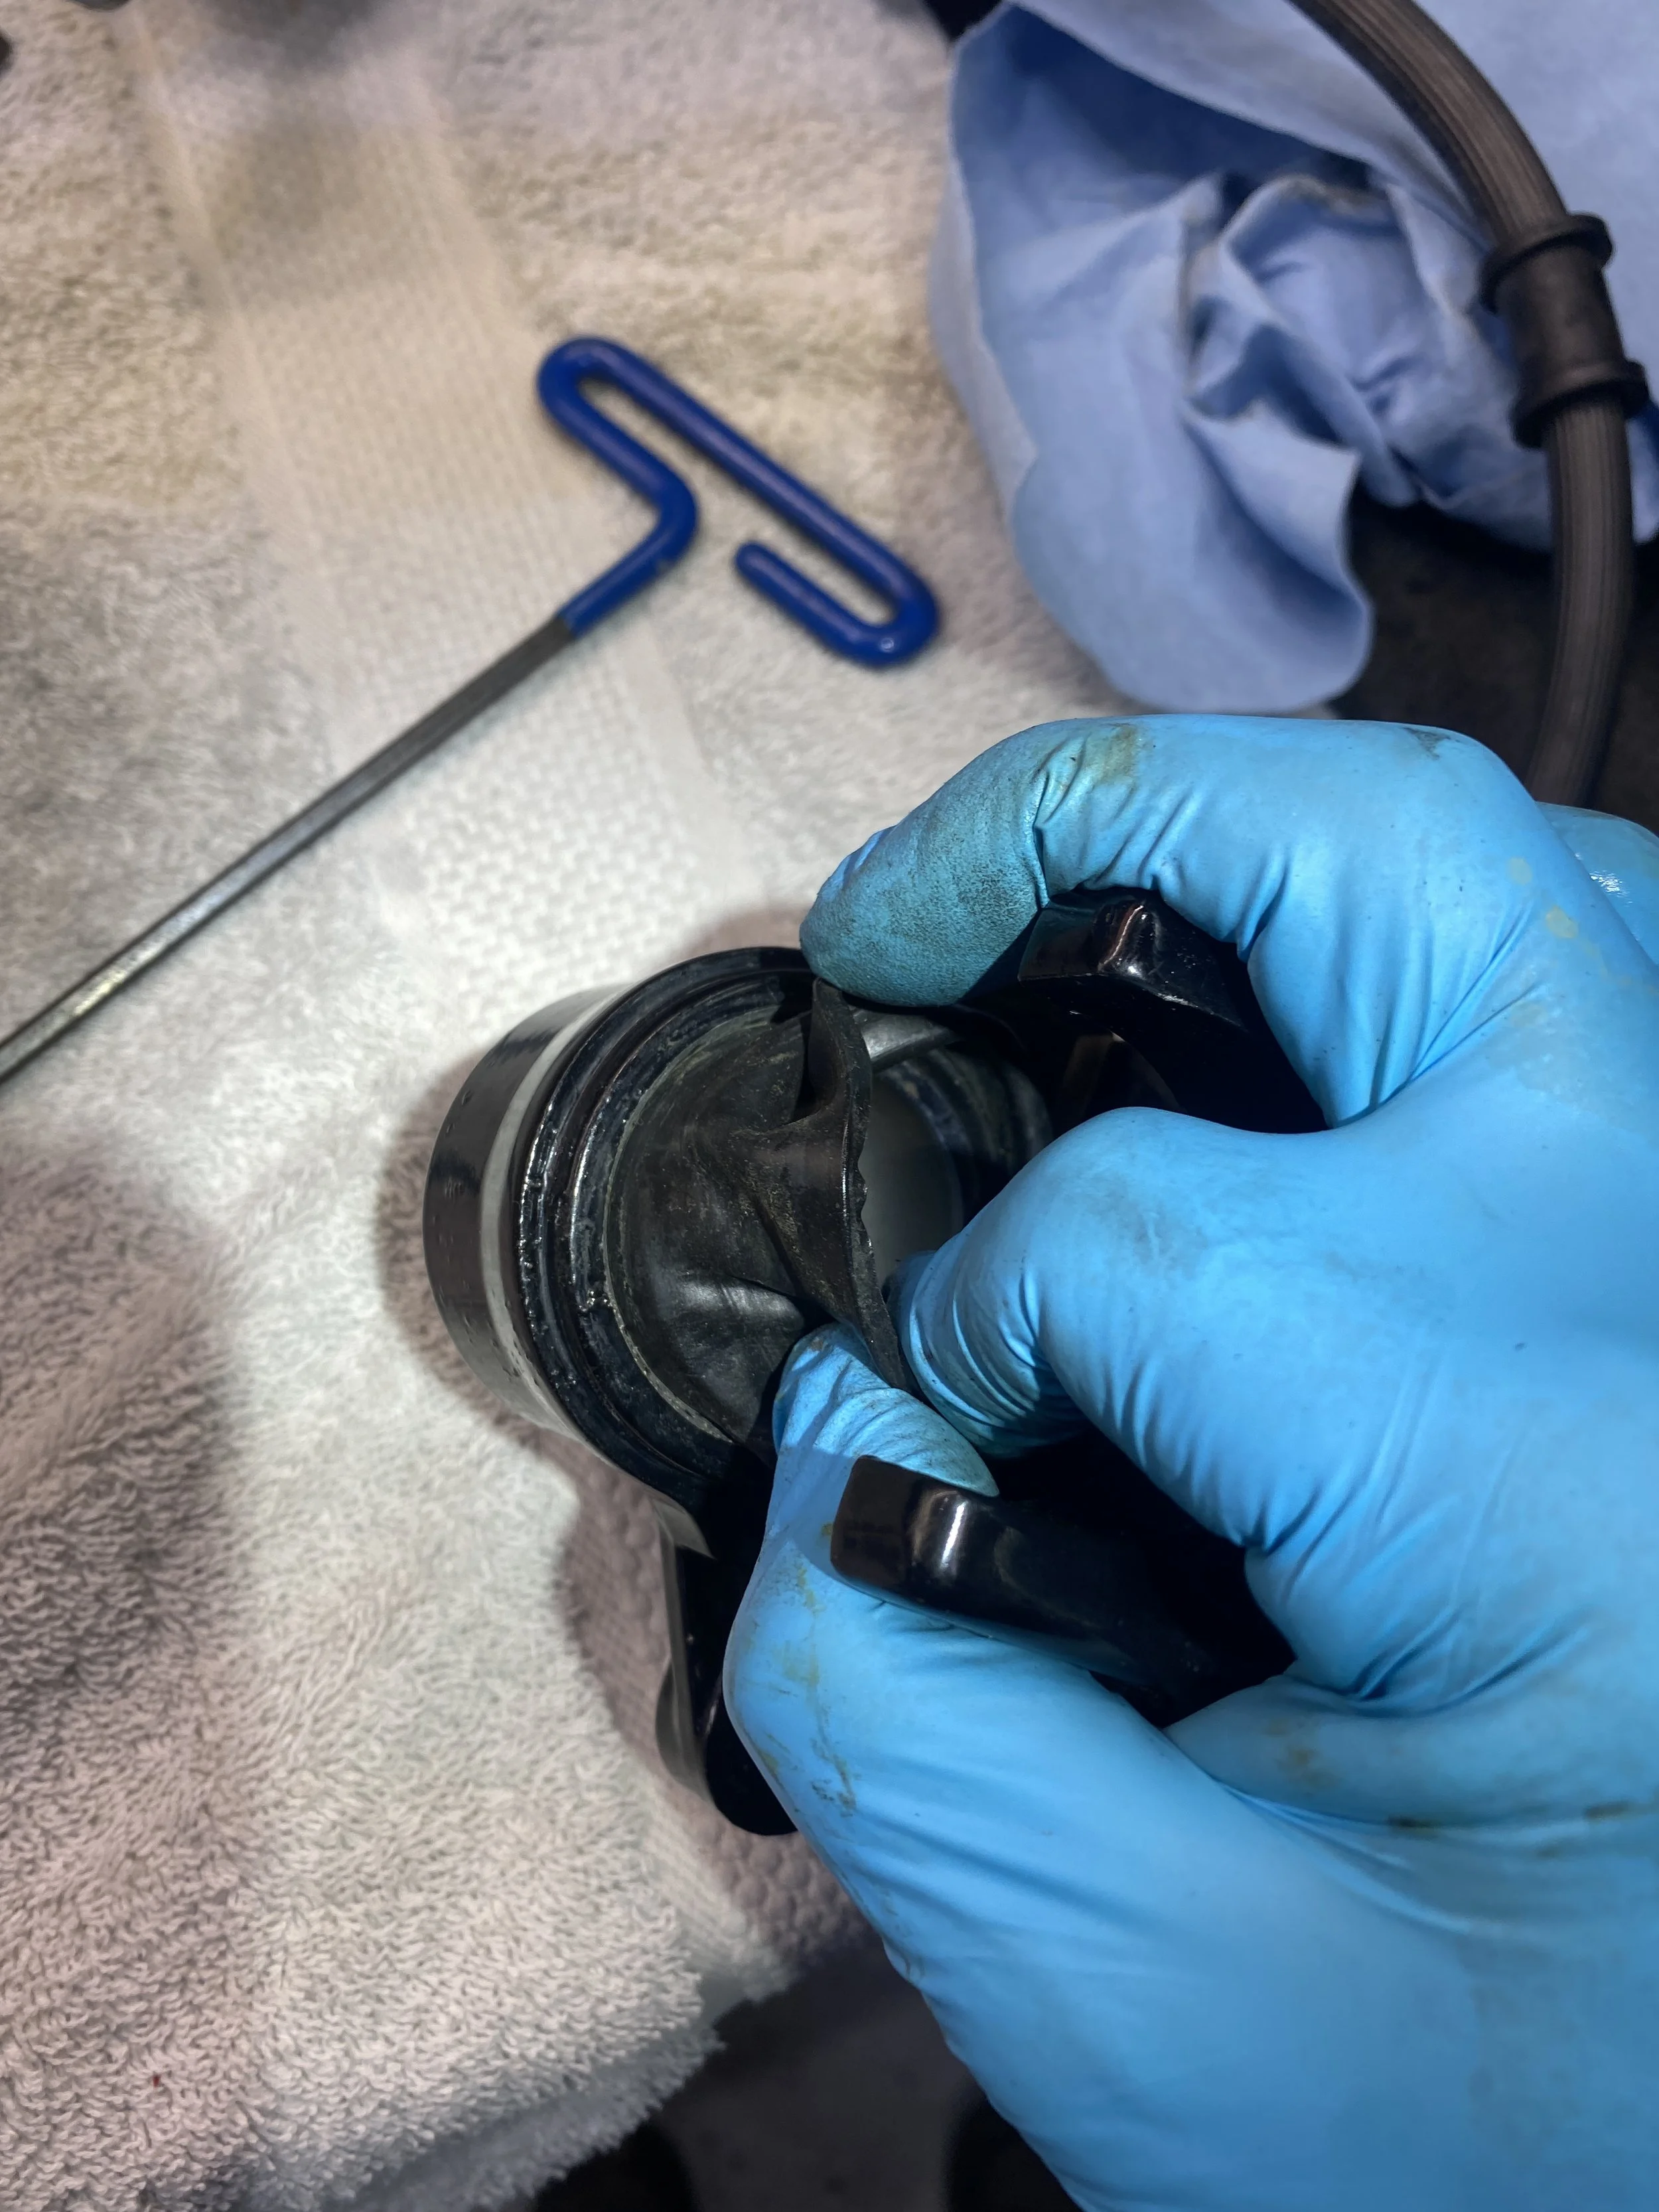
somehow the rubber covering had trapped itself between the piston and the caliper.
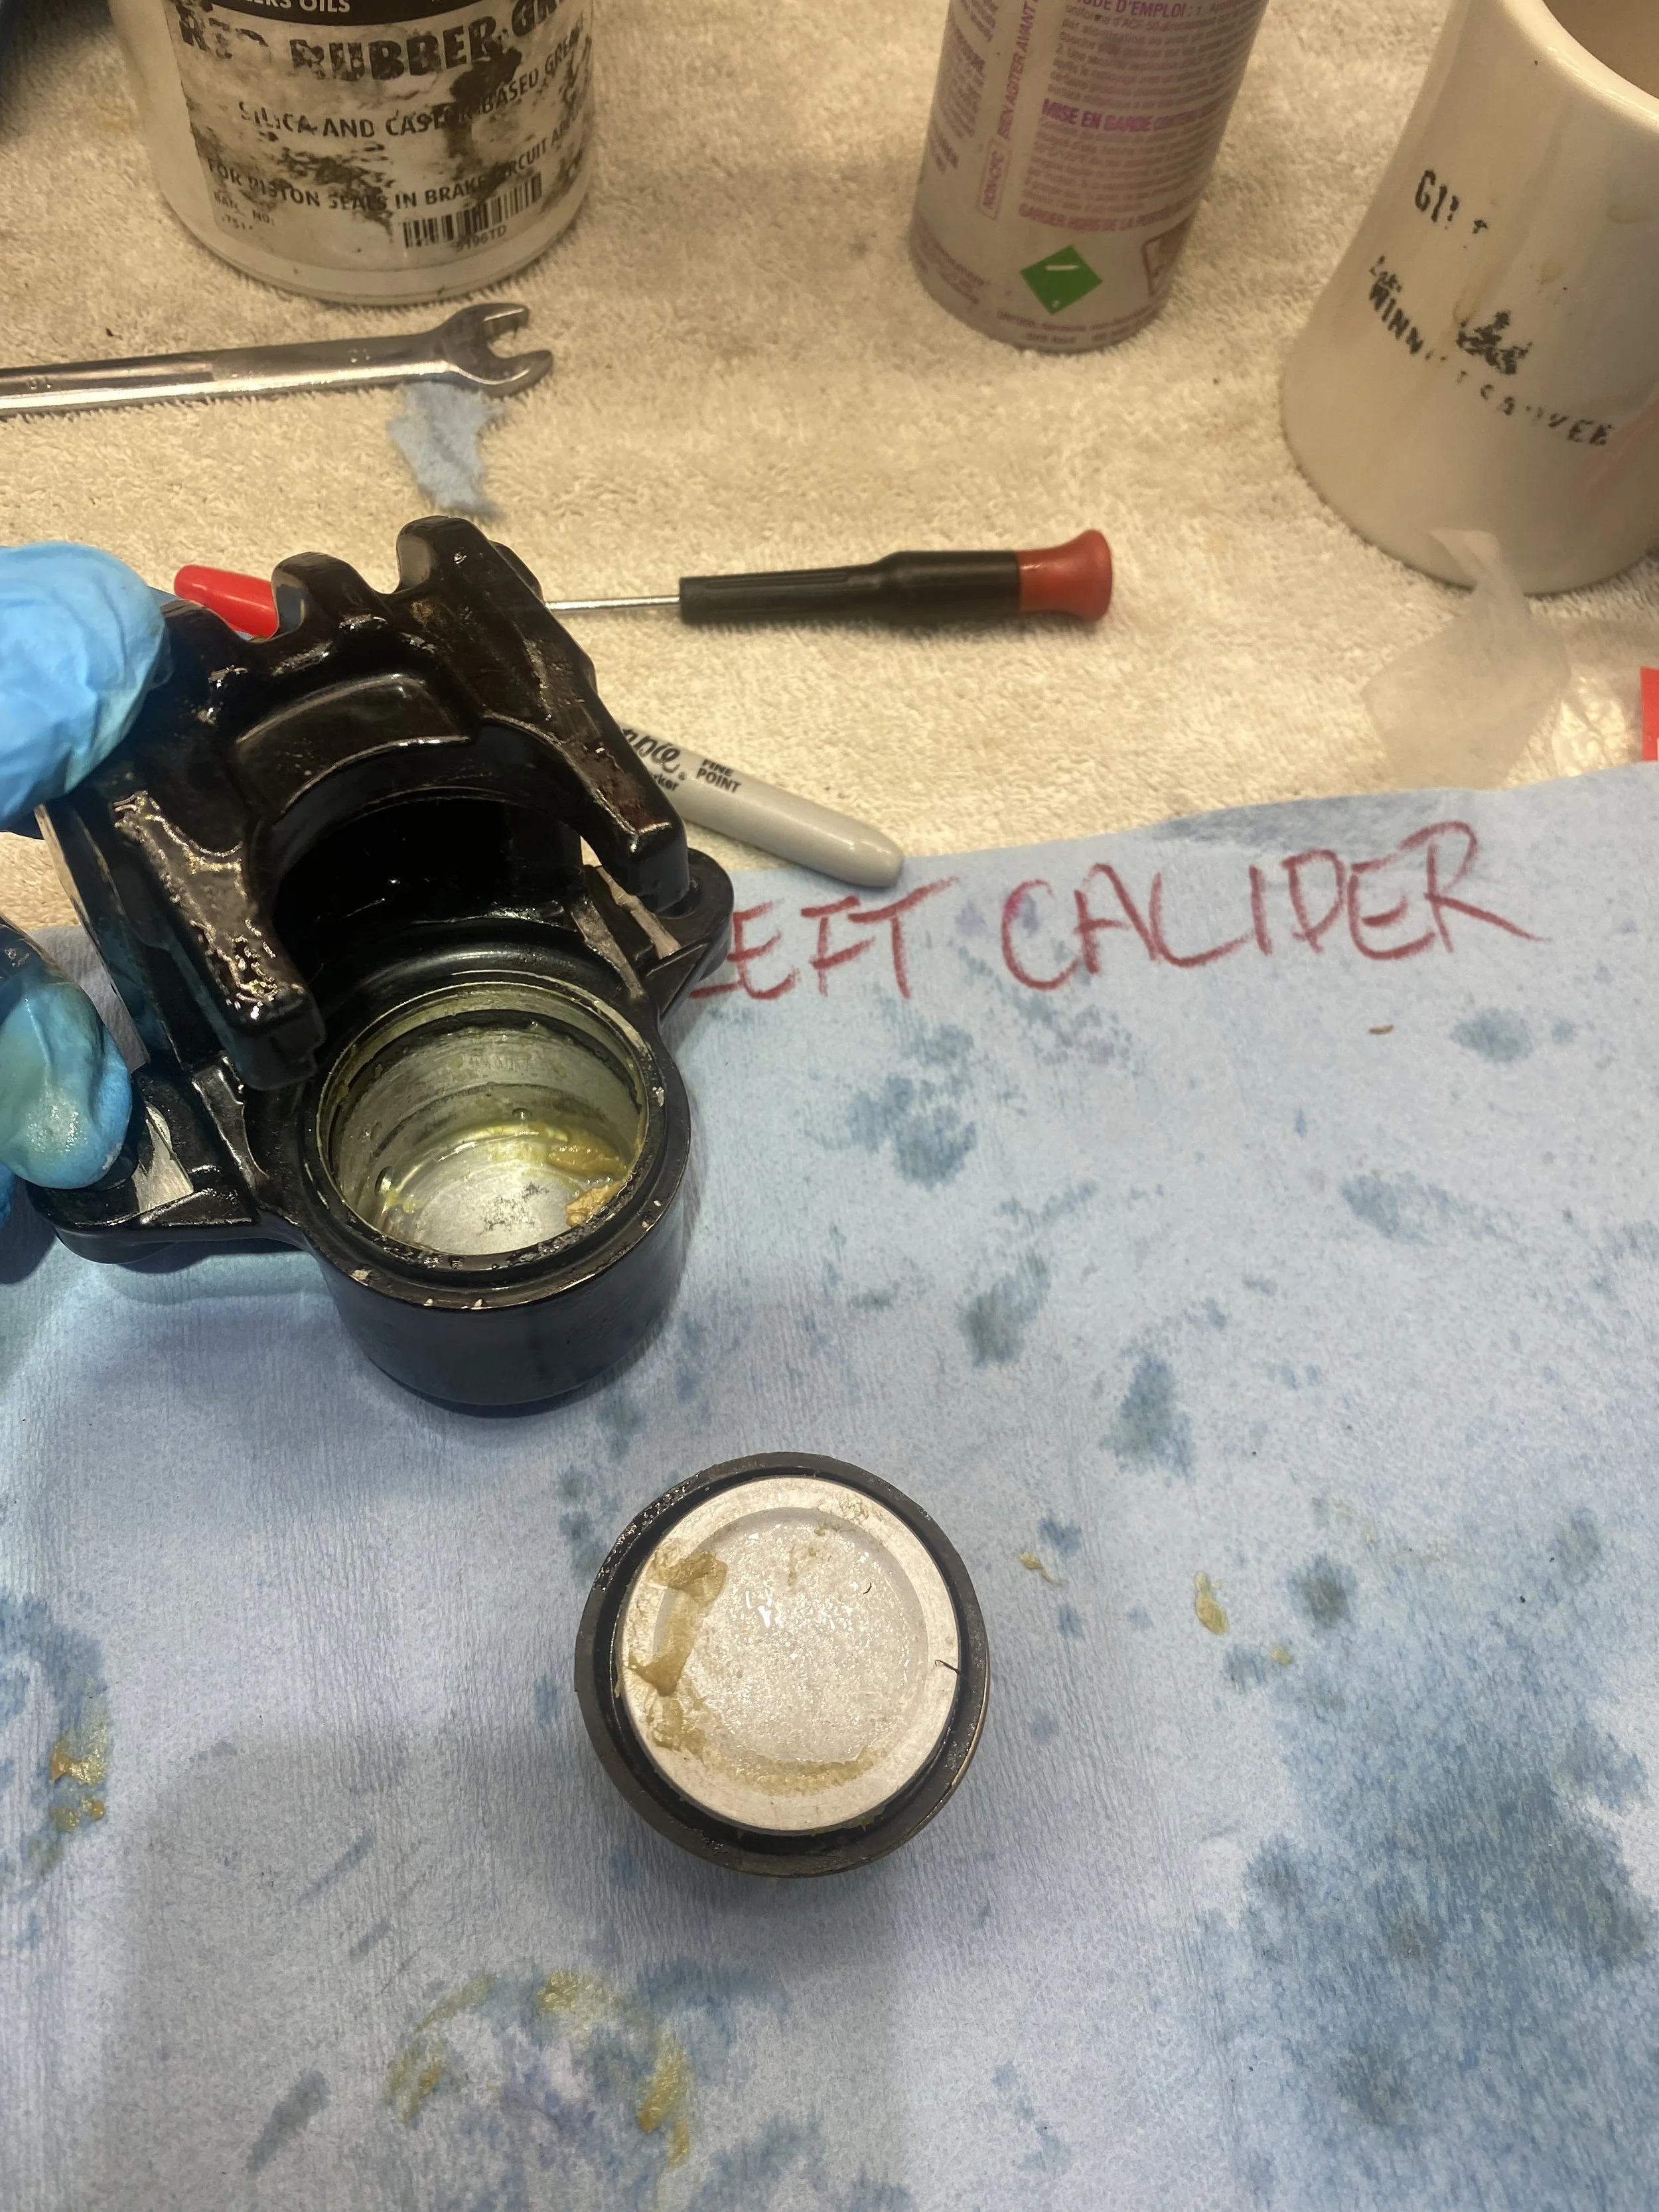
careful use of compressed air popped the piston out and freed the rubber. The fluid had deteriorated somewhat leaving this grunge....

....or could this be some kind of grease used by the previous owner? In this application I would use a thin coating of Red Rubber Grease just on the o-ring...and not this much.
This is another bad sign.....plumbers thread tape, I mean, I appreciate the theory...but as you can see that tape can come to pieces and get into the braking system. no bueno.
grease or grunge. either way not a good look.
Next set about rebuilding the front master cylinder.
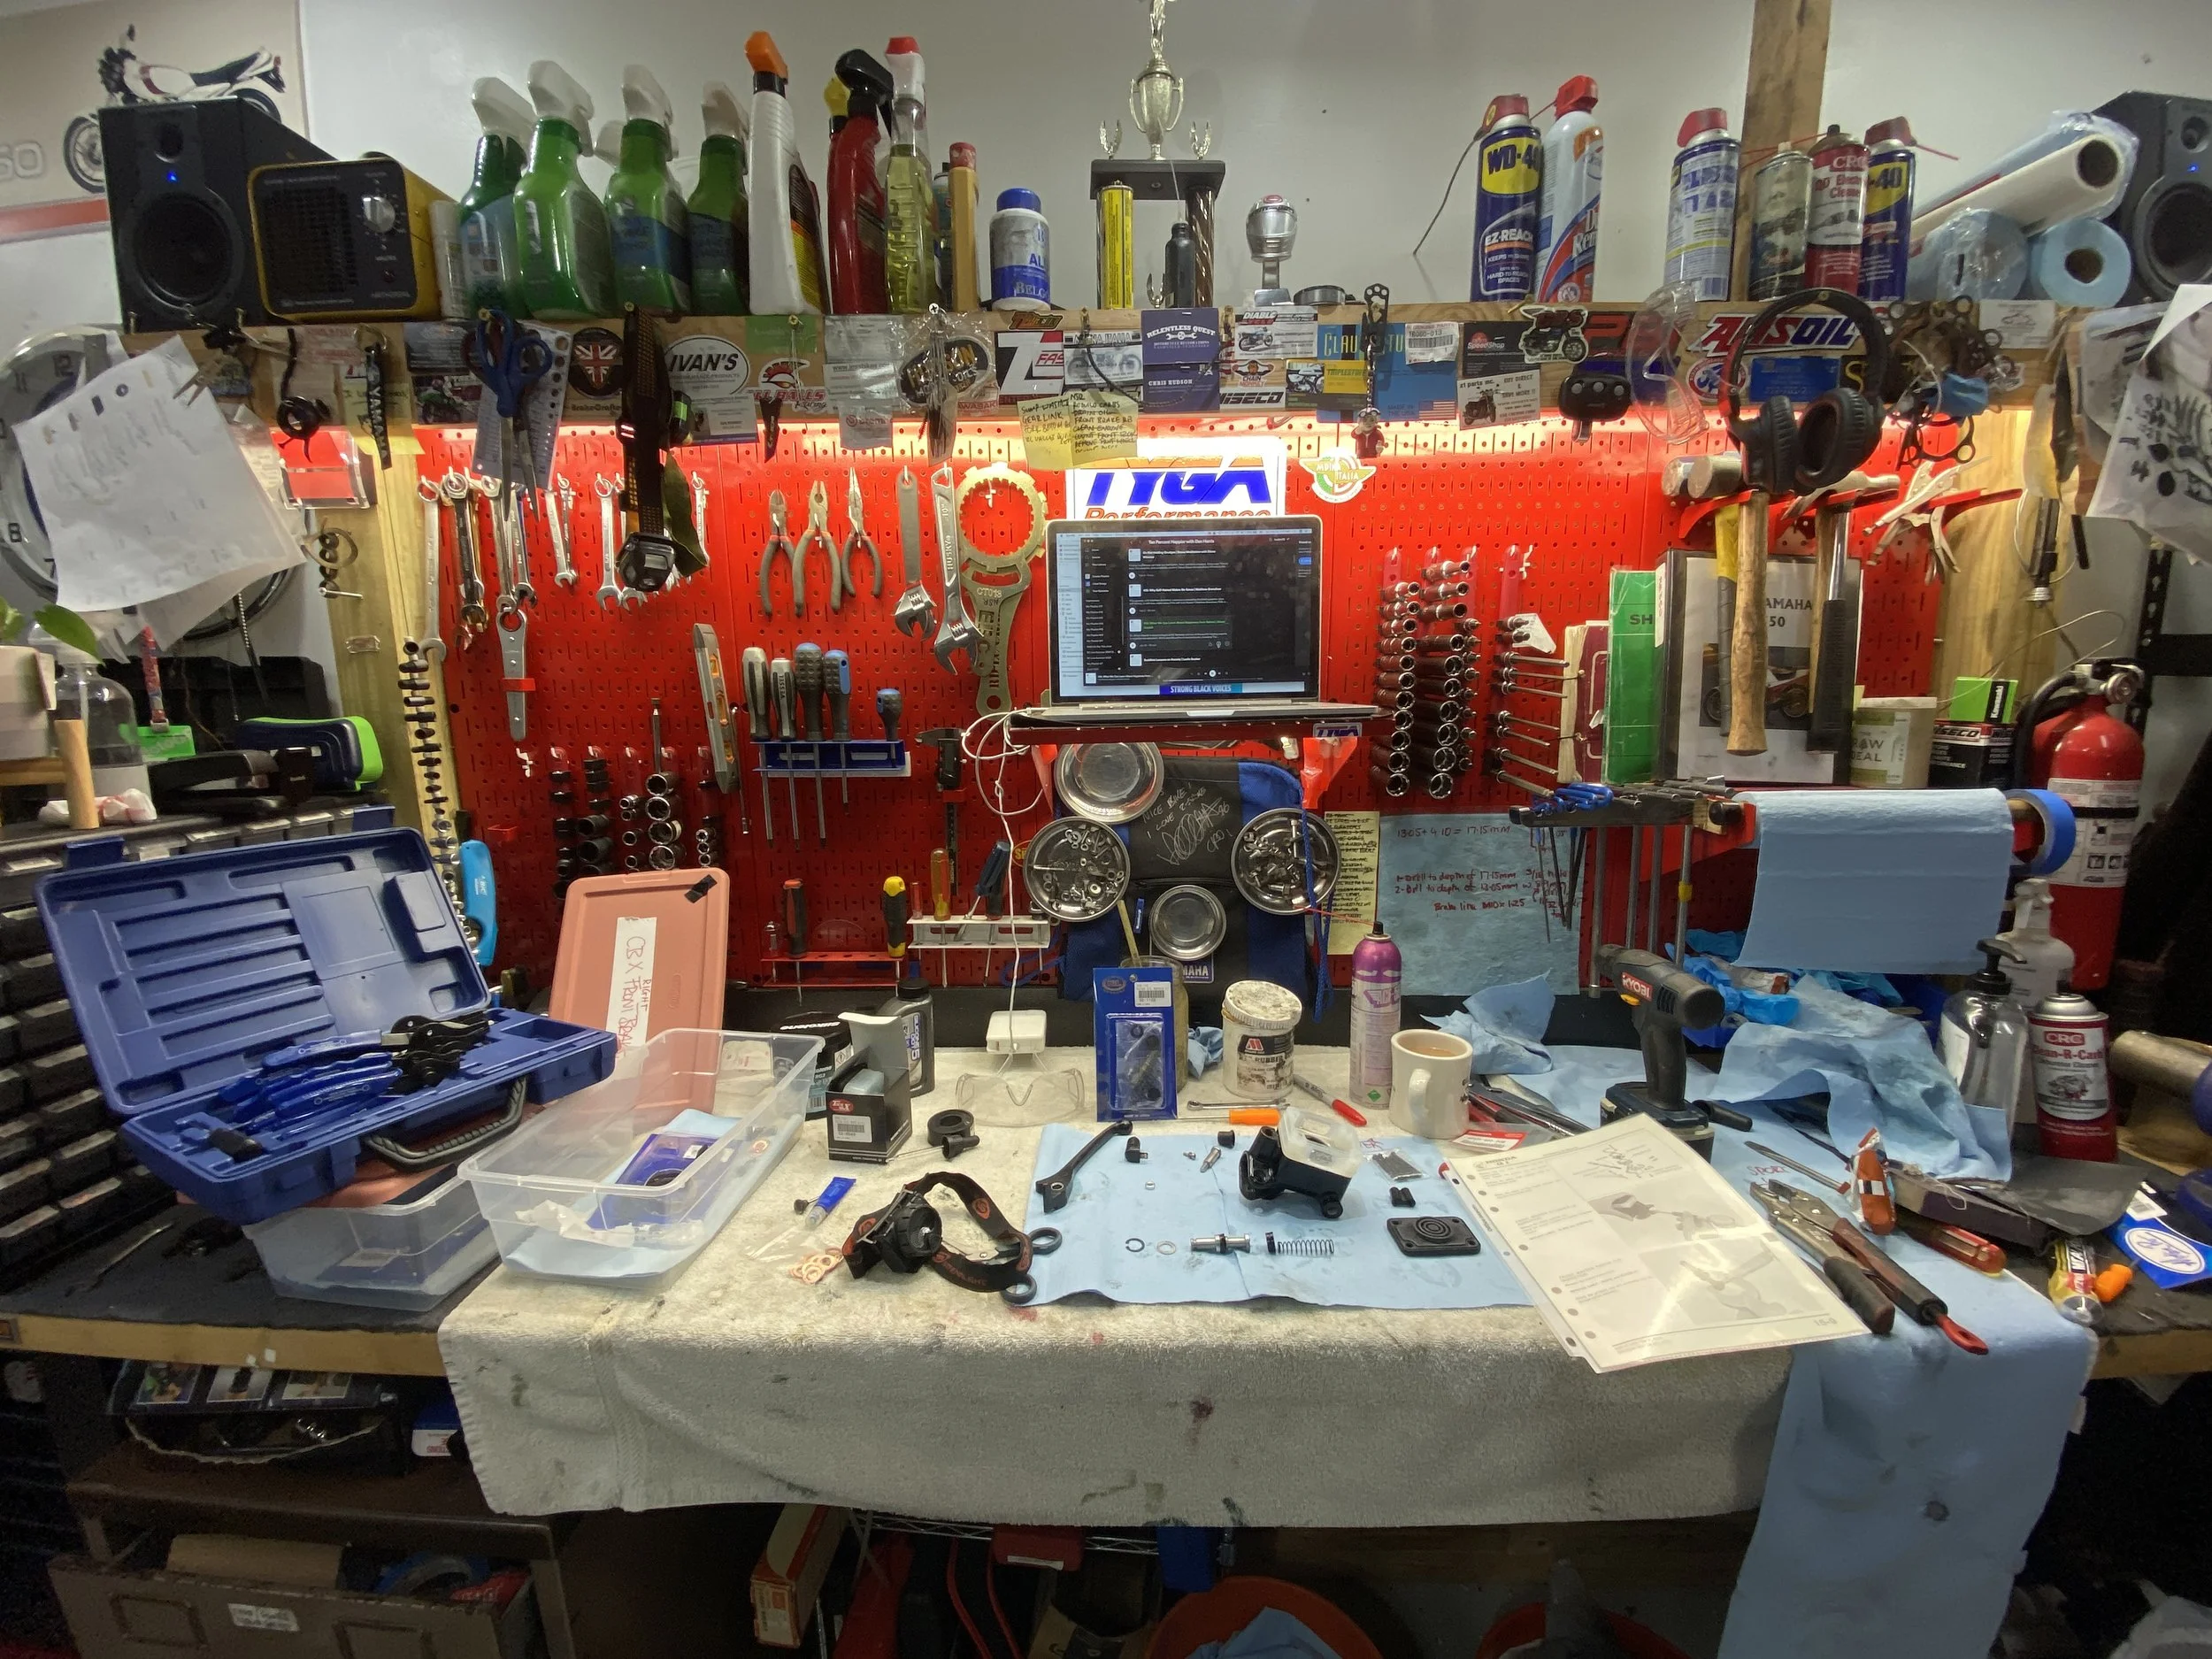
The office...
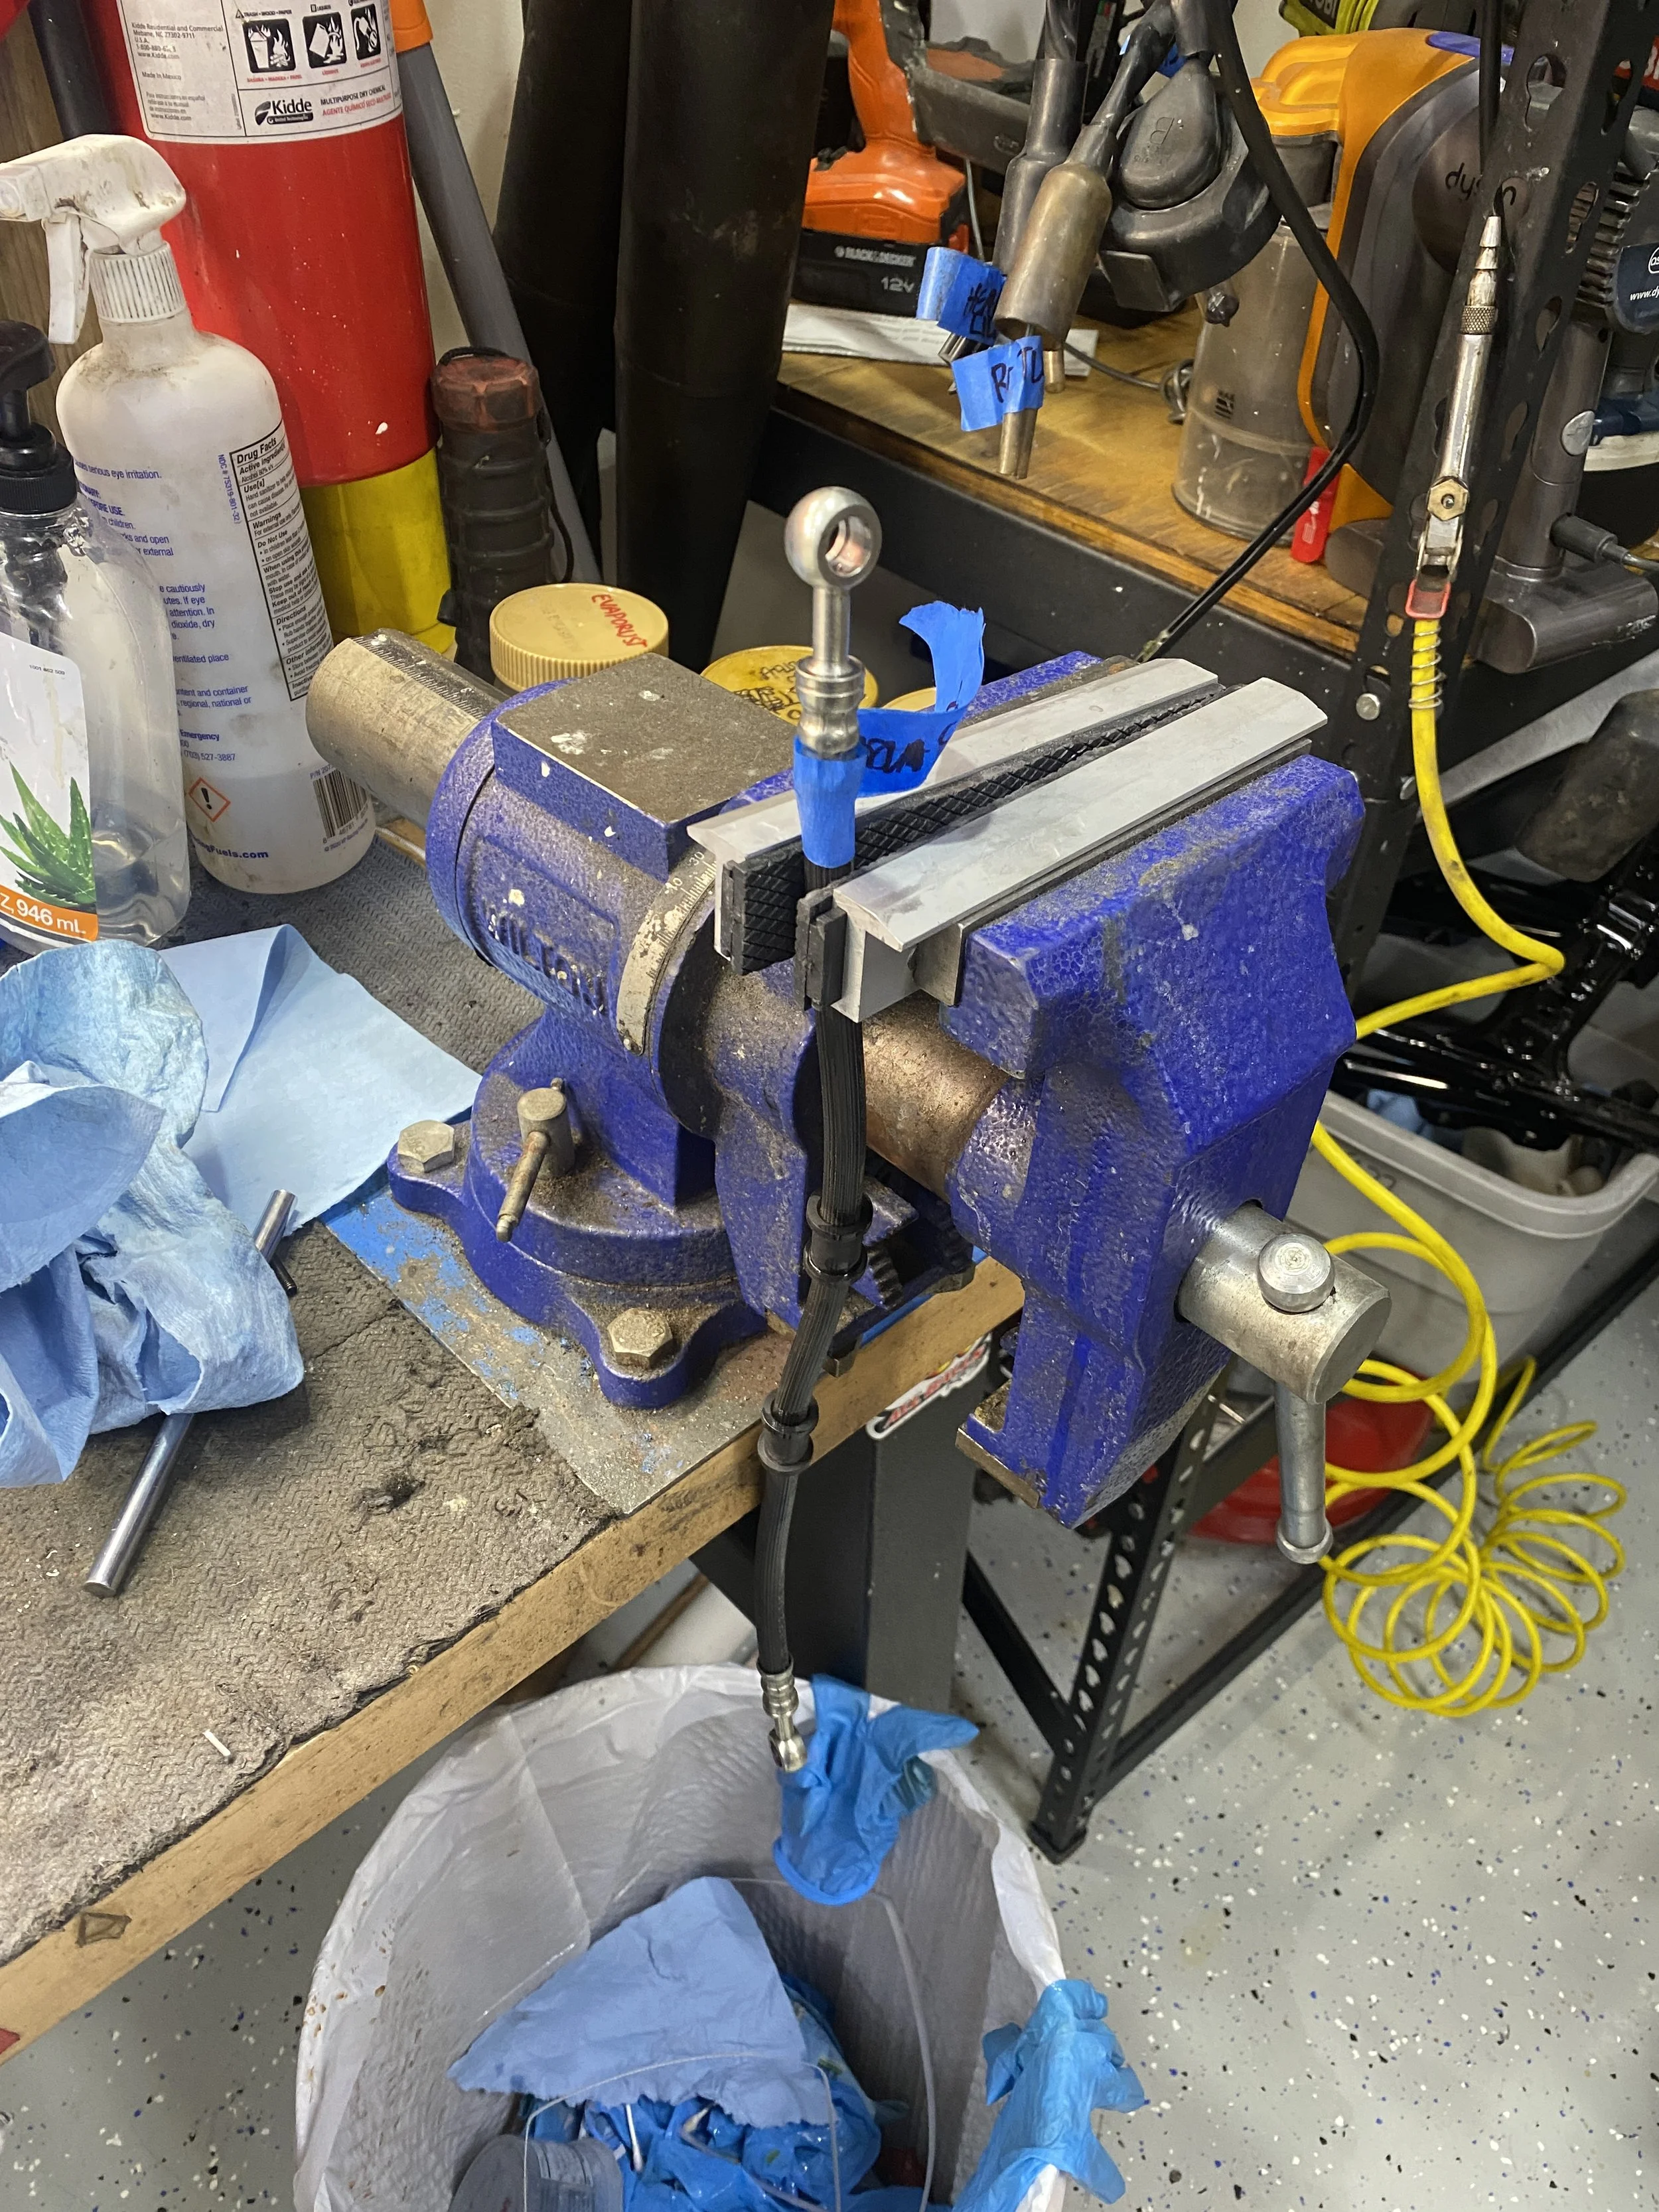
These brake lines are practically new. I let all the old fluid drain out- them blew them with compressed air and dropped some Belray Dot 5 down them with a small syringe and so rinsing out any remains of Dot 3...
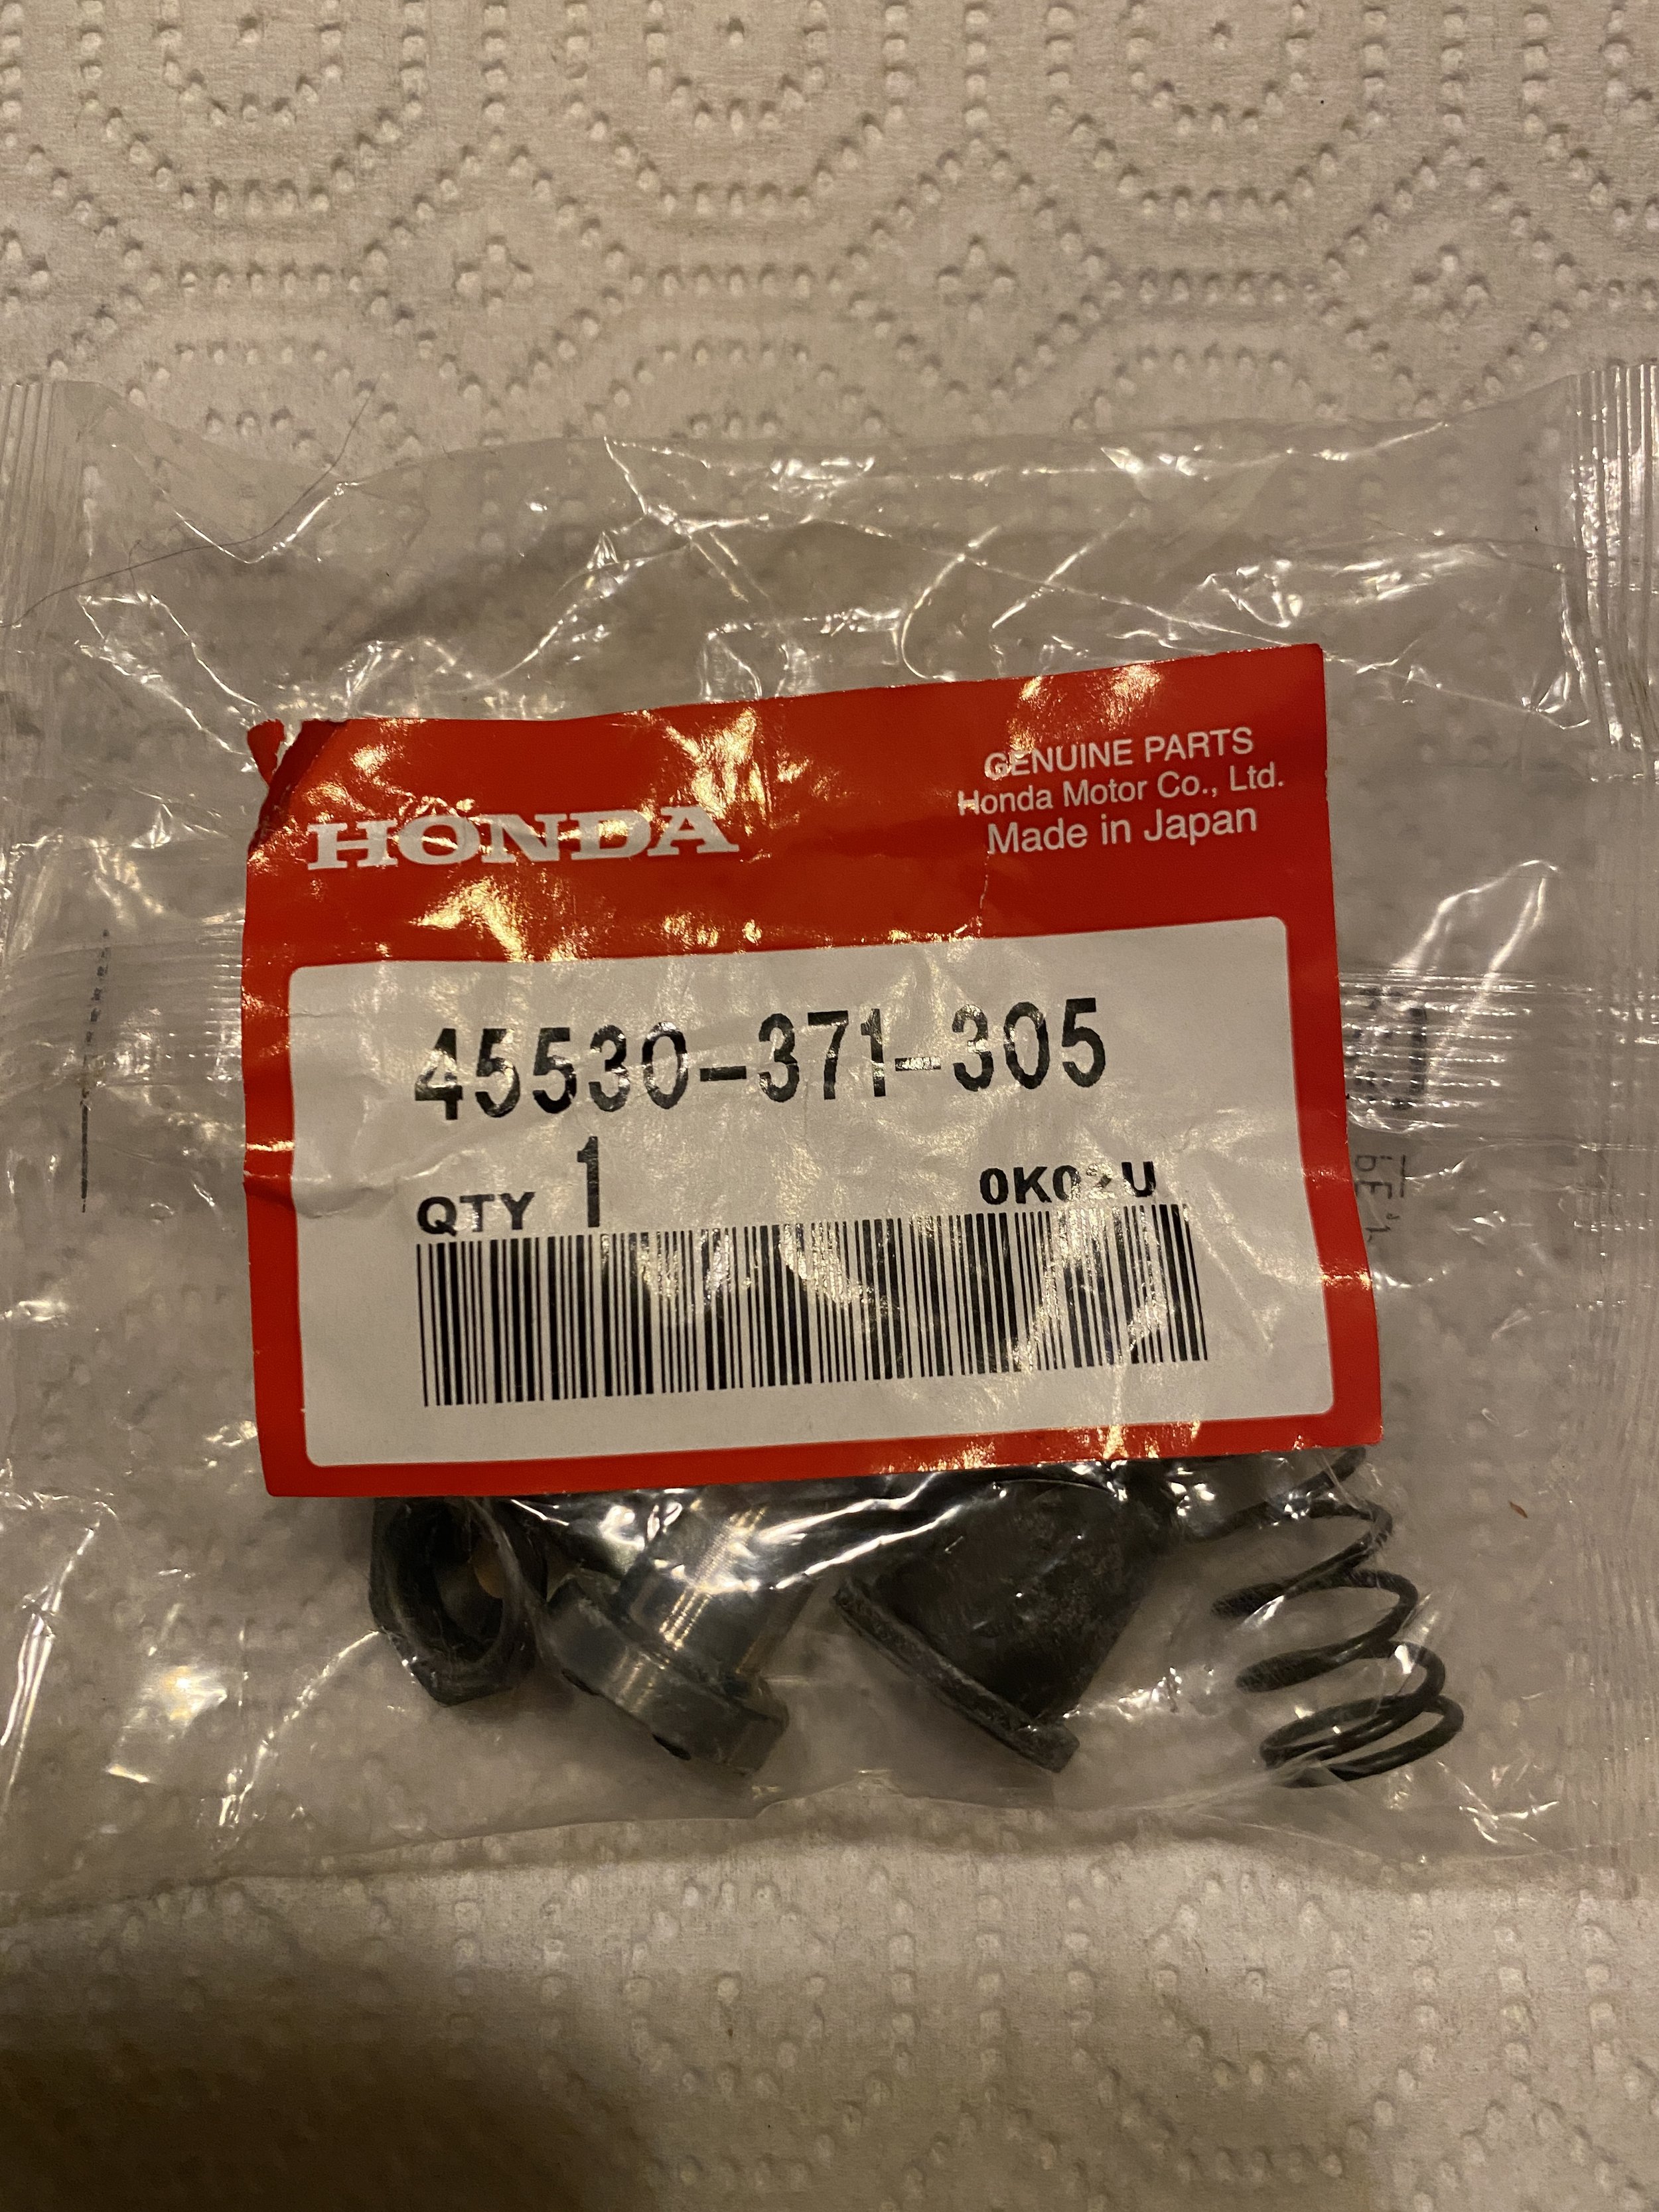
Update Apr 2022. Just not getting a good feel from the Master Cylinder. Feels like the piston was interfering with the bore or the bore is somehow misshapen, so I did what a do a lot of times when I'm having component issues....skip the aftermarket parts and search and find the Original Equipment. Found this kit in Germany.

Huge disappointment when I find that this may not be the kit.....piston will not fit in the bore. It's not only too long but it's also too wide. Somewhere along the line I made a mistake and this kit is for a Gold Wing.
Undeterred I forged ahead, went back to the piston that came with the bike, and rebuilt the Master using the circlip from the GoldWing kit which fit much more snugly in the bore. I then took the hints from the FB forum and bled the brakes with the bleeders at the 12 o'clock position. I then ziptied the brake lever reasonably tightly against the handlebar, put the bike on the sidestand (yes- with petcock off!) turned the bars all the way to the left so the master cylinder was at it's highest point and left it overnight. I even occasionally tapped the brake line splitter and all the brake line bolts hopefully to encourage any air bubbles to rise to the top and pop off in the master cylinder.
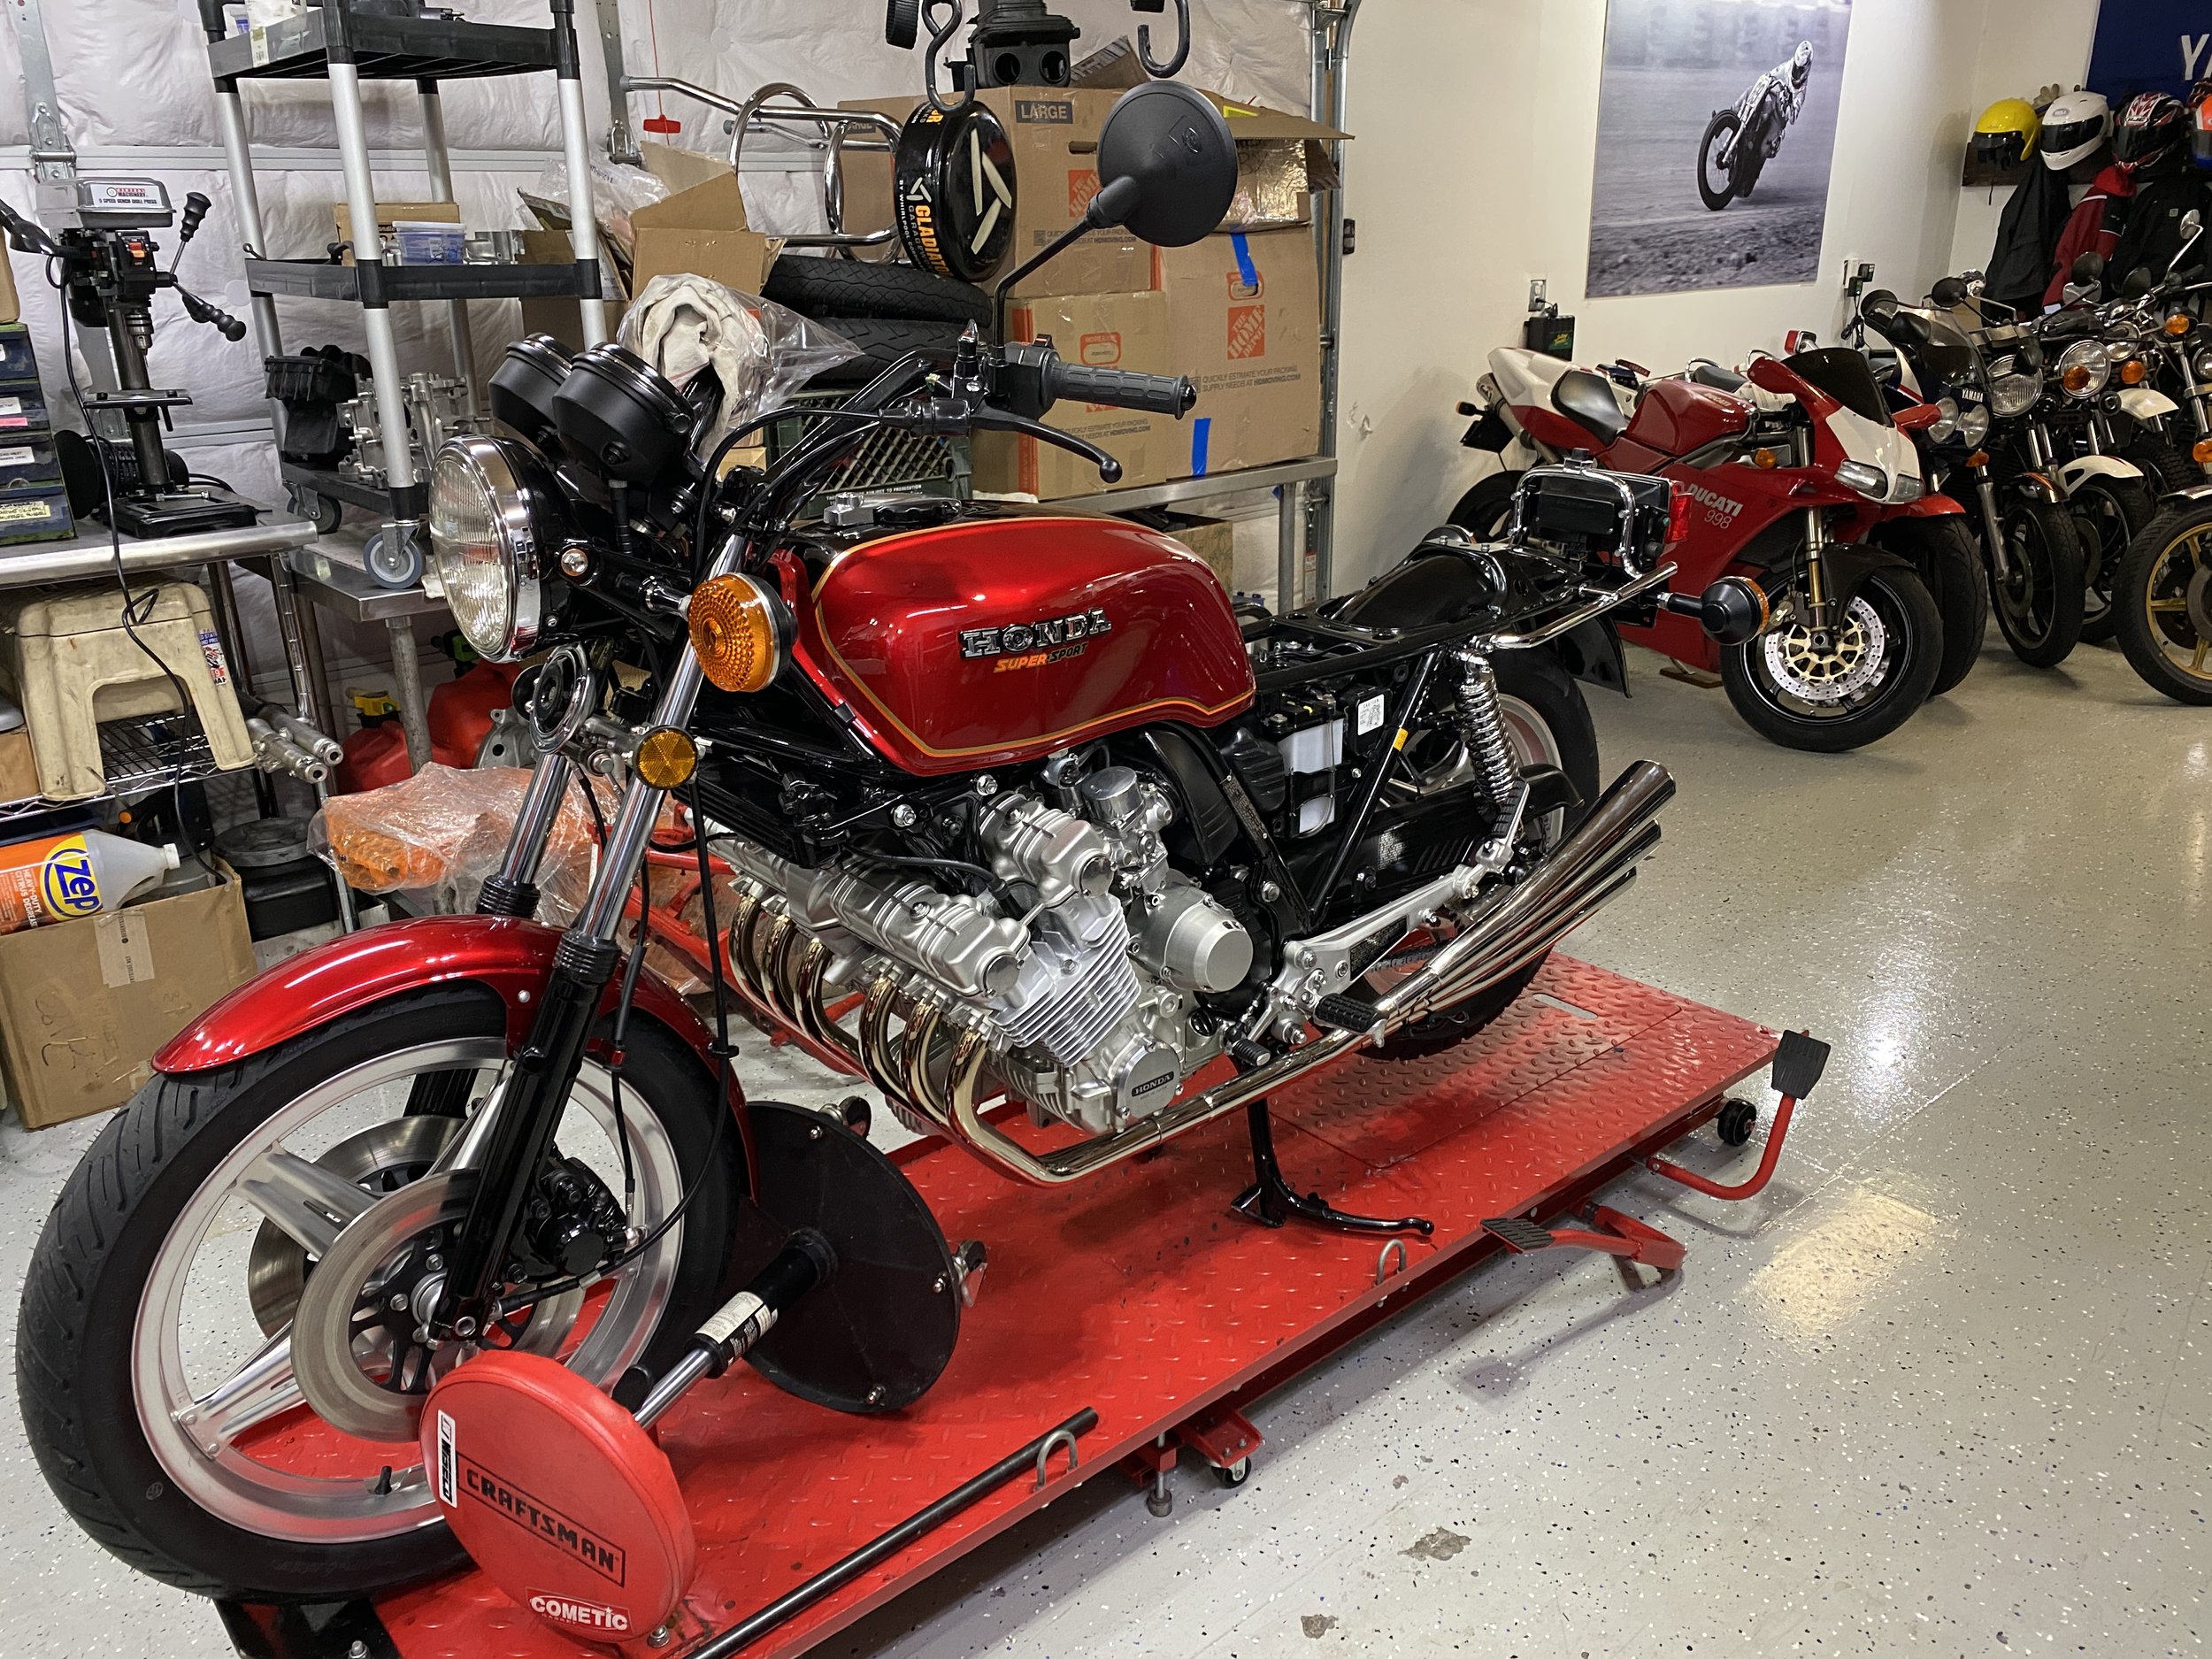
Finished….
…well, as of 2/27/22 anyway. As we all know, it’s never actually finished, but let’s say my first chapter of ownership and maintenance is completed. Sport kit installed and numerous fixes carried out along the way. Surprised at how much work needed to be done but, so far, happy with the end result. Test ride was great. Surprised how nimble to bike feels even at low speeds in town. Could do with another couple of gears though, not to mention I can’t ever see revving it past 6k.
To Do List: Investigate the front master cylinder. Still doesn’t feel right.
Look into:
For Quieter Top End: Dave McMunn on FB Installed oversized cam joints, he attributes these to noiseless top end on his bike. Available from usedcbxparts.
For Quieter Clutch Hub: Jan Ringnalda recommended New isolators available from Sixcenter. Sounds intriguing. A bit labor intensive…but some good instructions here . There was a suggestion on FB to add some Lucas Oil Additive, but I’m not convinced it won’t make the clutch slip.
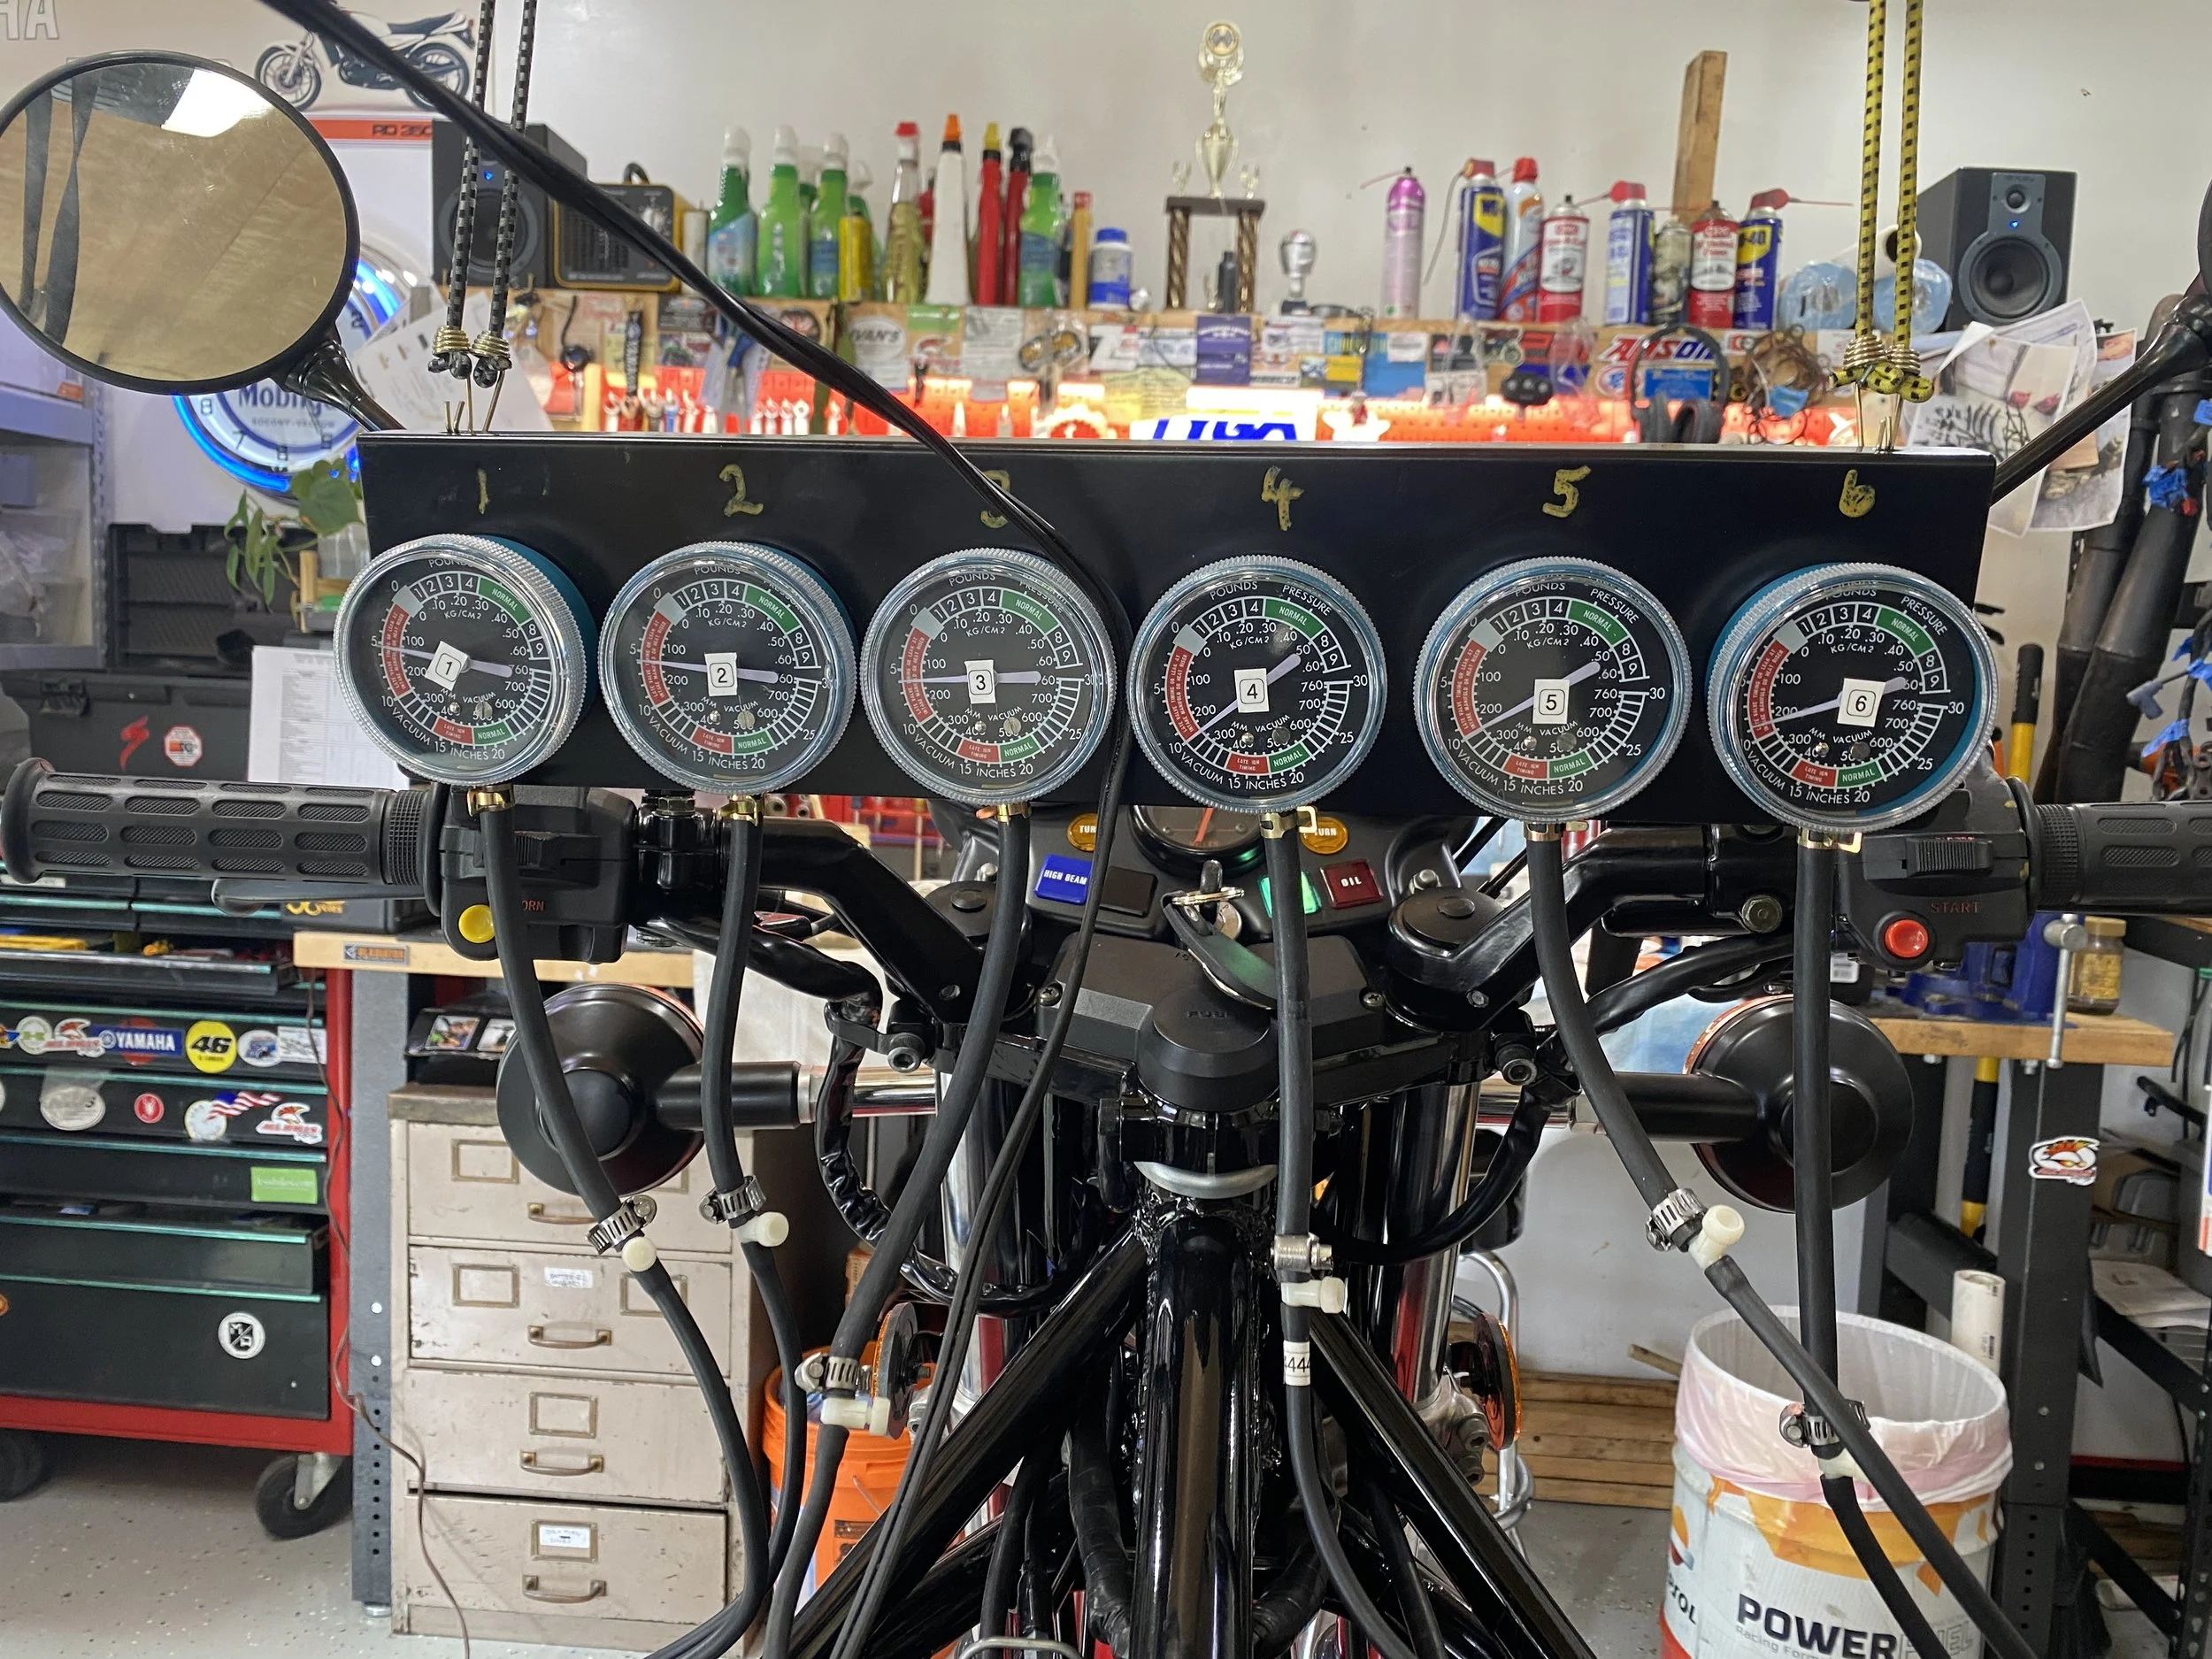
Dateline 3/23/22: I lied…it’s not finished….it needs some Carburetor Synchronization…
…I know the previous owner said the carbs had been sync’d…but much research has told me that the mechanism connecting all the units is somewhat flimsy and the synchronization does not last for long. Not to mention on the last run there was pronounced hesitation at just over a 1/4 throttle. Plus, I am so close to getting it done. The bike purchase included a set to Carb Sync Dials and a long stem carburetor adjuster/screwdriver. All I needed was a couple of other tools: 1) The smaller/shorter carb sync tool. It’s impossible to sync Carb #5 & #6 without this. The long screwdriver won't fit. Some try and make it fit and ruin either the locknut or the screw head. I’ve read that this is unacceptable :) Almost $100 from Partzilla! 2) The special screwdriver tool that will allow me to get under the carbs and ensure the pilot screws are all turned out 2 1/2 times. $30 from Motion Pro. (OEM Honda tool was about a ton.)
2 other reasons to sync the carbs. Number 1 was to help get rid of the infamous clutch basket knocking and the other is that I am hoping it will help get rid of the stuttering at quarter throttle. It’s not that serious to be honest but it’s true that CBX’s normally accelerate smoothly from zero to whatever (and I don’t want to have one that doesn’t) and I think you’ll find that when riding around normally your default throttle position is, yes, you guessed it: 1/4 throttle.
As to guidance: Everyone on the CBX 1000 Forum is always helpful and it’s populated by such CBX Professionals as the Ringnalda’s (https://www.mrcbx.com/) and Brint’s (https://timscbx.com) who are generous with their time and knowledge. In addition to that there is an ancient article from the International CBX Owners Association magazine (I.C.O.A.) from 1991, here: https://issuu.com/cbxclub/docs/cbxpress_winter_1991_final?viewMode=magazine (Pages 14-15). Last but not least there’s a special bit of prose and sage advice from carburetor specialist Mike Nixon to be found here: https://www.motorcycleproject.com/text/cbx_sync.html…his website has an unfeasible amount of verbage AND video on setting up CV carbs on many popular vintage Hondas.
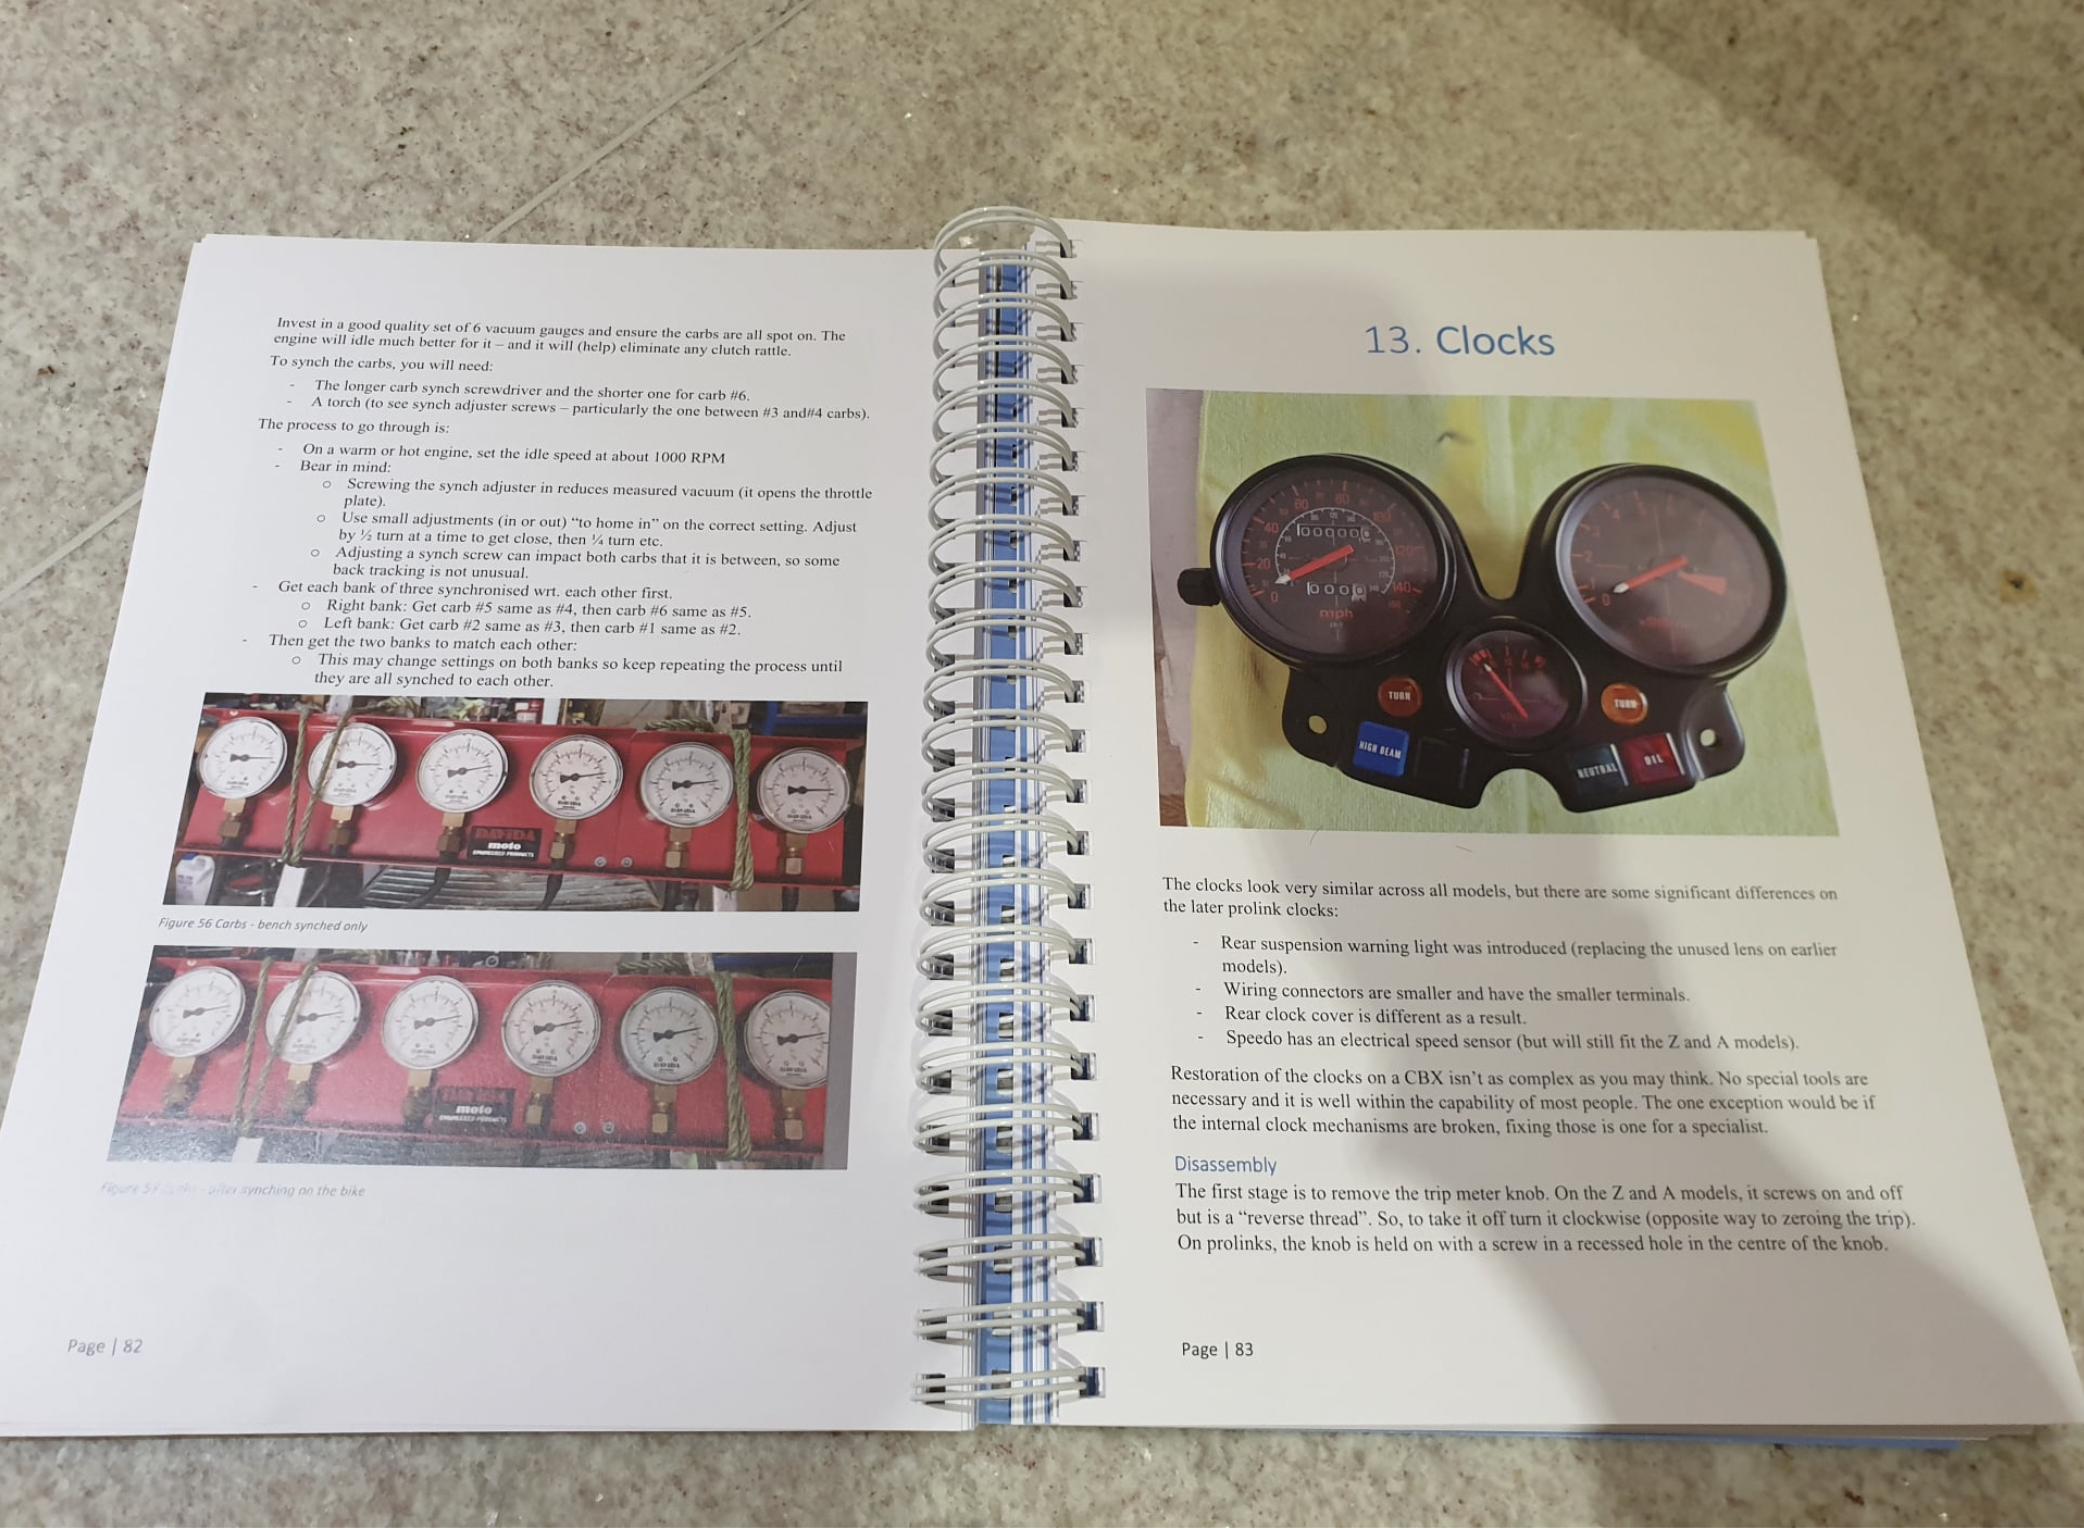
One other page of info from an eagerly awaited yet to be published CBX Restoration book by Paul Jennings.
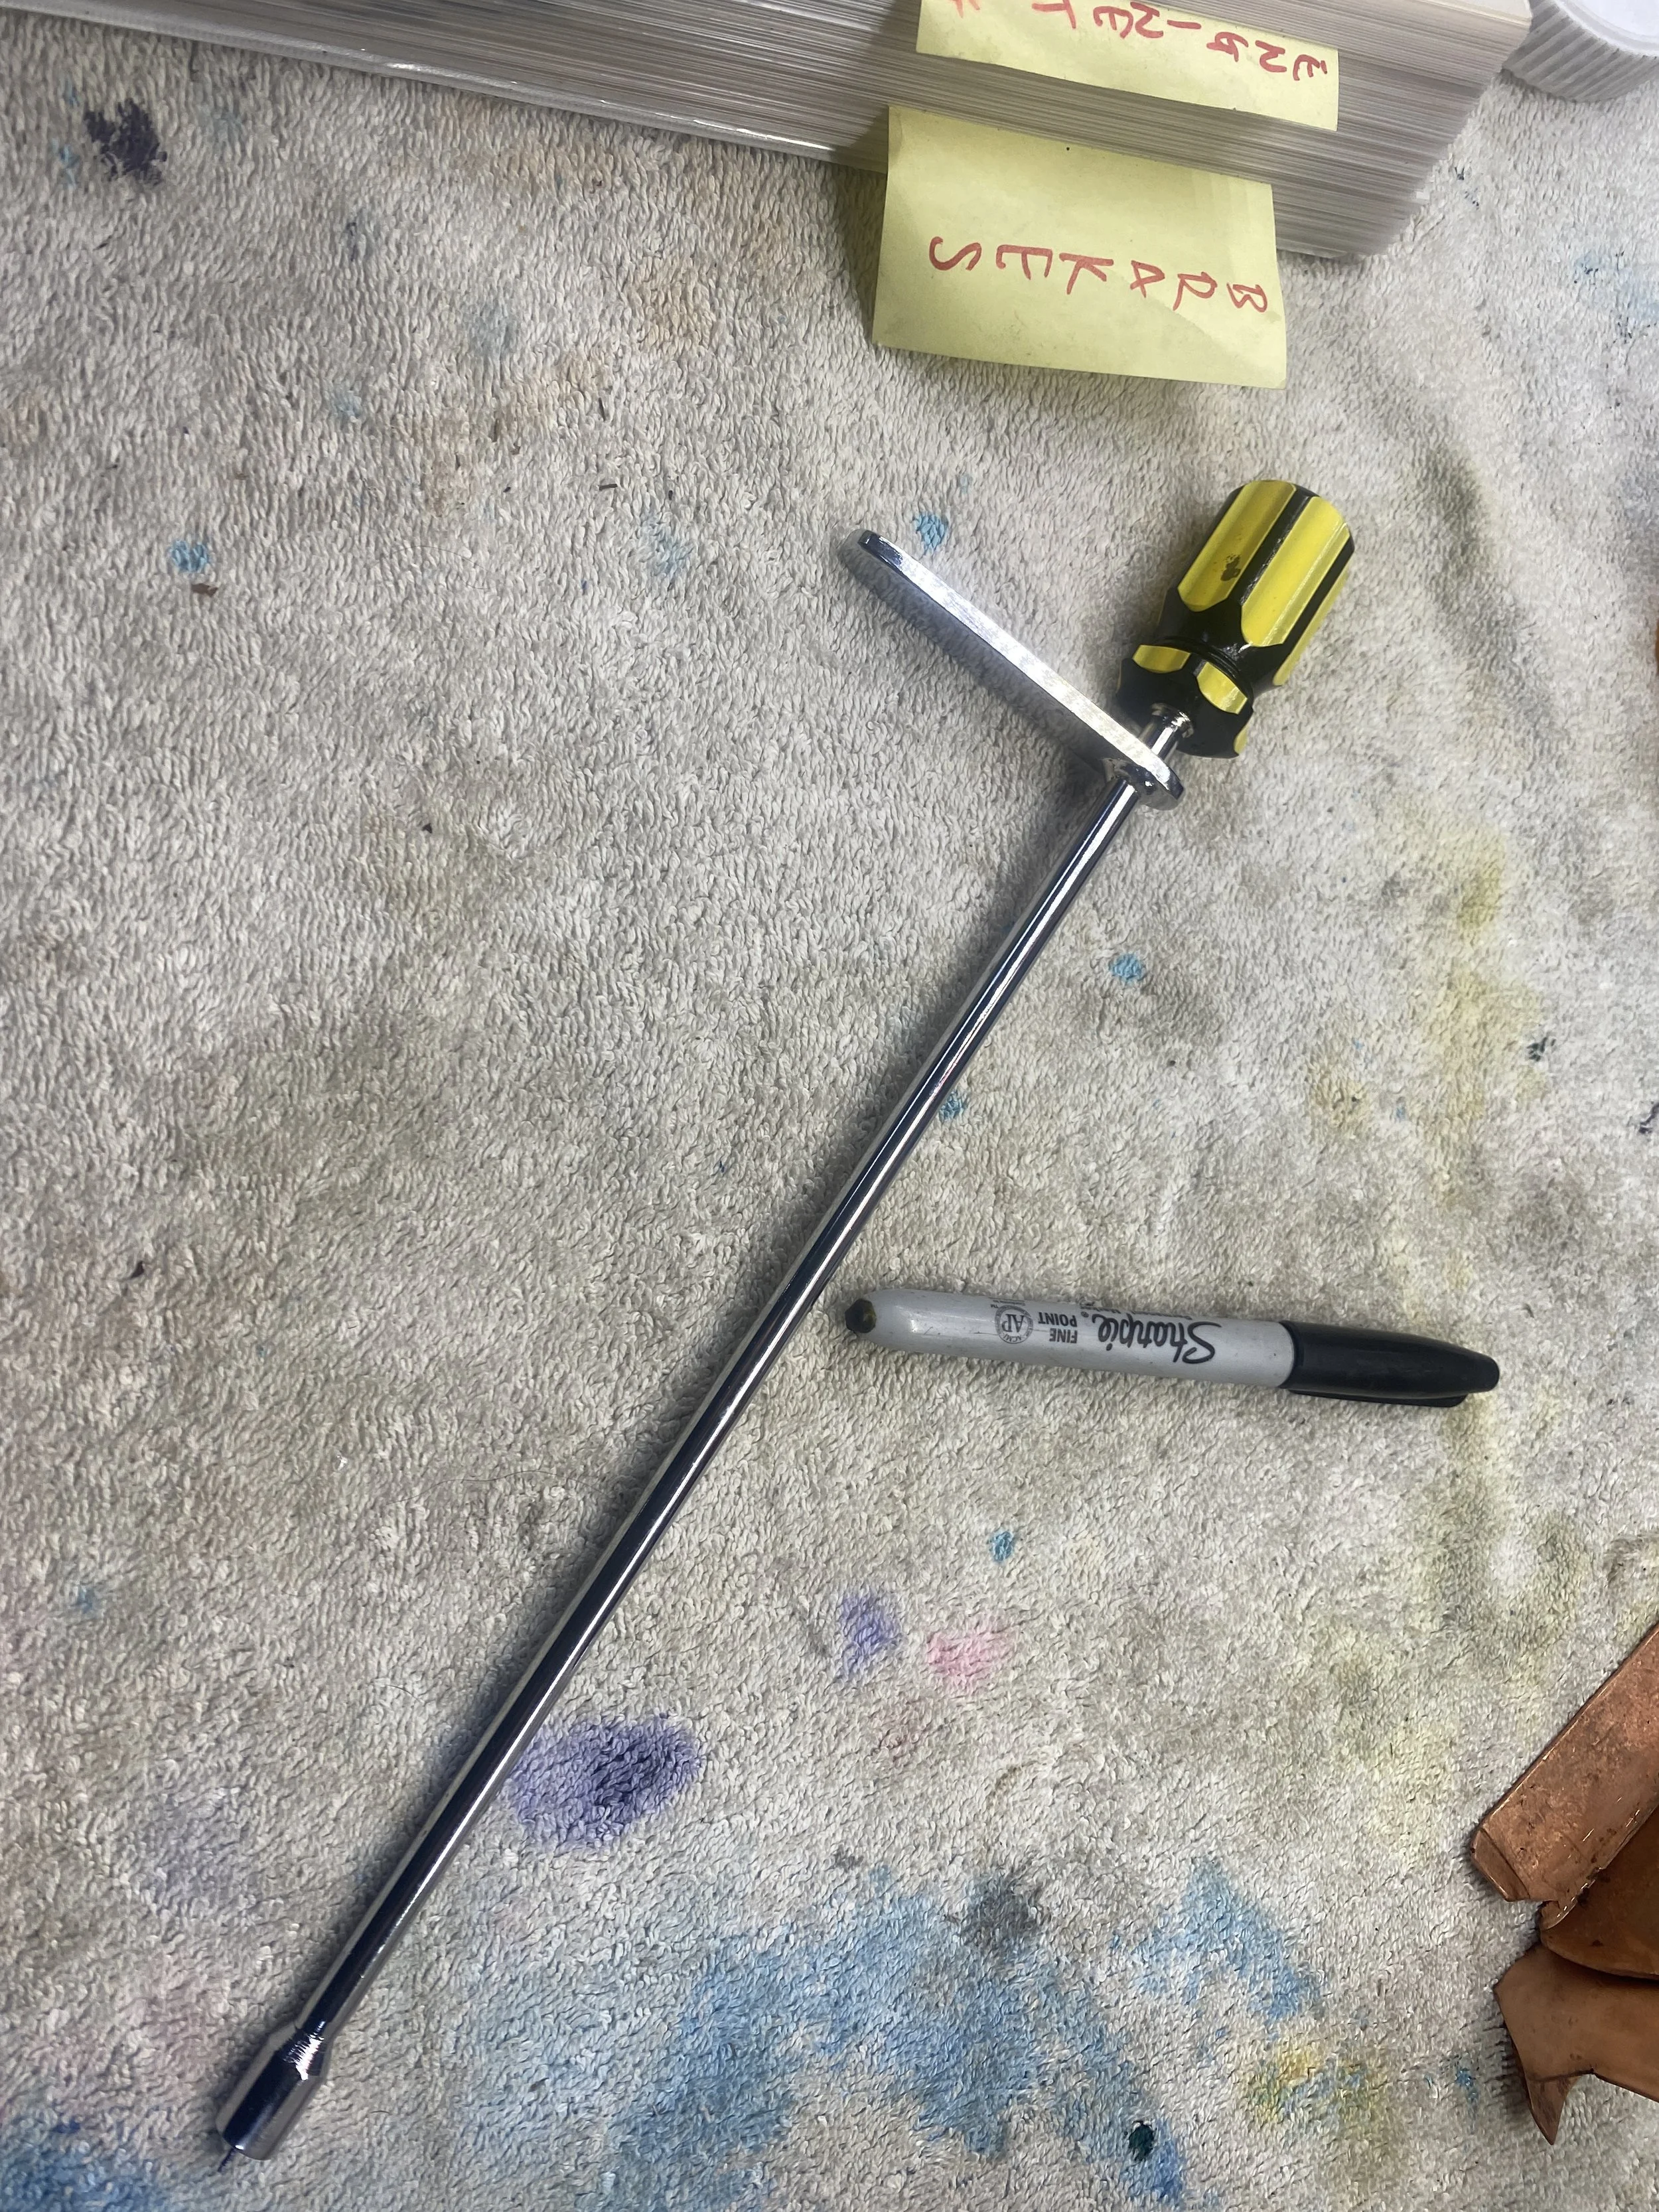
This long handled CBX Carb Adjuster came free with the bike.
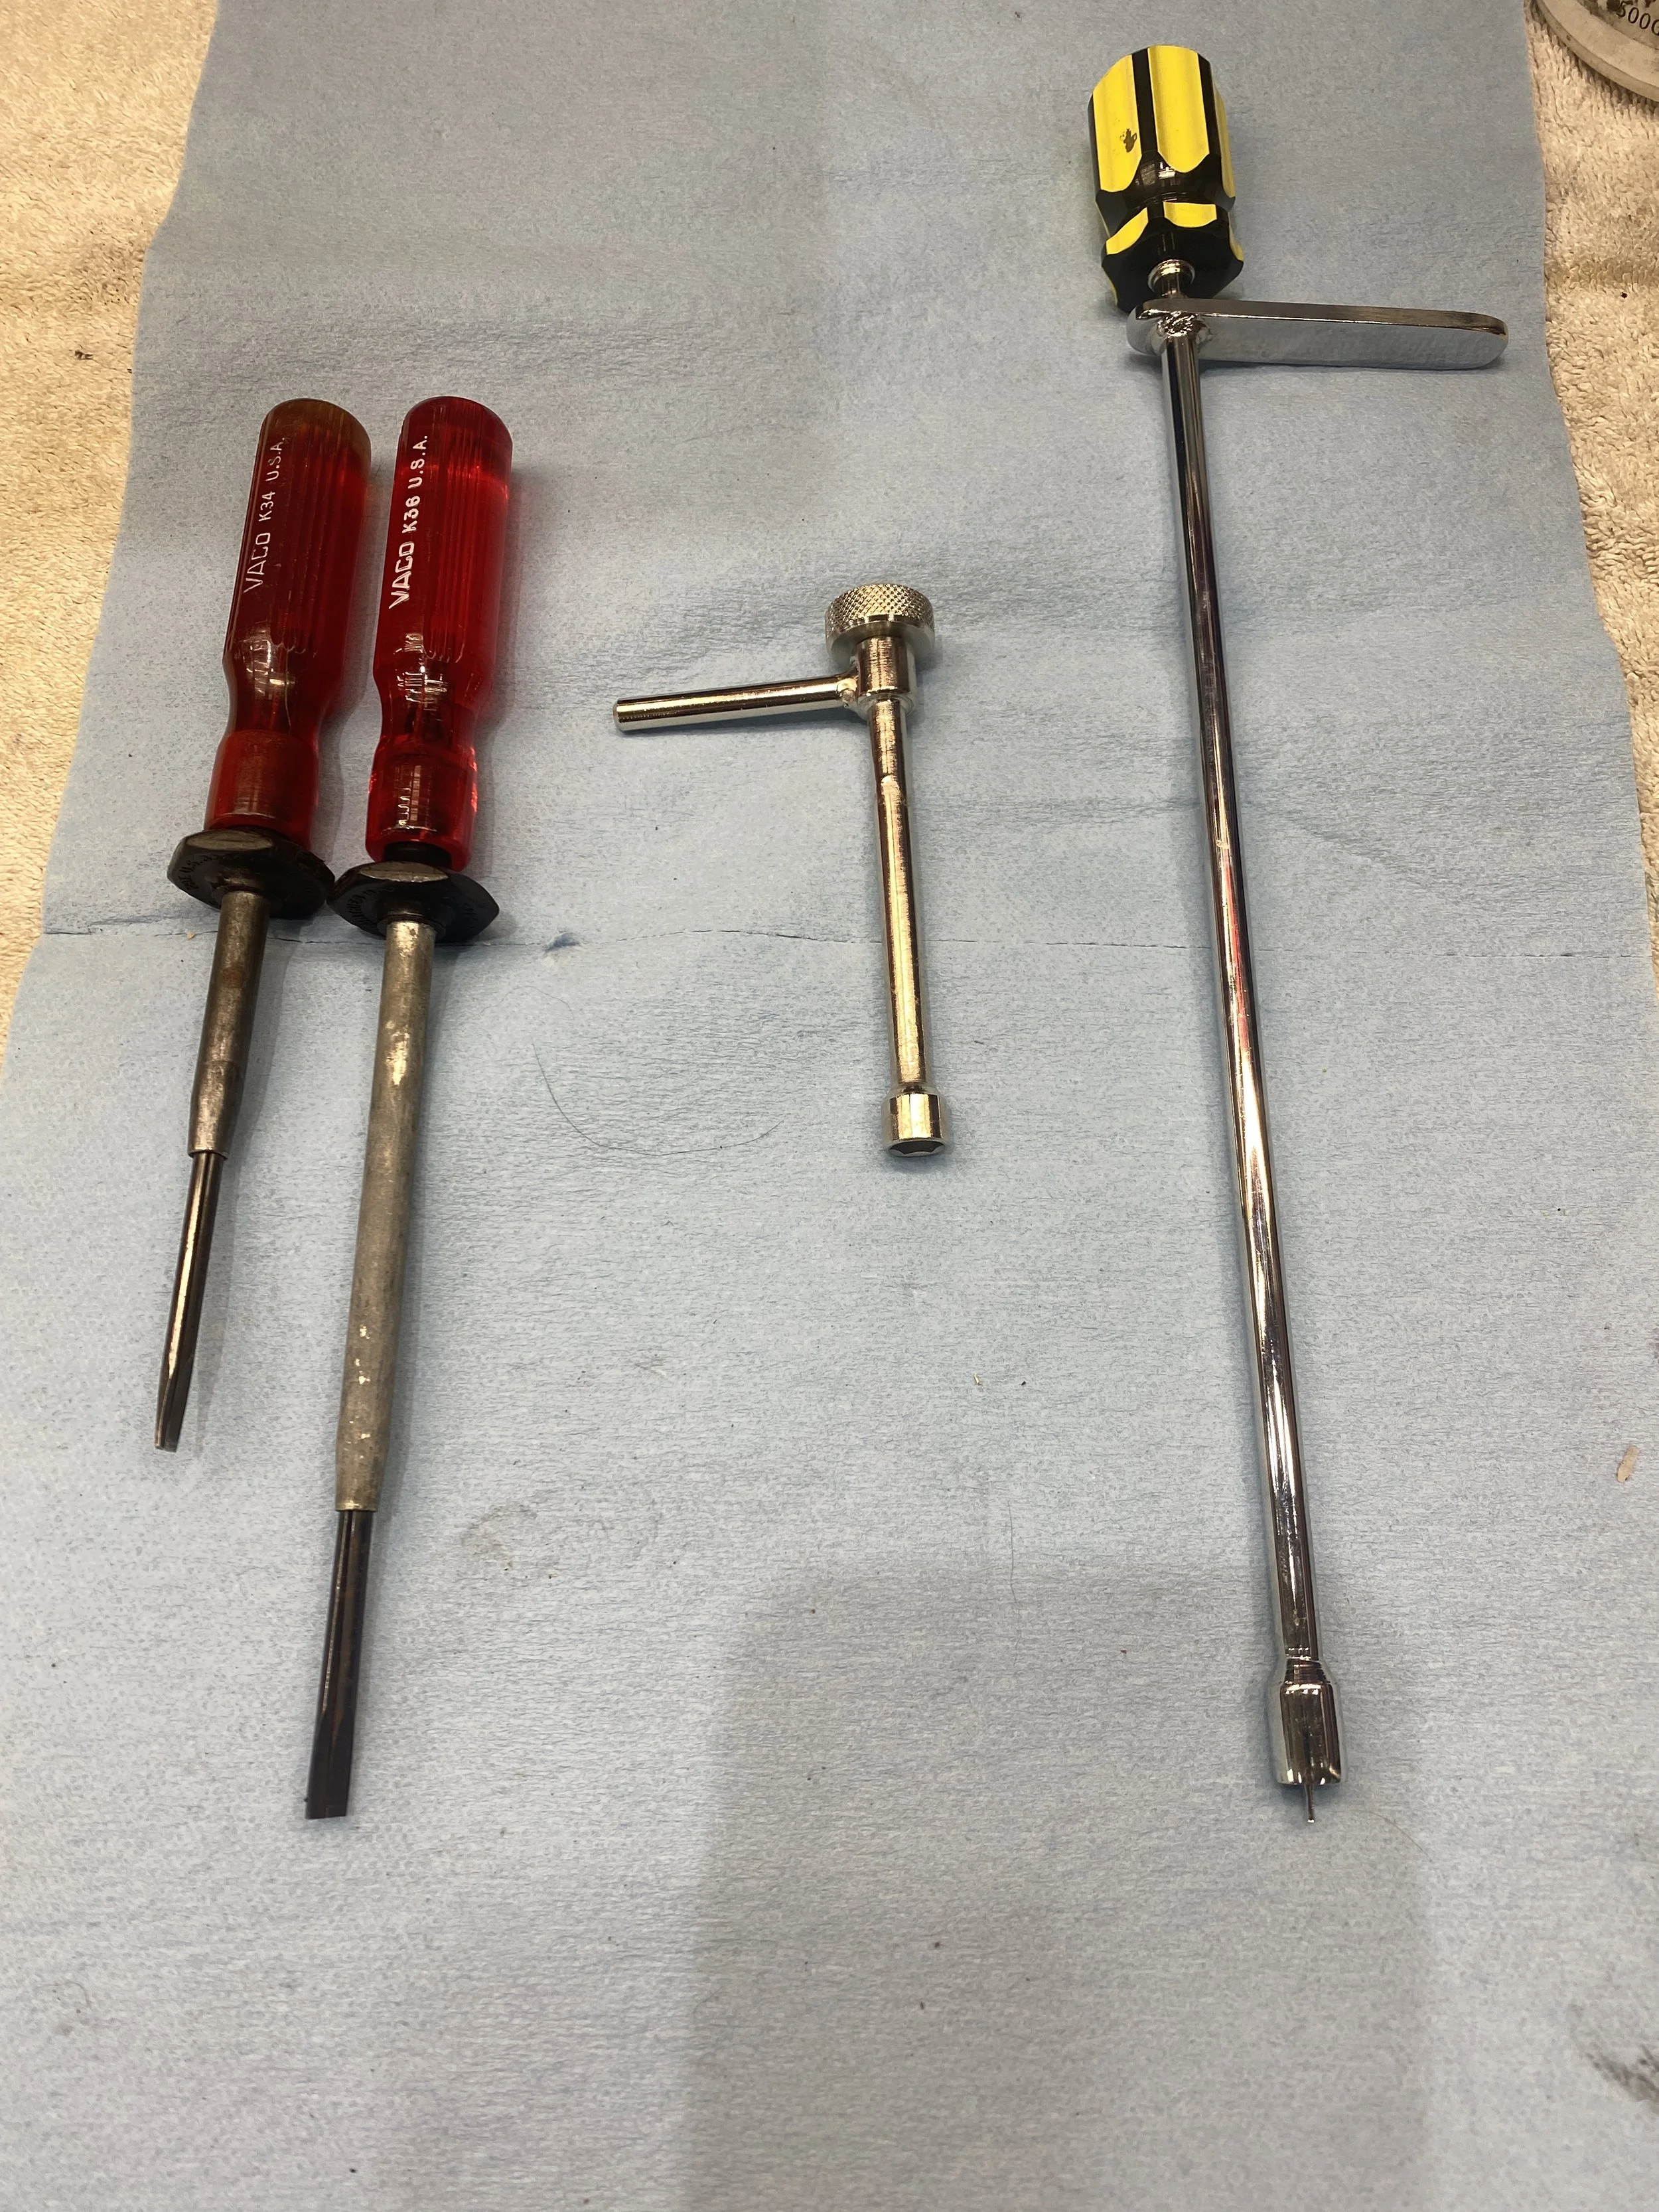
These vintage slotted screwdrivers from Ebay helped me put the non-magnetic alloy blanking screws back in the carb sync ports without dropping them into the oblivion of cooling fins and crankcase crannies.
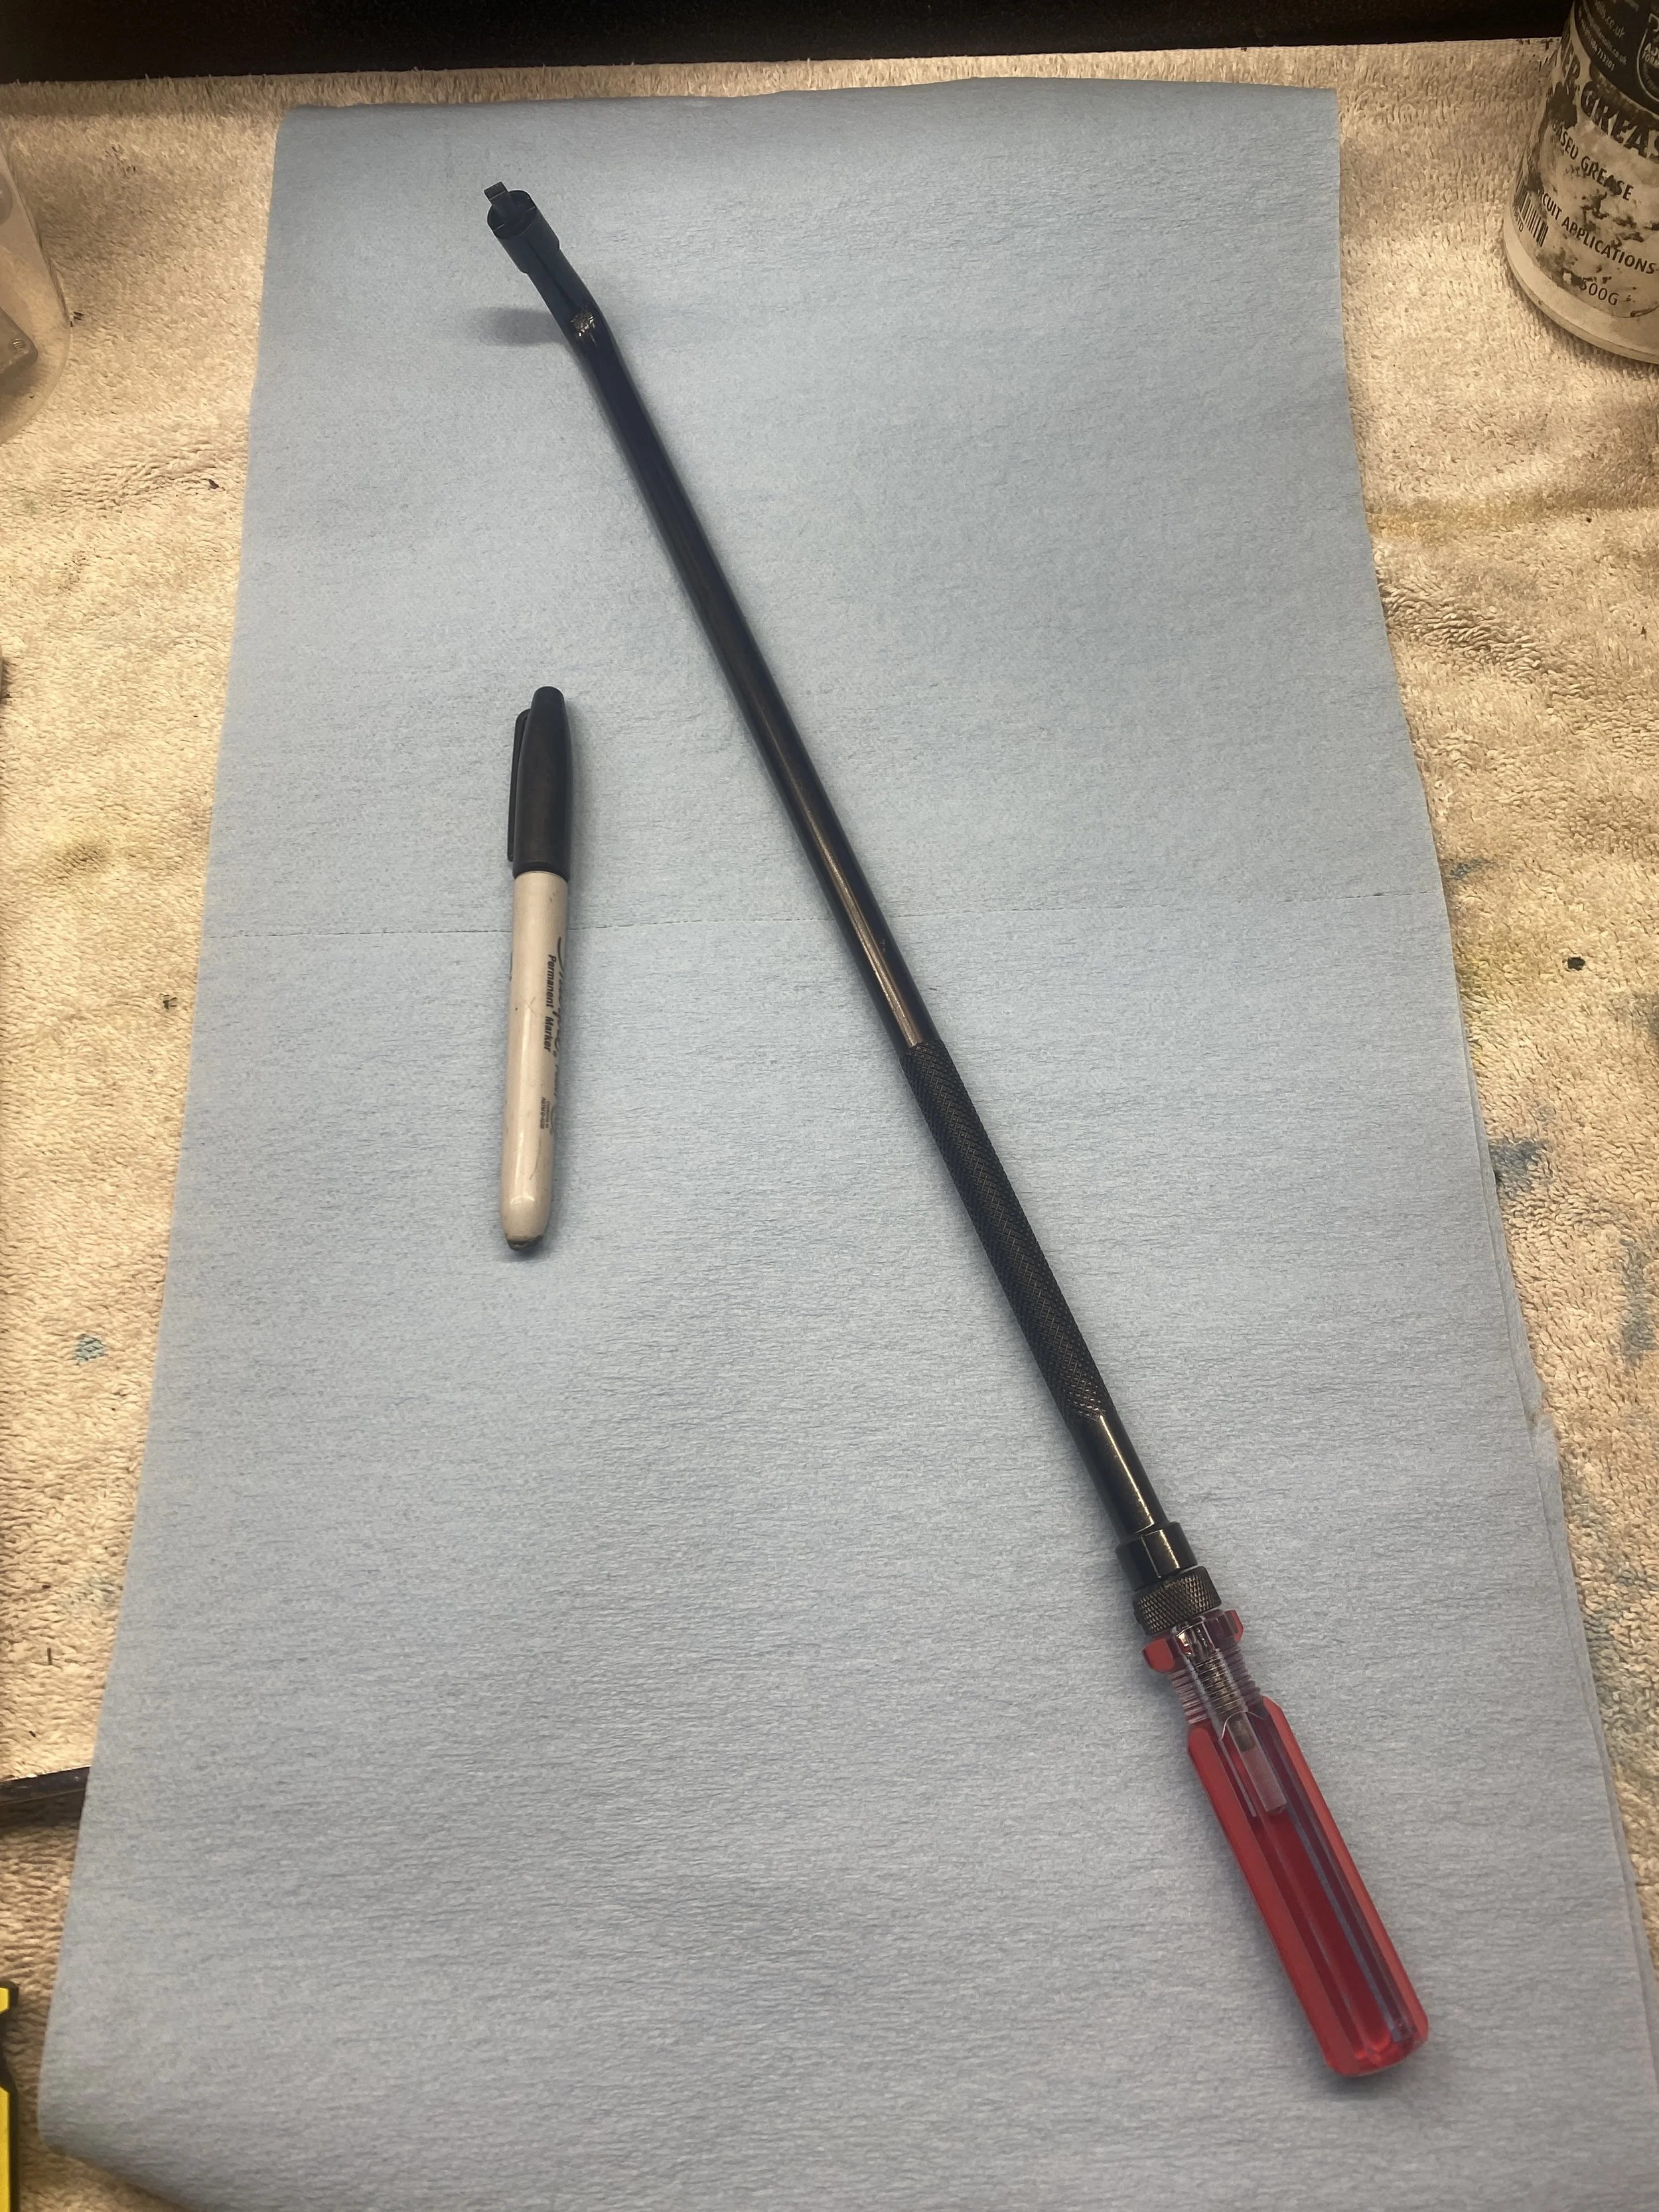
I could never find the 90º carb adjuster that was listed as included with the bike, so I got this one from Motion Pro
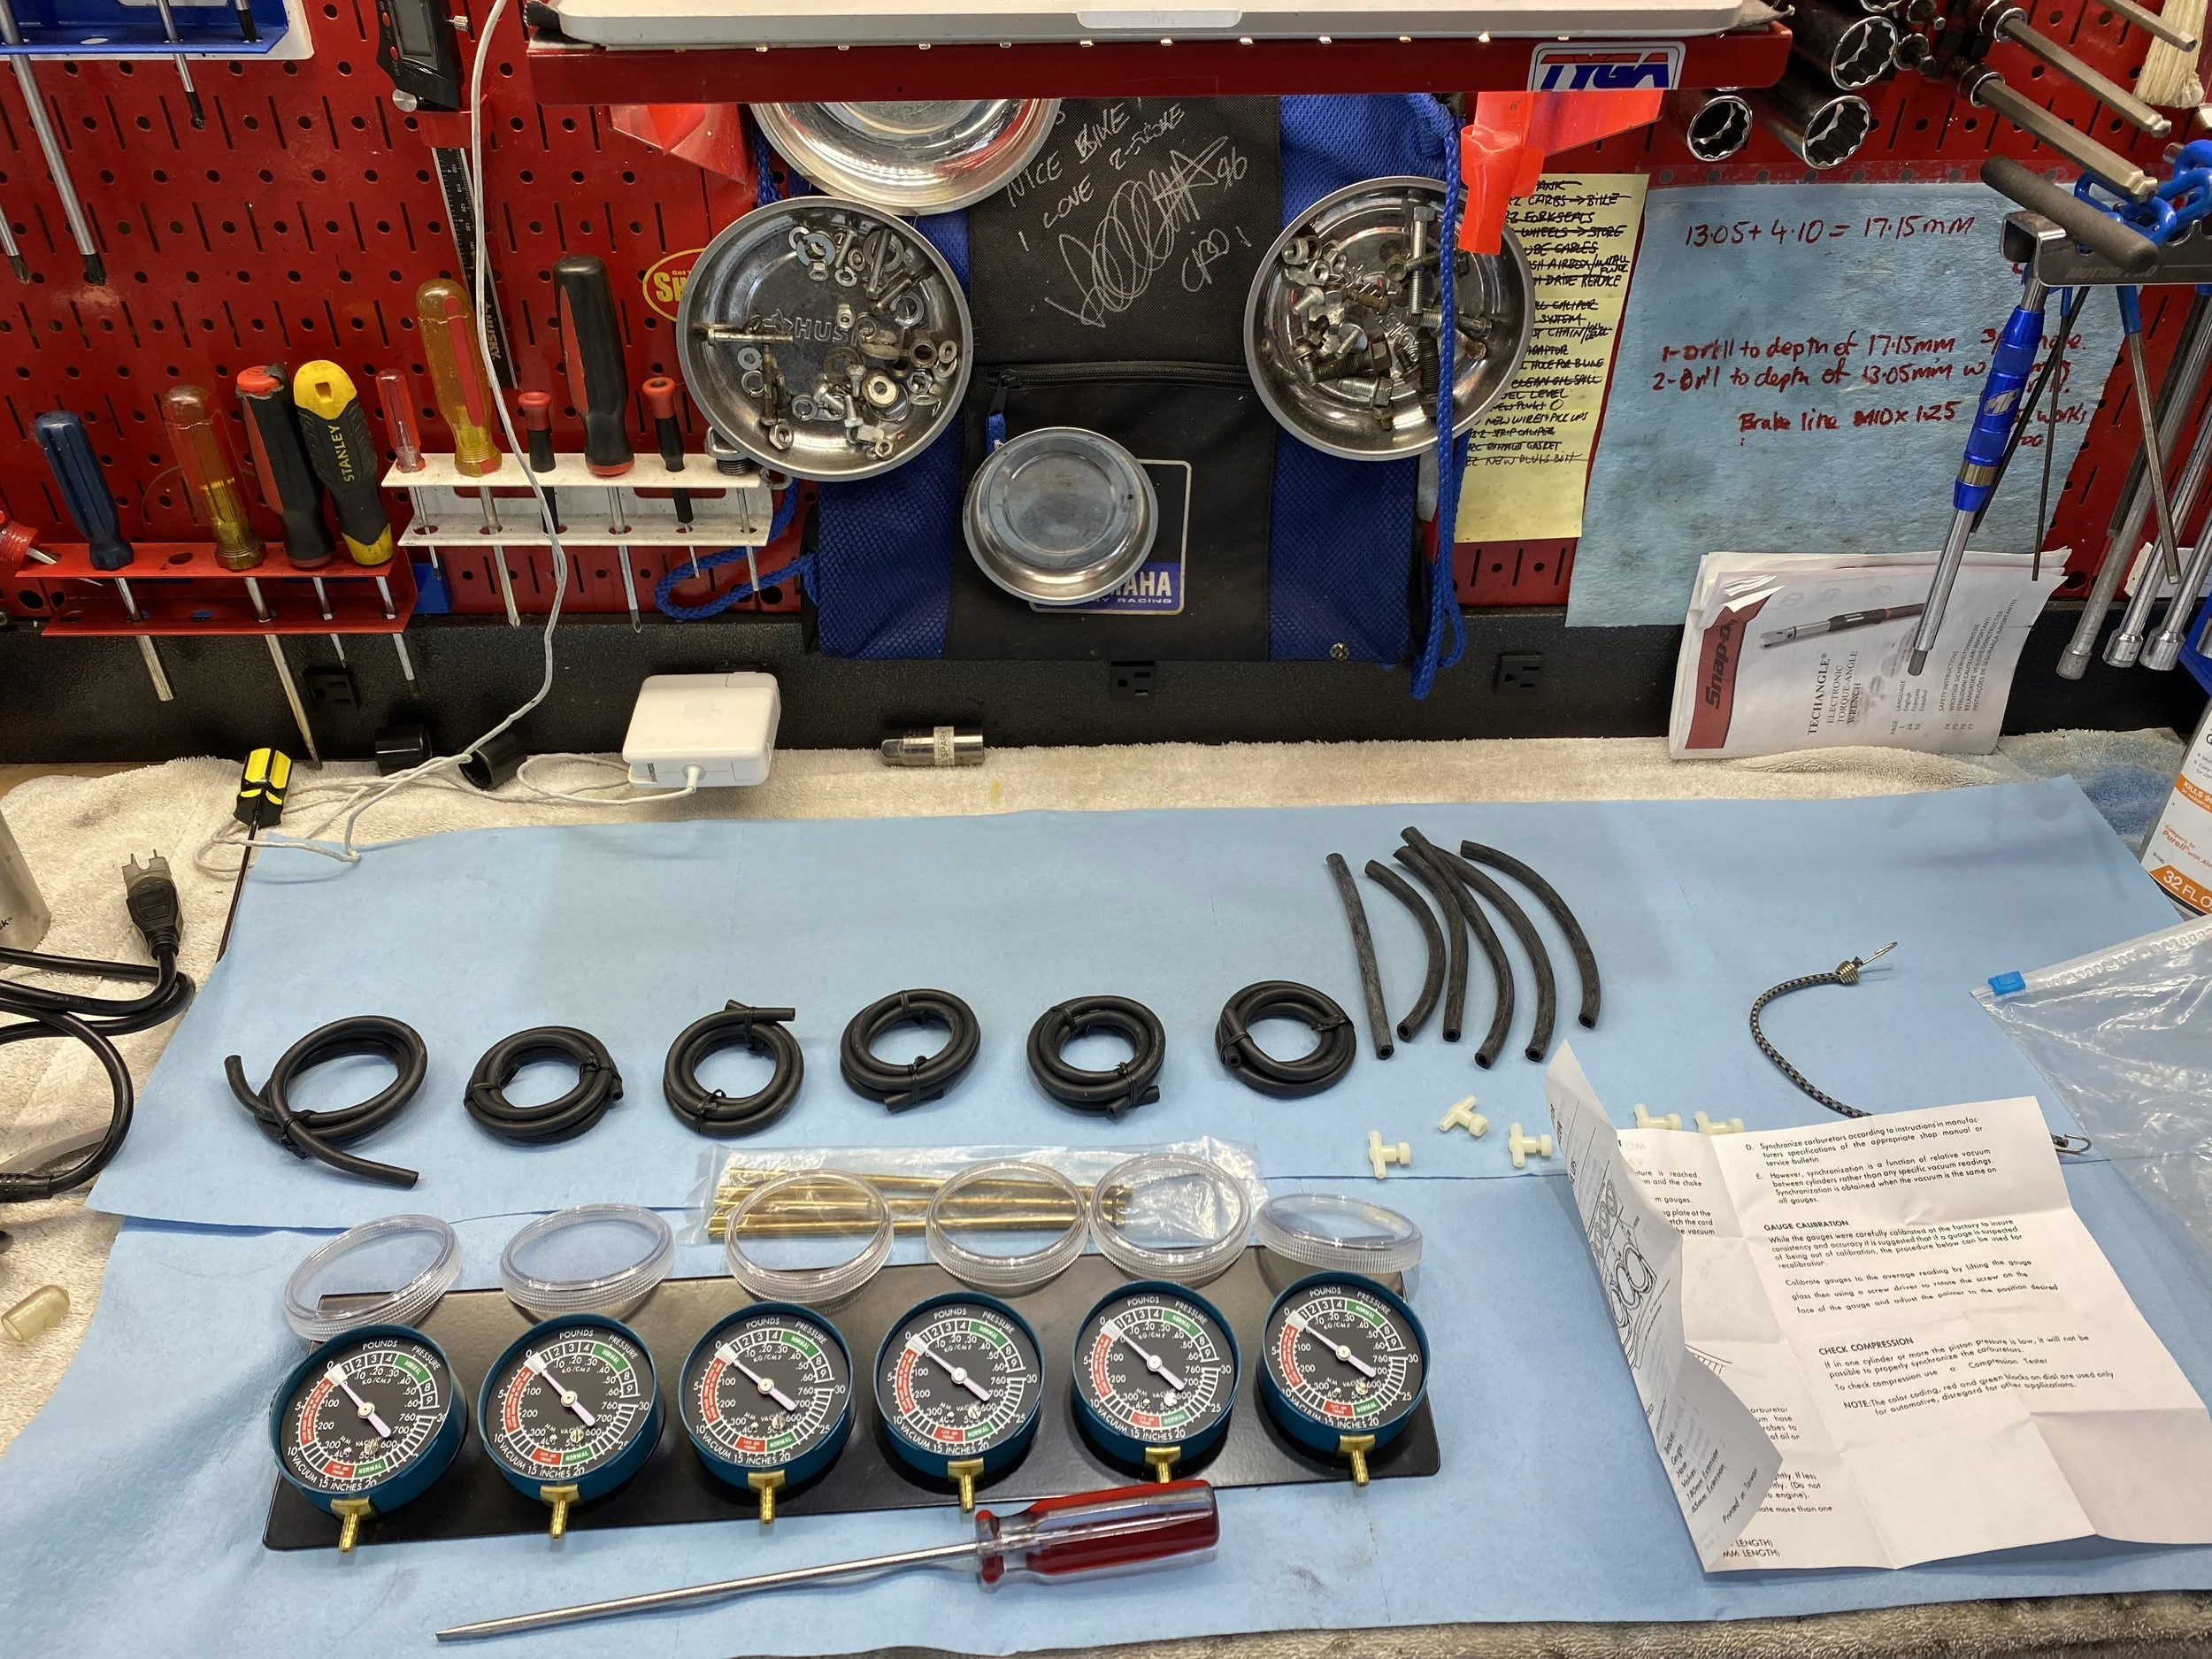
Sync dial set up came with the bike. Unused. It's the good one with the screw on the front to allow for calibration .
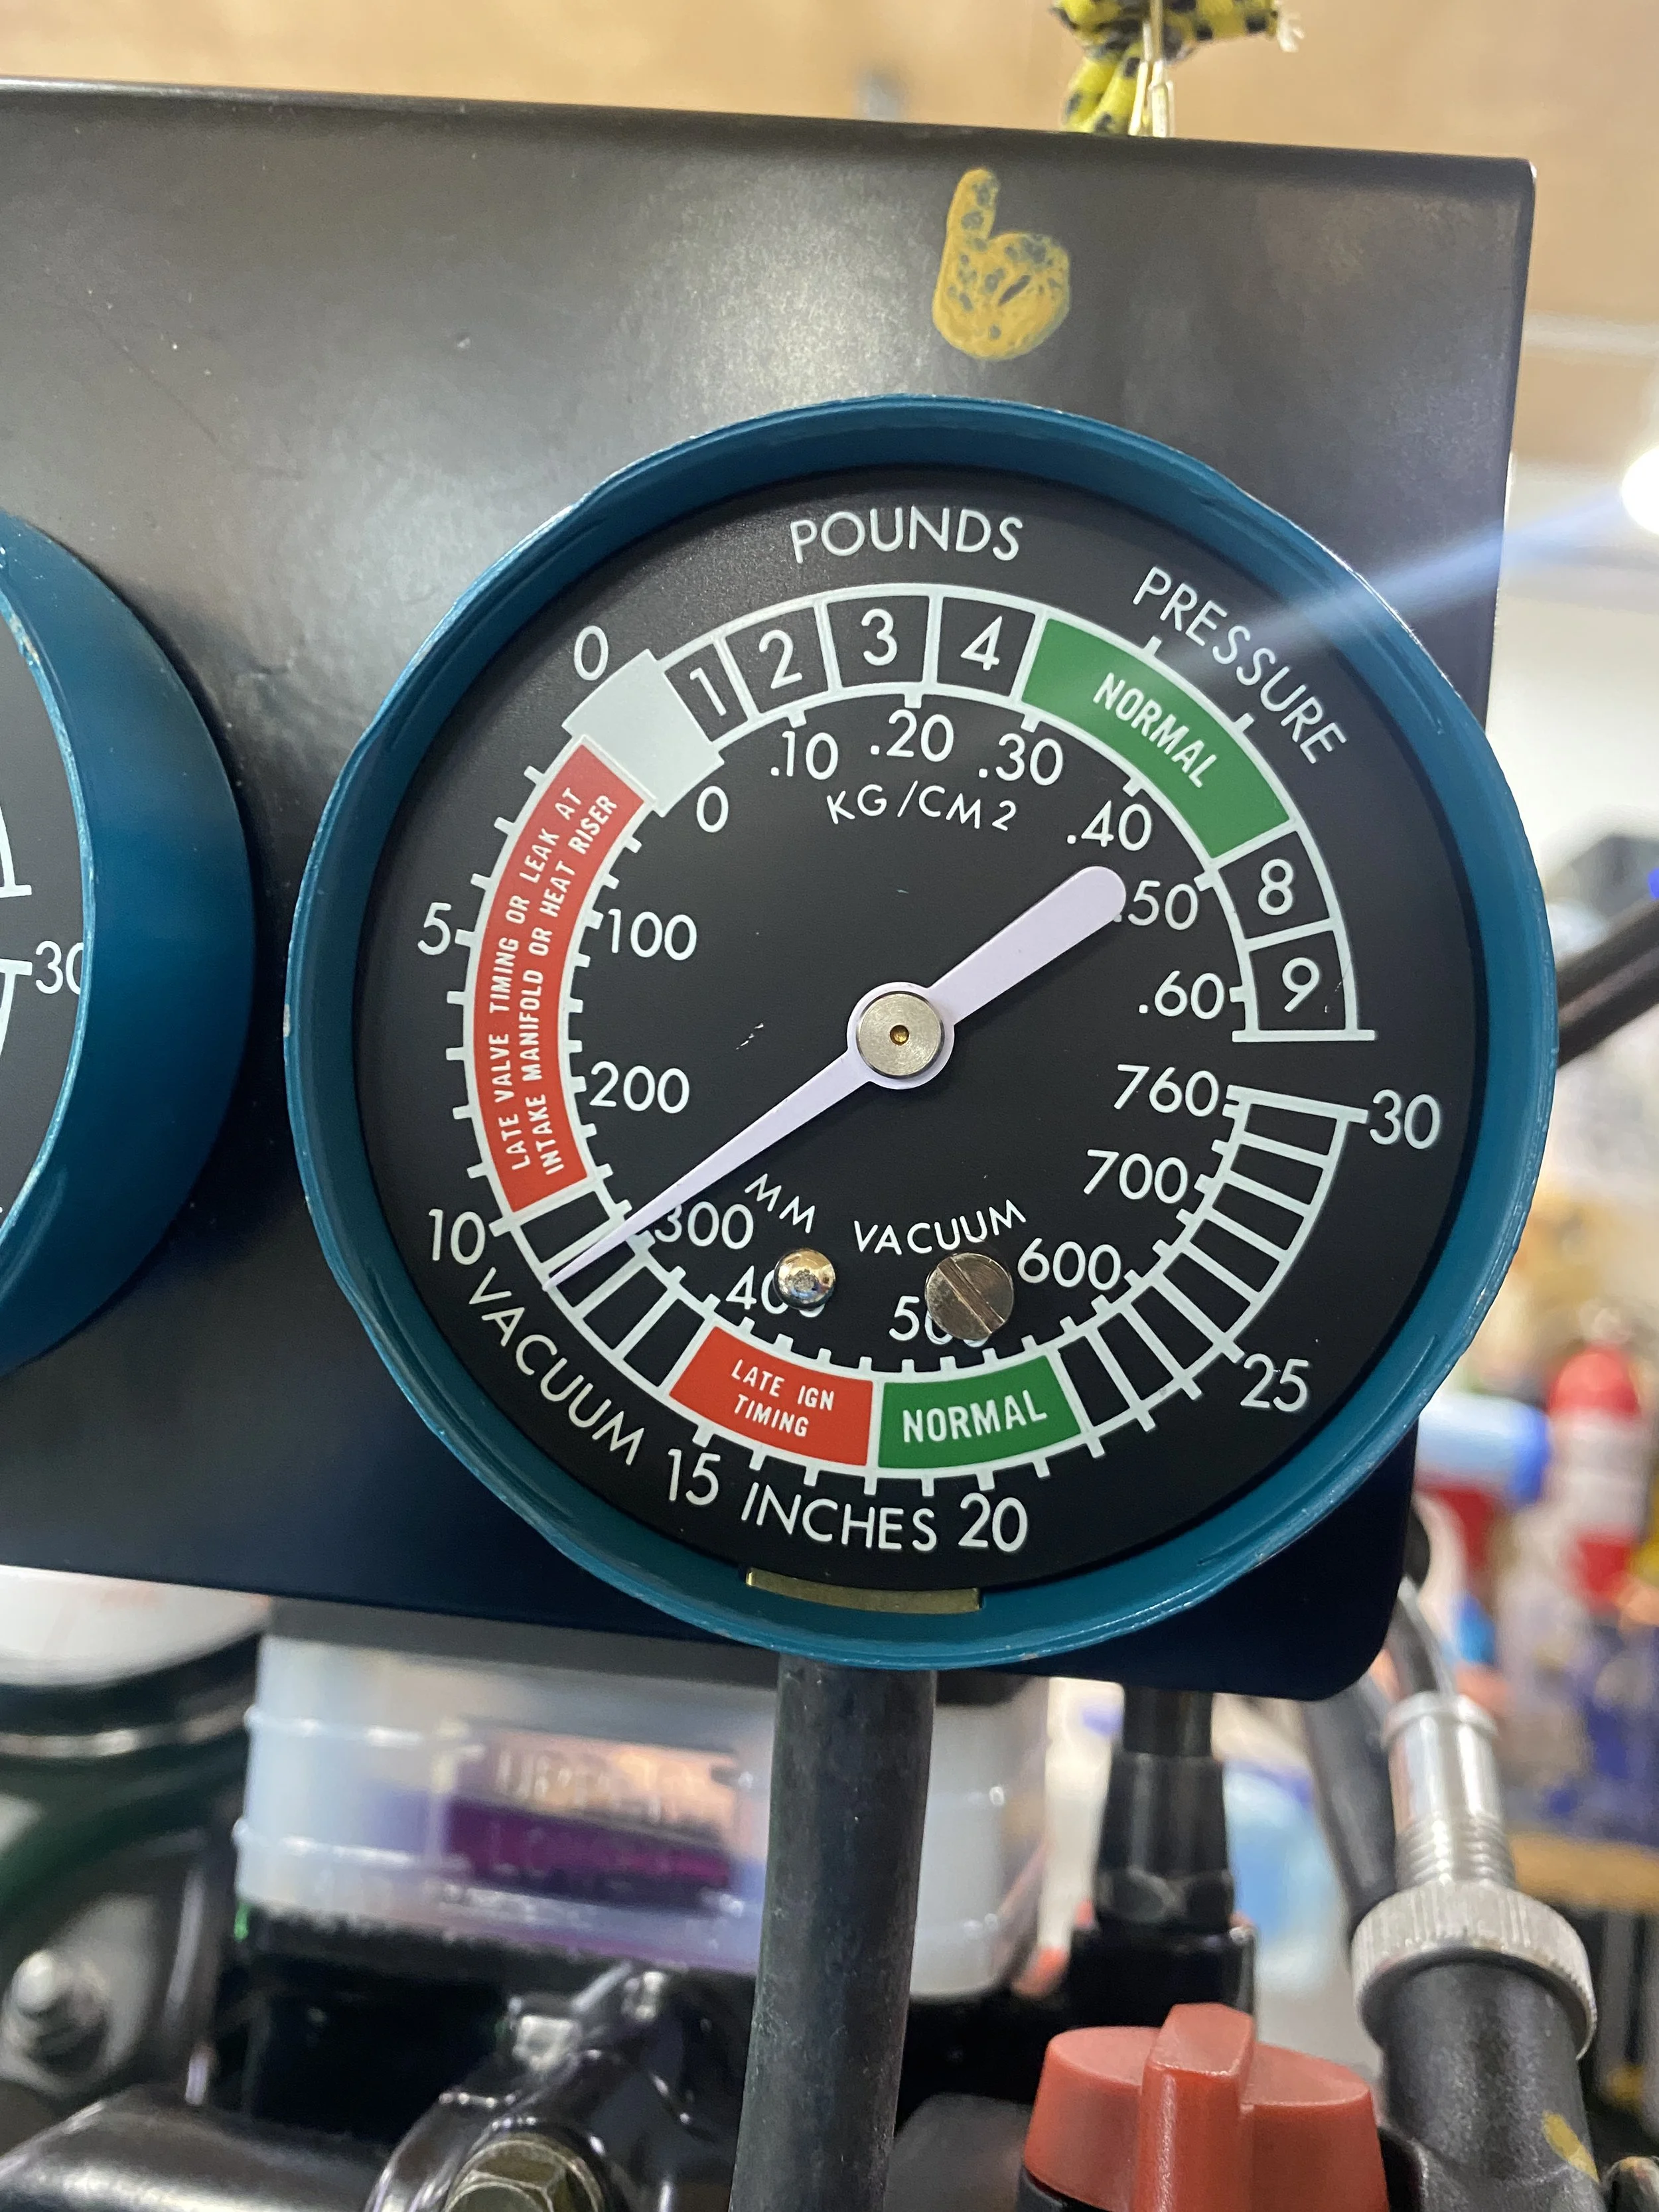
These are the 'good ones' in that they have the brass screw on there that allows you to calibrate the needles.
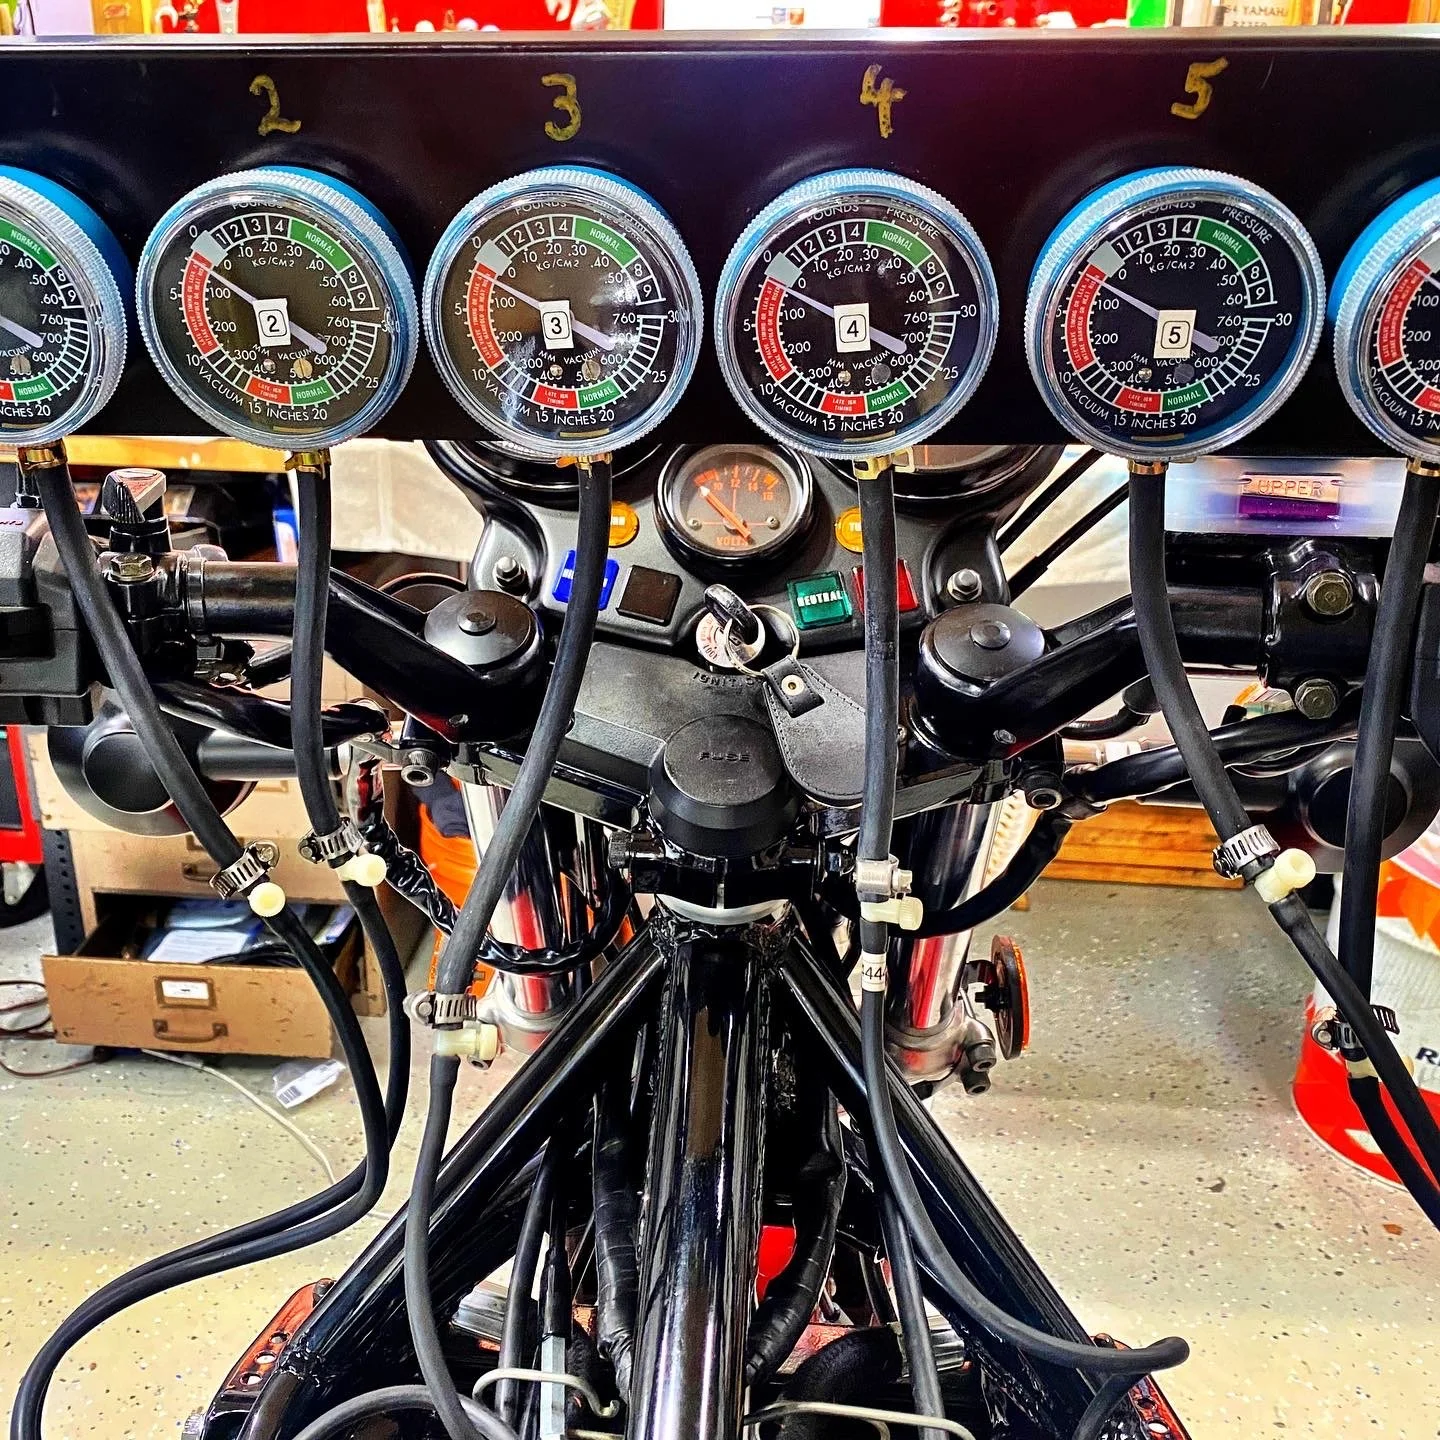
This is a fantastic sync picture...it's fantastic in the sense that it's not real, note that the ignition is switched off. I guess I took this to show all of the dials are now calibrated.
Looks complicated and it is.

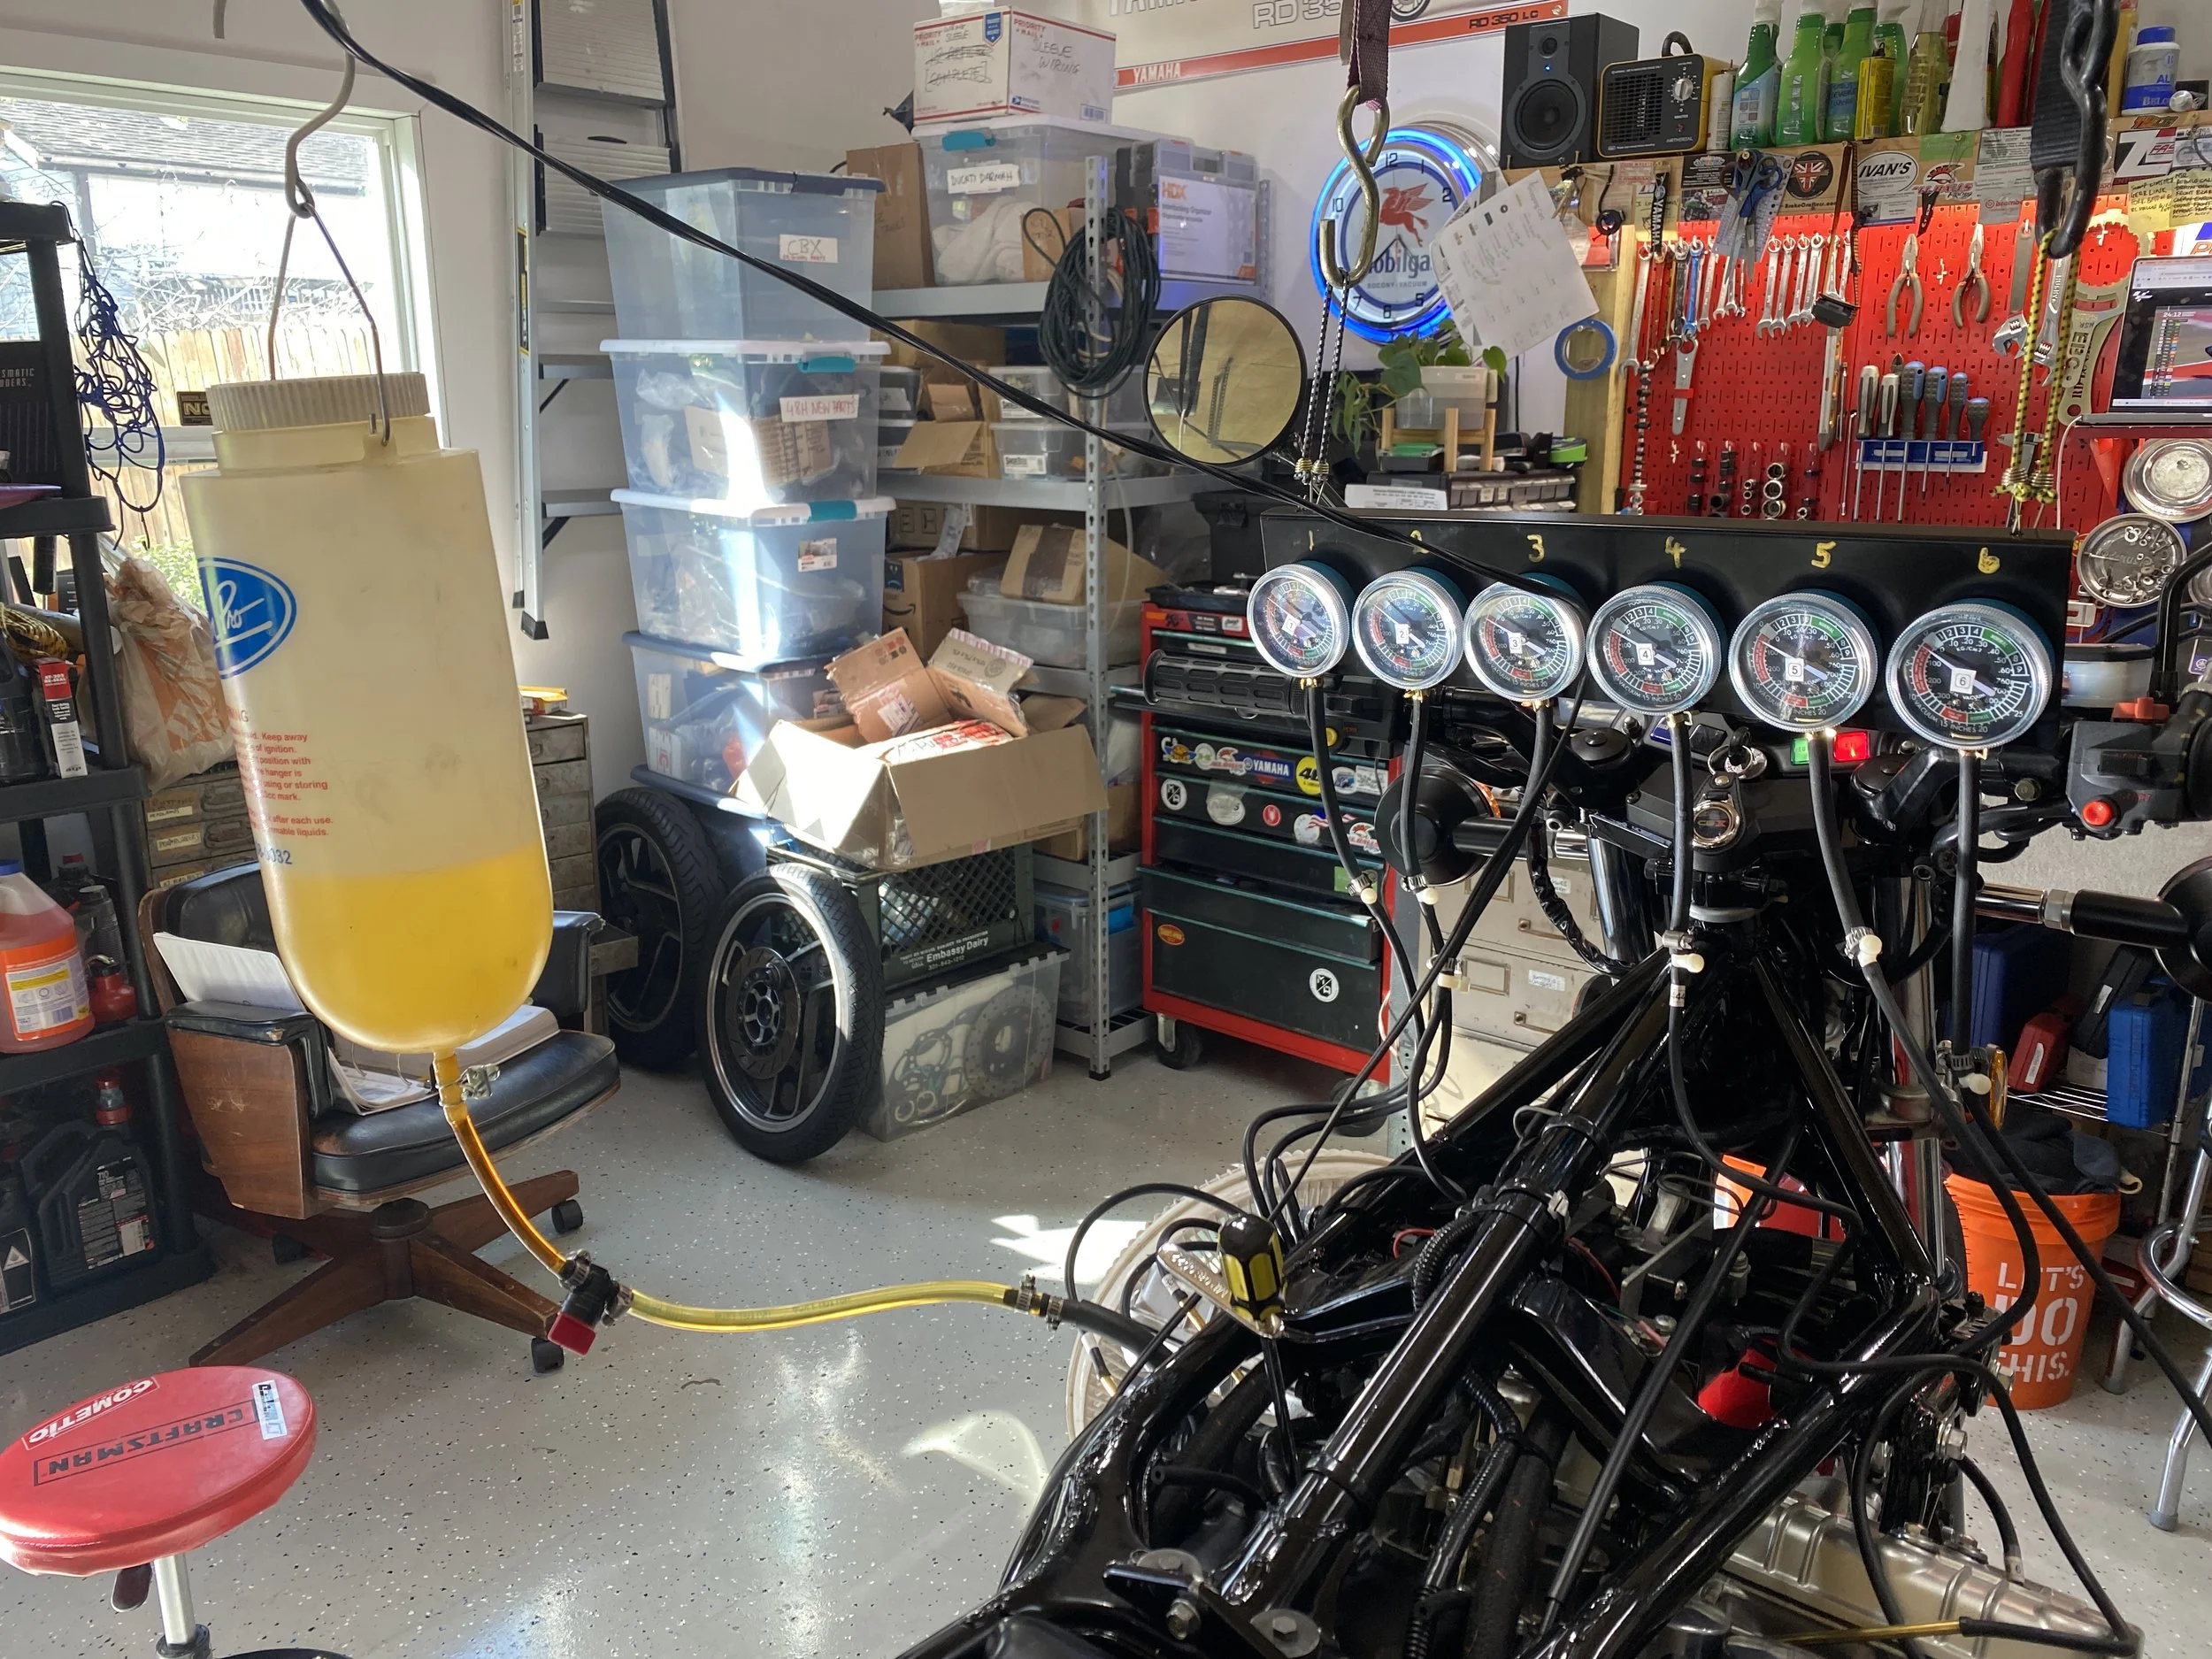
Visiting time while the CBX get's an IV
some work to do here.

This was one of the most helpful diagrams. I had got it into my head that, since #4 carb is a control there would be no 3 & 4 adjuster, and so I spent a few hours trying to sync the carbs with only 4 sync screws. Was easier once I discovered the 5th.
I have to admit, I am pretty happy with this...
Most Important: CBX's run hot. Once you get the bike to a good running temp, you will have about 10 mins or so before it starts to overheat. Besides needing ventilation while the six cylinders pump out copious amounts of carbon monoxide, you need to keep the engine cool, hence....doors open and fans a- blowing on 10....and still take lots of breaks to calm your mind and give the bike a rest.
Synchronization In Real Life

More on the 1/4 throttle flat spot/stuttering….
Apr 15, 2022: With the Carbs accurately synchronized the attempts to resolve the 1/4 throttle stuttering continues. 6 new D8EA’s arrived from TimsCBX and, excited for the Easter weekend, I installed them, turned the pilots another turn out (making it 3 turns out total) and went for a quick test ride.
All seemed smooth enough until I took it up to 6,000 rpm a couple of times. It wasn’t having it. It sputtered and popped like a mofo and wasn't interested in clearing at all. I switched to reserve tank just in case and played with the choke to see if it was fuel starvation but it didn’t help. Lights on or off, it wasn’t happy. It would run kind of smooth with the throttle barely cracked so I made it home like that.
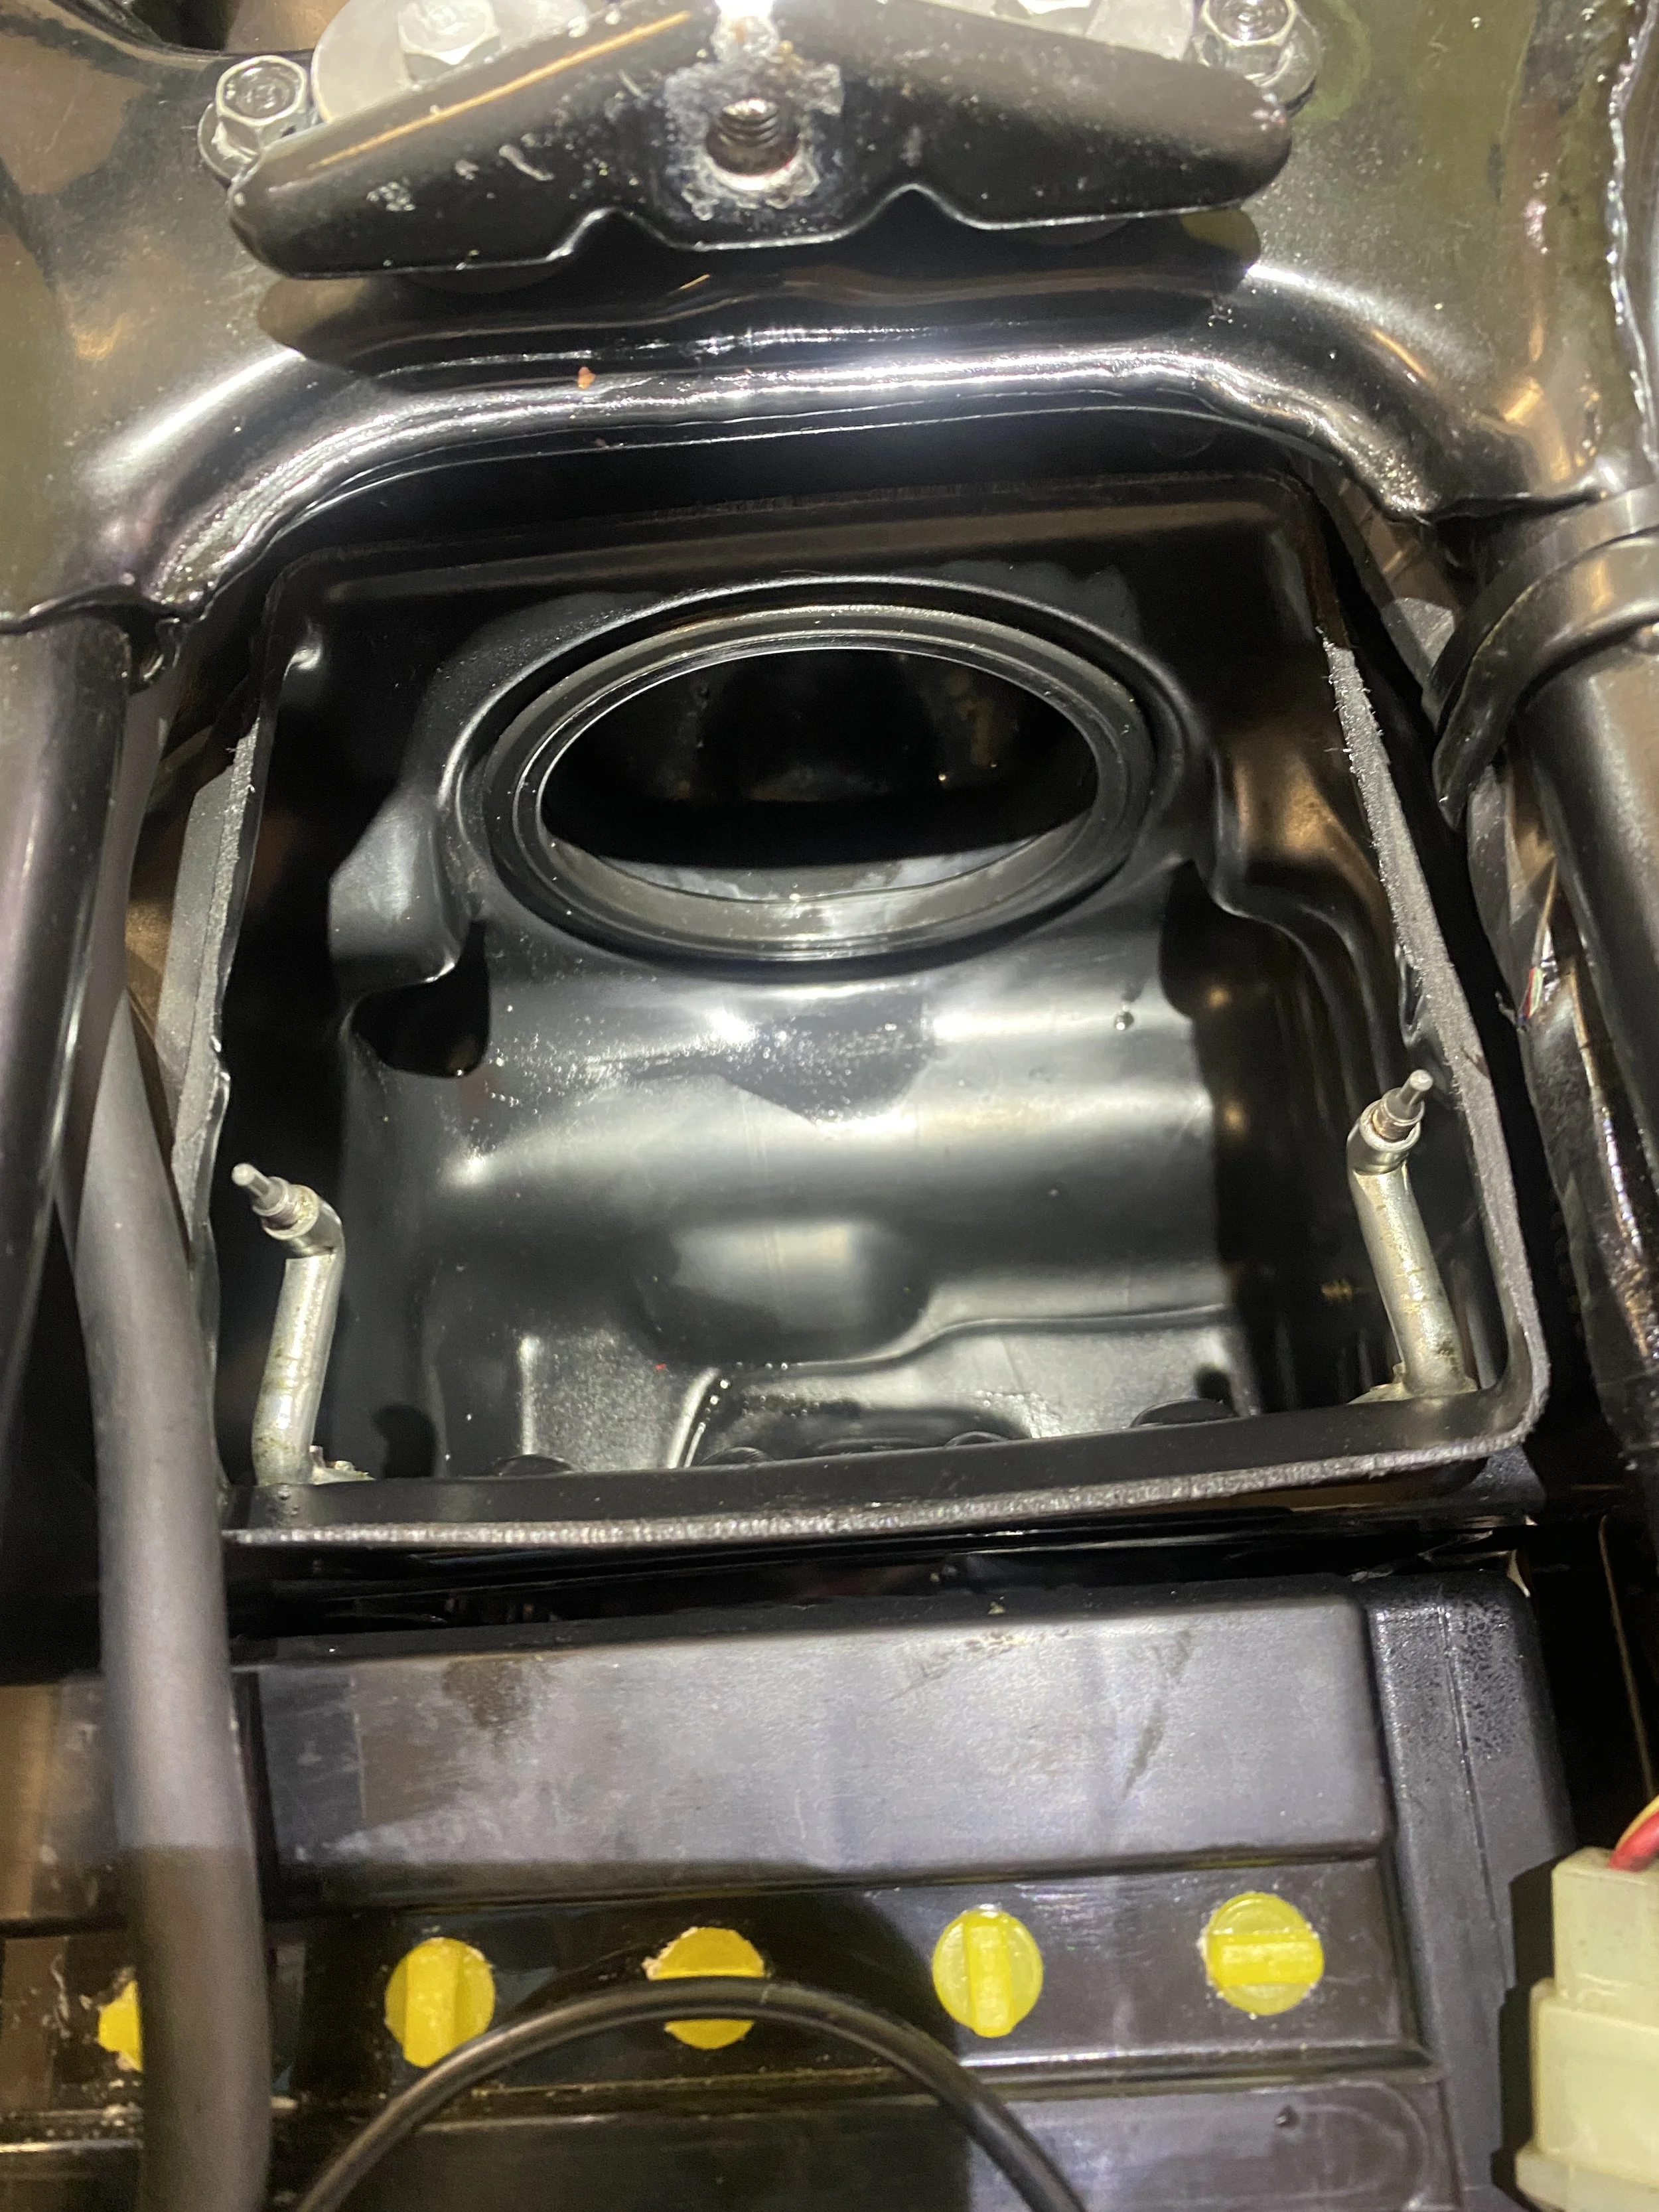
It was almost like there was some interference in the airbox, so I checked it- all normal. Running complete OEM.
Checked the plugs. Sooty as hell. Took out the airfilter and top and turned the pilots back 1 full turn so they are at 2 out now. Went for a run. Much better. Stuttering still there, a bit more pronounced but once past 1/4 throttle runs well. Plugs look much better, a little rich but feel like I'm going in the right direction.
Coincidentally the Previous Owner sent me a box of jets that he had found while he was cleaning out his garage. Has a TimsCBX sticker on it but no written details on contents which consists of 2 drill bits, float valves, and bunch of needles and all kinds of jets most of which look used, meaning that whatever came in that box was probably installed in these carbs.
It’s inevitable. I’m going to have to tilt the motor and get into the carbs to find out what’s in there if I’m going to cure the 1/4 throttle issue. Why is it such a big deal? Well it just so happens that 1/4 throttle is what you use 90% of any ride.
Have one last thing to test before I tear it down. Replace the paper K&N air filter that came with the bike and see what it’s like then.
Seat off to investigate airfilter...
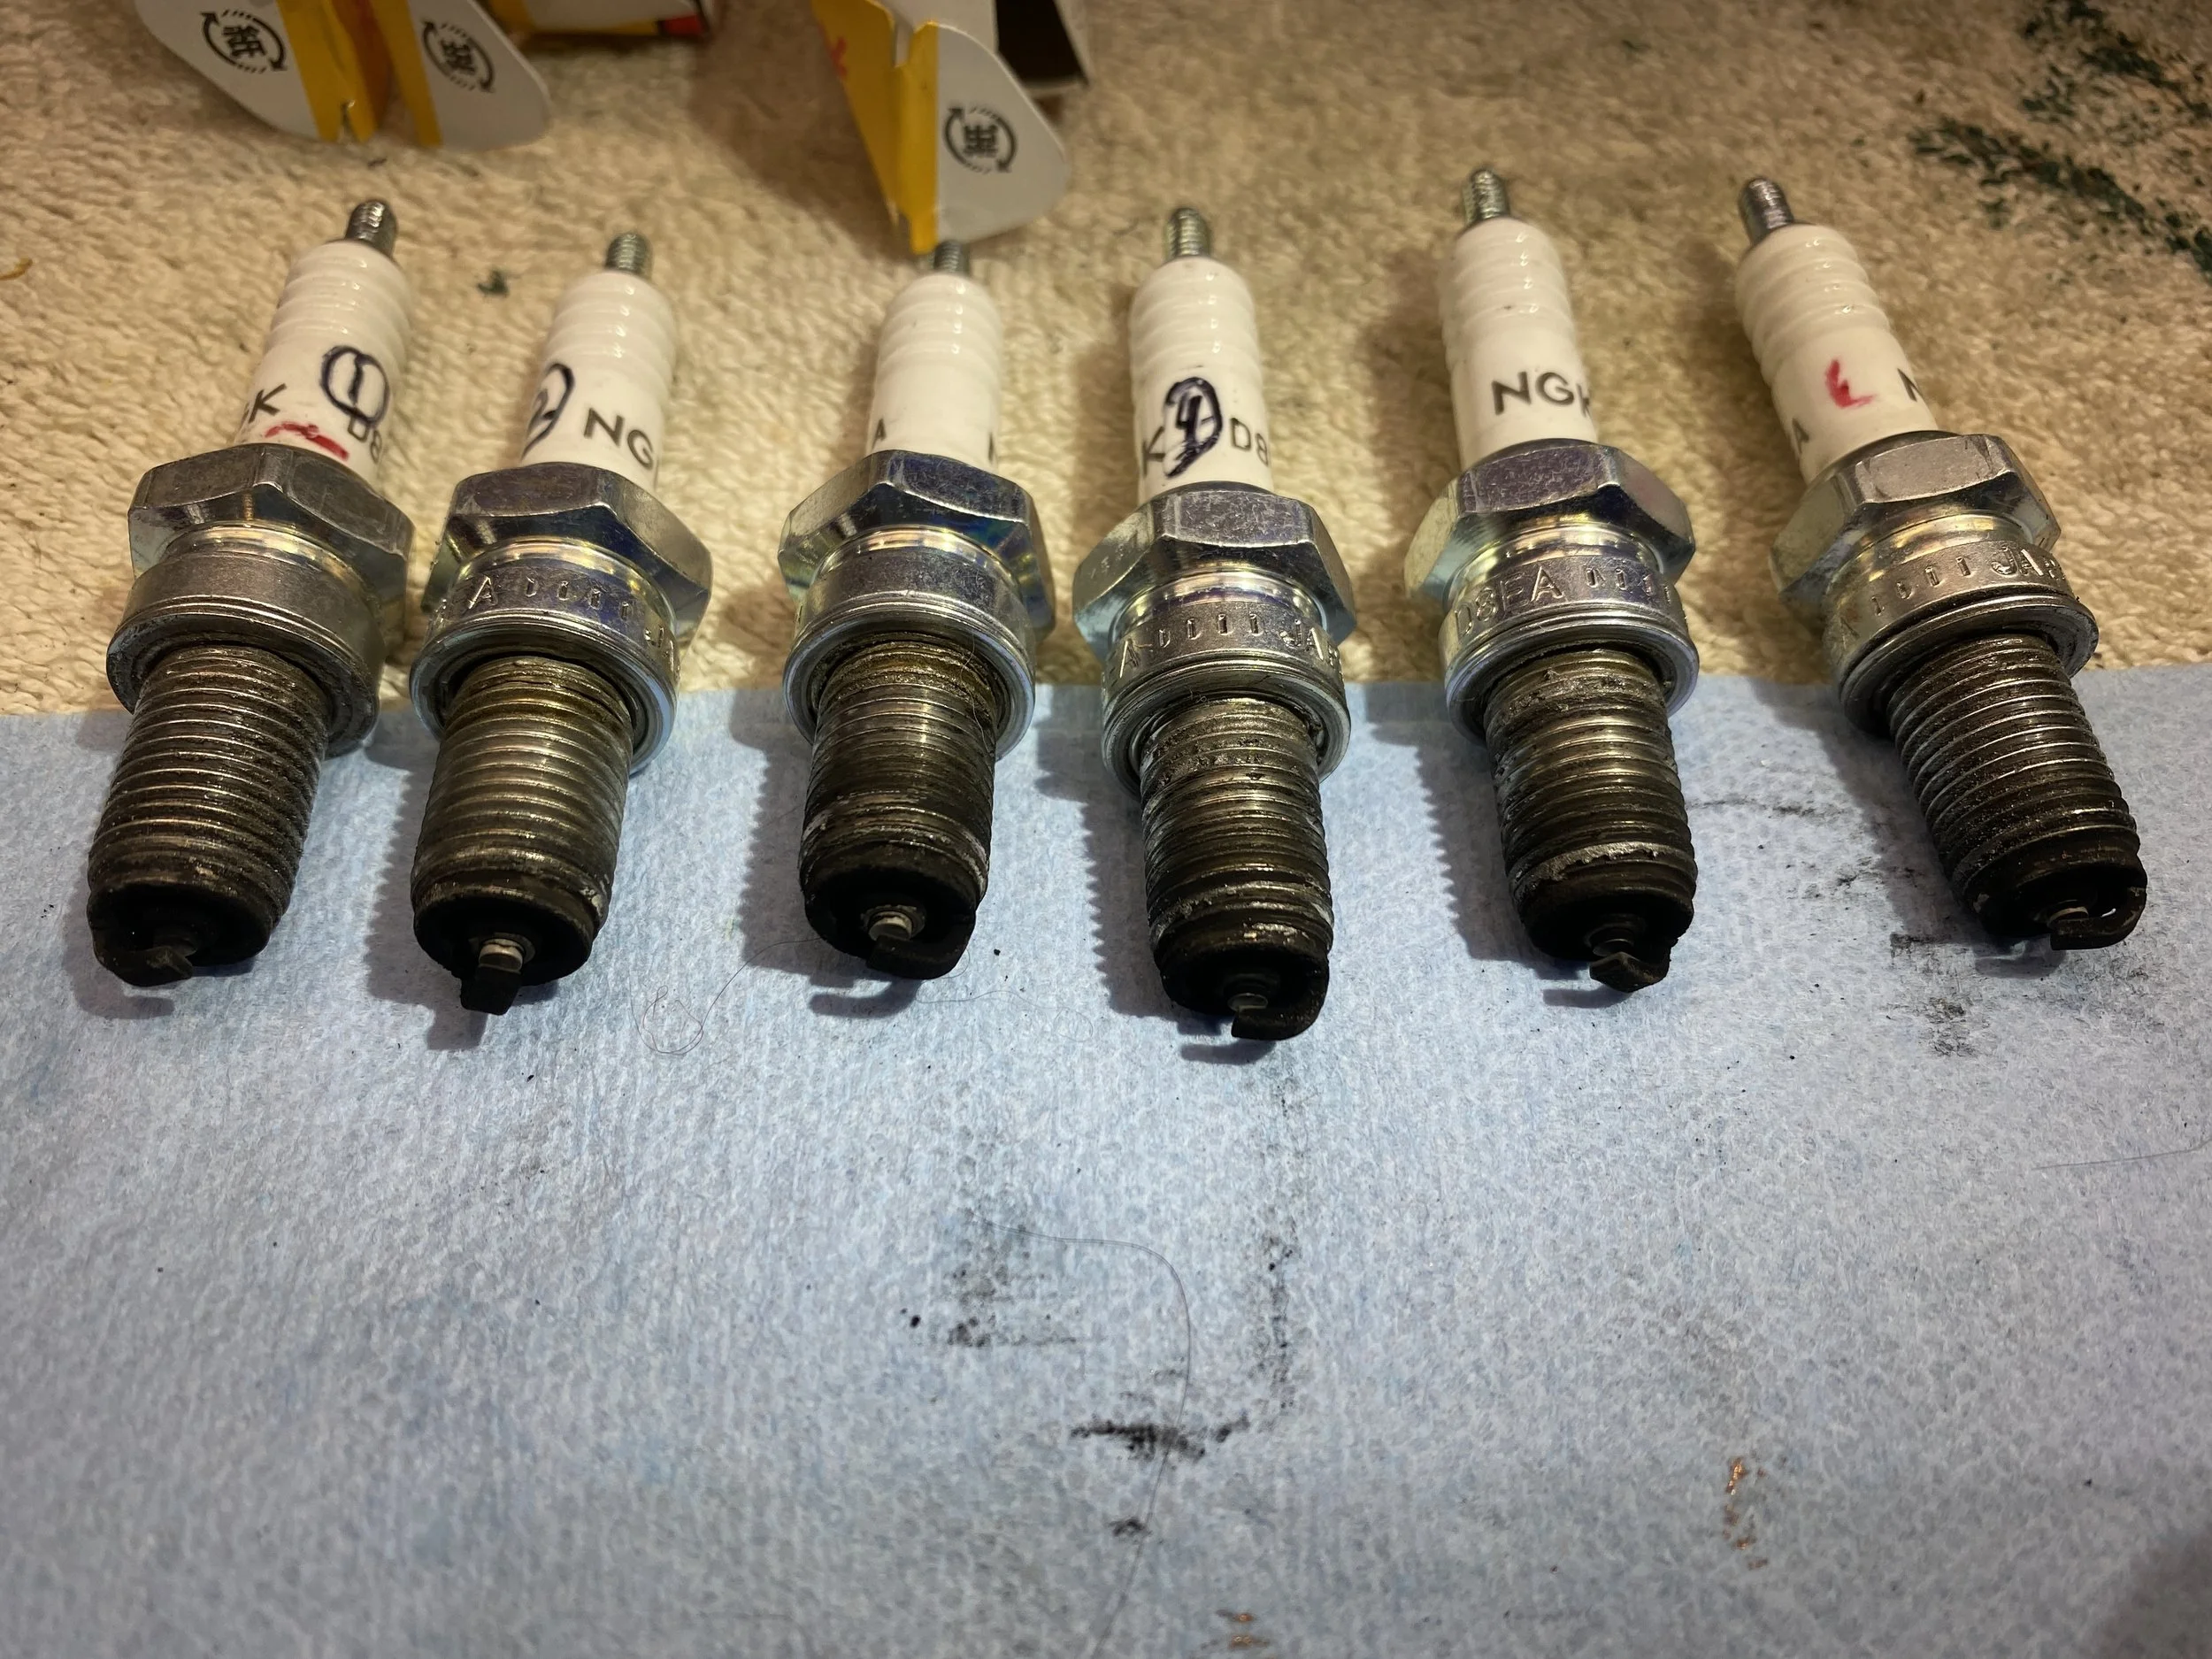
Original plugs...they are D8EA's...clear signs of being rich....and not the good kind.
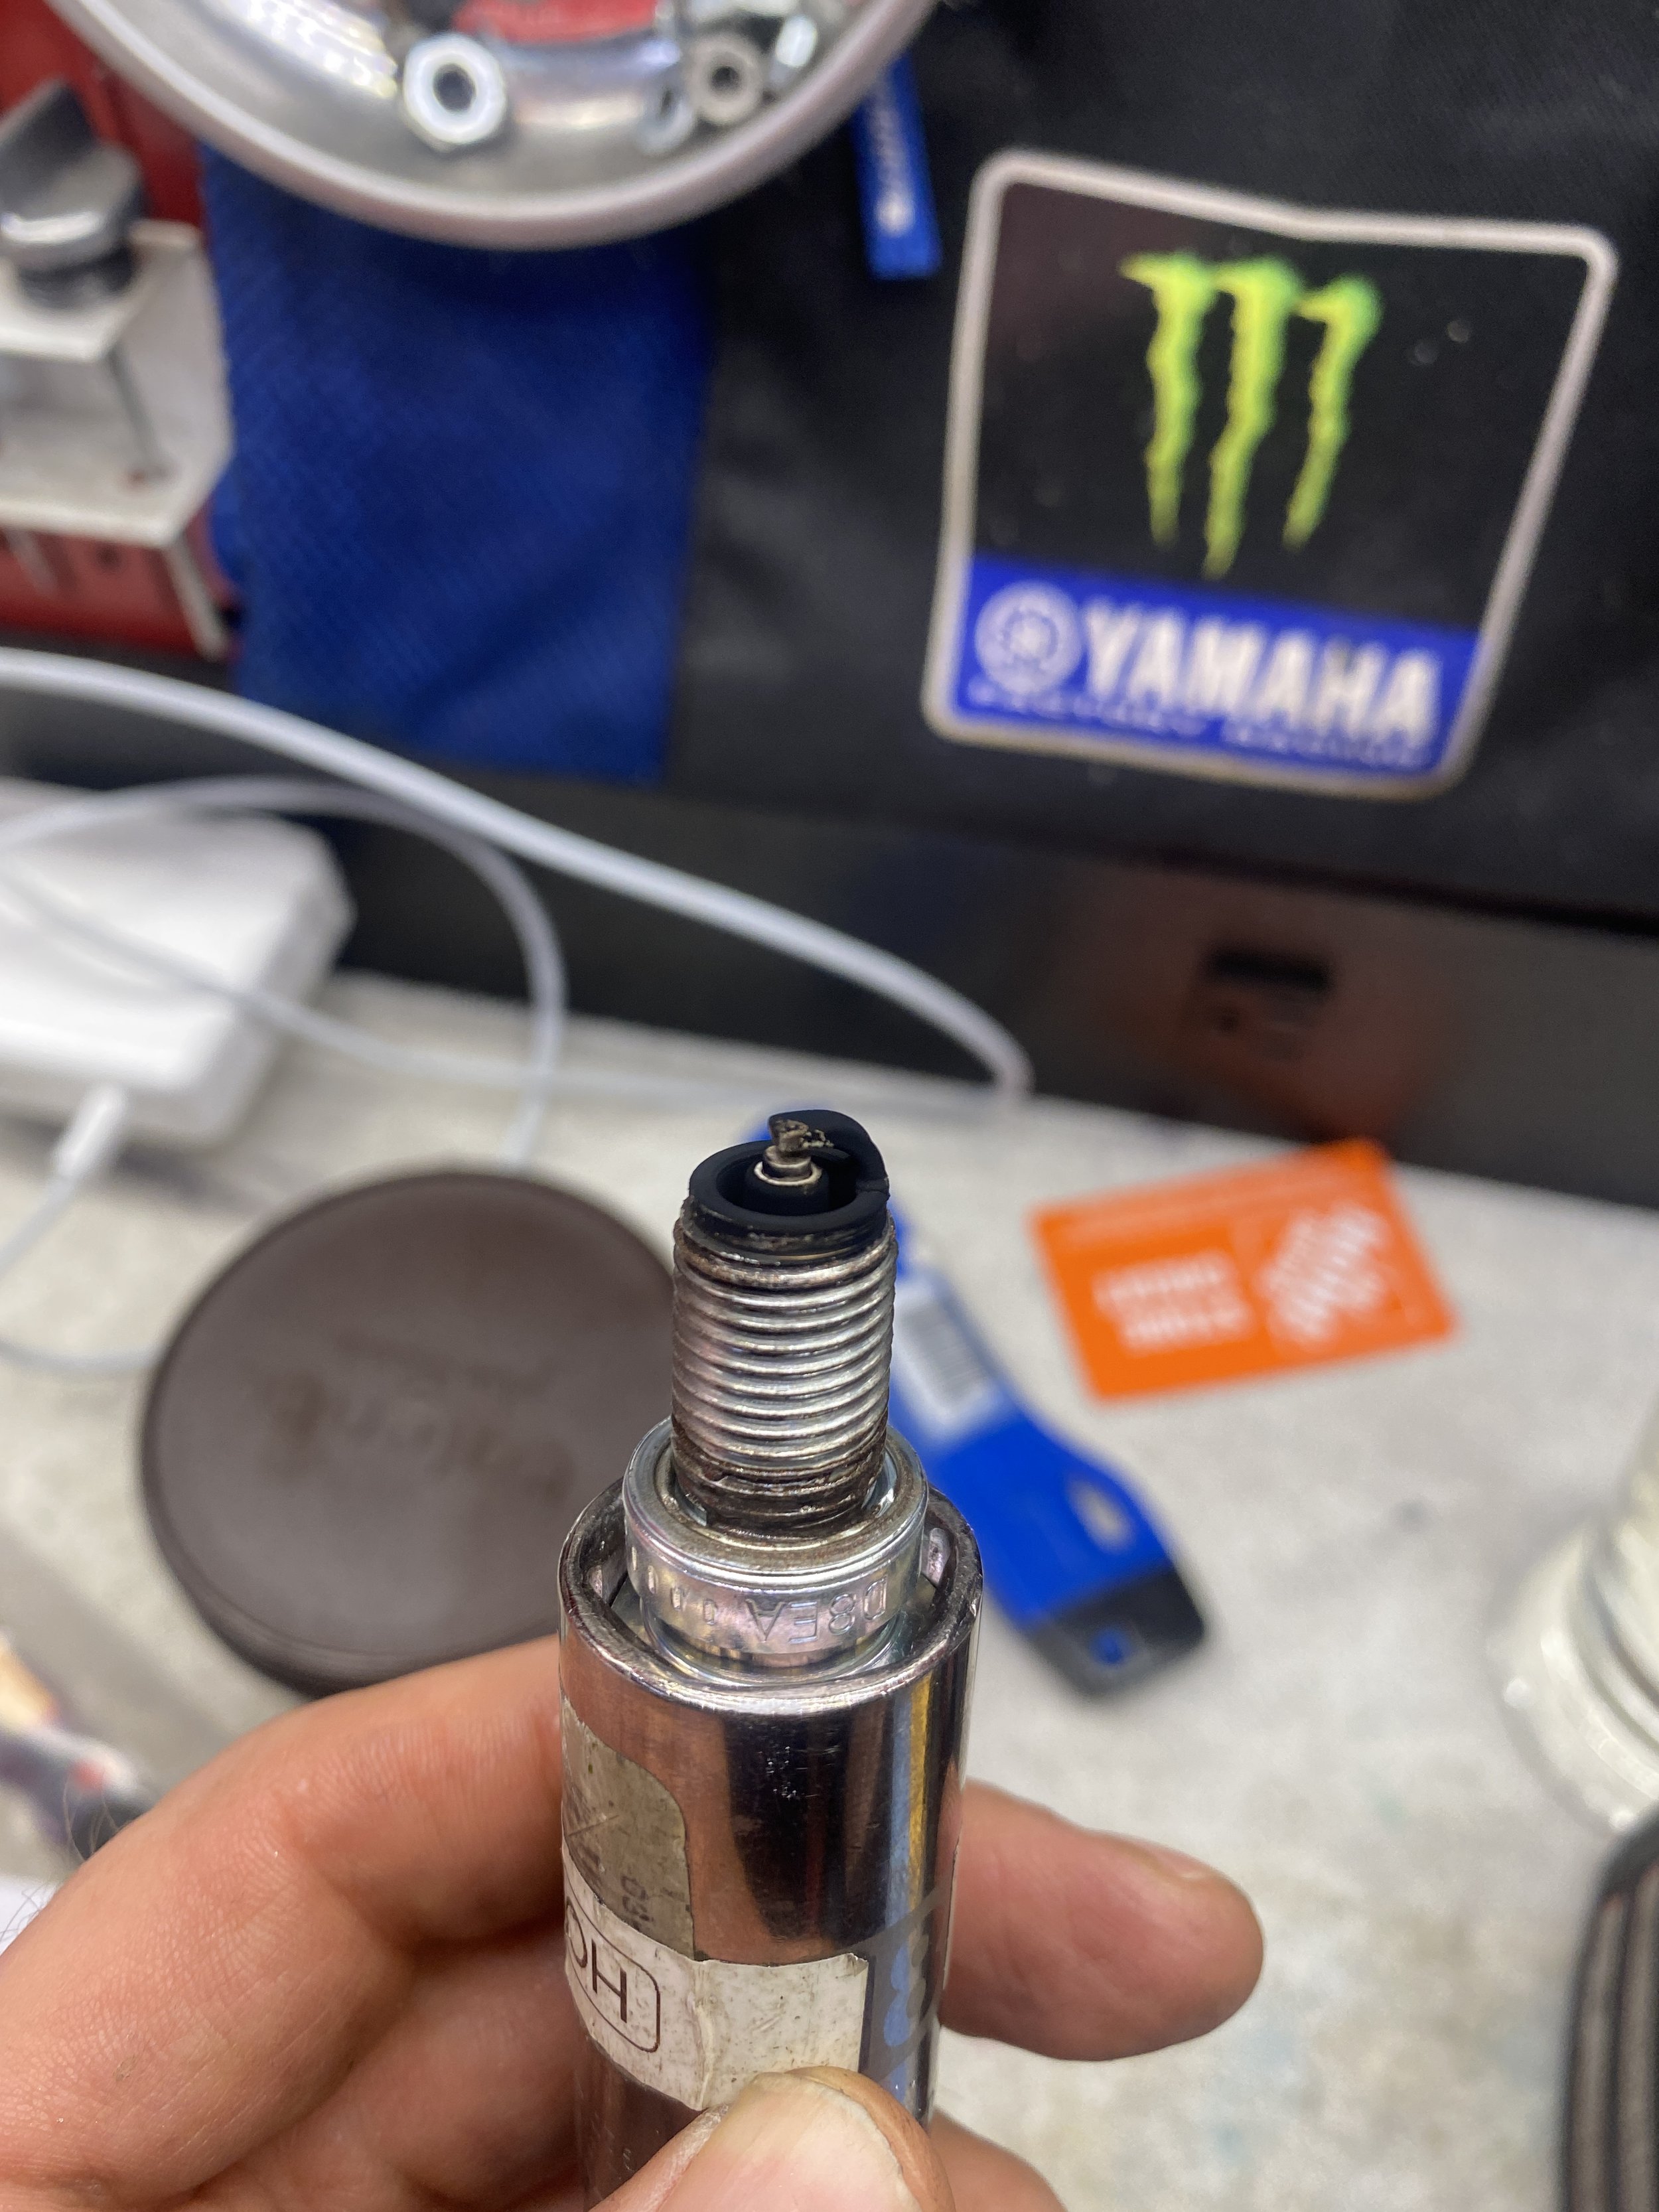
New plug after shortened test ride. Well Sooty...(said Sweep)
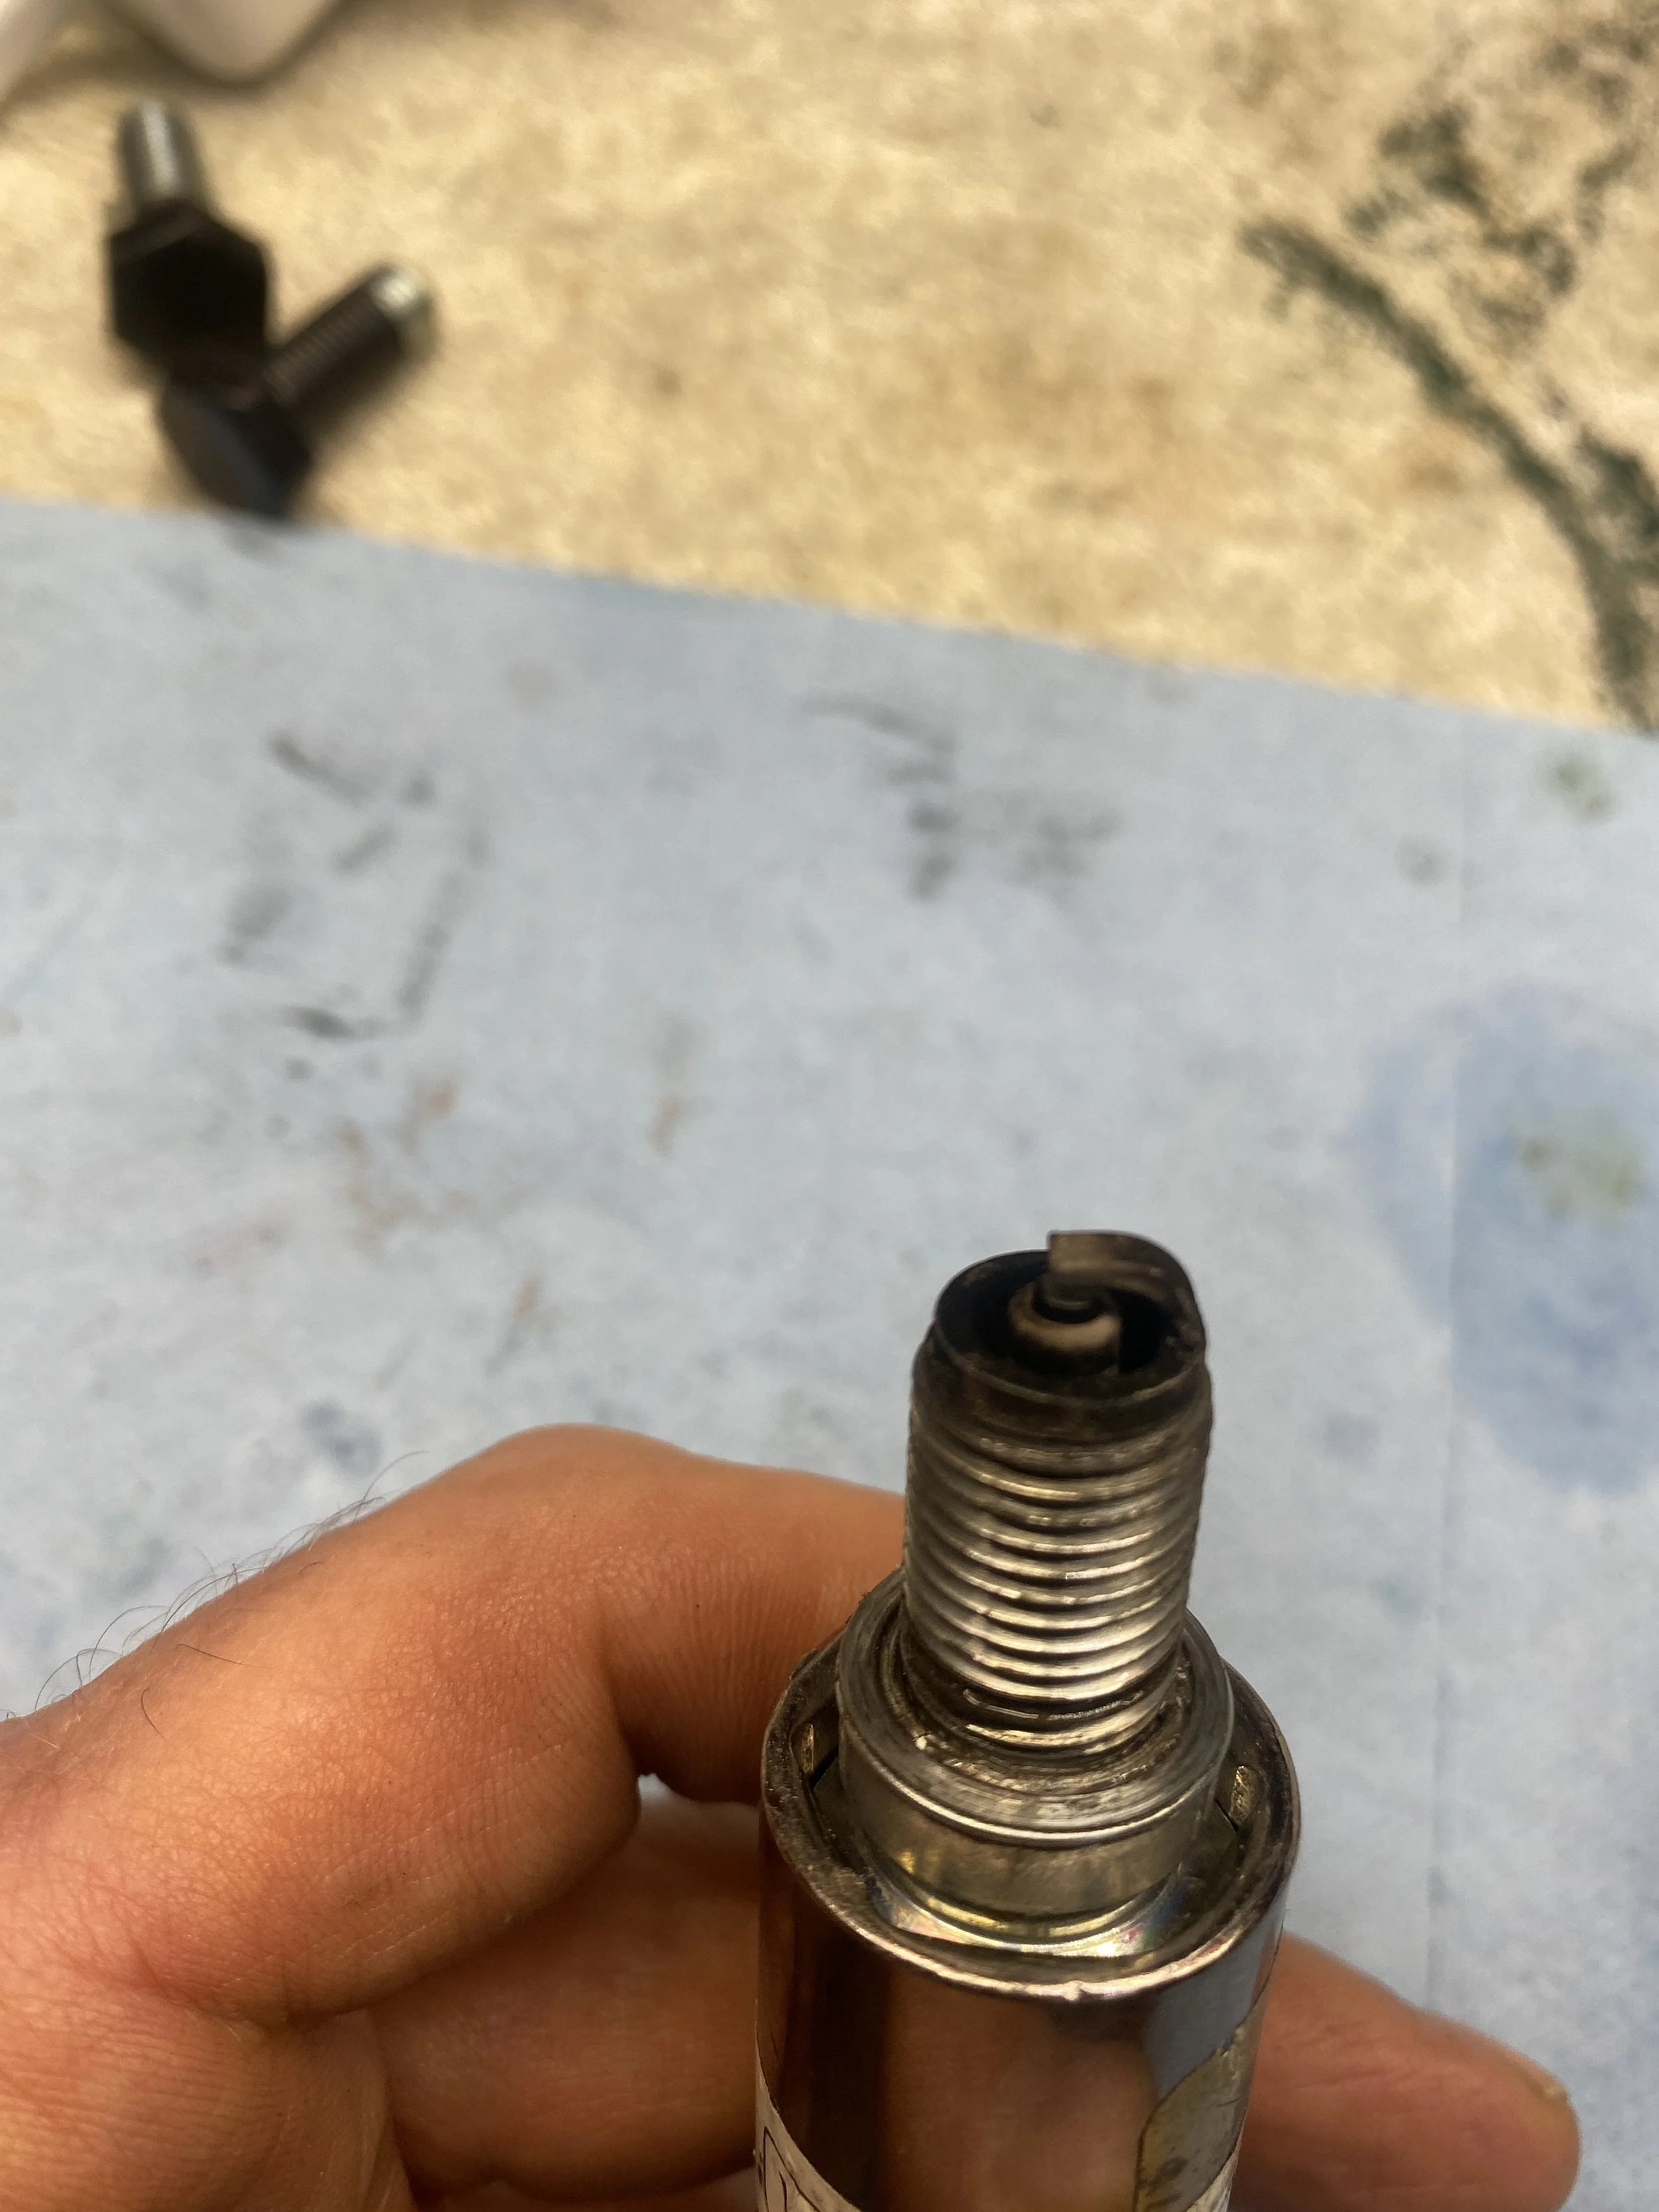
What a plug looks like after yanking the airfilter and turning the pilot screw 1 turn inwards. (Now at 2 out). Looking better. But stuttering still
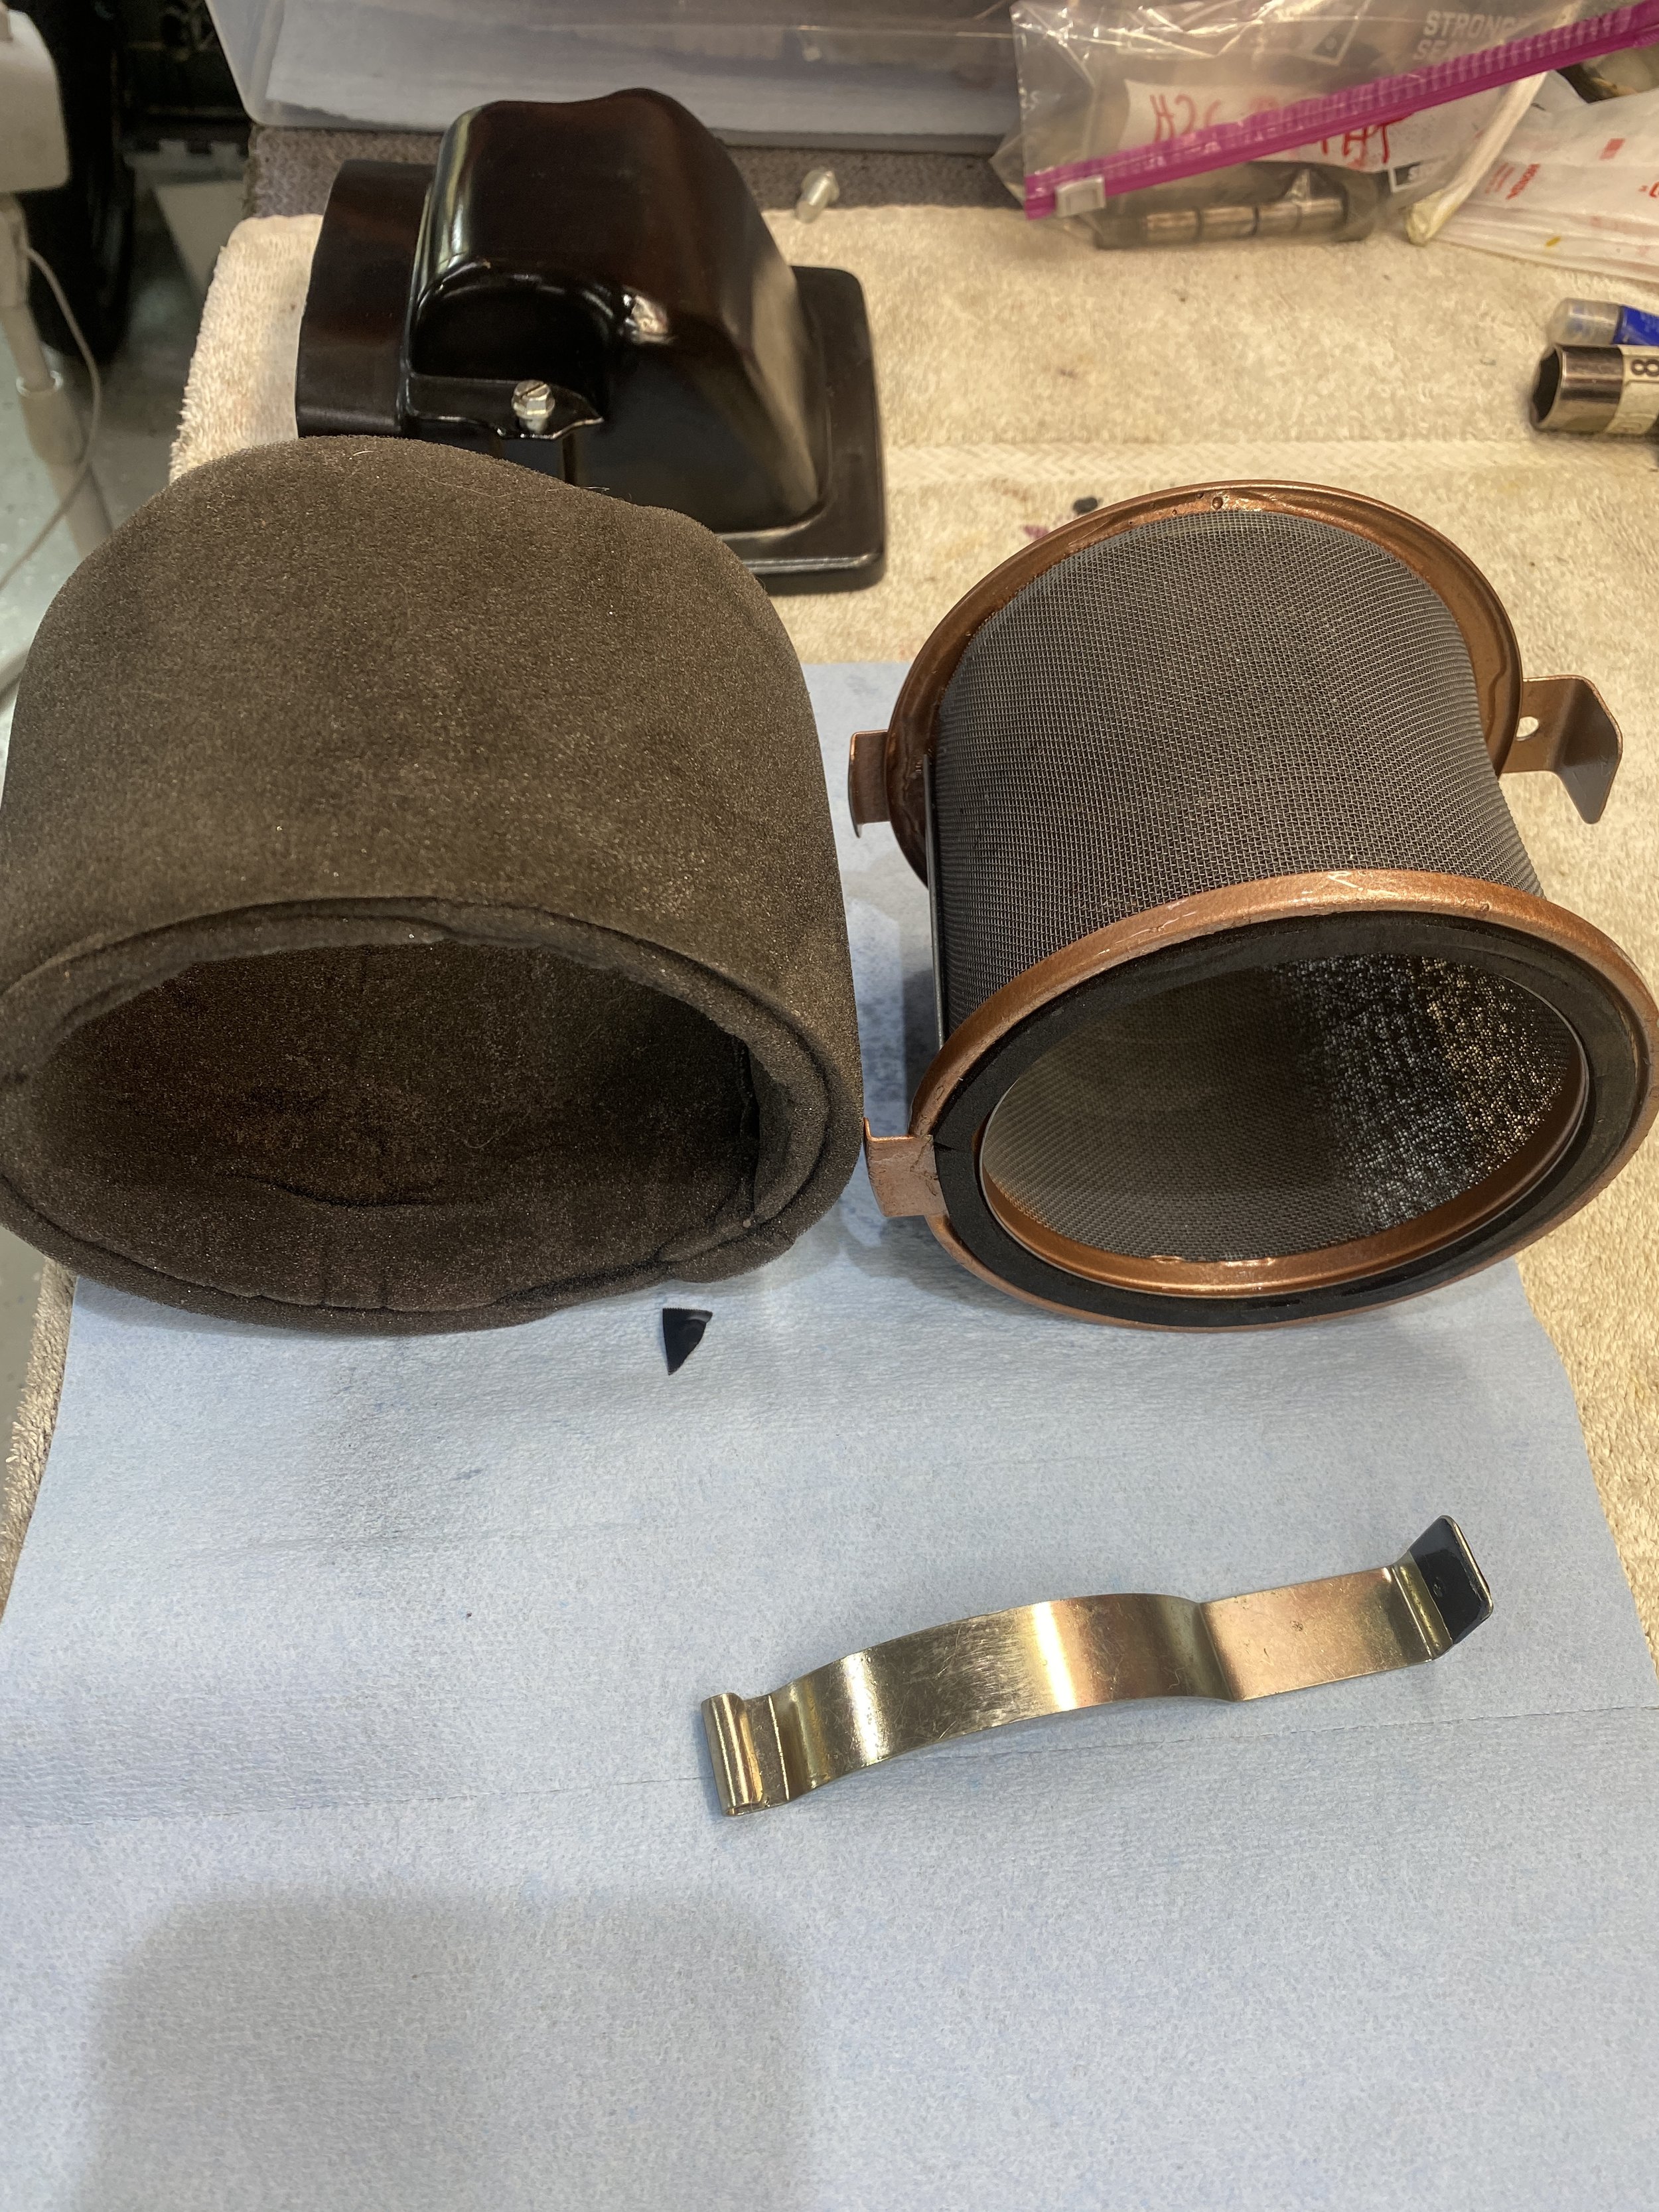
The OEM airfilter and 'flame trap' Great name for a band. Paul Jenning's great book tells me it should be plated zinc yellow.
Filter's home.
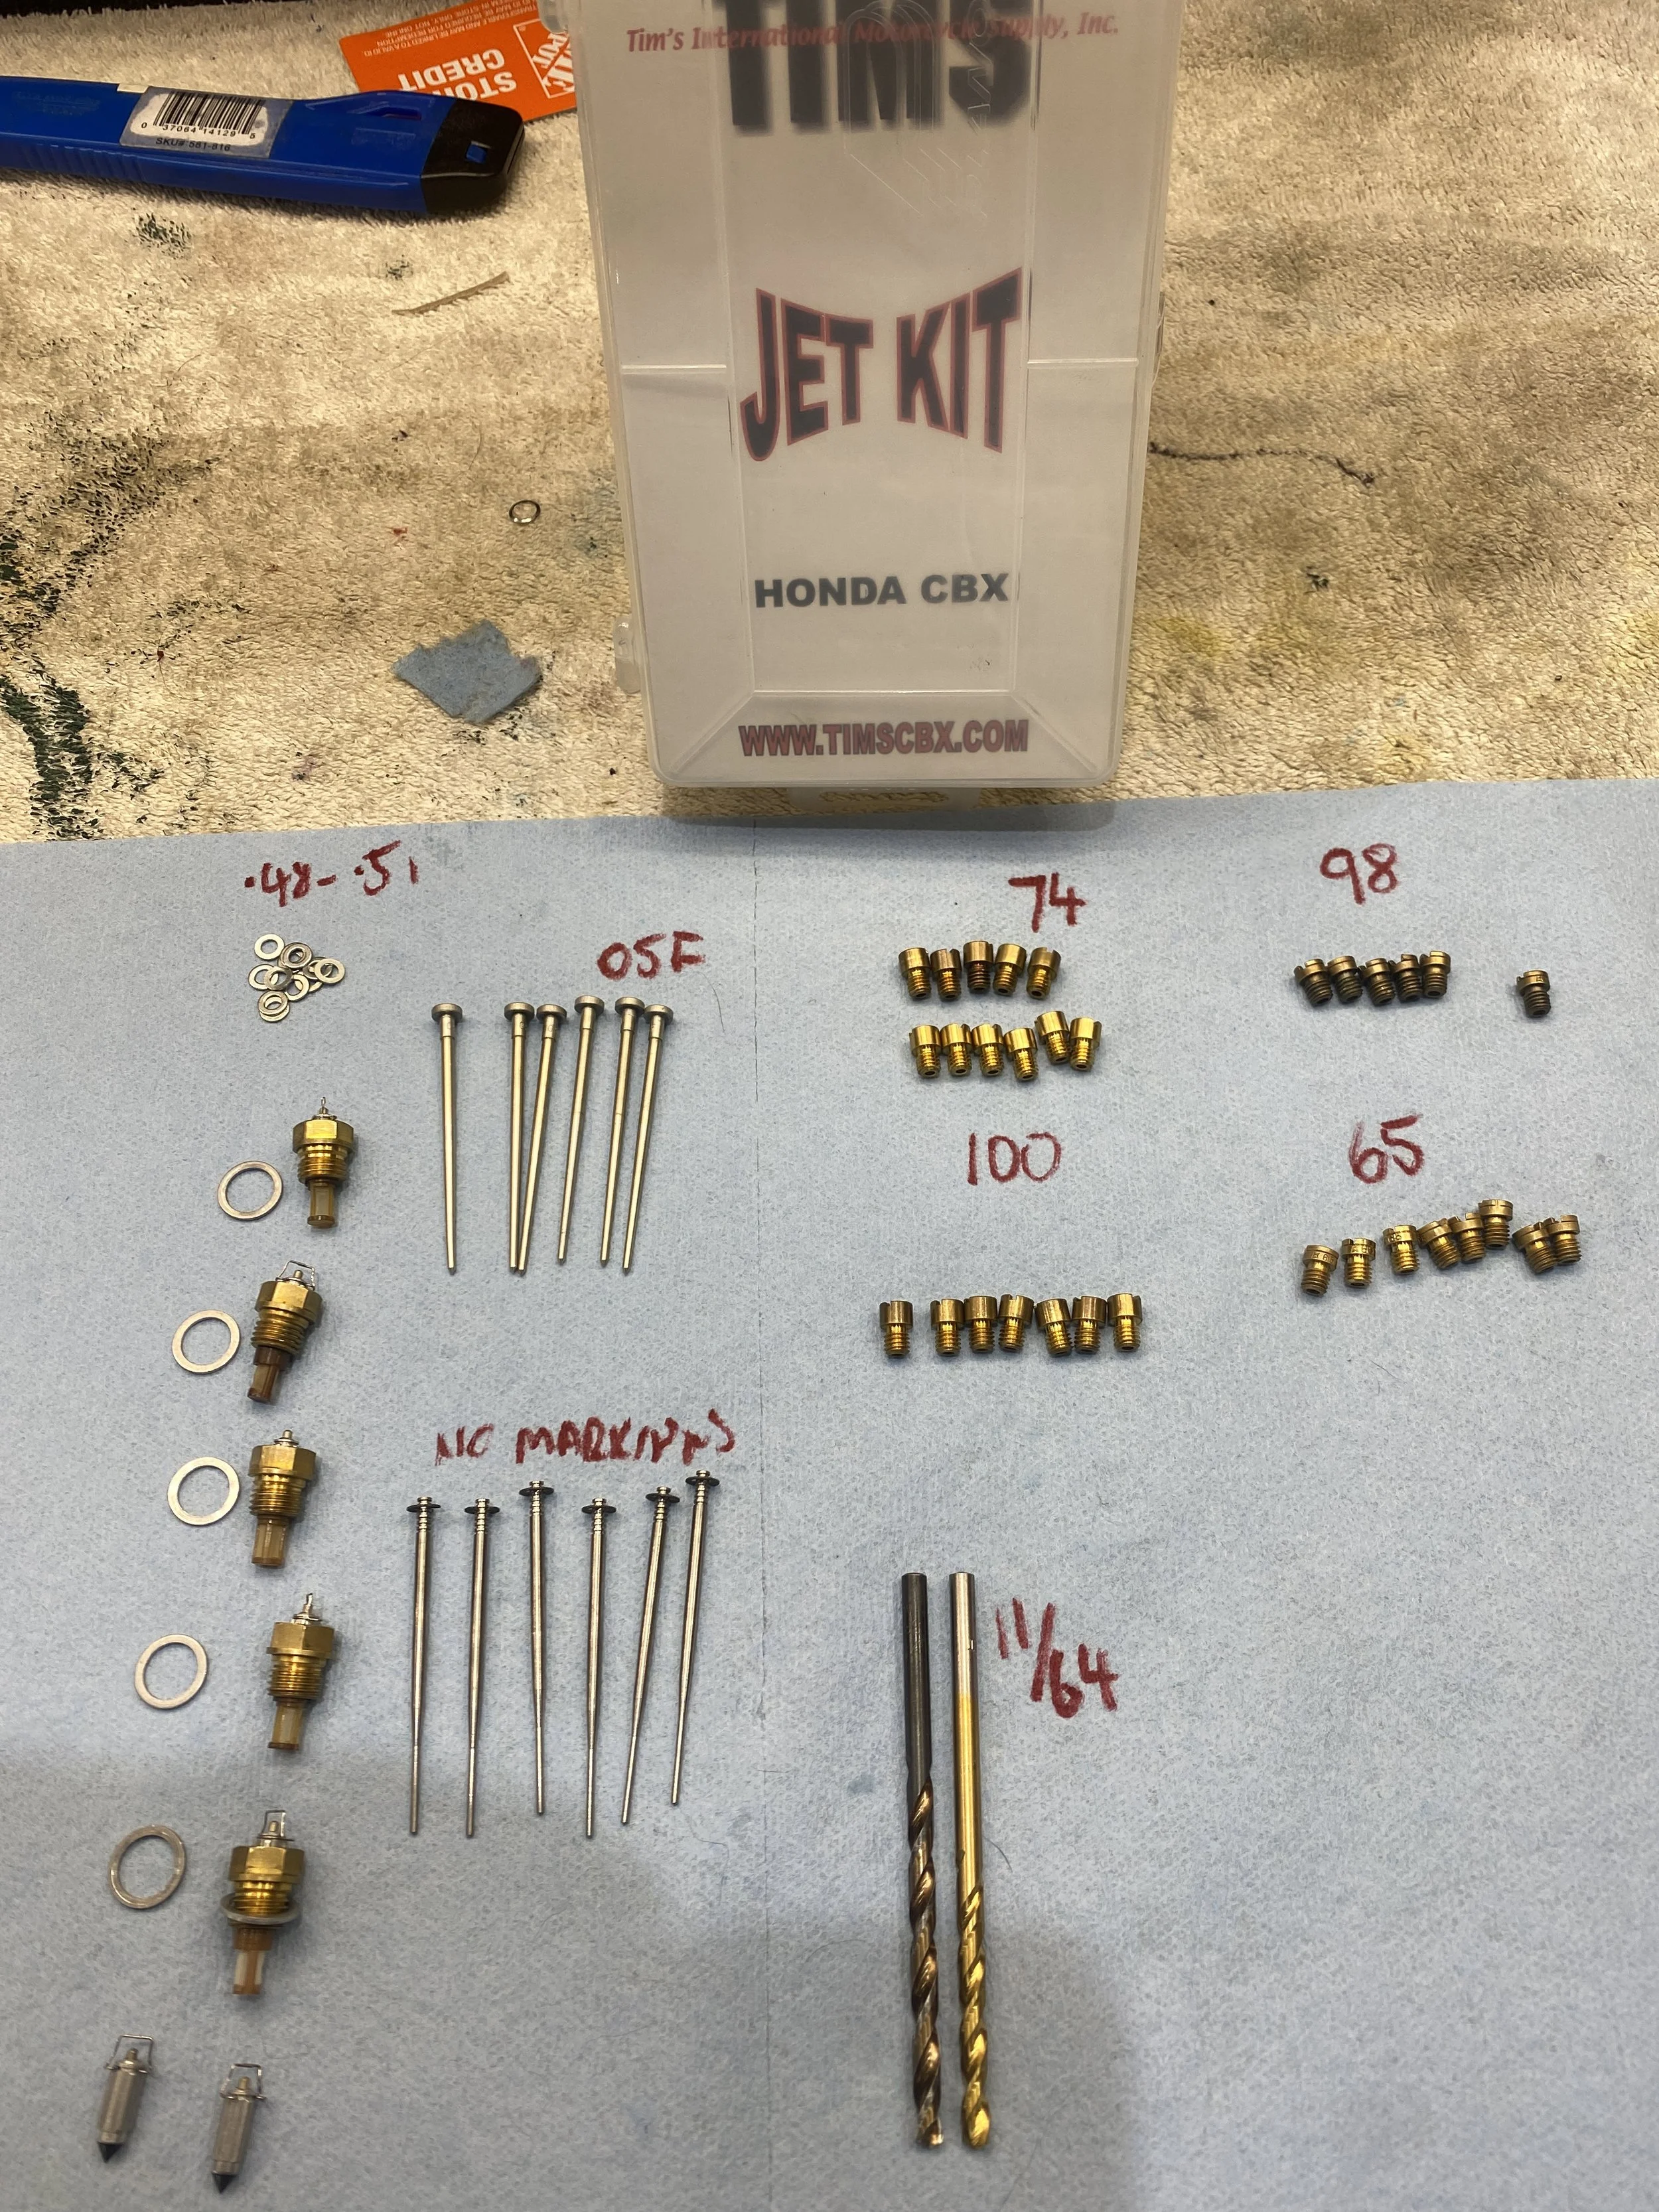
It's amazing how much detective work goes on with buying a used machine. Everytime I come upon a puzzle like this one I think never again, and then with the help of people like you reading this, we solve it and it doesn't seem so bad. Anyway: here's an update...what was in the Jet Kit. Looks like PO removed the Factory Needles (identified as non-adjustable/no circlips) because they are here. According to Dave McMunn Standard jetting for '79 CBX is #65 primary main and #98 secondary main. They are the only genuine Keihin jets in picture.
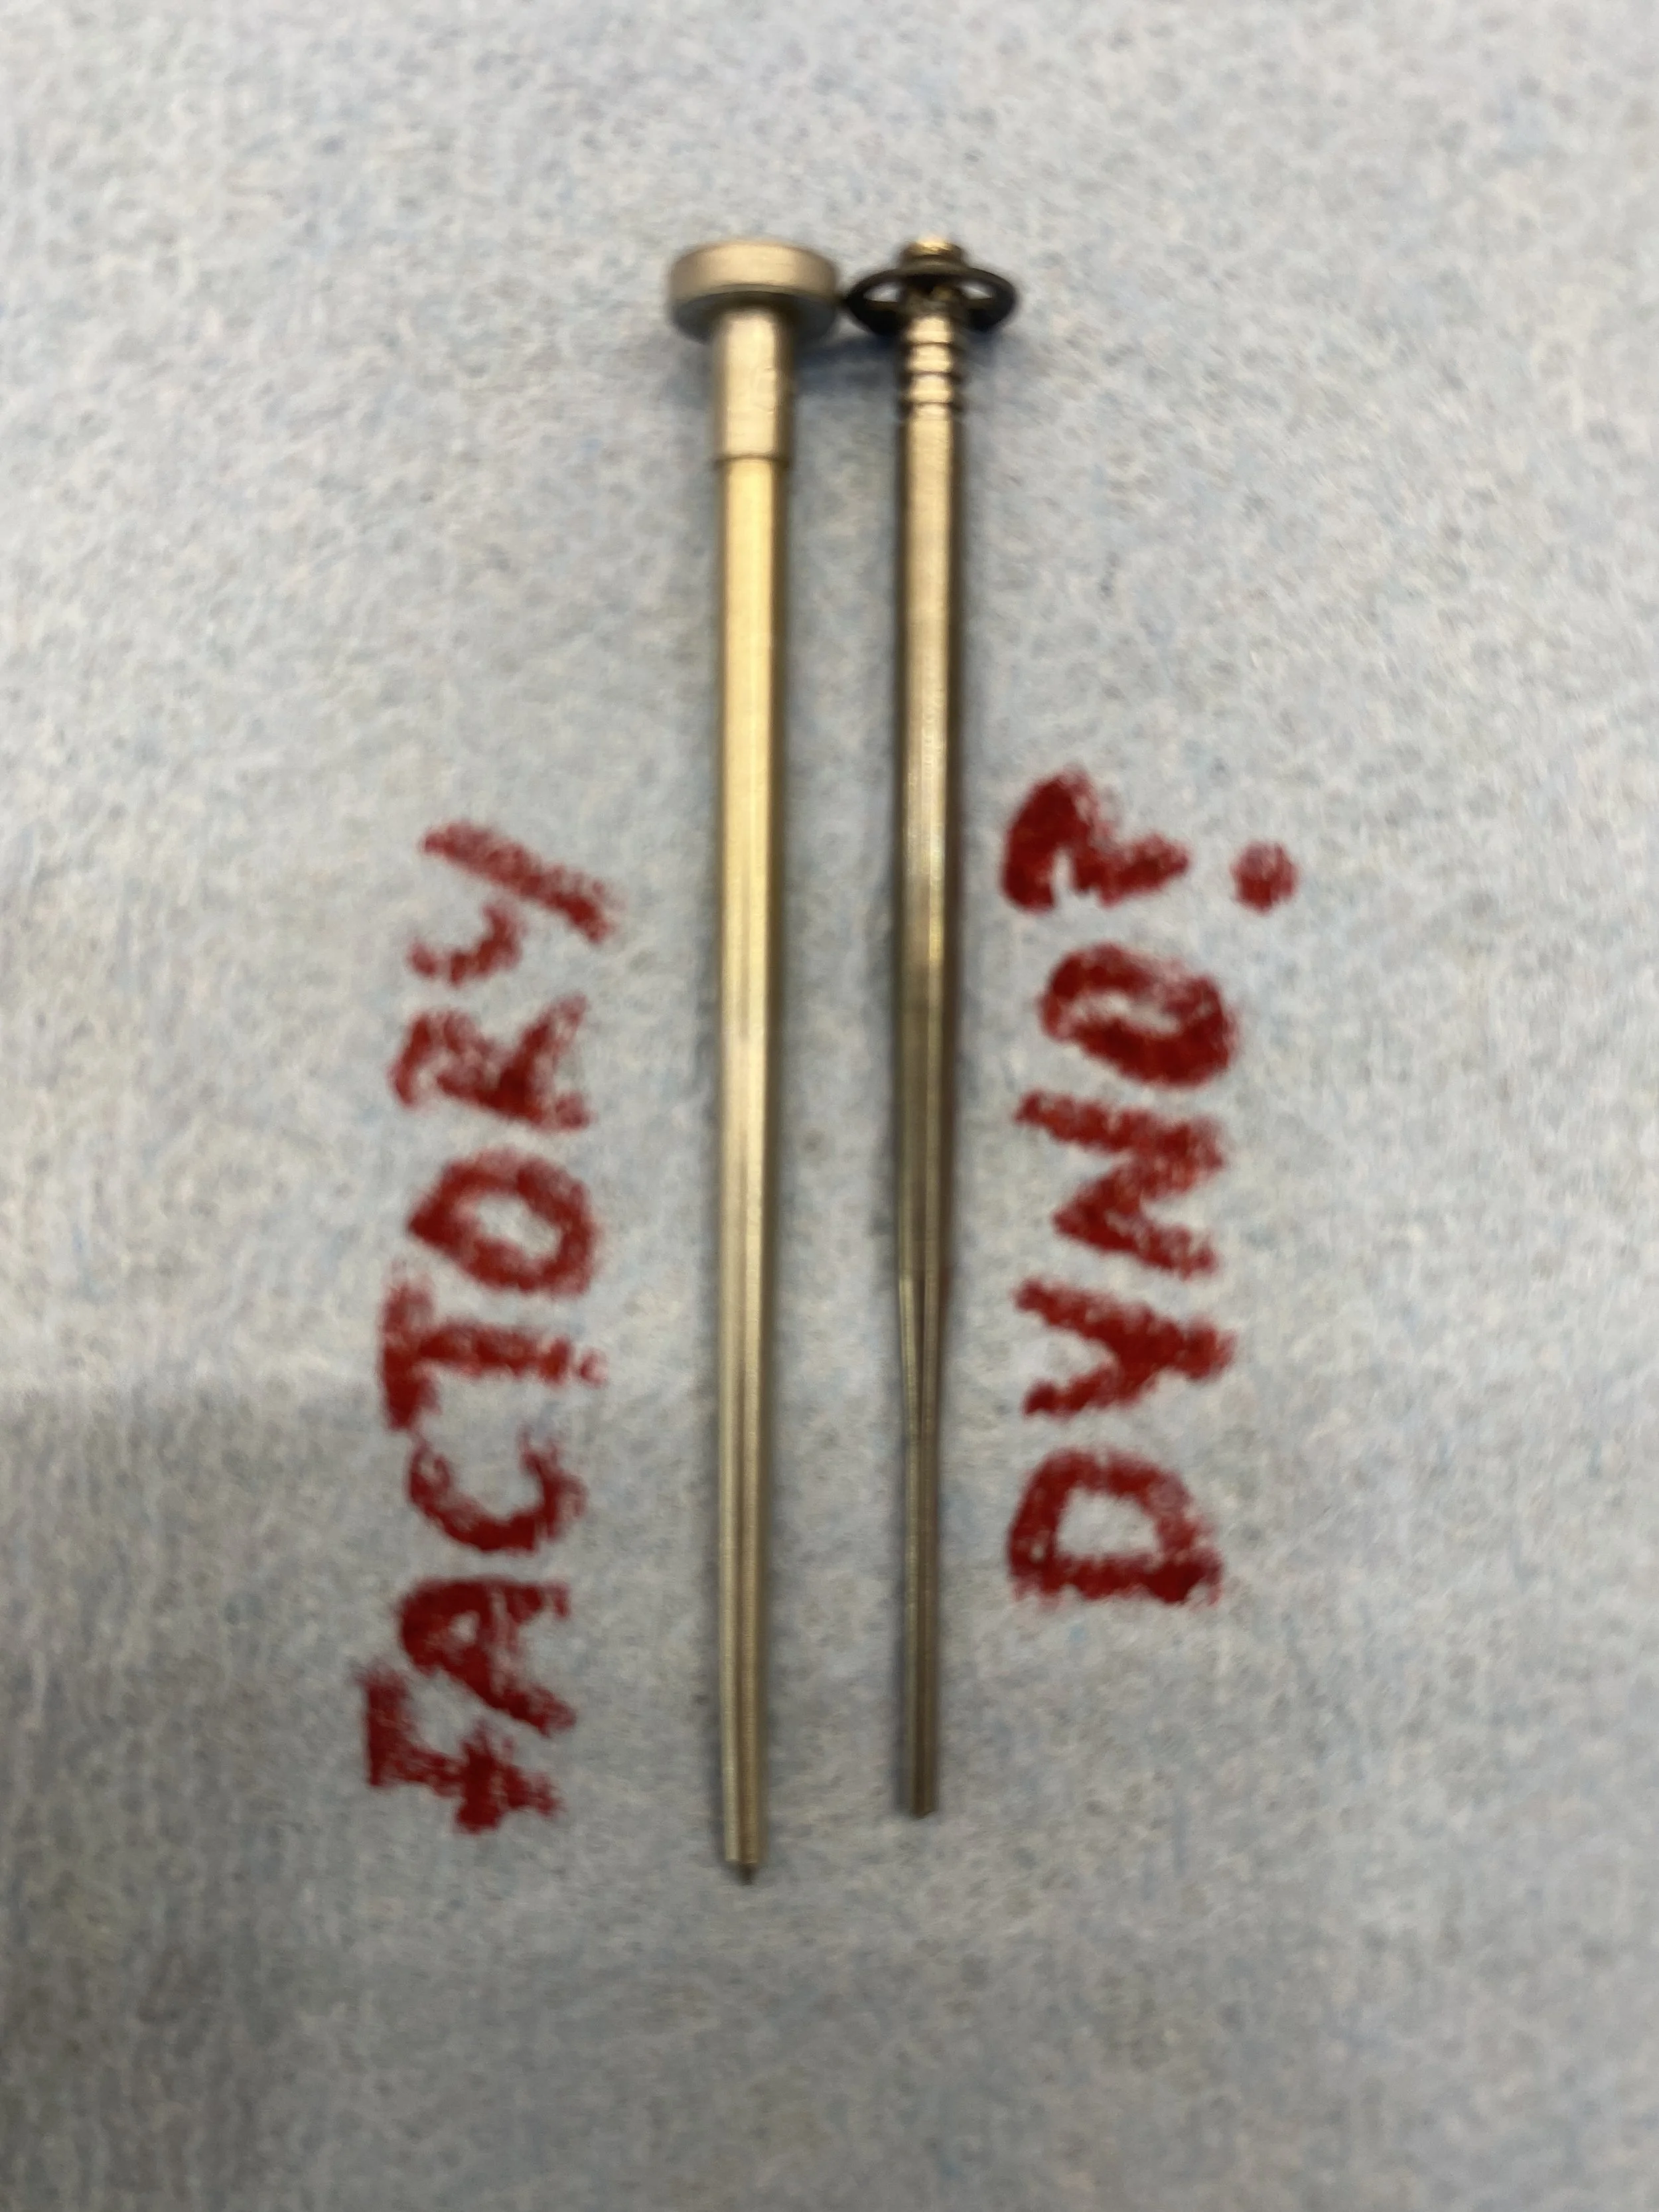
Needle to the right, identified by Jan Ringnalda as probably being a Dynojet needle, was what I found in carb #6. PO said that he had bought some Pod filters and a Dynojet kit but then decided against fitting them. Either he forgot he fitted the kit and sent back the filters OR the previous previous owner fitted them. The fact that the fitted needles give more fuel during a wider throttle makes sense why I couldn’t get the motor to go much past 6,000 rpm with the throttle cracked wide open.
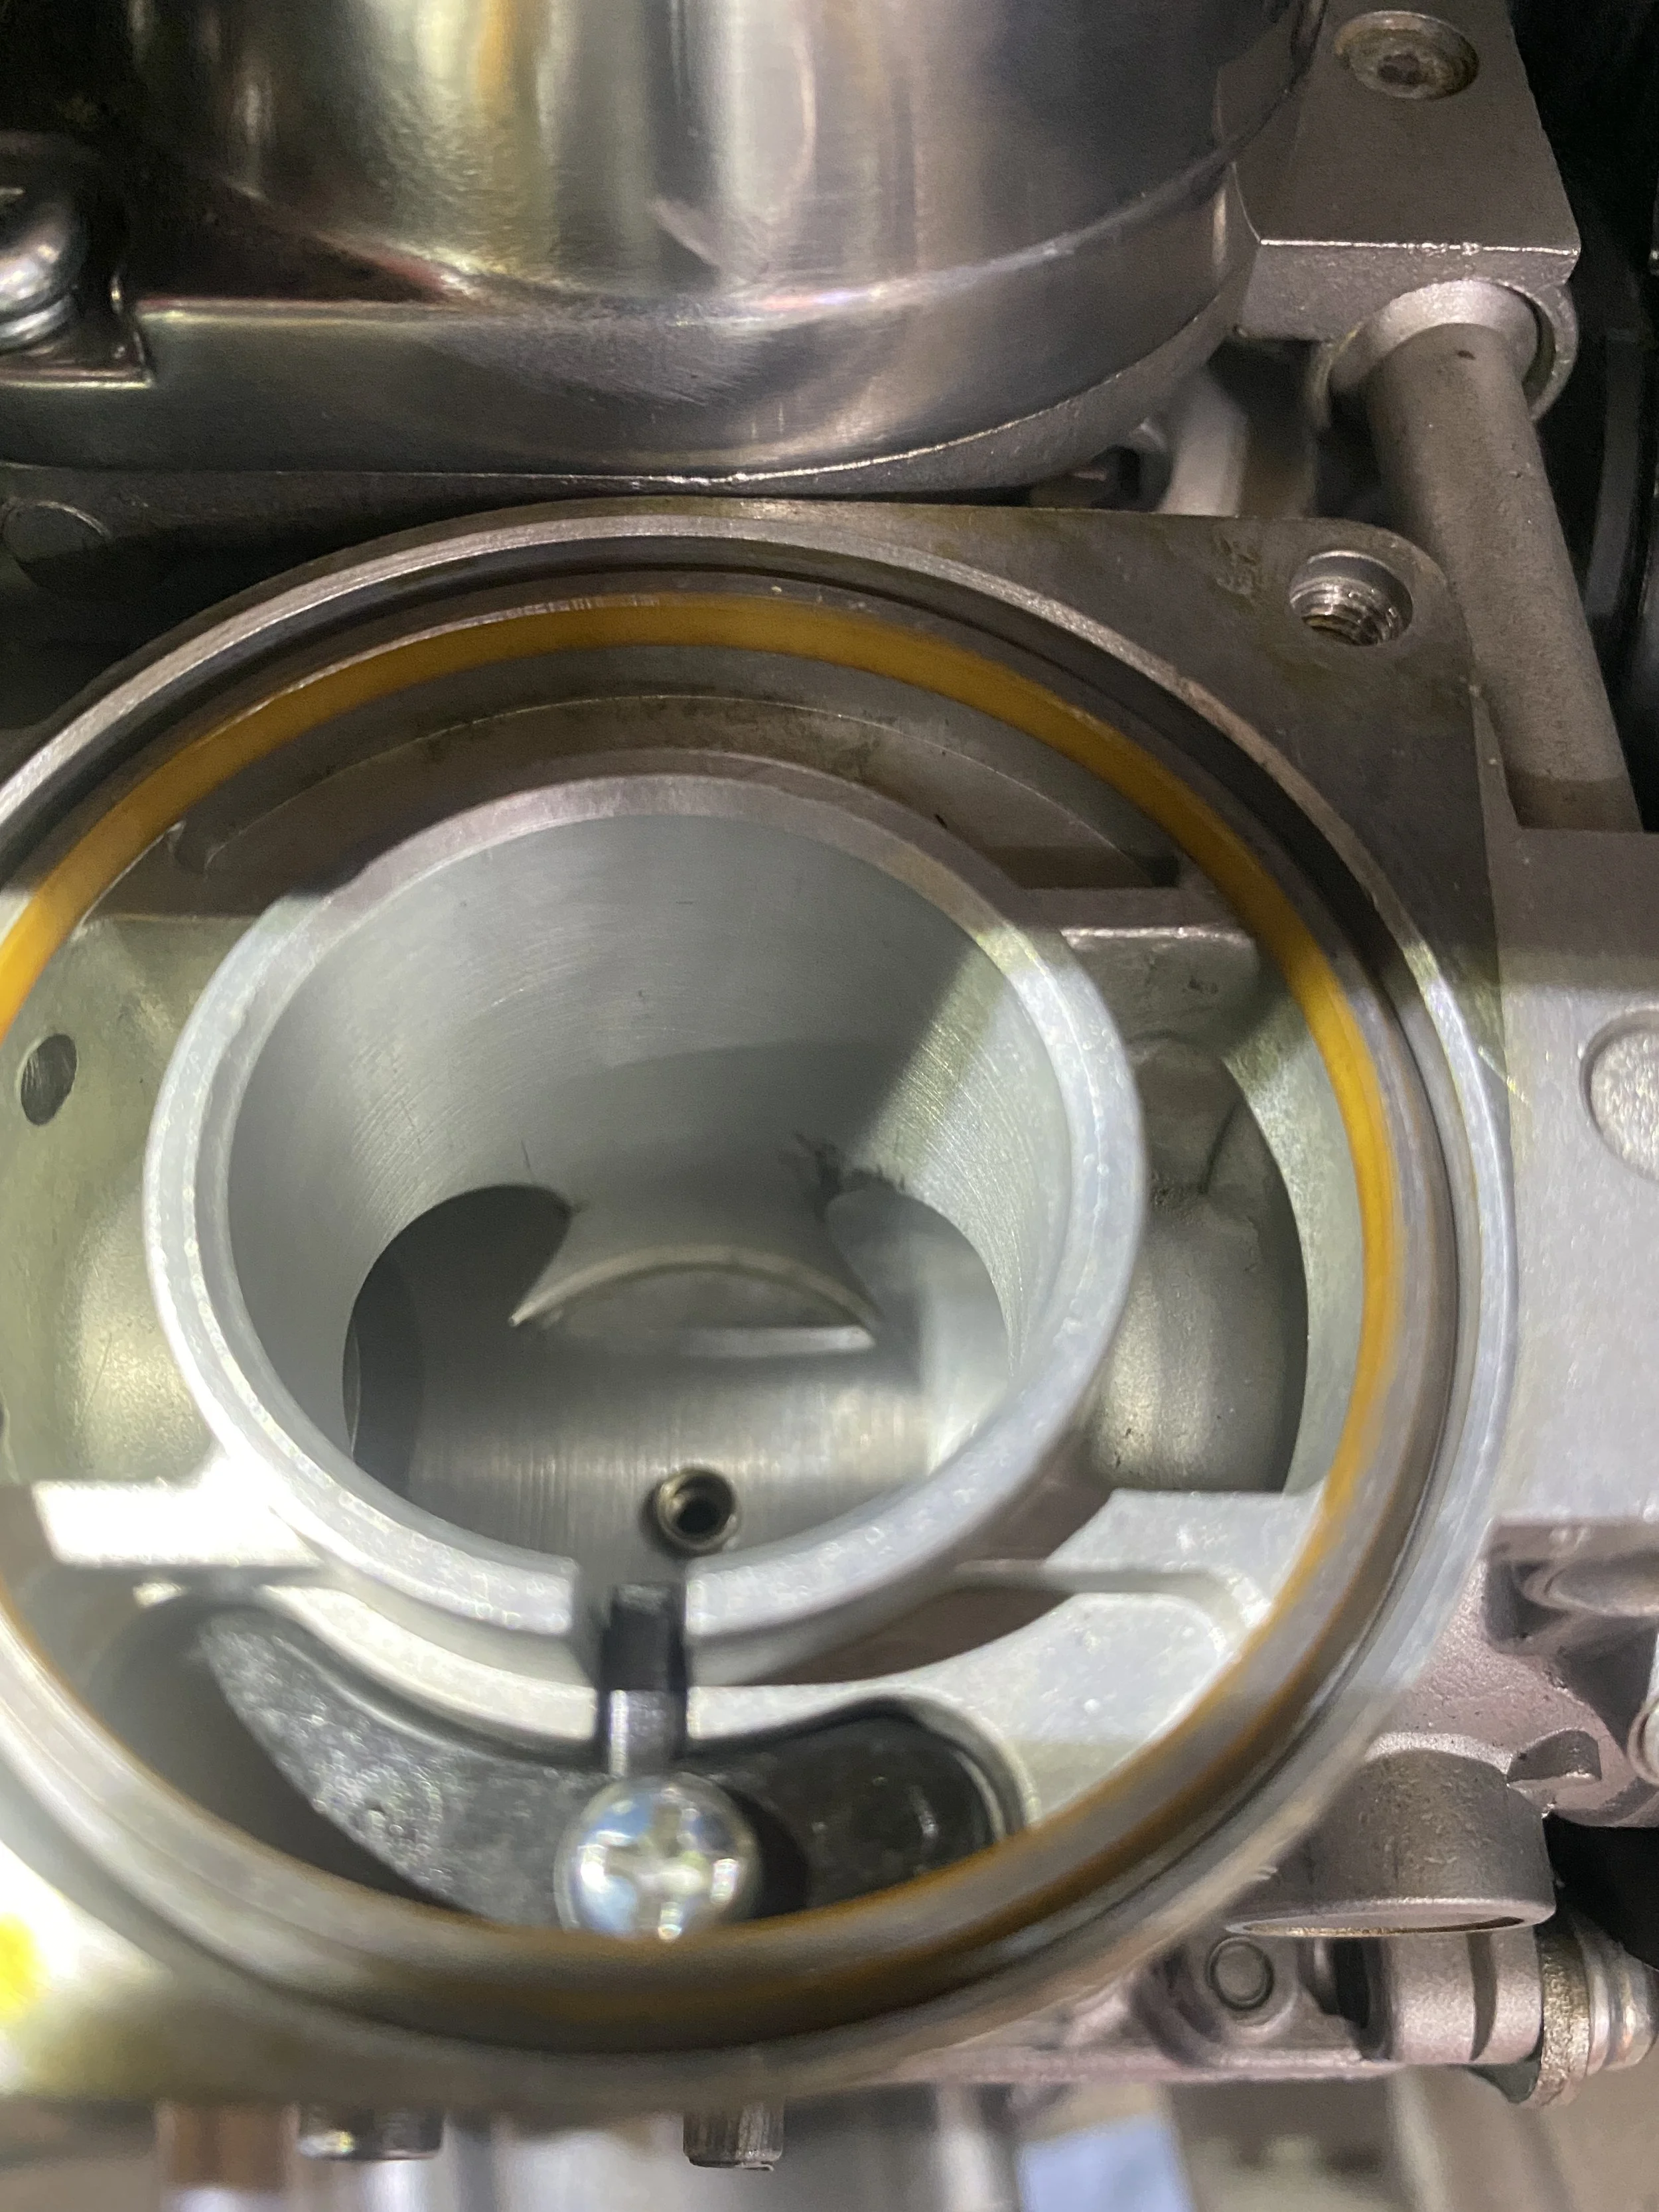
Bores are clean
Happy for my short JIS
It's clear that these carbs got a lot of love and attention at some point in their lives. Clean.
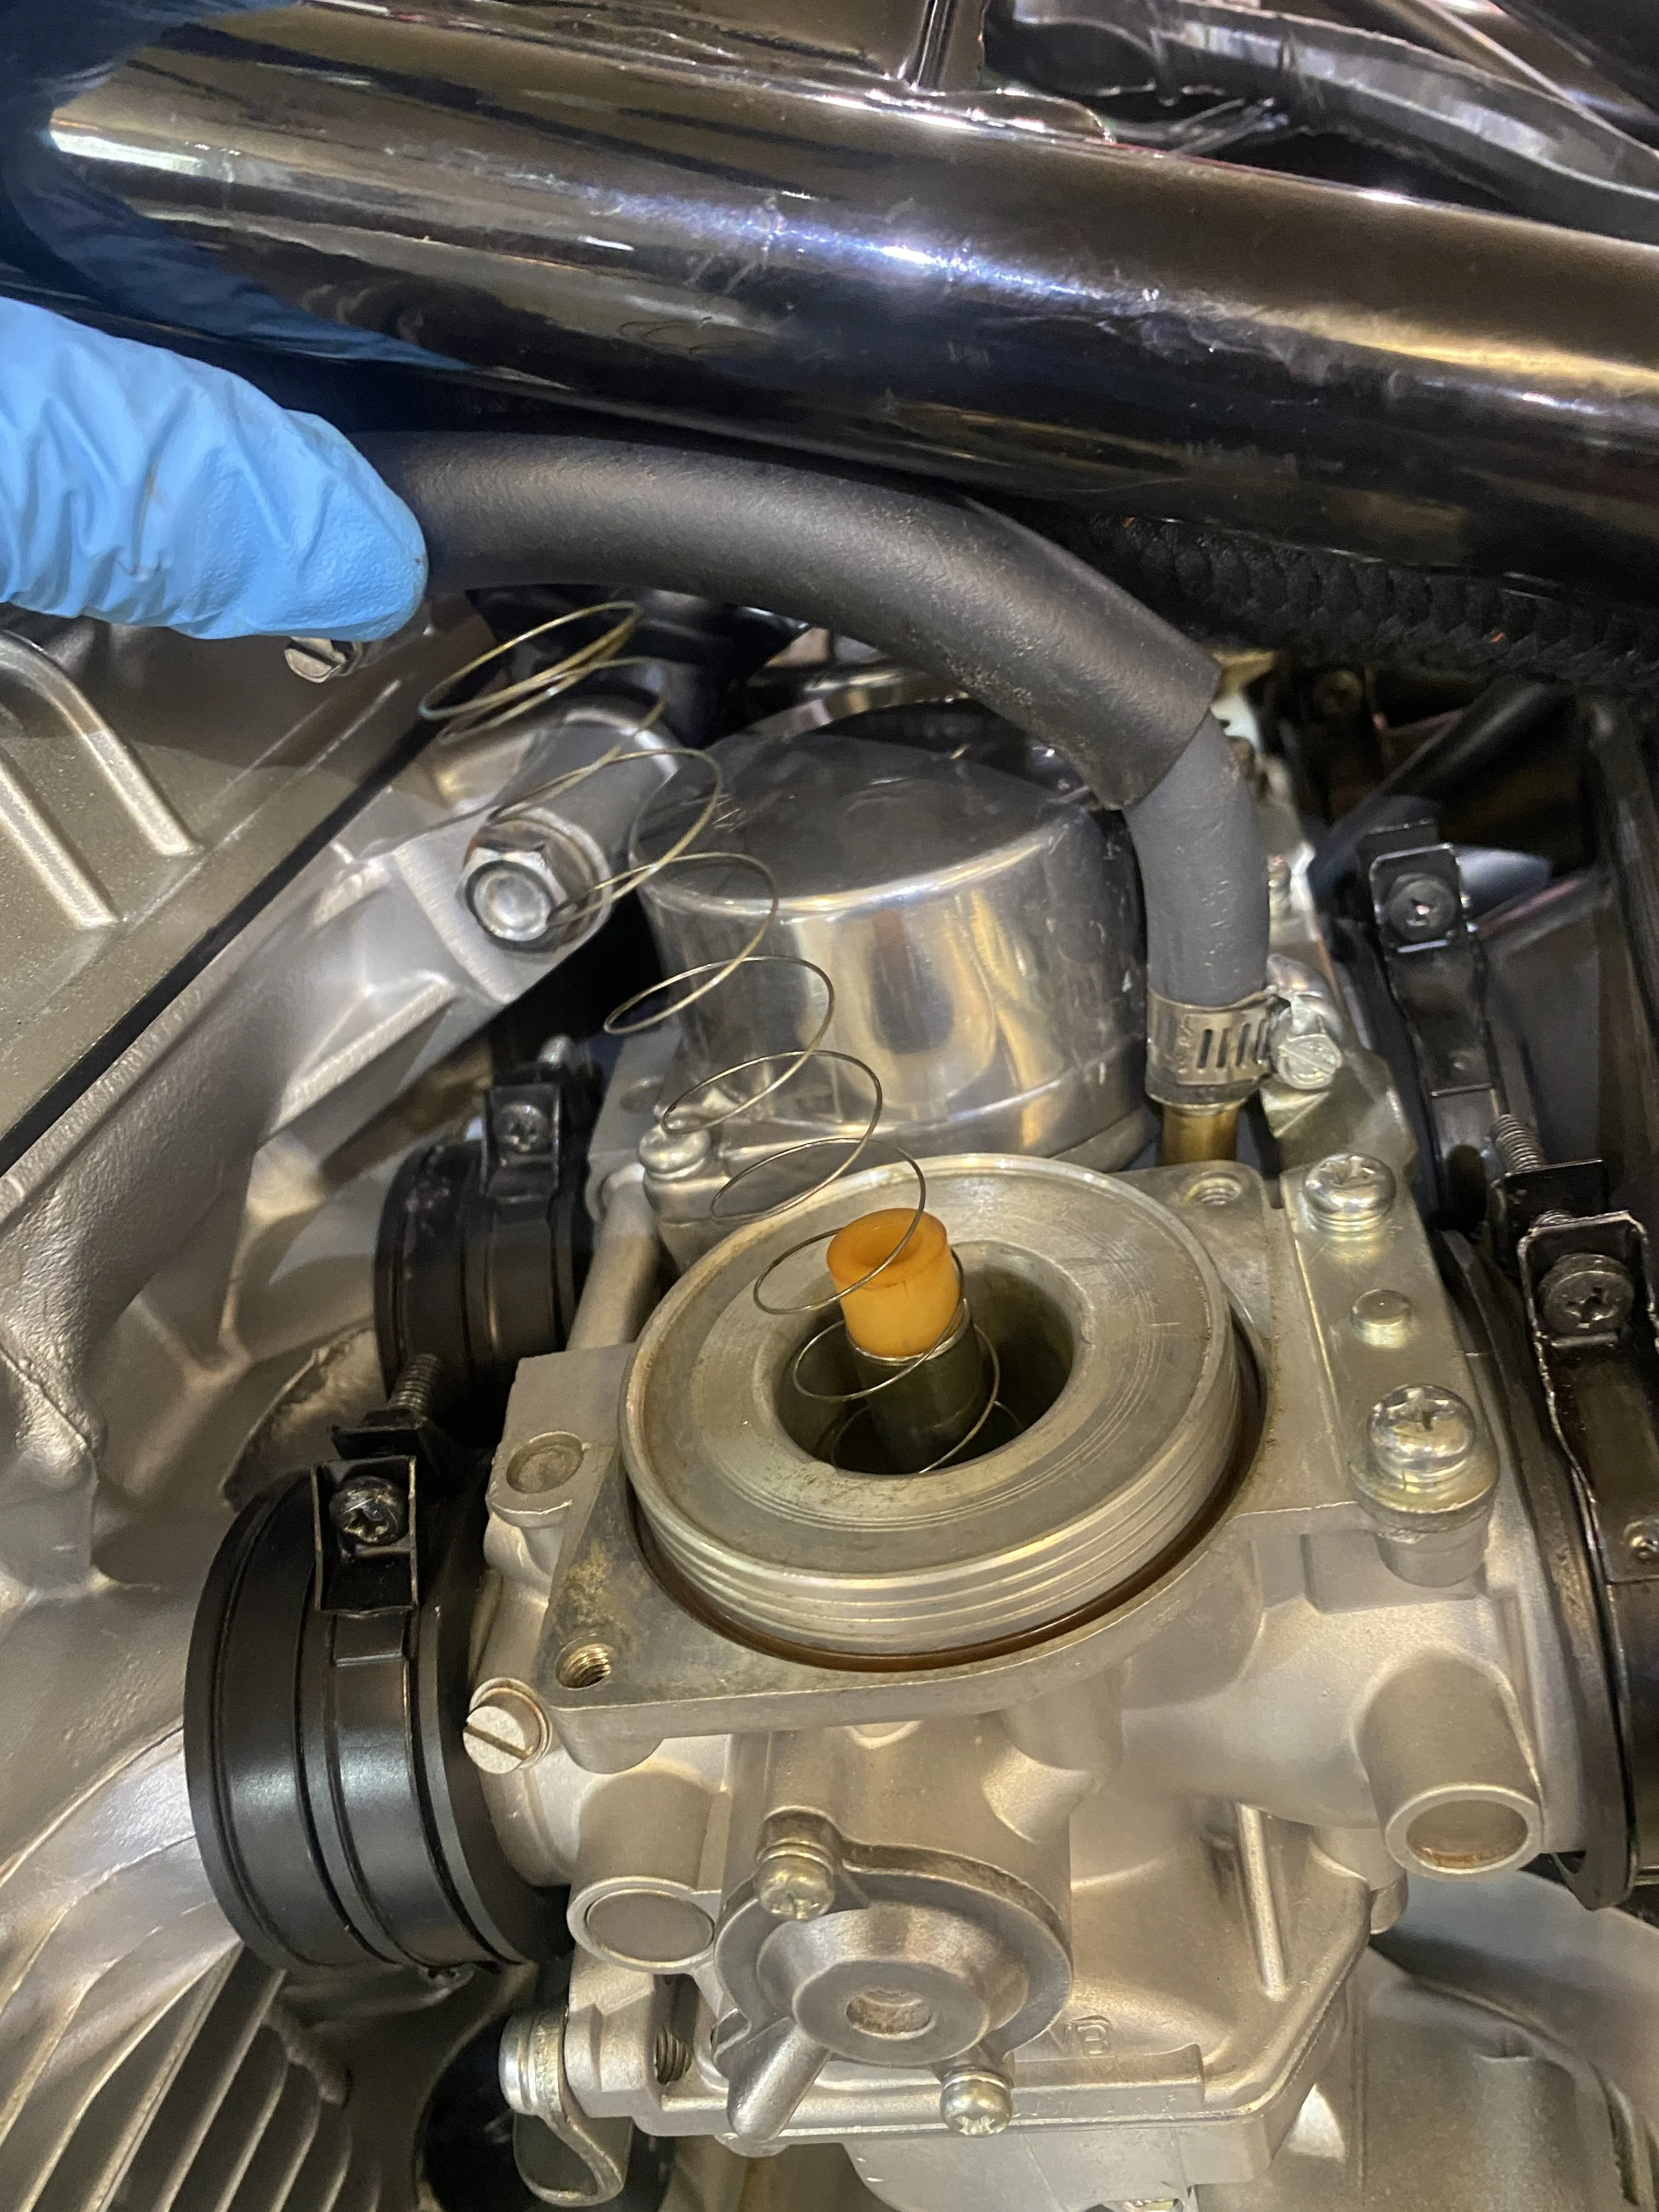
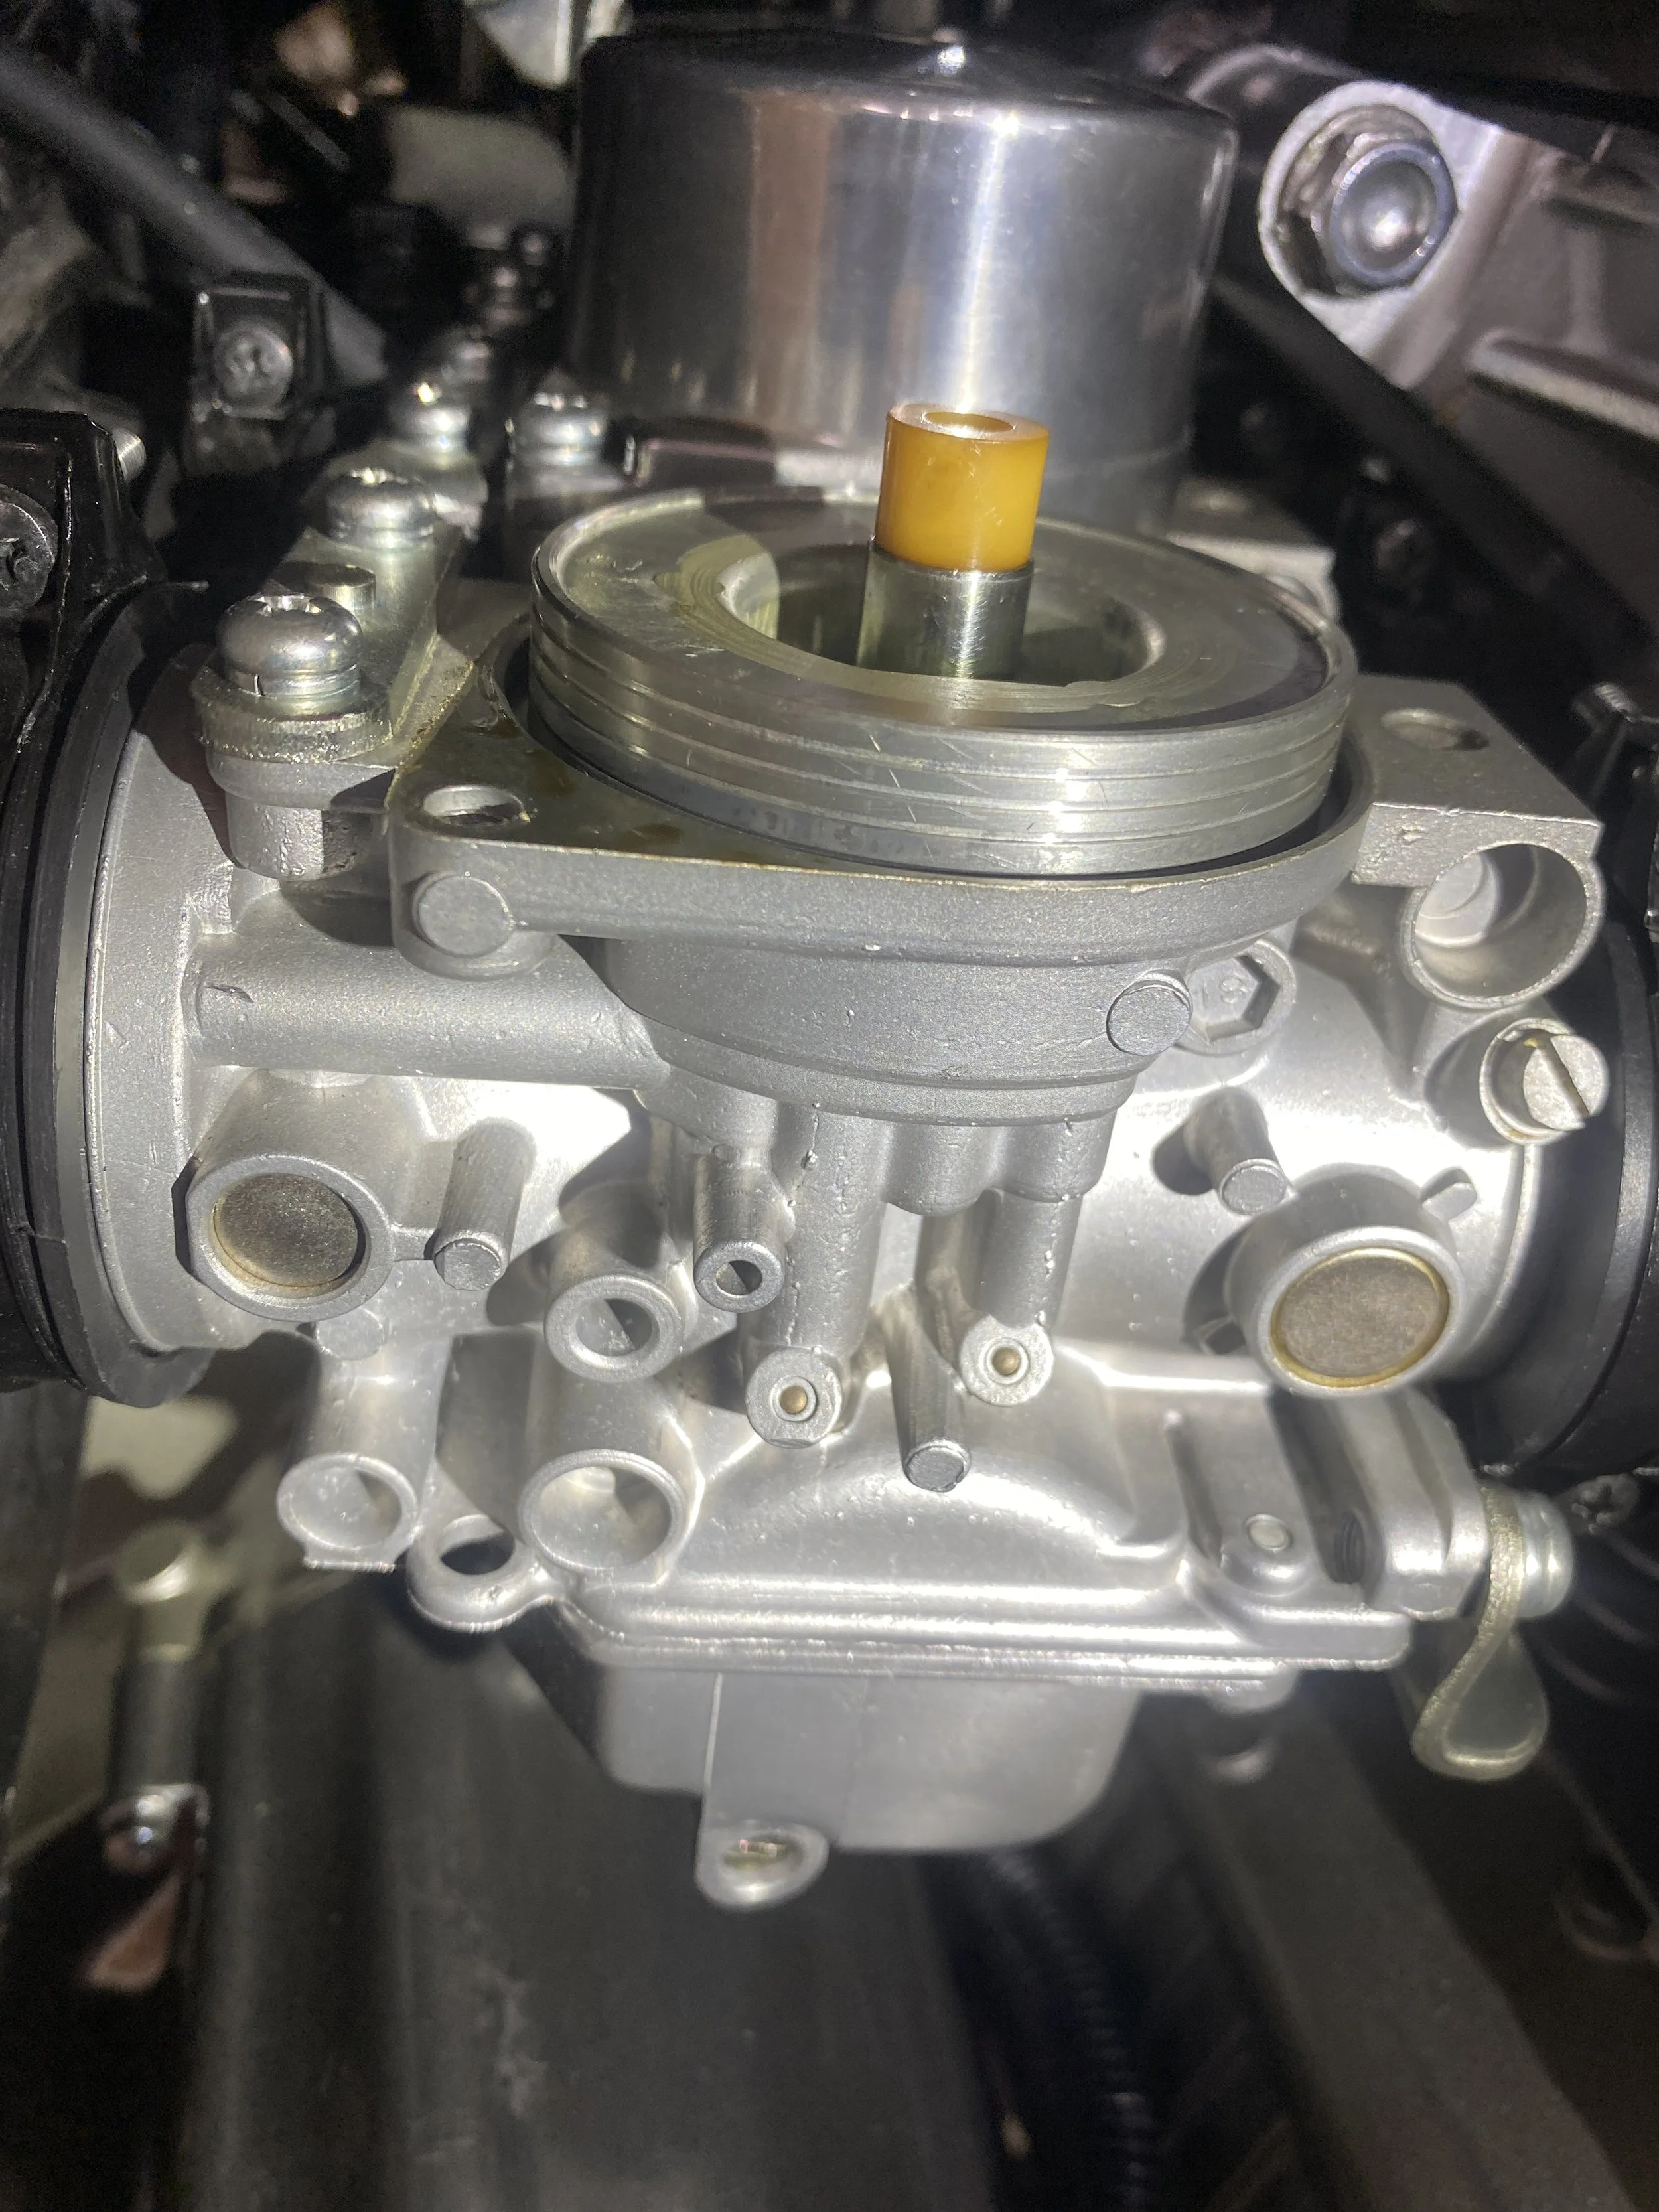
First thing you see with the top off.

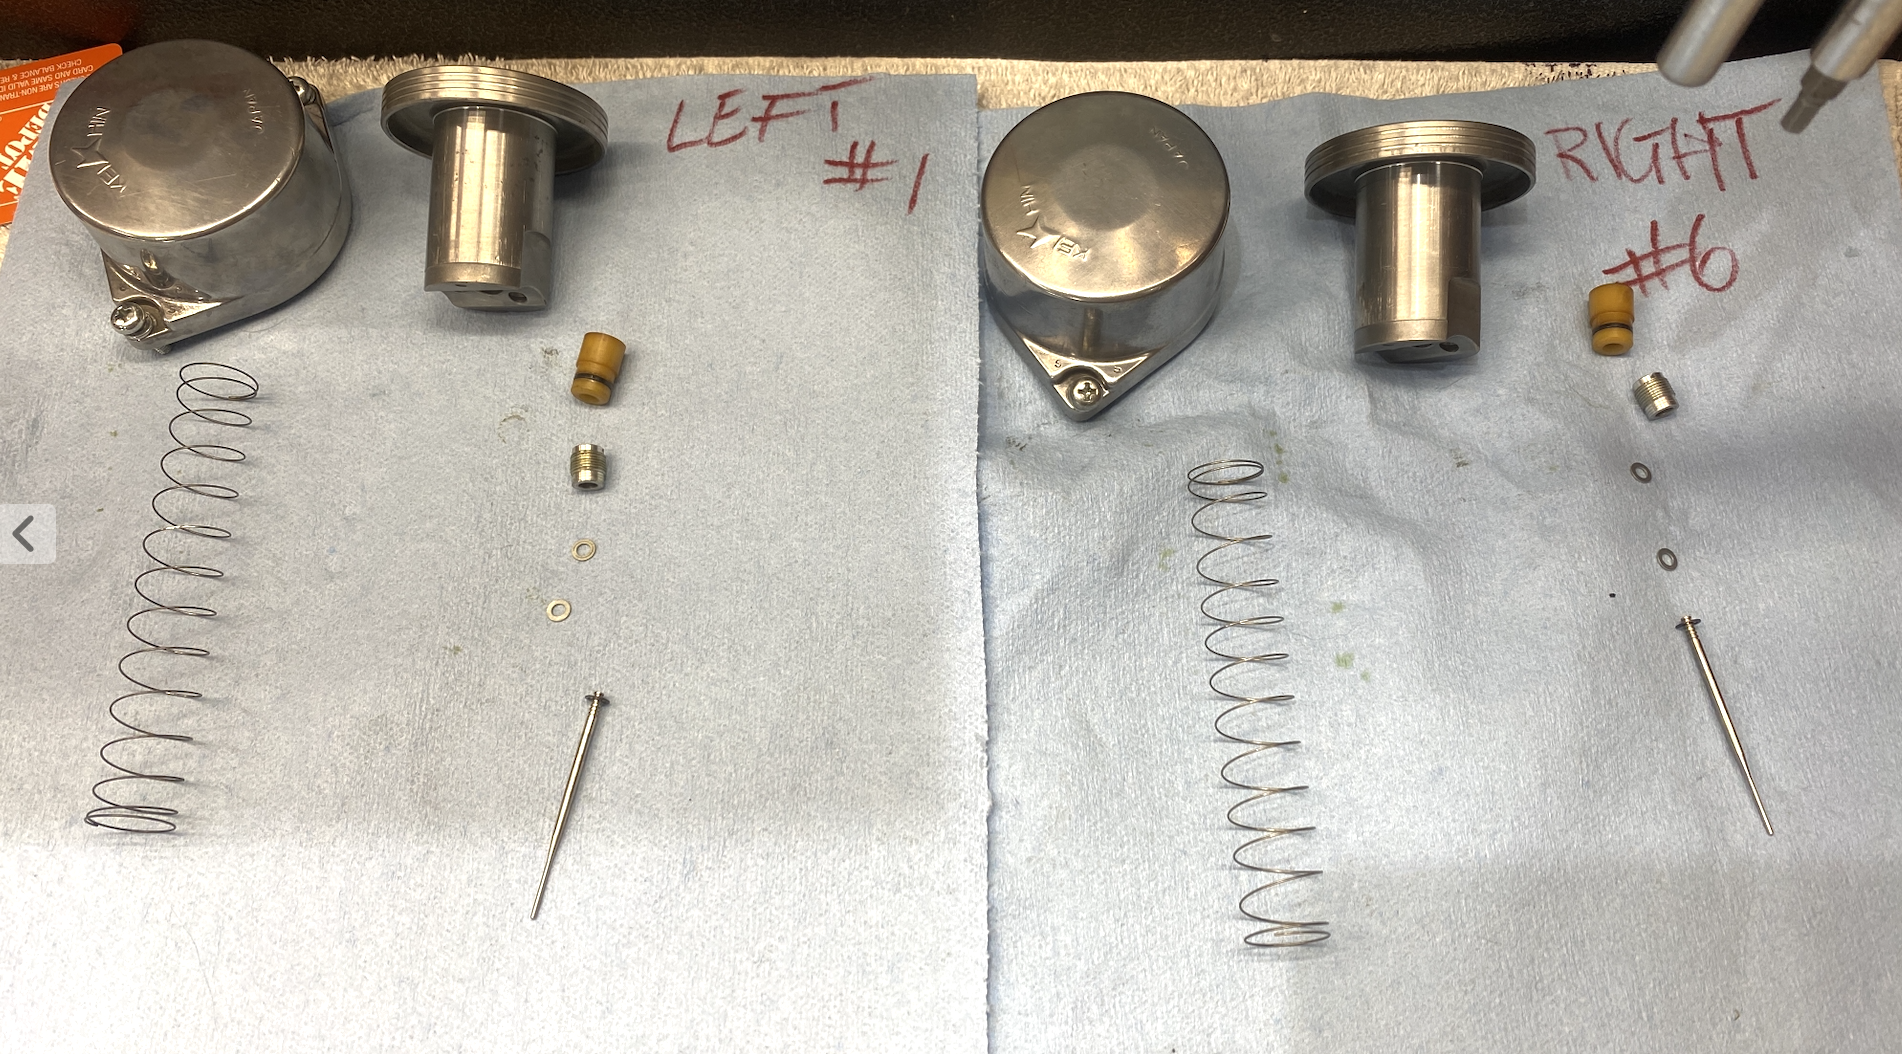
And here's what's in #1 and #6. Note custom needles that get skinny towards the end meaning that these are milled to give the bike more fuel on a wider open throttle than the factory needles. Note also that the 2 washers were ON TOP of the needle...I thought washers like these were usually used as an incremental adjustment, something less than a clip space on the needle. This is another variable that can skew a theory while trying to determine what the previous mechanic was doing: did he in fact know what he was doing or did he misplace these washers? At the end of the day it doesn't matter- I'm just going to try and get it back to factory settings
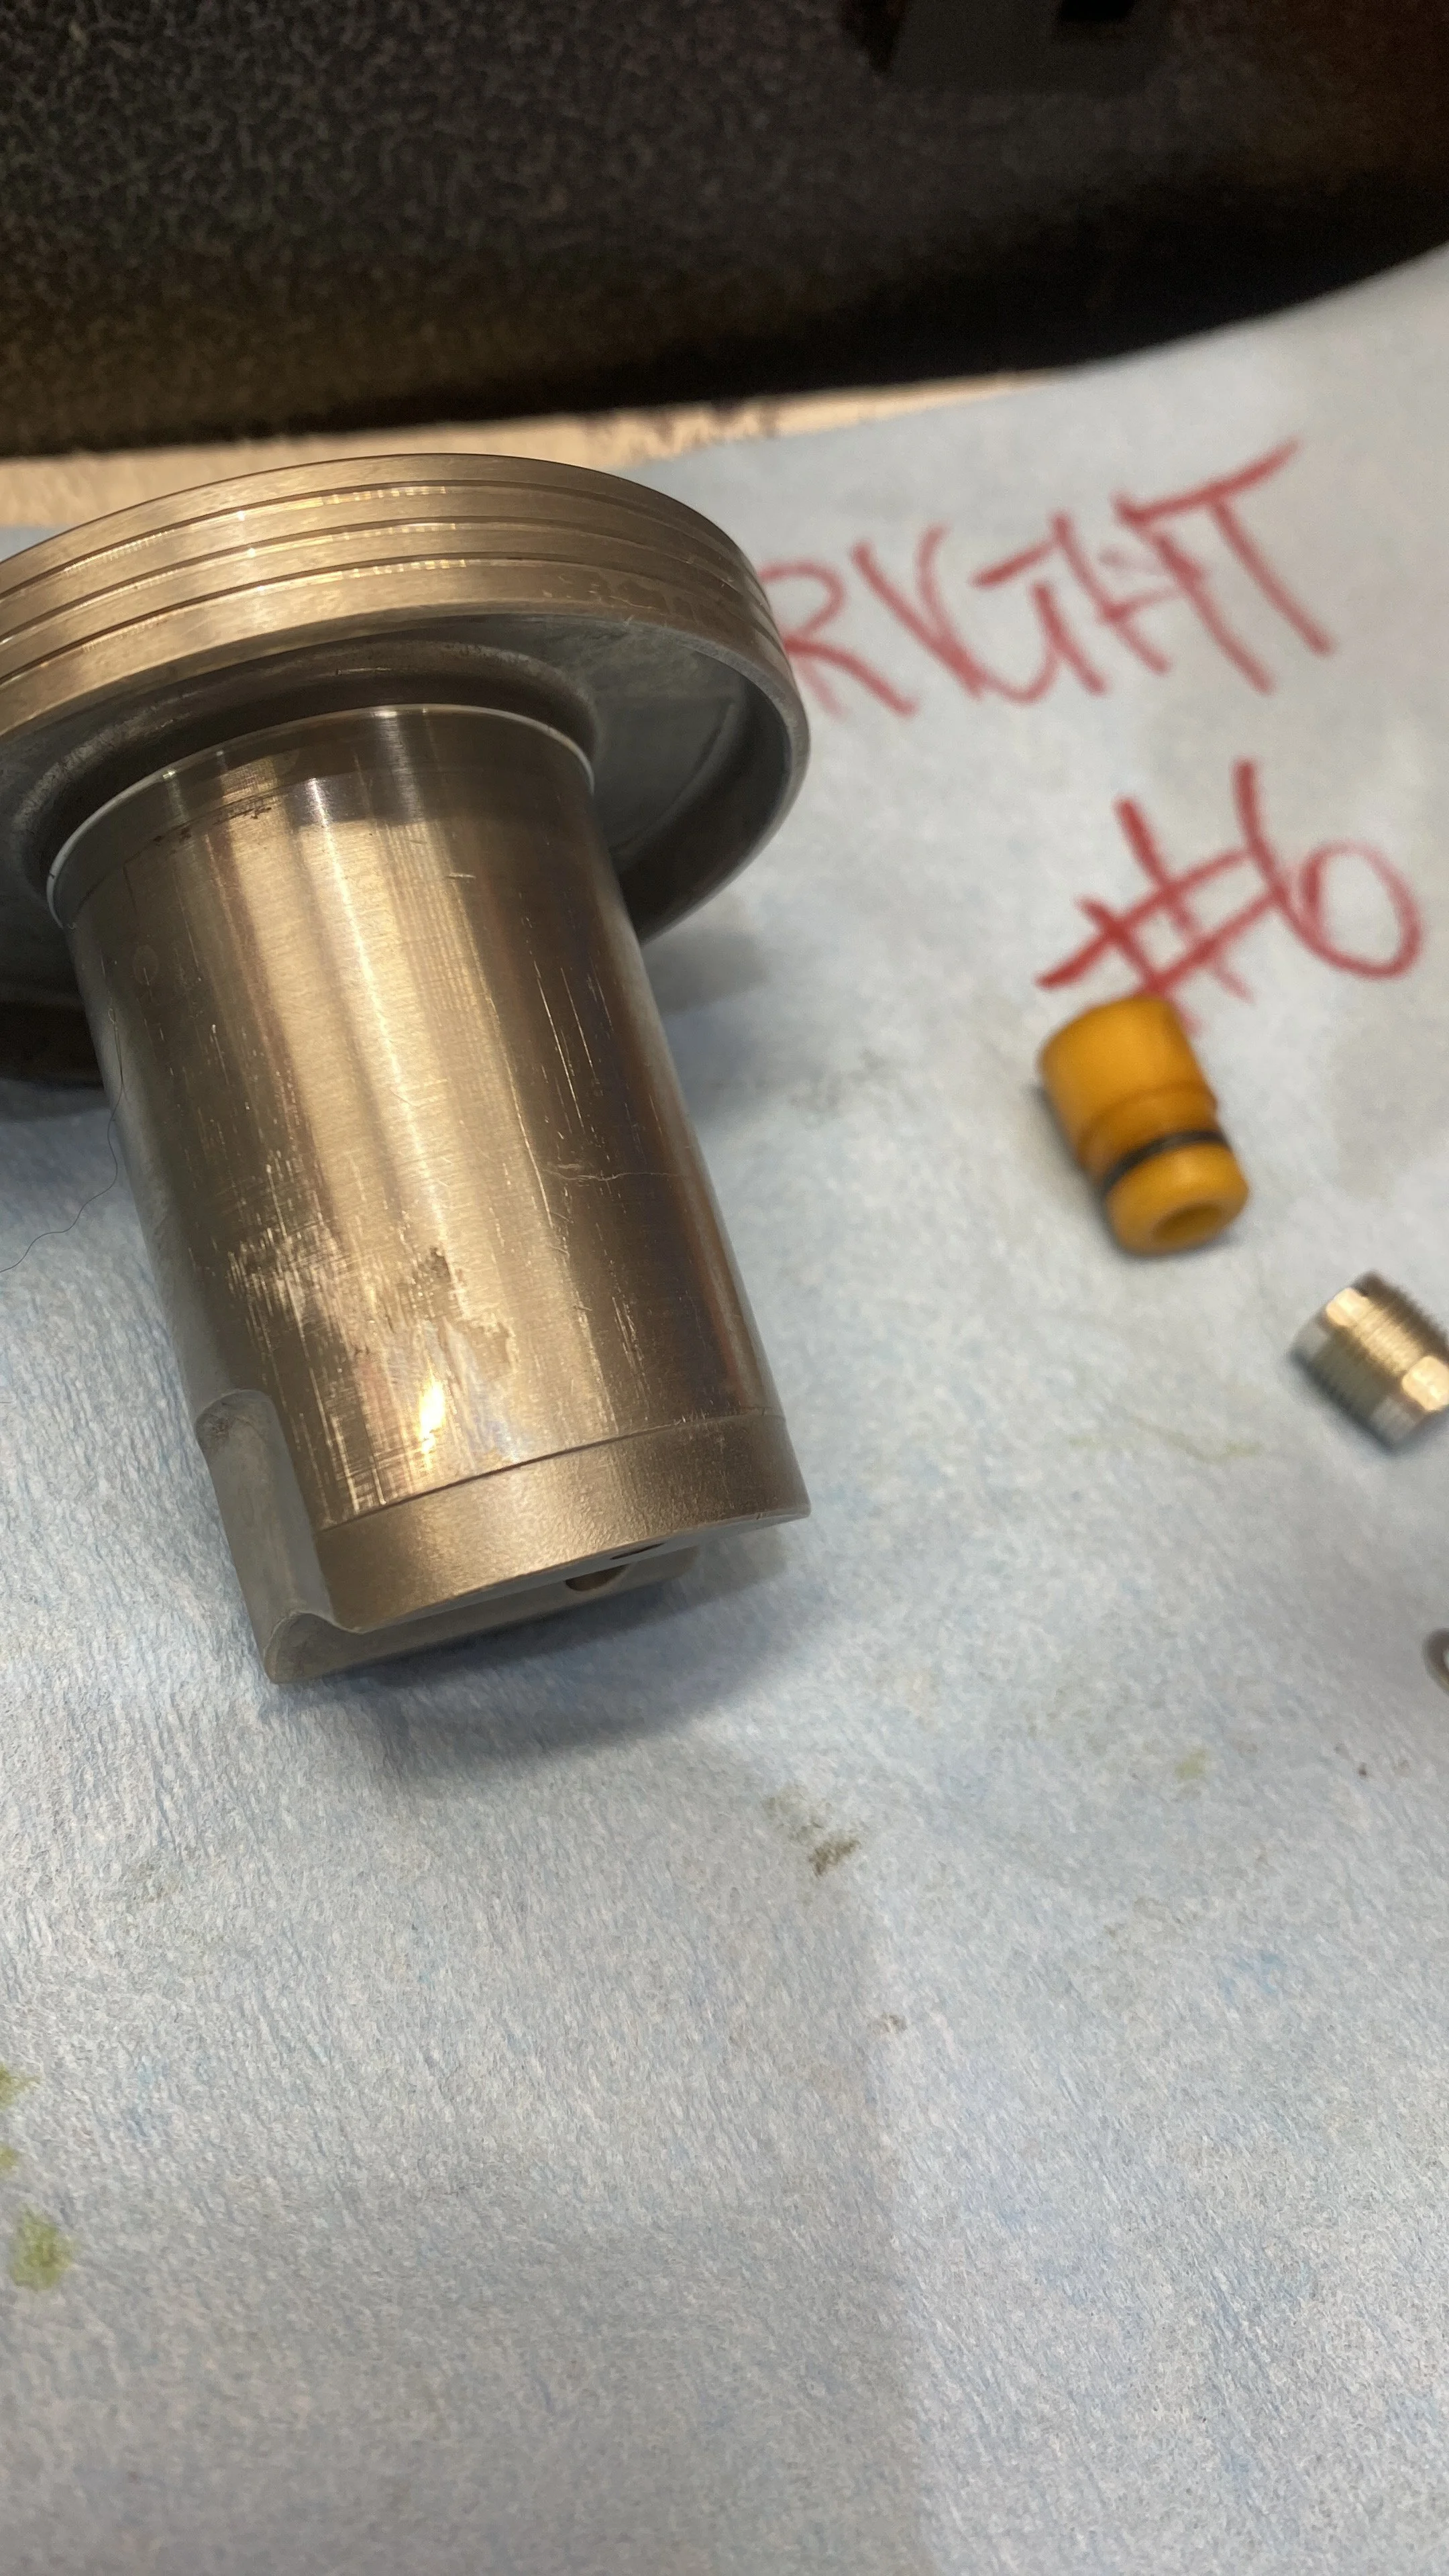
this rash is appartenly quite standard wear.
If tanks could speak. "Wot.....off again???!"
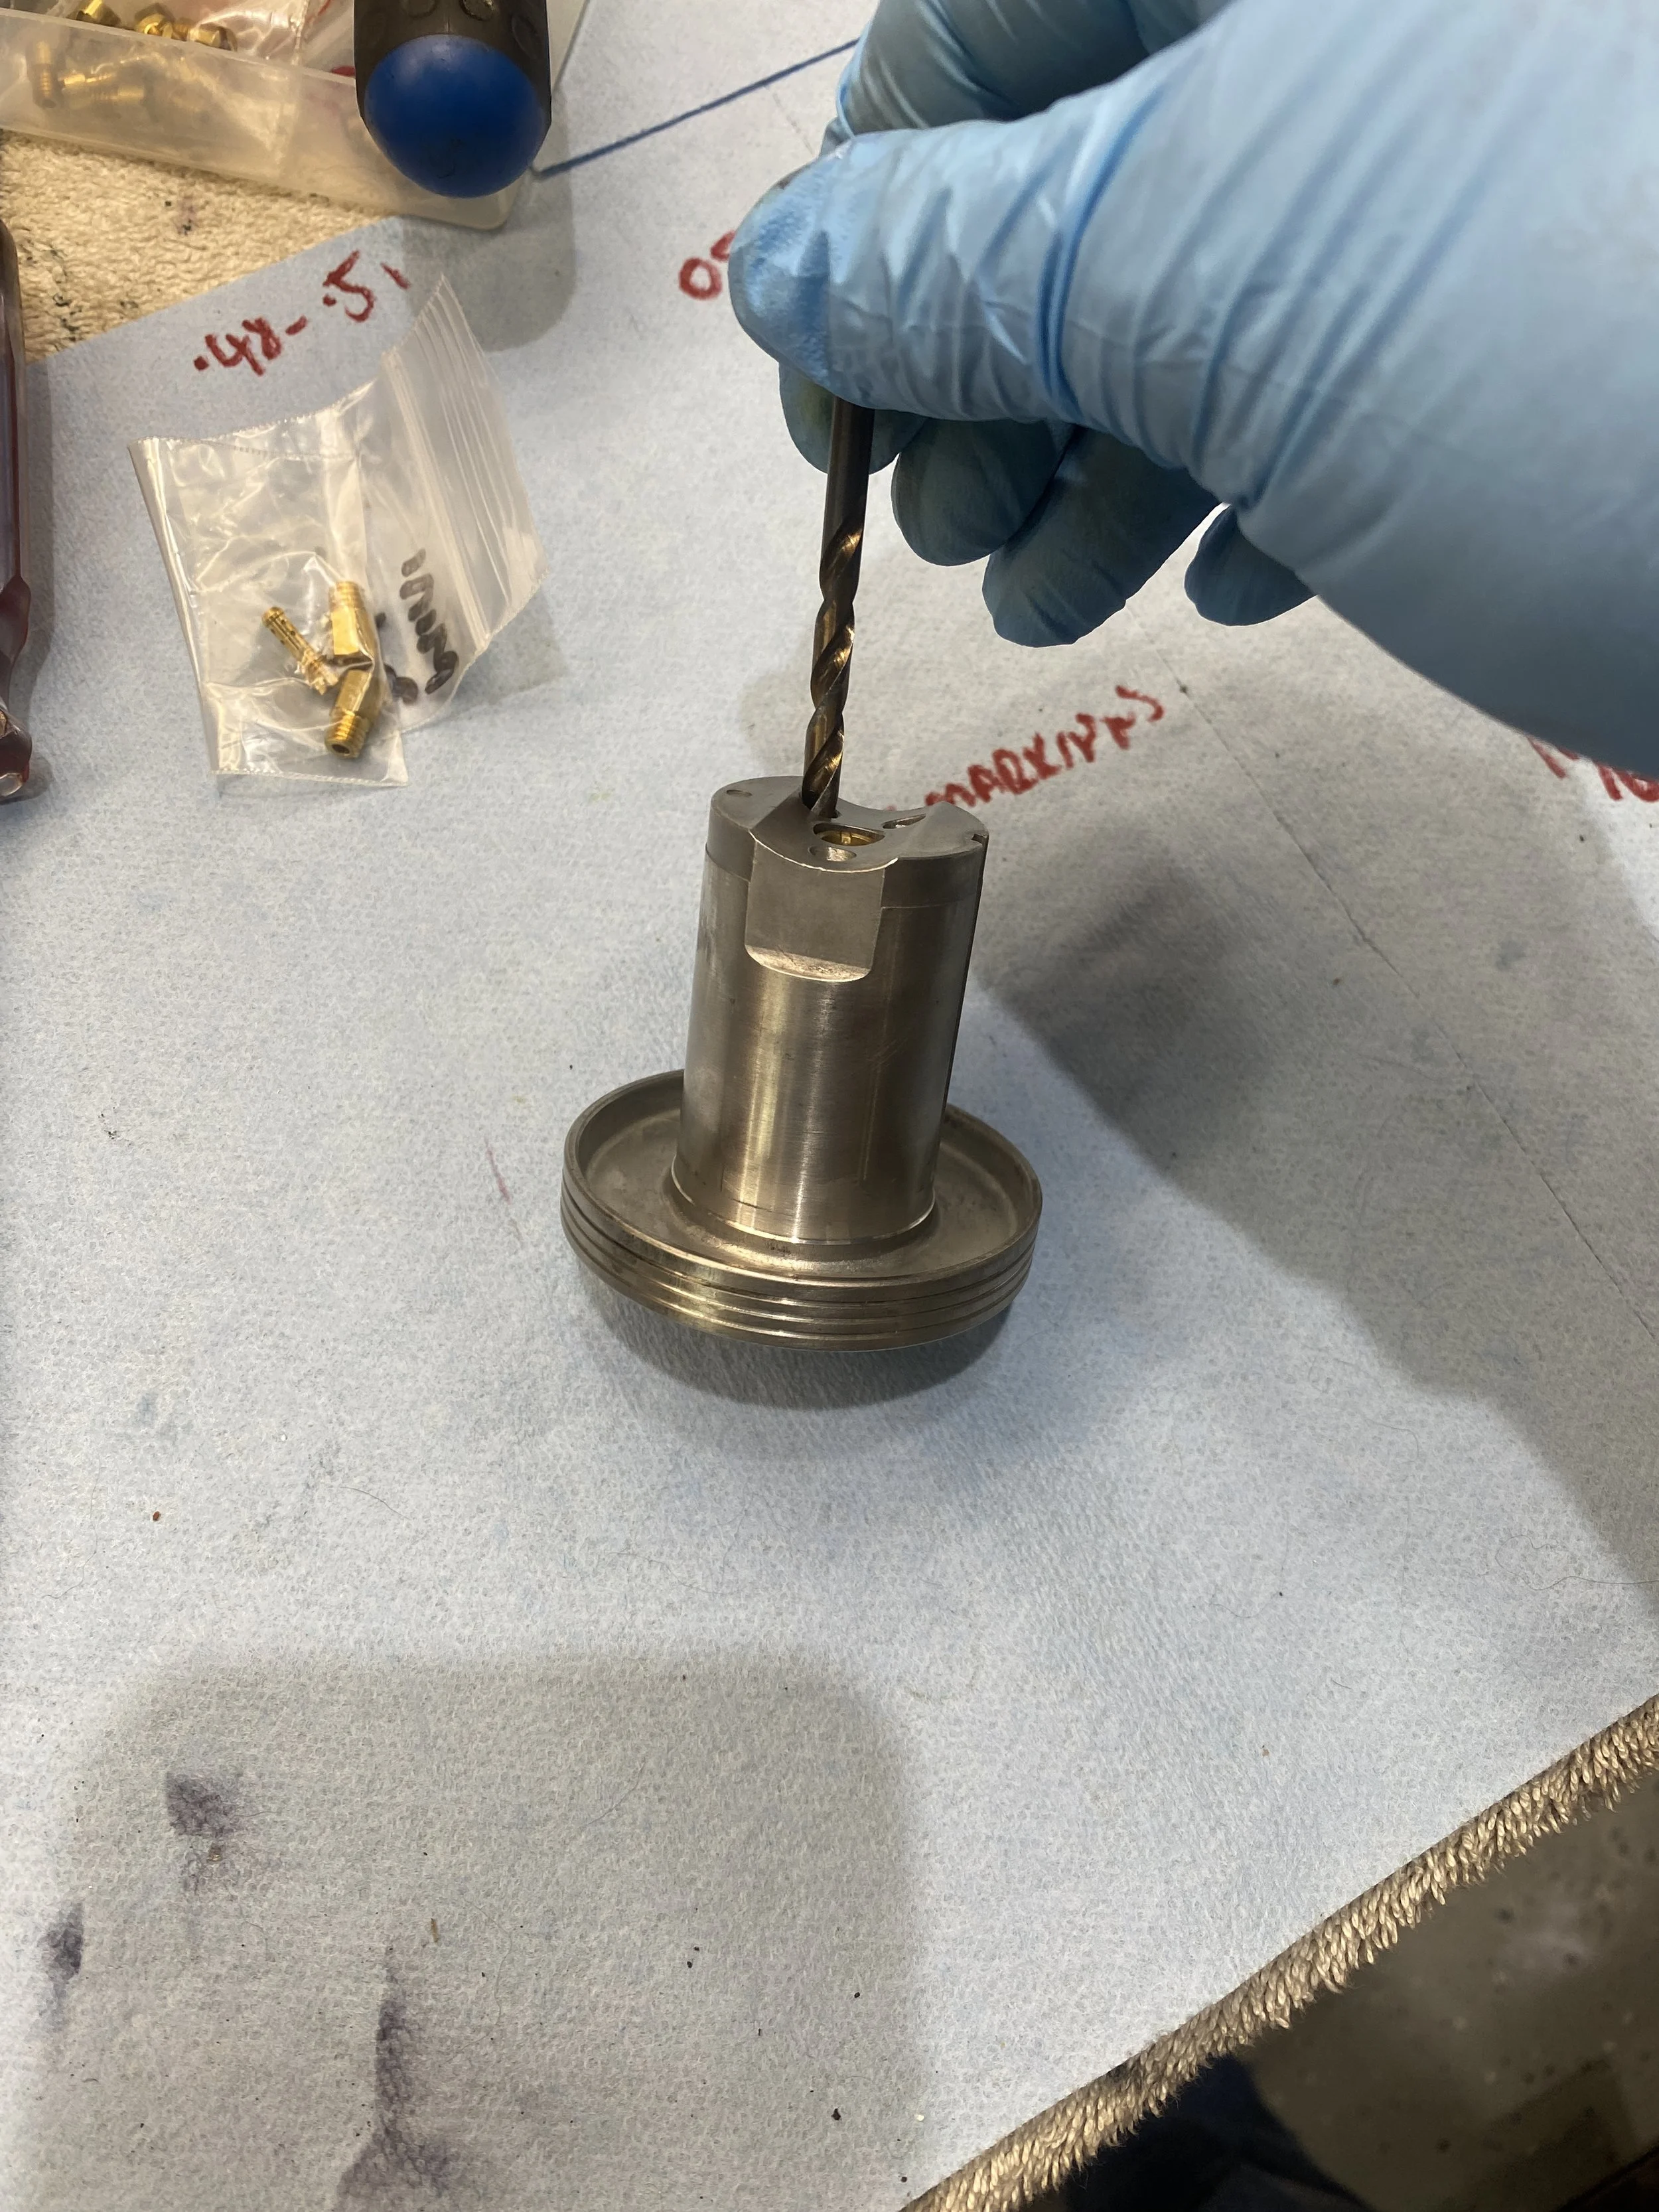
When I saw that this drill bit that I found in the Tim'sCBX jet kit fit in the holes of the slide, I was in despair. It was clear someone had enlarged the holes and so the slides had lost their genuine OEM integrity. However Dave Wigston professes that it won't make a difference and it's still worth taking everything else, needles, jets etc back to factory spec, but maybe not today.
Summary: Keen to get a ride in versus tilting the engine over a holiday weekend, I put everything back together but this time with the K&N Filter and I left the top off the airbox. I think it’s a pure stroke of luck that I hit on this combination: Flat spot is gone, no more sputtering a 1/4 throttle. It’s pulling pretty steadily throughout the rev range, slight hiccup at nearly full throttle but that’s almost certainly those needles. Despite this minor success And knowing I can open up yet another can of worms, I still want to re-install the original needles and jets, on the other hand I might let sleeping dogs lie, coz I have to rebuild 6 calipers for my H2’s. (4/16/22)
More with the brakes…
Dateline Sep 21 2022: The route to my hot yoga class takes in about 7 miles of the sweeping curves of I440 mostly spent in the outer lanes flirting with the edges of license revokable speeds. That’s all fun and games unless it’s going home time and you come upon a logjam of brake lights as rush hour participants jostle to either go left to Memphis or right to…somewhere else. This evening, traffic slowed to snail pace and in between down shifting I felt the Hand Of God pulling the bike back. Binding brakes. How bad is it? As the traffic came to a dead stop I dropped it into neutral to test. It was the front and the bike felt hard to push, in the hot traffic it felt like it was getting worse, and the typically spongy front brake lever had gone all Viagra and was hard as a rock. How did this suddenly happen? And what if I had been merrily buzzing along in the fast lane at my usual…’license revokable’ 64mph? Whatever. Case at hand. I had a few choices.1-Keep going until the discs glowed red hot and hope I’ll get as far a yoga, 2-pull over and call AAA to trailer me home, or C pull over and take the hillbilly option. I voted for C, filtered to the side and prayed I didn’t end up on YouTube as The Disappearing Motorcyclist when an errant tractor trailer plows into me. Once again I thanked the Previous and Previous, Previous Owner for not only keeping the OEM toolkit with the bike from transfer to transfer, but also for keeping it intact. The hillbilly option, if you don’t know, simply involves getting out the 14mm and bleeding out some fluid at the caliper to release the pressure in the system and thus the pads from the disc. Just a quick turn and a few drips is all it took and I was on my way. Brakes acted perfectly normally to destination AND the trip home. So, what happened? Clues: Front brakes & master cylinder were rebuilt back in February ‘22 and I haven’t done more than 500 miles. It was hot. 98º and….(preparing for a big told-you-so from you purists out there) when I rebuilt the system: I went to Silicon Dot-5.
1-Mea culpa?
2-I've never liked this Master Cylinder. Is there a better option out there? The CB900?
Diagnosis: I reached out to the CBX Facebook Group and MrCBX himself, Jan Ringnalda and CBX specialist Dave McMunn both said that there’s a small bleed hole in the Master Cylinder and it was likely blocked, and Dale Maxwell backed that up with “Thats pretty much the only thing that can cause that.”
Since then: Topped the reservoir back up, saw zero debris. It’s not happened again. Re: the question-Does a better (compatible) master cylinder exist? I am most certain that they do, but I didn’t get that answer nor have I been motivated to really search for one. If it was good enough for Mr. Honda back in 1979, then it’s good enough for me now. I’ll just keep my wits about me.
Parts Department

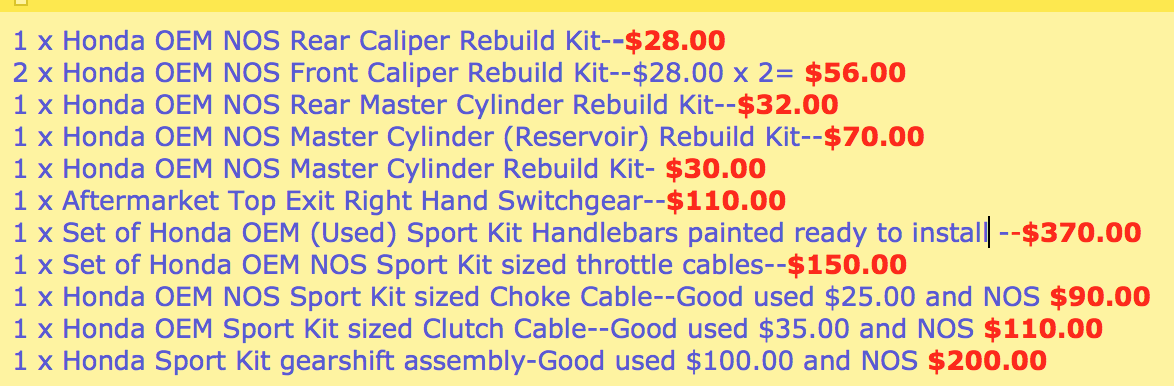
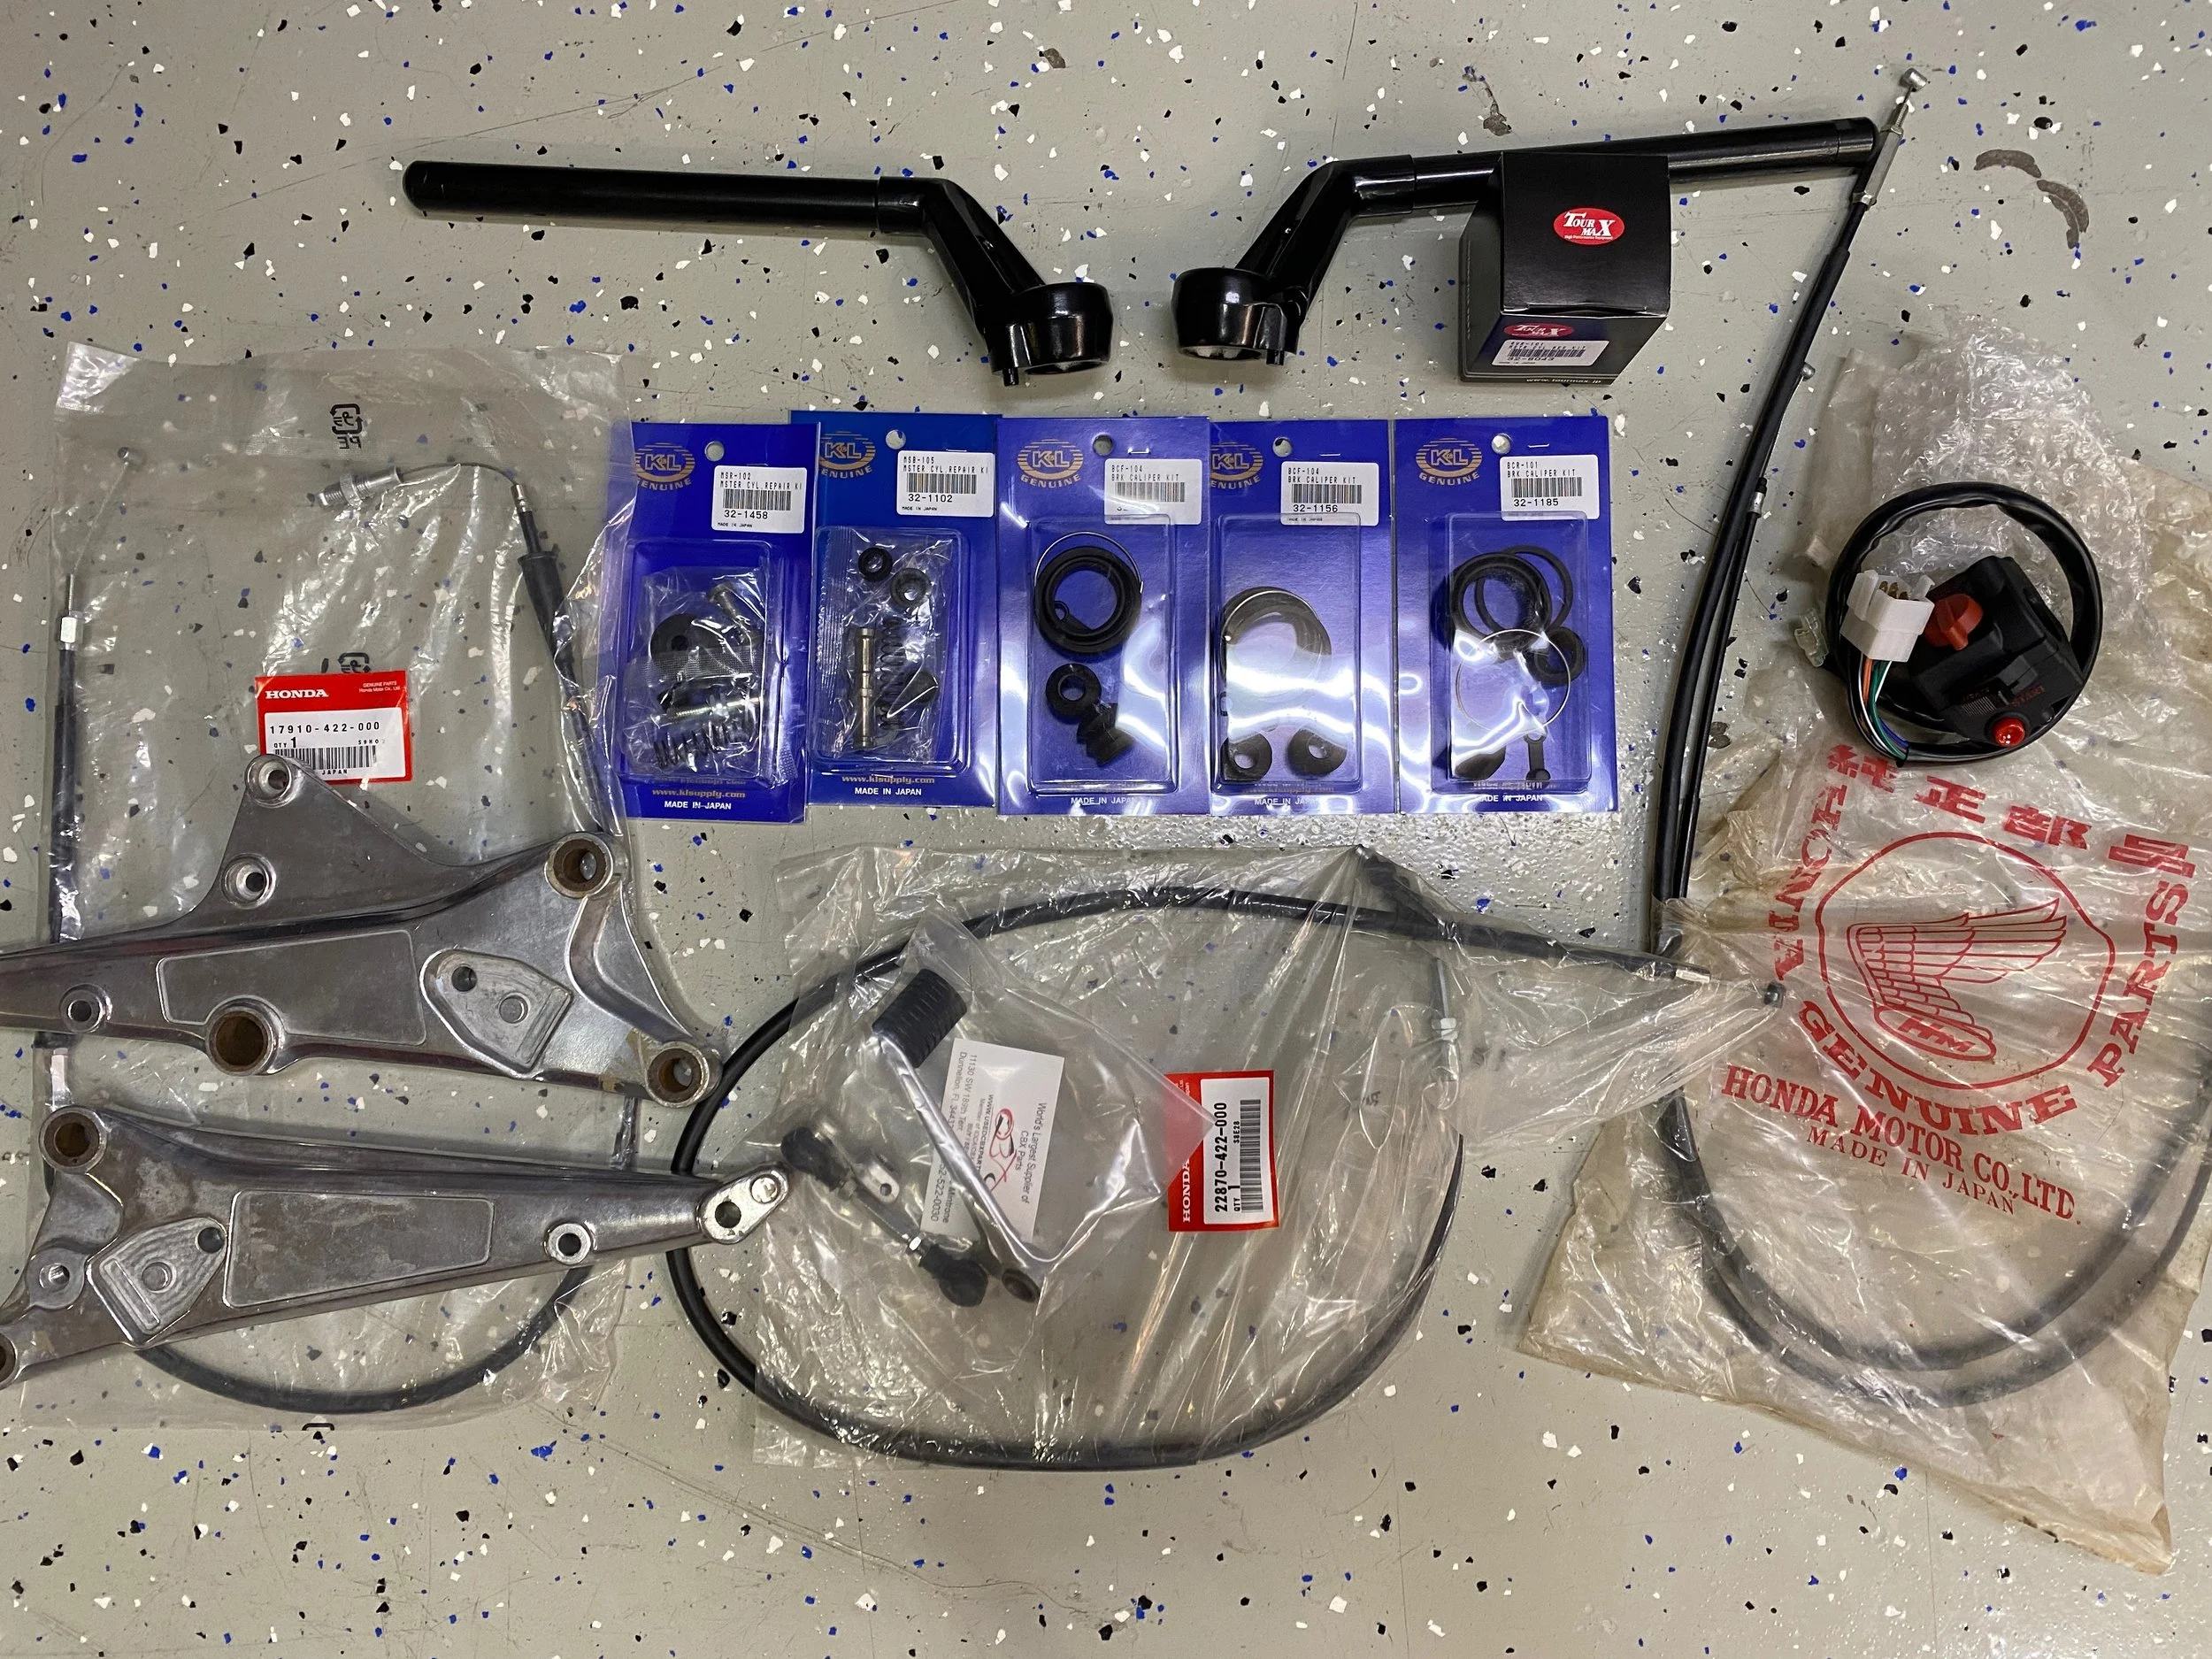
To get the bike back on the road the way I like it (with the Sports Kit lower bars) I mostly went for Original Equipment parts from Louis https://usedcbxparts.com/ he is the best communicator on the SparePartsPlanet- always gets back to you super quick...this was my shopping list. Turned out it wasn't OEM brake kits that arrived but I was persuaded that the OEM's would have been made years ago and seals would have hardened with age.

Items from usedcbxparts.com (except the hangers which came from E-bay) in real life.
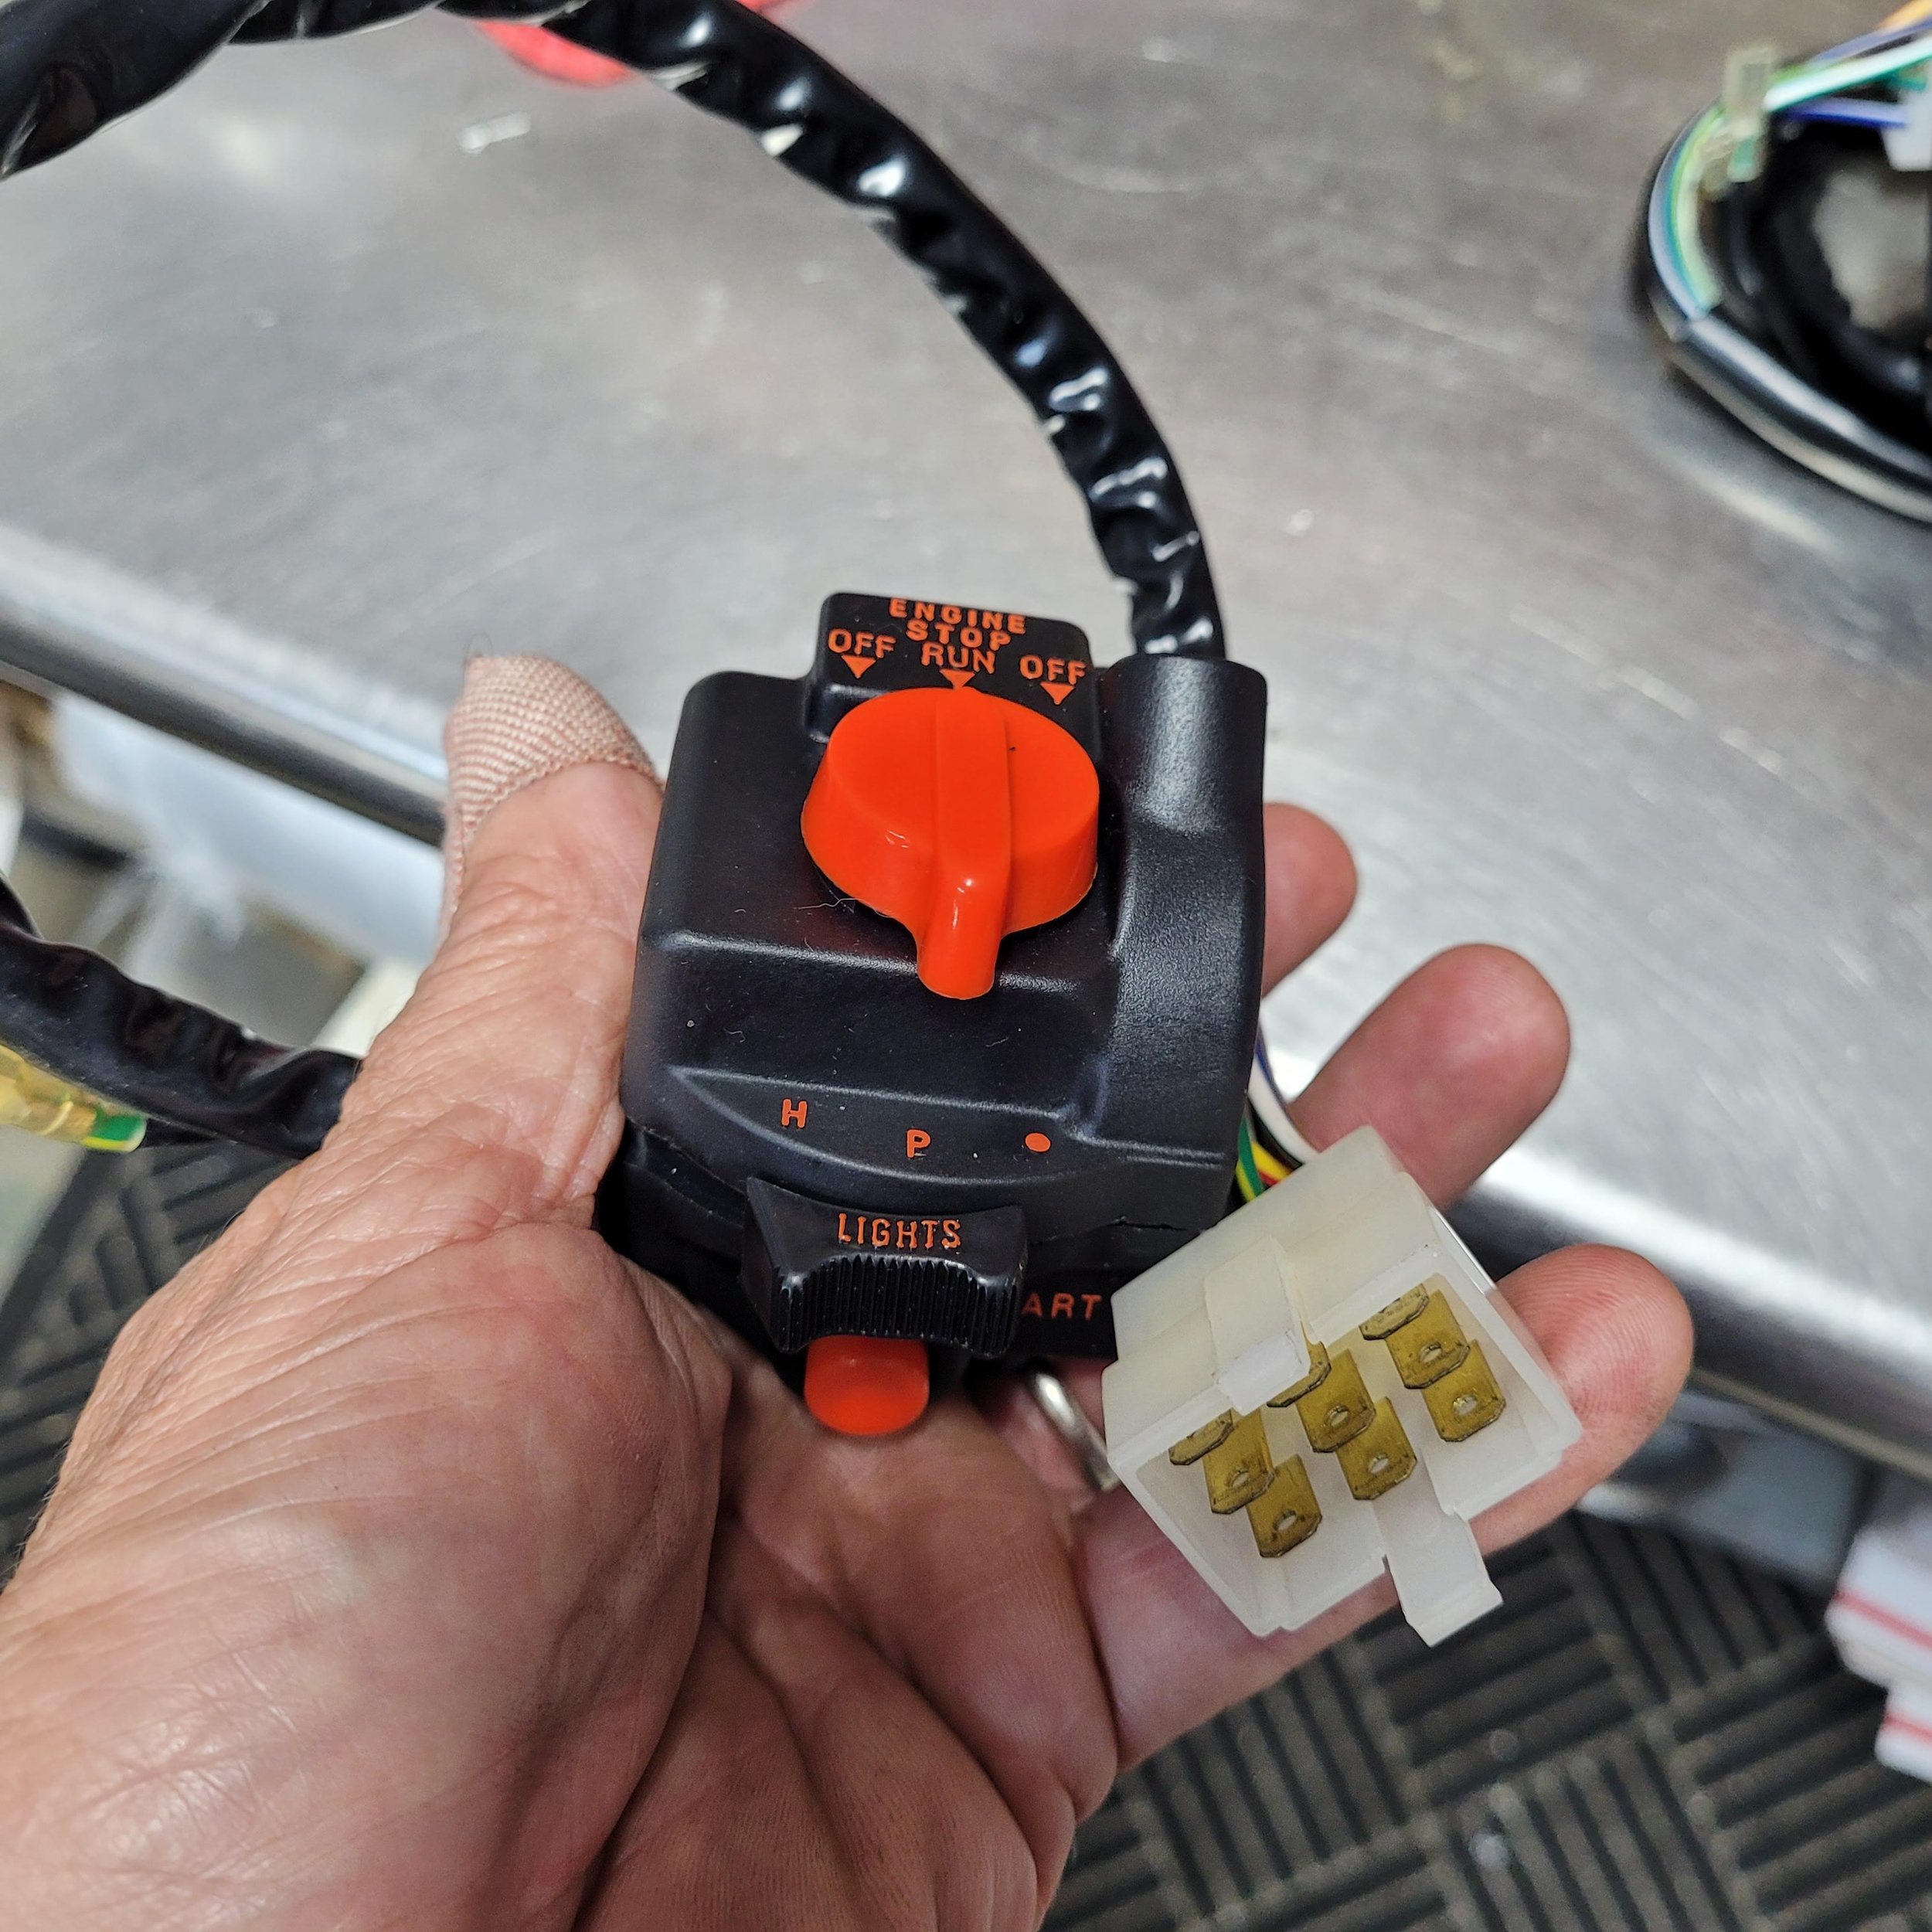
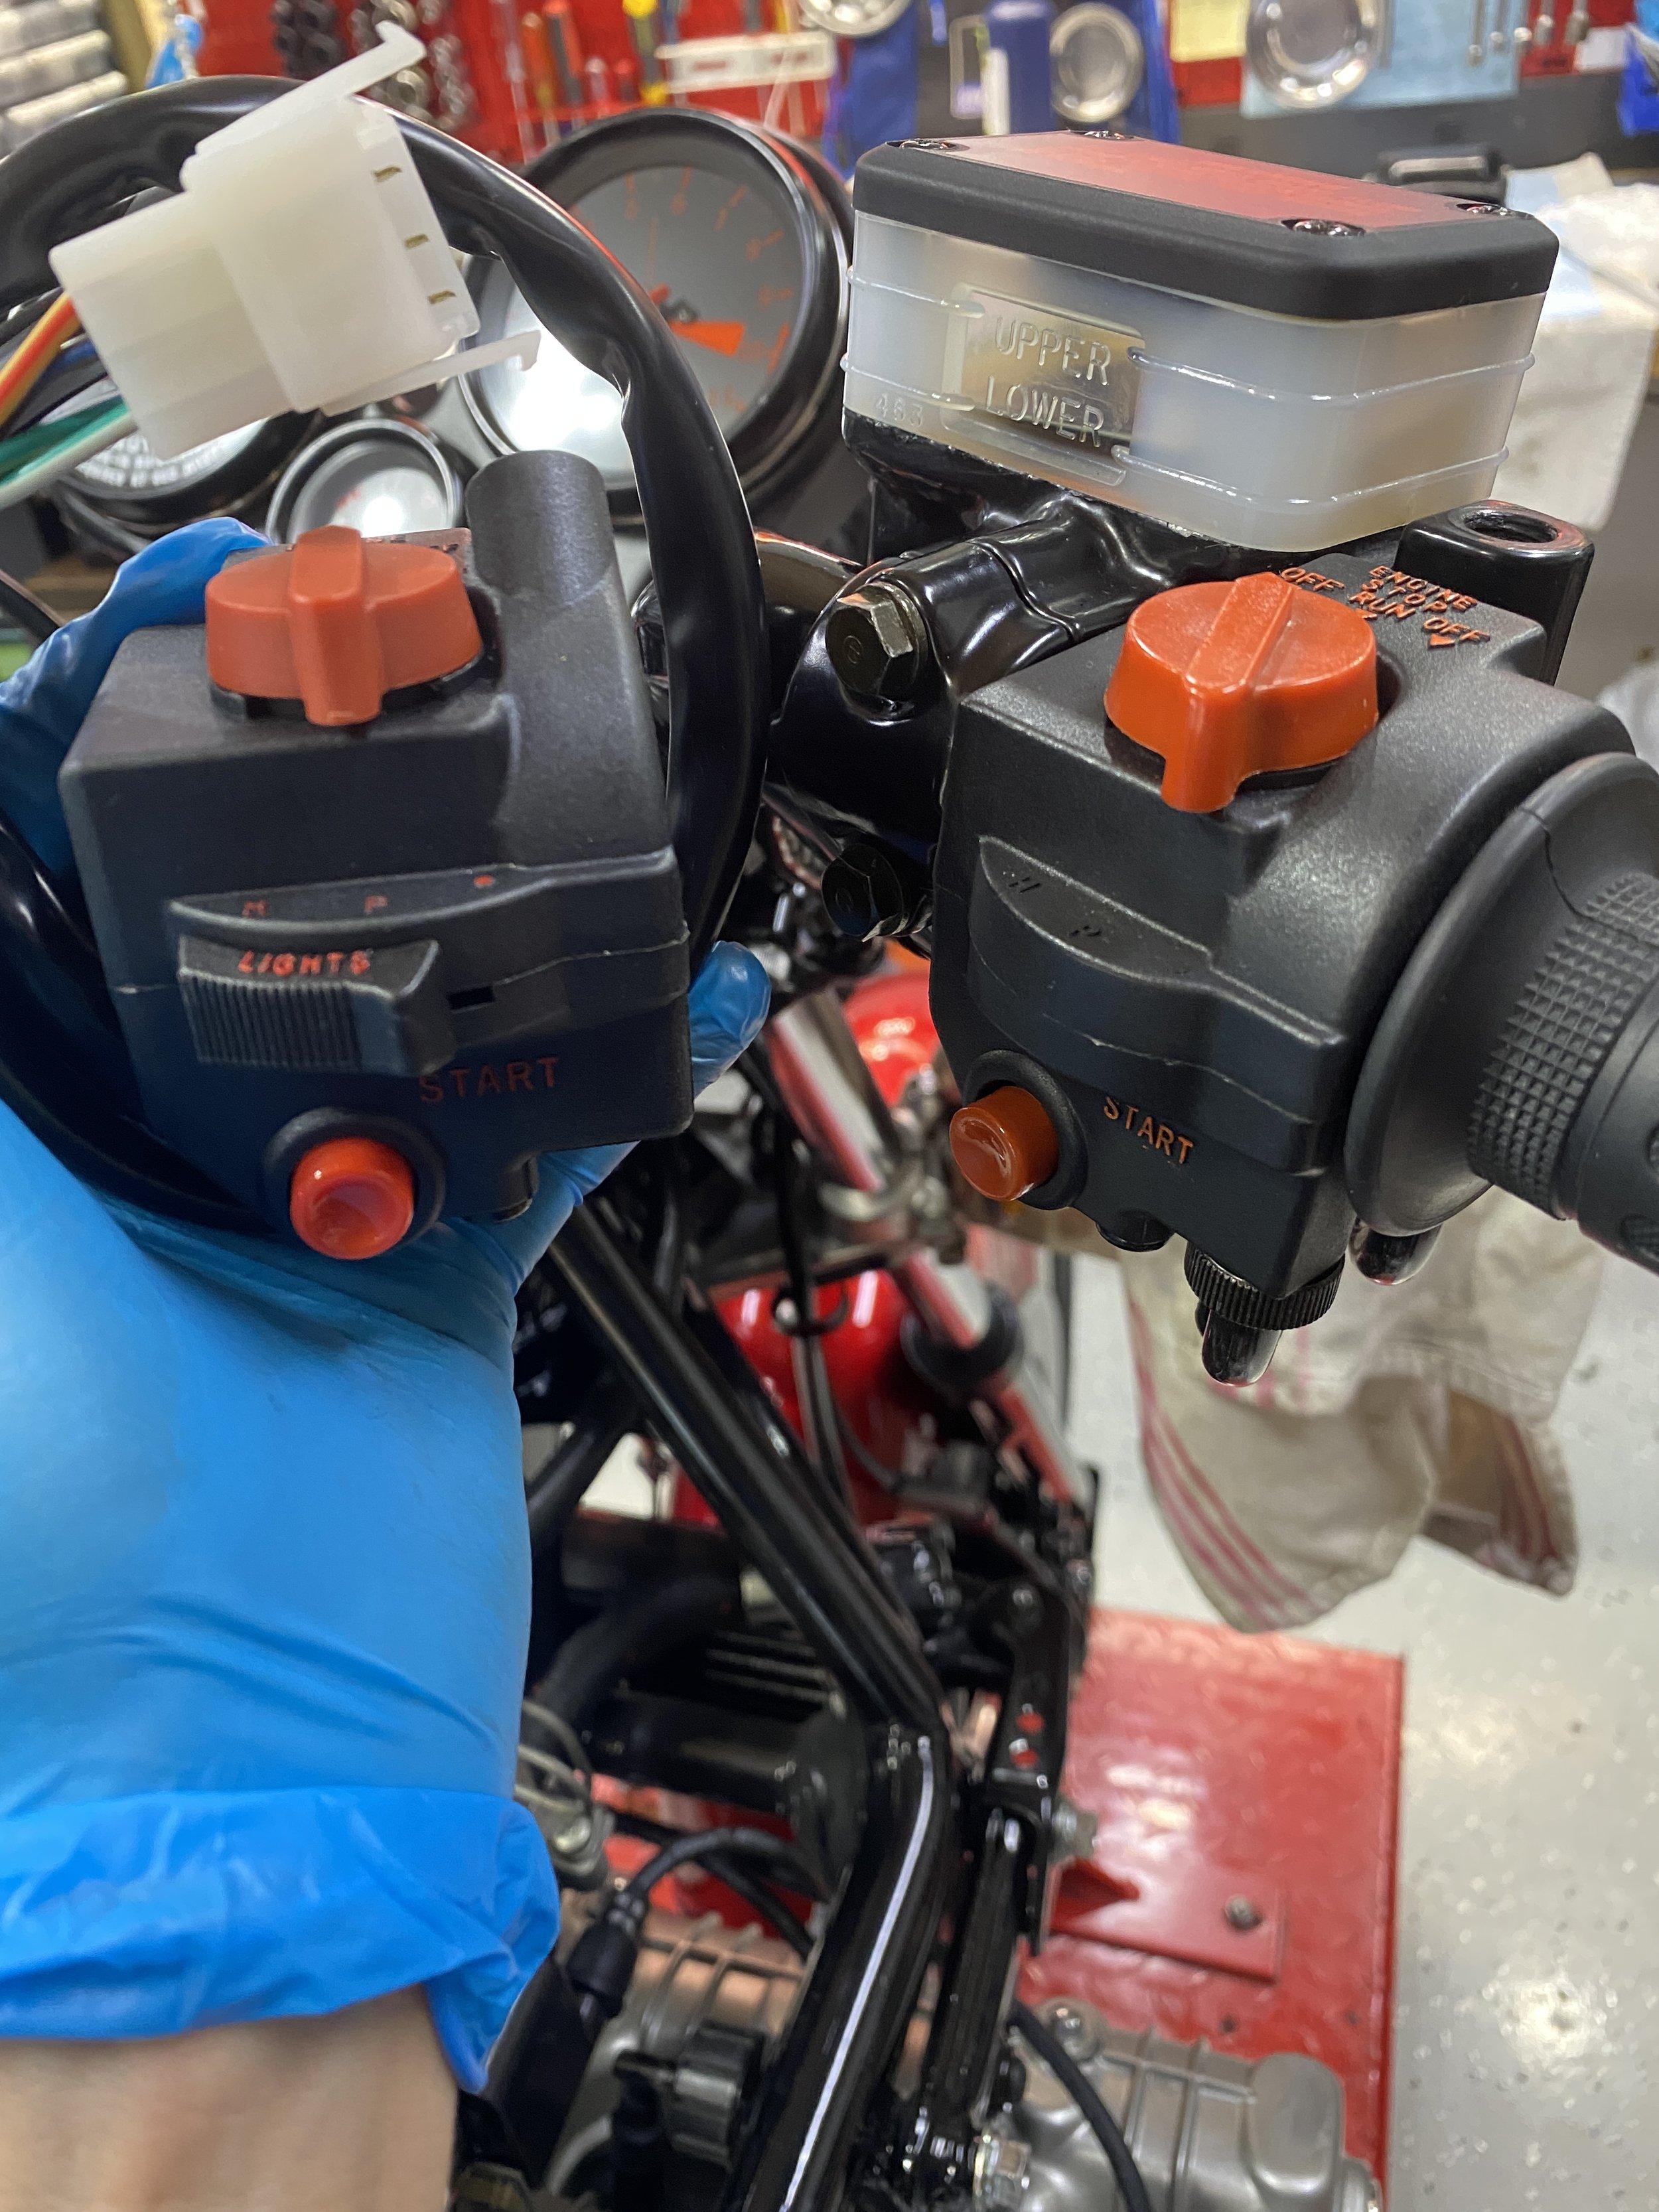
I had to decide between a $475 OEM right hand switchgear (you need the throttle cables to exit out the top with the lower bars-hence need to change switchgear)

....or the aftermarket version for $110. Being so near Christmas I couldn't spend all my money on just me......so I went with this.

$50 plus shipping to obtain that shorter top brake line. Is braided with a smooth black plastic finish so will blend well. Since I'm going to convert to Dot 5 will be detaching all piping and blowing them out so will want brand new copper washers. Could of course have annealed the old ones but- wouldn't look as good, not to mention, we're playing with brakes here.
Comparing the standard hanger (at the back) to the sport hanger. Note the right hand sticker is a slightly different shape necessitating the parting of $90 for a pair of new stickers. UPDATE 3/1/22...found some cheaper ones the Dutch company sixcenter. https://www.sixcenter.nl/onderdelen/detail.html?aid=26287&start=4 16 Euros but it's not clear if they are OEM.
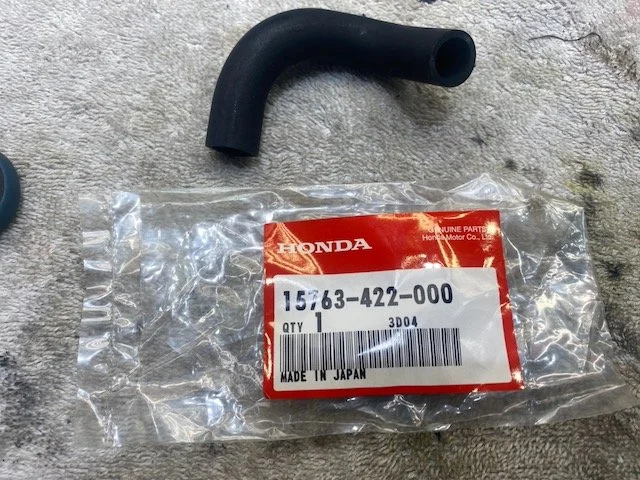
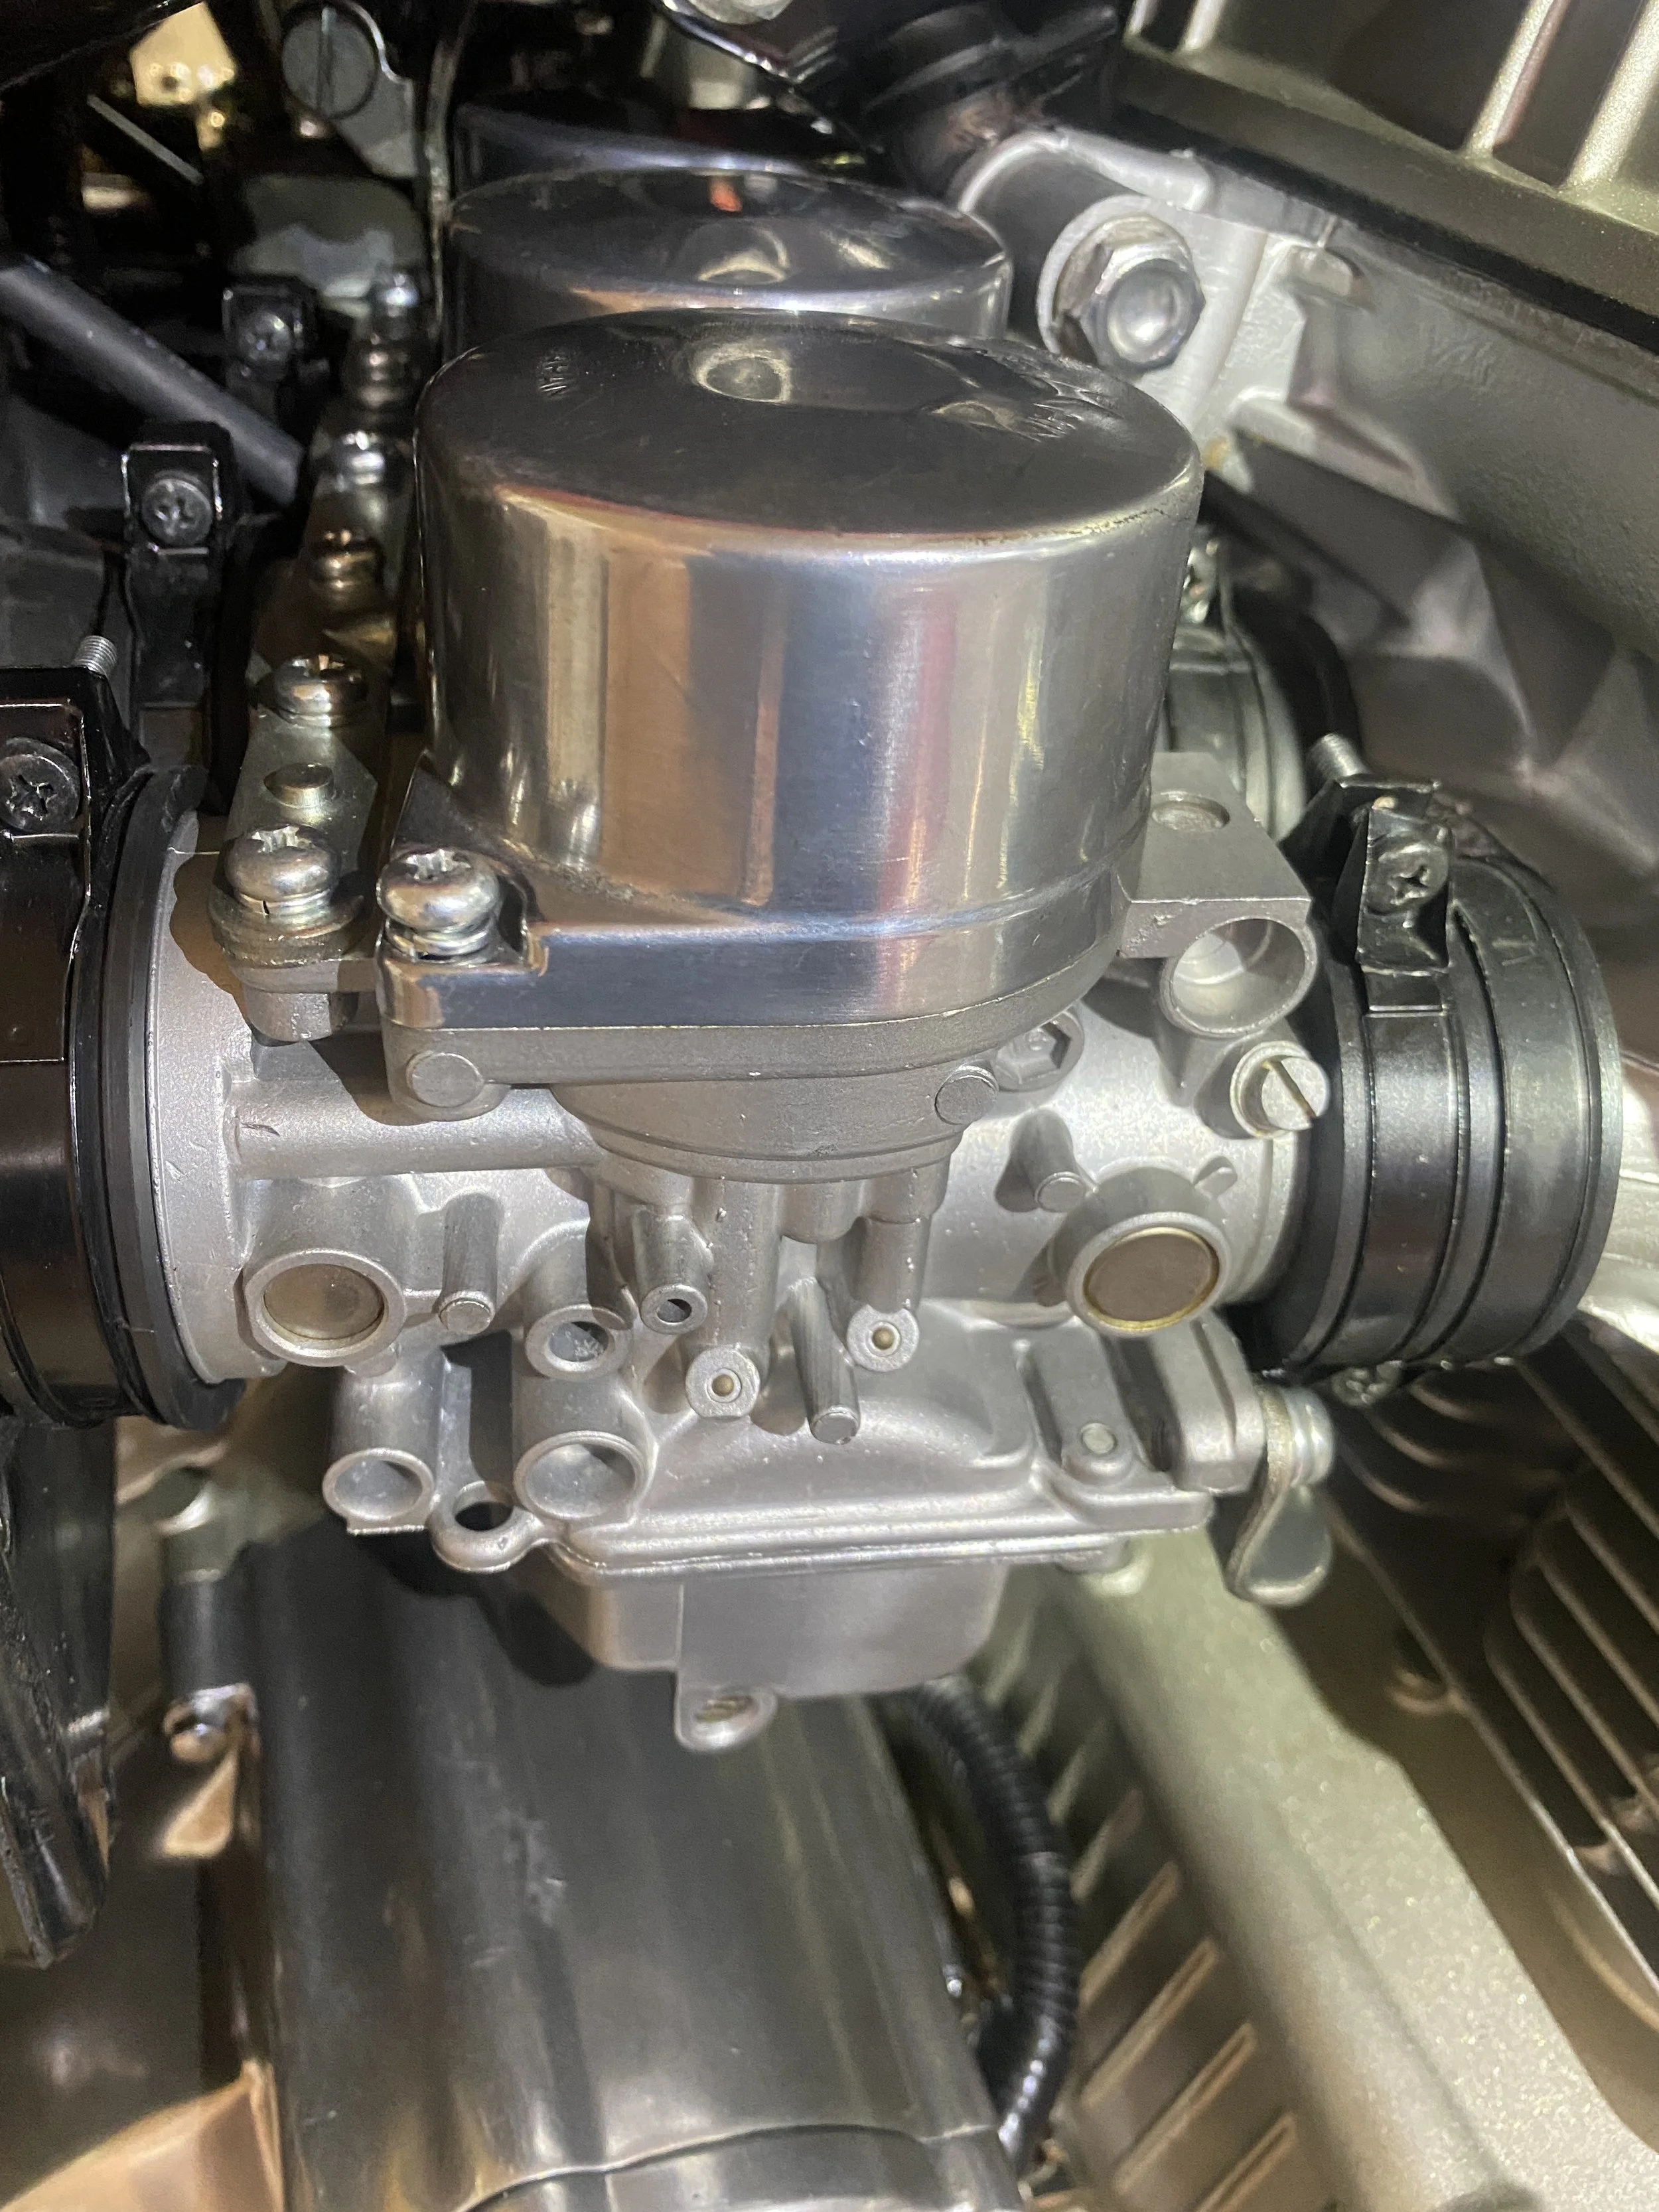
Proper engine to air filter breathing tube. One that was on it did not have a bend and was constricted making the turn to the air filter spigot. Not cheap. $65 plus $5 shipping from usedcbxparts.com

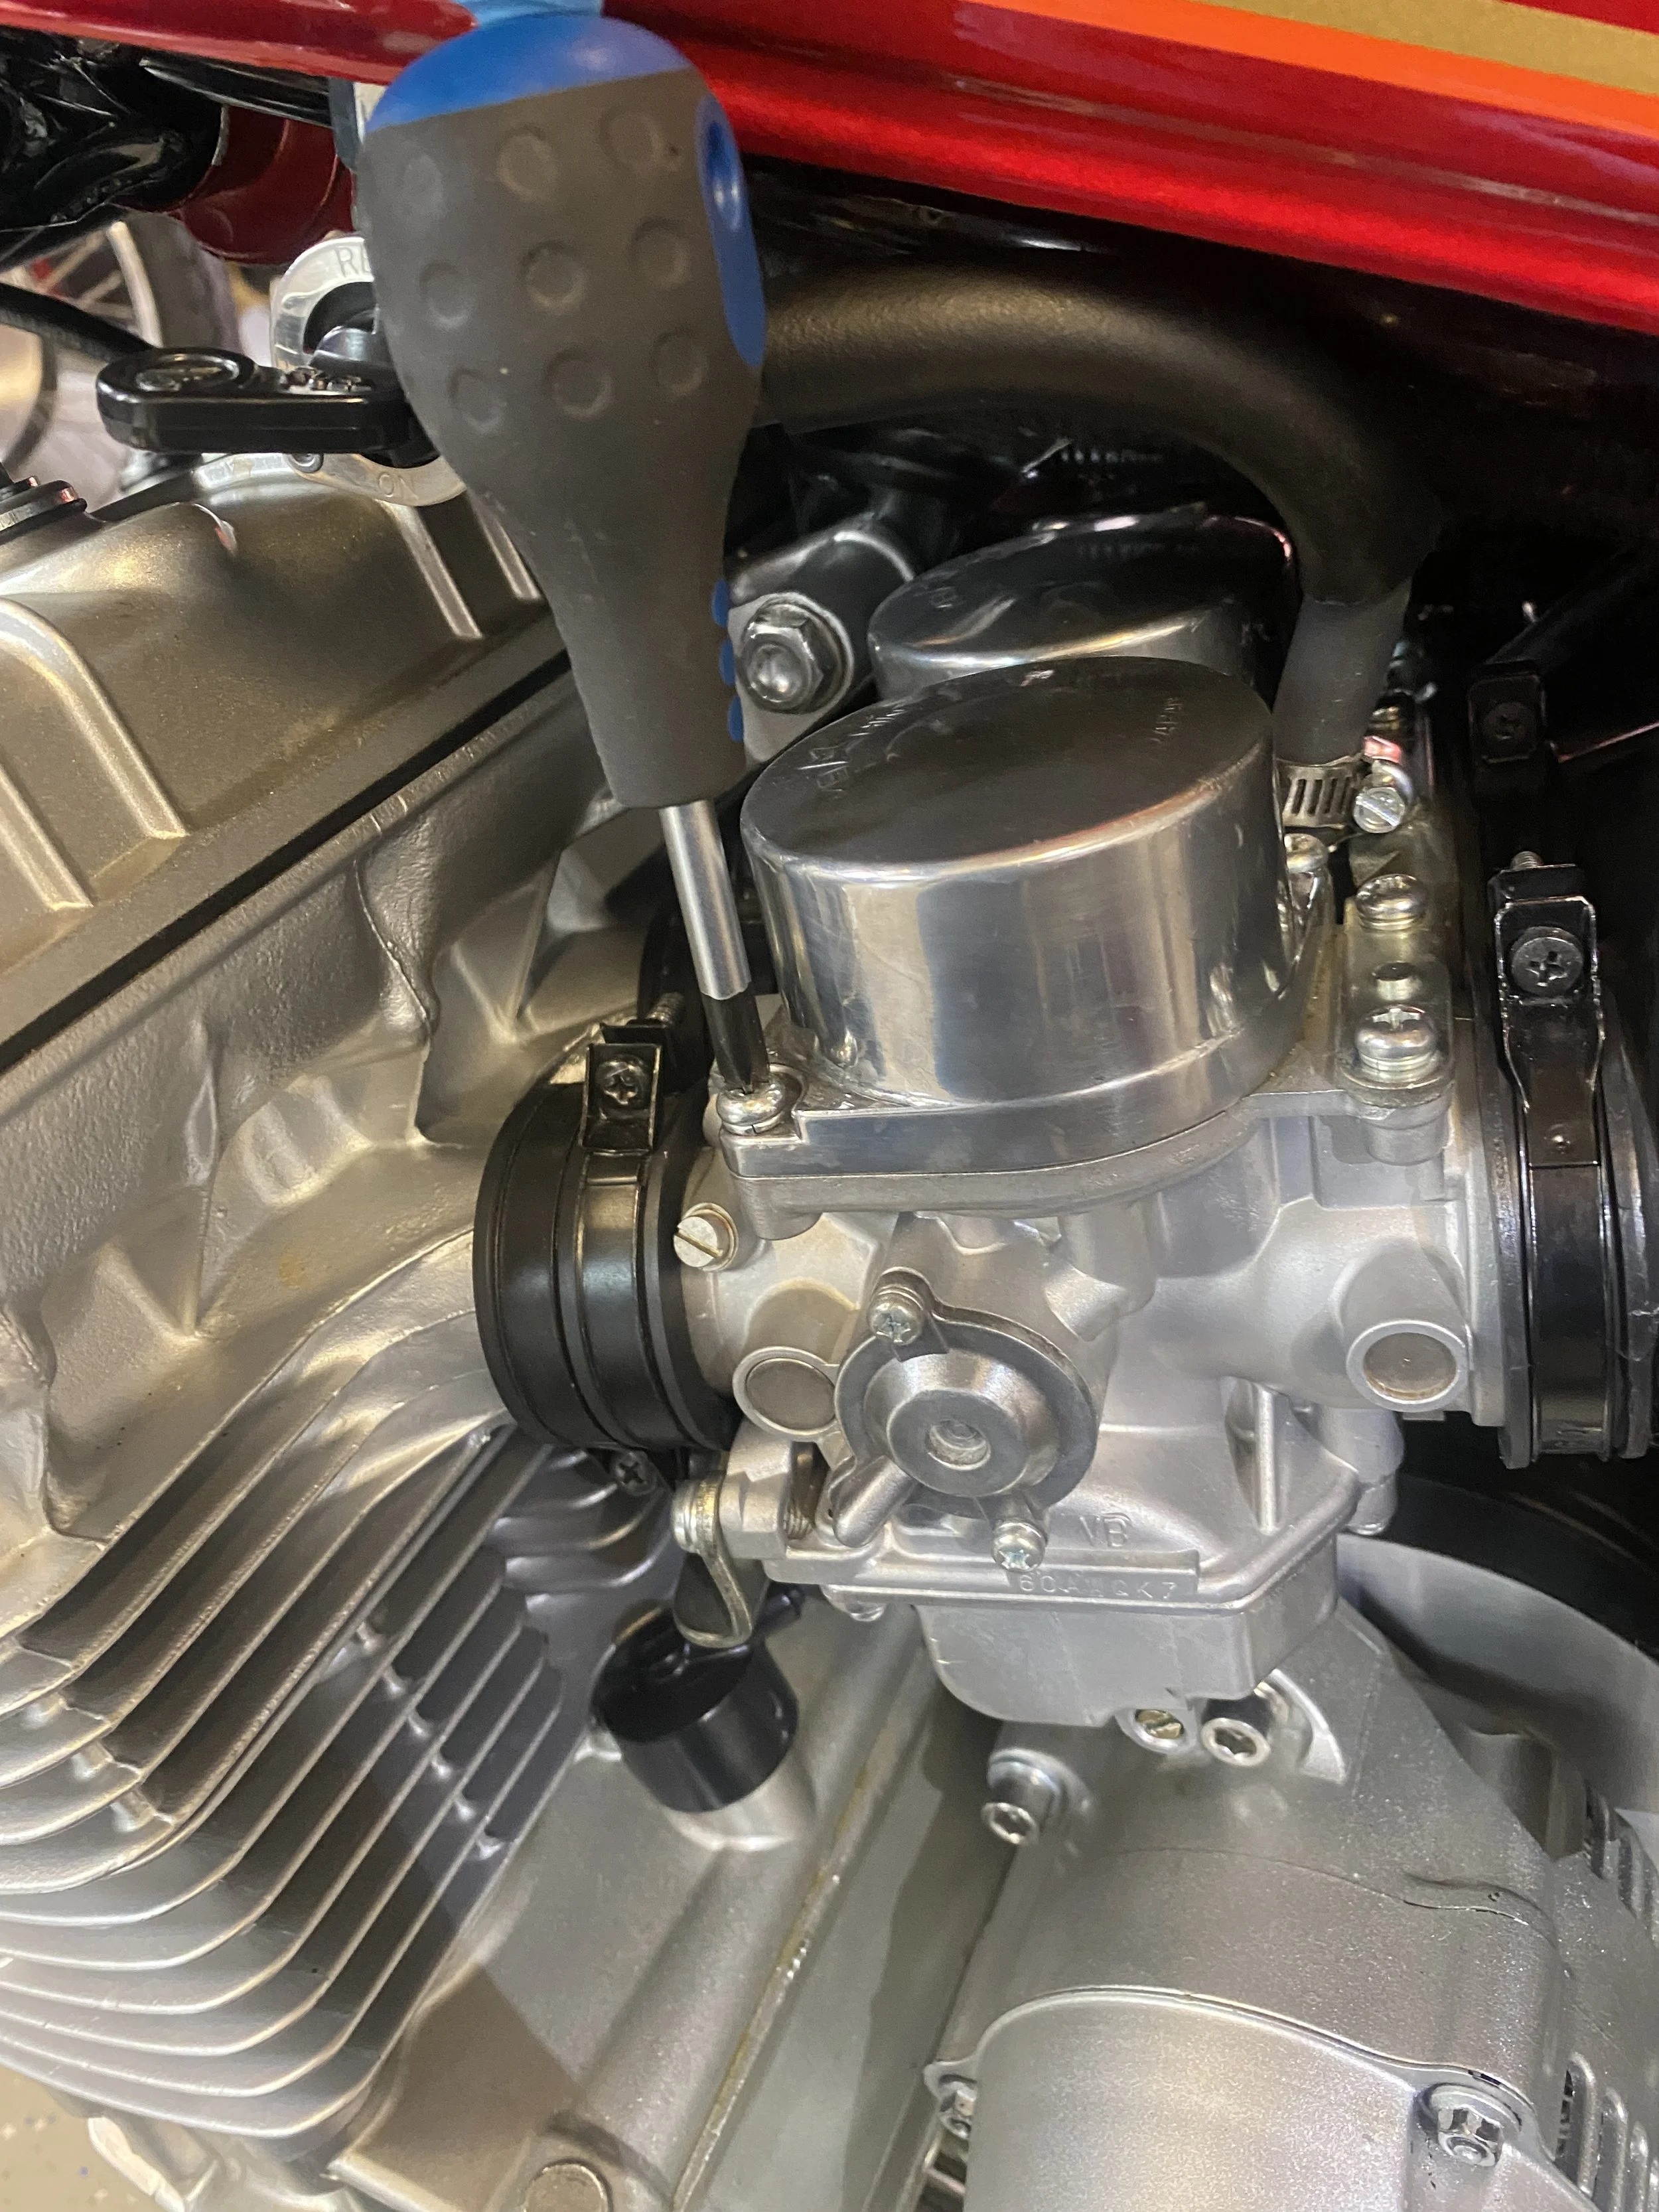
Need that darn pilot screw tool to adjust all the carbs and 2 1/2 turns out before I can start sync'ing them.
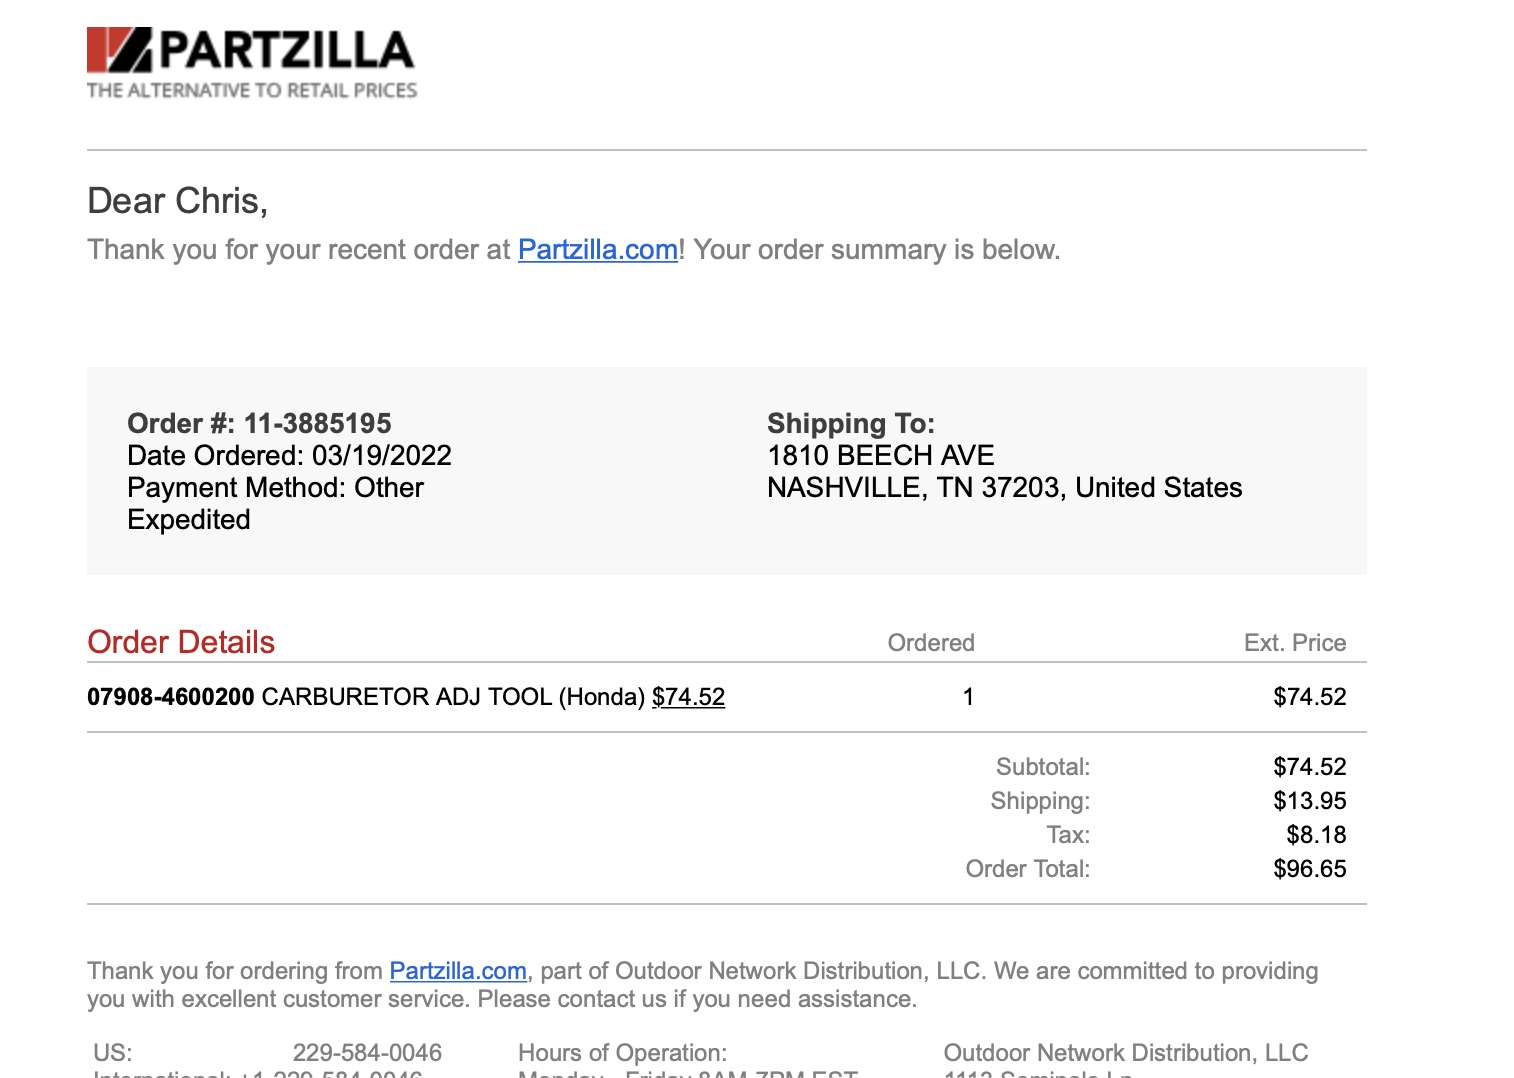
Impossible to sync Carb #5 & #6 without this because the screw is directly under the frame bar....the long screwdriver won't fit...some try and make it fit and ruin either the locknut or the screw head. This is unacceptable.
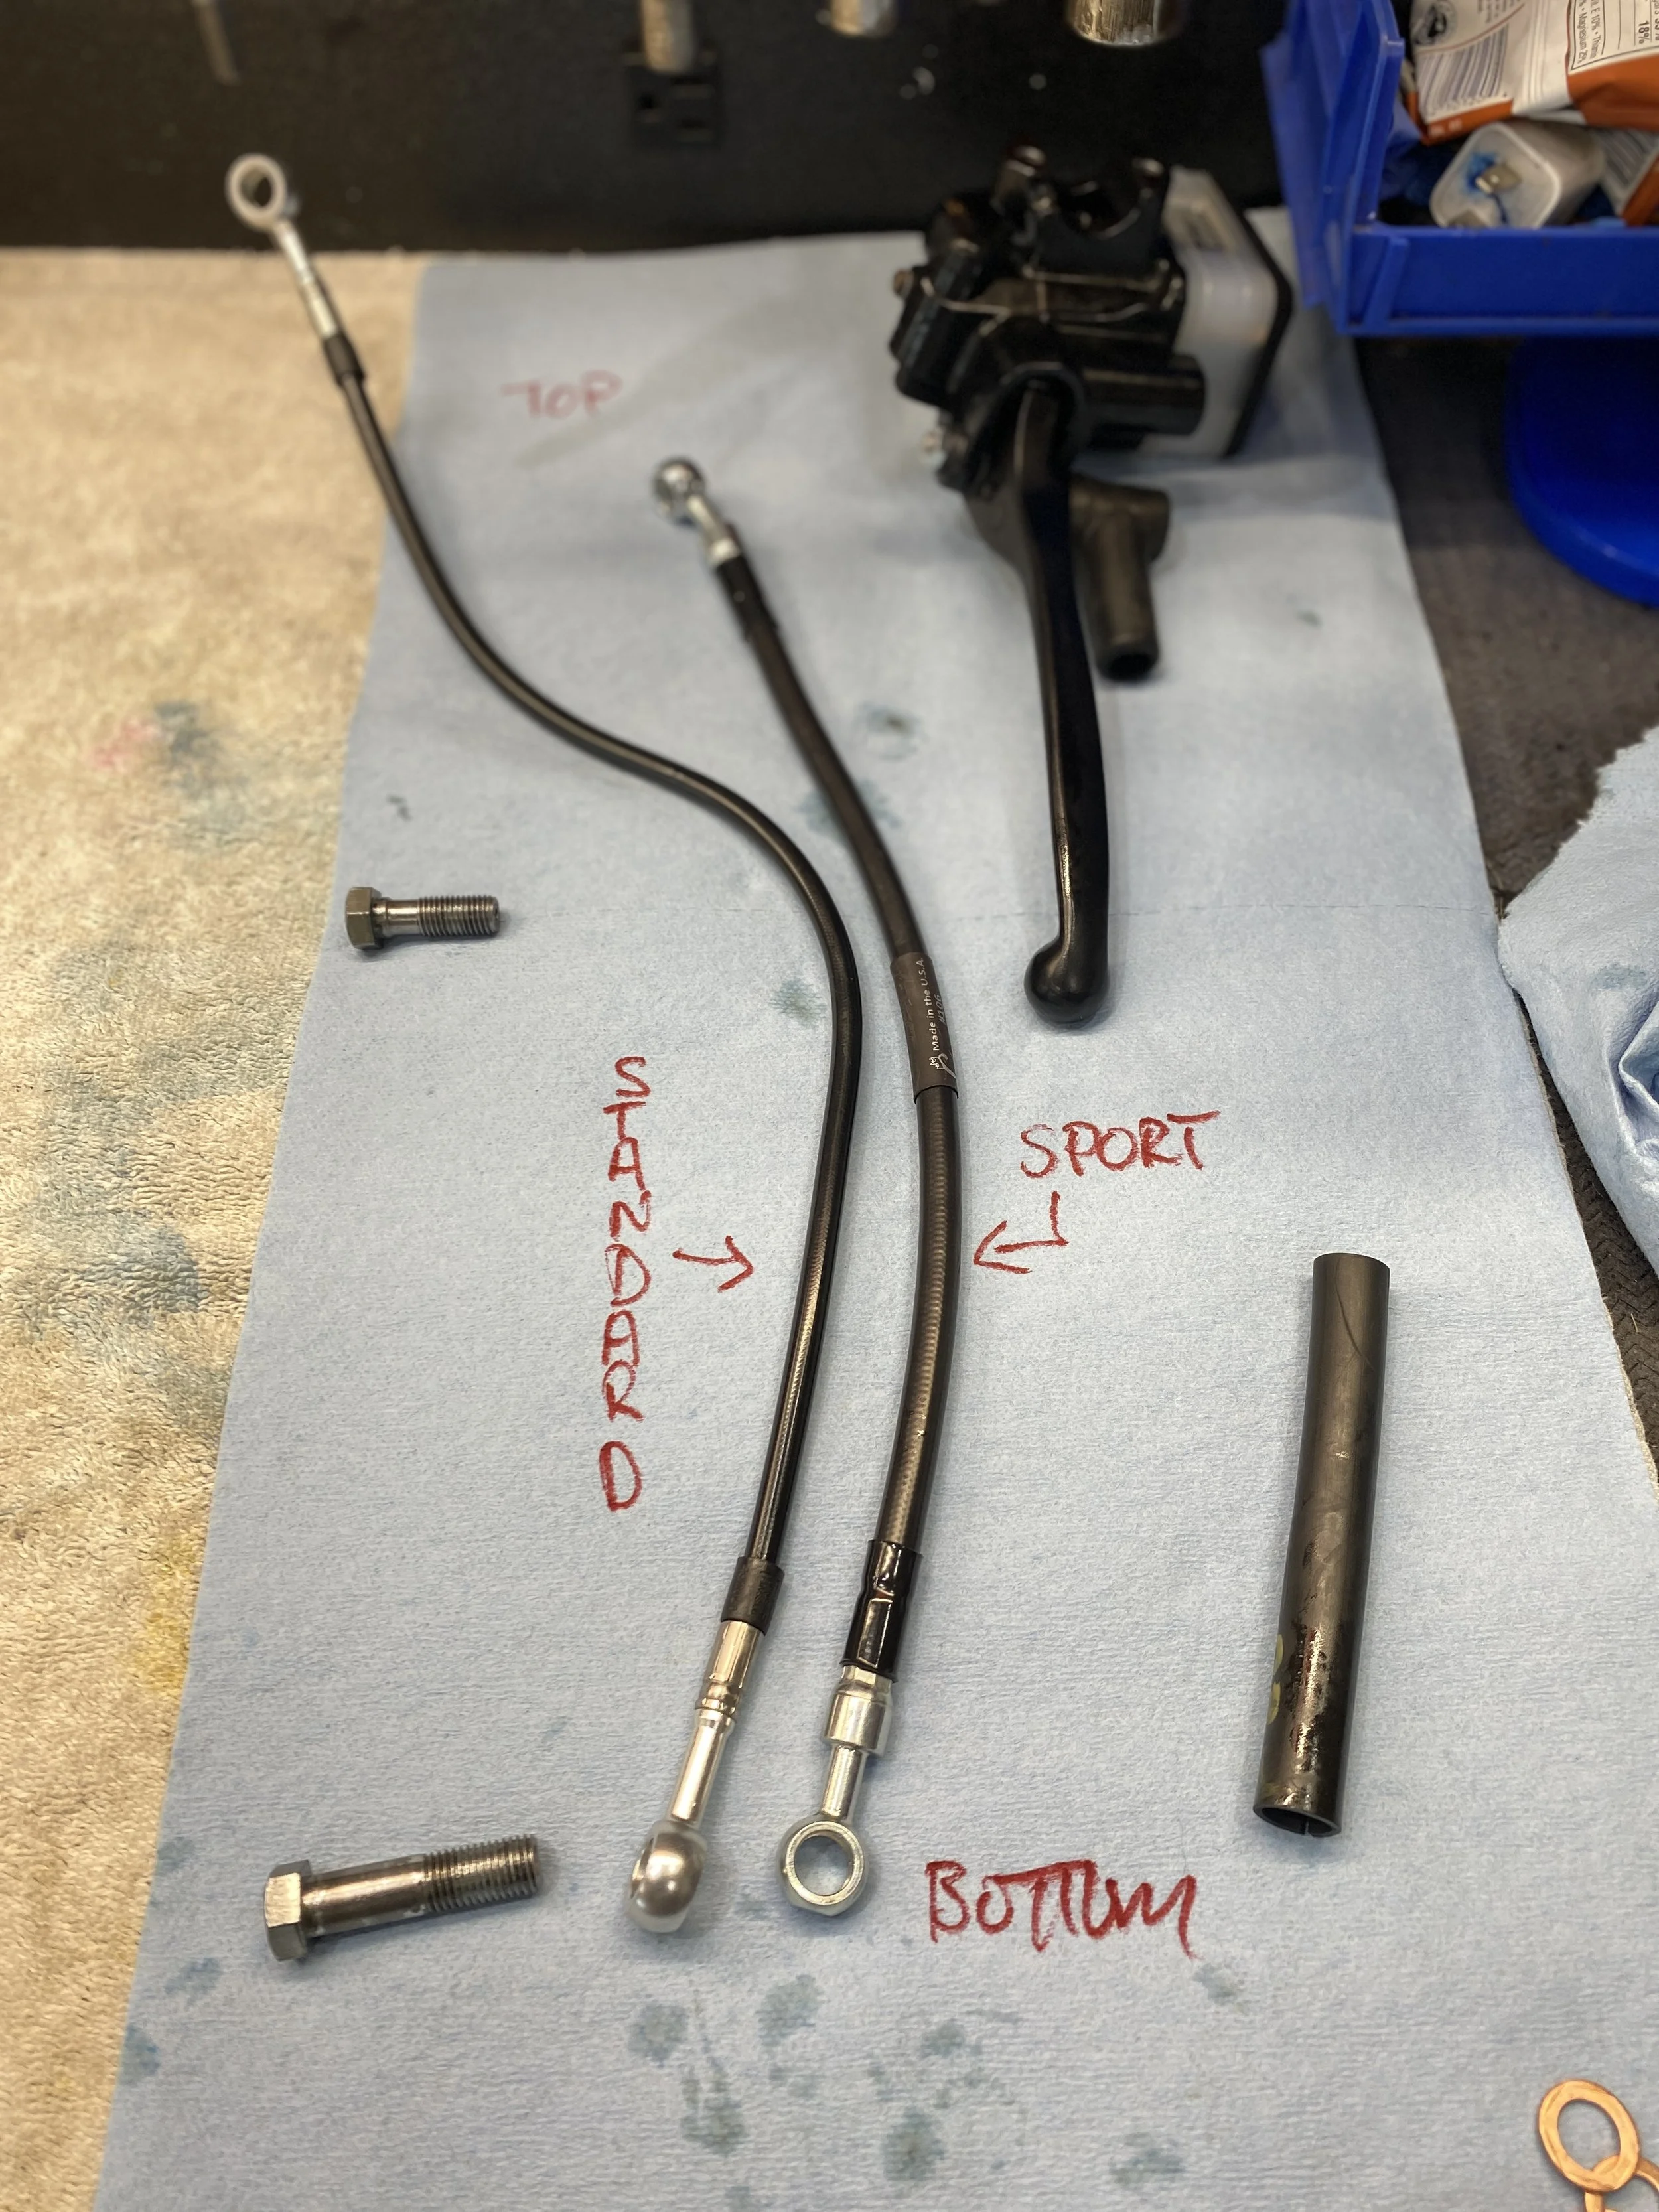
Top front brake line which came comparison from Bill Brint of Timscbx.com. In response to my enquiry he said "Chris—I only have the top sport kit line individually in black braided—I do have them in oem style rubber but only in the complete 3 line kit—$50 for the individual braided black line and $150 for the 3 line oem style"
I rebuilt the front master cylinder, (well that's a fairly grand way to say I replaced a spring, a few rubber bits, and plunger and a circlip) with a K&L kit...and it doesn't feel great... soft and spongy all the way to the bar and it also kind of 'squeaks' when you pull it...as if the piston or rubber is interfering with the inside of the master cylinder bore. So I (over)spent $162.09 on a real OEM kit that came from a seller in Hamburg, Germany. I hope that will make a difference. Also Rusty Cornier on the CBX FB Forum suggested. "Make sure the tiny little fluid transfer hole is completely clear, and when you bleed the brakes unbolt and rotate your calipers a little so the nipples are at the 12 o’clock position as opposed to the 11 o’clock position they are at when mounted!" Hint #2 From Jim Jordan .."pull the brake lever as if you want to stop the bike and put something around the lever to the grip to hold it there. Put the bike on the side stand and leave it over-night. This lets the bubbles in the brake fluid rise up into the master cylinder. Old trick that works."
